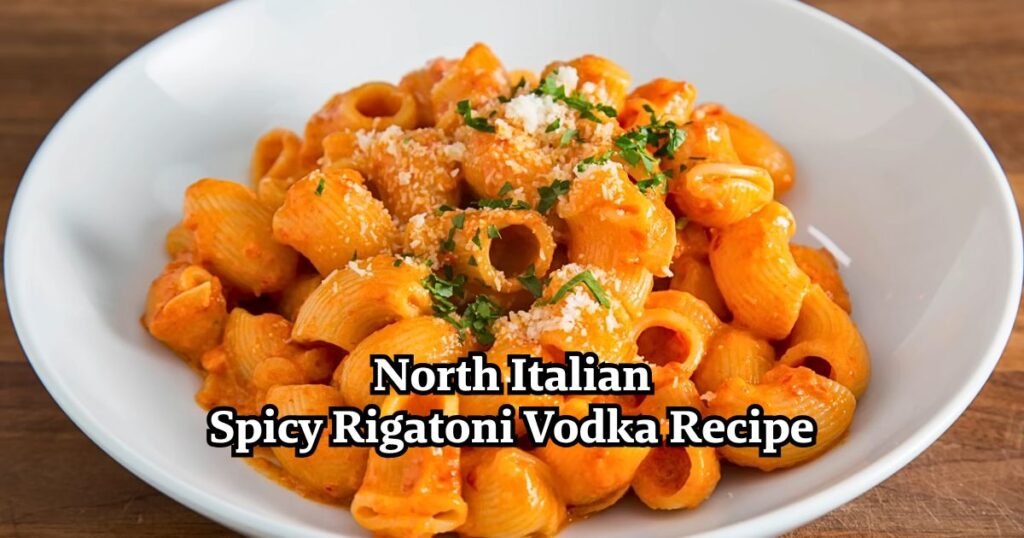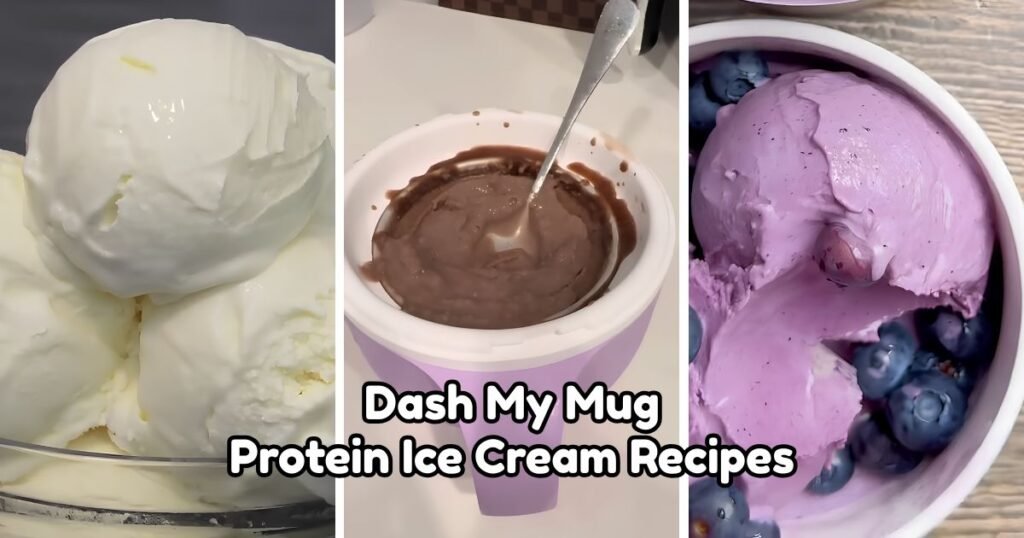
Protein ice cream is everywhere right now — and Dash My Mug Protein Ice Cream Recipes are leading the pack. If you haven’t heard of Dash My Mug yet, it’s a small single-serving mug method that turns a few simple ingredients into creamy, frozen ice cream in minutes. No big machine needed. No giant batch that disappears before you can stop yourself.
These recipes are packed with protein, low in sugar, and ready in under five minutes of prep. That’s what makes them so popular right now. People want desserts that taste good and actually support their health goals.
Fitness lovers use them as a post-workout treat. Busy parents make them after the kids go to bed. Dessert fans keep coming back because every flavor feels brand new. Whether you want chocolate, fruit, peanut butter, or something totally different, there’s a Dash My Mug protein ice cream recipe waiting for you here.
It may seem like making ice cream at home is complicated — but it’s actually quite the opposite!

Why Choose Protein Ice Cream in a Dash My Mug?
Protein ice cream made in a mug is one of the smartest dessert swaps out there. Here’s why so many people are making the switch:
1. More protein, fewer empty calories. Traditional ice cream is mostly sugar and fat with little nutrition. These Dash My Mug Protein Ice Cream Recipes use protein powder and wholesome ingredients to give your body something useful while still tasting amazing.
2. Built-in portion control. A single mug means a single serving. No guessing, no overeating. You make exactly what you need and nothing more.
3. Ready in under 5 minutes of prep. Mix, freeze, and churn — it’s that simple. Most recipes need just a few minutes to put together before going into the freezer.
4. Endless flavor options. From classic vanilla to matcha to s’mores, you can switch up the flavor every single day. Every recipe in this list uses the same basic method but delivers something totally different.
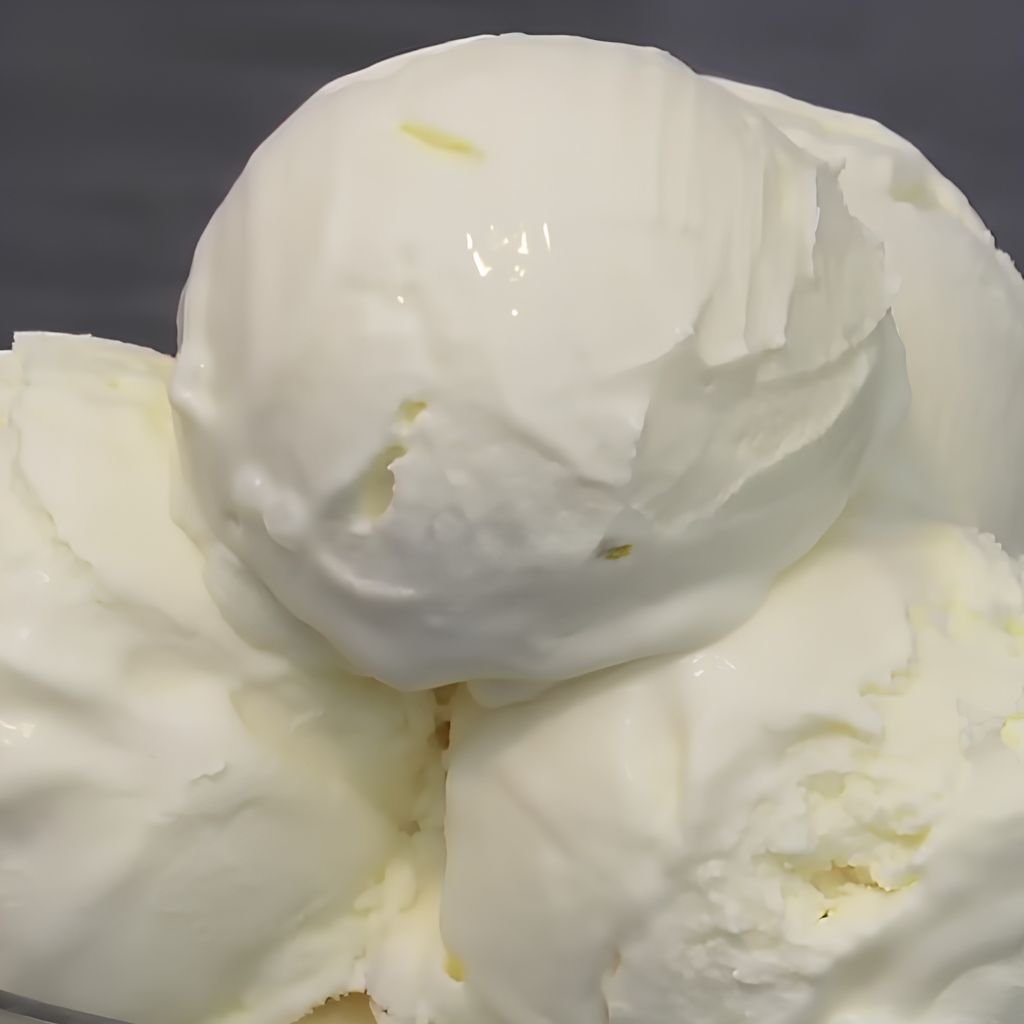
1. Vanilla Protein Mug Ice Cream
Prep Time: 5 minutes | Churn Time: 20–25 minutes | Serves: 1
Creamy, smooth, and lightly sweet — a classic vanilla base made with protein powder and just a few pantry staples. It’s the kind of simple, satisfying dessert you’ll want to make again and again, especially when you need something cold and filling without any extra work.
Ingredients
- 1 scoop vanilla protein powder (approx. 30g)
- ½ cup unsweetened almond milk (or milk of choice)
- 2 tablespoons plain Greek yogurt
- 1 teaspoon pure vanilla extract
- 1 tablespoon honey or maple syrup (adjust to taste)
- Pinch of salt
Instructions
Start by gathering all your ingredients and setting them out on a clean counter. Cold ingredients blend better, so make sure your almond milk and Greek yogurt are coming straight from the refrigerator.
Pour the almond milk into your Dash My Mug cup or any small freezer-safe mug. Add the Greek yogurt and stir gently to combine. The yogurt helps create a creamy, thick texture once everything freezes, so make sure it’s fully mixed in with no lumps.
Next, add the scoop of vanilla protein powder. It helps to add it gradually rather than dumping it all in at once — this prevents clumping. Stir in a circular motion from the bottom of the mug upward until the powder is completely dissolved.
Add the vanilla extract and the pinch of salt. The salt is a small step but it makes a real difference; it sharpens the vanilla flavor and keeps the sweetness balanced. Stir again until everything is smooth and uniform.
Taste the mixture before freezing. This is your chance to adjust. If you want it sweeter, drizzle in the honey or maple syrup now, one teaspoon at a time. Stir well after each addition.
Cover the mug with plastic wrap or a small lid and place it in the freezer for at least 45 minutes to 1 hour. You want the edges to be frozen solid but the center to still have some give. This is the ideal churning consistency.
Once the mixture reaches that semi-frozen state, take it out of the freezer and place it directly into your Dash My Mug machine. Secure the lid and press the button. Let it churn for the full cycle — about 20 to 25 minutes — until the texture turns light, smooth, and creamy.
When the cycle is done, open the lid carefully and give the ice cream a look. It should be thick and soft-serve-like. Use a small spoon to scoop it into a bowl or eat it right out of the mug while it’s fresh and cold. Vanilla protein mug ice cream is best enjoyed immediately after churning, but it can be placed back in the freezer for 10 minutes if you prefer a firmer scoop.
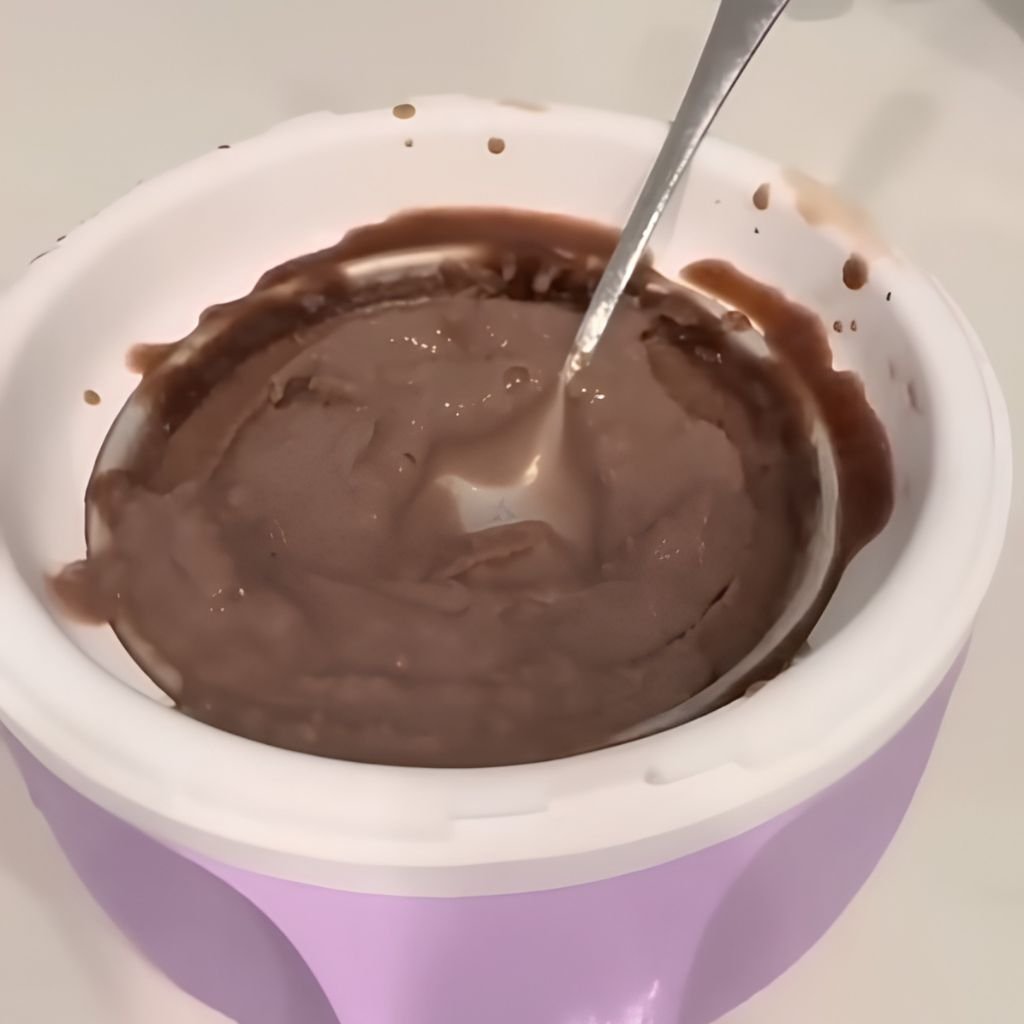
2. Chocolate Protein Mug Ice Cream
Prep Time: 5 minutes | Churn Time: 20–25 minutes | Serves: 1
Rich and deeply chocolatey with a smooth, fudgy finish — this one is made for anyone who needs a serious chocolate fix without the sugar crash. The combination of cocoa powder and chocolate protein powder makes it incredibly satisfying and way more nutritious than a store-bought bar.
Ingredients
- 1 scoop chocolate protein powder (approx. 30g)
- ½ cup unsweetened almond milk
- 1 tablespoon unsweetened cocoa powder
- 1 tablespoon plain Greek yogurt
- 1 tablespoon maple syrup or honey
- ½ teaspoon vanilla extract
- Pinch of salt
Instructions
Begin by measuring out your cocoa powder and protein powder separately before adding anything to the mug. Cocoa powder tends to clump when it meets liquid all at once, so having it pre-measured helps you add it slowly.
Pour the almond milk into your Dash My Mug cup. It should be cold from the refrigerator. Add the Greek yogurt next and stir until no streaks of yogurt remain visible. A smooth base at this stage means a smoother final texture.
Sift the cocoa powder directly into the mug if you have a small sifter handy. This step helps break up any dry clumps before mixing. Add it in small pinches, stirring between each addition, until fully incorporated.
Now add the chocolate protein powder. Just like with the cocoa, go slowly. Stir from the bottom up, working through the thick mixture until it becomes a smooth, dark brown liquid. Take your time here — it may take a minute or two of steady stirring to get everything perfectly smooth.
Add the vanilla extract, salt, and sweetener. The vanilla and salt both work behind the scenes to boost the chocolate flavor without adding extra sugar. Stir one more time until the mixture looks glossy and uniform.
Before freezing, taste it and decide if you want more sweetness or a deeper cocoa punch. Adjust with an extra half teaspoon of cocoa or a small drizzle of maple syrup.
Place the mug in the freezer, covered, for about 45 minutes to 1 hour. Check the edges at the 45-minute mark. You’re looking for a firm frozen ring around the outer edge with a softer, almost slushy center. This is the perfect pre-churn state.
Transfer the mug to your Dash My Mug machine and run the full churn cycle. As it churns, the frozen outer layer breaks down and combines with the softer center to create a creamy, dense chocolate ice cream. By the time the machine finishes, the texture should be thick, smooth, and almost fudgy.
Eat it right away for a soft-serve experience, or return it to the freezer for 10 to 15 minutes for a scoopable consistency. Add a few chocolate chips on top if you want extra texture.
3. Strawberry Protein Mug Ice Cream
Prep Time: 5 minutes | Churn Time: 20–25 minutes | Serves: 1
Bright, fruity, and naturally sweet — this strawberry version uses real frozen strawberries blended into the base for an authentic berry flavor that no artificial powder can match. Light, refreshing, and high in protein, it’s a great option for warm afternoons.
Ingredients
- 1 scoop vanilla or strawberry protein powder (approx. 30g)
- ½ cup unsweetened almond milk
- ¼ cup frozen strawberries, slightly thawed
- 1 tablespoon plain Greek yogurt
- 1 teaspoon honey
- ½ teaspoon vanilla extract
Instructions
Take the frozen strawberries out of the freezer about five minutes before you start. You want them slightly soft — not fully thawed — so they blend easily without turning watery.
Add the slightly thawed strawberries to a small blender or mash them very thoroughly with a fork until they become a smooth, thick puree. If tiny chunks remain, that’s fine — they’ll add a natural texture to the finished ice cream.
Pour the almond milk into your mug. Add the Greek yogurt and stir until smooth. Spoon in the strawberry puree and mix it through completely. The mixture should turn a light pink color at this point.
Add your protein powder of choice — vanilla works beautifully here, but a strawberry-flavored powder makes the flavor even bolder. Stir slowly and steadily until the powder is fully dissolved and no dry spots remain.
Add the honey and vanilla extract. Stir once more. Taste the mixture — strawberries vary a lot in sweetness depending on the batch, so you may want to add a little extra honey if it tastes too tart.
Cover and freeze for 45 minutes to 1 hour. Check on it at the 45-minute mark and look for the firm edges with a soft center that signals it’s ready to churn.
Place the mug into your Dash My Mug machine and run the full cycle. The frozen strawberry pieces that formed during freezing will get churned into the base, creating tiny ribbons of concentrated berry flavor throughout the ice cream.
Once the cycle ends, the ice cream should be light pink, creamy, and smooth. Serve it right away with a few fresh strawberry slices on top for color and extra freshness.
4. Banana Cream Protein Ice Cream
Prep Time: 5 minutes | Churn Time: 20–25 minutes | Serves: 1
Thick, creamy, and naturally sweet from real frozen banana — this one is almost like eating banana soft-serve with a protein boost. No added sugar is needed because the banana does all the work. A go-to recipe when you have a ripe banana that needs to be used.
Ingredients
- 1 scoop vanilla protein powder (approx. 30g)
- ½ medium frozen banana, sliced
- ⅓ cup unsweetened almond milk
- 1 tablespoon plain Greek yogurt
- ½ teaspoon vanilla extract
- Pinch of cinnamon
Instructions
The key to this recipe is using a frozen banana, not a fresh one. Freeze your banana slices at least 2 hours ahead of time, or keep a bag of pre-frozen banana slices in your freezer so you’re always ready.
Take the frozen banana slices out and let them sit for about three to four minutes until they soften just enough to blend. Add them to a small blender or bowl and mash into a thick, smooth paste. The texture should look almost like soft serve on its own at this point — that’s a sign the banana is ready.
Pour the almond milk into your Dash My Mug cup and add the Greek yogurt. Stir until smooth. Spoon in the banana paste and mix it in well. The almond milk will thin the mixture slightly and make it easier to stir.
Add the vanilla protein powder gradually, stirring as you go. Banana and vanilla are a classic combination, so the flavors come together naturally here. Once the powder is fully dissolved, add the vanilla extract and a small pinch of cinnamon.
The cinnamon is optional but highly recommended. Just a tiny amount deepens the banana flavor and makes the whole dessert taste warmer and more complex.
Taste the mixture before freezing. Because the banana is already sweet, you likely won’t need any added sweetener. If the banana you used wasn’t very ripe, you can add a small drizzle of honey.
Cover the mug and freeze for 45 minutes to 1 hour. The banana base freezes a little firmer than a plain almond milk base, so check it at 40 minutes. You want it firm on the outside but not completely solid all the way through.
Transfer to the Dash My Mug machine and churn for the full cycle. The banana makes this ice cream extra creamy and thick — when it’s done, the texture will be dense and smooth, closer to a traditional ice cream scoop than many protein versions.
Serve immediately with a sprinkle of extra cinnamon or a few walnut pieces on top.
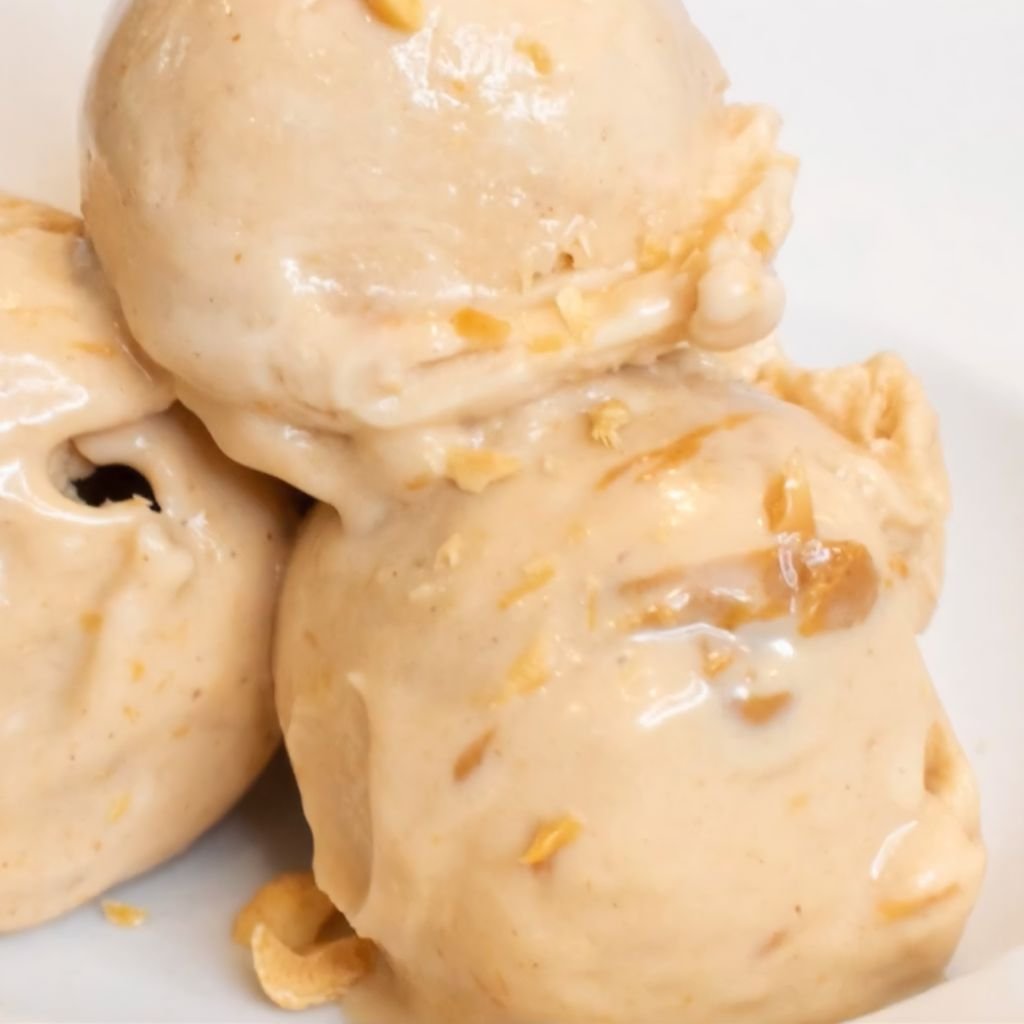
5. Peanut Butter Protein Ice Cream
Prep Time: 5 minutes | Churn Time: 20–25 minutes | Serves: 1
Bold, nutty, and rich with a deep peanut butter flavor — this recipe satisfies the craving for something indulgent while still giving you a solid protein hit. A small amount of natural peanut butter goes a long way here, creating a thick, creamy base that tastes like dessert straight from a diner.
Ingredients
- 1 scoop vanilla or chocolate protein powder (approx. 30g)
- ½ cup unsweetened almond milk
- 1.5 tablespoons natural peanut butter (smooth)
- 1 tablespoon plain Greek yogurt
- 1 teaspoon honey
- ½ teaspoon vanilla extract
- Pinch of salt
Instructions
Start by letting your peanut butter come to room temperature if it’s been in the refrigerator. Cold peanut butter is stiff and difficult to mix evenly. Room temperature peanut butter blends into liquids much more smoothly and evenly.
Pour the almond milk into your mug. Add the peanut butter next. Use a small whisk or fork to work the peanut butter into the almond milk. It won’t fully dissolve the way protein powder does — instead, you’re looking to break it into very small pieces distributed throughout the liquid. Keep stirring until no large clumps remain.
Add the Greek yogurt and continue to stir. The yogurt adds creaminess and helps the mixture hold together during freezing. At this point, the base should look thick, pale tan, and slightly foamy from all the mixing.
Add the protein powder — vanilla works very well here, but chocolate peanut butter is an amazing combination if you want to go that route. Stir slowly and patiently. Peanut butter bases can be a little harder to mix because of the fat content, so give it an extra minute of stirring to make sure everything is fully combined.
Add the vanilla extract, honey, and salt. The salt is particularly important in peanut butter recipes — it amplifies the nutty flavor and keeps the sweetness from being one-dimensional.
Taste and adjust. Natural peanut butter varies in saltiness and sweetness depending on the brand, so use your own judgment here. Add more honey if it needs sweetness, or a tiny pinch more salt if the peanut flavor needs to come forward.
Cover and freeze for 45 minutes to 1 hour. Peanut butter mixtures often freeze a bit unevenly because of the fat, so when you check it, look for a firm outer shell with a thicker, semi-solid center rather than a perfectly slushy interior.
Transfer the mug to the Dash My Mug machine. As it churns, the frozen peanut butter pieces redistribute throughout the base and create a beautifully marbled, creamy texture. The result is thick, rich, and deeply satisfying.
Eat it right from the mug or top it with a few chocolate chips and a drizzle of extra peanut butter for a next-level treat.
6. Cookies & Cream Protein Mug Ice Cream
Prep Time: 5 minutes | Churn Time: 20–25 minutes | Serves: 1
All the nostalgia of cookies and cream in a single-serving, high-protein mug. Crushed chocolate sandwich cookies are folded into a creamy vanilla protein base, giving you those classic cookie crumbles in every bite. A crowd favorite from the very first spoonful.
Ingredients
- 1 scoop vanilla protein powder (approx. 30g)
- ½ cup unsweetened almond milk
- 2 tablespoons plain Greek yogurt
- 1 teaspoon vanilla extract
- 1 teaspoon honey
- 2 chocolate sandwich cookies (like Oreos), roughly crushed
- Pinch of salt
Instructions
Crush the chocolate sandwich cookies before you start mixing anything else. Place them in a small zip bag and use the back of a spoon to break them into a mix of fine crumbs and small chunky pieces. This combination of textures is what makes cookies and cream so satisfying — the fine crumbs blend into the ice cream base while the bigger pieces stay crunchy.
Set the crushed cookies aside for now. You’ll add them in two stages — some go into the base before freezing, and some get stirred in just before churning.
Pour the almond milk into your Dash My Mug cup. Add the Greek yogurt and stir until smooth. Add the vanilla protein powder gradually, stirring from the bottom up until fully dissolved. The base should be smooth, creamy, and white at this point.
Add the vanilla extract, honey, and salt. Give everything a final stir until the mixture is uniform and lightly sweet. Taste it and adjust the sweetness if needed.
Now take about half of the crushed cookies and stir them directly into the base. These cookies will partially dissolve during freezing, lending their chocolate flavor to the whole mixture and turning the base a very light grey-brown color. That’s exactly what you want.
Cover the mug and freeze for 45 minutes to 1 hour. Check the edges at the 40-minute mark — you want the mixture to be frozen solid around the outer edges but still slightly soft in the very center.
When it’s ready, transfer the mug to your Dash My Mug machine. Just before pressing the button, sprinkle the remaining cookie pieces on top of the semi-frozen base. This way, they get folded in during churning rather than disappearing completely.
Run the full churn cycle. By the end, you’ll have a creamy, vanilla-white ice cream studded with dark cookie pieces throughout. Serve immediately while the cookies still have some crunch to them.
7. Chocolate Chip Protein Ice Cream
Prep Time: 5 minutes | Churn Time: 20–25 minutes | Serves: 1
A smooth vanilla base dotted with mini chocolate chips — simple, classic, and deeply satisfying. The tiny chips stay slightly firm against the soft ice cream, giving you that little chocolate surprise in every spoonful. Great for both kids and adults who love a no-fuss dessert.
Ingredients
- 1 scoop vanilla protein powder (approx. 30g)
- ½ cup unsweetened almond milk
- 2 tablespoons plain Greek yogurt
- 1 teaspoon vanilla extract
- 1 teaspoon honey or maple syrup
- 2 tablespoons mini chocolate chips
- Pinch of salt
Instructions
Gather all your ingredients and start by combining the wet ingredients in your Dash My Mug cup. Pour in the cold almond milk first, followed by the Greek yogurt. Use a fork or small whisk to stir them together until the yogurt is completely incorporated and the mixture looks smooth without streaks.
Add the vanilla protein powder next, introducing it slowly to avoid clumping. Stir steadily for about 60 to 90 seconds, working from the bottom of the mug upward. The mixture will thicken slightly as the powder absorbs the liquid — that’s a good sign. Keep going until no dry powder remains.
Add the vanilla extract and salt. These two small additions work together to deepen the vanilla flavor profile. Without salt, vanilla protein ice cream can taste flat, so don’t skip it even though it seems like a minor step. Stir to combine.
Add the honey or maple syrup and taste the base. Vanilla protein powders vary widely in sweetness from brand to brand. Some are already very sweet, and others are quite neutral. Start with one teaspoon of sweetener and add more only if you feel it needs it.
The chocolate chips go in last, and only half of them at this stage. Fold in one tablespoon of mini chips directly into the mixture. They’ll sink to the bottom and freeze in place, which means they end up distributed throughout the ice cream rather than just sitting on top.
Cover the mug and place it in the freezer for 45 minutes to 1 hour. The mixture is ready to churn when the edges are solidly frozen and the center has a thick, slushy consistency.
Transfer the mug to the Dash My Mug machine. Just before starting the cycle, scatter the remaining tablespoon of mini chips across the top of the semi-frozen base. This way some chips get churned into the ice cream and others remain more visible on top.
Run the full churn cycle. The result is a creamy, smooth vanilla base with chocolate chips distributed throughout — cold, sweet, and perfectly balanced. Serve immediately from the mug.
8. Mocha Protein Ice Cream
Prep Time: 5 minutes | Churn Time: 20–25 minutes | Serves: 1
Coffee and chocolate in one cold, creamy scoop — this mocha version is made for people who love their coffee but want it in frozen form. The combination of espresso powder and cocoa creates a deep, layered flavor that feels like a frozen café drink. Rich, bold, and energizing.
Ingredients
- 1 scoop chocolate protein powder (approx. 30g)
- ½ cup unsweetened almond milk
- 1 teaspoon instant espresso powder (or strong brewed coffee, cooled)
- 1 tablespoon unsweetened cocoa powder
- 1 tablespoon plain Greek yogurt
- 1 teaspoon maple syrup
- ½ teaspoon vanilla extract
- Pinch of salt
Instructions
If you’re using brewed coffee instead of espresso powder, brew it strong and let it cool completely before starting. Warm liquid will throw off the freezing time and may affect the final texture. About two tablespoons of strong, cold brewed coffee can substitute for the teaspoon of espresso powder.
Pour the almond milk into the mug. If you’re using espresso powder, dissolve it directly into the cold almond milk first before adding anything else. Espresso powder dissolves best in liquid when stirred for at least 30 seconds. If using brewed coffee, swap out two tablespoons of almond milk for two tablespoons of cold coffee.
Once the coffee is dissolved into the milk, add the Greek yogurt and stir until smooth. The yogurt adds body and creaminess and keeps the ice cream from turning icy after churning.
Sift in the cocoa powder gradually, stirring between each addition. Cocoa and coffee together can become very thick if added all at once, so patience here pays off. Once the cocoa is fully mixed in, the liquid should look deep brown and slightly glossy.
Add the chocolate protein powder slowly, stirring as it goes in. With cocoa already in the base, this mixture will be quite thick. Take your time and stir from the bottom upward, working through any sticky patches near the bottom of the mug.
Add the vanilla extract, maple syrup, and salt. Stir one final time until everything looks smooth and cohesive. Taste the base — it should taste like a slightly sweet mocha with clear coffee and chocolate notes.
Cover and freeze for 45 minutes to 1 hour. Mocha bases freeze at a similar rate to chocolate bases, so check it at 45 minutes. Look for solid frozen edges and a thick, semi-soft center.
Churn in the Dash My Mug machine for the full cycle. The texture will be dense and smooth with a deep brown color. Serve immediately for a soft, spoonable mocha ice cream. A light dusting of cocoa powder or a few espresso beans on top makes a beautiful finish.
9. Mango Protein Ice Cream
Prep Time: 5 minutes | Churn Time: 20–25 minutes | Serves: 1
Tropical, bright, and bursting with natural mango sweetness — this is the recipe to make when you want something that feels like summer in a cup. Frozen mango does all the heavy lifting here, creating a golden, fruity base that pairs perfectly with vanilla protein powder.
Ingredients
- 1 scoop vanilla protein powder (approx. 30g)
- ½ cup frozen mango chunks, slightly thawed
- ¼ cup unsweetened coconut milk (from a can)
- 1 tablespoon plain Greek yogurt
- 1 teaspoon honey (optional)
- ½ teaspoon lime juice
- Pinch of salt
Instructions
Start with the frozen mango. Remove it from the freezer five minutes before starting to allow it to soften just slightly. Very hard, rock-frozen mango is difficult to blend smoothly. You want the chunks soft enough to puree but still cold.
Place the slightly thawed mango chunks into a small blender and blend on high until they reach a completely smooth, thick puree. Stop the blender and scrape down the sides once or twice during blending to make sure every piece is broken down. The puree should be silky and bright orange-yellow when it’s ready.
Pour the coconut milk into your Dash My Mug cup. Coconut milk adds a natural creaminess and a very light coconut undertone that works beautifully with mango. Add the Greek yogurt and stir to combine.
Spoon in the mango puree and stir it through the coconut milk base until the mixture is uniformly golden and smooth. The natural sugar in mango will make this base smell amazing even before it’s frozen.
Add the vanilla protein powder slowly, stirring constantly. Because the mango puree is already thick, this mixture can resist the powder at first. Keep stirring patiently until the powder is fully dissolved and no lumps remain.
Add the lime juice, salt, and optional honey. The lime juice is a small but important step — it brightens the mango flavor and keeps the sweetness from feeling too heavy. Stir to combine.
Taste the base and adjust as needed. Ripe mangoes are naturally very sweet, so you may find you don’t need the honey at all.
Cover and freeze for 45 minutes to 1 hour. Mango bases freeze on the firmer side because of their natural sugar content, so check at 40 minutes. You’re looking for the familiar pattern — firm outer edges, soft center.
Churn in the Dash My Mug machine for the full cycle. The result is a bright, tropical ice cream with real mango flavor throughout. Serve immediately for a soft texture, or freeze for 10 extra minutes for a scoopable consistency.
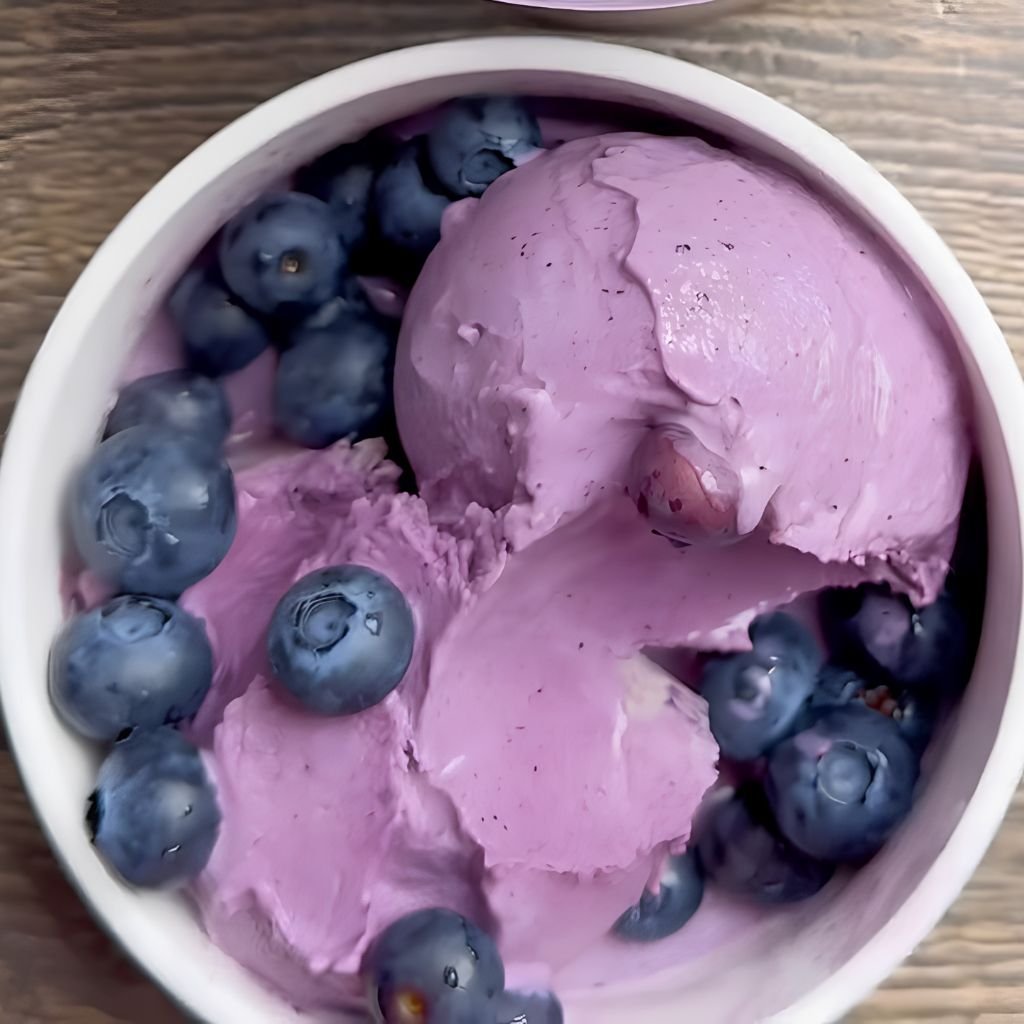
10. Blueberry Protein Ice Cream
Prep Time: 5 minutes | Churn Time: 20–25 minutes | Serves: 1
Deep purple, packed with antioxidants, and naturally sweet — blueberry protein ice cream is one of the most beautiful recipes in this collection. Frozen blueberries blend into a rich, jammy base that turns the whole ice cream a gorgeous violet-blue color. A healthy dessert that genuinely looks as good as it tastes.
Ingredients
- 1 scoop vanilla protein powder (approx. 30g)
- ⅓ cup frozen blueberries, slightly thawed
- ⅓ cup unsweetened almond milk
- 2 tablespoons plain Greek yogurt
- 1 teaspoon honey or maple syrup
- ½ teaspoon lemon juice
- ½ teaspoon vanilla extract
- Pinch of salt
Instructions
Let the frozen blueberries thaw for about five minutes at room temperature. You want them to be soft enough to blend into a smooth puree without adding extra water to the recipe. Hard-frozen berries can sometimes leave small icy flecks in the final ice cream if they’re not blended properly.
Add the blueberries to a small blender or use an immersion blender directly in a bowl. Blend until the berries become a smooth, deep purple puree. Add the lemon juice to the blender as well — it will immediately brighten the color from dull purple to a vibrant blue-violet, which is visually stunning in the finished ice cream.
Pour the almond milk into your Dash My Mug cup. Add the Greek yogurt and stir together until smooth. Spoon in the blueberry puree and mix it through completely. The base will turn a beautiful deep purple.
Add the vanilla protein powder in slow additions, stirring steadily between each addition. Blueberry bases can be slightly thick, so take your time here. Stir from the bottom upward and make sure no powder is clinging to the sides of the mug.
Add the vanilla extract, honey, and salt. Stir until fully combined. Taste the base — it should be sweet, slightly tart from the lemon, and deeply blueberry in flavor. Adjust sweetness if needed.
Cover the mug and freeze for 45 minutes to 1 hour. Blueberry ice cream bases typically freeze at a moderate rate — not too fast, not too slow. Check at the 45-minute mark for the firm outer ring and soft center.
Transfer to the Dash My Mug machine and run the full churn cycle. As it churns, the vibrant purple color stays beautiful and the texture becomes smooth and creamy. Serve topped with a few fresh blueberries or a drizzle of honey.
11. Pineapple Coconut Protein Ice Cream
Prep Time: 5 minutes | Churn Time: 20–25 minutes | Serves: 1
A tropical pairing that feels like a vacation in a cup — pineapple and coconut come together in a light, refreshing protein ice cream that’s naturally sweet and completely dairy-free. This one is a top pick for hot summer days when you want something cold and fruity without any heaviness.
Ingredients
- 1 scoop vanilla protein powder (approx. 30g)
- ⅓ cup frozen pineapple chunks, slightly thawed
- ⅓ cup full-fat coconut milk (from a can)
- 1 tablespoon shredded unsweetened coconut
- 1 teaspoon honey (optional)
- ½ teaspoon vanilla extract
- Pinch of salt
Instructions
Begin by taking the frozen pineapple chunks out of the freezer and letting them sit for about five minutes. Pineapple is quite fibrous when frozen solid, so a little thawing time makes it much easier to blend into a smooth puree.
Once the pineapple has softened slightly, add it to a small blender. Blend on high until completely smooth. Pineapple blends very well and typically turns into a silky, bright yellow puree in about 30 seconds. Scrape down the sides of the blender and blend once more to make sure no fibrous chunks remain.
Pour the coconut milk into your Dash My Mug cup. Full-fat coconut milk from a can works best here because it has a higher fat content, which translates directly into a creamier, richer frozen texture. Shake the can well before opening to re-emulsify any separated coconut cream.
Spoon in the pineapple puree and stir it into the coconut milk. The two flavors blend together immediately and the mixture will smell incredible. Add the shredded coconut and stir it through — these small pieces will add a gentle chewiness to the finished ice cream.
Add the vanilla protein powder in gradual additions, stirring patiently as you go. Because pineapple puree is naturally thick and coconut milk is creamy, this base can resist the powder slightly. Keep stirring until fully dissolved.
Add the vanilla extract, optional honey, and salt. Taste the mixture. Pineapple is naturally sweet and acidic, so you may need only a tiny bit of honey, or none at all depending on the ripeness of your pineapple.
Cover and freeze for 45 to 55 minutes. Check at 40 minutes — coconut milk bases tend to freeze slightly faster than almond milk bases.
Churn in the Dash My Mug machine for the full cycle. The finished ice cream will be pale yellow, creamy, and beautifully tropical. Top with extra shredded coconut and a small pineapple wedge for a complete vacation-in-a-mug moment.
12. Mixed Berry Protein Mug Ice Cream
Prep Time: 5 minutes | Churn Time: 20–25 minutes | Serves: 1
A medley of strawberries, blueberries, and raspberries blended into one vibrant, antioxidant-rich protein ice cream. The layered berry flavors create something more complex and interesting than any single fruit would on its own. Naturally colorful, naturally sweet, and naturally protein-packed.
Ingredients
- 1 scoop vanilla protein powder (approx. 30g)
- ¼ cup frozen mixed berries (strawberry, blueberry, raspberry blend), slightly thawed
- ⅓ cup unsweetened almond milk
- 2 tablespoons plain Greek yogurt
- 1 teaspoon honey or agave syrup
- ½ teaspoon lemon juice
- ½ teaspoon vanilla extract
- Pinch of salt
Instructions
Take the mixed berries out of the freezer five minutes before starting. Mixed berry blends often include a variety of sizes and densities, and a little thaw time ensures that the harder berries (like blueberries) soften up alongside the softer ones (like raspberries).
Add the partially thawed berries to a small blender along with the lemon juice. Blend until completely smooth. The combination of berries will create a deep, jewel-toned puree — a mix of pink, purple, and red that looks almost like a natural food dye. Strain the puree through a fine mesh sieve if you want a completely smooth texture, or leave it as-is for a more natural, slightly textured result.
Pour the almond milk into your Dash My Mug cup. Add the Greek yogurt and whisk together until smooth. Spoon in the berry puree and stir it through. The base will immediately turn a beautiful berry-red-purple.
Add the vanilla protein powder in small additions, stirring constantly. With a thick berry base already in the mug, patience is important here. Work the powder in slowly, scraping the sides of the mug occasionally, until fully dissolved.
Add the vanilla extract, honey, and salt. Stir to combine. Taste the base — it should be bright and fruity with a good balance of sweet and tart. Add more honey if needed.
Cover and freeze for 45 minutes to 1 hour. Berry bases tend to freeze evenly and smoothly. Check at 40 minutes and look for the standard indicators: solid edges, soft center.
Churn in the Dash My Mug machine for the full cycle. The mixed berry color becomes even more vivid after churning, and the texture will be light and smooth. Serve topped with a small handful of fresh berries.
13. Keto Vanilla Protein Ice Cream
Prep Time: 5 minutes | Churn Time: 20–25 minutes | Serves: 1
A low-carb, sugar-free vanilla protein ice cream made for anyone following a keto lifestyle. Using heavy cream and a keto-friendly sweetener, this version delivers an incredibly rich, creamy texture with almost no sugar. Clean, simple, and deeply satisfying.
Ingredients
- 1 scoop vanilla protein powder (approx. 30g, low-carb/keto-friendly brand)
- ¼ cup heavy whipping cream
- ¼ cup unsweetened almond milk
- 1 tablespoon plain full-fat Greek yogurt
- 1–2 teaspoons powdered erythritol or monk fruit sweetener (adjust to taste)
- 1 teaspoon pure vanilla extract
- Pinch of salt
Instructions
Keto ice cream success depends on the fat content of the ingredients. The heavy whipping cream is the star here — it provides the richness and creaminess that makes this recipe so satisfying and so different from regular almond-milk-based versions. Don’t substitute it with a lower-fat cream.
Start by combining the heavy whipping cream and almond milk in your Dash My Mug cup. Stir them together briefly. Add the Greek yogurt and whisk until no lumps of yogurt remain visible. The mixture should look thick, white, and creamy.
Add the powdered sweetener. Powdered erythritol or monk fruit sweetener work best here because they dissolve more easily in cold liquid than granulated versions. Start with one teaspoon, stir thoroughly, and taste. Keto sweeteners vary in intensity from brand to brand — some are much sweeter than others — so always taste before adding more.
Add the vanilla protein powder gradually, stirring in small additions. With the higher fat content of this base, the powder may clump slightly at first. Keep stirring in circular motions until completely smooth.
Add the vanilla extract and salt. These two add so much to the final flavor. Salt, in particular, does something magical with the heavy cream — it rounds out the fat and makes the vanilla taste cleaner and more prominent.
Taste the final base. It should taste like a lightly sweet vanilla cream. Adjust sweetener as needed.
Cover the mug and freeze for 45 minutes to 1 hour. Cream-based bases freeze quite firm, so check at 40 minutes. The center should be a thick, semi-solid slush when you poke it with a spoon.
Churn in the Dash My Mug machine. The high fat content of the cream creates an incredibly smooth, dense, scoopable ice cream after churning — more like traditional premium ice cream than most protein versions. Serve immediately.
14. Low-Carb Chocolate Ice Cream
Prep Time: 5 minutes | Churn Time: 20–25 minutes | Serves: 1
A rich, sugar-free chocolate ice cream made without any high-carb ingredients. Dutch-process cocoa and a keto-friendly sweetener create a deep, fudgy flavor while keeping the carb count low. A chocolate fix that fits into a low-carb lifestyle without any compromise on taste.
Ingredients
- 1 scoop chocolate protein powder (keto-friendly, approx. 30g)
- ¼ cup heavy whipping cream
- ¼ cup unsweetened almond milk
- 1.5 tablespoons Dutch-process cocoa powder
- 1 tablespoon plain full-fat Greek yogurt
- 1–2 teaspoons powdered monk fruit sweetener
- ½ teaspoon vanilla extract
- Pinch of salt
Instructions
Measure out the cocoa powder and set it aside. Dutch-process cocoa is darker, smoother, and less bitter than natural cocoa powder, which makes it ideal for no-sugar-added recipes where you need the cocoa to carry the full flavor without the help of extra sweetener.
Combine the heavy cream and almond milk in your Dash My Mug cup. Stir briefly. Add the Greek yogurt and stir until smooth.
Begin adding the cocoa powder in very small amounts — about a quarter teaspoon at a time — stirring well between each addition. Cocoa powder in a fat-rich base tends to clump more aggressively than in a thinner almond milk base, so this slow-addition method is important. Take your time and keep stirring until the cocoa is fully dissolved and the mixture looks dark, glossy, and smooth.
Add the chocolate protein powder gradually, stirring as you go. The mixture will now be very dark and thick. Keep working from the bottom upward until all traces of powder are gone.
Add the monk fruit sweetener, one teaspoon at a time, tasting between additions. Monk fruit sweetener can have a slight cooling aftertaste in large amounts, so less is often better. Stir in the vanilla extract and salt. The vanilla softens any harshness from the cocoa and the sweetener.
Taste the base. It should be dark, mildly sweet, and deeply chocolatey. If it tastes too intense, add a tiny extra splash of almond milk.
Cover and freeze for 45 minutes to 1 hour. Check the center at 40 minutes.
Churn in the Dash My Mug machine for the full cycle. The result is a dense, fudgy, chocolate ice cream with almost no carbs. Let it sit for five extra minutes post-churn if you prefer a slightly firmer scoop.
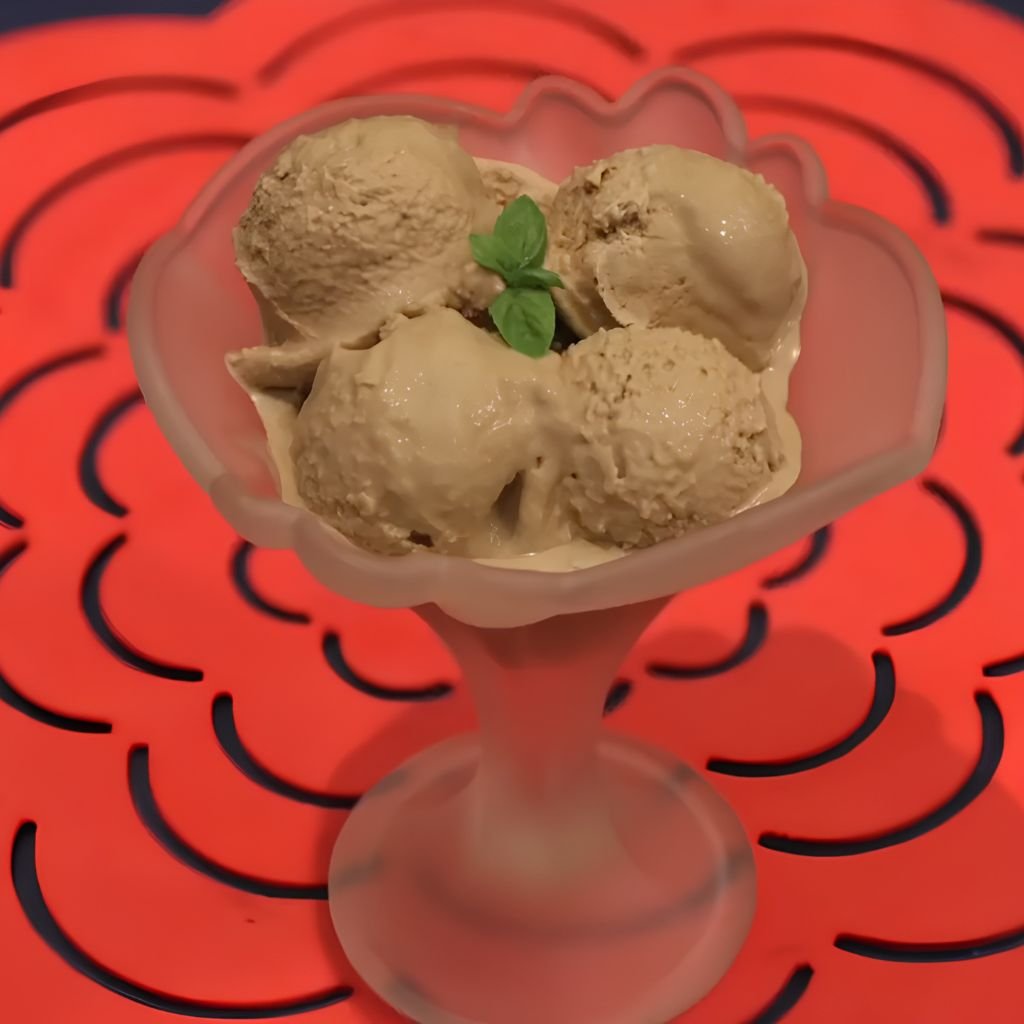
15. Sugar-Free Coffee Ice Cream
Prep Time: 5 minutes | Churn Time: 20–25 minutes | Serves: 1
Strong coffee flavor with zero added sugar — this recipe is made for people who want their caffeine in cold, creamy form. Using real brewed coffee and espresso powder gives this ice cream an authentic coffee shop flavor that no artificial powder can replicate.
Ingredients
- 1 scoop vanilla protein powder (approx. 30g)
- ¼ cup cold strong brewed coffee
- ¼ cup unsweetened almond milk
- 2 tablespoons plain Greek yogurt
- 1 teaspoon instant espresso powder
- 1–2 teaspoons powdered erythritol or monk fruit sweetener
- ½ teaspoon vanilla extract
- Pinch of salt
Instructions
Brew a small amount of strong coffee — at least double the normal strength — and allow it to cool completely in the refrigerator before starting. Warm coffee will affect the freezing time and can partially cook the protein powder if it’s too hot. Cold coffee is essential.
Once the coffee is fully chilled, combine it with the almond milk in your Dash My Mug cup. Add the instant espresso powder and stir until completely dissolved. Espresso powder needs about 60 seconds of active stirring in cold liquid to fully dissolve. This double coffee approach (brewed coffee plus espresso powder) creates a deep, multi-layered coffee flavor that really comes through in the frozen dessert.
Add the Greek yogurt and stir until smooth. The yogurt adds creaminess and helps prevent icy crystals from forming during freezing.
Add the vanilla protein powder slowly and steadily. Coffee bases tend to be thinner than fruit or nut butter bases, so the powder should dissolve relatively quickly here. Stir until the base is completely smooth and no dry protein powder is visible.
Add the vanilla extract, sweetener, and salt. Stir to combine. Taste the base carefully — coffee is already slightly bitter, and keto sweeteners can sometimes add a cool or slightly metallic aftertaste. Adjust with small additions of sweetener until the balance feels right to you.
Cover the mug and freeze for 45 minutes to 1 hour. The coffee base freezes fairly evenly and quickly. Check at 40 minutes.
Transfer to the Dash My Mug machine and churn for the full cycle. The result is a smooth, creamy, deeply caffeinated ice cream with genuine coffee shop quality. Serve immediately, or enjoy as an afternoon energy boost in frozen form.
16. Greek Yogurt Protein Ice Cream
Prep Time: 5 minutes | Churn Time: 20–25 minutes | Serves: 1
Tangy, thick, and incredibly creamy — this version uses Greek yogurt as the main base rather than just a small addition. The natural tanginess of the yogurt creates a flavor very close to frozen yogurt, but with far more protein. Clean, simple, and endlessly customizable.
Ingredients
- 1 scoop vanilla protein powder (approx. 30g)
- ½ cup plain full-fat Greek yogurt
- 3 tablespoons unsweetened almond milk
- 1 tablespoon honey or maple syrup
- 1 teaspoon vanilla extract
- Pinch of salt
Instructions
Full-fat Greek yogurt is the right choice for this recipe. Low-fat or non-fat versions have too much water content and can produce an icy, grainy texture after churning. The fat in full-fat Greek yogurt is what creates the smooth, creamy consistency you want.
Spoon the Greek yogurt directly into your Dash My Mug cup. Add the almond milk and stir together until the yogurt loosens and the mixture is smooth and pourable. This takes a little more stirring than other recipes because yogurt is naturally thick, but it will come together.
Add the vanilla protein powder in gradual additions. Because the yogurt base is already thick, the powder needs time to absorb. Stir slowly and thoroughly, scraping the bottom and sides of the mug as you go. After about 90 seconds of stirring, the powder should be fully dissolved and the base should look uniform and creamy.
Add the honey, vanilla extract, and salt. Taste the base. The Greek yogurt gives it a pleasant tanginess that works really well with vanilla. Adjust the honey depending on how sweet you want the final ice cream.
Cover and freeze for 45 minutes to 1 hour. Greek yogurt bases tend to freeze firmer than liquid milk bases because of their density. Check at 40 minutes — you’re looking for the outer edges to be solidly frozen with a thick, semi-solid center.
Transfer to the Dash My Mug machine and run the full cycle. The yogurt base churns into an incredibly smooth, creamy frozen yogurt-style ice cream. The texture is thick, rich, and satisfying. Serve immediately with your choice of toppings — fresh fruit, granola, or a drizzle of honey all work beautifully.
17. Brownie Batter Protein Ice Cream
Prep Time: 5 minutes | Churn Time: 20–25 minutes | Serves: 1
Dark, dense, and intensely chocolatey — this one tastes like you scooped ice cream directly out of a mixing bowl of brownie batter. A hit of cocoa, a touch of chocolate protein powder, and a tiny bit of almond flour create that thick, raw-batter quality that makes this recipe absolutely addictive.
Ingredients
- 1 scoop chocolate protein powder (approx. 30g)
- ½ cup unsweetened almond milk
- 1 tablespoon unsweetened cocoa powder
- 1 tablespoon plain Greek yogurt
- 1 tablespoon almond flour (finely ground)
- 1 teaspoon maple syrup
- ½ teaspoon vanilla extract
- Pinch of salt
Instructions
The almond flour is what makes this recipe different from a regular chocolate protein ice cream. It adds a subtle nuttiness and a slightly grainy, batter-like quality that genuinely mimics the texture of brownie batter. Use finely ground almond flour, not almond meal — the texture difference is significant.
Pour the almond milk into your Dash My Mug cup. Add the Greek yogurt and stir until smooth. Add the almond flour and stir it through. The flour will partially suspend in the liquid and partially settle — that’s normal. Keep stirring until it’s evenly distributed.
Sift the cocoa powder into the mug in small additions, stirring between each. Once the cocoa is fully incorporated, the mixture will look dark and slightly thick.
Add the chocolate protein powder gradually, stirring steadily. With the almond flour and cocoa already in the base, this mixture will be quite thick — almost like a thin batter. Keep working it until fully smooth.
Add the maple syrup, vanilla extract, and salt. Stir to combine. Taste the base — it should taste like literal brownie batter. If it tastes too intensely chocolatey or bitter, add a tiny extra drizzle of maple syrup to balance it out.
Cover and freeze for 45 minutes to 1 hour. The almond flour makes this base freeze slightly on the denser side. Check at 40 minutes.
Churn in the Dash My Mug machine for the full cycle. The result is a dense, fudgy, intensely chocolate ice cream with a brownie-batter quality that makes it completely irresistible. Serve immediately with a few mini chocolate chips on top.
18. Salted Caramel Protein Ice Cream
Prep Time: 5 minutes | Churn Time: 20–25 minutes | Serves: 1
Sweet, buttery, and finished with a hit of sea salt — this salted caramel protein ice cream delivers a sophisticated flavor combination that feels much more indulgent than its ingredient list suggests. A small amount of sugar-free caramel syrup does all the heavy lifting here.
Ingredients
- 1 scoop vanilla protein powder (approx. 30g)
- ½ cup unsweetened almond milk
- 2 tablespoons plain Greek yogurt
- 1.5 tablespoons sugar-free caramel syrup (like the kind used in coffee drinks)
- ½ teaspoon vanilla extract
- ¼ teaspoon fine sea salt (plus a pinch of flaky salt for topping)
- Optional: 1 teaspoon honey if you want extra sweetness
Instructions
Sugar-free caramel syrup — the kind used in coffee shops and available at most grocery stores — is the key ingredient here. It’s already flavored, sweetened, and has a smooth consistency that blends perfectly into an ice cream base without requiring any cooking or melting. Check the label to make sure it’s a syrup, not a thick caramel sauce, as the sauce version can be too heavy for this recipe.
Pour the almond milk into your Dash My Mug cup. Add the caramel syrup and stir together. The syrup will dissolve almost immediately. The mixture will smell sweet and buttery right away.
Add the Greek yogurt and stir until smooth. Add the vanilla protein powder slowly, stirring as it goes in. Vanilla protein pairs exceptionally well with caramel — the two flavors are natural complements.
Once the powder is fully dissolved, add the vanilla extract, fine sea salt, and optional honey. The sea salt is the defining element of this recipe — it should be noticeable without being overwhelming. Start with ¼ teaspoon and taste. You can add more, but you can’t take it out.
The base should taste sweet, creamy, and caramel-forward with a pleasant salty note at the end. Cover and freeze for 45 minutes to 1 hour.
Churn in the Dash My Mug machine for the full cycle. Serve immediately topped with a light pinch of flaky sea salt — like Maldon or fleur de sel — for a beautiful finishing touch that makes each bite pop.
19. Nutella-Style Protein Ice Cream
Prep Time: 5 minutes | Churn Time: 20–25 minutes | Serves: 1
Hazelnut and chocolate in one creamy scoop — this Nutella-inspired protein ice cream captures that iconic spread flavor without the excess sugar. A small amount of hazelnut butter and cocoa powder creates a rich, deeply flavored base that tastes indulgent and satisfying.
Ingredients
- 1 scoop chocolate protein powder (approx. 30g)
- ½ cup unsweetened almond milk
- 1 tablespoon hazelnut butter (or hazelnut spread with lower sugar)
- 1 tablespoon plain Greek yogurt
- 1 tablespoon unsweetened cocoa powder
- 1 teaspoon honey or maple syrup
- ½ teaspoon vanilla extract
- Pinch of salt
Instructions
Hazelnut butter — pure ground hazelnuts with no added sugar or palm oil — is ideal here. It gives you the genuine hazelnut flavor without the extra sweetness, which means you can control the final taste of the ice cream more precisely. If hazelnut butter is hard to find, a low-sugar hazelnut chocolate spread works as well, but reduce the honey accordingly.
Let the hazelnut butter sit at room temperature for a few minutes so it softens. Cold nut butter is always harder to mix.
Pour the almond milk into your Dash My Mug cup. Add the hazelnut butter and begin working it into the milk with a fork or small whisk. Like peanut butter, hazelnut butter won’t fully dissolve — you’re dispersing it into small pieces throughout the liquid. Keep stirring until no large clumps remain.
Add the Greek yogurt and stir to combine. Sift in the cocoa powder in small additions, stirring between each. Once the cocoa is in and mixed, the base will turn a deep brown and start smelling remarkably like Nutella.
Add the chocolate protein powder gradually. The hazelnut butter and cocoa make this a fairly thick base, so stir patiently and thoroughly.
Add the honey, vanilla extract, and salt. Stir until smooth. Taste — the balance should be sweet, chocolatey, and nutty with a clean finish.
Cover and freeze for 45 minutes to 1 hour. Churn in the Dash My Mug machine for the full cycle. The result is dense, rich, and deeply hazelnut-chocolate. Serve with a few chopped hazelnuts on top.
20. S’mores Protein Mug Ice Cream
Prep Time: 5 minutes | Churn Time: 20–25 minutes | Serves: 1
Everything you love about s’mores — chocolate, graham cracker, marshmallow — in one cold, creamy protein scoop. This is the most playful recipe in the collection. Crushed graham crackers add a sandy, slightly sweet crunch, and mini marshmallows folded in at the end make every bite feel like a campfire treat.
Ingredients
- 1 scoop chocolate protein powder (approx. 30g)
- ½ cup unsweetened almond milk
- 1 tablespoon plain Greek yogurt
- 1 tablespoon unsweetened cocoa powder
- 2 full graham cracker sheets, crushed
- 2 tablespoons mini marshmallows
- 1 teaspoon honey
- ½ teaspoon vanilla extract
- Pinch of salt
Instructions
Crush the graham crackers into a mix of fine crumbs and small pieces — exactly like you did with the cookies in the cookies and cream recipe, but with a slightly more rustic, uneven texture. Graham cracker crumbs have a sandy quality that becomes almost like a cookie dough texture when mixed into a frozen base. Set them aside.
Pour the almond milk into the Dash My Mug cup. Add the Greek yogurt and stir until smooth. Sift in the cocoa powder slowly, stirring between additions.
Add the chocolate protein powder gradually. Stir until fully dissolved and smooth. Add the honey, vanilla extract, and salt. Stir to combine. Taste the base — it should taste like a rich, slightly sweet chocolate.
Fold in half the graham cracker crumbs directly into the liquid base. These will soften during freezing and absorb into the chocolate base, adding a subtle graham flavor throughout.
Cover and freeze for 45 minutes to 1 hour. Check at 40 minutes for the firm-edge, soft-center signal.
Transfer to the Dash My Mug machine and scatter the remaining graham cracker pieces on top of the semi-frozen base. Run the full churn cycle.
In the final minute of churning (or after the machine finishes), gently fold in the mini marshmallows with a small spoon. Don’t put them in before churning — the machine will break them apart too much. By adding them at the very end, they stay as recognizable, chewy little pieces.
Serve immediately for the best texture — soft ice cream, crunchy graham, chewy marshmallow in every bite. A drizzle of chocolate sauce on top is optional but absolutely worth it.
21. Almond Milk Vanilla Protein Ice Cream
Prep Time: 5 minutes | Churn Time: 20–25 minutes | Serves: 1
A clean, light, dairy-free vanilla protein ice cream that relies on almond milk as its full base. Lighter in texture than cream-based versions but still smooth and satisfying — a great everyday option for anyone avoiding dairy while still wanting a high-protein dessert.
Ingredients
- 1 scoop vanilla protein powder (approx. 30g)
- ¾ cup unsweetened almond milk (use more than usual for a lighter texture)
- 1 tablespoon plain coconut yogurt (dairy-free)
- 1 teaspoon pure vanilla extract
- 1–2 teaspoons maple syrup
- 1 teaspoon tapioca starch or arrowroot powder (helps with creaminess)
- Pinch of salt
Instructions
The addition of tapioca starch or arrowroot powder is a small but meaningful step in a fully almond milk-based recipe. These natural starches help thicken the base slightly during freezing, which prevents the ice cream from becoming overly icy or crumbly. They’re flavorless and blend in completely — you won’t taste them, but you’ll notice the creamier result.
Pour the almond milk into your Dash My Mug cup. Add the tapioca starch and whisk it in immediately and thoroughly. Starches need to be evenly distributed before freezing, not clumped together. Stir for 30 to 45 seconds.
Add the coconut yogurt and stir until smooth. Coconut yogurt is thicker than regular dairy yogurt and has a subtle coconut undertone that works beautifully with vanilla.
Add the vanilla protein powder in gradual additions, stirring steadily. Because this base is thinner than cream-based recipes, the powder should dissolve more quickly. Stir until no lumps remain.
Add the maple syrup, vanilla extract, and salt. Taste and adjust sweetness. The mixture should taste lightly sweet and very cleanly vanilla.
Cover and freeze for 45 minutes to 1 hour. The tapioca starch helps the base freeze more evenly, so you may find it freezes slightly more uniformly from edge to center compared to a plain almond milk base.
Transfer to the Dash My Mug machine and churn for the full cycle. The result is lighter and slightly airier than cream-based versions — refreshing and clean with a pure vanilla flavor.
22. Vegan Chocolate Protein Ice Cream
Prep Time: 5 minutes | Churn Time: 20–25 minutes | Serves: 1
A fully plant-based chocolate protein ice cream made without dairy of any kind. Using a vegan chocolate protein powder, coconut milk, and cocoa, this recipe delivers real chocolate richness that even non-vegans will love. Smooth, dark, and completely satisfying.
Ingredients
- 1 scoop vegan chocolate protein powder (approx. 30g, pea or brown rice protein)
- ½ cup full-fat canned coconut milk
- 1 tablespoon cocoa powder
- 1 tablespoon coconut yogurt (unsweetened)
- 1 teaspoon maple syrup or agave nectar
- ½ teaspoon vanilla extract
- Pinch of salt
Instructions
Full-fat coconut milk is essential here. It provides the fat needed to create a creamy, non-icy texture without any dairy. Shake the can well before opening to emulsify the separated coconut cream back into the liquid.
Pour the coconut milk into your Dash My Mug cup. Add the coconut yogurt and stir until well combined. The base will be thick and creamy even before adding anything else — that’s the fat from the coconut milk doing its job.
Sift in the cocoa powder gradually, stirring between each addition. Cocoa in a coconut milk base blends more smoothly than in a water-heavy milk, so this step should go quickly and easily. Stir until the base is uniformly dark and glossy.
Add the vegan chocolate protein powder. Vegan proteins (pea, brown rice) often have a slightly grainier texture than whey, so extra stirring time is beneficial here. Stir thoroughly for 90 seconds to two minutes until the powder is completely incorporated.
Add the maple syrup, vanilla extract, and salt. Taste the base. It should be rich, dark, and chocolatey. Vegan protein powders vary widely in sweetness, so adjust the maple syrup to your preference.
Cover and freeze for 45 minutes to 1 hour. Coconut milk bases freeze on the faster side, so check at 40 minutes.
Churn in the Dash My Mug machine for the full cycle. The coconut fat creates a beautifully smooth, creamy texture. Serve immediately for a soft, fudgy vegan chocolate ice cream that rivals any traditional version.
23. Coconut Cream Protein Ice Cream
Prep Time: 5 minutes | Churn Time: 20–25 minutes | Serves: 1
Pure coconut flavor in a clean, creamy, protein-rich package. This recipe leans fully into the coconut with coconut milk as the base, toasted coconut flakes as a mix-in, and vanilla protein powder to bring it all together. A naturally dairy-free tropical treat with a genuinely luxurious texture.
Ingredients
- 1 scoop vanilla protein powder (approx. 30g)
- ½ cup full-fat canned coconut milk
- 2 tablespoons coconut cream (scooped from the top of a chilled can)
- 1 tablespoon toasted unsweetened coconut flakes
- 1 teaspoon coconut extract (or ½ teaspoon vanilla extract + ½ teaspoon coconut extract)
- 1 teaspoon maple syrup
- Pinch of salt
Instructions
Refrigerate a can of full-fat coconut milk the night before or at least four hours ahead. When you open the chilled can, the thick coconut cream will have risen to the top and solidified. Scoop two tablespoons of this solid cream and set it aside. Use the liquid beneath as your base coconut milk. This two-component approach gives the ice cream a deep, layered coconut richness.
Toast the coconut flakes if they aren’t already toasted. Add them to a small dry skillet over low-medium heat and stir constantly for about three to four minutes until golden and fragrant. Remove immediately and let cool. Toasted coconut has a warm, nutty depth that raw coconut flakes don’t have.
Pour the liquid coconut milk into your Dash My Mug cup. Add the solid coconut cream and stir vigorously to combine. It will take a minute of active stirring to fully incorporate the cream into the liquid. The base should look very white and thick once it’s combined.
Add the vanilla protein powder slowly, stirring as you go. The high fat content of this base means the powder may resist slightly — keep stirring until fully dissolved.
Add the coconut extract, maple syrup, and salt. Stir to combine. Fold in most of the toasted coconut flakes (saving a small pinch for topping).
Cover and freeze for 40 to 50 minutes. Coconut cream bases freeze faster than almond milk, so check early.
Churn in the Dash My Mug machine. Serve immediately topped with the reserved toasted coconut flakes.
24. Vegan Berry Protein Ice Cream
Prep Time: 5 minutes | Churn Time: 20–25 minutes | Serves: 1
A plant-based berry protein ice cream using frozen mixed berries, coconut milk, and vegan protein powder. Bright, vibrant, and completely dairy-free — a perfect option for vegans and anyone avoiding dairy who still wants a colorful, fruity frozen treat.
Ingredients
- 1 scoop vegan vanilla protein powder (approx. 30g, pea or rice protein)
- ¼ cup frozen mixed berries, slightly thawed
- ⅓ cup full-fat coconut milk
- 1 tablespoon coconut yogurt
- 1 teaspoon agave nectar or maple syrup
- ½ teaspoon lemon juice
- ½ teaspoon vanilla extract
- Pinch of salt
Instructions
Take the berries out of the freezer five minutes ahead of time. Partial thawing makes blending much easier and produces a smoother puree.
Blend the berries with the lemon juice until completely smooth. Strain through a fine mesh sieve if you prefer a seedless result — raspberries especially have many small seeds that some people find noticeable in the finished ice cream. Set the strained puree aside.
Pour the coconut milk into your Dash My Mug cup. Add the coconut yogurt and stir until fully combined. The base will already be thick and creamy.
Spoon in the berry puree and mix it through. The base will turn a beautiful vivid pink or purple depending on which berries dominate your mix.
Add the vegan protein powder in gradual additions, stirring patiently. Vegan proteins need extra stirring time in a thick base like this. Work through any resistance and stir for a full two minutes to ensure it’s fully dissolved.
Add the agave or maple syrup, vanilla extract, and salt. Taste the base. It should be sweet, fruity, and lightly tangy from the berries and lemon.
Cover and freeze for 40 to 50 minutes. Check at 40 minutes for the firm-outer, soft-inner consistency.
Churn in the Dash My Mug machine for the full cycle. The color will be stunning — a deep, vivid berry hue with a smooth, creamy texture. Serve immediately topped with a few fresh berries.
25. Matcha Protein Ice Cream
Prep Time: 5 minutes | Churn Time: 20–25 minutes | Serves: 1
Earthy, slightly bitter matcha balanced with creamy vanilla protein and a touch of honey — this green tea ice cream is elegant and unique. Ceremonial-grade matcha creates the most vibrant color and smoothest flavor, but culinary grade works perfectly fine for everyday recipes.
Ingredients
- 1 scoop vanilla protein powder (approx. 30g)
- ½ cup unsweetened almond milk (or oat milk for a creamier result)
- 2 tablespoons plain Greek yogurt
- 1.5 teaspoons matcha powder (ceremonial or culinary grade)
- 1 tablespoon honey
- ½ teaspoon vanilla extract
- Pinch of salt
Instructions
Matcha requires a specific mixing technique. Unlike cocoa powder, matcha clumps very aggressively when it touches cold liquid. The solution is to bloom it first: add the matcha to a small separate cup or bowl with about one tablespoon of warm — not hot — almond milk. Use a small matcha whisk (chasen) or regular fork to whisk it into a smooth, lump-free paste before adding it to the main mixture. This step takes about 60 seconds and makes a noticeable difference in the final texture.
Once you have a smooth matcha paste, pour the remaining almond milk into your Dash My Mug cup. Add the Greek yogurt and stir until smooth.
Scrape the matcha paste into the mug and stir it into the almond milk base. The mixture should turn a vibrant green color immediately. Stir thoroughly — the paste needs to be completely dispersed throughout the liquid before you add the protein powder.
Add the vanilla protein powder in slow additions. Matcha has a slightly drying quality that can make the base thicker than expected, so stir patiently and give the powder time to fully absorb.
Add the honey, vanilla extract, and salt. Taste the base. Matcha is naturally bitter and grassy, and honey balances it beautifully. Adjust the honey up or down depending on how sweet you want the final ice cream. Some people prefer their matcha ice cream on the more bitter, tea-forward side — others like it sweeter and lighter.
Cover and freeze for 45 minutes to 1 hour. The matcha base freezes evenly and cleanly. Check at 40 minutes for the standard firm-outer-ring signal.
Transfer to the Dash My Mug machine and churn for the full cycle. The finished ice cream will be a beautiful, vivid green with a smooth, creamy texture and a sophisticated matcha flavor. Serve with a light dusting of extra matcha on top and a drizzle of honey for a clean, beautiful presentation.
Customization Ideas
One of the best things about Dash My Mug Protein Ice Cream Recipes is that you can make each one your own. Here are some easy ways to mix things up:
1. Add-ins for texture. Fold in mini chocolate chips, chopped walnuts, crushed pecans, dried cranberries, cacao nibs, or granola just after the churn cycle ends. These additions stay slightly firm against the cold ice cream and give each bite more to enjoy.
2. Flavor swaps. Swap almond milk for oat milk, coconut milk, or cashew milk to change the creaminess and flavor profile. Replace vanilla protein with chocolate, caramel, or strawberry protein in almost any recipe for a quick flavor variation. Use almond or hazelnut extract in place of vanilla for a completely different character.
3. Sweetness adjustments. Every protein powder brand is different in sweetness. Start with less sweetener than the recipe calls for, taste the base, and add more only if you need it. For zero-sugar versions, use powdered monk fruit sweetener or erythritol. For a more natural sweetness, dates blended into the base work surprisingly well.
4. Boost the nutrition. Add a teaspoon of chia seeds, a tablespoon of hemp hearts, or a small scoop of collagen peptides to any recipe without changing the flavor at all.
Conclusion
Dash My Mug Protein Ice Cream Recipes are proof that you don’t have to choose between enjoying dessert and taking care of your health. Every recipe in this collection is quick to make, packed with protein, and completely customizable to your taste preferences and dietary needs.
Whether you’re coming back from a workout, winding down after a long day, or just craving something cold and sweet, there’s a Dash My Mug recipe here for you. The variety is the best part — 25 flavors means you could try a new one almost every day for a month without repeating.
Start with whichever flavor calls to you most, then keep experimenting. Mix and match flavors. Try different protein powder brands. Swap in new add-ins. The more you make these, the better your instincts get about what combinations work for you.
Make your first batch, give it a taste, and share how it turned out. The best recipes always start with one bold first try.