A food processor is one of the most useful tools you can have in your kitchen. Cuisinart food processors are known for being powerful, reliable, and easy to clean.
They come in different bowl sizes — from compact 3-cup models to large 14-cup versions — so you can pick one that fits your cooking needs. With a Cuisinart food processor, you can chop, slice, shred, blend, and knead in just seconds.
That means less time prepping and more time eating. You can make everything from smooth dips and creamy soups to fresh doughs and healthy snacks.
These Cuisinart food processor recipes cover a little bit of everything — savory, sweet, quick, and filling. No matter what you are cooking, this machine makes the job easier and faster.

Why Use a Cuisinart Food Processor for Everyday Cooking?
1. Faster meal preparation — Chopping onions, garlic, or vegetables by hand takes time. A Cuisinart food processor does it in seconds, helping you get dinner on the table much faster.
2. Consistent chopping, slicing, and mixing — Every piece comes out about the same size. That means your food cooks evenly and looks better too.
3. Reduces manual kitchen work — Kneading dough, grinding nuts, and shredding cheese all take a lot of hand effort. The food processor handles all of that for you.
4. Ideal for beginners and experienced cooks — You do not need to have professional knife skills to cook great food. These Cuisinart food processor recipes are easy to follow and give great results every time.
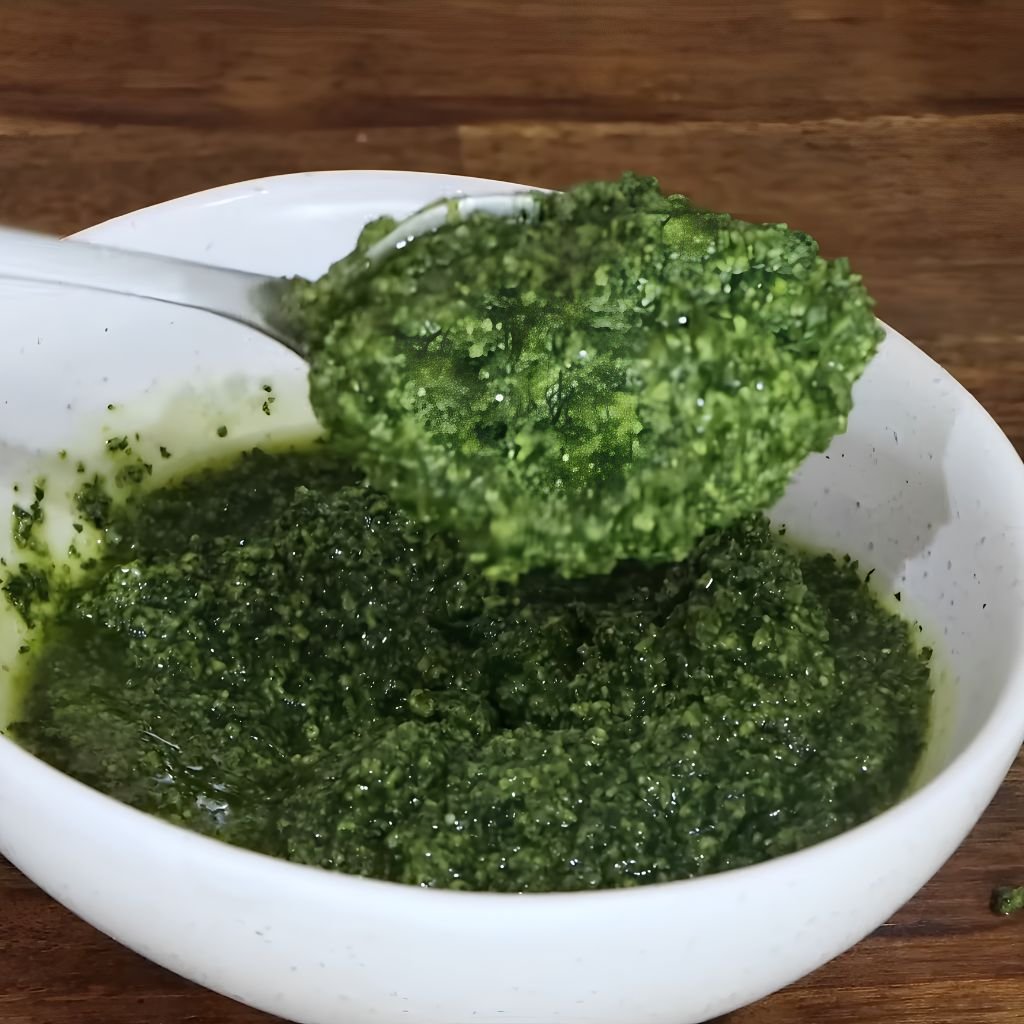
1. Classic Basil Pesto
Prep Time: 10 minutes | Cook Time: 0 minutes | Serves: 6–8
Fresh basil pesto from scratch tastes so much better than the jar version. Made with just a handful of simple ingredients, it comes together in under ten minutes and works on pasta, sandwiches, pizza, and so much more. The Cuisinart food processor blends everything into a smooth, vibrant green sauce you will want to put on everything.
Ingredients:
- 2 cups fresh basil leaves, packed
- ½ cup grated Parmesan cheese
- ⅓ cup pine nuts (or walnuts)
- 3 garlic cloves
- ½ cup extra virgin olive oil
- ½ teaspoon salt
- ¼ teaspoon black pepper
- 1 teaspoon lemon juice (optional)
Instructions:
Start by gathering your ingredients and making sure your basil leaves are clean and dry. Wet basil can make the pesto watery, so pat the leaves dry with a paper towel after washing them. If any of the leaves look brown or wilted, remove those and only use the bright green ones. This will give you the best color and flavor.
Place the garlic cloves into the food processor bowl. Put the lid on and pulse about 5 to 6 times until the garlic is finely minced. Stop and scrape down the sides of the bowl with a rubber spatula to make sure all the garlic gets processed evenly. This step is important because uneven garlic pieces can make the pesto taste sharp in certain bites.
Add the pine nuts to the bowl with the garlic. Pulse another 5 to 8 times until the nuts are finely chopped and start to look almost like a rough paste. Be careful not to over-process the nuts at this stage — you want them broken down, but not so much that they turn into butter.
Now add the fresh basil leaves. They will take up a lot of space in the bowl at first, but they will pack down quickly once you start processing. Place the lid back on and pulse 8 to 10 times. Stop and scrape down the sides again, then pulse another 5 times. The mixture should look coarsely blended at this point, with the basil broken down and mixed into the nuts and garlic.
Add the grated Parmesan cheese, salt, black pepper, and lemon juice if you are using it. The lemon juice helps the pesto keep its bright green color and adds a slight tang. Pulse the mixture 4 to 5 more times to combine everything.
Now, with the food processor running on low speed, slowly drizzle the olive oil in through the feed tube at the top of the lid. Take about 30 to 45 seconds to pour it all in — going slowly helps the oil emulsify into the pesto instead of just pooling on top. Once all the oil is in, let the processor run for another 10 to 15 seconds until the pesto looks smooth and creamy.
Taste the pesto and adjust the seasoning. Add more salt, pepper, or lemon juice to your liking. If the pesto looks too thick, add a little more olive oil one tablespoon at a time. If it tastes too sharp from the garlic, add a bit more Parmesan to balance it out.
Transfer the finished pesto to a clean jar or airtight container. Press a thin layer of olive oil on the surface before sealing — this keeps the pesto from turning brown. Store in the refrigerator for up to 5 days, or freeze in small portions for up to 3 months.
2. Homemade Hummus
Prep Time: 10 minutes | Cook Time: 0 minutes | Serves: 8–10
Creamy, smooth hummus made at home is on a completely different level from the store-bought version. Using a Cuisinart food processor, you can get that perfectly silky texture that makes this dip so satisfying. Great for snacking, meal prep, or serving at parties with pita bread and veggies.
Ingredients:
- 1 can (15 oz) chickpeas, drained and rinsed
- 3 tablespoons tahini (sesame paste)
- 3 tablespoons fresh lemon juice
- 2 garlic cloves
- 3 tablespoons extra virgin olive oil
- ¼ teaspoon cumin
- ½ teaspoon salt
- 3–4 tablespoons cold water
- Paprika and olive oil for topping (optional)
Instructions:
Before you start, drain the canned chickpeas and rinse them thoroughly under cold water. For an extra smooth hummus, take a few minutes to peel the thin skin off each chickpea. This step is optional, but it makes a noticeable difference in the final texture. Just squeeze each chickpea gently between your fingers and the skin will slip right off. Set them aside in a bowl.
Add the garlic cloves to the food processor bowl and pulse 5 to 6 times until the garlic is finely minced. Scrape down the sides of the bowl. Add the tahini and lemon juice to the food processor. Run the processor on high for about 60 seconds. This step is called “whipping the tahini,” and it creates a fluffy, lighter base for your hummus. The mixture will look thick and almost white. Scrape down the sides again.
Add the cumin, salt, and about half of the cold water. Process for another 30 seconds. The mixture should look smoother now. Add all the chickpeas to the bowl. Process continuously on high for 2 full minutes. Stop and scrape down the sides thoroughly. Process for another 60 to 90 seconds. You want the hummus to look very smooth at this stage.
With the processor still running, slowly drizzle in the olive oil through the feed tube. Take about 20 to 30 seconds to pour it all in. This helps make the hummus creamy and light. Once all the oil is added, add the remaining cold water one tablespoon at a time until you reach your preferred consistency. Some people like it thick; others prefer it looser and more spreadable.
Taste the hummus and adjust the salt, lemon juice, or garlic to your preference. Process for another 15 to 20 seconds after any adjustments.
Scoop the hummus into a shallow bowl. Use the back of a spoon to create a swirl on top. Drizzle with olive oil and sprinkle with paprika if you like. Serve with pita bread, crackers, or fresh vegetables. Store leftovers in a sealed container in the refrigerator for up to 5 days.
3. Restaurant-Style Salsa
Prep Time: 10 minutes | Cook Time: 0 minutes | Serves: 8–10
Smooth, chunky, and full of bold flavor — this restaurant-style salsa is easy to make at home. The Cuisinart food processor does all the chopping work in seconds. Serve it fresh with tortilla chips or use it as a topping for tacos, eggs, grilled chicken, and more.
Ingredients:
- 1 can (14.5 oz) fire-roasted diced tomatoes
- 1 can (10 oz) diced tomatoes with green chilies (like Rotel)
- ½ medium white onion, roughly chopped
- 2 garlic cloves
- 1 jalapeño, seeded and roughly chopped (use more for extra heat)
- ½ cup fresh cilantro leaves
- 2 tablespoons fresh lime juice
- 1 teaspoon cumin
- ½ teaspoon salt
- ¼ teaspoon sugar (optional, to balance acidity)
Instructions:
Cut your onion into rough chunks — no need to dice it finely since the food processor will do that. Remove the seeds from the jalapeño if you want a milder salsa. If you like heat, leave some or all of the seeds in. Peel your garlic cloves and set everything aside.
Place the garlic cloves into the food processor bowl and pulse 4 to 5 times until minced. Add the onion chunks and jalapeño pieces. Pulse 6 to 8 times until the onion looks finely chopped. Scrape down the sides of the bowl with a spatula.
Add the cilantro leaves, lime juice, cumin, salt, and sugar to the bowl. Pulse 3 to 4 times to combine. Now add both cans of tomatoes — do not drain them. The juices from the cans add great flavor to the salsa.
Pulse the salsa 8 to 12 times, stopping every few pulses to check the texture. For a chunky salsa, stop when you still see small pieces of tomato. For a smoother salsa, pulse a few more times. Avoid running the processor continuously, or the salsa will turn into a thin liquid.
Once the salsa reaches the texture you like, taste it and adjust the seasoning. Add more lime juice for brightness, more jalapeño for heat, or more salt as needed.
Pour the salsa into a bowl or jar and refrigerate for at least 30 minutes before serving. The flavor gets better as it sits because the spices have time to blend together. This salsa keeps well in the refrigerator for up to one week. You can also freeze it for up to 3 months.
4. Creamy Guacamole
Prep Time: 10 minutes | Cook Time: 0 minutes | Serves: 4–6
Guacamole made in a food processor comes out extra smooth and creamy — perfect for dipping, spreading, or topping your favorite dishes. It may seem intimidating or difficult to get the right texture without over-processing, but it’s actually quite the opposite! With just a few quick pulses, you get guacamole that tastes fresh and rich.
Ingredients:
- 3 ripe avocados, pitted and scooped
- 2 tablespoons fresh lime juice
- ½ small red onion, roughly chopped
- 1 garlic clove
- 1 jalapeño, seeded
- ¼ cup fresh cilantro
- ½ teaspoon salt
- ¼ teaspoon cumin
- 1 small Roma tomato, diced (stirred in at the end, not processed)
Instructions:
Pick avocados that are fully ripe — they should feel soft when you press them gently but not mushy. Cut them in half, remove the pits, and scoop the flesh out with a large spoon into the food processor bowl.
Add the garlic clove, jalapeño pieces, red onion chunks, cilantro, lime juice, salt, and cumin to the bowl with the avocado. Do not worry about chopping these ingredients finely since the processor will take care of that.
Put the lid on and pulse the mixture 8 to 12 times. Stop and check the texture after every 2 to 3 pulses. The goal is creamy but not completely smooth — you want a little texture left in the guacamole. Scrape down the sides as needed and pulse again.
Once you reach the consistency you want, transfer the guacamole to a mixing bowl. Fold in the diced Roma tomato with a spoon — adding the tomato at the end keeps it from getting watery in the processor.
Taste and adjust the seasoning. Add more lime juice for a brighter flavor, more salt if needed, or more jalapeño for heat.
To keep the guacamole from browning, press a piece of plastic wrap directly onto the surface before refrigerating. The lime juice also helps slow down the browning process. Serve within a few hours for the best color and taste.
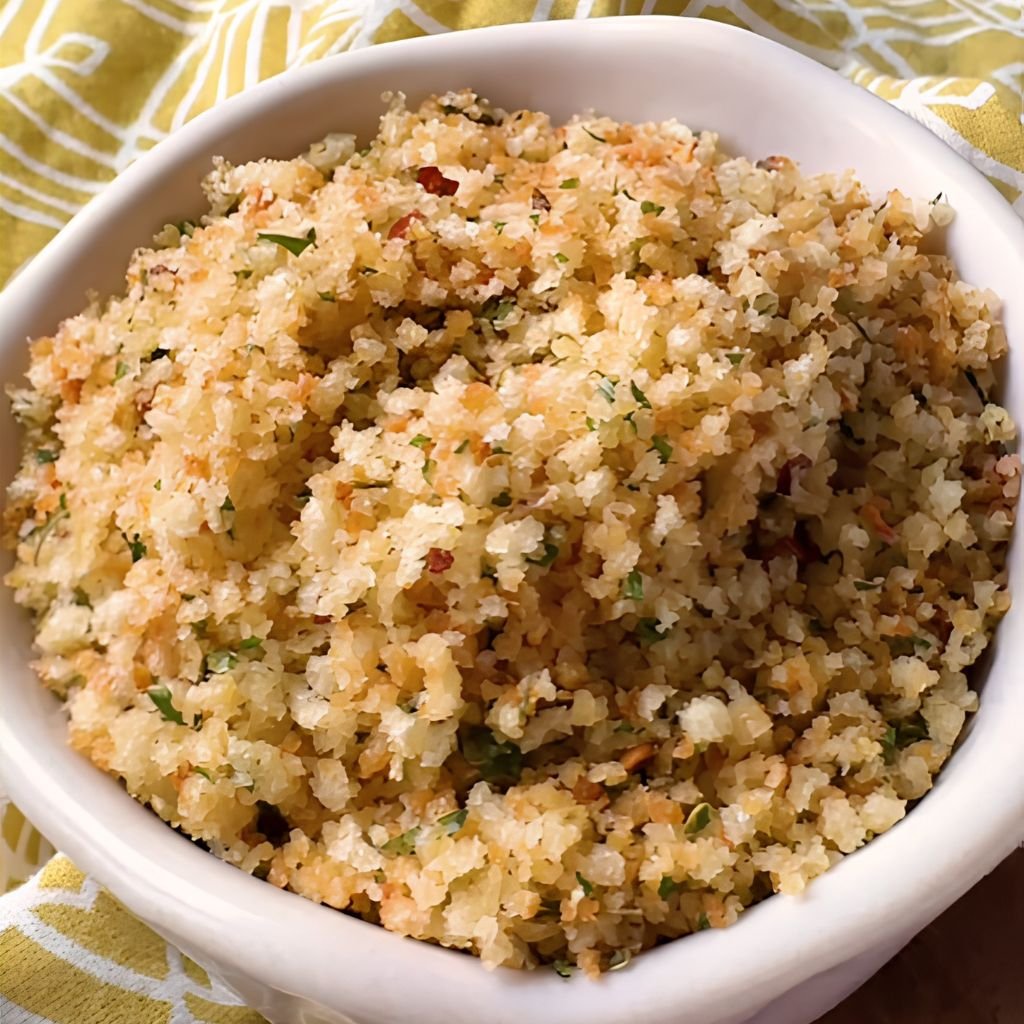
5. Garlic Parmesan Breadcrumbs
Prep Time: 5 minutes | Cook Time: 8 minutes | Serves: Makes about 1½ cups
Turn old bread into something amazing with these crispy garlic Parmesan breadcrumbs. They are great as a coating for chicken, a topping for pasta, or sprinkled on roasted vegetables. The food processor makes quick work of turning bread into perfectly even crumbs.
Ingredients:
- 4 slices day-old bread (white, sourdough, or Italian)
- 3 tablespoons butter, melted
- 2 garlic cloves
- ¼ cup grated Parmesan cheese
- 1 teaspoon dried Italian seasoning
- ½ teaspoon salt
- ¼ teaspoon black pepper
Instructions:
Preheat your oven to 375°F. Line a baking sheet with parchment paper and set it aside. Day-old bread works best for this recipe because it has less moisture than fresh bread, which helps the crumbs toast up crispier. If your bread is fresh, cut it into cubes and spread them on a baking sheet. Bake for 5 minutes to dry them out a little before processing.
Break the bread slices into rough chunks and add them to the food processor bowl. Add the garlic cloves as well. Put the lid on and pulse 10 to 15 times. Stop and check the size of the crumbs. You want them to look like coarse crumbs — not too fine, not too chunky. Pulse a few more times if needed.
Transfer the bread and garlic crumbs to a mixing bowl. Add the melted butter, Parmesan cheese, Italian seasoning, salt, and black pepper. Mix everything together with a spoon until the crumbs are evenly coated with the butter and seasoning.
Spread the seasoned breadcrumbs in a single layer on the prepared baking sheet. Make sure they are spread out evenly so they toast uniformly. Bake for 8 minutes, then stir the crumbs and bake for another 4 to 5 minutes until they are golden brown and crispy.
Remove from the oven and let them cool completely on the baking sheet. They will crisp up even more as they cool. Once fully cooled, store in an airtight container at room temperature for up to 2 weeks.
6. Coleslaw Mix
Prep Time: 10 minutes | Cook Time: 0 minutes | Serves: 6–8
Making coleslaw from scratch is so much fresher than the bagged version. The Cuisinart food processor shreds the cabbage and carrots in seconds, giving you the perfect base for a classic creamy coleslaw or a tangy vinegar-based version.
Ingredients:
For the slaw mix:
- ½ head green cabbage, cut into wedges
- ¼ head purple cabbage, cut into wedges
- 3 medium carrots, peeled and cut into chunks
For the creamy dressing:
- ½ cup mayonnaise
- 2 tablespoons apple cider vinegar
- 1 tablespoon sugar
- ½ teaspoon celery seed
- ½ teaspoon salt
- ¼ teaspoon black pepper
Instructions:
Cut the green and purple cabbage into manageable wedges that will fit through the food processor’s feed tube. Remove the tough core from each wedge before processing. Peel the carrots and cut them into 2-inch chunks.
Attach the shredding disc to your Cuisinart food processor. Turn the processor on and use the food pusher to push the cabbage wedges through the feed tube one at a time. Work slowly and use steady pressure so the cabbage shreds evenly. Do the same with the carrot chunks. Empty the bowl into a large mixing bowl when it gets full and continue until all the vegetables are shredded.
Once all the vegetables are shredded, you can switch to the regular chopping blade and pulse the shredded mix 3 to 4 times if you want even finer pieces. This is optional — it depends on the texture you prefer.
In a separate small bowl, whisk together the mayonnaise, apple cider vinegar, sugar, celery seed, salt, and pepper until smooth. Pour the dressing over the shredded vegetable mix and toss everything together with tongs or two large spoons. Make sure all the cabbage and carrots are coated evenly.
Cover the bowl and refrigerate for at least 30 minutes before serving. The coleslaw tastes even better after sitting for an hour because the vegetables soften slightly and absorb the dressing flavors. Serve cold as a side dish, on sandwiches, or alongside pulled pork or grilled meats.
7. Cauliflower Rice
Prep Time: 5 minutes | Cook Time: 5 minutes | Serves: 4
Cauliflower rice is a great low-carb swap for regular rice. Made in a food processor, it takes less than 5 minutes to prep. You can eat it raw, sauté it, or use it as a base for bowls, stir-fries, and fried rice dishes.
Ingredients:
- 1 medium head of cauliflower, cut into florets
- 1 tablespoon olive oil or butter
- ½ teaspoon salt
- ¼ teaspoon garlic powder (optional)
- Fresh parsley for garnish (optional)
Instructions:
Wash the cauliflower and remove all the leaves. Cut it into large florets, making sure to cut off most of the thick stem pieces. The florets should be roughly the same size so they process evenly. Pat them dry with a paper towel — removing moisture helps the cauliflower rice cook up light and fluffy instead of soggy.
Fill the food processor bowl about halfway with cauliflower florets. Do not overfill the bowl — processing too much at once gives you uneven results, with some pieces too fine and others too large. Put the lid on and pulse 8 to 12 times. Stop after every 3 pulses to check the size. You want the cauliflower to look like small, rice-sized granules. Repeat with the remaining florets.
Once all the cauliflower is processed, check for any large pieces that did not break down fully. Pick those out and pulse them separately for a few more seconds.
To cook the cauliflower rice, heat olive oil or butter in a large skillet over medium-high heat. Once the pan is hot, add the cauliflower rice and spread it out in an even layer. Season with salt and garlic powder. Cook for 4 to 5 minutes, stirring every minute or so. You want it to look slightly golden in spots and feel dry rather than wet.
Remove from heat and taste for seasoning. Add more salt if needed. Garnish with fresh parsley if you like. Serve hot as a side dish or let it cool and use it as a base for meal prep bowls.
8. Pizza Dough
Prep Time: 15 minutes | Cook Time: 12–15 minutes | Serves: Makes 1 large pizza or 2 small pizzas
Homemade pizza dough is easier than most people think, and the food processor makes it even simpler. Using the dough blade, the Cuisinart food processor kneads the dough in under two minutes — no hand kneading needed. The result is a smooth, elastic dough ready to be shaped and topped.
Ingredients:
- 2¼ teaspoons active dry yeast (1 packet)
- ¾ cup warm water (around 110°F)
- 1 teaspoon sugar
- 2 cups all-purpose flour, plus extra for dusting
- 1 teaspoon salt
- 2 tablespoons olive oil
Instructions:
Start by activating the yeast. Combine the warm water, sugar, and yeast in a small bowl or measuring cup. Stir gently and let it sit for 5 to 10 minutes. The mixture should start to look foamy and bubbly on top. This tells you the yeast is active and ready to use. If the mixture does not foam, your yeast may be expired or the water was too hot — start over with fresh yeast.
While the yeast activates, add the flour and salt to the food processor bowl fitted with the dough blade (the plastic blade). Pulse 3 to 4 times to mix the dry ingredients together.
Once the yeast mixture is foamy, add the olive oil to it and stir to combine. Turn the food processor on and slowly pour the yeast and oil mixture through the feed tube at the top. Pour in a steady stream over about 15 to 20 seconds. The dough will begin to come together and form a ball. Let the processor run for 60 seconds after all the liquid is added. The dough should pull away from the sides of the bowl and feel slightly tacky but not sticky.
If the dough looks too dry and crumbly, add water one teaspoon at a time through the feed tube while the processor runs. If it looks too sticky, add flour one tablespoon at a time.
Remove the dough from the bowl and shape it into a smooth ball with your hands. Place it in a lightly oiled bowl, turning it once so all sides are coated. Cover the bowl with plastic wrap or a clean kitchen towel. Let the dough rise in a warm spot for 45 to 60 minutes, until it doubles in size.
Once risen, punch the dough down and turn it out onto a lightly floured surface. Roll it into your desired shape. Add your sauce, cheese, and toppings, then bake at 475°F for 12 to 15 minutes until the crust is golden and the cheese is bubbling.
9. Pie Crust Dough
Prep Time: 15 minutes (plus 30 minutes chilling) | Cook Time: Varies | Serves: Makes 1 double crust or 2 single crusts
A perfectly flaky pie crust is one of the most satisfying things to make from scratch. The food processor does an amazing job here — it cuts the cold butter into the flour quickly and evenly, which is exactly what you need for a flaky crust. Cold ingredients and a light touch are the secrets to success.
Ingredients:
- 2½ cups all-purpose flour
- 1 teaspoon salt
- 1 tablespoon sugar (for sweet pies; skip for savory)
- 1 cup (2 sticks) unsalted butter, very cold, cut into ½-inch cubes
- 4–6 tablespoons ice water
Instructions:
The most important thing about pie crust is keeping everything cold. Before you start, cut your butter into small cubes and place them in the freezer for 10 minutes. Fill a glass with water and add a handful of ice cubes to get it very cold. Also, chill the food processor bowl in the freezer for 5 minutes if you want the best results.
Add the flour, salt, and sugar to the chilled food processor bowl fitted with the regular chopping blade. Pulse 3 to 4 times to mix the dry ingredients.
Take the cold butter cubes out of the freezer and add them all to the flour mixture. Pulse the processor 15 to 20 times in short bursts. After each pulse, check the mixture. You want the butter pieces to be pea-sized — some small, some a little larger. There should still be visible chunks of butter throughout the flour. These butter chunks are what create the flaky layers in the crust. Do not process until the butter disappears completely or the crust will be tough.
With the processor running, add the ice water one tablespoon at a time through the feed tube. After adding 4 tablespoons, pulse 4 to 5 times and check the dough. Squeeze a small amount between your fingers — if it holds together without crumbling, the dough has enough moisture. If it falls apart, add another tablespoon of water and check again. You may need up to 6 tablespoons total, depending on your flour and humidity.
As soon as the dough starts to clump together, stop processing immediately. Over-mixing develops the gluten in the flour and makes the crust tough instead of flaky.
Turn the dough out onto a lightly floured surface. Gently press it into a flat disk (or two disks if making a double crust). Wrap each disk tightly in plastic wrap and refrigerate for at least 30 minutes, or up to 2 days. This resting time helps relax the gluten and makes the dough easier to roll out.
When ready to use, let the dough sit at room temperature for 5 minutes, then roll it out on a lightly floured surface to about ⅛-inch thickness. Transfer carefully to your pie dish and proceed with your chosen pie recipe.
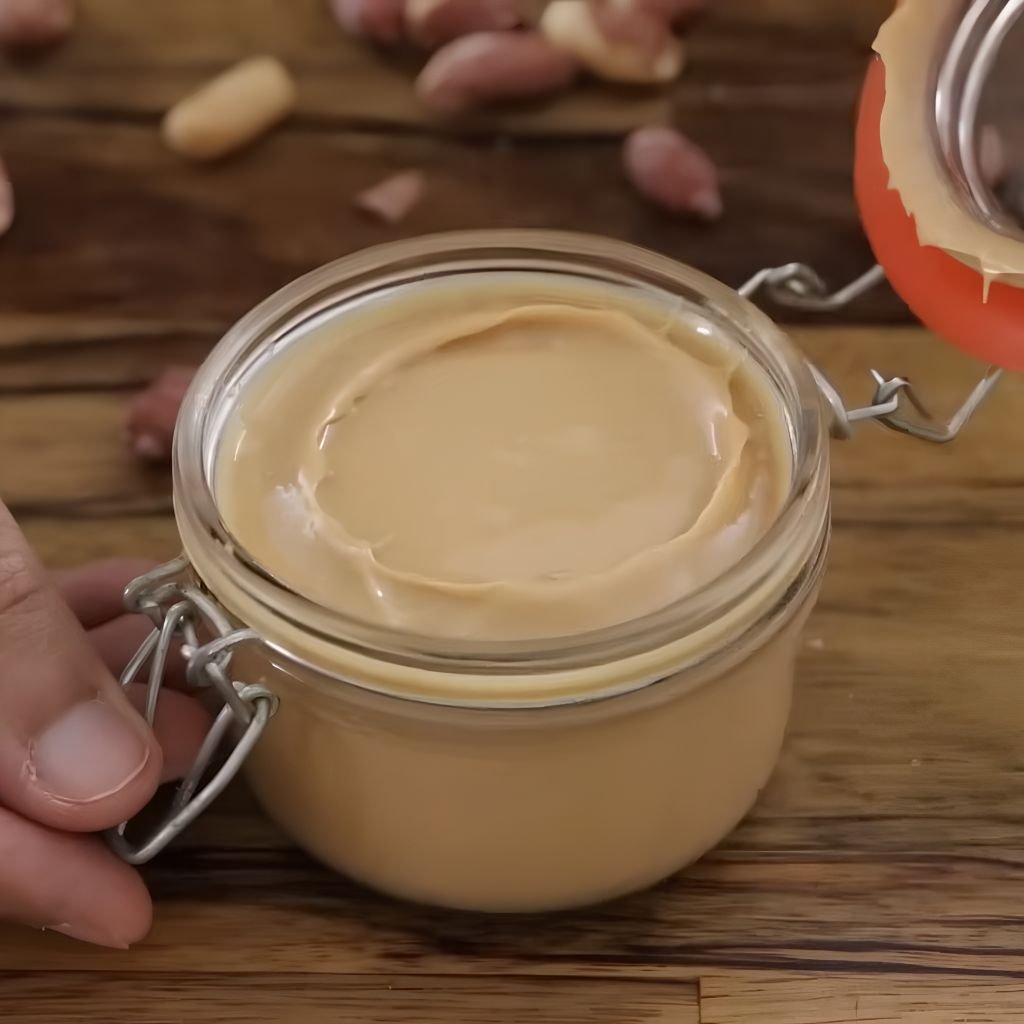
10. Homemade Peanut Butter
Prep Time: 5 minutes | Cook Time: 0 minutes | Serves: Makes about 1 cup
Making peanut butter at home with a Cuisinart food processor is surprisingly easy and the result is fresher and more flavorful than anything you can buy at the store. You control how smooth or chunky it gets, and you can adjust the sweetness and salt to your taste. All you need is one main ingredient — roasted peanuts.
Ingredients:
- 2 cups dry roasted peanuts (salted or unsalted)
- 1 tablespoon honey or maple syrup (optional)
- ¼ teaspoon salt (if using unsalted peanuts)
- 1 tablespoon neutral oil (like coconut or peanut oil, if needed)
Instructions:
Pour the roasted peanuts into the food processor bowl fitted with the chopping blade. Put the lid on and turn the processor on. Let it run continuously — do not stop and start. The peanuts will go through several stages during processing, and it is important to keep going through each one.
In the first 30 seconds, the peanuts will break down into a rough, crumbly texture — almost like coarse sand. Keep processing. Around the 1-minute mark, the mixture will look like dry peanut butter crumbles and may start to clump into a ball that rolls around the bowl. This is normal — keep the processor running.
After about 2 minutes, the ball will break down and the mixture will start to look smoother and glossier as the natural oils in the peanuts are released. Keep processing. Scrape down the sides of the bowl at this point and continue running the processor.
By the 3 to 4 minute mark, the peanut butter should look smooth and creamy. If it still looks dry or thick, add the neutral oil one teaspoon at a time while the processor is running. This helps achieve a silky texture without making the peanut butter greasy.
Once the peanut butter is as smooth as you like, add the honey and salt if you are using them. Process for another 20 to 30 seconds to fully incorporate them. Taste and adjust the sweetness or saltiness.
For chunky peanut butter, add ¼ cup of whole peanuts at the end and pulse 4 to 6 times. This gives you that classic chunky texture with big pieces throughout.
Transfer the finished peanut butter to a clean glass jar with a lid. Store in the refrigerator for up to 3 weeks. Natural peanut butter does separate, so stir it before each use.
11. Almond Butter
Prep Time: 10 minutes | Cook Time: 10 minutes | Serves: Makes about 1 cup
Homemade almond butter is creamy, rich, and made with just one ingredient. Lightly toasting the almonds before processing brings out a deeper, nuttier flavor that makes this so much better than the store version. The Cuisinart food processor handles it all with ease.
Ingredients:
- 2 cups raw almonds
- ¼ teaspoon salt (optional)
- 1 teaspoon honey or maple syrup (optional)
- 1 teaspoon vanilla extract (optional)
Instructions:
Preheat your oven to 350°F. Spread the raw almonds in a single layer on a rimmed baking sheet. Roast them in the oven for 10 minutes, stirring once halfway through, until they turn a slightly darker brown color and smell fragrant and nutty. Watch them carefully in the last few minutes — almonds can burn quickly.
Remove the almonds from the oven and let them cool for 5 minutes. They should still feel warm when you add them to the food processor — processing warm almonds helps release their natural oils faster, which speeds up the process and gives you a smoother result.
Pour the warm toasted almonds into the food processor bowl with the chopping blade. Put the lid on and run the processor continuously. Just like with peanut butter, the almonds will go through several stages — first crumbly, then clumpy, then gradually smoother as the oils release.
Let the processor run for a total of 8 to 12 minutes, stopping every 2 to 3 minutes to scrape down the sides with a spatula. Each time you scrape down, check the texture. The almond butter is ready when it looks completely smooth and runs off the spatula like a thick syrup.
Almonds take longer than peanuts to reach this stage because they have less oil naturally. Be patient and keep going — the texture changes dramatically in the last 2 to 3 minutes of processing.
Once smooth, add the salt, honey, and vanilla if you are using them. Process for another 20 to 30 seconds. Taste and adjust flavors as needed.
Transfer to a clean glass jar and store in the refrigerator for up to 3 weeks. Stir before each use as natural separation occurs over time.
12. Energy Balls
Prep Time: 15 minutes (plus 30 minutes chilling) | Cook Time: 0 minutes | Serves: Makes 18–20 balls
Energy balls are the perfect no-bake snack — packed with fiber, protein, and natural sweetness. The food processor makes blending the dates and other ingredients quick and effortless. These keep well in the fridge for the whole week, making them great for meal prep.
Ingredients:
- 1 cup Medjool dates, pitted (about 10–12 dates)
- 1 cup rolled oats
- ½ cup almond butter or peanut butter
- ¼ cup honey
- ¼ cup dark chocolate chips
- 2 tablespoons chia seeds
- 1 teaspoon vanilla extract
- ¼ teaspoon cinnamon
- Pinch of salt
Instructions:
Check that the dates are soft and moist. If they feel dry and hard, soak them in warm water for 10 minutes, then drain and pat them dry before using. Dry dates do not blend well and can make the energy balls crumbly.
Place the pitted dates into the food processor and process for 30 to 45 seconds until they form a sticky, paste-like ball. Stop and scrape down the sides. The date paste should look smooth and cohesive without any large chunks remaining.
Add the rolled oats, nut butter, honey, vanilla, cinnamon, and salt to the bowl. Process for 20 to 30 seconds until everything is combined and the mixture starts to pull together into a dough-like consistency. Stop and scrape down the sides, then pulse 5 to 8 more times.
Remove the blade and add the chocolate chips and chia seeds to the bowl. Stir them into the mixture by hand with a spoon — processing these in the machine would break them down too much and you would lose that texture.
The mixture should feel sticky but hold its shape when you press it together. If it feels too wet, add a tablespoon of oats and mix again. If it feels too dry, add a teaspoon of honey.
Line a baking sheet or plate with parchment paper. Scoop out about 1½ tablespoons of the mixture at a time and roll each portion between your palms to form a smooth ball. Place each ball on the prepared surface. Once all the balls are shaped, refrigerate them for at least 30 minutes to firm up.
Store the energy balls in an airtight container in the refrigerator for up to 7 days, or freeze for up to 2 months.
13. Banana Oat Muffin Batter
Prep Time: 10 minutes | Cook Time: 18–20 minutes | Serves: Makes 12 muffins
Soft, moist, and naturally sweetened with ripe bananas, these muffins come together fast with help from the food processor. The blender turns everything into a smooth batter in just a minute — no mixing bowls required. Great for breakfast, snacking, or meal prep.
Ingredients:
- 3 ripe bananas (the riper the better — brown spots are fine)
- 2 large eggs
- ¼ cup maple syrup or honey
- ¼ cup melted coconut oil or butter
- 1 teaspoon vanilla extract
- 1½ cups rolled oats
- 1 teaspoon baking powder
- ½ teaspoon baking soda
- ½ teaspoon cinnamon
- ¼ teaspoon salt
- ½ cup blueberries, chocolate chips, or chopped walnuts (optional mix-ins)
Instructions:
Preheat your oven to 350°F. Line a 12-cup muffin tin with paper liners or spray the cups with nonstick cooking spray. Set it aside.
Break the ripe bananas into chunks and place them in the food processor bowl. Process for 15 to 20 seconds until the bananas are smooth and pureed. Scrape down the sides of the bowl.
Add the eggs, maple syrup, melted coconut oil, and vanilla extract to the pureed bananas. Process for another 15 to 20 seconds until the wet ingredients are well blended together.
Add the rolled oats, baking powder, baking soda, cinnamon, and salt to the bowl. Process for 30 to 40 seconds until a smooth batter forms. The oats will blend into the batter, giving the muffins their structure. Scrape down the sides once and pulse 5 more times.
Remove the blade and stir in any mix-ins — chocolate chips, blueberries, or walnuts — by hand with a spoon. This prevents them from being chopped up during processing.
Use a ¼ cup measuring cup or a large cookie scoop to fill each muffin cup about ¾ of the way full. This gives the muffins enough room to rise without overflowing.
Bake for 18 to 20 minutes. Check doneness by inserting a toothpick into the center of a muffin — it should come out clean or with just a few dry crumbs. The tops should look golden and spring back when pressed lightly.
Let the muffins cool in the pan for 5 minutes, then transfer to a wire rack. These muffins stay moist for up to 3 days at room temperature or up to 5 days in the refrigerator. They also freeze well for up to 2 months.
14. Chocolate Chip Cookie Dough
Prep Time: 10 minutes | Cook Time: 10–12 minutes | Serves: Makes about 24 cookies
Classic chocolate chip cookies made with a food processor come together in just minutes. The machine creams the butter and sugar together quickly and mixes the dough evenly. The result is soft, chewy cookies with crispy edges — just the way most people love them.
Ingredients:
- 1 cup (2 sticks) unsalted butter, softened to room temperature
- ¾ cup granulated sugar
- ¾ cup packed brown sugar
- 2 large eggs
- 2 teaspoons vanilla extract
- 2¼ cups all-purpose flour
- 1 teaspoon baking soda
- 1 teaspoon salt
- 2 cups chocolate chips
Instructions:
Preheat your oven to 375°F. Line two baking sheets with parchment paper and set aside. Make sure your butter is truly at room temperature — it should feel soft when you press it with your finger but should not be melted or greasy. Cold butter will not cream properly in the food processor.
Cut the softened butter into chunks and place it in the food processor bowl. Add both sugars. Process on high for about 60 seconds until the mixture looks light, pale, and fluffy. Scrape down the sides of the bowl thoroughly.
Add the eggs one at a time through the feed tube while the processor is running. Let each egg incorporate for about 10 seconds before adding the next. Add the vanilla extract and process for another 10 seconds. Scrape down the sides again.
Add the flour, baking soda, and salt to the bowl. Pulse 12 to 15 times — just until the flour disappears into the dough and no dry streaks remain. Do not over-process at this stage or the cookies will come out tough. A few extra pulses beyond what is needed develops too much gluten.
Remove the blade and transfer the dough to a large mixing bowl. Stir in the chocolate chips by hand with a wooden spoon or spatula. Make sure the chips are distributed evenly throughout the dough.
Scoop rounded tablespoons of dough and place them on the prepared baking sheets, spacing them about 2 inches apart. Bake for 10 to 12 minutes until the edges look set and golden but the centers still look slightly underdone. They will firm up as they cool on the pan.
Let the cookies cool on the baking sheet for 5 minutes before moving them to a wire rack. Store in an airtight container at room temperature for up to 5 days.
15. Cheesecake Filling
Prep Time: 15 minutes | Cook Time: 50–60 minutes | Serves: 10–12
A smooth, creamy cheesecake filling depends on the cream cheese being perfectly blended without any lumps. The food processor does this beautifully and quickly. This classic New York-style filling works in a graham cracker crust and can be topped with anything you like.

Ingredients:
- 3 packages (8 oz each) cream cheese, at room temperature
- 1 cup granulated sugar
- 3 large eggs, at room temperature
- 1 cup full-fat sour cream
- 1 teaspoon vanilla extract
- 2 tablespoons all-purpose flour
- 1 tablespoon fresh lemon juice
- Zest of 1 lemon
Instructions:
Take the cream cheese and eggs out of the refrigerator at least one hour before you start. Room temperature cream cheese blends much more smoothly than cold cream cheese and reduces the chance of lumps in the finished filling. Also preheat your oven to 325°F and prepare a 9-inch springform pan with a graham cracker crust.
Cut the cream cheese into chunks and place them in the food processor bowl. Process on high for 60 seconds, stopping to scrape down the sides twice during this time. The cream cheese should look completely smooth and slightly fluffy before you move on.
Add the sugar and flour to the cream cheese and process for another 30 seconds. Scrape down the sides. Add the sour cream, vanilla extract, lemon juice, and lemon zest. Process for 20 seconds more until fully combined.
Add the eggs one at a time through the feed tube while the processor is running on the lowest speed. Let each egg process for about 10 seconds before adding the next. Once all the eggs are added, process for just 10 more seconds. Do not over-mix at this stage — overworking the eggs adds too much air to the filling, which causes the cheesecake to puff up and crack during baking.
Pour the filling into the prepared crust and smooth the top with a spatula. Tap the pan gently on the counter a few times to release any large air bubbles.
Bake at 325°F for 50 to 60 minutes. The cheesecake is done when the edges look set and firm, but the center still jiggles slightly when you shake the pan gently — like Jell-O. It will fully set as it cools.
Turn off the oven and crack the oven door open. Let the cheesecake sit inside the oven for one hour. This slow cooling prevents cracking. After that, transfer to the refrigerator and chill for at least 4 hours — overnight is best. Add your toppings right before serving.
16. Broccoli Cheddar Soup Base
Prep Time: 10 minutes | Cook Time: 25 minutes | Serves: 4–6
Rich, creamy, and loaded with cheesy flavor — this broccoli cheddar soup is the kind of comfort food that never gets old. The Cuisinart food processor makes quick work of chopping the vegetables and blending the soup to a silky finish. Easy enough for a weeknight dinner.
Ingredients:
- 1 medium head of broccoli, cut into florets
- 1 medium onion, roughly chopped
- 3 garlic cloves
- 3 tablespoons butter
- 3 tablespoons all-purpose flour
- 3 cups chicken or vegetable broth
- 2 cups whole milk or half-and-half
- 2 cups shredded sharp cheddar cheese
- ½ teaspoon mustard powder
- ½ teaspoon salt (plus more to taste)
- ¼ teaspoon black pepper
- Pinch of cayenne pepper
Instructions:
Start by chopping the vegetables in the food processor. Add the onion chunks and garlic cloves to the food processor bowl. Pulse 6 to 8 times until finely chopped. Remove and set aside. Add the broccoli florets to the bowl and pulse 8 to 10 times until they are chopped into small, even pieces. Set aside separately from the onion and garlic.
In a large pot or Dutch oven, melt the butter over medium heat. Add the chopped onion and garlic and cook for 4 to 5 minutes, stirring often, until they are soft and translucent. Sprinkle the flour over the onion and garlic and stir constantly for 1 to 2 minutes. This cooks the raw flour taste out and creates the roux that thickens the soup.
Slowly pour in the broth, whisking constantly to prevent lumps. Once the broth is fully incorporated, add the milk or half-and-half, mustard powder, salt, pepper, and cayenne. Stir to combine and bring the mixture to a gentle simmer over medium heat.
Add the chopped broccoli to the pot. Let the soup simmer for 12 to 15 minutes, stirring occasionally, until the broccoli is very tender and easy to mash with a spoon.
Remove the pot from heat and let the soup cool for a few minutes. Carefully ladle about half of the soup into the food processor and blend until smooth. Pour the blended portion back into the pot with the remaining chunky soup. This gives you a soup with both a creamy base and bits of broccoli throughout.
Return the pot to low heat. Add the shredded cheddar cheese one handful at a time, stirring between each addition to let the cheese melt fully before adding more. Once all the cheese is melted in, taste the soup and adjust the seasoning.
Ladle into bowls and serve hot with crusty bread or crackers.
17. Butternut Squash Soup
Prep Time: 15 minutes | Cook Time: 30 minutes | Serves: 4–6
Velvety smooth butternut squash soup is the definition of cozy fall cooking. Roasting the squash first deepens the flavor, and the food processor blends everything into a beautifully smooth soup. Finished with a touch of cream and warming spices, this one is pure comfort in a bowl.
Ingredients:
- 1 large butternut squash (about 3 lbs), peeled, seeded, and cubed
- 1 medium onion, quartered
- 4 garlic cloves, unpeeled
- 3 tablespoons olive oil, divided
- 3 cups vegetable or chicken broth
- ½ cup heavy cream or coconut milk
- 1 teaspoon cumin
- ½ teaspoon nutmeg
- ½ teaspoon cinnamon
- 1 teaspoon salt
- ¼ teaspoon black pepper
- 1 tablespoon maple syrup (optional)
Instructions:
Preheat your oven to 400°F. Peel the butternut squash and cut it into roughly 1-inch cubes. Place the squash cubes and quartered onion on a large baking sheet. Tuck the unpeeled garlic cloves around the squash. Drizzle everything with 2 tablespoons of olive oil and sprinkle with salt and pepper. Toss everything together so the vegetables are evenly coated.
Roast in the oven for 25 to 30 minutes, stirring once halfway through, until the squash is tender, golden, and slightly caramelized on the edges. Remove the garlic cloves from the pan and squeeze the soft roasted garlic out of the skins — discard the skins. The roasted garlic is sweeter and milder than raw garlic and adds a rich depth of flavor.
Let the roasted vegetables cool for 5 minutes before processing. Working in batches, add the roasted squash, onion, and garlic to the food processor bowl. Add a ladleful of broth to each batch to help the blending. Process each batch for 60 to 90 seconds until completely smooth. Pour the blended batches into a large pot.
Once all the squash is blended, place the pot over medium-low heat. Add the remaining broth and stir to combine. Add the cumin, nutmeg, cinnamon, and maple syrup. Stir and bring the soup to a gentle simmer.
Stir in the heavy cream or coconut milk. Taste the soup and adjust the seasoning — add more salt, pepper, or spices as needed. Let the soup simmer on low heat for 5 more minutes to blend the flavors.
Serve hot with a drizzle of cream, a sprinkle of cinnamon, and toasted pumpkin seeds or croutons on top if you like.
18. Vegetable Stir-Fry Prep
Prep Time: 10 minutes | Cook Time: 10 minutes | Serves: 4
Getting all your vegetables prepped for a stir-fry is the most time-consuming part of making one. The Cuisinart food processor slices and shreds everything in seconds, cutting your prep time dramatically so you can get dinner on the table fast.
Ingredients:
- 1 medium zucchini, cut into chunks
- 2 medium carrots, peeled and cut into chunks
- 1 red bell pepper, seeded and quartered
- 1 yellow bell pepper, seeded and quartered
- 2 cups broccoli florets
- 1 cup snap peas
- 3 garlic cloves
- 1 tablespoon fresh ginger, roughly chopped
For the stir-fry sauce:
- 3 tablespoons soy sauce
- 1 tablespoon sesame oil
- 1 tablespoon rice vinegar
- 1 tablespoon honey
- 1 teaspoon cornstarch
- 2 tablespoons water
Instructions:
First, prep the sauce by whisking all the sauce ingredients together in a small bowl until the cornstarch dissolves. Set it aside — having the sauce ready before you start cooking is important because stir-frying goes fast.
Place the garlic cloves and ginger in the food processor bowl and pulse 4 to 5 times until finely minced. Remove and set aside separately — these will be added to the hot pan first for flavor.
Attach the slicing disc to the food processor. Feed the zucchini chunks, carrot chunks, and bell pepper quarters through the feed tube one at a time, using the food pusher for even pressure. This gives you thin, uniform slices perfect for stir-frying. Switch to the shredding disc for the carrots if you prefer them shredded instead of sliced.
For the broccoli, switch back to the regular chopping blade and pulse the florets 4 to 6 times until they break into small, even pieces. Leave the snap peas whole — they are best added directly to the wok.
Now you are ready to cook. Heat a wok or large skillet over very high heat until it is very hot. Add 2 tablespoons of neutral oil. Add the minced garlic and ginger and stir-fry for 30 seconds until fragrant — move them around constantly so they do not burn.
Add the hardest vegetables first — carrots and broccoli. Stir-fry for 2 to 3 minutes. Then add the bell peppers, zucchini, and snap peas. Stir-fry for another 2 to 3 minutes. Pour the sauce over the vegetables and toss everything together. Cook for 1 more minute until the sauce thickens and coats the vegetables. Serve immediately over rice or noodles.
19. Chicken Salad
Prep Time: 10 minutes | Cook Time: 0 minutes (using pre-cooked chicken) | Serves: 4
Classic chicken salad gets a quick upgrade when the food processor does the chopping work. Using a pulse technique, you can chop everything to the perfect consistency without turning it mushy. Serve it in sandwiches, lettuce wraps, or on crackers.
Ingredients:
- 2 cups cooked chicken breast, cut into chunks
- 2 celery stalks, roughly chopped
- ½ small red onion, roughly chopped
- ¼ cup fresh parsley leaves
- ½ cup mayonnaise
- 1 tablespoon Dijon mustard
- 1 tablespoon fresh lemon juice
- ½ teaspoon salt
- ¼ teaspoon black pepper
- ¼ teaspoon garlic powder
Instructions:
Make sure your cooked chicken is completely cooled before processing. Warm chicken releases steam in the food processor and makes the salad watery. You can use rotisserie chicken, poached chicken, or any leftover cooked chicken — just remove the skin and cut it into rough chunks before you start.
Add the celery and red onion to the food processor bowl. Pulse 4 to 5 times until they are finely chopped. Scrape down the sides. Add the fresh parsley and pulse 2 more times to chop it in. Remove the chopped vegetables and parsley and place them in a large mixing bowl.
Add the chicken chunks to the food processor bowl. Do not put the vegetables back in yet — you want to control how finely the chicken gets chopped. Pulse the chicken 6 to 8 times, checking the texture after each pulse. You want the chicken to look shredded and finely chopped but not ground into a paste. Stop as soon as it looks right.
Add the processed chicken to the bowl with the vegetables. Add the mayonnaise, Dijon mustard, lemon juice, salt, pepper, and garlic powder. Mix everything together with a spoon until fully combined. Taste the salad and adjust the seasoning — add more mayo if you want it creamier, more lemon for brightness, or more mustard for a tangier flavor.
Cover the bowl and refrigerate for at least 20 minutes before serving. This allows the flavors to meld together. The chicken salad keeps well in the refrigerator for up to 4 days.
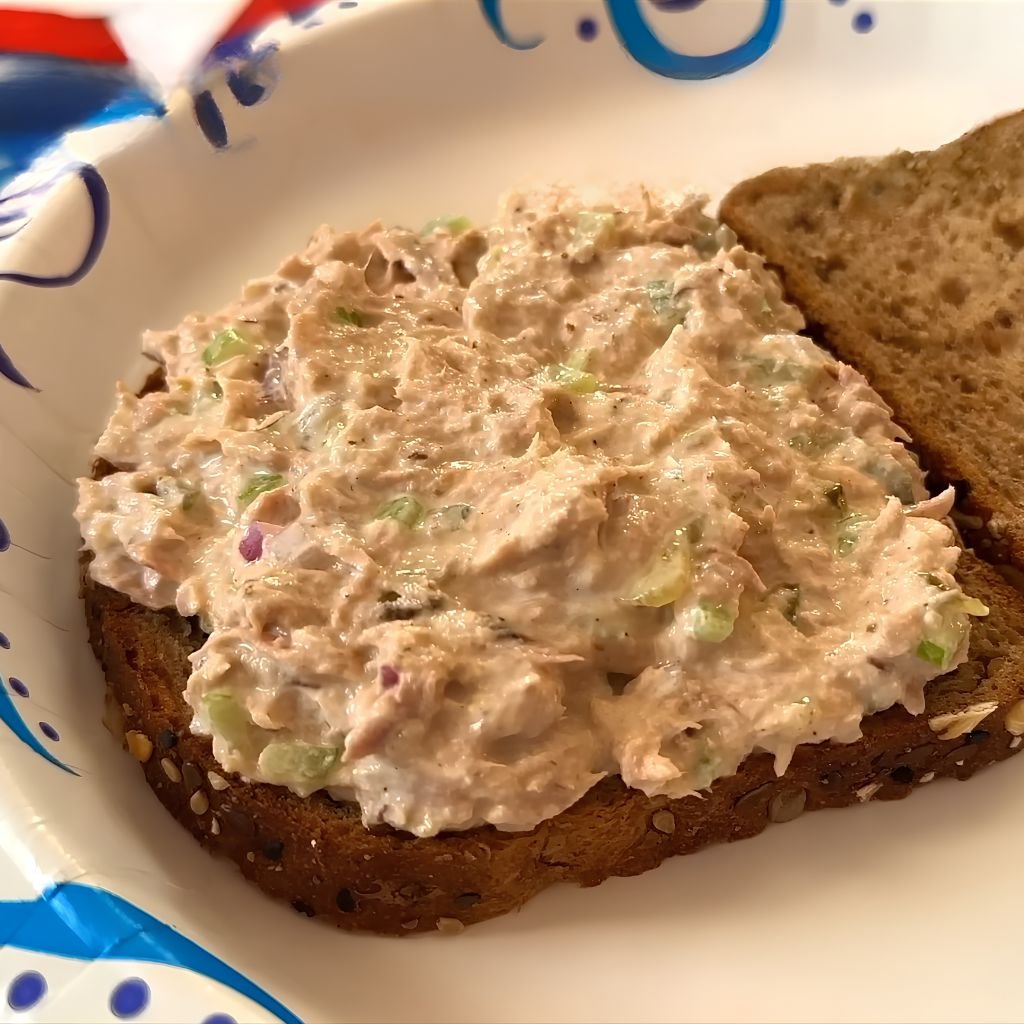
20. Tuna Salad
Prep Time: 10 minutes | Cook Time: 0 minutes | Serves: 4
Quick, protein-packed, and easy to customize — tuna salad is a lunchtime staple. With the food processor doing the chopping, everything comes together in just minutes. This version is creamy, well-seasoned, and works great in sandwiches, on salads, or with crackers.
Ingredients:
- 2 cans (5 oz each) tuna in water, drained
- 2 celery stalks, roughly chopped
- ¼ small red onion, roughly chopped
- 2 tablespoons fresh parsley (optional)
- ¼ cup dill pickles or relish, drained
- ⅓ cup mayonnaise
- 1 tablespoon fresh lemon juice
- 1 teaspoon Dijon mustard
- ½ teaspoon salt
- ¼ teaspoon black pepper
Instructions:
Drain the tuna cans very well by pressing the lid firmly against the tuna to squeeze out as much liquid as possible. Too much liquid in the tuna makes the salad watery and less flavorful. Set the drained tuna aside in a mixing bowl.
Add the celery chunks, red onion, and parsley to the food processor bowl. Pulse 5 to 7 times until all the vegetables are finely and evenly chopped. Scrape down the sides and pulse 2 more times if any large pieces remain. You want the vegetables to be small and consistent so they distribute evenly through the salad.
Add the drained pickle relish or chopped pickles to the bowl and pulse one more time to combine them into the vegetable mix.
Transfer the chopped vegetable mixture to the bowl with the drained tuna. Add the mayonnaise, lemon juice, Dijon mustard, salt, and black pepper. Use a fork or spoon to break up the tuna and mix everything together thoroughly. The tuna should be in small, flaky pieces mixed evenly throughout the salad.
Taste the tuna salad and adjust the seasoning. Add more mayo for creaminess, more lemon for brightness, or more mustard for extra tang.
Refrigerate for at least 15 minutes before serving. The salad stays fresh in the refrigerator for up to 3 days in a sealed container.
21. Falafel Mixture
Prep Time: 15 minutes | Cook Time: 15 minutes | Serves: 4–6 (makes 20–24 falafels)
Homemade falafel made from dried chickpeas — not canned — is the real deal. The texture is completely different: crispy on the outside, fluffy and light on the inside. The food processor processes everything to the perfect consistency and makes the whole process fast and easy.
Ingredients:
- 1½ cups dried chickpeas, soaked overnight and drained (do NOT use canned)
- ½ medium onion, roughly chopped
- 4 garlic cloves
- 1 cup fresh parsley leaves
- ½ cup fresh cilantro leaves
- 1 teaspoon cumin
- 1 teaspoon coriander
- ½ teaspoon paprika
- ½ teaspoon cayenne pepper
- 1 teaspoon salt
- 3 tablespoons all-purpose flour (or chickpea flour)
- 1 teaspoon baking powder
- Oil for frying (at least 3 cups)
Instructions:
The night before, place the dried chickpeas in a large bowl and cover with plenty of cold water — they will expand to about double their size as they soak. Let them soak for at least 12 hours or overnight. Do not skip this step and do not use canned chickpeas — canned chickpeas are too wet and the falafel will fall apart during frying.
After soaking, drain the chickpeas and pat them dry with a clean towel. Add them to the food processor along with the onion, garlic, parsley, and cilantro. Process for 30 to 40 seconds. Stop and scrape down the sides, then process for another 15 to 20 seconds. The mixture should look like coarse, slightly wet breadcrumbs — not a paste. You want some texture remaining. If it looks too smooth or wet, the falafels will not hold their shape.
Transfer the mixture to a large bowl. Add the cumin, coriander, paprika, cayenne, salt, flour, and baking powder. Mix everything together with a spoon until fully incorporated. Taste the raw mixture for seasoning and adjust as needed.
Cover the bowl with plastic wrap and refrigerate the mixture for at least 30 minutes. Chilling the mixture helps it firm up and hold its shape better during frying.
Heat the frying oil in a deep pot or Dutch oven to 350°F. Use a thermometer to check the temperature — oil that is too cool makes greasy falafel, and oil that is too hot burns the outside before the inside cooks.
Shape the falafel mixture into small balls or patties using about 2 tablespoons of mixture per piece. Press them firmly so they hold together. Fry in batches of 4 to 6 at a time, turning once, for about 3 to 4 minutes per side, until deep golden brown all over.
Remove with a slotted spoon and drain on a paper towel-lined plate. Serve hot in pita bread with hummus, salad, and tahini sauce.
22. Black Bean Burger Patties
Prep Time: 15 minutes | Cook Time: 10 minutes | Serves: 4
Hearty, satisfying, and packed with plant-based protein, these black bean burgers are firm enough to grill and flavorful enough to satisfy. The food processor brings the mixture together in just a few minutes, and the burgers cook up in under 10 minutes. Serve on buns with all your favorite toppings.
Ingredients:
- 2 cans (15 oz each) black beans, drained and rinsed
- ½ medium onion, roughly chopped
- 3 garlic cloves
- ½ red bell pepper, roughly chopped
- ½ cup rolled oats or breadcrumbs
- 1 large egg
- 2 tablespoons tomato paste
- 1 tablespoon soy sauce or Worcestershire sauce
- 1 teaspoon cumin
- 1 teaspoon smoked paprika
- ½ teaspoon chili powder
- ½ teaspoon salt
- ¼ teaspoon black pepper
Instructions:
Drain and rinse the black beans very well. Spread them on a clean kitchen towel or paper towels and pat them as dry as possible. Removing the excess moisture is the most important step — wet beans make a mushy patty that falls apart. Let them air dry for a few minutes while you prep the other ingredients.
Add the onion, garlic, and red bell pepper to the food processor and pulse 5 to 6 times until finely chopped. Scrape down the sides. Add the tomato paste, soy sauce, cumin, smoked paprika, chili powder, salt, and pepper. Pulse 3 more times to mix.
Add about ¾ of the dried black beans to the food processor. Reserve the remaining ¼ cup of whole beans to stir in at the end for texture. Pulse the beans with the vegetable mixture 8 to 12 times. Check the texture after each pulse — you want a mixture that looks somewhat smooth but still has visible chunks of bean. Do not process until the beans turn into a paste.
Transfer the mixture to a large mixing bowl. Add the reserved whole black beans, oats or breadcrumbs, and the egg. Mix everything together by hand with a spoon until fully combined. The mixture should feel firm enough to hold a shape when pressed together. If it feels too wet and sticky, add more oats one tablespoon at a time and mix again.
Divide the mixture into 4 equal portions. Shape each portion into a patty about ¾-inch thick, pressing firmly so the patty holds together. Place the shaped patties on a baking sheet lined with parchment paper.
Refrigerate the patties for at least 20 minutes before cooking — this helps them hold their shape on the pan. Cook in a lightly oiled skillet over medium heat for 4 to 5 minutes per side until the outside looks dark golden brown and crispy. Serve immediately on buns with your favorite toppings.
23. Spinach Artichoke Dip
Prep Time: 10 minutes | Cook Time: 25 minutes | Serves: 8–10
Warm, creamy, and absolutely irresistible — spinach artichoke dip is always the first thing to disappear at any gathering. Made in the food processor, the prep work takes just minutes. Baked until golden and bubbly, this dip is perfect with pita chips, bread slices, or crackers.
Ingredients:
- 1 can (14 oz) artichoke hearts, drained and roughly chopped
- 2 cups fresh baby spinach (or 1 cup frozen spinach, thawed and squeezed dry)
- 1 package (8 oz) cream cheese, softened
- ½ cup sour cream
- ½ cup mayonnaise
- 2 garlic cloves
- 1 cup shredded mozzarella cheese, divided
- ½ cup grated Parmesan cheese, divided
- ½ teaspoon salt
- ¼ teaspoon black pepper
- ¼ teaspoon red pepper flakes (optional)
Instructions:
Preheat your oven to 375°F. Lightly grease a 9-inch baking dish or oven-safe skillet with cooking spray and set aside.
If using frozen spinach, thaw it completely and then wrap it in a clean kitchen towel. Squeeze the towel tightly over the sink to remove as much moisture as possible from the spinach. This is very important — too much water from the spinach will make the dip watery and thin. Fresh spinach can go directly into the food processor.
Place the garlic cloves in the food processor and pulse 4 to 5 times until minced. Add the softened cream cheese, sour cream, mayonnaise, salt, pepper, and red pepper flakes. Process for 30 seconds until smooth and well blended. Scrape down the sides.
Add the drained artichoke hearts and spinach to the bowl. Pulse 6 to 8 times — you want the artichokes and spinach broken down and incorporated but still with some texture. Add ¾ cup of the mozzarella and ¼ cup of the Parmesan. Pulse 4 more times to mix the cheese in.
Transfer the mixture to the prepared baking dish and spread it out evenly with a spatula. Sprinkle the remaining mozzarella and Parmesan over the top in an even layer.
Bake at 375°F for 20 to 25 minutes until the dip is hot all the way through, bubbling around the edges, and the top is golden brown. Let it cool for 5 minutes before serving — it will be very hot right out of the oven.
Serve directly from the baking dish with toasted pita chips, sliced bread, or fresh vegetables.
24. Homemade Veggie Burgers
Prep Time: 20 minutes | Cook Time: 10 minutes | Serves: 4–6
These colorful, vegetable-packed burgers are loaded with flavor and hold together beautifully on the grill or in a skillet. The food processor handles all the chopping and mixing, making the prep surprisingly quick. These Cuisinart food processor recipes like this one prove that meatless meals can be just as satisfying as their meaty counterparts.
Ingredients:
- 1 cup cooked brown rice or quinoa
- 1 can (15 oz) chickpeas, drained and rinsed
- ½ medium zucchini, cut into chunks
- ½ red bell pepper, roughly chopped
- ½ medium onion, roughly chopped
- 2 garlic cloves
- ¼ cup sun-dried tomatoes, roughly chopped
- ½ cup breadcrumbs
- 1 large egg
- 2 tablespoons olive oil
- 1 teaspoon cumin
- 1 teaspoon smoked paprika
- ½ teaspoon oregano
- 1 teaspoon salt
- ¼ teaspoon black pepper
Instructions:
Place the onion, garlic, bell pepper, and zucchini chunks in the food processor. Pulse 6 to 8 times until everything is finely and evenly chopped. Transfer the mixture to a clean kitchen towel and squeeze firmly to remove as much moisture as possible from the vegetables. This is a critical step — excess moisture is the main reason veggie burgers fall apart. Get out as much liquid as you can.
Place the squeezed vegetables into a large mixing bowl and set aside. Add the drained chickpeas to the food processor and pulse 8 to 10 times until they are roughly chopped — you want a chunky, coarse texture, not a smooth paste. Transfer to the bowl with the vegetables.
Add the cooked brown rice or quinoa, sun-dried tomatoes, breadcrumbs, olive oil, cumin, smoked paprika, oregano, salt, and pepper to the bowl. Crack in the egg. Mix everything together with a large spoon or your hands until all the ingredients are fully combined. The mixture should feel firm enough to hold its shape — if it feels too wet or sticky, add more breadcrumbs one tablespoon at a time.
Divide the mixture into 4 to 6 equal portions depending on how large you want your patties. Shape each portion into a patty about ¾-inch thick, pressing firmly with your hands. Place the shaped patties on a parchment-lined baking sheet.
Refrigerate the patties for at least 30 minutes. This chilling time is important — it helps the patties firm up significantly and hold their shape much better during cooking.
Heat 1 tablespoon of olive oil in a large nonstick skillet over medium-high heat. Cook the patties for 4 to 5 minutes per side until they are well browned and firm on the outside. Serve on toasted buns with lettuce, tomato, and your favorite condiments.
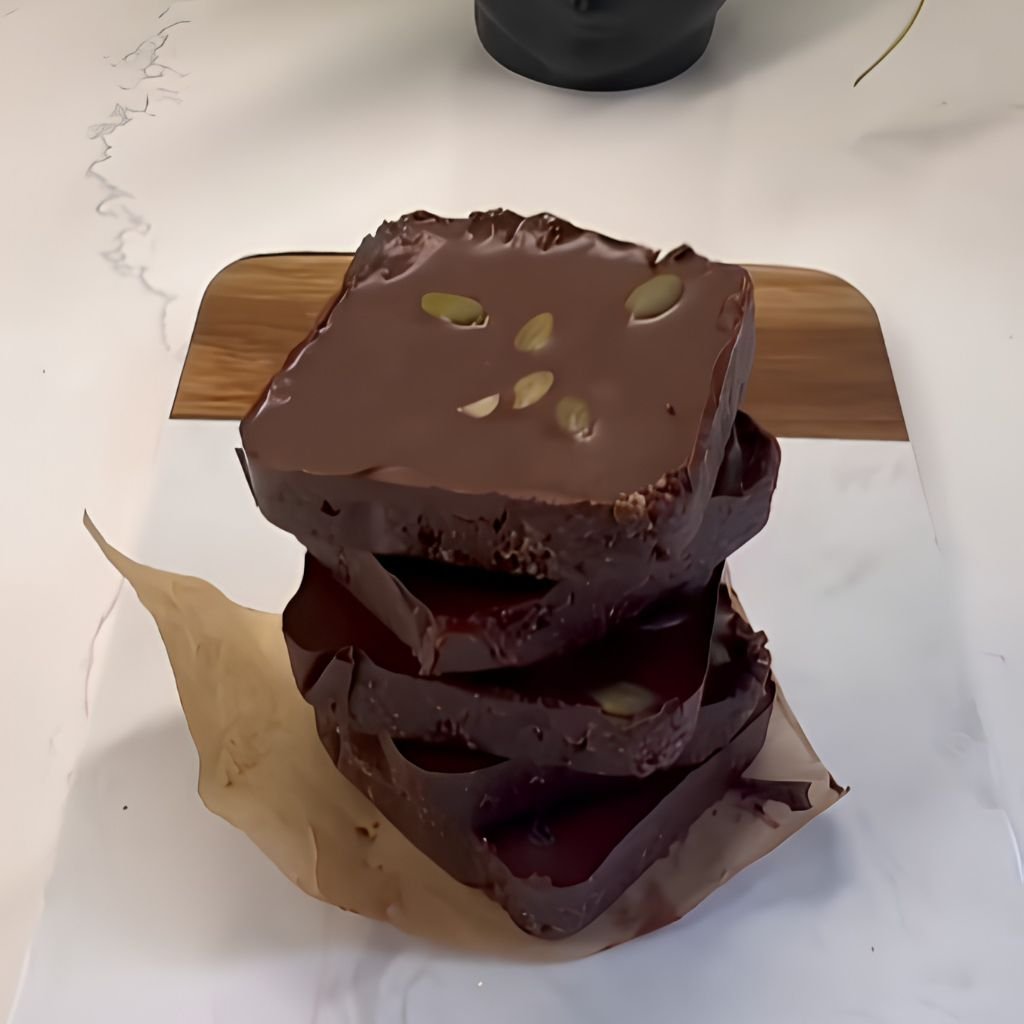
25. No-Bake Date and Nut Bars
Prep Time: 15 minutes (plus 1 hour chilling) | Cook Time: 0 minutes | Serves: Makes 12–16 bars
These wholesome, naturally sweet bars are made with just a handful of real ingredients and zero refined sugar. Chewy dates, crunchy nuts, and a hint of chocolate make them the perfect snack or quick breakfast. The food processor does all the heavy lifting and they require no baking at all.
Ingredients:
- 2 cups Medjool dates, pitted
- 1 cup raw almonds
- ½ cup raw cashews
- ½ cup walnuts or pecans
- 2 tablespoons cocoa powder
- 1 teaspoon vanilla extract
- ½ teaspoon cinnamon
- ¼ teaspoon salt
- ½ cup dark chocolate chips or shredded coconut for coating (optional)
Instructions:
Make sure the dates are soft and moist. If they feel hard or dry, soak them in warm water for 10 minutes and drain them thoroughly before using. Dry dates do not blend properly and give you crumbly bars that do not hold together.
Add the almonds, cashews, and walnuts to the food processor. Process for 15 to 20 seconds until the nuts are coarsely chopped — you want them broken down into small pieces but not turned into flour. Stop and check the texture. Some larger pieces are perfectly fine and actually add a nice crunch to the bars.
Add the pitted dates to the nut mixture in the food processor. Add the cocoa powder, vanilla extract, cinnamon, and salt. Process for 45 to 60 seconds, stopping every 15 seconds to scrape down the sides and check the consistency. The mixture should start to clump and come together into a sticky, dough-like ball. It is ready when you can press a small amount between your fingers and it holds together without crumbling. If it does not stick together, add 1 to 2 more dates and process again.
Line an 8×8-inch or 9×9-inch baking pan with parchment paper, leaving some overhang on the sides — this makes it easy to lift the bars out later. Transfer the date and nut mixture into the prepared pan and spread it out evenly. Press the mixture down firmly using the back of a flat spatula or the bottom of a measuring cup. Press hard so the mixture compacts into a solid, even layer about ¾-inch thick. The more firmly you press, the better the bars will hold together when cut.
Sprinkle dark chocolate chips or shredded coconut over the top and press them gently into the surface. Cover the pan with plastic wrap and refrigerate for at least 1 hour — 2 hours is even better.
Once fully chilled and firm, lift the bars out of the pan using the parchment overhang. Place on a cutting board and slice into 12 to 16 even bars with a sharp knife. Store in an airtight container in the refrigerator for up to 2 weeks, or freeze for up to 3 months.
Common Mistakes to Avoid When Using a Food Processor
Getting the most out of your Cuisinart food processor means knowing what not to do as well as what to do. Here are the most common mistakes home cooks make and how to avoid them:
1. Overfilling the bowl — Putting too many ingredients into the food processor bowl at once leads to uneven processing. Some pieces get over-chopped while others barely get touched. Always work in batches when dealing with large quantities. Fill the bowl no more than two-thirds full for best results.
2. Processing ingredients too long — Running the food processor continuously without checking the texture is one of the fastest ways to ruin a dish. Vegetables can turn to mush, dough can become tough, and nuts can turn into butter when you only wanted a coarse chop. Stop and check the texture every few seconds to get exactly what you need.
3. Using the wrong attachment — The chopping blade, dough blade, slicing disc, and shredding disc all do very different jobs. Using the wrong one for a task gives you poor results. Always match the blade or disc to the job at hand. When in doubt, read the manual that came with your Cuisinart model.
4. Ignoring pulse mode — The pulse button gives you much more control than running the machine continuously. Short pulses allow you to check progress between each burst and stop the moment the texture looks right. For most chopping and mixing tasks, using the pulse function consistently gives you better results than letting the machine run on its own.
Conclusion
There is no shortage of things you can make with a Cuisinart food processor — from creamy dips and smooth soups to hearty burgers, fresh doughs, and wholesome snacks. These 25 Cuisinart food processor recipes show just how wide the range of possibilities really is. You can go from making a batch of hummus for afternoon snacking to preparing pizza dough for Friday night dinner, all with the same machine and just a quick rinse in between.
Do not be afraid to play around with the ingredients in any of these recipes. Swap one nut for another in the energy balls, change up the spices in the falafel, or add different mix-ins to the banana muffins. Cooking at home gives you full control over what goes into your food — no preservatives, no hidden additives, just real ingredients that you chose yourself.
Making homemade meals with a Cuisinart food processor is not just faster and more convenient — it also helps you eat better and save money over time. Once you get comfortable with how the machine works, you will find yourself reaching for it every time you cook. These recipes are just the beginning.