
Making homemade bread used to take hours of hard work in the kitchen. West Bend bread maker recipes have changed all of that.
These machines take away the guesswork and do most of the heavy lifting for you — from mixing the dough to baking the perfect loaf.
West Bend bread makers are popular among home bakers because they are easy to use, built to last, and produce great results every single time.
Using a bread machine means you spend less time in the kitchen and more time enjoying fresh, warm bread. You control exactly what goes into each loaf — no preservatives, no mystery ingredients.
Just simple, wholesome food made at home. The machine handles the mixing, kneading, rising, and baking all on its own, so you can walk away and come back to a finished loaf.
These West Bend bread maker recipes are made to work perfectly with the settings built into your machine. Each recipe matches the right cycle so you always get the right texture, rise, and crust.
It may seem intimidating or difficult to bake bread from scratch — but it’s actually quite the opposite! With your West Bend and these recipes, great bread is always within reach.

Understanding Your West Bend Bread Maker
1. How a West Bend Bread Maker Works
Your West Bend bread maker is a fully automated appliance that turns raw ingredients into a finished loaf of bread. Here is a quick look at what happens inside the machine during each bake:
1. Mixing – The machine’s paddle blends all the ingredients together into a rough dough.
2. Kneading – The paddle then works the dough for several minutes to develop gluten, which gives bread its structure and chew.
3. First Rise (Bulk Fermentation) – The machine rests and warms the dough so the yeast can activate and the dough can puff up.
4. Second Rise (Proofing) – After a punch-down, the dough rises again to reach its final shape before baking.
5. Baking – The heating element brings the chamber up to the right temperature and bakes the loaf until fully done.
6. Keep-Warm – Most cycles end with a short keep-warm period so the bread stays fresh until you are ready to remove it.
2. Choosing the Right Bread Machine Settings
Picking the correct setting is one of the most important steps. Here is what each setting does:
1. Basic Bread Setting – Used for standard white and simple yeast breads. This is the go-to setting for most beginner recipes. The cycle runs a full mix, knead, rise, and bake.
2. Whole Wheat Setting – Gives extra time for the dough to fully hydrate and rise, since whole wheat flour is denser and needs more help from the yeast.
3. Sweet Bread Setting – Uses a lower baking temperature to prevent sweet doughs (those with honey, sugar, or fruit) from burning on the outside before the inside is cooked through.
4. Dough Cycle – Mixes and rises the dough but stops before baking. Great for dinner rolls, pizza dough, and shaped breads you want to finish in a regular oven.
5. Rapid Bake Options – Shortens the total bake time by using faster rise cycles. Best for simple recipes when you are short on time, though the texture may be slightly denser than a standard cycle.
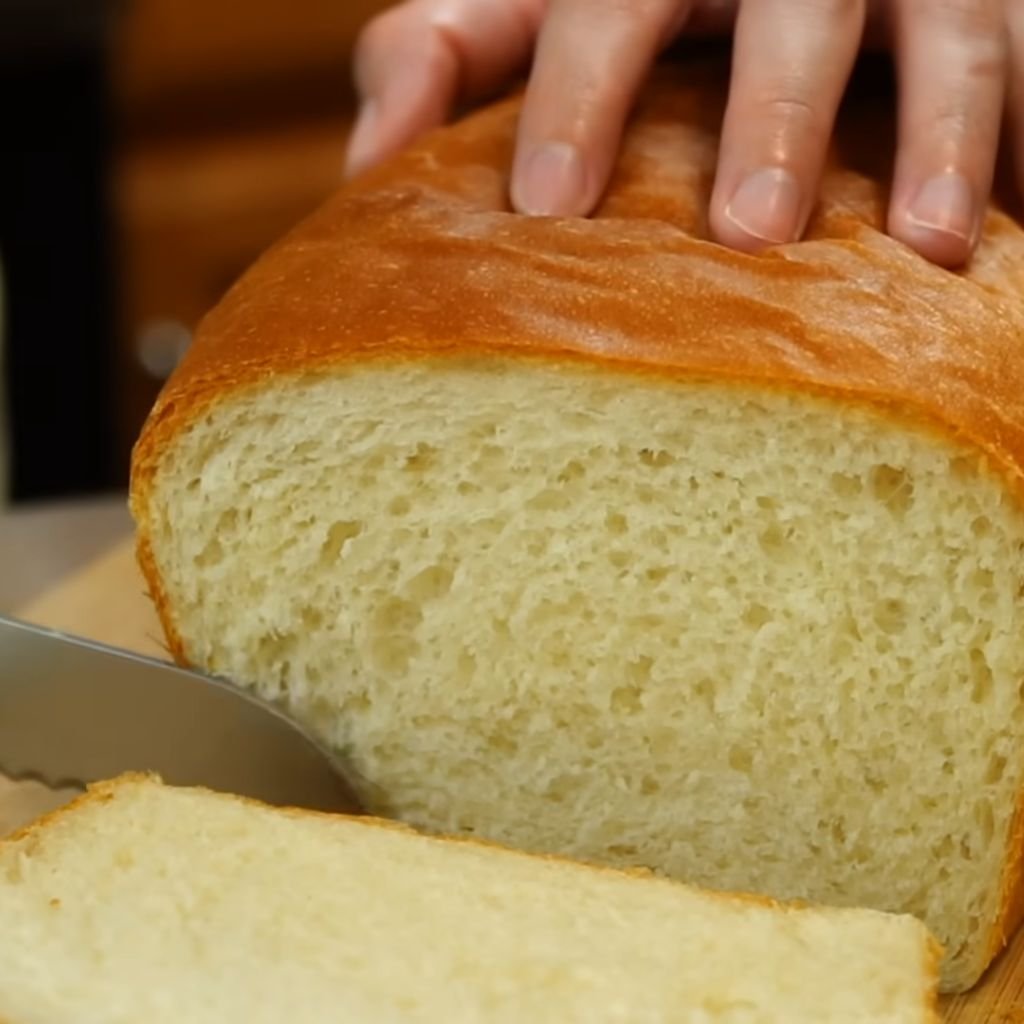
1. Classic White Bread
Prep Time: 10 minutes | Bake Time: 3 hours | Serves: 12 slices
A soft, golden loaf that is perfect for everyday eating. Classic white bread made in your West Bend bread maker comes out with a tender crumb and a light, golden crust every single time. Great for sandwiches, toast, or simply eaten warm with a pat of butter.
Ingredients
- 1 cup warm water (110°F)
- 2 tablespoons unsalted butter, softened
- 2 tablespoons granulated sugar
- 1 teaspoon salt
- 3 cups bread flour
- 2¼ teaspoons active dry yeast (1 standard packet)
Instructions
Start by gathering all of your ingredients and measuring them carefully before adding anything to the bread pan. Accuracy in measurements is one of the most important factors in getting a great loaf, so take your time with this step. Pour the warm water into the bread pan first. The water should feel warm to the touch but not hot — around 110°F is ideal. Water that is too hot can kill the yeast, and water that is too cold will not activate it properly.
Next, add the softened butter, sugar, and salt directly on top of the water. It is fine if they mix a little at this stage. Then spoon in the bread flour, making sure to level off each cup for an accurate measurement. Bread flour has a higher protein content than all-purpose flour, which is what gives this loaf its chewy texture and good structure.
Make a small well or indentation in the center of the flour. Add the yeast into this well. This step is important — keeping the yeast away from the salt until the machine starts mixing helps protect the yeast from being deactivated too early. Salt in direct contact with yeast before mixing begins can slow or stop the fermentation process.
Place the bread pan securely into the West Bend bread maker. Close the lid and select the Basic Bread setting. Choose your preferred loaf size (1.5 lb or 2 lb depending on your model) and set the crust to your liking — light, medium, or dark. Press Start and let the machine take over from here.
During the mixing and kneading phase, you can open the lid briefly to check the dough. It should form a smooth, slightly tacky ball that pulls away from the sides of the pan. If the dough looks too dry or crumbly, add warm water one teaspoon at a time. If it looks too wet and sticky, add bread flour one tablespoon at a time. After about 10 minutes of kneading, close the lid and do not open it again until the baking cycle is complete.
Once the machine signals that baking is finished, use oven mitts to remove the bread pan from the machine. Turn the pan upside down and gently shake the loaf out onto a wire cooling rack. If the paddle is stuck inside the loaf, use a non-scratch tool to carefully pull it out. Let the bread cool for at least 15 to 20 minutes before slicing. Cutting the bread too soon causes the inside to become gummy, as the steam is still finishing the cooking process. Once cooled, slice and enjoy.
Tips for Best Results
- Always use bread flour instead of all-purpose flour for the best structure.
- Make sure your yeast is fresh — old yeast will not rise properly.
- Add ingredients in the order listed: liquids first, then dry ingredients, then yeast last.
2. Soft Sandwich Bread
Prep Time: 10 minutes | Bake Time: 3 hours | Serves: 12 slices
Pillowy-soft and slightly rich, this sandwich bread has the kind of gentle, tender crumb that holds together beautifully under your favorite fillings. A small amount of milk and butter gives each slice a smooth texture and a mellow flavor that both kids and adults enjoy.
Ingredients
- ¾ cup warm milk (110°F)
- ¼ cup warm water (110°F)
- 2 tablespoons unsalted butter, softened
- 1½ tablespoons granulated sugar
- 1 teaspoon salt
- 3 cups bread flour
- 2¼ teaspoons active dry yeast
Instructions
Warm the milk gently on the stovetop or in the microwave until it reaches about 110°F. Do not let it get too hot — scalding the milk will also kill your yeast just like overly hot water would. Combine the warm milk and warm water together in a measuring cup, then pour both into the bread pan. The combination of milk and water gives this bread its soft, pillowy texture without making it too heavy.
Add the softened butter on top of the liquids. Softened butter distributes more evenly into the dough than cold or melted butter, helping create that consistent, tender crumb throughout every slice. Sprinkle the sugar and salt on top of the butter, keeping them separate for now.
Measure the bread flour carefully and spoon it gently into the bread pan on top of the liquids and butter. Use the back of a knife or a straightedge to level off each cup. Do not pack the flour in tightly — loose, leveled cups give you the best result. Once the flour is in, use your finger to press a small hole or indentation into the center of the flour. Drop the yeast into this hole.
Place the bread pan into your West Bend bread maker and lock it in place. Select the Basic Bread setting, set the crust to Medium, and choose your loaf size. Press Start and allow the machine to run through its full cycle. During the kneading phase, you may notice the dough coming together into a smooth, satiny ball. That is exactly what you want to see.
As the rise cycles proceed, resist the urge to open the lid too often. Every time you open the lid, you let heat and humidity escape, which can affect how well the dough rises. Trust the machine and let it work. By the time the baking cycle begins, your bread should already be domed nicely above the rim of the bread pan.
When the bake cycle is complete and the machine beeps, remove the pan using oven mitts and invert it onto a wire rack. Let the bread cool for at least 20 minutes before cutting into it. The inside of the loaf continues to set as it cools, and cutting it too soon will result in a doughy center. Once fully cooled, this bread slices beautifully and stays soft for days when stored properly.
Storage Tips
- Store in a resealable bag or wrapped tightly in plastic wrap at room temperature for up to 3 days.
- For longer storage, freeze pre-sliced in a zip-lock bag for up to 3 months.
- Avoid storing in the refrigerator, as it dries out bread faster.
3. Honey Wheat Bread
Prep Time: 10 minutes | Bake Time: 3 hours 30 minutes | Serves: 12 slices
Lightly sweet and hearty, this honey wheat bread balances the nuttiness of whole wheat flour with just the right amount of honey for a gentle sweetness. Each slice has a soft crumb with a slightly chewy crust — the kind of bread that pairs well with soups, salads, or homemade jam.
Ingredients
- 1 cup warm water (110°F)
- 3 tablespoons honey
- 2 tablespoons unsalted butter, softened
- 1 teaspoon salt
- 1½ cups whole wheat flour
- 1½ cups bread flour
- 2¼ teaspoons active dry yeast
Instructions
Measure the warm water and pour it into the bread pan first. Water goes in first with every recipe because it helps protect the yeast from the salt and ensures everything hydrates properly once the machine starts mixing. Drizzle the honey directly into the warm water and give it a quick swirl. Honey acts as a natural sweetener and also feeds the yeast, which can help produce a slightly better rise in denser wheat doughs.
Add the softened butter on top of the honey water. Then sprinkle in the salt. Measure the whole wheat flour and the bread flour separately, then add them both to the bread pan. Mixing the two flours creates a loaf that has the nutrition and flavor of whole wheat without the very dense, heavy texture that comes from using 100% whole wheat flour alone.
Level off the top of the flour in the pan and make a small well in the center. Place the yeast in the well. Insert the bread pan into your West Bend bread maker and secure it. Select the Whole Wheat setting on your machine. This setting provides a longer knead and rise time, which whole wheat flour absolutely needs in order to develop properly and achieve a good texture. Set the crust to Medium and pick your loaf size, then press Start.
During the kneading cycle, check the dough once. Whole wheat dough tends to be a bit stickier than all-white doughs, but it should still form a cohesive ball. If it looks too wet or is not pulling from the sides of the pan, add bread flour one tablespoon at a time until the texture is right. If it looks dry and crumbly, add warm water a teaspoon at a time.
The longer rise time on the Whole Wheat setting is important. Do not try to rush it or switch to a faster setting. Whole wheat flour is heavier and absorbs moisture more slowly than white flour, so the extra time allows the gluten to properly develop and the yeast to fully lift the dough. Be patient — the result is a beautifully risen, flavorful loaf that is absolutely worth the wait.
When the machine signals that baking is complete, remove the pan carefully and turn the loaf out onto a wire rack. Let the bread cool for at least 20 to 25 minutes before slicing. This bread is excellent warm with butter, and also makes wonderful toast the next morning. The honey flavor becomes more pronounced on day two, so do not be surprised if leftovers taste even better.
Flavor Variations
- Add 2 tablespoons of ground flaxseed to the flour for a nutritional boost.
- Replace honey with pure maple syrup for a different kind of sweetness.
- Mix in ¼ cup of sunflower seeds during the add-in beep cycle.
4. Whole Wheat Bread
Prep Time: 10 minutes | Bake Time: 3 hours 30 minutes | Serves: 12 slices
Dense, hearty, and full of earthy, nutty flavor, whole wheat bread is a staple in many homes. Made with 100% whole wheat flour and just a touch of honey to help the yeast along, this loaf delivers real, wholesome goodness in every single slice.
Ingredients
- 1⅛ cups warm water (110°F)
- 2 tablespoons honey
- 2 tablespoons vegetable oil
- 1 teaspoon salt
- 3 cups whole wheat flour
- 1 tablespoon vital wheat gluten
- 2¼ teaspoons active dry yeast
Instructions
Pour the warm water into the bread pan. Add the honey and vegetable oil directly on top of the water. Oil helps tenderize the crumb of whole wheat bread and prevents the loaf from drying out too quickly after baking. Sprinkle in the salt and then add the vital wheat gluten. Vital wheat gluten is a key ingredient in 100% whole wheat bread — it gives the dough extra strength and elasticity that whole wheat flour alone cannot provide, which leads to a better rise and a less crumbly final loaf.
Carefully measure out the 3 cups of whole wheat flour. Spoon it into the bread pan on top of the liquids. Do not pack the flour — just spoon it loosely and level it off with a flat edge. Make a small depression in the center of the flour and add the yeast there. Keeping the yeast separated from the salt until the machine starts is a habit worth building for every bread recipe.
Lock the bread pan into the West Bend bread maker and choose the Whole Wheat setting. This setting runs a longer kneading cycle, two rise periods, and a slightly extended baking time — all of which are necessary for whole wheat flour to reach its full potential. Set the crust to Medium or Dark depending on your preference, and press Start.
Watch the dough during the first few minutes of kneading. Whole wheat dough is naturally stiffer and less stretchy than white bread dough. The ball should be firm but not brick-like. If it is crumbling and not coming together, add warm water by the teaspoon. If it is very sticky and wet, add whole wheat flour one tablespoon at a time. The vital wheat gluten you added will help things along significantly.
Once the kneading is done, the machine will move into the rise cycles. This is where the magic happens. The yeast, fed by the honey and warmed by the machine, will slowly inflate the dough. Do not open the lid during the rise or baking cycles. The heat inside the chamber is carefully controlled by the machine and interrupting it can cause the loaf to collapse or bake unevenly.
When the baking cycle finishes, immediately remove the bread pan from the machine. Turn it out onto a wire rack and allow the loaf to cool completely — a full 30 to 40 minutes — before cutting. Whole wheat bread needs more time than white bread to finish setting, and slicing it hot will give you a gummy, compressed interior. Once cooled, this bread slices cleanly and makes superb toast.
Expert Tips
- Vital wheat gluten is essential — do not skip it for a 100% whole wheat loaf.
- Let ingredients come to room temperature before adding them for a more consistent rise.
- Whole wheat bread dries out faster than white bread, so store it well-wrapped.
5. Milk Bread
Prep Time: 10 minutes | Bake Time: 3 hours | Serves: 12 slices
Milk bread is one of the softest, fluffiest loaves you can make in your West Bend bread maker. The combination of whole milk, butter, and egg creates a rich dough that bakes into a feather-light crumb with a thin, golden crust. Every bite melts in your mouth.
Ingredients
- ¾ cup whole milk, warm (110°F)
- 1 large egg, room temperature
- 3 tablespoons unsalted butter, softened
- 3 tablespoons granulated sugar
- 1 teaspoon salt
- 3 cups bread flour
- 2¼ teaspoons active dry yeast
Instructions
Warm the milk to about 110°F before adding it to the bread pan. Lightly beat the egg in a small bowl and add it to the warm milk in the pan. The egg contributes both richness and structure to the bread. The fat from the yolk tenderizes the crumb while the protein from the white helps the loaf hold its shape during baking.
Add the softened butter, sugar, and salt on top of the milk and egg mixture. Then add the bread flour, spooning it in loosely and leveling off each cup. Create a small well in the top of the flour and drop the yeast in. Place the bread pan into the machine, select the Basic Bread setting, choose a Medium crust, and press Start.
During kneading, milk bread dough should be noticeably softer and more pliable than standard white bread dough. The high fat content from the butter and egg creates a dough that feels almost silky. Do not add extra flour just because it feels soft — that softness is what makes the final crumb so light and tender. The dough should still hold together as a ball and not stick to the sides of the pan.
Allow the machine to run through both rise cycles without interruption. The sugar in this dough helps it brown faster during baking, so if your machine allows a crust color selection, stick with Medium rather than Dark to avoid over-browning the crust. The milk adds natural sugars of its own, which also contributes to the golden color of the finished loaf.
When the cycle is complete, remove the pan and turn the loaf out onto a cooling rack. The crust of milk bread is thinner and more delicate than other breads, so handle it gently right after baking. Let the loaf cool for at least 15 minutes before slicing. This bread is best enjoyed on the day it is baked — warm and fresh from the machine. However, it can be stored and still makes wonderful toast the following day.
Serving Suggestions
- Serve warm with honey butter for a simple and satisfying treat.
- Use leftover slices for French toast the next morning.
- Pairs beautifully with fruit preserves and a cup of hot tea.
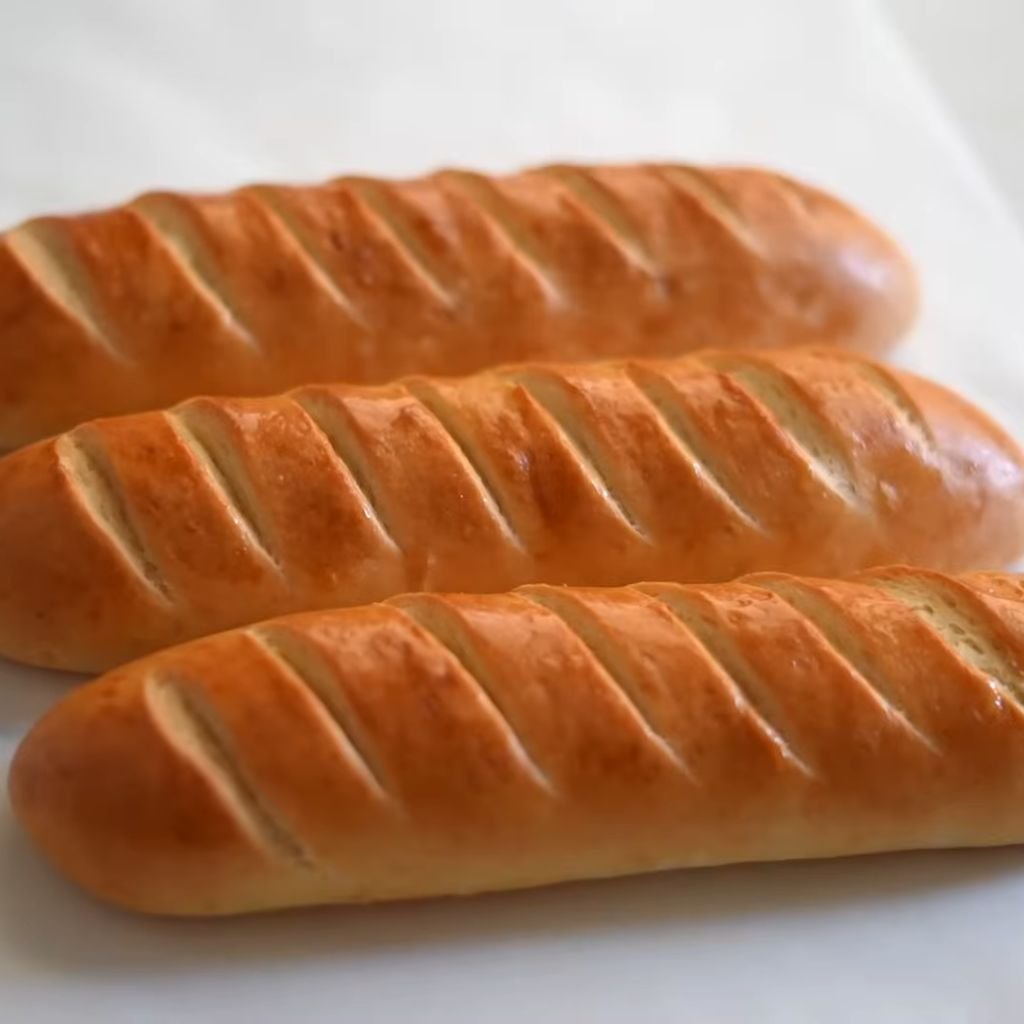
6. French Bread
Prep Time: 10 minutes | Bake Time: 3 hours | Serves: 12 slices
Crispy on the outside, chewy and airy on the inside — French bread made in a West Bend bread maker is a real treat. Made with just a handful of simple ingredients, this lean dough develops a beautiful flavor and crust that rivals what you find in a bakery.
Ingredients
- 1 cup warm water (110°F)
- 1½ teaspoons salt
- 1 teaspoon granulated sugar
- 3 cups bread flour
- 2¼ teaspoons active dry yeast
Instructions
Add the warm water to the bread pan first. French bread is a very lean dough, meaning it contains no butter, oil, milk, or eggs. This simplicity is what gives it that characteristic chew and crispy crust. The yeast has nothing extra to compete with and the gluten from the bread flour develops very cleanly, creating an open, airy crumb structure.
Add the salt and sugar to the water. Then spoon in the bread flour evenly across the top of the liquid. Create a small well in the center of the flour and place the yeast there. Insert the bread pan into the West Bend bread maker and select the French Bread setting if your model has one. If not, the Basic Bread setting on a Light crust works well.
During the kneading cycle, French bread dough should be smooth and slightly tacky — less soft than a milk bread dough but not stiff. It should form a clean ball that pulls away from the sides of the pan without leaving much residue. If it is too dry, add water a teaspoon at a time. If it is too wet, add a tablespoon of bread flour.
French bread benefits from a long, slow rise. Do not rush the process by using a rapid cycle. The extended fermentation time is what develops the flavor in a lean dough. Every minute the yeast has to work slowly adds depth and a slightly tangy, yeasty quality to the finished loaf. Let the machine run through the full cycle uninterrupted.
When the baking cycle ends, remove the pan and turn the loaf out onto a wire rack right away. French bread should cool on a rack — not on a solid surface — so that air can circulate underneath and the crust stays crispy all the way around. Allow it to cool for at least 15 to 20 minutes before slicing. The crust will crackle slightly as it cools, which is a sign that your loaf is perfect.
Crust Enhancement Tips
- Brush the top of the dough with water before the baking cycle begins to encourage crust crispness.
- Place a small cup of hot water inside the machine during baking to add steam (only if safe to do with your model).
- For a shiny crust, brush the finished loaf with a little water right when it comes out of the machine.
7. Italian Bread
Prep Time: 10 minutes | Bake Time: 3 hours | Serves: 12 slices
Soft on the inside with a slightly firm crust, Italian bread has a mild, clean flavor that makes it one of the most versatile loaves in the kitchen. A small amount of olive oil adds richness and keeps the crumb moist without making the bread heavy.
Ingredients
- 1 cup warm water (110°F)
- 2 tablespoons olive oil
- 1 teaspoon salt
- 1 teaspoon granulated sugar
- 3 cups bread flour
- 2¼ teaspoons active dry yeast
Instructions
Pour the warm water into the bread pan. Add the olive oil directly on top of the water. Olive oil plays a dual role in Italian bread — it tenderizes the dough slightly and also adds a subtle, rich flavor that you cannot get from a neutral oil like vegetable or canola. Use a good quality olive oil here because it genuinely makes a difference in the finished taste.
Sprinkle the salt and sugar over the liquids. Then add the bread flour, spooning it in loosely. Level off the top and make a small indentation in the center for the yeast. Place the pan into the West Bend bread maker and select the Basic Bread setting. Set the crust to Medium and press Start.
Italian bread dough should feel smooth, slightly elastic, and not too sticky. It is very similar to French bread dough but the olive oil makes it just a little more pliable. During the kneading cycle, the dough should form a smooth ball. If it clings to the walls of the pan and will not pull free, add bread flour one tablespoon at a time.
Allow the machine to run through the full rise and baking cycles. Italian bread has a naturally mild, yeasty aroma as it bakes, and by the time the baking cycle is complete your kitchen will smell incredible. The crust should be lightly golden and firm when tapped — a hollow sound means it is fully baked through.
Remove the loaf from the pan and cool it on a wire rack for at least 15 minutes. Italian bread is best eaten on the day it is made, but leftovers are excellent toasted or used for bruschetta and dipping into olive oil and herbs.
Pairing Ideas
- Serve alongside pasta dishes, soups, or hearty salads.
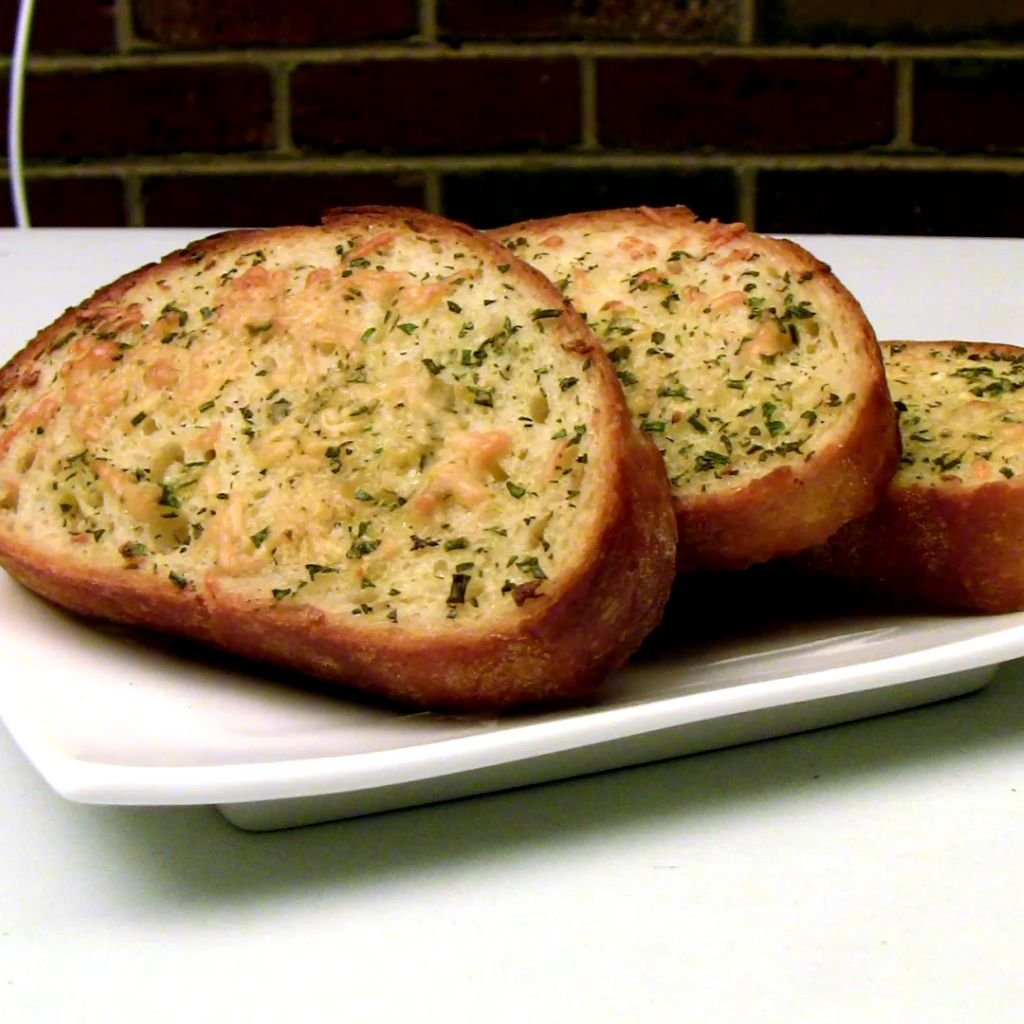
- Slice and broil with garlic butter for a quick garlic bread.
- Use as a base for bruschetta topped with tomatoes and fresh basil.
8. Buttermilk Bread
Prep Time: 10 minutes | Bake Time: 3 hours | Serves: 12 slices
Buttermilk gives this loaf a faint tang, a super-soft crumb, and a flavor that is slightly different from plain white bread in the best possible way. The acid in buttermilk also helps activate the yeast and breaks down gluten just enough to keep the texture wonderfully tender.
Ingredients
- ¾ cup warm buttermilk (110°F)
- ¼ cup warm water (110°F)
- 2 tablespoons unsalted butter, softened
- 2 tablespoons granulated sugar
- 1 teaspoon salt
- ½ teaspoon baking soda
- 3 cups bread flour
- 2¼ teaspoons active dry yeast
Instructions
Warm the buttermilk gently — do not let it boil or overheat. Buttermilk can separate at very high temperatures, which affects its ability to blend smoothly into the dough. Heat it just until it reaches about 110°F, the same temperature you use for water. Combine the warm buttermilk and warm water in a measuring cup and pour both into the bread pan.
Add the softened butter, sugar, and salt to the liquids. Then add the baking soda. This is an extra step unique to buttermilk bread. The small amount of baking soda reacts with the acidity in the buttermilk to produce a little extra lift, which works alongside the yeast to create a slightly more tender and airy crumb. Do not skip it.
Spoon in the bread flour, level it off, and create a well in the center for the yeast. Lock the pan into your West Bend bread maker and select the Basic Bread setting with a Medium crust. Press Start and let the machine handle the rest.
During the kneading phase, buttermilk dough may seem a little sticker than a standard white dough at first. That is normal. Give it a few minutes to knead before adjusting anything. As the gluten develops, the dough will tighten and become smoother. By the end of the kneading cycle it should be a soft, cohesive ball.
The rise cycle will fill your kitchen with a warm, slightly tangy yeast aroma — one of the most comforting smells in home baking. Allow the machine to complete the full cycle without interruption. When done, remove the pan, turn the loaf out onto a rack, and let it rest for 20 minutes before slicing. Buttermilk bread has a very soft crust and crumb, so slicing it hot will compress the interior.
Baking Notes
- If you do not have buttermilk, mix ¾ cup regular milk with 2¼ teaspoons white vinegar and let it sit for 5 minutes before using.
- The baking soda is important — it balances the acidity and improves the rise.
- This bread is especially good toasted and spread with cream cheese.
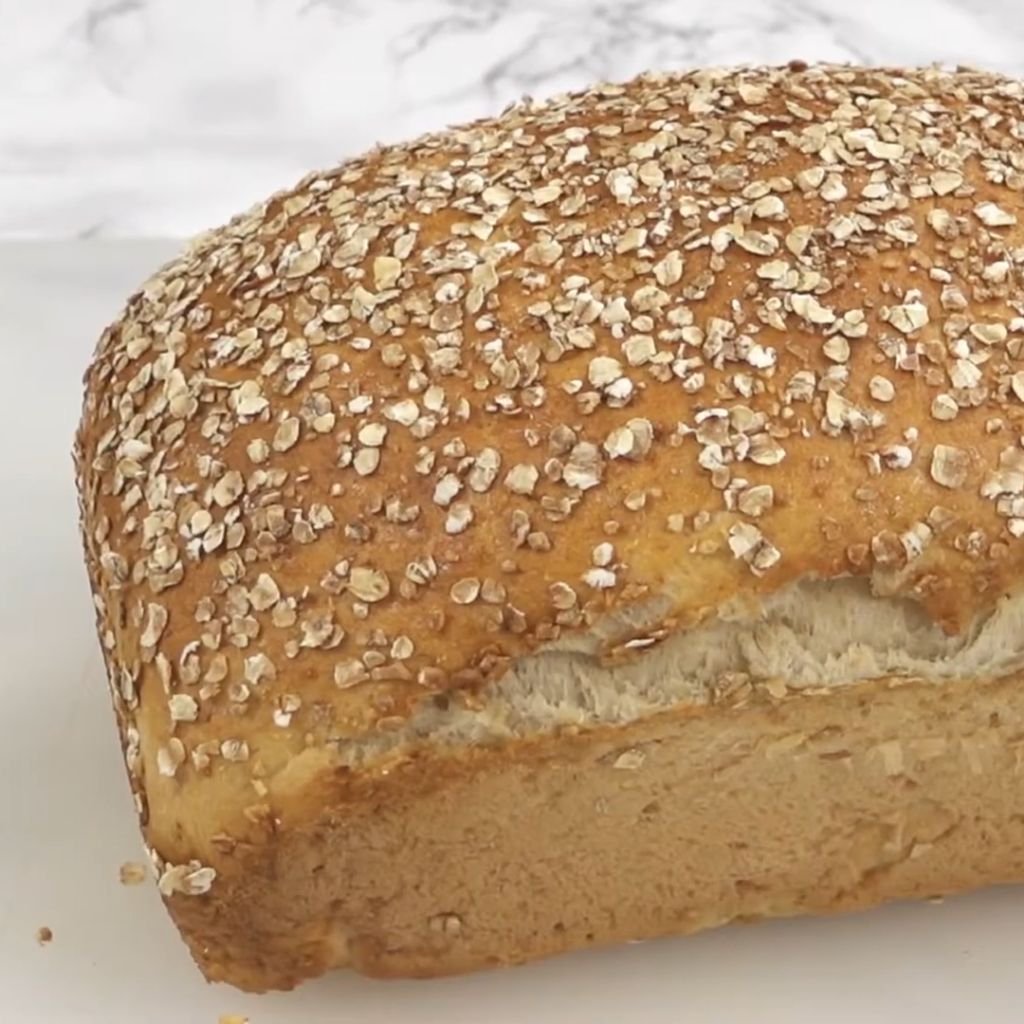
9. Oatmeal Bread
Prep Time: 10 minutes | Bake Time: 3 hours | Serves: 12 slices
Oatmeal bread has a slightly earthy flavor, a moist crumb, and a rustic look that makes it feel wholesome and homemade. Old-fashioned rolled oats added to the dough give each slice a gentle chew and keep the loaf moist longer than a plain white bread.
Ingredients
- 1 cup warm water (110°F)
- 2 tablespoons unsalted butter, softened
- 2 tablespoons honey
- 1 teaspoon salt
- ¾ cup old-fashioned rolled oats
- 2½ cups bread flour
- 2¼ teaspoons active dry yeast
Instructions
Pour the warm water into the bread pan first. Add the butter and honey on top of the water. Honey acts as both a sweetener and a moisture-retaining ingredient — it pulls water into the bread and keeps it from drying out as quickly as a plain-sweetened loaf would. This is especially helpful in oatmeal bread because the oats already have a slightly absorbent quality.
Sprinkle the salt over the liquids. Then add the rolled oats. Oats go in before the flour so they have a chance to absorb some of the liquid and soften during the mixing process. If you add them too late, they may not fully hydrate and can create a slightly gritty texture in the finished bread.
Spoon in the bread flour on top of the oats. Level off the flour and make a small well in the center for the yeast. Secure the bread pan in the West Bend bread maker and select the Basic Bread setting with a Medium crust. Press Start.
During kneading, the oats will break down slightly and blend into the dough, giving it a speckled, rustic appearance. The dough will be a little softer and stickier than a plain white dough because of the oats. That is completely normal. As long as it is forming a cohesive ball and not sticking to the sides, you are on the right track.
After the rise cycles, the loaf should look nicely domed and slightly rustic on top. During baking, the oats that rise to the top of the loaf may toast a little, which adds a slight nutty aroma to the finished bread. When the machine beeps, remove the loaf and cool it on a wire rack for at least 20 minutes before slicing.
Nutrition Benefits
- Oats add dietary fiber that helps you feel full longer.
- Rolled oats are a good source of beta-glucan, which supports heart health.
- This bread is more filling per slice than standard white bread.
10. Potato Bread
Prep Time: 15 minutes | Bake Time: 3 hours | Serves: 12 slices
Potato bread is one of the softest, most pillowy breads you can make at home. The starch in cooked, mashed potato keeps the loaf moist and gives it a plush, tender crumb that holds together well without being dense. A true crowd-pleaser for any occasion.
Ingredients
- ¾ cup warm water (110°F)
- ½ cup mashed potato (plain, no butter or milk added), cooled to room temperature
- 2 tablespoons unsalted butter, softened
- 1½ tablespoons granulated sugar
- 1 teaspoon salt
- 3 cups bread flour
- 2¼ teaspoons active dry yeast
Instructions
Cook and mash the potato ahead of time and let it cool completely before using it in this recipe. Hot mashed potato can kill the yeast, so room temperature or slightly cool mashed potato is what you want. Make sure the mashed potato is plain — no butter, milk, or salt added. The recipe accounts for those ingredients separately.
Pour the warm water into the bread pan first. Add the mashed potato on top of the water and use a fork to break it up loosely. It does not need to be perfectly smooth — the kneading process will take care of that. Add the softened butter, sugar, and salt on top of the potato.
Spoon in the bread flour on top of everything and level off the cups. Make a small well in the center of the flour and add the yeast. Lock the pan into your West Bend bread maker, select the Basic Bread setting with a Medium or Light crust, and press Start.
During the kneading cycle, the mashed potato will blend completely into the dough. Potato bread dough is very soft and slightly tacky — softer than a standard white loaf. Do not add excess flour to try to firm it up. The softness is what makes the finished bread so wonderfully light and fluffy. As long as the dough is holding together in a loose ball, the consistency is right.
By the time the baking cycle is done, the loaf will be golden, plump, and will have a subtle starchy aroma from the potato. The crust is typically thinner and more delicate than a standard white bread. Remove the pan immediately when the cycle completes, turn the loaf out, and let it cool on a wire rack for at least 20 minutes. Potato bread slices beautifully and makes exceptional sandwiches.
Texture Tips
- Use Russet or Yukon Gold potatoes for the smoothest mash.
- Do not add milk or butter to the mash — the recipe balances itself without it.
- The dough will be softer than standard doughs; resist adding extra flour.
11. Cinnamon Raisin Bread
Prep Time: 10 minutes | Bake Time: 3 hours | Serves: 12 slices
Warm cinnamon and plump, sweet raisins swirled through a soft, lightly sweetened dough — this is the kind of bread that makes the whole house smell wonderful as it bakes. Perfect for breakfast toast, it is one of the most popular sweet bread recipes made in West Bend bread machines.
Ingredients
- 1 cup warm water (110°F)
- 2 tablespoons unsalted butter, softened
- 3 tablespoons granulated sugar
- 1 teaspoon salt
- 1½ teaspoons ground cinnamon
- 3 cups bread flour
- 2¼ teaspoons active dry yeast
- ¾ cup raisins (added at the add-in beep)
Instructions
Add the warm water to the bread pan first. Then place the softened butter, sugar, and salt on top of the water. Stir the cinnamon directly into the bread flour before adding it to the pan — this ensures the cinnamon distributes evenly throughout the dough rather than sitting in clumps.
Spoon the cinnamon-flour mixture into the pan and level it off. Make a small well in the center for the yeast. Lock the pan into the West Bend bread maker and select the Sweet Bread setting. The Sweet Bread cycle uses a lower baking temperature that prevents the sugar in the dough from causing the crust to burn before the inside has finished cooking.
Most West Bend models have an audible beep that signals when it is time to add mix-ins like raisins, nuts, or dried fruit. Wait for that beep — which usually occurs near the end of the kneading cycle — before adding the raisins. If you add them at the very beginning, they will break down completely and turn the dough purple. Adding them at the right moment keeps them whole and plump.
If your model does not have an add-in beep, add the raisins about 10 to 12 minutes into the kneading cycle. They will mix in gently without being over-processed. The dough at this stage should be smooth and elastic, and the raisins will fold in beautifully.
Allow the machine to complete the full Sweet Bread cycle without interruption. The aroma of cinnamon will grow stronger as the baking cycle progresses. When done, remove the pan, turn the loaf onto a rack, and let it cool for at least 20 to 25 minutes. This bread is exceptional toasted with a thin layer of cream cheese or butter.
Sweet Bread Tips
- Always use the Sweet Bread setting for raisin bread to prevent the crust from burning.
- Soak raisins in warm water for 10 minutes before adding them for extra plumpness.
- A slice toasted and spread with almond butter is a fantastic breakfast option.
12. Honey Oat Bread
Prep Time: 10 minutes | Bake Time: 3 hours | Serves: 12 slices
A lovely combination of golden honey and wholesome oats baked into a soft, mildly sweet loaf. Honey oat bread has a gentle chew from the rolled oats and a natural sweetness that makes it equally good plain, toasted, or layered with fresh fruit and cream cheese.
Ingredients
- 1 cup warm water (110°F)
- 3 tablespoons honey
- 2 tablespoons unsalted butter, softened
- 1 teaspoon salt
- ½ cup old-fashioned rolled oats
- 2½ cups bread flour
- 2¼ teaspoons active dry yeast
Instructions
Pour the warm water into the bread pan. Add the honey directly on top, letting it slide off the spoon into the water. Honey is sticky and measuring it by weight is ideal, but if you are measuring by volume, a light spray of cooking spray on the measuring spoon makes the honey slide off cleanly.
Add the softened butter and salt to the bread pan on top of the water and honey. Then add the rolled oats. Oats added before the flour have time to absorb moisture during the kneading cycle, which softens them significantly and helps them incorporate smoothly into the dough.
Spoon in the bread flour on top of the oats and level off the surface. Create a small well in the center of the flour and add the yeast. Insert the bread pan into the West Bend bread maker and select the Basic Bread setting. Choose a Medium crust for a balanced golden color and press Start.
During the kneading phase, the oats will partially absorb the liquid and soften into the dough. You may see small flecks of oat throughout the dough — this is perfectly normal and adds a pleasant visual and textural quality to the finished loaf. The dough should be smooth and slightly tacky but not wet.
Let the machine run through the full cycle without opening the lid. When the baking cycle ends, the loaf should be a beautiful golden color with oats visible on the top. Remove the pan, turn the bread out onto a wire rack, and rest it for at least 20 minutes before slicing. The honey keeps this bread moist longer than most, so it stores very well.
Breakfast Ideas
- Toast slices and top with ricotta, sliced banana, and a drizzle of honey.
- Use for avocado toast with a sprinkle of red pepper flakes.
- Great with natural peanut butter and sliced strawberries.
13. Banana Bread (Bread Machine Version)
Prep Time: 10 minutes | Bake Time: 1 hour 30 minutes | Serves: 10 slices
Moist, fragrant, and full of ripe banana flavor, this bread machine banana bread is a foolproof recipe that uses the Quick Bread or Cake setting on your West Bend machine. No yeast needed — just ripe bananas, simple pantry staples, and your bread maker doing the work.
Ingredients
- 2 large ripe bananas, mashed (about 1 cup)
- 2 large eggs, beaten
- ⅓ cup melted butter, cooled
- ¾ cup granulated sugar
- 1 teaspoon vanilla extract
- 1½ cups all-purpose flour
- 1 teaspoon baking soda
- ½ teaspoon salt
- ½ teaspoon ground cinnamon (optional)
Instructions
Mash the bananas thoroughly with a fork until almost smooth — a few small lumps are totally fine and add nice texture to the finished bread. The riper the bananas, the better. Bananas with brown spots or fully yellow-brown skins have higher sugar content and much more intense banana flavor than yellow bananas with green tips.
Beat the eggs in a bowl and mix them together with the mashed banana, cooled melted butter, sugar, and vanilla extract. Make sure the melted butter has cooled to room temperature — adding hot butter directly to the eggs can partially cook them, which you do not want.
Pour the wet mixture into the bread pan first. In a separate bowl, whisk together the flour, baking soda, salt, and cinnamon. Spoon the dry ingredients on top of the wet mixture in the bread pan. Do not stir them together — let the machine do the mixing.
Select the Quick Bread or Cake setting on your West Bend bread maker. This setting does not use a rise cycle since banana bread is leavened by baking soda, not yeast. The machine will mix the batter and then bake it without any of the extended fermentation steps used for yeast breads.
During the mixing cycle, the machine will blend the wet and dry ingredients together. The batter will be thick and pourable — much looser than a yeast dough. Once the mixing phase finishes, the machine will move directly into the baking cycle. Allow it to bake completely without opening the lid.
When the cycle is finished, check the banana bread by inserting a toothpick into the center of the loaf. It should come out clean or with just a few moist crumbs — not wet batter. If the toothpick comes out wet, allow it to bake for another 10 minutes using a manual bake setting if your machine has one. Remove the pan and let the bread cool in the pan for 10 minutes before turning it out onto a rack. Cool completely before slicing.
Serving Suggestions
- Serve warm with a scoop of vanilla ice cream for dessert.
- Spread with Nutella or peanut butter for a satisfying snack.
- Top slices with whipped cream and banana slices for a special breakfast.
14. Pumpkin Spice Bread
Prep Time: 10 minutes | Bake Time: 1 hour 30 minutes | Serves: 10 slices
Rich with the flavors of fall — warm cinnamon, nutmeg, ginger, and real pumpkin purée — this bread machine pumpkin spice bread is moist, fragrant, and absolutely perfect for the cooler months of the year. Made with the Quick Bread setting, no yeast is required.
Ingredients
- 1 cup canned pumpkin purée (not pumpkin pie filling)
- 2 large eggs, beaten
- ⅓ cup vegetable oil
- 1 cup granulated sugar
- 1 teaspoon vanilla extract
- 1½ cups all-purpose flour
- 1 teaspoon baking soda
- ½ teaspoon baking powder
- ½ teaspoon salt
- 1½ teaspoons ground cinnamon
- ½ teaspoon ground nutmeg
- ¼ teaspoon ground ginger
- ¼ teaspoon ground cloves
Instructions
Make sure you are using plain canned pumpkin purée, not pumpkin pie filling. Pumpkin pie filling has added sugar and spices already mixed in, which will throw off the balance of flavors in this recipe. Plain purée is just cooked, mashed pumpkin — nothing else added.
In a bowl, combine the pumpkin purée, beaten eggs, vegetable oil, sugar, and vanilla extract. Stir until well mixed. The mixture will be thick and orange-colored. In a separate bowl, whisk together the flour, baking soda, baking powder, salt, and all of the spices. Combining the dry ingredients separately ensures the baking soda and spices are evenly distributed before they go into the bread pan.
Pour the wet pumpkin mixture into the bread pan first. Then spoon the dry ingredient mixture on top. Do not mix them before adding to the pan. Select the Quick Bread or Cake setting on your West Bend bread maker and press Start. The machine will do the mixing and blending for you.
During the mixing cycle, the machine will bring the batter together into a thick, smooth mixture. The spices will begin releasing their fragrance almost immediately as they heat up during baking. The kitchen will smell like fall the entire time the bread is in the machine — a very welcome thing on a cool morning.
When the baking cycle ends, test with a toothpick inserted into the center. It should come out clean. If not, allow extra baking time. Let the bread cool in the pan for 10 minutes before turning it out onto a rack. Cool completely before slicing — pumpkin bread is very moist and will crumble if cut too hot.
Seasonal Variations
- Add ½ cup of chopped walnuts or pecans for crunch.
- Mix in ½ cup of chocolate chips for a sweet twist.
- Replace pumpkin with canned sweet potato purée for a similar but distinct flavor.
15. Apple Cinnamon Bread
Prep Time: 15 minutes | Bake Time: 3 hours | Serves: 12 slices
Chunks of tender apple and warm cinnamon folded into a soft, lightly sweetened yeast dough create a loaf that is equal parts comforting and delicious. Apple cinnamon bread made in a West Bend bread maker has a beautiful aroma and a flavor that gets better with every slice.
Ingredients
- ¾ cup warm water (110°F)
- 2 tablespoons unsalted butter, softened
- 3 tablespoons granulated sugar
- 1 teaspoon salt
- 1 teaspoon ground cinnamon
- 3 cups bread flour
- 2¼ teaspoons active dry yeast
- 1 medium apple, peeled and finely diced (added at add-in beep)
Instructions
Peel and finely dice the apple before you start. The pieces should be small — about the size of a pea. Larger chunks can create air pockets in the bread or weigh down specific areas of the dough, leading to uneven texture. A Granny Smith or Honeycrisp apple works very well because they hold their shape during baking rather than turning to mush.
Add the warm water to the bread pan. Place the butter, sugar, and salt on top. Stir the cinnamon into the bread flour before spooning it into the pan so the spice is evenly distributed. Level off the flour and make a well in the center for the yeast.
Select the Sweet Bread setting on your West Bend bread maker. The sweet cycle’s lower baking temperature protects the apple pieces and the sugary cinnamon dough from over-browning. Press Start and wait for the add-in beep, then add the diced apple pieces. If your machine does not have a beep, add the apple about 10 minutes into the kneading cycle.
The apple adds moisture to the dough as it bakes, so the finished bread will be very soft and slightly dense in a pleasant way. During the baking phase, the apple pieces will soften and become jammy throughout the loaf. The aroma of cinnamon and cooked apple is one of the most wonderful smells in home baking.
Remove the loaf when baking is done and rest it on a wire rack for 20 minutes before slicing. Apple cinnamon bread is absolutely wonderful warm with a pat of salted butter, but it also makes great French toast the next day if there are any slices left.
Flavor Enhancements
- Add ½ teaspoon of cardamom to the cinnamon for extra depth.
- Mix in a handful of raisins or dried cranberries with the apple pieces.
- Drizzle a simple powdered sugar glaze over the cooled loaf for a sweeter finish.
16. Garlic Parmesan Bread
Prep Time: 10 minutes | Bake Time: 3 hours | Serves: 12 slices
Bold garlic flavor and nutty Parmesan cheese baked right into the dough make this one of the most savory, satisfying breads you can pull from your West Bend bread maker. Every slice carries that deep, garlicky richness that makes it impossible to eat just one piece.
Ingredients
- 1 cup warm water (110°F)
- 2 tablespoons olive oil
- 1 teaspoon salt
- 1 teaspoon granulated sugar
- 3 cloves garlic, minced (or 1 teaspoon garlic powder)
- ½ cup finely grated Parmesan cheese
- 3 cups bread flour
- 2¼ teaspoons active dry yeast
Instructions
Pour the warm water and olive oil into the bread pan. The olive oil acts as both a flavor agent and a dough conditioner — it makes the crumb tender and adds depth that neutral oil cannot. Add the salt, sugar, and minced garlic directly on top of the liquids.
If using fresh garlic, mince it as finely as possible so it blends smoothly into the dough. If using garlic powder, it will mix in evenly on its own. Add the grated Parmesan on top of the garlic. Parmesan cheese is salty, so do not be tempted to add extra salt — the recipe is balanced as written.
Spoon in the bread flour and level off the top. Make a small well and add the yeast. Select the Basic Bread setting on the West Bend machine and choose a Medium crust. Press Start.
As the machine kneads, the garlic and Parmesan will distribute evenly throughout the dough. The Parmesan adds a slight stickiness to the dough as it begins to soften, but by the end of the kneading cycle the dough should be smooth and cohesive. During the baking cycle, the Parmesan on the outer surface of the loaf may form a slight savory crust — this is a very good thing.
When the machine signals completion, remove the loaf and cool it on a wire rack. The garlic aroma as the loaf bakes is absolutely wonderful. Allow it to rest for 15 minutes before slicing. This bread is best enjoyed warm.
Best Uses
- Serve alongside pasta dishes, soups, or stews.
- Slice and use as the base for mini bruschetta topped with tomatoes.
- Excellent toasted and rubbed with a cut clove of fresh garlic while still hot.
17. Cheddar Cheese Bread
Prep Time: 10 minutes | Bake Time: 3 hours | Serves: 12 slices
Loaded with real shredded cheddar cheese folded into a simple yeast dough, this bread has a savory, rich flavor and a beautiful golden crust. The cheese melts into the crumb during baking, creating pockets of savory goodness throughout every slice.
Ingredients
- 1 cup warm water (110°F)
- 1 tablespoon unsalted butter, softened
- 1 teaspoon salt
- 1 teaspoon granulated sugar
- 3 cups bread flour
- 2¼ teaspoons active dry yeast
- 1 cup sharp cheddar cheese, shredded (added at add-in beep)
Instructions
Shred your own cheddar from a block rather than using pre-shredded cheese from a bag. Pre-shredded cheese is coated with starch and anti-caking agents that can affect how it melts and blends into the dough. Freshly shredded cheese melts more cleanly and creates a better texture throughout the loaf.
Add the warm water and butter to the bread pan. The amount of butter here is small because the cheese provides most of the fat and richness the dough needs. Add the salt and sugar, then spoon in the bread flour. Level it off and make a well for the yeast. Select the Basic Bread setting on the West Bend bread maker with a Medium crust.
Wait for the add-in beep before adding the shredded cheddar. Adding it too early will break it down completely into the dough before it has a chance to develop into pockets of melted cheese. At the beep, drop in the shredded cheddar and allow the machine to fold it in during the remaining kneading time.
As the cheese incorporates, you may notice the dough becomes slightly more golden in color and a little stiffer. The fat from the cheese adds richness but also firms up the gluten structure. This is normal. The loaf will still rise beautifully during the rise cycles. During baking, the cheese on the top of the loaf will melt and form a slightly crispy, golden cheesy layer on the crust.
Remove the loaf when done, rest for 20 minutes, and slice. Cheddar cheese bread is exceptional warm, and it pairs perfectly with tomato soup, chili, or a simple bowl of vegetable stew.
Cheese Selection Tips
- Sharp cheddar gives the strongest flavor — use mild if you prefer something more subtle.
- Pepper Jack or Gruyère are excellent alternatives to cheddar.
- Always shred your own cheese from a block for the best melt.
18. Herb Bread
Prep Time: 10 minutes | Bake Time: 3 hours | Serves: 12 slices
Fragrant dried herbs mixed directly into the dough make this loaf smell incredible as it bakes and taste equally as good once it cools. Herb bread works with a wide range of herb combinations and pairs beautifully with almost any savory meal you can think of.
Ingredients
- 1 cup warm water (110°F)
- 2 tablespoons olive oil
- 1 teaspoon salt
- 1 teaspoon granulated sugar
- 1 teaspoon dried basil
- 1 teaspoon dried oregano
- ½ teaspoon dried thyme
- ½ teaspoon garlic powder
- 3 cups bread flour
- 2¼ teaspoons active dry yeast
Instructions
Pour the warm water into the bread pan and add the olive oil on top. The olive oil in this recipe serves two purposes — it adds a mild richness to the dough and helps carry the flavor of the dried herbs throughout every bite. Add the salt, sugar, and all of the dried herbs on top of the liquids.
Alternatively, you can stir the herbs directly into the bread flour before adding it to the pan. This distributes the herbs more evenly through the dough and ensures no clumping during the early mixing phase. Either method works well — choose whichever feels easiest for you.
Spoon in the bread flour and level off the top. Make a small well in the center and add the yeast. Secure the pan in the West Bend bread maker and select the Basic Bread setting with a Medium crust. Press Start.
During kneading, the herbs will bloom slightly in the warmth of the machine and the dough will begin to smell wonderful. The finished dough should be smooth, elastic, and flecked throughout with green and brown specks from the herbs. If it looks too wet, add flour one tablespoon at a time.
Let the machine complete its full cycle. When baking is done, the top of the loaf will be golden with small flecks of toasted herbs visible on the surface. Remove the loaf and cool on a wire rack for 15 to 20 minutes before slicing. This bread is spectacular alongside grilled meats, pasta, or a big salad.
Herb Combinations
- Italian blend: basil, oregano, thyme, and rosemary.
- French blend: herbes de Provence, tarragon, and chives.
- Simple garlic herb: parsley, garlic powder, and a pinch of dill.
19. Rosemary Olive Oil Bread
Prep Time: 10 minutes | Bake Time: 3 hours | Serves: 12 slices
Bold rosemary and rich olive oil come together in this Mediterranean-inspired loaf that is rustic, fragrant, and deeply flavorful. Made in a West Bend bread maker with just a handful of quality ingredients, this bread proves that simplicity can produce extraordinary results.
Ingredients
- 1 cup warm water (110°F)
- 3 tablespoons olive oil
- 1½ teaspoons salt
- 1 teaspoon granulated sugar
- 2 tablespoons fresh rosemary, finely chopped (or 1 tablespoon dried)
- 3 cups bread flour
- 2¼ teaspoons active dry yeast
Instructions
Use fresh rosemary if you can get it — the flavor is significantly brighter and more pungent than dried. Chop the leaves finely so they distribute evenly throughout the dough rather than sitting in large, tough pieces. If using dried rosemary, crush it lightly between your fingers before adding it to release more of its essential oils.
Pour the warm water into the bread pan. Add the olive oil on top. Use a good quality extra-virgin olive oil if you have it — it really does make a difference in a bread where olive oil is such a prominent flavor. Add the salt, sugar, and chopped rosemary on top of the liquids.
Spoon in the bread flour and level off the cups carefully. Make a small indentation in the center of the flour and drop in the yeast. Secure the pan in the West Bend bread maker and choose the Basic Bread setting. Use a Medium or Light crust to let the olive oil flavor come through without the crust becoming too dark. Press Start.
As the machine kneads, the rosemary will work into the dough beautifully. The finished dough should be smooth and slightly springy, with tiny green specks of rosemary visible throughout. During the baking phase, the rosemary in contact with the hot pan and heating element will toast gently, releasing even more of its fragrance. Your kitchen will smell incredible.
When done, remove the loaf and allow it to rest on a rack for 15 minutes before slicing. Rosemary olive oil bread is spectacular on its own, dipped into more olive oil with a pinch of sea salt, or served alongside grilled fish or roasted vegetables.
Mediterranean Serving Ideas
- Serve slices alongside a bowl of extra-virgin olive oil and balsamic vinegar for dipping.
- Pair with hummus, olives, and roasted red peppers for a Mediterranean appetizer spread.
- Use as the base for an open-faced sandwich with roasted vegetables and fresh mozzarella.
20. Multigrain Bread
Prep Time: 10 minutes | Bake Time: 3 hours 30 minutes | Serves: 12 slices
Packed with the goodness of multiple grains, seeds, and flours, multigrain bread has a hearty, nutty flavor and a satisfying chew. Each loaf is dense but not heavy, with a complex flavor that gets better with every slice. One of the most nutritious breads you can make at home.
Ingredients
- 1⅛ cups warm water (110°F)
- 2 tablespoons honey
- 2 tablespoons olive oil
- 1 teaspoon salt
- ½ cup multigrain cereal or 7-grain blend (dry)
- 2 cups bread flour
- ¾ cup whole wheat flour
- 1 tablespoon vital wheat gluten
- 2¼ teaspoons active dry yeast
Instructions
Pour the warm water into the bread pan and add the honey and olive oil on top. The honey feeds the yeast while the olive oil tenderizes the dough — both important for a bread that uses several dense grain components. Sprinkle in the salt.
Add the dry multigrain cereal directly into the liquid mixture. Allowing the grains to soak in the warm water before the flour is added helps them hydrate and soften, preventing a grainy or gritty texture in the finished bread. Use any dry 7-grain or multigrain cereal blend from the grocery store.
Add the bread flour, whole wheat flour, and vital wheat gluten together into the pan. The vital wheat gluten is important here — multigrain and whole wheat flours do not develop gluten as efficiently as bread flour alone, so the added gluten gives the dough extra strength to rise properly and hold its shape. Level off the flour and make a small well in the center for the yeast.
Select the Whole Wheat setting on your West Bend bread maker. This setting offers the extended kneading and rise time that multigrain dough needs. Choose a Medium crust and press Start.
During the kneading cycle, the multigrain dough will be noticeably denser and less stretchy than a white flour dough. It should still come together into a cohesive ball, just a firmer one. Allow the full cycle to complete without interruption. When done, remove the pan, turn the loaf out, and cool for 30 minutes before slicing. Multigrain bread is excellent for toast and holds up very well for open-faced sandwiches.
Healthy Add-Ins
- Add 2 tablespoons of ground flaxseed for extra omega-3s.
- Mix in a handful of sunflower seeds or pumpkin seeds at the add-in beep.
- Replace some of the bread flour with spelt flour for a more complex grain profile.
21. Sunflower Seed Bread
Prep Time: 10 minutes | Bake Time: 3 hours | Serves: 12 slices
Sunflower seeds add a pleasant crunch and a mild nuttiness to this wholesome, golden loaf. Each slice has a satisfying texture that plain white bread simply cannot match, and the seeds provide a nice nutritional boost to your everyday bread without changing the flavor dramatically.
Ingredients
- 1 cup warm water (110°F)
- 2 tablespoons honey
- 2 tablespoons vegetable oil
- 1 teaspoon salt
- 1½ cups bread flour
- 1½ cups whole wheat flour
- 2¼ teaspoons active dry yeast
- ½ cup raw sunflower seeds (added at add-in beep)
Instructions
Pour the warm water into the bread pan and add the honey and oil on top. The combination of honey and oil creates a slightly richer, more tender dough that complements the crunch of the sunflower seeds. Add the salt on top of the liquids.
Measure the bread flour and whole wheat flour and spoon both into the bread pan on top of the liquid ingredients. Using half bread flour and half whole wheat gives you a loaf that has both the structural strength of a well-risen white bread and the earthy, hearty character of a whole wheat loaf. Level off the flour and create a well in the center for the yeast.
Select the Whole Wheat setting on your West Bend bread maker and press Start. Wait for the add-in beep signal before adding the sunflower seeds. Adding seeds too early can disrupt the kneading cycle and prevent the gluten from developing properly. At the beep, add the seeds and allow the machine to fold them into the dough.
During the kneading cycle after the seeds are added, you will hear a slight change in the sound of the machine as the seeds get worked into the dough. Some seeds may crack slightly — this is normal and actually adds more surface area for their mild flavor to release into the bread. Allow the machine to complete the full cycle without lifting the lid.
When baking is complete, the finished loaf should have a beautiful golden color with seeds dotting the surface and interior. Remove from the pan and cool on a wire rack for at least 20 minutes before slicing.
Nutritional Benefits
- Sunflower seeds are high in vitamin E and healthy unsaturated fats.
- Seeds add protein and fiber to each slice, making the bread more filling.
- A good source of magnesium and selenium from the whole wheat and seeds combined.
22. Flaxseed Bread
Prep Time: 10 minutes | Bake Time: 3 hours 30 minutes | Serves: 12 slices
Flaxseed bread is a nourishing, slightly earthy loaf that packs impressive health benefits into every slice. Ground flaxseed blends smoothly into the dough while whole flaxseeds add a gentle crunch and visual interest. A great everyday bread for those looking to add more nutrition to their diet.
Ingredients
- 1 cup warm water (110°F)
- 2 tablespoons honey
- 2 tablespoons olive oil
- 1 teaspoon salt
- 3 tablespoons ground flaxseed
- 2 cups bread flour
- 1 cup whole wheat flour
- 2¼ teaspoons active dry yeast
- 2 tablespoons whole flaxseeds (added at add-in beep)
Instructions
Pour the warm water into the bread pan and add the honey and olive oil. Honey provides natural sweetness and works well with the slightly earthy taste of flaxseed. Add the salt and the ground flaxseed directly to the liquid. Ground flaxseed will absorb water and slightly thicken the liquid base, which helps incorporate it evenly into the bread crumb.
Add the bread flour and whole wheat flour into the pan and level off the surface. The combination of flours and ground flaxseed makes for a moderately dense dough, which is why you want to use the Whole Wheat setting to give it the extended rise time it needs. Make a well in the flour and drop the yeast in.
Secure the pan in the West Bend bread maker and select the Whole Wheat setting. Press Start. When the add-in beep sounds, add the whole flaxseeds. These will remain intact in the finished bread and provide a pleasant, nutty crunch in each slice.
During the kneading cycle, the dough will come together as a slightly dense, smooth ball. Ground flaxseed acts a little like a gel when hydrated, which helps the dough retain moisture during baking. The result is a loaf that stays moist longer than a standard whole wheat bread.
Let the machine complete the full cycle. When done, remove the loaf, cool on a wire rack for 25 to 30 minutes, and slice. Flaxseed bread is excellent with avocado, hummus, or simply toasted with a drizzle of olive oil.
Health Benefits
- Flaxseed is one of the best plant-based sources of omega-3 fatty acids.
- Ground flaxseed provides soluble fiber that supports digestive health.
- Flaxseeds contain lignans, which are natural antioxidant compounds.
23. Dinner Roll Dough Recipe
Prep Time: 10 minutes (machine) + 20 minutes shaping | Bake Time: 15–18 minutes in oven | Serves: 12 rolls
Your West Bend bread maker does all the hard work of making the dough — you simply shape the rolls and bake them in the oven for a perfect golden finish. Soft, buttery, and impossible to resist, these dinner rolls are a wonderful addition to any family meal.
Ingredients
- ¾ cup warm milk (110°F)
- ¼ cup warm water (110°F)
- 3 tablespoons unsalted butter, softened
- 2 tablespoons granulated sugar
- 1 teaspoon salt
- 1 large egg, room temperature
- 3 cups bread flour
- 2¼ teaspoons active dry yeast
Instructions
Pour the warm milk and warm water into the bread pan. Add the softened butter, sugar, salt, and egg on top of the liquid. The egg adds richness to the dough and gives the rolls a soft, tender interior. Add the bread flour and make a well in the center for the yeast.
Select the Dough Cycle on your West Bend bread maker. The dough cycle will mix, knead, and allow the dough to rise inside the machine, but it will stop before baking — which is exactly what you want for rolls that will be shaped and finished in the oven.
When the dough cycle completes, remove the dough from the pan onto a lightly floured surface. Gently punch it down to release the gas built up during the rise. Divide the dough into 12 equal pieces — the easiest way to do this is to flatten the dough slightly, cut it in half, then cut each half into 6 pieces.
Shape each piece into a smooth ball by tucking the edges underneath and rolling it between your palm and the counter in a circular motion. Place the shaped rolls into a greased 9×13 inch baking pan, spacing them evenly. Cover with a clean kitchen towel and allow them to rise at room temperature for 30 to 45 minutes, or until puffy and nearly doubled in size.
Preheat your oven to 375°F. Brush the tops of the rolls with melted butter or a beaten egg wash for a glossy, golden finish. Bake for 15 to 18 minutes, until the tops are golden brown and the rolls sound hollow when tapped. Remove from the oven and brush again with melted butter while still hot. Serve warm.
Shaping and Baking
- For pull-apart rolls, place them touching in the pan — they will separate easily after baking.
- Brush with garlic butter right out of the oven for a savory variation.
- Rolls can be made ahead and frozen before the second rise — thaw and rise before baking.
24. Pizza Dough
Prep Time: 10 minutes (machine) + 10 minutes shaping | Bake Time: 12–15 minutes in oven | Serves: 2 pizzas (12-inch each)
Fresh pizza dough made in your West Bend bread maker is game-changing. The dough cycle produces a perfectly smooth, elastic dough that stretches easily and bakes into a crust that is crispy on the bottom and chewy in the middle — just like a real pizzeria crust.
Ingredients
- 1 cup warm water (110°F)
- 2 tablespoons olive oil
- 1 teaspoon salt
- 1 teaspoon granulated sugar
- 3 cups bread flour (or all-purpose flour)
- 2¼ teaspoons active dry yeast
Instructions
Add the warm water and olive oil to the bread pan. The olive oil is key in pizza dough — it tenderizes the gluten just enough to allow the dough to stretch without tearing, which is essential when you are trying to shape a thin crust. It also adds flavor to the finished crust and helps the bottom crisp up in the oven.
Add the salt and sugar on top of the liquids. Then spoon in the bread flour and level it off. Bread flour is the better choice for pizza dough because its higher protein content develops more gluten, giving the crust that satisfying chew. If you only have all-purpose flour, it will still work well, just with a slightly more tender bite.
Make a small well in the flour for the yeast and lock the pan into your West Bend bread maker. Select the Dough Cycle and press Start. The machine will mix, knead, and allow the dough to rise through one full cycle before stopping.
When the dough cycle ends, remove the dough from the pan and place it on a lightly floured surface. Divide the dough into two equal portions for two 12-inch pizzas, or use it all for one thick-crust pizza. Cover the portions with a towel and let them rest for 10 minutes. This resting period is important — it relaxes the gluten so the dough stretches easily without snapping back.
Stretch and shape each portion into a circle using your hands, working from the center outward. Avoid using a rolling pin if possible, as it presses out the air bubbles that give the crust a light, open texture. Place the shaped dough onto a greased pizza pan or a piece of parchment paper. Add your sauce, cheese, and toppings, then bake at 450°F for 12 to 15 minutes until the crust is golden and the cheese is bubbling.
Pizza Topping Ideas
- Classic Margherita: tomato sauce, fresh mozzarella, and fresh basil leaves.
- Garlic white pizza: olive oil, minced garlic, ricotta, mozzarella, and spinach.
- BBQ chicken pizza: BBQ sauce, shredded chicken, red onion, and smoked mozzarella.
25. Sweet Hawaiian Bread
Prep Time: 10 minutes | Bake Time: 3 hours | Serves: 12 slices
Golden, pillowy, and gently sweet with a hint of pineapple, this Sweet Hawaiian bread made in a West Bend bread maker is a bakery-worthy loaf that is as good for breakfast as it is for making sliders and sandwiches. The pineapple juice gives it a signature flavor you simply cannot replicate any other way.
Ingredients
- ¾ cup pineapple juice, warm (110°F)
- 1 large egg, room temperature
- 3 tablespoons unsalted butter, softened
- ¼ cup granulated sugar
- ½ teaspoon salt
- 3 cups bread flour
- 2¼ teaspoons active dry yeast
Instructions
Warm the pineapple juice to about 110°F before adding it to the bread pan. Do not use pineapple juice that is too cold — it will slow the yeast activation and produce a dense loaf. The pineapple juice is the key ingredient that makes this bread special. It provides natural sugar for the yeast, adds a mild tropical sweetness, and contributes to the gorgeous golden color of the finished crust.
Add the egg to the warm pineapple juice in the bread pan. The egg enriches the dough, giving it a soft, tender crumb and a slightly silky texture. Add the softened butter, sugar, and salt on top of the liquid. The relatively high amount of sugar for a yeast bread is intentional — it is what gives Hawaiian bread its signature sweetness. Do not reduce the sugar.
Spoon in the bread flour and level off each cup carefully. Make a small well in the center of the flour and add the yeast. Secure the bread pan in the West Bend bread maker and select the Sweet Bread setting. The Sweet Bread cycle uses a slightly lower baking temperature, which is important here because the high sugar content of this dough will cause the crust to over-brown quickly on a hotter setting. Set the crust to Light or Medium and press Start.
During the kneading phase, the dough will come together as a very soft, slightly sticky ball with a beautiful golden-yellow tint from the pineapple juice and egg yolk. Do not be alarmed by the softness — this is a rich, enriched dough and it is supposed to feel very soft. Resist the urge to add extra flour unless the dough is genuinely sticking to the walls of the pan throughout the entire kneading cycle.
As the rise cycles proceed, the dough will puff up nicely. Sweet, enriched doughs like this one may not rise quite as dramatically as a plain white dough, but they will still reach a good dome. During the baking phase, the kitchen will fill with a warm, sweet, tropical aroma. The crust will turn a deep golden color, almost honey-brown, which is completely normal and desirable.
When the machine beeps to signal the end of the baking cycle, use oven mitts to remove the bread pan immediately. Turn the loaf out onto a wire cooling rack. Let the bread cool for at least 20 to 25 minutes before slicing. The interior of sweet, enriched breads needs extra time to fully set after baking. Cutting too soon will result in a gummy, underset crumb. Once cooled, slice and enjoy this wonderful, golden loaf.
Serving Suggestions
- Slice and use for pulled pork or ham sliders at your next gathering.
- Serve warm with honey butter and fresh pineapple slices for a tropical breakfast.
- Use thick slices to make French toast — the sweetness of the bread takes it to another level.
- Pair with a cup of tropical fruit salad for a light, refreshing brunch option.
Storage and Freezing Tips
- How to Store Homemade Bread – Let your bread cool completely before storing it. Storing warm bread traps steam and makes the crust soggy. Wrap the cooled loaf in plastic wrap or place it in a resealable bread bag. Store at room temperature for up to 3 days. Never store bread in the refrigerator — the cold air causes it to go stale much faster than leaving it at room temperature.
- Freezing Bread for Long-Term Freshness – Homemade bread freezes beautifully. Slice the fully cooled loaf before freezing so you can pull out individual slices without thawing the whole thing. Layer slices with small pieces of parchment paper to prevent sticking, place in a freezer-safe zip-lock bag, and freeze for up to 3 months. Label the bag with the date and type of bread so you always know what is in the freezer.
- Reheating Bread Properly – To reheat a frozen slice, pop it directly in the toaster on a low-medium setting. For a whole loaf or several slices, wrap in aluminum foil and warm in a 300°F oven for 10 to 15 minutes until heated through. Avoid microwaving bread for more than 15 seconds at a time, as it can cause the crumb to become tough and rubbery. For best results, always reheat covered to preserve moisture.
Conclusion
West Bend bread maker recipes cover an incredible range of flavors, textures, and styles — from a simple classic white loaf to fragrant rosemary olive oil bread and tropical sweet Hawaiian bread. Whatever your taste or occasion, there is a recipe in this collection that fits perfectly. The best part is that your West Bend bread machine handles all the difficult work, leaving you with nothing more to do than add the ingredients in the right order.
Do not be afraid to experiment once you have mastered the basics. Try adding different seeds, herbs, or spices to your favorite recipes. Swap out honey for maple syrup. Use buttermilk in place of water for a softer crumb. Each small change leads to a slightly different result, and part of the joy of home baking is discovering those happy accidents that become your new favorites.
For consistent results every time, always measure your ingredients accurately, use fresh yeast, add liquids to the pan first, and choose the correct setting on your machine. These small habits make a big difference in the quality of your finished loaves. Keep your West Bend bread maker clean, check that the paddle is properly seated before each use, and you will be baking beautiful homemade bread for years to come. Happy baking!