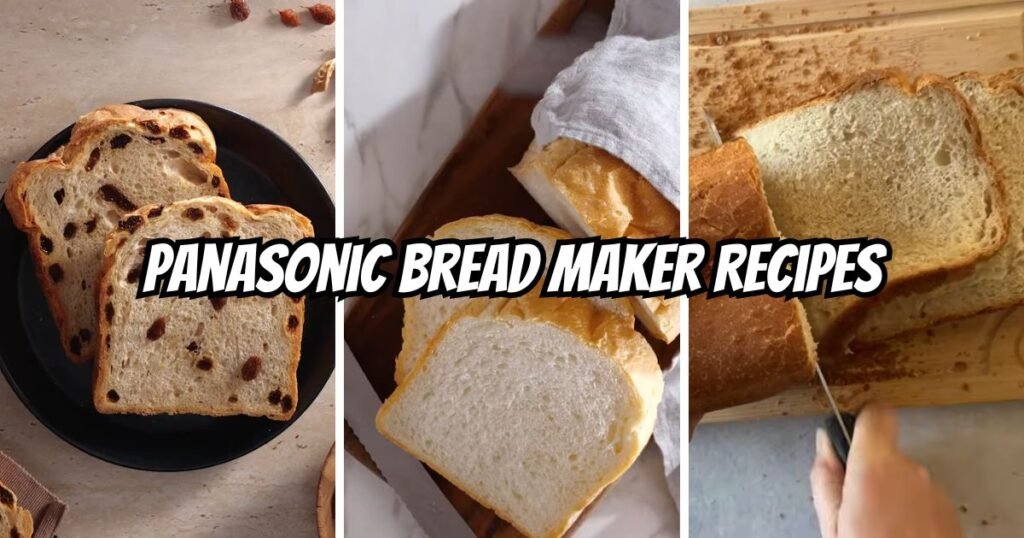
Panasonic Bread Maker Recipes make homemade baking simple for anyone with a busy kitchen and a craving for warm, fresh bread.
Panasonic machines have earned a strong reputation among home bakers because of their reliable heating elements, sturdy kneading paddles, and programs that handle every step from mixing to baking without extra effort. Many households choose these machines to save time, avoid preservatives found in store-bought loaves, and control exactly what goes into every slice.
Baking bread at home offers real benefits too — fresher taste, better texture, and the option to adjust ingredients for dietary needs such as low sugar, whole grain, or dairy-free choices. Cost savings add up over months of regular baking, since flour, yeast, and butter cost far less than bakery bread purchased weekly.
This guide brings together nineteen recipes built specifically for Panasonic machines, ranging from simple starter loaves to advanced options like brioche, sourdough, and gluten-free bread.
Every recipe includes clear measurements, step-by-step instructions, and helpful baking tips suited for beginners and seasoned bakers alike. Gather the ingredients, set the machine, and get ready to fill the kitchen with the smell of freshly baked bread.

Why Choose a Panasonic Bread Maker for Homemade Bread?
1. Consistent Baking Results Every Time — Panasonic machines use precise heating sensors and steady paddle rotation, so every loaf rises evenly and bakes with a uniform crust. Home bakers get the same reliable outcome batch after batch, without guesswork about oven hot spots or uneven mixing.
2. Time-Saving Automatic Programs — Preset cycles handle kneading, rising, and baking in one continuous process. A loaf can go from raw ingredients to a finished bake with only a few minutes of hands-on preparation, freeing up the rest of the day for other tasks.
3. Perfect for Beginners and Experienced Bakers — New bakers benefit from guided programs and simple button controls, while experienced bakers appreciate custom settings for crust color, loaf size, and specialty cycles like dough-only or jam-making. Getting started may seem intimidating at first glance, but it’s actually quite the opposite — most machines guide users through every stage clearly!
4. Energy-Efficient and Cost-Effective — Compared with running a full-size oven for a single loaf, a bread maker uses a fraction of the electricity. Combined with the lower cost of basic ingredients, home baking becomes a budget-friendly habit rather than an occasional treat.
1. Classic White Bread
Prep Time: 15 minutes | Cook Time: 3 hours 50 minutes | Serve: 12 slices
Classic White Bread turns basic pantry staples into a soft, golden loaf with a light crumb and a gentle crust. This recipe works well for weekday sandwiches, toast, or a warm snack beside butter and jam. The balanced flour-to-yeast ratio produces a steady rise every session, making the loaf a dependable starting point for anyone new to a bread machine and a solid base recipe worth repeating often.
Ingredients
- Bread flour: 3 cups (360g)
- Warm water: 1 cup (240ml)
- Sugar: 2 tablespoons
- Salt: 1.5 teaspoons
- Butter, softened: 2 tablespoons
- Active dry yeast: 2 teaspoons
Instructions
Pour warm water into the bread pan first, keeping the temperature close to 100°F so the yeast activates properly without weakening its rising power. Add softened butter next, then sprinkle sugar and salt into separate corners of the pan so they don’t touch directly until mixing begins. Spoon bread flour over the liquid mixture, covering the surface completely so no wet spots remain visible on top. Create a small well in the center of the flour mound and add active dry yeast into that well, keeping it away from the salt and sugar until the paddle starts turning.
Lock the bread pan into the Panasonic bread maker and close the lid firmly. Select the Basic or White Bread program on the control panel, then choose a medium crust setting for balanced color and texture. Set the loaf size according to the recipe amount, typically the 2-pound or 1.5-pound option depending on the specific model. Press start and allow the machine to begin its automatic cycle, which usually includes an initial rest period, several kneading rounds, one or two rise cycles, and a final baking stage.
During the first kneading cycle, lift the lid briefly and check the dough consistency. A properly hydrated dough forms a smooth, slightly tacky ball that pulls cleanly from the sides of the pan. Add a small spoonful of flour when the dough looks too wet, or a teaspoon of water when it appears dry and crumbly. Close the lid again quickly to maintain internal temperature for proper fermentation.
Let the machine complete the full cycle without opening the lid during rising or baking stages, since temperature loss can affect the final rise. Once the baking cycle finishes, the machine signals completion with several beeps. Use oven mitts to remove the pan carefully, then turn the loaf onto a wire cooling rack right away to prevent a soggy bottom crust. Remove the kneading paddle from the base of the loaf using a wooden or plastic tool to avoid scratching the nonstick coating. Cool the bread for at least thirty minutes before slicing, since cutting too early compresses the soft interior crumb and releases steam unevenly.
Baking Program: Basic/White Bread cycle, medium crust setting, 2-pound loaf.
Tips: Use bread flour rather than all-purpose flour for a stronger gluten structure and taller rise. Check the yeast expiration date before starting, since older yeast produces a flatter loaf. Store leftover bread in a sealed bag at room temperature for up to three days.
2. Whole Wheat Bread
Prep Time: 15 minutes | Cook Time: 4 hours | Serve: 12 slices
Whole Wheat Bread delivers a hearty, nutty flavor along with extra fiber compared with plain white loaves. Panasonic Bread Maker Recipes such as this one suit households looking for a healthier daily bread option without sacrificing softness. A blend of whole wheat and bread flour keeps the texture light while still delivering the wholesome taste that whole grain lovers expect from every slice.
Ingredients
- Whole wheat flour: 2 cups (240g)
- Bread flour: 1 cup (120g)
- Warm water: 1 cup (240ml)
- Honey: 2 tablespoons
- Salt: 1.5 teaspoons
- Vegetable oil: 2 tablespoons
- Active dry yeast: 2 teaspoons
- Vital wheat gluten: 1 tablespoon (optional, for extra rise)
Instructions
Measure warm water into the bread pan first, followed by vegetable oil and honey, stirring gently with a spatula so the honey dissolves partially before the dry ingredients go in. Add salt into one corner of the pan, away from where the yeast will later sit. Combine whole wheat flour, bread flour, and vital wheat gluten in a separate bowl, mixing thoroughly so the gluten powder distributes evenly through the flour blend. Pour this dry mixture over the liquid layer in the pan, smoothing it out so it covers the surface completely.
Press a shallow well into the center of the flour and add the active dry yeast there, keeping distance from the salt corner. Secure the pan inside the machine and close the lid. Select the Whole Wheat program specifically, since this setting includes a longer rest period that allows the denser bran particles in whole wheat flour to absorb moisture fully before kneading starts. Choose a medium or dark crust setting, since whole wheat loaves often benefit from slightly longer baking to set the denser crumb properly.
Monitor the dough about ten minutes into the first knead cycle. Whole wheat dough tends to look shaggier than white bread dough, so avoid adding too much extra flour, since this can result in a dry, crumbly finished loaf. A slightly sticky, cohesive ball is normal and expected at this stage. Close the lid and allow the rise cycles to continue undisturbed, since whole wheat dough generally needs more time to develop volume compared with refined flour.
Once baking finishes and the machine beeps, remove the pan using oven mitts and tip the loaf onto a cooling rack immediately. Take out the kneading paddle carefully from the bottom of the warm loaf, using a plastic hook or the back of a wooden spoon. Let the bread rest for close to forty-five minutes before cutting, since whole wheat loaves hold more moisture internally and need extra cooling time for the crumb structure to set fully. Store the finished loaf wrapped in a clean kitchen towel or a paper bag to preserve the slightly crisp crust texture.
Tips: Adding vital wheat gluten strengthens the rise significantly, since whole wheat flour alone lacks enough gluten-forming protein. Swap honey for molasses for a deeper, richer flavor profile. Slice with a serrated knife for cleaner cuts through the denser crumb.
3. Soft Milk Bread
Prep Time: 15 minutes | Cook Time: 3 hours 40 minutes | Serve: 10 slices
Soft Milk Bread stands apart with its pillowy texture and slightly sweet flavor, achieved through a warm milk and butter combination that keeps the crumb tender for days. This Japanese-style loaf pairs beautifully with breakfast spreads or simple sandwiches. The enriched dough produces a golden crust with a cloud-like interior that many households request on repeat once they try the recipe for the first time.
Ingredients
- Bread flour: 3 cups (360g)
- Whole milk, warm: 1 cup (240ml)
- Sugar: 3 tablespoons
- Salt: 1 teaspoon
- Butter, softened: 3 tablespoons
- Egg, room temperature: 1 large
- Active dry yeast: 2 teaspoons
Instructions
Warm the milk gently on the stovetop or in the microwave until it reaches roughly body temperature, avoiding overheating since hot milk can kill the yeast later in the process. Crack the egg into the bread pan first, then pour in the warm milk and whisk lightly with a fork right inside the pan. Add softened butter in small chunks scattered around the pan, followed by sugar and salt placed in separate corners away from each other.
Layer bread flour over the wet ingredients, spreading it evenly so the liquid stays fully covered underneath. Press a small indentation into the center of the flour mound and place the active dry yeast inside, keeping it separated from the salt until the machine starts mixing. Lock the pan into the bread maker and close the lid securely.
Select the Sweet Bread or Milk Bread program when the model includes one, since this setting adjusts kneading time and temperature for enriched, egg-and-butter doughs. When the machine lacks a dedicated setting, the Basic program with a light crust works as a reliable substitute. Press start and let the initial mixing begin, checking the dough texture after the first few minutes of kneading.
Enriched dough for milk bread should feel soft, elastic, and slightly tacky without sticking heavily to fingers. Add a teaspoon of flour at a time when the dough spreads too loosely across the pan bottom. Close the lid promptly after each check to keep the rising environment warm and stable, since enriched dough with egg and butter can be more sensitive to temperature swings than plain white dough.
Allow the full cycle to run through both rise stages and the baking phase without interruption. Once finished, remove the pan carefully with oven mitts, since the enriched crust stays soft and can dent easily under pressure. Turn the loaf out onto a cooling rack and take out the paddle from the base while the bread remains warm enough to release it cleanly. Cool the loaf for at least thirty minutes before slicing to preserve the soft, stretchy crumb structure that makes this bread distinctive.
Tips: Room temperature eggs blend more evenly than cold eggs straight from the refrigerator. Brush the top crust with a small amount of melted butter right after baking for extra shine and softness. Store in an airtight container to keep the crumb tender for up to four days.
4. Honey Oat Bread
Prep Time: 15 minutes | Cook Time: 3 hours 50 minutes | Serve: 12 slices
Honey Oat Bread combines rolled oats and natural honey for a lightly sweet, textured loaf packed with a rustic character. The oats add chewiness while honey balances the flavor without overwhelming sweetness. This recipe suits breakfast toast, hearty sandwiches, or a simple snack paired with a bit of jam, offering a wholesome alternative to standard white bread for regular weekly baking.
Ingredients
- Bread flour: 2.5 cups (300g)
- Rolled oats: 0.5 cup (45g), plus extra for topping
- Warm water: 1 cup (240ml)
- Honey: 3 tablespoons
- Salt: 1.5 teaspoons
- Butter, softened: 2 tablespoons
- Active dry yeast: 2 teaspoons
Instructions
Begin by pouring warm water into the bread pan, followed immediately by honey and softened butter. Stir these liquid ingredients briefly with a spatula so the honey starts dissolving before the dry ingredients are layered on top. Add salt into a corner of the pan away from where yeast will later sit. Combine bread flour and rolled oats in a separate bowl, mixing well so the oats distribute evenly rather than clumping together in one spot.
Spoon the flour and oat mixture over the liquid layer, smoothing the top so no wet spots peek through. Create a shallow well in the center and add active dry yeast, keeping it away from the salt corner until the kneading paddle begins turning. Secure the bread pan into the machine and close the lid tightly.
Select the Basic Bread program, choosing a medium crust setting for a balanced golden color. Some Panasonic models include a raisin or mix-in signal beep partway through the kneading cycle; when the machine has this feature, add a small handful of extra oats for topping texture right when the beep sounds. Otherwise, sprinkle oats over the top of the dough by hand after the final shaping stage, just before the last rise begins, gently pressing them so they stick to the surface.
Check the dough during the first kneading round, since oats absorb liquid gradually and the texture may look slightly wetter at first than a standard white bread dough. Allow a few extra minutes of kneading time for the oats to hydrate fully before deciding whether more flour is needed. A properly mixed dough should feel tacky but hold its shape without spreading flat in the pan.
Let the machine run through both rise cycles and the baking phase undisturbed. When the cycle completes, remove the pan with oven mitts and turn the loaf onto a cooling rack immediately. Extract the kneading paddle from the bottom while the loaf is still warm, using a wooden tool to avoid scratching the pan surface. Rest the bread for thirty to forty minutes before slicing, allowing the oat-enriched crumb to set fully and the crust to firm up for cleaner cuts.
Tips: Toast the oats lightly in a dry pan before adding them for a deeper, nuttier flavor. Substitute maple syrup for honey for a slightly different sweetness profile. Store wrapped in a paper bag to keep the crust from softening too quickly.
5. French Bread
Prep Time: 15 minutes | Cook Time: 4 hours | Serve: 14 slices
French Bread brings a crisp, golden crust and an open, airy crumb reminiscent of a Paris bakery counter. This lean dough recipe uses minimal fat, relying instead on extended fermentation to develop deep flavor. Panasonic Bread Maker Recipes like this one work best with the dedicated French Bread program, which extends rising time for that signature chewy bite and crackly outer shell.
Ingredients
- Bread flour: 3 cups (360g)
- Warm water: 1.25 cups (300ml)
- Sugar: 1 tablespoon
- Salt: 1.5 teaspoons
- Active dry yeast: 2 teaspoons
Instructions
Pour warm water into the bread pan as the first step, since this lean dough recipe skips butter and oil entirely for an authentic crusty texture. Add sugar into the water, stirring briefly to help it dissolve before layering in the remaining ingredients. Sprinkle salt into a corner of the pan, positioned away from where the yeast will sit once the flour goes in.
Add bread flour over the water mixture, spreading it evenly across the surface so no liquid remains visible underneath. Press a small well into the center of the flour mound and place active dry yeast there, keeping distance from the salt corner. Lock the pan into the machine and close the lid firmly before selecting the program.
Choose the French Bread setting specifically on the control panel, since this program runs a noticeably longer cycle than the Basic setting, often extending total time to around four hours. The extended rise allows the lean dough to develop more complex flavor and a chewier texture without any added fat softening the crumb. Select a medium to dark crust setting, since French bread traditionally features a deeper golden, crackly exterior.
Check the dough consistency partway through the first knead, since lean dough without butter can feel stiffer initially compared with enriched recipes. A firm, smooth ball that holds together without tearing indicates proper hydration. Add water a teaspoon at a time only when the dough looks dry and refuses to come together into a cohesive mass, since this lean recipe should stay on the firmer side compared with milk or butter-enriched loaves.
Allow the machine to run through its extended rise and baking cycles without opening the lid, since the longer fermentation period is sensitive to temperature loss. Once baking finishes, remove the pan carefully using oven mitts and tip the loaf onto a wire rack right away, since a crusty loaf left in a warm pan can turn soft and lose its signature crackle. Take out the kneading paddle from the base while the bread is still warm enough to release cleanly. Let the loaf cool for close to an hour before slicing, since the crust continues to set and crisp up as it cools, and cutting too soon can flatten the airy crumb structure inside.
Tips: Score the top of the dough with a sharp blade before the final rise for a more traditional bakery appearance. Spritz the inside of the machine lightly with water partway through baking for extra crust crispness, when the model allows lid access safely. Store uncovered on a cutting board for a day to keep the crust crisp, then move to a paper bag afterward.
6. Multigrain Bread
Prep Time: 15 minutes | Cook Time: 4 hours | Serve: 12 slices
Multigrain Bread packs a mix of grains and seeds into every slice, offering a hearty bite along with a naturally sweet, earthy flavor. A blend of oats, flaxseed, and sunflower seeds adds crunch and nutrition without weighing the loaf down. Panasonic Bread Maker Recipes featuring several grains benefit from a longer rise, giving the seeds time to soften and blend smoothly into the finished crumb.
Ingredients
- Bread flour: 2.5 cups (300g)
- Multigrain cereal mix or rolled oats: 0.5 cup (45g)
- Warm water: 1.25 cups (300ml)
- Honey: 2 tablespoons
- Salt: 1.5 teaspoons
- Butter, softened: 2 tablespoons
- Flaxseed, ground: 2 tablespoons
- Sunflower seeds: 2 tablespoons
- Active dry yeast: 2 teaspoons
Instructions
Pour warm water into the bread pan, then add honey and softened butter, stirring gently so the honey begins dissolving into the liquid before the dry ingredients go in. Sprinkle salt into a corner of the pan away from where the yeast will eventually sit. In a separate bowl, combine bread flour, multigrain cereal or oats, ground flaxseed, and sunflower seeds, mixing thoroughly so the seeds distribute evenly rather than settling in one section.
Layer this dry mixture over the liquid ingredients in the pan, spreading it so the surface looks fully covered with no wet patches showing. Press a small well into the center of the flour blend and place active dry yeast inside, keeping distance from the salt corner. Lock the pan into the machine and close the lid securely before choosing a program.
Select the Whole Wheat or Multigrain program when the model offers one, since these settings extend the rest and knead time to allow seeds and grains to absorb moisture fully. When no dedicated setting exists, the Basic program works as a substitute, though the finished texture may turn out slightly denser. Choose a medium crust setting for balanced color without over-darkening the seed-flecked surface.
Check the dough about ten minutes into the first knead cycle. Seeds and grains can make the dough look coarser than a plain white loaf, and this rough texture is expected rather than a sign of trouble. Avoid adding excessive flour at this stage, since the seeds will continue absorbing moisture as kneading progresses. A cohesive, slightly tacky dough ball that holds together indicates good hydration.
Let the machine complete both rise cycles and the baking stage without interruption, since grain-heavy dough benefits from steady, undisturbed fermentation. Once the cycle finishes and the machine signals completion, remove the pan using oven mitts and turn the loaf onto a cooling rack right away. Take the kneading paddle out from the base while the loaf remains warm enough to release cleanly, using a plastic or wooden tool to protect the nonstick coating. Cool the bread for close to forty-five minutes before slicing, since the seeds and grains need extra time to set fully within the crumb for clean, even cuts.
Tips: Toast the sunflower seeds briefly before adding them for a richer, nuttier flavor throughout the loaf. Swap flaxseed for chia seeds when a different texture is preferred. Store in a bread bag at room temperature for up to four days for the best texture.
7. Garlic Herb Bread
Prep Time: 15 minutes | Cook Time: 3 hours 40 minutes | Serve: 12 slices
Garlic Herb Bread fills the kitchen with a savory aroma thanks to roasted garlic and a blend of dried herbs folded directly into the dough. This loaf pairs naturally with pasta dinners, soups, or a simple dip of olive oil. The combination of garlic and herbs turns a basic bread machine recipe into a flavorful side dish worthy of a dinner table centerpiece.
Ingredients
- Bread flour: 3 cups (360g)
- Warm water: 1 cup (240ml)
- Olive oil: 2 tablespoons
- Sugar: 1 tablespoon
- Salt: 1.5 teaspoons
- Garlic, minced or roasted: 3 cloves
- Dried Italian herb blend: 1.5 teaspoons
- Active dry yeast: 2 teaspoons
Instructions
Pour warm water into the bread pan first, followed by olive oil and sugar, stirring lightly with a spatula to combine before adding the remaining ingredients. Add minced or roasted garlic directly into the liquid, distributing the pieces evenly across the bottom of the pan. Sprinkle salt into a corner away from the eventual yeast placement, and scatter the dried herb blend over the liquid mixture as well.
Add bread flour on top, covering the wet ingredients completely so the surface looks dry and even. Press a shallow well into the center of the flour and place active dry yeast there, separated from the salt corner. Secure the pan into the bread maker and close the lid tightly before selecting a program setting.
Choose the Basic Bread program with a medium crust setting, since this recipe does not require an extended cycle despite the added garlic and herbs. Press start and allow the initial mixing phase to begin, watching for even distribution of the garlic pieces throughout the dough during the first few minutes of kneading.
Check the dough texture partway through the first knead cycle. Garlic releases some moisture as it breaks down during mixing, so the dough may look slightly wetter than a plain loaf at this stage. Avoid adding extra flour immediately, since the texture typically balances out as kneading continues and the garlic pieces integrate fully. A smooth, elastic dough ball that pulls cleanly from the pan sides signals proper hydration.
Allow the machine to run through both rise cycles and the baking phase undisturbed, since opening the lid during fermentation can release the aromatic steam building inside and slow the rise. Once the cycle completes, remove the pan carefully with oven mitts, since the garlic and herb aroma will be noticeably strong at this point. Turn the loaf onto a cooling rack immediately and take out the kneading paddle from the base while the bread remains warm. Rest the loaf for thirty minutes before slicing to let the interior crumb set fully and the herb flavor settle evenly throughout each slice.
Tips: Roasting the garlic beforehand mellows its sharpness and adds a deeper, sweeter flavor compared with raw minced garlic. Add a tablespoon of grated parmesan for extra savory depth. Brush the finished crust with garlic-infused olive oil right after baking for additional flavor.
8. Cheese Bread
Prep Time: 15 minutes | Cook Time: 3 hours 40 minutes | Serve: 12 slices
Cheese Bread folds sharp cheddar directly into the dough, creating pockets of melted cheese throughout every slice. The savory, slightly salty flavor makes this loaf a natural pairing for soups, chili, or a simple breakfast with eggs. Panasonic Bread Maker Recipes with cheese mixed into the dough produce a soft crumb with a subtly crisp, golden crust from the cheese along the edges.
Ingredients
- Bread flour: 3 cups (360g)
- Warm water: 1 cup (240ml)
- Sugar: 1 tablespoon
- Salt: 1 teaspoon
- Butter, softened: 2 tablespoons
- Sharp cheddar cheese, shredded: 1 cup (100g)
- Active dry yeast: 2 teaspoons
Instructions
Pour warm water into the bread pan, then add softened butter and sugar, stirring gently to combine before layering the remaining ingredients on top. Add salt into a corner of the pan away from where yeast will sit later in the process. Add bread flour over the liquid mixture, spreading it evenly so the surface looks fully covered.
Create a small well in the center of the flour and place active dry yeast inside, keeping it away from the salt. Secure the pan into the machine and close the lid. Select the Basic Bread program with a medium crust setting, and press start to begin the automatic cycle.
Watch for the raisin or mix-in signal beep partway through the first knead cycle, a feature many Panasonic models include specifically for adding ingredients like cheese without disrupting the kneading process. When the beep sounds, add the shredded cheddar cheese gradually, allowing the paddle to fold it into the dough evenly. When the machine lacks this feature, add the cheese by hand roughly fifteen minutes into the kneading cycle, folding it in gently with a spatula before closing the lid again.
Check the dough consistency shortly after the cheese incorporates fully. Cheese adds some moisture and fat to the dough, so the texture may feel slightly softer and stickier than a plain loaf. This is normal and should not require additional flour unless the dough looks excessively loose and fails to hold shape at all. A properly mixed cheese dough still forms a cohesive ball with visible cheese flecks distributed throughout.
Allow the machine to complete both rise cycles and the baking stage without interruption. The added cheese can create a slightly uneven top crust as it melts and browns during baking, which is expected and adds visual character to the finished loaf. Once baking finishes, remove the pan with oven mitts and turn the loaf onto a cooling rack promptly, since cheese along the crust edges stays hot and can stick to the pan when left too long. Take out the kneading paddle from the base while the bread is still warm. Cool the loaf for thirty to forty minutes before slicing, allowing the melted cheese pockets to firm up slightly for cleaner cuts.
Tips: Shred the cheese fresh rather than using pre-shredded bags, since anti-caking agents in packaged cheese can affect how well it melts into the dough. Add a pinch of smoked paprika for a subtle smoky note. Store in the refrigerator rather than at room temperature, since cheese bread spoils faster than plain loaves.
9. Cinnamon Raisin Bread
Prep Time: 15 minutes | Cook Time: 3 hours 50 minutes | Serve: 12 slices
Cinnamon Raisin Bread swirls warm spice and plump raisins through a lightly sweetened dough, producing a loaf perfect for breakfast toast or a mid-afternoon snack. The cinnamon sugar layer creates a marbled pattern inside each slice, while the raisins add bursts of natural sweetness. This recipe brings a bakery-style treat into a regular home baking rotation with minimal extra effort.
Ingredients
- Bread flour: 3 cups (360g)
- Warm milk: 1 cup (240ml)
- Sugar: 3 tablespoons
- Salt: 1 teaspoon
- Butter, softened: 2 tablespoons
- Egg: 1 large
- Raisins: 0.75 cup (110g)
- Cinnamon: 1.5 tablespoons
- Active dry yeast: 2 teaspoons
Instructions
Crack the egg into the bread pan first, then pour in warm milk and whisk lightly together with a fork. Add softened butter in small pieces scattered around the pan, followed by sugar and salt placed in separate corners so they remain apart until mixing begins. Add bread flour over the liquid ingredients, spreading it out so the surface looks evenly covered with no wet spots remaining.
Press a small well into the center of the flour mound and place active dry yeast there, keeping distance from the salt corner. Secure the pan into the bread maker and close the lid. Select the Sweet Bread or Raisin Bread program when the model includes one, since this setting is designed specifically for enriched dough with mix-ins. Choose a light to medium crust setting to prevent the sugar content from over-browning the crust.
Combine cinnamon with a tablespoon of sugar in a small bowl, setting this mixture aside for later use during the mix-in stage. Watch for the machine’s signal beep, which typically sounds partway through the first knead cycle to indicate the right moment for adding raisins and other mix-ins. When the beep sounds, add the raisins gradually, letting the paddle fold them into the dough. Sprinkle the cinnamon sugar mixture in at the same time, allowing it to swirl naturally through the dough rather than clumping in one area.
When the machine lacks a signal beep, add the raisins and cinnamon sugar by hand roughly fifteen minutes into the first knead, folding them in gently with a spatula before closing the lid again to preserve rising temperature. Check the dough shortly afterward to confirm the raisins have distributed evenly rather than settling in one section of the pan.
Allow the machine to run through both rise cycles and the baking phase without interruption. The sugar content in this dough can cause faster surface browning, so a lighter crust setting helps avoid a burnt-tasting exterior. Once baking finishes, remove the pan with oven mitts and turn the loaf onto a cooling rack immediately. Take out the kneading paddle from the base while the bread remains warm, then cool the loaf for at least thirty minutes before slicing to let the cinnamon swirl pattern set clearly inside each piece.
Tips: Soak raisins in warm water for ten minutes beforehand to prevent them from drying out during baking. Add a teaspoon of vanilla extract for extra depth of flavor. Toast slices lightly before serving to bring out the cinnamon aroma fully.
10. Banana Bread
Prep Time: 15 minutes | Cook Time: 2 hours 30 minutes | Serve: 10 slices
Banana Bread uses ripe, spotted bananas to create a moist, naturally sweet quick bread with a tender crumb. Unlike yeast-based loaves, this recipe relies on baking soda for lift, making it a faster option when time runs short. Panasonic Bread Maker Recipes for quick breads like this one use the dedicated Cake or Quick Bread program instead of the standard yeast cycle.
Ingredients
- All-purpose flour: 1.5 cups (180g)
- Ripe bananas, mashed: 3 medium
- Sugar: 0.5 cup (100g)
- Butter, melted: 0.33 cup (75g)
- Eggs: 2 large
- Baking soda: 1 teaspoon
- Salt: 0.5 teaspoon
- Vanilla extract: 1 teaspoon
- Cinnamon: 0.5 teaspoon (optional)
Instructions
Mash the ripe bananas in a separate bowl until mostly smooth, leaving a few small chunks for texture when a slightly rustic result is preferred. Whisk melted butter into the mashed bananas until fully combined, then add sugar, eggs, and vanilla extract, whisking until the mixture looks smooth and pale in color. Pour this wet mixture directly into the bread pan as the base layer.
In a separate bowl, combine all-purpose flour, baking soda, salt, and cinnamon, stirring the dry ingredients together thoroughly so the baking soda distributes evenly and avoids clumping into one spot within the batter. Add this dry mixture over the wet banana mixture already sitting in the bread pan, spreading it out evenly across the surface.
Secure the pan into the Panasonic machine and close the lid. Select the Cake or Quick Bread program specifically, since this setting skips the yeast-based rise cycles entirely and moves straight into a brief mixing phase followed by baking. Quick bread batters should only be mixed enough to combine ingredients, so this program typically runs a much shorter total cycle compared with standard bread settings.
Once the machine begins the brief mixing stage, check the batter after a minute or two to confirm the dry and wet ingredients have combined fully without overmixing, since excessive mixing can develop too much gluten in a quick bread and result in a dense, tough texture rather than the desired tender crumb. Use a spatula to scrape down the sides of the pan quickly when flour appears stuck to the edges, then close the lid promptly to continue the cycle.
Allow the baking phase to run its full course without interruption, since opening the lid during this quick bread cycle can cause uneven baking or sinking in the center. Test doneness near the end of the cycle by inserting a toothpick into the center through the lid vent, when the machine design allows this access safely; a clean or lightly crumbed toothpick indicates the bread has finished baking. Once complete, remove the pan carefully with oven mitts, since quick bread pans can retain heat differently than yeast bread pans. Turn the loaf out onto a cooling rack and allow it to cool for at least twenty minutes before slicing, since banana bread continues to set as it cools and slices cleaner once fully cooled.
Tips: Use bananas with heavy brown spotting for the sweetest, most flavorful result. Add chopped walnuts or chocolate chips during the brief mixing stage for extra texture. Store wrapped tightly at room temperature for up to three days, or refrigerate for longer freshness.
11. Brioche Bread
Prep Time: 15 minutes | Cook Time: 3 hours 50 minutes | Serve: 12 slices
Brioche Bread delivers a rich, buttery crumb with a golden, tender crust, thanks to a generous amount of eggs and butter folded into the dough. This French-style enriched loaf works beautifully for French toast, bread pudding, or simply toasted with a bit of jam. The extra fat content produces a slightly sweet, pillow-soft texture that sets brioche apart from leaner bread recipes.
Ingredients
- Bread flour: 3 cups (360g)
- Warm milk: 0.5 cup (120ml)
- Eggs: 3 large
- Sugar: 3 tablespoons
- Salt: 1 teaspoon
- Butter, softened: 6 tablespoons
- Active dry yeast: 2 teaspoons
Instructions
Crack the eggs into the bread pan first, then add warm milk and whisk lightly together inside the pan with a fork. Cut softened butter into small pieces and scatter them around the pan, since brioche dough requires a much higher fat ratio than standard bread recipes. Add sugar and salt into separate corners of the pan, keeping them apart from each other.
Layer bread flour over the wet ingredients, spreading it out so the surface looks fully covered with no liquid showing through. Press a small well into the center of the flour and add active dry yeast there, keeping it separated from the salt corner. Secure the pan into the machine and close the lid.
Select the Sweet Bread or Brioche program when the model offers one, since this setting adjusts kneading duration for high-fat, enriched dough that needs extra time to develop proper gluten structure around all the added butter. When no dedicated program exists, use the Basic setting with a light crust, since the high sugar and butter content browns quickly and can burn under a darker crust setting.
Check the dough about fifteen minutes into the first knead cycle. Brioche dough starts out looking quite loose and almost batter-like because of the high butter content, and this is completely normal rather than a sign of a measuring error. Continue letting the machine knead without adding extra flour too early, since the dough gradually tightens up and becomes smoother as the butter incorporates fully into the gluten network over time.
Once the dough reaches a smooth, glossy, elastic texture that pulls cleanly from the pan sides, allow the machine to continue through its rise cycles undisturbed. Brioche dough often rises more slowly than lean dough because of the heavy fat content weighing down the gluten strands, so patience during this stage matters for a properly risen loaf. Let the baking phase run its full course without opening the lid, since the enriched crust is prone to sinking with sudden temperature changes.
Once finished, remove the pan carefully using oven mitts, since the soft, buttery crust dents easily under pressure. Turn the loaf onto a cooling rack and take out the kneading paddle from the base while it remains warm enough to release without tearing the soft crumb underneath. Cool the bread for at least forty-five minutes before slicing, since brioche continues to firm up slightly as it cools and slices far more cleanly once fully cooled.
Tips: Use room temperature eggs and butter for smoother incorporation into the dough. Brush the top with an egg wash before the final rise for extra shine, when the machine design allows lid access safely. Store in an airtight container, since the high butter content keeps brioche fresh for up to five days.
12. Olive Bread
Prep Time: 15 minutes | Cook Time: 3 hours 45 minutes | Serve: 12 slices
Olive Bread brings briny, savory pockets of Mediterranean flavor into a rustic loaf perfect alongside cheese boards, soups, or a simple olive oil dip. Kalamata or green olives fold directly into the dough, releasing their salty brine slightly during baking for a naturally seasoned crumb. This loaf offers a satisfying alternative to plain white bread for dinner gatherings or casual snacking.
Ingredients
- Bread flour: 3 cups (360g)
- Warm water: 1 cup (240ml)
- Olive oil: 2 tablespoons
- Sugar: 1 tablespoon
- Salt: 1 teaspoon
- Kalamata or green olives, pitted and chopped: 0.75 cup (100g)
- Dried rosemary: 1 teaspoon
- Active dry yeast: 2 teaspoons
Instructions
Pour warm water into the bread pan, then add olive oil and sugar, stirring briefly with a spatula before layering the remaining ingredients on top. Add salt into a corner of the pan, keeping it apart from where the yeast will eventually sit. Scatter dried rosemary over the liquid mixture for even distribution throughout the dough later on.
Add bread flour over the wet ingredients, spreading it out so the surface looks fully covered. Press a shallow well into the center of the flour mound and place active dry yeast there, separated from the salt corner. Secure the pan into the bread maker and close the lid, then select the Basic Bread program with a medium crust setting.
Drain the chopped olives thoroughly on a paper towel before adding them, since excess brine can throw off the dough hydration and produce an overly wet, sticky texture. Watch for the machine’s signal beep during the first knead cycle, which many Panasonic models use to indicate the right moment for adding mix-ins like olives. When the beep sounds, add the drained olives gradually so the paddle folds them evenly through the dough.
When the machine lacks a signal beep, add the olives by hand roughly fifteen minutes into the kneading process, folding them in gently with a spatula and closing the lid quickly afterward to preserve the rising temperature. Check the dough shortly after incorporation to confirm the olives have spread evenly rather than clumping together in one section of the pan.
Allow the machine to run through both rise cycles and the baking stage without interruption. The olive brine and oil content can make the crust develop a slightly different color pattern compared with plain bread, showing darker spots where olive pieces sit close to the surface, which is a normal visual trait rather than a baking issue. Once the cycle completes, remove the pan with oven mitts and turn the loaf onto a cooling rack immediately. Take out the kneading paddle from the base while the bread remains warm, then cool the loaf for thirty to forty minutes before slicing to let the olive pieces settle fully within the crumb structure.
Tips: Pat the olives completely dry before adding them to avoid excess moisture in the finished dough. Substitute sun-dried tomatoes for a portion of the olives for added variety. Serve slightly warm with a drizzle of good olive oil for the best flavor.
13. Potato Bread
Prep Time: 20 minutes | Cook Time: 3 hours 45 minutes | Serve: 12 slices
Potato Bread uses mashed potato to create an exceptionally soft, moist crumb that stays fresh longer than standard white bread. The starch from the potato adds subtle sweetness while keeping the texture light and fluffy. This loaf works well for sandwiches, dinner rolls sliced from the loaf, or simply toasted with butter for a comforting breakfast option.
Ingredients
- Bread flour: 3 cups (360g)
- Mashed potato, plain and unseasoned: 0.75 cup (180g)
- Warm water: 0.75 cup (180ml)
- Sugar: 2 tablespoons
- Salt: 1.5 teaspoons
- Butter, softened: 2 tablespoons
- Active dry yeast: 2 teaspoons
Instructions
Boil and mash a peeled potato ahead of time, letting it cool to room temperature before adding it to the recipe, since hot potato can affect yeast activity when combined too early. Pour warm water into the bread pan, then add the cooled mashed potato, softened butter, and sugar, stirring these ingredients together gently with a spatula until roughly combined. Add salt into a corner of the pan away from the eventual yeast placement.
Layer bread flour over the wet mixture, spreading it out evenly so the surface looks fully covered with no visible wet patches. Press a small well into the center of the flour and place active dry yeast inside, keeping distance from the salt corner. Secure the pan into the machine and close the lid before selecting a program.
Choose the Basic Bread program with a medium crust setting, since potato bread does not typically require an extended cycle despite the added starch. Press start and monitor the dough during the first knead cycle, since mashed potato adds extra moisture that can make the dough look softer and stickier than a standard white bread recipe at this stage.
Add a small spoonful of flour when the dough spreads too loosely and refuses to form a cohesive ball, since potato content varies slightly depending on how much moisture remained in the mashed potato beforehand. A properly hydrated potato dough should feel soft, smooth, and slightly tacky, pulling cleanly from the pan sides after enough kneading time passes.
Allow the machine to complete both rise cycles and the baking phase without interruption, since the added starch from the potato tends to produce a notably taller rise compared with plain white bread, so the dough needs the full cycle time to develop properly. Once baking finishes, remove the pan carefully with oven mitts and turn the loaf onto a cooling rack right away. Take out the kneading paddle from the base while the loaf remains warm enough to release cleanly. Cool the bread for at least thirty minutes before slicing, since the moist potato crumb needs this rest period to set fully and avoid a gummy texture when cut too early.
Tips: Use plain mashed potato without added milk, butter, or seasoning for the most accurate hydration in the recipe. Leftover mashed potato from a previous meal works perfectly for this recipe when cooled fully first. Store wrapped at room temperature, since potato bread tends to stay soft for up to five days.
14. Pumpkin Bread
Prep Time: 15 minutes | Cook Time: 2 hours 40 minutes | Serve: 10 slices
Pumpkin Bread brings warm autumn spices and a moist, tender crumb using canned pumpkin puree as the star ingredient. This quick bread skips yeast entirely, relying on baking soda and baking powder for a reliable rise every time. The combination of cinnamon, nutmeg, and pumpkin creates a comforting loaf perfect for cooler months or a year-round seasonal favorite.
Ingredients
- All-purpose flour: 1.75 cups (210g)
- Pumpkin puree, canned: 1 cup (240g)
- Sugar: 0.75 cup (150g)
- Vegetable oil: 0.33 cup (75ml)
- Eggs: 2 large
- Baking soda: 1 teaspoon
- Baking powder: 0.5 teaspoon
- Salt: 0.5 teaspoon
- Cinnamon: 1 teaspoon
- Nutmeg: 0.25 teaspoon
- Ground cloves: 0.125 teaspoon
Instructions
Whisk pumpkin puree, sugar, vegetable oil, and eggs together in a bowl until the mixture looks smooth and well combined, then pour this wet mixture directly into the bread pan as the base layer. In a separate bowl, combine all-purpose flour, baking soda, baking powder, salt, cinnamon, nutmeg, and ground cloves, stirring thoroughly so the leavening agents and spices distribute evenly throughout the flour rather than clumping in one section.
Add the dry mixture over the pumpkin base in the bread pan, spreading it out evenly across the surface. Secure the pan into the Panasonic machine and close the lid, then select the Cake or Quick Bread program specifically, since this setting bypasses the standard yeast rise cycles and moves directly into a short mixing phase followed by baking.
Check the batter shortly after mixing begins to confirm the wet and dry ingredients combine fully without overmixing, since excessive mixing in a quick bread recipe develops unwanted gluten and can result in a tough, dense texture rather than the soft, moist crumb this recipe aims for. Scrape down the pan sides quickly with a spatula when dry flour clings to the edges, then close the lid promptly to resume the cycle.
Allow the baking phase to run its full course without interruption, since the batter needs steady heat to rise properly without sinking in the middle. Pumpkin bread batter is notably denser than a typical cake batter, so the baking time runs longer than most other quick breads in this collection. Test doneness near the end of the cycle with a toothpick inserted through the lid vent, when the machine allows safe access; a few moist crumbs clinging to the toothpick indicate a properly baked, moist loaf rather than an underbaked one.
Once the cycle completes, remove the pan carefully with oven mitts and turn the loaf out onto a cooling rack. Allow the bread to cool for at least twenty-five minutes before slicing, since pumpkin bread continues to firm up as it cools and cuts far more cleanly once the residual heat dissipates fully from the dense, moist center.
Tips: Use plain canned pumpkin puree rather than pumpkin pie filling, which already contains added sugar and spices. Fold in a handful of chopped pecans or chocolate chips during the mixing stage for extra texture. Store wrapped in plastic at room temperature for up to four days, or refrigerate for extended freshness.
15. Rye Bread
Prep Time: 15 minutes | Cook Time: 4 hours | Serve: 12 slices
Rye Bread offers a dense, earthy flavor with a slightly tangy edge from a blend of rye and bread flour combined with caraway seeds. This loaf pairs naturally with deli meats, hearty soups, or a simple spread of mustard. Panasonic Bread Maker Recipes featuring rye flour need a longer rise time, since rye has less gluten-forming protein than standard wheat flour.
Ingredients
- Rye flour: 1.5 cups (180g)
- Bread flour: 1.5 cups (180g)
- Warm water: 1.25 cups (300ml)
- Molasses: 2 tablespoons
- Salt: 1.5 teaspoons
- Butter, softened: 2 tablespoons
- Caraway seeds: 1 tablespoon
- Active dry yeast: 2.5 teaspoons
Instructions
Pour warm water into the bread pan, then add molasses and softened butter, stirring gently with a spatula so the molasses begins dissolving into the liquid before the dry ingredients go in. Sprinkle salt into a corner of the pan, positioned away from where the yeast will sit later. Combine rye flour and bread flour in a separate bowl along with caraway seeds, mixing thoroughly so the seeds distribute evenly through the flour blend.
Layer this dry mixture over the liquid ingredients in the pan, spreading it out so the surface looks fully covered with no wet spots remaining visible. Press a small well into the center of the flour mound and add active dry yeast there, using slightly more yeast than a standard white bread recipe since rye flour needs extra lift to compensate for its lower gluten content.
Secure the pan into the machine and close the lid, then select the Whole Wheat or French Bread program, since either setting extends the total rise time to help the denser rye dough develop properly. Choose a medium to dark crust setting, since rye bread traditionally features a deeper, richer crust color.
Check the dough consistency during the first knead cycle. Rye dough often looks stickier and less elastic than pure wheat dough because of the lower gluten content, and this stickier texture is expected rather than a sign of incorrect measurements. Avoid adding too much extra flour, since rye bread naturally produces a denser, tighter crumb compared with an all-wheat loaf, and adding excess flour can make the finished bread overly dry and crumbly.
Allow the machine to run through its extended rise cycles and baking phase without interruption, since rye dough needs the full cycle time to rise adequately despite its naturally denser structure. Once baking finishes, remove the pan carefully with oven mitts and turn the loaf onto a cooling rack right away. Take out the kneading paddle from the base while the bread remains warm enough to release cleanly. Cool the loaf for at least forty-five minutes before slicing, since rye bread benefits from extra cooling time to let the dense crumb set fully for clean, even slices.
Tips: Toast the caraway seeds lightly before adding them for a more pronounced flavor throughout the loaf. Substitute honey for molasses for a milder, less intense sweetness. Slice thinly with a sharp serrated knife, since the dense crumb can compress under a dull blade.
16. Sourdough Bread (Bread Maker Version)
Prep Time: 20 minutes | Cook Time: 4 hours | Serve: 12 slices
Sourdough Bread brings a tangy, complex flavor into a bread machine-friendly format using an active sourdough starter instead of relying purely on commercial yeast. The result carries the signature chew and slight sourness sourdough fans expect, without needing a full day of hand-shaping and stretching. This version simplifies the traditional process while still delivering authentic sourdough character.
Ingredients
- Bread flour: 3 cups (360g)
- Active sourdough starter, fed and bubbly: 1 cup (240g)
- Warm water: 0.5 cup (120ml)
- Salt: 1.5 teaspoons
- Sugar: 1 tablespoon
- Active dry yeast: 1 teaspoon (as a rising boost)
Instructions
Confirm the sourdough starter has been fed within the past eight to twelve hours and looks active, showing visible bubbles and a slightly domed surface, since an unfed or sluggish starter will not provide enough rising power for this recipe. Pour warm water into the bread pan first, then add the active sourdough starter, stirring gently with a spatula to loosen it slightly before layering the remaining ingredients on top.
Add sugar and salt into separate corners of the pan, keeping them apart from each other. Layer bread flour over the wet mixture, spreading it evenly so the surface looks fully covered with no visible wet patches remaining. Press a small well into the center of the flour and add the small amount of active dry yeast there, which helps supplement the starter’s natural rising power for a more reliable result inside a machine cycle.
Secure the pan into the bread maker and close the lid, then select the French Bread or Whole Wheat program, since either setting extends the total cycle time to accommodate the slower fermentation typical of sourdough. A longer rise allows the wild yeast and bacteria in the starter enough time to develop the characteristic tangy flavor before baking begins. Choose a medium to dark crust setting for a traditional sourdough crust appearance.
Check the dough during the first knead cycle. Sourdough-based dough can feel slightly different from commercial yeast dough, often looking a bit looser initially because of the starter’s liquid content. Add a small spoonful of flour only when the dough spreads too thin and refuses to hold together at all, since this recipe naturally produces a somewhat stickier dough compared with standard white bread.
Allow the machine to run through its extended cycle without interruption, since sourdough fermentation benefits from steady, undisturbed conditions to develop full flavor. The rise may look less dramatic than a commercial yeast loaf, which is expected given the milder rising power of natural starter culture. Once baking finishes, remove the pan carefully with oven mitts and turn the loaf onto a cooling rack immediately. Take out the kneading paddle from the base while the bread remains warm. Cool the loaf for a full hour before slicing, since sourdough needs extra time for the tangy, chewy crumb to set properly and avoid a gummy texture when cut too soon.
Tips: Feed the starter with equal parts flour and water twelve hours before baking for the most active rise. A longer, cooler fermentation produces a more pronounced tangy flavor when time allows for it. Store at room temperature wrapped in a cloth for the most authentic crust texture.
17. Chocolate Chip Bread
Prep Time: 15 minutes | Cook Time: 3 hours 45 minutes | Serve: 12 slices
Chocolate Chip Bread combines a lightly sweetened, soft dough with melty pockets of chocolate scattered through every slice. This loaf works as a breakfast treat, an afternoon snack, or a simple dessert bread served slightly warm. Panasonic Bread Maker Recipes with chocolate mix-ins rely on the signal beep feature to fold the chips in at just the right moment for even distribution.
Ingredients
- Bread flour: 3 cups (360g)
- Warm milk: 1 cup (240ml)
- Sugar: 3 tablespoons
- Salt: 1 teaspoon
- Butter, softened: 2 tablespoons
- Egg: 1 large
- Semi-sweet chocolate chips: 0.75 cup (130g)
- Active dry yeast: 2 teaspoons
Instructions
Crack the egg into the bread pan first, then pour in warm milk and whisk lightly together with a fork right inside the pan. Add softened butter in small pieces scattered around the pan, followed by sugar and salt placed into separate corners so they stay apart until mixing begins. Layer bread flour over the wet ingredients, spreading it out so the surface looks fully covered with no liquid showing through.
Press a small well into the center of the flour mound and place active dry yeast there, keeping it separated from the salt. Secure the pan into the machine and close the lid, then select the Sweet Bread program when the model includes one, since this setting suits enriched dough with mix-ins well. Choose a light to medium crust setting to prevent the sugar content from over-darkening the crust during baking.
Watch closely for the machine’s signal beep partway through the first knead cycle, which indicates the proper moment for adding chocolate chips without breaking them down completely during mixing. When the beep sounds, add the chocolate chips gradually, allowing the paddle to fold them into the dough gently rather than dumping them in all at once, which can cause clumping in one section of the loaf.
When the machine lacks a signal beep feature, add the chocolate chips by hand roughly fifteen minutes into the first knead cycle, folding them in quickly with a spatula and closing the lid right away to preserve rising temperature. Check the dough shortly after incorporation to confirm the chips have spread evenly throughout rather than sinking toward the bottom of the pan, which can happen when the dough is slightly too wet at the mixing stage.
Allow the machine to complete both rise cycles and the baking phase without further interruption. The melting chocolate can create small dark streaks along the crust as it bakes, which adds visual appeal rather than indicating any problem with the loaf. Once finished, remove the pan carefully with oven mitts and turn the loaf onto a cooling rack promptly, since melted chocolate near the crust stays hot longer than the surrounding bread. Take out the kneading paddle from the base while warm, then cool the loaf for at least thirty-five minutes before slicing, allowing the chocolate pockets to firm back up for cleaner cuts.
Tips: Freeze the chocolate chips briefly before adding them to help them hold their shape better during the kneading process. Substitute mini chips for a more even distribution throughout the crumb. Serve slightly warmed for the best gooey chocolate texture.
18. Gluten-Free Bread
Prep Time: 15 minutes | Cook Time: 3 hours | Serve: 10 slices
Gluten-Free Bread uses a blend of rice flour, tapioca starch, and xanthan gum to mimic the structure that gluten normally provides, resulting in a soft, sliceable loaf suitable for gluten-sensitive households. This recipe requires a dedicated gluten-free program on machines that include one, since the mixing and rising needs differ significantly from wheat-based dough.
Ingredients
- Gluten-free flour blend (rice flour, tapioca starch, potato starch): 3 cups (360g)
- Xanthan gum: 1.5 teaspoons
- Warm water: 1.25 cups (300ml)
- Sugar: 2 tablespoons
- Salt: 1.5 teaspoons
- Vegetable oil: 3 tablespoons
- Eggs: 2 large
- Active dry yeast: 2.5 teaspoons
Instructions
Whisk eggs, warm water, and vegetable oil together in a separate bowl until fully combined, then pour this liquid mixture into the bread pan as the base layer. Add sugar and salt into separate corners of the pan, keeping them apart from each other for now. In a separate bowl, combine the gluten-free flour blend with xanthan gum, whisking thoroughly so the gum distributes evenly, since clumped xanthan gum can create odd, gummy pockets throughout the finished loaf.
Layer this dry mixture over the liquid ingredients in the pan, spreading it evenly across the surface. Press a small well into the center and add active dry yeast there, using a slightly higher amount than standard wheat bread recipes, since gluten-free dough benefits from extra rising power to compensate for the missing gluten structure.
Secure the pan into the machine and close the lid, then select the Gluten-Free program specifically when the model offers one, since this setting uses a single knead and rise cycle rather than the multiple cycles standard bread uses, matching the different needs of gluten-free batter. When no dedicated program exists, the Quick Bread or Cake setting works as a reasonable substitute, though results may vary slightly between machine models.
Gluten-free dough behaves more like a thick batter than traditional bread dough, so avoid expecting the same smooth, elastic ball that wheat dough forms. The mixture should look thick, spreadable, and slightly sticky rather than a firm dough ball, and this batter-like consistency is completely normal and expected for this style of bread. Resist the urge to add extra flour to try achieving a wheat-like texture, since doing so throws off the carefully balanced starch ratio needed for proper structure.
Allow the machine to complete its single rise and baking cycle without interruption, since gluten-free bread typically only gets one rise opportunity before baking locks in the final structure. Once the cycle finishes, remove the pan carefully with oven mitts and turn the loaf onto a cooling rack immediately. Take out the kneading paddle gently, since gluten-free bread can stick to the paddle more than wheat bread does. Cool the loaf completely, for close to a full hour, before slicing, since cutting gluten-free bread while still warm often results in a gummy, dense texture that firms up properly only after full cooling.
Tips: Measure the flour blend by weight rather than volume for the most consistent results across baking sessions. Store slices in the freezer and toast directly from frozen for the best texture, since gluten-free bread dries out faster at room temperature. Avoid substituting a different gluten-free flour blend without adjusting the liquid ratio, since blends vary significantly in absorption.
19. Vegan Sandwich Bread
Prep Time: 15 minutes | Cook Time: 3 hours 40 minutes | Serve: 12 slices
Vegan Sandwich Bread swaps dairy and eggs for plant-based alternatives while still delivering a soft, sliceable loaf perfect for everyday sandwiches. Almond milk and a touch of maple syrup keep the crumb tender without any animal products. This recipe proves a fully plant-based loaf can match the texture and taste of traditional sandwich bread without much extra effort.
Ingredients
- Bread flour: 3 cups (360g)
- Unsweetened almond milk, warm: 1 cup (240ml)
- Maple syrup: 2 tablespoons
- Salt: 1.5 teaspoons
- Vegetable oil: 2 tablespoons
- Active dry yeast: 2 teaspoons
Instructions
Pour warm almond milk into the bread pan first, then add maple syrup and vegetable oil, stirring gently with a spatula to combine before layering in the remaining ingredients. Add salt into a corner of the pan, positioned away from where the yeast will sit once the flour goes in. Layer bread flour over the liquid mixture, spreading it evenly so the surface looks fully covered with no wet spots visible.
Press a small well into the center of the flour mound and add active dry yeast there, keeping distance from the salt corner. Secure the pan into the machine and close the lid, then select the Basic Bread program with a medium crust setting, since this plant-based dough behaves similarly to standard bread dough despite the ingredient swaps.
Check the dough consistency during the first knead cycle. Almond milk has a thinner consistency than dairy milk, so the dough may need a touch more flour compared with a dairy-based recipe to reach the right texture. Add a small spoonful of flour at a time when the dough looks too loose and fails to pull cleanly from the pan sides, watching closely so the dough does not become overly stiff from too much added flour.
A properly hydrated vegan dough should feel smooth, elastic, and slightly tacky to the touch, much like a standard enriched dough despite lacking eggs and dairy. Close the lid promptly after any adjustment to preserve the internal rising temperature, since plant-based dough can be slightly more sensitive to temperature swings without the stabilizing fat found in butter or eggs.
Allow the machine to run through both rise cycles and the baking phase without interruption. Vegetable oil provides enough fat to keep the crumb soft without any dairy, so the finished texture should closely resemble a traditional milk bread despite the fully plant-based ingredient list. Once baking finishes, remove the pan carefully with oven mitts and turn the loaf onto a cooling rack right away. Take out the kneading paddle from the base while the bread remains warm enough to release cleanly. Cool the loaf for at least thirty minutes before slicing, allowing the soft crumb to set fully for clean, even sandwich slices.
Tips: Swap almond milk for oat milk or soy milk depending on personal preference or availability. Use a neutral oil like canola or sunflower for the mildest flavor impact. Store in a sealed bag at room temperature for up to four days for the best sandwich texture.
How to Store Homemade Bread
1. Keeping Bread Fresh at Room Temperature — Store cooled loaves in a paper bag or bread box for one to three days, since paper allows some airflow while still protecting the crust from drying out completely. Avoid plastic bags for crusty loaves, since trapped moisture softens the crust quickly.
2. Refrigerating Bread — Refrigeration extends freshness for enriched or high-moisture loaves like milk bread or potato bread, typically up to a week when sealed in an airtight container or bag. Note that refrigeration can speed up staling in lean, crusty loaves such as French bread, so this method works best for softer, fattier recipes.
3. Freezing Bread for Long-Term Storage — Slice the loaf fully before freezing so individual pieces can be pulled out as needed without thawing the whole loaf. Wrap tightly in plastic and place inside a freezer bag, pressing out excess air to prevent freezer burn. Frozen bread keeps well for up to three months and toasts nicely straight from frozen.
Conclusion
A Panasonic bread maker turns homemade baking into a manageable, rewarding part of a weekly routine rather than a time-consuming chore. Consistent results, automatic programs, and settings suited for both new and experienced bakers make these machines a genuinely practical kitchen tool. Energy savings and lower ingredient costs add up nicely too, especially for households baking on a regular basis.
Experimenting with different flavors and ingredients keeps the process enjoyable, so trying a new mix-in or swapping flours from time to time can lead to a favorite recipe nobody expected. The nineteen recipes covered here span everyday sandwich loaves, healthier whole grain options, sweet breakfast breads, and specialty recipes like gluten-free and vegan versions, giving every household plenty of variety to work through.
Save this guide and come back to it anytime a craving for fresh, warm bread strikes. With measurements, programs, and detailed steps already laid out, each recipe stays ready to bake whenever the mood calls for it.