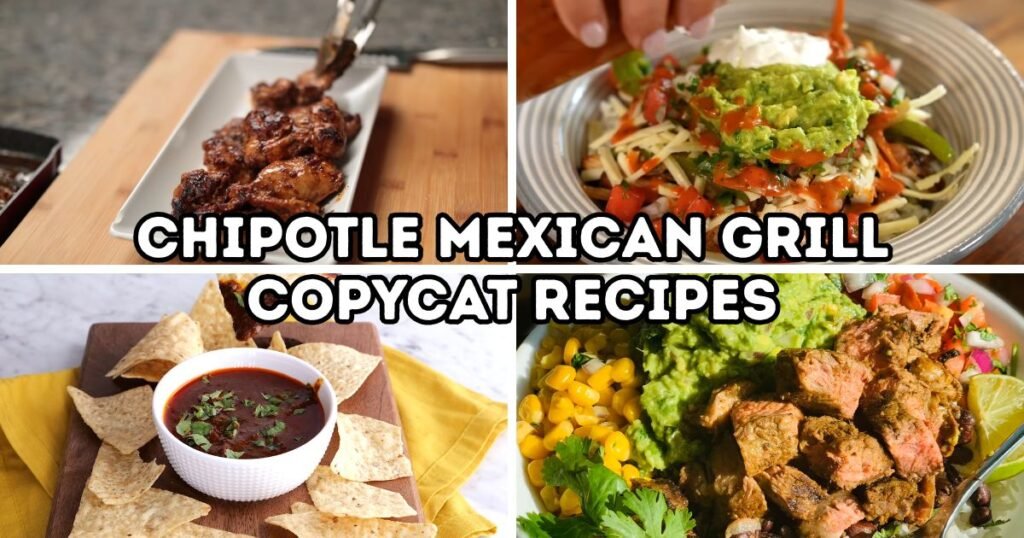
Chipotle Mexican Grill has turned into one of the most loved fast-casual restaurants in America, and the reason is simple: fresh ingredients, bold flavors, and a menu that lets every guest build a meal their own way.
From smoky chicken to zesty rice and creamy guacamole, each item on the line tastes like it took hours of work, yet the recipes behind them are surprisingly simple once broken down step by step.
Making Chipotle Mexican Grill copycat recipes at home brings all of that flavor into a regular kitchen without the wait in line or the rising menu prices.
A home cook gets to control portion sizes, spice levels, and ingredient quality, which turns every dish into something healthier and more personal. These recipes also save real money over time, since one batch of homemade barbacoa or guacamole often costs less than a single restaurant order.
Best of all, extra portions freeze well and mix into new meals during busy weeknights. This guide breaks every popular Chipotle item into clear, kitchen-tested steps that fit into any home cook’s routine, so building a full burrito bowl at home becomes an easy, repeatable habit.
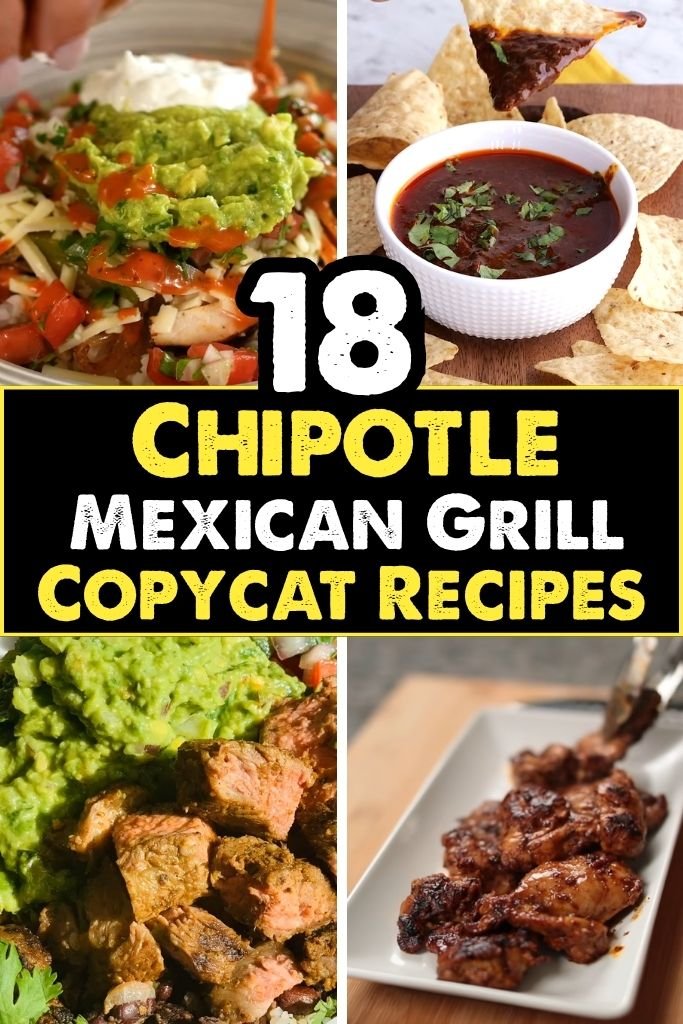
Why You’ll Love These Chipotle Mexican Grill Copycat Recipes
1. Restaurant-quality flavor at home – These recipes rebuild the same smoky, tangy, and savory notes found in the real menu items, using spice blends and cooking methods that match the originals closely.
2. Budget-friendly alternatives – A single grocery trip stretches into several meals, which costs far less than ordering the same items at the counter multiple times a week.
3. Easy ingredients from local grocery stores – Every recipe here uses items found in a standard supermarket, with no special ordering or hard-to-find spices required.
4. Healthier and customizable options – Salt, oil, and portion sizes are all adjustable, so each dish fits personal nutrition goals without losing its flavor.
5. Great for meal prep and family dinners – Proteins, rice, and beans store well, making it simple to build lunches and dinners for several days from one cooking session.
1. Chipotle Chicken Copycat Recipe
Prep Time: 15 minutes | Cook Time: 20 minutes | Serve: 6
Smoky, citrusy, and packed with warm spices, this chicken recreates the exact seasoning blend used behind the counter. Chicken thighs soak up a chipotle-adobo marinade before getting seared until charred at the edges, making it a strong base for bowls, tacos, or salads throughout the week.
Ingredients
- 2 lbs boneless, skinless chicken thighs
- 2 chipotle peppers in adobo sauce, minced
- 2 tablespoons adobo sauce (from the can)
- 3 cloves garlic, minced
- 2 tablespoons vegetable oil
- 1 tablespoon apple cider vinegar
- 1 tablespoon lime juice
- 1 teaspoon ground cumin
- 1 teaspoon smoked paprika
- 1 teaspoon dried oregano
- 1/2 teaspoon black pepper
- 1 teaspoon salt
- 1 tablespoon brown sugar
How to Make It
Start by building the marinade in a medium mixing bowl. Combine the minced chipotle peppers, adobo sauce, garlic, vegetable oil, apple cider vinegar, and lime juice, then whisk everything together until the mixture looks smooth and slightly thick. Add the ground cumin, smoked paprika, dried oregano, black pepper, salt, and brown sugar directly into the same bowl, stirring until the spices are fully blended into the wet ingredients with no dry clumps remaining.
Place the chicken thighs into a large resealable bag or a shallow dish, then pour the marinade over the meat, making sure every piece gets coated on both sides. Massage the bag gently so the marinade works into the folds of the meat, then seal it and set it in the refrigerator for at least 30 minutes, though letting it sit for up to 8 hours produces a deeper, more developed flavor.
When ready to cook, remove the chicken from the refrigerator and let it rest at room temperature for about 10 minutes so it cooks evenly. Heat a large cast-iron skillet or heavy-bottomed pan over medium-high heat and add a small drizzle of oil, swirling the pan so the surface is evenly coated. Once the pan is shimmering hot, lay the chicken thighs in a single layer, leaving space between each piece so they sear rather than steam.
Cook the chicken for about 6 to 7 minutes on the first side without moving it, allowing a deep golden-brown crust and slight char to form along the edges. Flip each piece over and cook for another 6 to 7 minutes, checking that the internal temperature reaches 165°F using a meat thermometer inserted into the thickest part. Once fully cooked, transfer the chicken to a cutting board and let it rest for 5 minutes before slicing, which keeps the juices locked inside instead of running out onto the board. Slice into bite-sized strips or cubes and serve warm over rice, in a tortilla, or on top of a salad.
Expert Tips
Use a meat thermometer rather than guessing doneness by color, since chipotle marinade can darken the chicken quickly and make it look more cooked than it actually is. Letting the chicken rest before slicing keeps every bite juicy instead of dry.
Variations
Swap chicken thighs for chicken breast for a leaner option, though the cook time should shorten slightly since breast meat dries out faster. Ground chicken also works well for taco filling using the same marinade ratios.
Storage Instructions
Store cooled chicken in an airtight container in the refrigerator for up to 4 days. Freeze cooked, sliced chicken in a freezer-safe bag for up to 3 months, and thaw overnight in the refrigerator before reheating in a skillet over medium heat.
2. Chipotle Steak Copycat Recipe
Prep Time: 15 minutes | Cook Time: 15 minutes | Serve: 6
Bold, peppery, and rich with adobo flavor, this steak brings restaurant-style char and tenderness to a home kitchen. A quick marinade tenderizes the meat while a hot cast-iron sear locks in the smoky crust that makes this cut so memorable in a burrito or bowl.
Ingredients
- 2 lbs flank steak or skirt steak
- 2 chipotle peppers in adobo sauce, minced
- 2 tablespoons adobo sauce
- 3 cloves garlic, minced
- 2 tablespoons olive oil
- 2 tablespoons red wine vinegar
- 1 tablespoon lime juice
- 1 teaspoon ground cumin
- 1 teaspoon smoked paprika
- 1/2 teaspoon ground coriander
- 1 teaspoon salt
- 1/2 teaspoon black pepper
Instructions
Begin by preparing the marinade in a mixing bowl, combining the minced chipotle peppers, adobo sauce, minced garlic, olive oil, red wine vinegar, and lime juice. Whisk the mixture thoroughly until it turns into a smooth, slightly glossy liquid, then stir in the ground cumin, smoked paprika, ground coriander, salt, and black pepper until every spice dissolves evenly into the marinade base.
Lay the flank or skirt steak flat on a cutting board and use a fork to pierce the surface several times on both sides, which helps the marinade penetrate deeper into the muscle fibers. Place the steak into a large resealable bag, pour the marinade over it, and seal the bag while pressing out excess air so the meat stays fully submerged. Refrigerate for at least 1 hour, though 4 to 6 hours produces noticeably more tender results because the acid in the marinade has more time to break down the connective tissue.
Remove the steak from the refrigerator about 20 minutes before cooking so it comes closer to room temperature, which helps it cook more evenly throughout. Heat a cast-iron skillet or heavy grill pan over high heat until it starts lightly smoking, then add a small amount of oil and spread it across the surface. Shake off any excess marinade from the steak before placing it into the hot pan, since excess liquid can cause steaming instead of a proper sear.
Cook the steak for 4 to 5 minutes on the first side without moving it, allowing a deep brown crust to develop. Flip once and cook for another 3 to 4 minutes for medium-rare, or slightly longer for a more well-done result, checking internal temperature with a thermometer for accuracy. Once done, transfer the steak to a cutting board and tent it loosely with foil, letting it rest for a full 10 minutes before slicing.
Slice the steak against the grain into thin strips, which shortens the muscle fibers and keeps every bite tender rather than chewy. Serve immediately while warm, layered into bowls, tacos, or burritos alongside rice, beans, and salsa.
Tips
Slicing against the grain matters more than any other step for tenderness, so take a moment to identify the direction of the muscle fibers before cutting. A hot, dry pan produces a better crust than a crowded or wet one.
Variations
Try this marinade on sirloin steak for a slightly leaner cut, or use the same method on portobello mushrooms for a plant-based version with a similar smoky profile.
Storage
Keep sliced steak in an airtight container in the refrigerator for up to 4 days. Freeze in a flat, sealed bag for up to 3 months and reheat gently in a skillet to avoid overcooking the meat further.
3. Chipotle Barbacoa Copycat Recipe
Prep Time: 20 minutes | Cook Time: 4 hours | Serve: 8
Deeply spiced and fall-apart tender, this barbacoa relies on a slow braise to break down a tough cut of beef into shredded, juicy meat. Chipotle peppers, warm spices, and a splash of vinegar combine into a rich braising liquid that turns into a flavorful sauce once the meat is fully shredded.
Ingredients
- 3 lbs beef chuck roast, trimmed and cut into large chunks
- 4 chipotle peppers in adobo sauce
- 3 tablespoons adobo sauce
- 6 cloves garlic
- 1 medium white onion, quartered
- 1/2 cup beef broth
- 3 tablespoons apple cider vinegar
- 2 tablespoons lime juice
- 2 bay leaves
- 1 tablespoon ground cumin
- 1 tablespoon dried oregano
- 1 teaspoon ground cloves
- 1 teaspoon black pepper
- 2 teaspoons salt
Instructions
Begin by making the braising sauce in a blender. Combine the chipotle peppers, adobo sauce, garlic cloves, onion, beef broth, apple cider vinegar, lime juice, ground cumin, dried oregano, ground cloves, black pepper, and salt, then blend on high speed until the mixture turns into a smooth, deep red-brown sauce with no visible chunks remaining.
Season the beef chuck chunks generously on all sides with a small extra pinch of salt and pepper, then place them into a slow cooker or a heavy Dutch oven. Pour the blended sauce evenly over the meat, making sure every piece gets coated, then tuck the bay leaves into the liquid around the beef. Cover the pot with a tight-fitting lid.
For a slow cooker, set the temperature to low and cook for 8 hours, or set it to high and cook for about 4 hours, checking that the meat pulls apart easily with a fork once done. For a stovetop or oven method, bring the liquid to a gentle simmer over medium heat on the stovetop, then transfer the covered pot into an oven preheated to 300°F and cook for 3 to 4 hours, checking every hour to make sure the liquid maintains a low simmer rather than a rolling boil.
Once the beef reaches full tenderness, remove the bay leaves and discard them. Use two forks to shred the meat directly in the pot, pulling it apart into thin strands while mixing it through the remaining braising liquid. Let the shredded meat sit in the sauce for another 10 to 15 minutes uncovered, either on low heat or with the slow cooker lid off, so some of the liquid reduces and thickens slightly, coating every strand of meat.
Taste the barbacoa and adjust the salt level as needed before serving, since slow cooking can mellow certain seasonings over a long cook time. Serve warm over rice, folded into tortillas, or piled into a bowl with beans and salsa for a complete meal.
Tips
Chuck roast works best because its marbling breaks down into tender strands during a long cook; leaner cuts tend to turn dry after hours of braising. Removing excess fat before cooking keeps the final sauce from turning greasy.
Variations
Swap beef for lamb shoulder for a slightly gamier, richer version, or use a chuck roast substitute like brisket for a different but equally tender texture.
Storage
Store shredded barbacoa with its sauce in an airtight container in the refrigerator for up to 5 days. Freeze in individual portions for up to 4 months and reheat gently on the stovetop with a splash of broth to loosen the sauce.
4. Chipotle Carnitas Copycat Recipe
Prep Time: 15 minutes | Cook Time: 3 hours | Serve: 8
Slow-braised and finished with a quick broil, this carnitas recipe delivers tender pork with crisp, golden edges. Citrus and warm spices infuse the meat while it simmers low and slow, and a short blast under high heat at the end gives every shredded piece a crackling texture similar to the restaurant version.
Ingredients
- 3 lbs pork shoulder, cut into large chunks
- 1 medium white onion, quartered
- 6 cloves garlic, smashed
- 1 orange, juiced and quartered (peel included)
- 2 limes, juiced
- 1 tablespoon ground cumin
- 1 tablespoon dried oregano
- 2 bay leaves
- 1 teaspoon ground cinnamon
- 2 teaspoons salt
- 1 teaspoon black pepper
- 1 cup chicken broth
Instructions
Place the pork shoulder chunks into a large Dutch oven or heavy pot, then scatter the quartered onion, smashed garlic cloves, and orange peel quarters around the meat. Pour the orange juice, lime juice, and chicken broth over everything, then sprinkle the ground cumin, dried oregano, ground cinnamon, salt, and black pepper evenly across the surface. Tuck the bay leaves into the liquid.
Bring the pot to a gentle simmer over medium-high heat on the stovetop, then reduce the heat to low, cover with a lid, and let the pork cook slowly for about 2.5 to 3 hours. Check the pot occasionally to make sure the liquid stays at a low simmer rather than boiling hard, adding a small splash of water or broth should the liquid reduce too quickly before the meat becomes tender.
Once the pork shreds easily with a fork, remove the pot from the heat and discard the bay leaves and orange peel pieces. Use two forks to shred the meat directly in the pot, mixing it through the remaining braising liquid so it absorbs extra moisture and flavor. Preheat the oven broiler while spreading the shredded pork out in a single, even layer on a large rimmed baking sheet, then spoon a few tablespoons of the reserved braising liquid over the top to keep it moist during broiling.
Place the baking sheet under the broiler for 4 to 6 minutes, watching closely since broilers vary in intensity and the pork can go from golden to burnt quickly. Once the edges turn deep golden-brown and slightly crisp, remove the tray and toss the pork gently to redistribute the crisped pieces throughout. Should more texture be preferred, spread the pork out again and broil for another 2 to 3 minutes.
Serve the carnitas warm, either on their own with a squeeze of fresh lime or layered into tacos, burritos, and rice bowls for a heartier meal.
Tips
Broiling in a single layer creates far more crisp edges than broiling in a thick pile, so spreading the meat out matters more than the broiling time itself. Keep a close eye during broiling since the sugar in the braising liquid caramelizes fast.
Variations
Use pork butt in place of pork shoulder for a similar fat content and texture, or try a leaner pork loin for a lighter version that skips the broiling step.
Storage
Store shredded carnitas in an airtight container in the refrigerator for up to 4 days. Freeze in flat, sealed bags for up to 3 months and reheat in a skillet over medium heat to restore some of the crisp texture.
5. Chipotle Sofritas Copycat Recipe
Prep Time: 15 minutes | Cook Time: 15 minutes | Serve: 6
A plant-based favorite built from crumbled tofu simmered in a smoky chipotle-tomato sauce, sofritas brings deep, savory flavor without any meat. Pressing the tofu well before cooking gives it a texture that holds onto the sauce, making it a satisfying option for bowls and tacos alike.
Ingredients
- 2 blocks (14 oz each) extra-firm tofu, pressed and crumbled
- 3 chipotle peppers in adobo sauce
- 2 tablespoons adobo sauce
- 1/2 cup canned diced tomatoes
- 3 cloves garlic
- 1/2 medium white onion, roughly chopped
- 2 tablespoons vegetable oil
- 1 tablespoon tomato paste
- 1 teaspoon ground cumin
- 1 teaspoon smoked paprika
- 1 teaspoon dried oregano
- 1 teaspoon salt
- 1/2 cup vegetable broth
Instructions
Begin by pressing the tofu thoroughly, wrapping each block in a clean kitchen towel and placing a heavy object on top for at least 15 minutes to draw out excess moisture, since removing water helps the tofu absorb the sauce properly later. Once pressed, crumble both blocks by hand into small, uneven pieces roughly the size of ground meat, setting the crumbled tofu aside in a bowl.
Build the sauce base in a blender by combining the chipotle peppers, adobo sauce, diced tomatoes, garlic cloves, chopped onion, and tomato paste, blending until the mixture turns into a smooth, thick, reddish-orange sauce. Set the blended sauce aside while heating a large skillet over medium heat.
Add the vegetable oil to the skillet, letting it warm for about a minute before adding the crumbled tofu directly into the pan. Spread the tofu into an even layer and let it cook undisturbed for 3 to 4 minutes, allowing some pieces to develop light golden edges before stirring. Continue cooking and stirring occasionally for another 3 to 4 minutes so the tofu dries out slightly and firms up in texture.
Pour the blended chipotle sauce over the tofu in the skillet, stirring well so every crumble gets coated evenly. Add the ground cumin, smoked paprika, dried oregano, and salt, mixing thoroughly so the spices distribute through the sauce rather than clumping in one spot. Pour in the vegetable broth, stirring again, then reduce the heat to low and let the mixture simmer uncovered for 8 to 10 minutes, stirring every couple of minutes to prevent sticking or scorching at the bottom of the pan.
As the mixture simmers, the sauce thickens and clings to the tofu crumbles rather than pooling loosely in the pan. Taste and adjust the salt level near the end of cooking, since the broth and adobo sauce both carry their own saltiness that can vary between brands. Once the sauce reaches a thick, saucy consistency that coats the tofu without being watery, remove the skillet from heat and serve warm.
Tips
Pressing the tofu long enough matters more than any other step, since wet tofu waters down the sauce and prevents proper browning. A nonstick or well-seasoned cast-iron skillet helps prevent sticking during the initial browning stage.
Variations
Crumbled tempeh works as a substitute for tofu, offering a firmer, slightly nuttier bite. For extra heat, add one additional chipotle pepper to the blended sauce.
Storage
Store sofritas in an airtight container in the refrigerator for up to 4 days. Freeze in a sealed container for up to 2 months and reheat in a skillet over medium heat, adding a small splash of broth to loosen the sauce should it thicken too much after freezing.
6. Chipotle Cilantro Lime Rice Copycat Recipe
Prep Time: 5 minutes | Cook Time: 20 minutes | Serve: 6
Light, fluffy, and finished with a burst of fresh citrus, this rice recreates the bright side that anchors nearly every bowl and burrito on the menu. A touch of oil and a full bunch of cilantro turn plain white rice into something worth eating on its own.
Ingredients
- 2 cups long-grain white rice, rinsed
- 3 cups water
- 2 tablespoons vegetable oil
- 1 bay leaf
- 1 teaspoon salt
- 1/3 cup fresh cilantro, chopped
- 2 tablespoons lime juice
- 1 teaspoon lime zest
Instructions
Rinse the rice under cool running water in a fine-mesh strainer for about a minute, swirling it gently by hand until the water runs mostly clear instead of cloudy, since removing excess starch keeps the grains separate once cooked. Set the rinsed rice aside to drain fully while preparing the pot.
Heat the vegetable oil in a medium saucepan over medium heat, then add the drained rice directly into the warm oil. Stir the rice constantly for about 2 minutes, toasting it lightly until the grains turn slightly translucent at the edges and give off a faint nutty aroma, which builds a deeper flavor base before any liquid gets added.
Pour the water into the saucepan along with the bay leaf and salt, stirring once to combine everything evenly. Raise the heat to bring the mixture to a full boil, then immediately reduce the heat to low and cover the pot with a tight-fitting lid. Let the rice simmer undisturbed for 15 to 18 minutes, resisting the urge to lift the lid during this time since escaping steam slows down the cooking process and can leave the rice undercooked in the center.
After the timer ends, remove the pot from the heat but keep the lid on for another 5 minutes, allowing the rice to finish steaming in its own residual heat. This resting period firms up the grains and makes them easier to fluff without turning mushy. Remove the bay leaf and discard it.
Fluff the rice gently with a fork, working from the edges toward the center to separate the grains without crushing them. Sprinkle the chopped cilantro, lime juice, and lime zest evenly over the rice, then fold everything together with the fork using light, careful strokes so the herbs distribute throughout without turning the rice sticky. Taste and add a small pinch of extra salt should the flavor need it, then serve warm alongside any protein or as the base of a bowl.
Tips
Toasting the rice in oil before adding water builds noticeably more flavor than skipping this step. Adding the cilantro and lime only after cooking keeps the herbs bright instead of wilted and dull.
Variations
Swap white rice for jasmine rice for a slightly more fragrant result, or use vegetable broth in place of water for extra depth.
Storage
Store cooled rice in an airtight container in the refrigerator for up to 5 days. Freeze in a flat, sealed bag for up to 2 months and reheat with a splash of water to restore moisture.
7. Chipotle Brown Rice Copycat Recipe
Prep Time: 5 minutes | Cook Time: 40 minutes | Serve: 6
A heartier, nuttier alternative to the classic white rice side, this brown rice version keeps the same citrus-herb finish while adding extra fiber and a firmer bite. A longer simmer time breaks down the tougher bran layer until each grain turns tender.
Ingredients
- 2 cups long-grain brown rice, rinsed
- 3 1/2 cups water
- 2 tablespoons vegetable oil
- 1 bay leaf
- 1 teaspoon salt
- 1/3 cup fresh cilantro, chopped
- 2 tablespoons lime juice
- 1 teaspoon lime zest
Instructions
Rinse the brown rice under cool water in a fine-mesh strainer, swirling it around for about a minute until the water runs mostly clear. Drain the rice thoroughly and set it aside while heating the pot, since excess water at this stage can throw off the final liquid ratio.
Warm the vegetable oil in a medium saucepan over medium heat, then add the drained rice and stir constantly for 2 to 3 minutes, toasting the grains until they smell slightly nutty and look a shade darker at the edges. This toasting step matters even more with brown rice, since the extra bran layer benefits from the added flavor built during this stage.
Pour the water into the pot along with the bay leaf and salt, stirring once to combine. Bring the liquid to a full boil over high heat, then reduce the heat to low and cover tightly with a lid. Let the rice simmer undisturbed for 35 to 40 minutes, checking near the end that the water has fully absorbed and the grains look tender rather than firm in the center.
Once the timer finishes, remove the pot from heat and let it rest, still covered, for 10 minutes. This resting period allows the rice to finish steaming fully, since brown rice tends to need slightly longer than white rice to reach an even, tender texture throughout every grain. Remove and discard the bay leaf.
Fluff the rice gently with a fork, breaking apart any clumps while keeping the grains intact. Sprinkle the chopped cilantro, lime juice, and lime zest over the top, then fold everything together using slow, careful strokes so the citrus and herbs coat the rice evenly without turning it mushy. Taste for seasoning and adjust with a touch more salt as needed, then serve warm as a side or bowl base.
Tips
Brown rice needs more liquid and a longer cook time than white rice, so resist the temptation to shorten either step. Letting the rice rest off heat for the full 10 minutes makes a noticeable difference in final texture.
Variations
Use a mix of half brown rice and half wild rice for a chewier, more textured side. A splash of vegetable broth in place of water adds extra savory depth.
Storage
Store cooled brown rice in an airtight container in the refrigerator for up to 5 days. Freeze in a sealed bag for up to 3 months and reheat with a small splash of water in a covered pan.
8. Chipotle Black Beans Copycat Recipe
Prep Time: 10 minutes | Cook Time: 45 minutes | Serve: 6
Smoky, tender, and lightly seasoned, these black beans simmer low and slow until the broth thickens into a rich, savory coating. A few warm spices and a bay leaf turn canned or dried beans into a side that tastes like it simmered all day.
Ingredients
- 2 cans (15 oz each) black beans, drained and rinsed
- 1 cup vegetable broth
- 1/2 medium white onion, finely diced
- 2 cloves garlic, minced
- 1 tablespoon vegetable oil
- 1 bay leaf
- 1 teaspoon ground cumin
- 1/2 teaspoon smoked paprika
- 1 teaspoon salt
- 1/2 teaspoon black pepper
Instructions
Heat the vegetable oil in a medium saucepan over medium heat, then add the finely diced onion. Cook the onion for 4 to 5 minutes, stirring occasionally, until the pieces turn soft and slightly translucent without browning too much. Add the minced garlic and cook for another 30 seconds, stirring constantly so it releases its aroma without burning, since scorched garlic turns bitter quickly.
Pour the drained and rinsed black beans into the saucepan, stirring to coat them in the softened onion and garlic. Add the vegetable broth, bay leaf, ground cumin, smoked paprika, salt, and black pepper, stirring everything together so the spices distribute evenly through the liquid rather than settling at the bottom.
Bring the mixture to a gentle simmer over medium heat, then reduce the heat to low and cover the pot partially, leaving a small gap for steam to escape. Let the beans simmer for 30 to 35 minutes, stirring every 8 to 10 minutes to prevent sticking and to check that the liquid reduces gradually rather than boiling away too fast.
As the beans cook, use the back of a spoon to lightly mash a small portion of them against the side of the pot, which releases natural starches into the broth and helps it thicken into a slightly creamy consistency. Continue simmering until the liquid reduces to a thick, saucy texture that clings to the beans rather than pooling loosely around them.
Remove the bay leaf and discard it before tasting the beans for seasoning, adjusting salt and pepper as needed since broth brands vary in sodium content. Serve the beans warm as a side dish or spoon them into a bowl alongside rice and a protein of choice.
Tips
Mashing a portion of the beans against the pot thickens the broth naturally without needing cornstarch or flour. Simmering uncovered during the last 10 minutes helps the liquid reduce faster.
Variations
Add a diced jalapeño along with the onion for extra heat, or stir in a small can of diced green chilies near the end of cooking for added texture.
Storage
Store cooled beans in an airtight container in the refrigerator for up to 5 days. Freeze in a sealed container for up to 4 months and reheat gently on the stovetop with a small splash of broth or water.
9. Chipotle Pinto Beans Copycat Recipe
Prep Time: 10 minutes | Cook Time: 45 minutes | Serve: 6
Earthy and mild, these pinto beans simmer in a lightly seasoned broth until soft and creamy throughout. A simple blend of onion, garlic, and warm spices lets the natural flavor of the beans come forward without overpowering the rest of a bowl.
Ingredients
- 2 cans (15 oz each) pinto beans, drained and rinsed
- 1 cup vegetable broth
- 1/2 medium white onion, finely diced
- 2 cloves garlic, minced
- 1 tablespoon vegetable oil
- 1 bay leaf
- 1 teaspoon ground cumin
- 1/2 teaspoon dried oregano
- 1 teaspoon salt
- 1/2 teaspoon black pepper
Instructions
Warm the vegetable oil in a medium saucepan over medium heat, then add the finely diced onion, cooking for 4 to 5 minutes until softened and lightly golden at the edges. Stir in the minced garlic and cook for another 30 seconds, watching closely so it softens without turning brown or bitter.
Add the drained and rinsed pinto beans to the pot, stirring gently so they mix through the onion and garlic without breaking apart too much. Pour in the vegetable broth, then add the bay leaf, ground cumin, dried oregano, salt, and black pepper, stirring once more so every spice spreads evenly through the liquid.
Bring the pot to a gentle simmer over medium heat, then lower the heat and cover partially, leaving room for steam to escape. Let the beans cook for 30 to 35 minutes, stirring occasionally to prevent sticking at the bottom and to monitor how quickly the liquid reduces.
Midway through cooking, mash a small spoonful of beans against the inside of the pot to release extra starch into the broth, which thickens the liquid naturally as the beans continue to simmer. Keep cooking until the broth reaches a thick, gravy-like consistency that coats the beans rather than sitting as a thin liquid around them.
Remove the bay leaf before serving and taste the beans, adjusting the salt level as needed depending on the broth used. Serve warm as a side dish, or layer into a bowl or burrito alongside rice and other toppings for a complete meal.
Tips
Pinto beans hold their shape a bit better than black beans during a long simmer, so mash a slightly larger portion if a creamier texture is preferred. A splash of extra broth near the end loosens the mixture should it thicken too much.
Variations
Stir in a small amount of diced tomato for extra brightness, or add a pinch of chili powder for a slightly spicier finish.
Storage
Store cooled pinto beans in an airtight container in the refrigerator for up to 5 days. Freeze in a sealed container for up to 4 months and reheat on the stovetop with a splash of broth or water.
10. Chipotle Fresh Tomato Salsa (Pico de Gallo)
Prep Time: 15 minutes | Cook Time: 0 minutes | Serve: 8
Crisp, bright, and loaded with fresh vegetables, this pico de gallo skips the stove entirely and relies on ripe tomatoes and a squeeze of lime for its flavor. A short rest in the refrigerator lets the ingredients blend together into a well-balanced, chunky salsa.
Ingredients
- 4 medium ripe tomatoes, diced
- 1/2 medium white onion, finely diced
- 1 jalapeño, seeded and finely diced
- 1/3 cup fresh cilantro, chopped
- 2 tablespoons lime juice
- 1 clove garlic, minced
- 1 teaspoon salt
Instructions
Dice the ripe tomatoes into small, even pieces, working over a bowl to catch any excess juice that runs off during cutting, since too much liquid can water down the finished salsa. Place the diced tomatoes into a large mixing bowl, then add the finely diced onion directly on top.
Cut the jalapeño in half lengthwise, then scrape out the seeds and white membrane with a small spoon, since removing these parts controls the heat level without losing the pepper’s flavor. Finely dice the jalapeño and add it to the bowl along with the tomatoes and onion. Add the chopped cilantro and minced garlic, then sprinkle the salt evenly across the top of the mixture.
Using a large spoon, fold all the ingredients together gently, working from the bottom of the bowl upward so the tomatoes stay somewhat intact rather than turning mushy. Pour the lime juice over the mixture and fold again, making sure the acid coats every piece evenly, which helps balance the sweetness of the tomatoes against the heat of the jalapeño.
Taste the salsa at this point and adjust the salt or lime juice slightly, keeping in mind that flavors continue to develop and deepen during the resting period that follows. Cover the bowl with a lid or plastic wrap and place it in the refrigerator for at least 20 minutes, though letting it rest for a full hour allows the onion and jalapeño to mellow while the tomato juices mix fully with the other ingredients.
Before serving, give the salsa one more gentle stir and drain off any excess liquid that has pooled at the bottom of the bowl, since fresh tomatoes release more juice the longer they sit. Serve chilled or at room temperature alongside chips, or spoon it directly over any bowl, taco, or burrito for a fresh, crisp topping.
Tips
Salting the tomatoes draws out extra moisture, so drain the bowl briefly before serving for a thicker, less watery salsa. Removing the jalapeño seeds controls heat without losing its fresh, grassy flavor.
Variations
Add diced mango or pineapple for a sweeter version, or swap the jalapeño for a milder poblano pepper for a gentler heat level.
Storage
Store salsa in an airtight container in the refrigerator for up to 3 days, though the texture is best within the first 24 hours. Freezing is not recommended, since fresh tomatoes turn watery and mushy once thawed.
11. Chipotle Roasted Chili Corn Salsa
Prep Time: 10 minutes | Cook Time: 10 minutes | Serve: 8
Sweet, smoky, and slightly charred, this corn salsa gets its depth from a quick roast under the broiler before mixing with fresh peppers and lime. The contrast between sweet corn and spicy jalapeño makes this a favorite topping for bowls and tacos alike.
Ingredients
- 3 cups corn kernels (fresh, frozen and thawed, or canned and drained)
- 1 red bell pepper, finely diced
- 1 jalapeño, seeded and finely diced
- 1/2 medium red onion, finely diced
- 1/3 cup fresh cilantro, chopped
- 2 tablespoons lime juice
- 1 tablespoon vegetable oil
- 1 teaspoon salt
- 1/2 teaspoon ground cumin
Instructions
Preheat the oven broiler and line a large rimmed baking sheet with foil for easy cleanup. Spread the corn kernels out in a single, even layer across the sheet, then drizzle the vegetable oil over the top and toss gently with a spoon so every kernel gets lightly coated.
Place the baking sheet under the broiler and let the corn roast for 6 to 8 minutes, checking every 2 minutes and stirring the kernels around, since broilers vary in intensity and corn can char quickly once it starts browning. Look for a mix of golden-brown and slightly blackened kernels scattered throughout, which builds the smoky flavor this salsa relies on. Once roasted, remove the sheet from the oven and let the corn cool for about 5 minutes before handling.
While the corn cools, finely dice the red bell pepper and jalapeño, removing the seeds and membrane from the jalapeño first to control the heat level. Finely dice the red onion as well, then combine all three into a large mixing bowl along with the chopped cilantro.
Add the cooled roasted corn to the bowl, then sprinkle the salt and ground cumin evenly over the mixture. Pour the lime juice over the top and fold everything together gently with a spoon, making sure the seasoning and citrus coat every ingredient evenly without crushing the corn kernels.
Taste the salsa and adjust the salt or lime juice as needed, keeping in mind the roasted corn carries a natural sweetness that balances well against the sharper onion and jalapeño. Let the salsa rest for at least 10 minutes at room temperature before serving, which gives the flavors a short window to blend together. Serve at room temperature or chilled, spooned over any bowl, taco, or salad for a smoky, sweet crunch.
Tips
Stirring the corn frequently under the broiler prevents one side from burning while the rest stays pale. Letting the salsa rest briefly before serving improves the overall flavor balance.
Variations
Add diced avocado just before serving for a creamier version, or swap the red bell pepper for a poblano for a slightly earthier flavor.
Storage
Store the salsa in an airtight container in the refrigerator for up to 4 days. Freezing is not recommended, since the corn’s texture turns mealy once thawed.
12. Chipotle Tomatillo Green Chili Salsa
Prep Time: 10 minutes | Cook Time: 15 minutes | Serve: 8
Tangy and slightly bright with a mild green heat, this tomatillo salsa gets its distinct flavor from roasted tomatillos and jalapeños blended into a smooth, pourable sauce. A short simmer after blending mellows the rawness of the vegetables into a rounded, well-balanced flavor.
Ingredients
- 1 lb tomatillos, husked and rinsed
- 2 jalapeños, stemmed
- 1/2 medium white onion, roughly chopped
- 2 cloves garlic, unpeeled
- 1/3 cup fresh cilantro
- 1 tablespoon lime juice
- 1 teaspoon salt
- 1/2 cup water
Instructions
Preheat the oven broiler and line a baking sheet with foil. Husk the tomatillos completely, rinsing off the sticky residue underneath the papery skin, then place them on the baking sheet along with the whole jalapeños, chopped onion, and unpeeled garlic cloves, spreading everything into a single, even layer.
Broil the vegetables for about 8 to 10 minutes, turning them once halfway through, until the tomatillos and jalapeños develop dark, blistered spots across their skins and the onion turns soft and lightly charred at the edges. Watch closely near the end, since broilers cook unevenly and some pieces may finish before others.
Remove the baking sheet from the oven and let everything cool for about 5 minutes. Peel the skins off the roasted garlic cloves, discarding the papery outer layer, then transfer the garlic, tomatillos, jalapeños, and onion into a blender, scraping in any juices left on the baking sheet as well, since that liquid carries a lot of the roasted flavor.
Add the fresh cilantro, lime juice, salt, and water to the blender, then blend on medium speed for about 30 seconds, stopping to scrape down the sides as needed, until the mixture turns into a smooth, slightly thick, pale green sauce.
Pour the blended salsa into a small saucepan and bring it to a gentle simmer over medium heat, stirring occasionally. Let it simmer uncovered for 5 to 7 minutes, which softens the raw, sharp edge of the blended vegetables and lets the flavors settle into a smoother, more rounded taste. Reduce the heat should the salsa begin to splatter, since tomatillo salsa can bubble more aggressively than tomato-based sauces.
Remove the pot from heat and let the salsa cool for several minutes before tasting, since flavors intensify slightly as the sauce cools. Adjust the salt or lime juice as needed, then transfer to a container and refrigerate until ready to serve chilled, or serve slightly warm alongside any bowl or taco.
Tips
Roasting the vegetables before blending builds far more depth than using raw tomatillos. Simmering the blended salsa briefly smooths out the sharp, grassy edge that raw tomatillos can carry.
Variations
Add an avocado during blending for a creamier, milder version, or leave the jalapeño seeds in for extra heat.
Storage
Store in an airtight container in the refrigerator for up to 5 days. Freeze in a sealed container for up to 3 months and thaw in the refrigerator before serving.
13. Chipotle Tomatillo Red Chili Salsa
Prep Time: 10 minutes | Cook Time: 15 minutes | Serve: 8
Deeper and spicier than its green counterpart, this red salsa combines roasted tomatillos with dried chili peppers for a smoky, slightly earthy heat. Soaking the dried chilies first softens them enough to blend into a smooth, richly colored sauce.
Ingredients
- 1 lb tomatillos, husked and rinsed
- 3 dried guajillo chilies, stemmed and seeded
- 1 dried ancho chili, stemmed and seeded
- 1/2 medium white onion, roughly chopped
- 2 cloves garlic, unpeeled
- 1 tablespoon lime juice
- 1 teaspoon salt
- 1/2 cup water
Instructions
Bring a small pot of water to a boil, then remove it from the heat. Add the stemmed and seeded guajillo and ancho chilies to the hot water, pressing them down gently so they stay submerged, and let them soak for 15 to 20 minutes until they turn soft and pliable. Drain and discard the soaking water afterward, since it can carry a bitter taste from the dried skins.
While the chilies soak, preheat the oven broiler and line a baking sheet with foil. Place the husked and rinsed tomatillos, chopped onion, and unpeeled garlic cloves onto the sheet in a single layer, then broil for 8 to 10 minutes, turning once, until the tomatillos blister and the onion softens with light charring at the edges.
Remove the baking sheet from the oven and let everything cool briefly. Peel the roasted garlic cloves and discard the skins, then transfer the garlic, tomatillos, and onion into a blender along with any juices from the baking sheet. Add the softened, drained chilies to the blender as well.
Pour in the lime juice, salt, and water, then blend on medium-high speed for 45 to 60 seconds, stopping once or twice to scrape down the sides, until the mixture turns into a smooth, deep reddish-orange sauce with no visible chili skin fragments remaining.
Transfer the blended salsa to a small saucepan and bring it to a gentle simmer over medium heat, stirring frequently since this salsa tends to thicken and can stick to the bottom of the pot faster than the green version. Let it simmer uncovered for 5 to 7 minutes, which mellows the raw chili flavor and deepens the overall color slightly.
Remove the pot from heat and let the salsa cool for a few minutes before tasting, adjusting the salt or lime juice as needed. Transfer to a container and refrigerate until chilled, or serve slightly warm spooned over eggs, tacos, or any bowl for a smoky, spicy finish.
Tips
Soaking the dried chilies fully before blending prevents small tough pieces of skin from remaining in the final sauce. Stir the salsa often while it simmers, since the natural sugars in dried chilies can scorch quickly.
Variations
Add an extra ancho chili for a milder, sweeter version, or include a dried chipotle for an even smokier, spicier profile.
Storage
Store in an airtight container in the refrigerator for up to 5 days. Freeze in a sealed container for up to 3 months and thaw in the refrigerator before reheating gently on the stovetop.
14. Chipotle Guacamole Copycat Recipe
Prep Time: 15 minutes | Cook Time: 0 minutes | Serve: 6
Creamy, chunky, and seasoned with just a handful of ingredients, this guacamole keeps the avocado flavor front and center. A simple mash-and-fold method preserves texture instead of turning the mixture into a smooth paste, matching the rustic style served at the counter.
Ingredients
- 4 ripe avocados
- 1/4 cup fresh cilantro, chopped
- 2 tablespoons lime juice
- 1/4 cup red onion, finely diced
- 1 jalapeño, seeded and finely diced
- 1 clove garlic, minced
- 1 teaspoon salt
Instructions
Cut each avocado in half lengthwise around the pit, then twist the two halves apart gently. Remove the pit carefully with a spoon, or by tapping a knife into it and twisting, then scoop the flesh out of the skin into a large mixing bowl using a spoon, working close to the skin so no flesh gets left behind.
Using a fork or a potato masher, mash the avocado directly in the bowl, leaving some larger chunks intact rather than mashing it into a completely smooth paste, since a slightly rustic texture matches the classic style better than a puree. Pour the lime juice over the mashed avocado right away and fold it in gently, since the acid slows down browning and keeps the color bright green for longer.
Add the finely diced red onion, diced jalapeño, minced garlic, and chopped cilantro directly into the bowl. Sprinkle the salt evenly across the top of the mixture, then fold everything together using a spoon, working from the bottom of the bowl upward so the avocado stays chunky while the other ingredients distribute evenly throughout.
Taste the guacamole at this point, adjusting the salt or lime juice slightly based on personal preference, since avocado ripeness can affect how much seasoning is needed. Continue folding gently until every scoop contains a good mix of onion, jalapeño, and cilantro rather than pockets of plain avocado.
Should the guacamole not be served right away, press a piece of plastic wrap directly onto the surface of the mixture, smoothing out any air pockets, since direct contact between the wrap and the guacamole slows down the browning process significantly. Refrigerate for up to a few hours before serving, then give it one more gentle stir just before bringing it to the table.
Serve the guacamole chilled or at room temperature alongside tortilla chips, or spoon it directly onto any bowl, taco, or burrito for a creamy, cooling contrast against spicier ingredients.
Tips
Choosing ripe avocados that yield slightly to gentle pressure makes mashing far easier than working with firm, underripe fruit. Pressing plastic wrap directly onto the surface prevents the top layer from turning brown.
Variations
Add diced tomato for extra freshness, or mix in a small spoonful of sour cream for an even creamier texture.
Storage
Store guacamole in an airtight container with plastic wrap pressed directly onto the surface in the refrigerator for up to 2 days. Freezing is not recommended, since avocado turns watery and grainy once thawed.
15. Chipotle Fajita Veggies Copycat Recipe
Prep Time: 10 minutes | Cook Time: 12 minutes | Serve: 6
Charred at the edges and lightly seasoned, these fajita vegetables bring a smoky, slightly sweet crunch to any bowl or burrito. A hot pan and minimal stirring create the same blistered look found on the line, while a simple spice blend keeps the focus on the natural sweetness of the peppers and onions.
Ingredients
- 2 green bell peppers, sliced into strips
- 1 red bell pepper, sliced into strips
- 1 large yellow onion, sliced into strips
- 2 tablespoons vegetable oil
- 1 teaspoon ground cumin
- 1/2 teaspoon smoked paprika
- 1 teaspoon salt
- 1/2 teaspoon black pepper
Instructions
Slice the green and red bell peppers into thin, even strips, removing the seeds and white membrane from the inside first. Slice the onion into similarly thin strips, keeping all the pieces roughly the same size so they cook at an even rate once in the pan.
Heat the vegetable oil in a large skillet or cast-iron pan over medium-high heat until it shimmers slightly, which signals the pan has reached a high enough temperature for proper searing. Add the sliced peppers and onion directly into the hot oil, spreading them into a single, even layer across the bottom of the pan.
Let the vegetables cook undisturbed for 2 to 3 minutes before stirring, which allows the bottom layer to develop a deep char rather than simply softening. Stir the vegetables once, then let them sit undisturbed again for another 2 to 3 minutes, repeating this pattern of brief stirring followed by resting throughout the cooking process rather than stirring constantly, since frequent stirring prevents proper browning.
Sprinkle the ground cumin, smoked paprika, salt, and black pepper evenly over the vegetables once they begin showing some char, tossing everything together so the spices coat each strip evenly. Continue cooking for another 4 to 5 minutes, checking that the peppers have softened while still holding a slight bite, since overcooked fajita vegetables turn mushy and lose their fresh crunch.
Taste a piece near the end of cooking and adjust the salt as needed, since the char on the vegetables can sometimes read as more intense than the actual salt level. Once the vegetables reach a tender-crisp texture with visible charred edges throughout, remove the pan from heat immediately, since residual heat continues cooking the vegetables even after the pan comes off the burner.
Serve the fajita vegetables warm, layered into a bowl, burrito, or taco alongside rice, beans, and a choice of protein for a complete, colorful meal.
Tips
Avoid overcrowding the pan, since too many vegetables at once causes steaming instead of charring; cook in batches should the pan feel too full. Letting the vegetables sit undisturbed for a couple of minutes at a time creates better color than constant stirring.
Variations
Add sliced poblano peppers for extra depth, or toss in a squeeze of lime juice right before serving for added brightness.
Storage
Store cooled fajita vegetables in an airtight container in the refrigerator for up to 4 days. Freezing is not recommended, since the vegetables turn soft and watery once thawed.
16. Chipotle Queso Blanco Copycat Recipe
Prep Time: 5 minutes | Cook Time: 15 minutes | Serve: 8
Smooth, creamy, and lightly spiced, this queso blanco recreates the warm, melty dip found on the menu using a simple roux base and real melting cheese. A steady, low heat keeps the sauce silky instead of grainy or separated.
Ingredients
- 2 tablespoons butter
- 2 tablespoons all-purpose flour
- 1 1/2 cups whole milk
- 8 oz white American cheese, shredded or cubed
- 4 oz Monterey Jack cheese, shredded
- 1 chipotle pepper in adobo sauce, minced
- 1/2 teaspoon ground cumin
- 1/2 teaspoon salt
- 1/4 teaspoon garlic powder
Instructions
Melt the butter in a medium saucepan over medium-low heat, swirling the pan occasionally until it turns fully liquid without browning. Once melted, sprinkle the flour evenly over the butter, then whisk continuously for about 1 minute, cooking the mixture until it turns pale golden and gives off a slightly toasted, nutty smell, which cooks out the raw flour taste before any liquid gets added.
Pour the whole milk into the saucepan in a slow, steady stream while whisking constantly, working out any lumps that form as the liquid meets the butter-flour mixture. Continue whisking over medium-low heat for 3 to 4 minutes, watching as the mixture gradually thickens into a smooth, pourable sauce similar in consistency to a light gravy.
Once the base thickens slightly and coats the back of a spoon, reduce the heat to low, since cheese sauces separate easily should the pan run too hot. Add the shredded white American cheese in small handfuls, stirring continuously and letting each addition melt fully before adding the next, rather than dumping all the cheese in at once, which can cause the fat to separate from the sauce.
Once the American cheese fully melts and the sauce turns smooth, add the Monterey Jack cheese in the same gradual manner, stirring constantly until it melts completely and blends into the sauce without any stringy clumps remaining. Stir in the minced chipotle pepper, ground cumin, salt, and garlic powder, mixing thoroughly so the spices distribute evenly throughout the cheese sauce.
Continue stirring over low heat for another 2 to 3 minutes, allowing the flavors to meld together while keeping a close eye on the texture, since queso can thicken quickly once it cools even slightly. Should the sauce turn too thick, whisk in a small splash of extra milk to loosen it back to a smooth, pourable consistency.
Remove the pot from heat once the queso reaches a silky, uniform texture with no visible lumps of cheese. Serve immediately while warm, since this sauce firms up as it cools, alongside tortilla chips or spooned generously over any bowl or burrito.
Tips
Adding cheese gradually in small handfuls prevents the sauce from turning grainy or separating. Keep the heat low throughout the entire process, since cheese sauces break easily under high heat.
Variations
Add a small can of diced green chilies for extra texture, or swap the chipotle pepper for a milder jalapeño for a gentler heat level.
Storage
Store queso in an airtight container in the refrigerator for up to 4 days. Reheat gently over low heat on the stovetop, whisking constantly and adding a small splash of milk to restore the smooth texture, since refrigeration causes the sauce to firm up considerably.
17. Chipotle Honey Vinaigrette Copycat Recipe
Prep Time: 5 minutes | Cook Time: 0 minutes | Serve: 8
Sweet, tangy, and slightly smoky, this honey vinaigrette brings together red wine vinegar and honey into a bright dressing that works well over any salad or bowl. A quick whisk or blend emulsifies the oil into the other ingredients for a smooth, pourable consistency.
Ingredients
- 1/3 cup red wine vinegar
- 1/4 cup honey
- 2 tablespoons water
- 1 teaspoon Dijon mustard
- 1 clove garlic, minced
- 1/2 teaspoon dried oregano
- 1/2 teaspoon salt
- 1/4 teaspoon black pepper
- 2/3 cup vegetable oil
Instructions
Combine the red wine vinegar, honey, water, Dijon mustard, minced garlic, dried oregano, salt, and black pepper in a small mixing bowl or a blender, depending on which method feels easier to work with. Whisk or blend these ingredients together first before adding any oil, since building this base thoroughly helps the final dressing emulsify more smoothly.
Should a blender be used, blend the base ingredients on low speed for about 15 seconds until everything looks fully combined and slightly frothy. Should a whisk and bowl be used instead, whisk vigorously for about 30 seconds, making sure the honey fully dissolves into the vinegar rather than sitting as a separate, sticky layer at the bottom.
With the base mixture ready, begin adding the vegetable oil very slowly, a small drizzle at a time, while whisking constantly or blending on low speed continuously. Adding the oil gradually rather than all at once allows it to emulsify properly into the vinegar and honey mixture, creating a smooth, slightly thickened dressing rather than a separated, oily liquid.
Continue drizzling in the oil over the course of about a minute, whisking or blending the entire time, until all the oil has been incorporated and the dressing looks uniform and slightly glossy. Should the dressing look thin or separated at any point, continue whisking or blending for another 15 to 20 seconds, since emulsification sometimes needs a little extra time to fully set.
Taste the finished vinaigrette and adjust the sweetness or acidity slightly, adding a touch more honey for extra sweetness or a small splash more vinegar for extra tang, depending on personal preference. Pour the dressing into a sealable jar or bottle for easy storage and serving.
Shake or whisk the dressing again right before each use, since the oil and vinegar naturally separate over time even after a proper emulsion forms. Drizzle over salads, bowls, or grilled vegetables for a bright, tangy finish.
Tips
Adding the oil slowly rather than all at once is the single most important step for a smooth, well-emulsified dressing. A blender creates a slightly thicker, creamier texture than whisking by hand.
Variations
Add a small spoonful of adobo sauce for a smokier, spicier version, or swap red wine vinegar for apple cider vinegar for a milder tang.
Storage
Store the vinaigrette in a sealed jar in the refrigerator for up to 2 weeks, shaking well before each use since the oil separates naturally over time.
18. Chipotle Burrito Bowl Copycat Recipe
Prep Time: 15 minutes | Cook Time: 0 minutes (using pre-cooked components) | Serve: 4
Bringing every earlier recipe together into one complete meal, this burrito bowl layers rice, beans, protein, salsa, and guacamole into a colorful, satisfying plate. Building the bowl in the right order keeps every layer distinct instead of turning into a mixed, mushy pile.
Ingredients
- 2 cups cilantro lime rice (recipe above)
- 1 cup black beans (recipe above)
- 1 cup pinto beans (recipe above)
- 2 cups chipotle chicken or steak, sliced (recipe above)
- 1 cup fajita veggies (recipe above)
- 1/2 cup fresh tomato salsa (recipe above)
- 1/2 cup roasted chili corn salsa (recipe above)
- 1/2 cup guacamole (recipe above)
- 1/4 cup queso blanco (recipe above)
- 2 tablespoons honey vinaigrette (recipe above)
- Shredded lettuce, as needed
Instructions
Begin building the bowl by warming each component that needs reheating, since a good burrito bowl relies on contrasting warm and cool elements working together rather than everything served at the same temperature. Warm the rice gently in a saucepan over low heat with a small splash of water, stirring occasionally so it heats evenly without drying out. Warm the black beans and pinto beans separately in small saucepans over low heat, stirring occasionally, until heated through but not boiling.
Warm the chosen protein, either the chipotle chicken or steak, in a skillet over medium heat for 2 to 3 minutes, tossing occasionally until heated through and slightly crisp at the edges again. Warm the fajita veggies in the same manner, either in the same skillet or a separate one, for 2 to 3 minutes until hot and lightly charred.
Once every warm component is ready, start assembling the bowl using a large, wide dish that gives enough surface area for each ingredient to sit in its own section rather than piling on top of each other. Spoon the warmed cilantro lime rice into the base of the bowl first, spreading it into an even layer across the bottom, since rice serves as the foundation that soaks up flavor from everything layered on top.
Add the black beans and pinto beans next, spooning each into its own section on top of the rice rather than mixing them together, which keeps the bowl visually appealing and lets each flavor stand distinct when eaten. Place the warmed protein into another section of the bowl, followed by the fajita veggies arranged alongside it.
Add a handful of shredded lettuce into any remaining open space in the bowl, which adds a cool, crisp contrast against the warm ingredients. Spoon the fresh tomato salsa and roasted chili corn salsa over the top in small, distinct piles rather than pouring them evenly across the whole bowl, since keeping the salsas concentrated in one area lets each bite include a customizable amount of heat and acidity.
Finish the bowl with a generous spoonful of guacamole placed in its own section, followed by a drizzle of queso blanco over the warm rice and protein area. Drizzle the honey vinaigrette lightly over the lettuce and vegetable sections just before serving, since dressing added too early can wilt the lettuce and water down the salsa.
Serve the bowl immediately while the warm components are still hot, allowing each person to mix the layers together to their own preference right before the first bite.
Tips
Building the bowl in distinct sections rather than mixing everything together keeps every ingredient’s texture intact until the moment of eating. Warming each component separately produces better results than microwaving the whole assembled bowl at once, since microwaving can turn the lettuce soggy and the salsa watery.
Customization Ideas
Swap in barbacoa, carnitas, or sofritas for a different protein each time this bowl gets made, or add both rice and bean varieties for a heartier, more filling meal. A scoop of tomatillo green or red chili salsa also works well layered alongside the standard tomato and corn salsas for extra variety.
Storage
Store each component separately in individual airtight containers in the refrigerator for up to 4 days, assembling the bowl fresh each time rather than storing it pre-mixed, since combined ingredients turn soggy and lose their distinct textures within a few hours.
Meal Prep Tips for Chipotle Copycat Recipes
Turning these recipes into a week of easy meals comes down to a few simple habits.
- Cook proteins in batches – Prepare a double batch of chicken, steak, or barbacoa during one cooking session, then divide it into portions for several meals throughout the week.
- Store ingredients separately – Keep rice, beans, protein, and salsa in their own containers rather than combined, since separate storage keeps every texture fresh until the moment of eating.
- Best containers to use – Glass containers with tight-fitting lids work well for rice and beans, while smaller containers or jars suit salsas, guacamole, and dressing, which need less air exposure.
- Refrigeration and freezing guide – Cooked proteins, rice, and beans generally last 4 to 5 days refrigerated and up to 3 to 4 months frozen, while fresh salsas and guacamole are best eaten within 2 to 3 days and do not freeze well.
- Weekly meal prep ideas – Cook a large batch of rice, two proteins, and two types of beans on one day, then build a different bowl combination each night using fresh toppings like salsa and guacamole added right before eating.
Conclusion
Making Chipotle Mexican Grill copycat recipes at home turns an expensive, occasional treat into an everyday option that costs less and tastes just as good.
Each component covered in this guide, from smoky proteins to fresh salsas and creamy guacamole, works on its own or combined into a full bowl, giving endless ways to build a meal around personal taste.
Trying different protein and topping combinations keeps the routine interesting week after week, since a simple swap between chicken, steak, or sofritas changes the entire feel of a meal without any extra effort.
Bookmarking this guide makes future meal prep sessions faster, since every recipe here holds up well in the refrigerator or freezer for busy weeknights ahead. Sharing a favorite combination or a personal twist on any of these recipes in the comments below helps build a stronger resource for anyone else looking to recreate these flavors at home.