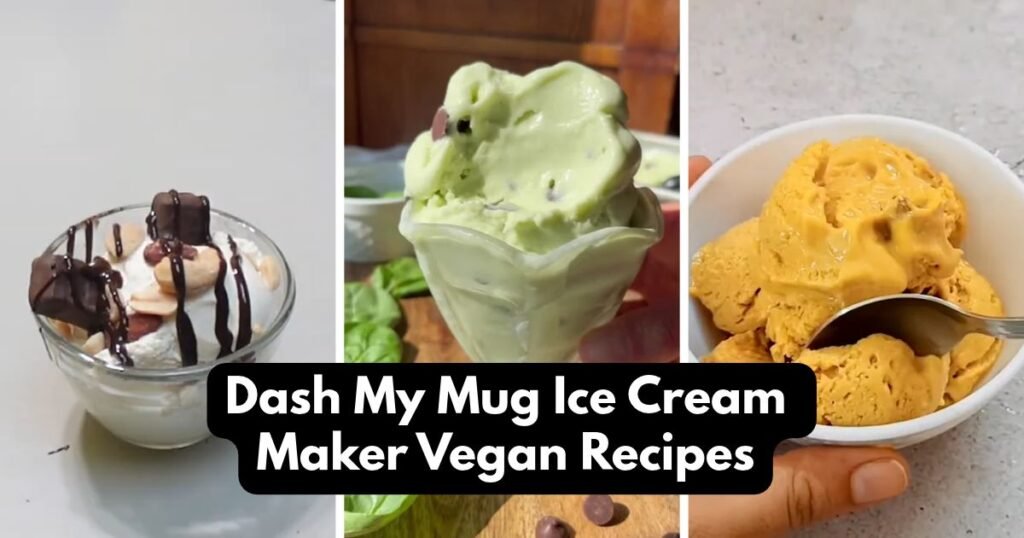
My first scoop of homemade dairy-free ice cream came out like a sweet, icy slush. Not a good start.
The fix was small. More fat, a colder mixture, and a little patience. After that, the mug gave me thick, smooth ice cream in about fifteen minutes.
Now my freezer always holds a frozen mug, ready for a quick flavor test. The small size makes each try easy, and the dishes pile up very little.
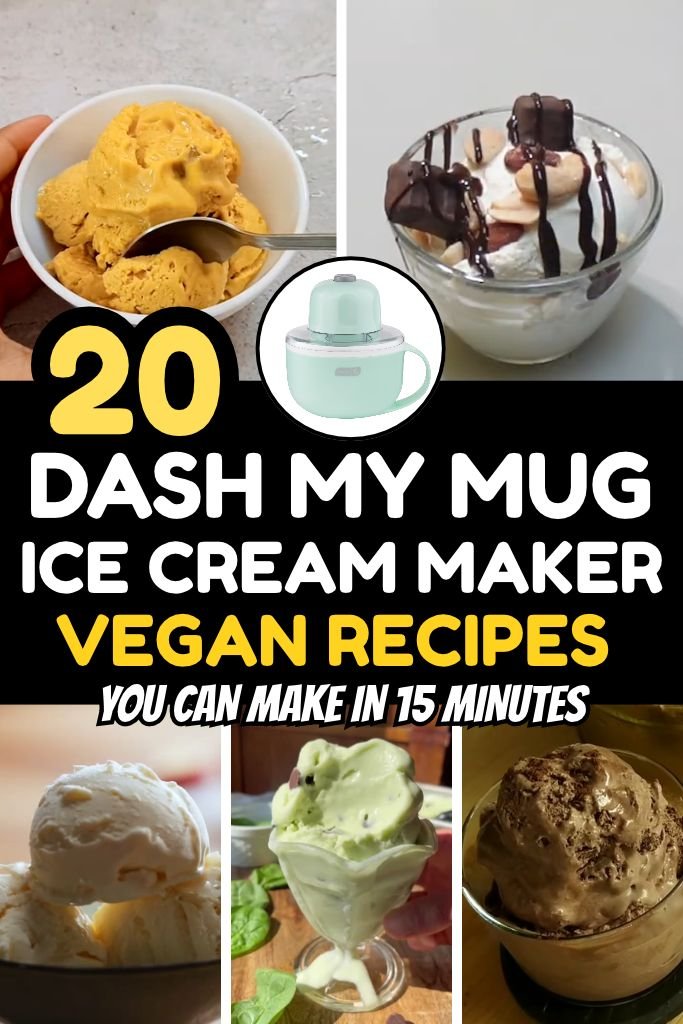
What Makes a Good Vegan Ice Cream for the Dash My Mug?
- Fat gives the creamy body. Ice cream needs fat to stay smooth. Without it, water turns into big ice crystals. Coconut milk and coconut cream carry plenty of fat, so they make a rich base.
- Pick your main ingredients with care. Coconut cream brings thickness. Cashew or almond butter adds a soft, nutty feel. Ripe bananas bring natural sweetness and a thick texture. A splash of plant milk then thins the mix just enough to pour.
- Thin plant milks can turn icy. Rice milk, light almond milk, and many soy drinks have little fat. Used alone, they freeze into hard, grainy ice. Use them in small amounts, next to a fatty ingredient.
- Sugar does more than sweeten. Sugar lowers the freezing point, so the ice cream stays softer and scoops better. Too little sugar makes a hard, icy mug. Too much keeps the mix from freezing at all.
- Chill the mixture first. A cold base freezes faster in the frozen mug and churns thicker. Two hours in the fridge works well. A warm mix melts the frozen bowl wall and gives you a runny result.
- Choose mix-ins that suit vegan ice cream. Dairy-free chocolate chips, vegan cookies, chopped nuts, shredded coconut, and fruit pieces all work well.
- Keep solid add-ins small. Big chunks can catch on the paddle and slow it down. Small bits spread evenly, so every spoonful has a little something in it.
How to Prepare the Dash My Mug Ice Cream Maker for Vegan Recipes
- Freeze the mug for at least 24 hours. The mug has a cooling bowl built into the walls. That bowl must freeze solid before the first batch.
- Keep the mug upright. Stand it straight in the freezer. Do not lay it on its side, because the cooling liquid inside needs to freeze evenly.
- Check your freezer temperature. The maker’s instructions call for 0°F or colder. A warmer freezer gives you a soft, soupy result.
- Set the frozen mug on a steady surface. Take it out only when the mixture is cold and ready. A flat counter keeps it from tipping.
- Attach the motor to the cover. Line up the pins on the motor with the slots in the cover, then press them together.
- Click the paddle into place. Slide it into the slot at the base of the motor. You will hear a small click.
- Lock the cover and paddle onto the mug. Match the pins on the cover with the notches on the mug base. Turn clockwise until it locks.
- Turn the machine on first. Plug it in and flip the switch. The paddle should spin before any liquid goes in.
- Pour the cold mixture through the chute. Add it slowly while the paddle turns. This keeps the base from freezing into a lump on the wall.
- Add your mix-ins near the end. Drop small vegan pieces through the chute while the ice cream churns.
- Switch it off at the right texture. Soft-serve thickness usually shows up around 15 to 20 minutes.
- Lift off the cover and pull out the paddle. Turn the lock counterclockwise first. Then eat your ice cream right from the mug.
Dash My Mug Ice Cream Maker Vegan Recipes
Making ice cream at home may seem hard or messy at first. It’s actually quite the opposite! You whisk a few things, chill them, and let the mug do the work. Every recipe below makes one mug, so you can try a new flavor without a big commitment.
1. Classic Vegan Vanilla Ice Cream
⏱ Time
Prep Time: 10 minutes, plus 2 hours of chilling
Churn Time: 15–20 minutes
Total: About 2 hours 30 minutes
Servings: 1 mug
This is the base I reach for most often. The coconut milk gives it a thick, smooth feel, and the vanilla stays soft and clean. A tiny pinch of salt makes the sweetness taste rounder. Make this one first, because it shows you how the mug behaves. Once you know how the texture should look, every other flavor gets easier.
Ingredients
- 1/2 cup vegan cream or full-fat coconut milk (shake the can well)
- 1/4 cup plant-based milk (oat or soy)
- 3 tablespoons granulated sugar
- 1 teaspoon pure vanilla extract
- 1 small pinch of salt
- Optional: 1/4 teaspoon scraped vanilla bean seeds
Instructions
- Place the cream or coconut milk, plant milk, and sugar in a small bowl. Whisk for about one minute. The sugar should look fully gone, with no grains at the bottom.
- Stir in the vanilla extract and the salt. Add the vanilla bean seeds now, too, and whisk until you see tiny dark specks spread evenly.
- Cover the bowl and place it in the fridge for at least 2 hours. A longer rest is fine. Cold liquid freezes faster and gives a smoother result.
- About ten minutes before churning, check that your mug has been frozen upright for a full 24 hours. Shake it gently. You should not hear any liquid sloshing inside the walls.
- Set the frozen mug on a steady counter. Attach the motor to the cover, then click the paddle into the slot under the motor.
- Lower the cover onto the mug and turn it clockwise until it locks. Plug in the maker and flip the switch. Make sure the paddle is spinning before you pour.
- Give the cold mixture one last quick whisk. Pour it slowly through the chute while the paddle turns. A steady, thin stream keeps it from sticking in one spot.
- Let it churn for 15 to 20 minutes. Around the 10-minute mark, the mix will start to look like thick cream. Near the end, it should hold soft peaks on the paddle.
- Switch the machine off and unplug it. Turn the cover counterclockwise to unlock it, then lift it away. The paddle stays in the ice cream, which keeps the counter clean.
- Pull out the paddle and scrape off any extra with a spoon. Eat it right away for a soft-serve texture, or freeze it for 30 minutes for a firmer scoop.
2. Vegan Chocolate Ice Cream
⏱ Time
Prep Time: 15 minutes, plus 2 hours of chilling
Churn Time: 15–20 minutes
Total: About 2 hours 35 minutes
Servings: 1 mug
Cocoa powder can turn gritty when it hits cold liquid, so I learned to warm a little of the milk first. That one small step makes the base silky. The coconut cream adds a deep, fudge-like body. Finish it with a spoonful of dairy-free chips for little pockets of melty chocolate in every bite. It tastes dark and rich, with no dairy needed.
Ingredients
- 1/2 cup coconut cream (the thick part from a chilled can)
- 1/4 cup plant-based milk
- 2 tablespoons unsweetened cocoa powder
- 3 tablespoons granulated sugar
- 1 teaspoon pure vanilla extract
- 1 small pinch of salt
- Optional: 1 tablespoon mini dairy-free chocolate chips
Instructions
- Warm the plant milk in a small saucepan over low heat for about one minute. It should feel hot to the touch but not bubbling. Take it off the burner right away.
- Add the cocoa powder and sugar to the warm milk. Whisk hard until the mixture turns smooth and glossy, with no dry cocoa lumps left behind.
- Pour the cocoa mixture into a bowl. Let it sit on the counter for five minutes so it stops steaming. Adding it hot to cold cream would make the whole base too warm.
- Whisk in the coconut cream, vanilla extract, and salt. Keep whisking until the color looks even and the texture feels like thin pudding.
- Cover the bowl and chill it for at least 2 hours. The mix will thicken a bit in the fridge, so give it a quick stir before you pour.
- Take the mug out of the freezer and set it on a flat surface. Attach the motor to the cover, then click the paddle into place until it holds firmly.
- Lock the cover onto the mug by turning clockwise. Plug in the maker and switch it on. Wait until the paddle is moving smoothly.
- Pour the chilled mixture through the chute in a slow stream. The cold wall will start to set the edges right away, and the paddle scrapes them back in.
- Churn for 15 to 20 minutes. During the last two minutes, drop the chocolate chips through the chute a few at a time so they spread evenly.
- Turn the machine off, unlock the cover, and lift it away. Pull the paddle out last. Serve straight from the mug, or freeze briefly for a firmer texture.
3. Vegan Strawberry Ice Cream
⏱ Time
Prep Time: 15 minutes, plus 2 hours of chilling
Churn Time: 15–20 minutes
Total: About 2 hours 35 minutes
Servings: 1 mug
Strawberries hold a lot of water, which can make ice cream icy. The trick is to mash them with sugar first and let them sit. That draws out the juice and makes a sweet, pink syrup. Coconut milk then brings the creaminess back. A small squeeze of lemon keeps the berry flavor bright, and a few tiny fruit pieces at the end add a nice little bite.
Ingredients
- 1/2 cup fresh strawberries, hulled and chopped
- 1/2 cup full-fat coconut milk or vegan cream
- 3 tablespoons granulated sugar
- 1/2 teaspoon pure vanilla extract
- 1 teaspoon fresh lemon juice
- Optional: 1 tablespoon finely diced strawberries
Instructions
- Place the chopped strawberries and the sugar in a small bowl. Mash with a fork until most of the fruit breaks down. A few small chunks are fine.
- Let the bowl sit for 10 minutes. The sugar will pull juice from the berries and form a bright red syrup. Stir it once or twice while you wait.
- Pour in the coconut milk, then add the vanilla and the lemon juice. Whisk well until the mixture turns a soft, even pink.
- For a smoother ice cream, press the mixture through a fine strainer. For a fruitier one, leave it as is. Both ways work well in the mug.
- Cover the bowl and chill it for at least 2 hours. The fruit flavor deepens as it rests, and the cold base churns thicker.
- Remove the frozen mug and place it on a stable counter. Attach the motor to the cover and click the paddle in until it sits tight.
- Turn the cover clockwise onto the mug until it locks. Plug in the maker and turn it on. Check that the paddle spins freely before you add anything.
- Stir the chilled mixture once, since the fruit may have settled. Pour it through the chute slowly while the paddle turns.
- Churn for 15 to 20 minutes, until it looks thick and creamy. In the last minute or two, add the diced strawberries through the chute. Keep the pieces small so the paddle moves easily.
- Switch off the maker and unlock the cover. Lift it away with the paddle still in the ice cream, then pull the paddle out. Eat it soft, or let it firm up in the freezer for a short time.
4. Vegan Banana Ice Cream
⏱ Time
Prep Time: 10 minutes, plus 2 hours of chilling
Churn Time: 15-20 minutes
Total: About 2 hours 30 minutes
Servings: 1 mug
Spotted bananas work best here. The dark freckles mean the fruit is full of natural sugar, so you need no extra sweetener. Blended with coconut cream, the banana turns thick and smooth, almost like a custard. A little cinnamon adds warmth, and chopped walnuts bring a gentle crunch. It tastes like banana bread in a cold, creamy form.
Ingredients
- 1 large ripe banana, peeled (about 1/2 cup mashed)
- 1/4 cup plant-based milk
- 1/3 cup coconut cream
- 1/2 teaspoon pure vanilla extract
- 1/4 teaspoon ground cinnamon
- Optional: 2 tablespoons chopped walnuts
Instructions
- Break the banana into chunks and drop them in a small bowl. Mash with a fork until the pieces turn into a smooth paste. Tiny lumps will vanish later in the mug.
- Add the plant milk and the coconut cream. Use a whisk or a small blender to mix until the color looks even and creamy. A blender gives the silkiest result.
- Stir in the vanilla and the cinnamon. Taste a tiny spoonful. The banana flavor should come first, with the spice sitting softly behind it.
- Cover the bowl tightly and slide it into the fridge for two hours. A tight cover matters, since banana turns brown fast when air touches it. A little color change is harmless, though.
- Pull the mug from the freezer when the chill time is almost done. Set it on a flat counter and give it a quick shake. No sloshing sound means it is frozen solid.
- Press the motor onto the cover so the pins slide into their slots. Then push the paddle into the base of the motor until you feel it click.
- Place the cover on the mug and twist clockwise until it locks. Plug in the maker and switch it on. Let the paddle spin freely for a few seconds.
- Stir the cold banana mixture once, then pour it down the chute in a thin, slow stream. Pouring slowly lets the paddle catch the frozen edges as they form.
- Churn for 15 to 20 minutes. About two minutes before the end, add the chopped walnuts through the chute. Cut them small so the paddle does not catch on them.
- Turn off the machine, unplug it, and twist the cover counterclockwise. Lift it off and pull out the paddle. Spoon the ice cream out of the mug and top it with a few extra walnuts.
5. Vegan Mango Ice Cream
⏱ Time
Prep Time: 15 minutes, plus 2 hours of chilling
Churn Time: 15-20 minutes
Total: About 2 hours 35 minutes
Servings: 1 mug
Ripe mango blends into a bright, golden base that feels almost like sorbet, only creamier. The coconut milk rounds out the fruit and keeps the texture soft. A squeeze of lime wakes up the flavor and keeps it from tasting flat. Pick a mango that gives slightly under your thumb and smells sweet at the stem. A hard mango will taste sour and look pale.
Ingredients
- 1/2 cup ripe mango chunks (about 1 small mango)
- 1/2 cup full-fat coconut milk
- 3 tablespoons granulated sugar
- 1 teaspoon fresh lime juice
- 1/2 teaspoon pure vanilla extract
- Optional: 2 tablespoons finely diced mango
Instructions
- Peel the mango and slice the flesh away from the large pit. Measure out half a cup of chunks. Set aside a few extra pieces for the end, and dice them very small.
- Put the mango chunks, coconut milk, and sugar into a blender. Blend on high for about 40 seconds. Stop and scrape the sides, then blend once more until nothing stringy remains.
- Add the lime juice and vanilla. Pulse two or three times just to mix them in. Taste the base and add a tiny bit more lime when it seems too sweet.
- Pour the mixture into a bowl and cover it. Let it chill in the fridge for at least two hours. Mango bases thicken as they cool, which helps the final texture.
- Take the frozen mug out and place it on a steady surface. Fit the motor onto the cover, then snap the paddle into its slot until it stays put.
- Lower the cover onto the mug and give it a clockwise turn until it locks tight. Plug in the maker and press the switch. Wait until the paddle moves at a steady speed.
- Whisk the chilled base once to bring it back together. Mango pulp likes to settle at the bottom. Then pour it through the chute in a slow, even stream.
- Let the maker run for 15 to 20 minutes. The mixture will turn from a thin juice into a thick, scoopable cream. It should cling to the paddle when it is ready.
- Toss in the diced mango during the final minute. Drop the pieces in a few at a time so they spread out rather than clump together.
- Switch the motor off and unlock the cover with a counterclockwise turn. Lift the cover away, remove the paddle, and eat the ice cream straight from the mug with a squeeze of extra lime on top.
6. Vegan Coconut Ice Cream
⏱ Time
Prep Time: 10 minutes, plus 2 hours of chilling
Churn Time: 15-20 minutes
Total: About 2 hours 30 minutes
Servings: 1 mug
This one is pure coconut from the first spoonful to the last. Two kinds of coconut work together here: the milk makes the base smooth, while the cream gives it a thick, rich body. Shredded coconut adds a soft chew. Toasting the shreds for a few minutes in a dry pan brings out a nutty flavor that I like even more than the plain version.
Ingredients
- 1/2 cup full-fat coconut milk
- 1/4 cup coconut cream
- 3 tablespoons granulated sugar
- 1/2 teaspoon pure vanilla extract
- 2 tablespoons unsweetened shredded coconut
- 1 small pinch of salt
Instructions
- Open the can of coconut milk without shaking it first, then scoop the thick top layer into a bowl for the cream. Measure the milk and the cream separately so the ratio stays right.
- Warm a dry skillet over medium-low heat. Add the shredded coconut and stir constantly for about three minutes. Pull it off the heat when the edges turn light gold. Spread it on a plate to cool.
- In a mixing bowl, whisk the coconut milk, coconut cream, and sugar together. Keep going for a full minute. You want the sugar to melt away and the cream to blend in smoothly.
- Add the vanilla and the salt, then whisk again. The mixture should look pale and thick, a bit like heavy cream. Lumps of cream should be gone.
- Press plastic wrap onto the bowl and set it in the fridge. Two hours is the minimum. Coconut fat firms up when cold, and this firmness is what makes the churned texture so creamy.
- Remove the mug from the freezer and set it down where it will not wobble. Connect the motor to the cover, and push the paddle into the base until it clicks.
- Place the cover over the mug and turn it clockwise until you feel it lock. Plug in the cord and flip the switch, so the paddle starts to turn.
- Whisk the chilled mixture one more time, since coconut fat sometimes separates. Pour it through the chute slowly while the paddle keeps spinning.
- Churn for 15 to 20 minutes. Add the cooled toasted coconut in the last two minutes, sprinkling it in through the chute in small pinches.
- Shut off the machine and turn the cover counterclockwise to release it. Lift the cover away and take out the paddle. Scoop the ice cream into bowls, or eat it right from the mug.
7. Vegan Chocolate Peanut Butter Ice Cream
⏱ Time
Prep Time: 15 minutes, plus 2 hours of chilling
Churn Time: 15-20 minutes
Total: About 2 hours 35 minutes
Servings: 1 mug
Peanut butter and chocolate are a classic pair, and they work even better in a frozen form. The peanut butter adds fat and body, so the ice cream turns thick and silky. Use a smooth, creamy kind with few ingredients. Natural peanut butter with the oil stirred in blends best. Chopped dairy-free chocolate at the end gives you little crisp bits that melt on your tongue.
Ingredients
- 2 tablespoons smooth peanut butter
- 1/4 cup plant-based milk
- 1/3 cup coconut cream
- 1 1/2 tablespoons unsweetened cocoa powder
- 3 tablespoons granulated sugar
- 1/2 teaspoon pure vanilla extract
- 2 tablespoons chopped dairy-free chocolate pieces
Instructions
- Heat the plant milk in a small pot over low heat until it feels warm, not hot. Warm milk helps the peanut butter melt in smoothly, so skip this step only when your peanut butter is very runny.
- Add the peanut butter to the warm milk and whisk until the two blend into a smooth, light-brown liquid. This takes about a minute. Take the pot off the heat when no streaks remain.
- Sift the cocoa powder and sugar into the pot. Stir vigorously. The mixture will thicken and turn deep brown, with a glossy look like chocolate sauce.
- Move the mixture to a bowl, then let it cool on the counter for five minutes. Whisk in the coconut cream and the vanilla extract until everything looks smooth and even.
- Cover the bowl and chill it in the fridge for two hours or longer. The peanut butter will make the base quite thick, so stir it well before you use it.
- Get the frozen mug out and plant it on a flat counter. Slide the motor onto the cover and press the paddle into its slot. Listen for the click that tells you it is seated.
- Lock the cover to the mug with a clockwise twist, then plug the maker in. Press the switch and watch the paddle begin to turn.
- Loosen the cold mixture with a quick whisk. Pour it into the chute slowly, in a thin line, so the paddle can work it against the frozen wall.
- Run the maker for 15 to 20 minutes. Chop the chocolate into pieces no bigger than a pea. Add them in the last two minutes, a few at a time, through the chute.
- Switch off the motor and rotate the cover counterclockwise. Raise the cover, pull out the paddle, and serve. A drizzle of melted peanut butter on top makes a nice finish.
8. Vegan Cookies and Cream Ice Cream
⏱ Time
Prep Time: 10 minutes, plus 2 hours of chilling
Churn Time: 15-20 minutes
Total: About 2 hours 30 minutes
Servings: 1 mug
Plain vanilla gets a big upgrade here. Crushed chocolate sandwich cookies turn the base gray and speckled, just like the kind from the ice cream shop. Many store-bought sandwich cookies are vegan by accident, so read the label before you buy. Crush them by hand, not in a blender. Uneven bits of cookie give the best bite.
Ingredients
- 1/2 cup vegan cream
- 1/4 cup plant-based milk
- 3 tablespoons granulated sugar
- 1/2 teaspoon pure vanilla extract
- 4 vegan chocolate sandwich cookies, crushed into small pieces
- Optional: 1 extra cookie, broken into tiny bits for topping
Instructions
- Pour the vegan cream and plant milk into a bowl. Add the sugar and whisk for about a minute, until you can no longer feel grains when you rub a drop between your fingers.
- Stir in the vanilla. The base should look pale and smooth, a lot like thin pancake batter. Taste it now, since the cookies will add more sweetness later.
- Cover the bowl and chill it for at least two hours. A cold base is the secret to a thick texture, so do not rush this part.
- While the base chills, put the cookies in a zip bag and press them with a rolling pin. Aim for pieces smaller than a dime. Pour the crumbs into a small cup and set them aside.
- Take the mug out of the freezer and put it on a flat counter. Slide the motor onto the cover, then press the paddle into its slot until it clicks.
- Turn the cover onto the mug until it locks tight. Plug in the cord and press the switch. Wait a few seconds so the paddle settles into a steady spin.
- Give the chilled base a quick stir. Pour it through the chute in a slow stream and keep your hand steady. The mix will begin to thicken against the cold wall.
- Let the maker run for 15 to 20 minutes. Look through the chute now and then. When the ice cream clings to the paddle in soft ribbons, it is nearly done.
- Add the crushed cookies in the last two minutes. Sprinkle them in slowly, a spoonful at a time, so the paddle never jams.
- Turn the machine off and twist the cover counterclockwise. Lift it away and take out the paddle. Top with the extra cookie bits and eat it right away.
9. Vegan Coffee Ice Cream
⏱ Time
Prep Time: 10 minutes, plus 2 hours of chilling
Churn Time: 15-20 minutes
Total: About 2 hours 30 minutes
Servings: 1 mug
Coffee ice cream needs coffee that is strong, because the cold dulls the flavor. Brew it double strength, or use a little instant espresso powder in hot water. Let it cool all the way before mixing. The coconut cream softens the bitter edge and leaves a smooth, mellow finish. A few shavings of dairy-free chocolate on top make it feel like a café dessert.
Ingredients
- 1/3 cup strong coffee, fully chilled
- 1/4 cup plant-based milk
- 1/3 cup coconut cream
- 3 tablespoons granulated sugar
- 1/2 teaspoon pure vanilla extract
- Optional: 1 tablespoon finely chopped dairy-free chocolate
Instructions
- Brew the coffee extra strong, using about double the usual grounds. Pour it into a cup and let it cool on the counter for 15 minutes. Then place it in the fridge until it feels cold.
- Spoon the coconut cream into a mixing bowl. Whisk it for 30 seconds to loosen it. It should look smooth, with no hard white clumps left.
- Add the sugar and the plant milk. Whisk until the sugar melts away and the mixture turns a creamy white.
- Slowly pour in the cold coffee while you keep whisking. The color will shift to a warm tan. Stir in the vanilla last.
- Taste a small spoonful. Coffee flavor gets milder once frozen, so the base should taste a little stronger than you want the finished ice cream to be.
- Cover the bowl and chill it for two hours. Stir it once halfway through. This keeps the coconut fat from settling on top.
- Pull the mug from the freezer and set it on a stable surface. Attach the motor to the cover, then push the paddle in until you hear the click.
- Lock the cover on with a clockwise turn. Plug in the maker and switch it on. Pour the base in through the chute in a thin, steady stream.
- Churn for 15 to 20 minutes. When the texture looks like thick soft-serve, add the chopped chocolate through the chute in small amounts.
- Switch off the motor and turn the cover counterclockwise. Lift the cover, remove the paddle, and scoop. A light dusting of ground coffee on top looks nice.
10. Vegan Mocha Ice Cream
⏱ Time
Prep Time: 15 minutes, plus 2 hours of chilling
Churn Time: 15-20 minutes
Total: About 2 hours 35 minutes
Servings: 1 mug
Mocha sits right between chocolate and coffee, and each one makes the other taste deeper. Here, the coffee brings out the roasted notes in the cocoa. Use less coffee than in the plain coffee flavor, so the chocolate stays in front. Mini chips work better than big ones, since they spread out evenly and never get stuck in the paddle.
Ingredients
- 1/4 cup strong coffee, fully chilled
- 1 1/2 tablespoons unsweetened cocoa powder
- 1/4 cup plant-based milk
- 1/3 cup coconut cream
- 3 tablespoons granulated sugar
- 1/2 teaspoon pure vanilla extract
- 1 tablespoon mini dairy-free chocolate chips
Instructions
- Warm the plant milk in a small pot for about one minute over low heat. It only needs to feel hot to the touch. Remove the pot from the burner.
- Whisk the cocoa powder and sugar into the warm milk. Keep whisking until the liquid turns smooth and shiny. Dry cocoa lumps hide at the edges, so scrape the sides of the pot.
- Pour the chocolate mixture into a bowl and leave it for five minutes. Then add the coconut cream and whisk until the color is even and the texture looks like thin pudding.
- Stir in the chilled coffee and the vanilla. The mixture will turn a lighter brown. Taste it and add one more teaspoon of sugar when the coffee seems too sharp.
- Cover and refrigerate for at least two hours. The longer rest helps the cocoa and coffee flavors blend into one.
- Take the frozen mug from the freezer and place it on a flat counter. Fit the motor into the cover and snap the paddle into its slot.
- Twist the cover clockwise onto the mug until it locks. Plug in the maker and press the switch. The paddle should turn smoothly with nothing in the way.
- Whisk the base one more time, then pour it slowly through the chute. Slow pouring gives the paddle time to scrape the frozen edges back into the mix.
- Churn for 15 to 20 minutes. During the last two minutes, drop the mini chips through the chute a few at a time.
- Turn off the motor and rotate the cover counterclockwise. Lift off the cover, pull out the paddle, and serve. A pinch of cocoa dusted on top finishes it nicely.
11. Vegan Blueberry Ice Cream
⏱ Time
Prep Time: 15 minutes, plus 2 hours of chilling
Churn Time: 15-20 minutes
Total: About 2 hours 35 minutes
Servings: 1 mug
Blueberries turn this ice cream a deep purple that looks almost too pretty to eat. Frozen berries work just as well as fresh ones, and they are often cheaper in the fall. Cook them for a few minutes first. Heat breaks the skins and releases the juice, which gives you a smooth color and a jammy flavor in every bite.
Ingredients
- 1/2 cup fresh or frozen blueberries
- 1/3 cup full-fat coconut milk
- 2 tablespoons plant-based cream
- 3 tablespoons granulated sugar
- 1 teaspoon fresh lemon juice
- 1/2 teaspoon pure vanilla extract
Instructions
- Put the blueberries, sugar, and one tablespoon of water in a small pot. Set it over medium heat. Stir now and then as the berries begin to warm.
- Cook for about five minutes. The berries will burst and the liquid will turn dark purple and slightly thick. Press a few against the side of the pot with a spoon.
- Pour the hot berries into a bowl and let them cool for 10 minutes. Mash them a little more with a fork. Leave some small pieces for texture.
- Stir in the coconut milk and the plant-based cream. The color will lighten to a soft lavender. Add the lemon juice and the vanilla, then whisk well.
- Taste the base. Berries vary a lot in sweetness, so add a teaspoon more sugar when they seem tart. Stir until it melts away.
- Cover the bowl and chill for two hours. The flavor gets deeper as it rests. Stir it before pouring, because the berry bits tend to sink.
- Remove the frozen mug and set it on a steady counter. Connect the motor to the cover. Press the paddle in until it clicks into its place.
- Lock the cover onto the mug with a clockwise turn. Plug in the cord and flip the switch. Wait until the paddle is moving at a steady pace.
- Pour the cold mixture through the chute slowly while the paddle spins. Let it churn for 15 to 20 minutes, until it looks thick, creamy, and a little glossy.
- Switch off the motor and unlock the cover with a counterclockwise turn. Lift it away and pull out the paddle. Spoon the ice cream into a bowl, or eat it from the mug.
12. Vegan Raspberry Ice Cream
⏱ Time
Prep Time: 15 minutes, plus 2 hours of chilling
Churn Time: 15-20 minutes
Total: About 2 hours 35 minutes
Servings: 1 mug
Raspberries bring a sharp, tangy flavor that stays bold even after freezing. The coconut cream softens that tang and makes the texture silky. The small seeds can feel gritty, so I press the mashed berries through a strainer. It takes two extra minutes and changes the whole mouthfeel. The color comes out a bright, deep pink.
Ingredients
- 1/2 cup fresh or thawed raspberries
- 1/3 cup coconut cream
- 1/4 cup plant-based milk
- 3 tablespoons granulated sugar
- 1 teaspoon fresh lemon juice
- 1/2 teaspoon pure vanilla extract
Instructions
- Place the raspberries and sugar in a small bowl. Crush them with the back of a fork until the fruit turns into a wet, red pulp. Let the bowl rest for five minutes.
- Set a fine strainer over a second bowl. Pour the pulp into it and press with a spoon. Keep pressing until only the seeds are left behind. Throw the seeds away.
- Add the coconut cream to the strained juice. Whisk hard for about 30 seconds. The mixture will change from deep red to a soft, rosy pink.
- Pour in the plant milk, the lemon juice, and the vanilla. Whisk again until the color looks even. Taste a small spoonful. It should be sweet first, with a gentle tang after.
- Cover the bowl and place it in the fridge for two hours. The cold time helps the coconut fat firm up, which keeps the ice cream creamy.
- Take the mug out of the freezer and set it on a flat counter. Slide the motor onto the cover. Push the paddle into the base of the motor until the click tells you it is locked in.
- Lower the cover onto the mug and turn it clockwise until it stops. Plug in the maker and press the switch. Wait a moment so the paddle finds a steady speed.
- Stir the chilled base one time, since the cream may have drifted to the top. Pour it through the chute in a slow, thin stream while the paddle keeps turning.
- Let it churn for 15 to 20 minutes. The color will lighten as air blends in. It is ready when it looks like thick, pale pink soft-serve.
- Turn off the motor and twist the cover counterclockwise. Lift it away and pull the paddle free. Scoop the ice cream into a small bowl, or eat it from the mug while it is soft.
13. Vegan Peach Ice Cream
⏱ Time
Prep Time: 20 minutes, plus 2 hours of chilling
Churn Time: 15-20 minutes
Total: About 2 hours 40 minutes
Servings: 1 mug
Peaches taste best when they are soft and smell sweet near the stem. Cooking them for a few minutes makes the flavor deeper and keeps extra water out of the base. Oat milk gives a gentle, creamy feel, though coconut milk makes it richer. A pinch of cinnamon adds a warm note that reminds me of peach cobbler on a late summer porch.
Ingredients
- 1 large ripe peach, peeled and chopped (about 3/4 cup)
- 1/3 cup oat milk or coconut milk
- 1/4 cup vegan cream
- 3 tablespoons granulated sugar
- 1/2 teaspoon pure vanilla extract
- Optional: 1/8 teaspoon ground cinnamon
Instructions
- Bring a small pot of water to a boil. Drop the whole peach in for 30 seconds, then move it into a bowl of cold water. The skin will slip off with your fingers.
- Cut the peach away from the pit and chop the flesh into small cubes. Measure out three-quarters of a cup. Save any extra for a snack.
- Put the peach cubes, sugar, and a tablespoon of water in a small pot over medium heat. Cook for about six minutes, stirring often, until the fruit turns soft and the liquid looks syrupy.
- Pour the warm peaches into a blender and blend until smooth. Let the puree cool on the counter for ten minutes. Hot fruit would warm the cream and spoil the texture.
- Add the oat milk, the vegan cream, and the vanilla to the puree. Sprinkle in the cinnamon now, too. Blend for a few seconds, just until the color looks even.
- Pour the base into a bowl, cover it, and chill for two hours. Peach bases thicken a little as they cool, so give it a stir before churning.
- Get the mug out of the freezer and set it on a stable surface. Connect the motor to the cover. Then push the paddle into its slot until it clicks tight.
- Twist the cover onto the mug clockwise until it locks. Plug in the cord and flip the switch. Check that the paddle turns freely before you pour.
- Pour the cold mixture through the chute slowly. Churn for 15 to 20 minutes, until it clings to the paddle and holds a soft, thick shape.
- Switch off the machine and turn the cover counterclockwise. Lift it away and pull out the paddle. Top the ice cream with a few thin peach slices and a tiny shake of cinnamon.
14. Vegan Pineapple Coconut Ice Cream
⏱ Time
Prep Time: 15 minutes, plus 2 hours of chilling
Churn Time: 15-20 minutes
Total: About 2 hours 35 minutes
Servings: 1 mug
Think of a piña colada, minus the drink and plus a spoon. Sweet pineapple and rich coconut belong together, and lime juice ties them up. Fresh pineapple holds a natural enzyme that can make plant milk turn bitter. A short cook on the stove calms that enzyme down. Canned pineapple works too, since the canning step already did that job for you.
Ingredients
- 1/2 cup fresh pineapple, finely chopped (or canned, drained well)
- 1/3 cup full-fat coconut milk
- 1/4 cup coconut cream
- 3 tablespoons granulated sugar
- 1 teaspoon fresh lime juice
- 2 tablespoons unsweetened shredded coconut
Instructions
- Chop the pineapple into very small bits. Place it in a small pot with the sugar. Set the pot over medium heat and stir for about four minutes, until the juice runs and the pieces soften.
- Remove the pot from the heat and let it cool for ten minutes. Use a fork to mash the soft pineapple a little. Some small chunks add a nice texture later.
- Add the coconut milk and the coconut cream to the pot. Whisk well. The mixture will turn a creamy, pale yellow, with no hard bits of cream left.
- Stir in the lime juice. Taste a spoonful. The flavor should be sweet and tropical, with a bright edge. Add a few more drops of lime when it tastes too sweet.
- Pour the mixture into a bowl and cover it tightly. Chill in the fridge for at least two hours. Cold coconut fat is what gives this flavor its thick body.
- Toast the shredded coconut in a dry pan over low heat for two or three minutes. Stir it constantly until it turns light gold. Let it cool on a plate.
- Take the frozen mug from the freezer and place it on a flat counter. Slide the motor onto the cover, then press the paddle in until you hear it snap into place.
- Lock the cover to the mug with a clockwise twist. Plug in the maker and press the switch. Pour the cold mixture through the chute in a thin, slow stream.
- Churn for 15 to 20 minutes. In the final two minutes, sprinkle the toasted coconut through the chute a pinch at a time so it spreads evenly.
- Turn off the motor and rotate the cover counterclockwise. Lift off the cover and pull out the paddle. Serve right away, with a little extra coconut on top.
15. Vegan Mint Chocolate Chip Ice Cream
⏱ Time
Prep Time: 10 minutes, plus 2 hours of chilling
Churn Time: 15-20 minutes
Total: About 2 hours 30 minutes
Servings: 1 mug
Mint chocolate chip is a cool, clean flavor, and it gets even better with homemade chips. Peppermint extract is strong, so add it a few drops at a time and taste as you go. Too much can feel like toothpaste. The base turns pale white on its own, and a tiny bit of natural mint coloring gives the soft green look many people expect.
Ingredients
- 1/2 cup vegan cream
- 1/4 cup plant-based milk
- 3 tablespoons granulated sugar
- 1/4 teaspoon peppermint extract
- 2 tablespoons mini dairy-free chocolate chips
- Optional: 1 drop natural green food coloring
Instructions
- Pour the vegan cream and plant milk into a mixing bowl. Add the sugar and whisk for one full minute. The liquid should look smooth, with no sugar grains left on the bottom.
- Add 1/8 teaspoon of the peppermint extract and stir. Taste a small spoonful, then add more in tiny amounts. Stop when the mint feels cool but not sharp.
- Add the green coloring last, only when you want it. Use a single drop and whisk well. The color grows deeper as it chills, so keep it light.
- Cover the bowl and put it in the fridge for two hours. Mint flavor spreads and softens as it rests, which makes the finished ice cream taste more balanced.
- Chop any larger chocolate chips into pieces about the size of a grain of rice. Put them in a small cup and place the cup in the freezer. Cold chips will not melt while they mix in.
- Remove the mug from the freezer and set it on a steady surface. Fit the motor onto the cover. Push the paddle into the slot at the base until it clicks.
- Place the cover onto the mug and turn it clockwise until it locks. Plug in the maker and switch it on. Wait until the paddle moves at an even speed.
- Give the chilled base a quick stir. Pour it slowly through the chute while the paddle spins. A steady pour keeps the mix from freezing in one big lump.
- Let it churn for 15 to 20 minutes. When it looks thick and fluffy, add the cold chocolate bits through the chute in small pinches during the last two minutes.
- Turn the machine off and twist the cover counterclockwise. Lift it away and take out the paddle. Spoon the ice cream out right away, and add a few extra chips on top.
16. Vegan Salted Caramel Ice Cream
⏱ Time
Prep Time: 10 minutes, plus 2 hours of chilling
Churn Time: 15-20 minutes
Total: About 2 hours 30 minutes
Servings: 1 mug
Sweet and salty always makes me reach for a second spoonful. Brown sugar gives the base a toffee-like depth, and the store-bought vegan caramel sauce adds a buttery swirl of flavor. Sea salt is the key. A small pinch makes the caramel taste bold and keeps the sugar from feeling flat. Choose a thick caramel sauce, since a runny one thins the mixture.
Ingredients
- 1/2 cup full-fat coconut milk
- 1/4 cup vegan cream
- 2 tablespoons vegan caramel sauce, plus 1 teaspoon for drizzling
- 2 tablespoons packed brown sugar
- 1/2 teaspoon pure vanilla extract
- 1/8 teaspoon fine sea salt, plus a few flakes for topping
Instructions
- Pour the coconut milk and vegan cream into a medium bowl. Add the brown sugar and whisk for one minute. Press out any hard sugar lumps against the side of the bowl with the whisk.
- Add the caramel sauce and whisk until the mixture turns a pale tan with no streaks. Warm the caramel jar in a cup of hot water for two minutes first when it feels too stiff to pour.
- Stir in the vanilla and the 1/8 teaspoon of sea salt. Taste a small spoonful. The salt should be barely noticeable, just enough to round out the sweetness.
- Cover the bowl and chill for two hours. The brown sugar needs time to melt into the cream, and the cold makes the base thick enough to churn well.
- Take the mug from the freezer and set it on a flat counter. Slide the motor onto the cover, then press the paddle into its slot until you hear the click.
- Place the cover on the mug and turn it clockwise until it locks. Plug in the maker and press the switch. Wait until the paddle spins at a steady speed.
- Whisk the chilled base to loosen it. Pour it through the chute in a thin stream while the paddle turns. Slow pouring keeps the mix from clumping on the cold wall.
- Churn for 15 to 20 minutes. The ice cream will turn from thin and tan into a thick, glossy cream. It should cling to the paddle in soft ribbons.
- Switch off the motor and twist the cover counterclockwise. Lift it away and pull out the paddle. Scrape the extra ice cream from the paddle with a spoon.
- Drizzle the extra teaspoon of caramel over the top and add a few salt flakes. Eat it right away, while the caramel is still soft and sticky.
17. Vegan Chocolate Almond Ice Cream
⏱ Time
Prep Time: 15 minutes, plus 2 hours of chilling
Churn Time: 15-20 minutes
Total: About 2 hours 35 minutes
Servings: 1 mug
Almond butter does the heavy lifting in this flavor. It brings fat, body, and a toasty, nutty taste that pairs well with cocoa. Almond milk keeps the base light enough to pour. Toasting the chopped almonds for a few minutes makes them crisp, and they stay crunchy even after sitting in the cold ice cream. Pick plain almond butter without added sugar.
Ingredients
- 1/2 cup unsweetened almond milk
- 3 tablespoons smooth almond butter
- 1 1/2 tablespoons unsweetened cocoa powder
- 3 tablespoons granulated sugar
- 1/2 teaspoon pure vanilla extract
- 2 tablespoons chopped almonds
- 1 tablespoon chopped dairy-free chocolate
Instructions
- Heat the almond milk in a small pot over low heat for about one minute. It should feel warm, not hot. Warm milk helps the almond butter blend without leaving oily streaks.
- Add the almond butter to the pot and whisk until the liquid turns smooth and light brown. Take it off the heat as soon as no thick bits remain.
- Whisk in the cocoa powder and sugar. The mixture will darken and turn glossy. Scrape the bottom of the pot, since cocoa tends to settle there.
- Pour the mixture into a bowl and stir in the vanilla. Let it cool on the counter for ten minutes. Then cover it and chill in the fridge for at least two hours.
- Toast the chopped almonds in a dry pan over medium-low heat for three minutes. Shake the pan often. Pour them onto a plate when they smell nutty, then let them cool fully.
- Remove the frozen mug and place it on a stable surface. Attach the motor to the cover. Push the paddle into the base of the motor until it clicks into place.
- Lock the cover onto the mug with a clockwise turn. Plug in the cord and flip the switch. Stir the chilled base well, since almond butter can settle at the bottom.
- Pour the base through the chute in a slow, thin stream. Let the machine run for 15 to 20 minutes, until the mixture looks thick like soft pudding.
- In the last two minutes, add the cooled almonds and chopped chocolate through the chute. Keep the pieces small so they flow past the paddle without sticking.
- Switch off the motor and rotate the cover counterclockwise. Lift off the cover, remove the paddle, and serve. A few extra almonds on top add a nice crunch.
18. Vegan Pumpkin Spice Ice Cream
⏱ Time
Prep Time: 10 minutes, plus 2 hours of chilling
Churn Time: 15-20 minutes
Total: About 2 hours 30 minutes
Servings: 1 mug
This is my pick for crisp October afternoons. Pumpkin puree makes the base smooth and thick, and brown sugar brings a soft, molasses sweetness. Use plain canned pumpkin, not pie filling, since the filling already has sugar and spices. The pumpkin pie spice does the rest of the work. Let the base chill for the full time so the spices can settle in.
Ingredients
- 1/3 cup canned pumpkin puree
- 1/3 cup full-fat coconut milk
- 2 tablespoons plant-based cream
- 3 tablespoons packed brown sugar
- 1/2 teaspoon pumpkin pie spice
- 1/2 teaspoon pure vanilla extract
- 1 small pinch of salt
Instructions
- Spoon the pumpkin puree into a medium bowl. Blot it gently with a paper towel first when it looks watery. Extra water makes ice cream icy, so a dry puree gives a better result.
- Add the coconut milk and plant-based cream. Whisk until the pumpkin blends in fully. The mixture will turn a soft orange with no pale streaks.
- Stir in the brown sugar, pumpkin pie spice, vanilla, and salt. Whisk for one full minute. Rub a drop between your fingers to check that no sugar grains are left.
- Taste a small spoonful. Cold dulls the spice, so the base should taste a touch stronger than you want the finished ice cream to be.
- Cover the bowl and chill for two hours. Pumpkin bases get thicker in the fridge, so give the bowl a good stir before pouring.
- Take the mug out of the freezer and set it on a flat counter. Slide the motor onto the cover. Press the paddle into its slot until it clicks.
- Turn the cover clockwise onto the mug until it locks. Plug in the maker and press the switch. Make sure the paddle is turning before you add the base.
- Pour the thick mixture through the chute in a slow stream. It moves slower than milk-based bases, so tilt the bowl a little and let it glide.
- Churn for 15 to 20 minutes. The ice cream is ready when it looks smooth and holds soft peaks on the paddle. Pumpkin bases often finish a little thicker than other flavors.
- Switch off the motor, unlock the cover with a counterclockwise turn, and pull out the paddle. Dust the top with a pinch of pumpkin pie spice and serve.
19. Vegan Apple Cinnamon Ice Cream
⏱ Time
Prep Time: 10 minutes, plus 2 hours of chilling
Churn Time: 15-20 minutes
Total: About 2 hours 30 minutes
Servings: 1 mug
Warm apple pie, but frozen and spoonable. Applesauce gives the base a soft, mellow sweetness, while coconut cream adds the richness that apples lack. Cinnamon and brown sugar bring the cozy part. Cook a small apple until tender and dice it tiny for the finishing touch. Soft apple bits mix in much better than raw ones, which turn hard and icy in the cold.
Ingredients
- 1/3 cup unsweetened applesauce
- 1/4 cup oat milk
- 1/3 cup coconut cream
- 2 tablespoons packed brown sugar
- 1/2 teaspoon ground cinnamon
- 1/2 teaspoon pure vanilla extract
- Optional: 2 tablespoons finely diced cooked apple
Instructions
- Peel and dice half a small apple into pieces smaller than a pea. Cook them in a small pot with a teaspoon of water and a pinch of cinnamon for four minutes, until soft.
- Spread the cooked apple on a plate and let it cool completely. Place the plate in the freezer for ten minutes so the pieces turn cold before they reach the mug.
- In a mixing bowl, whisk the applesauce, oat milk, and coconut cream together. Keep going for about 30 seconds. The mixture should look smooth and pale gold.
- Add the brown sugar, the cinnamon, and the vanilla. Whisk for another minute. The color will deepen to a warm tan, and the sugar should melt away.
- Taste it. The apple flavor should come through first, followed by the cinnamon. Add a small pinch more cinnamon when it tastes too plain.
- Cover the bowl and chill for at least two hours. The cinnamon flavor blends into the cream as it rests, and the cold helps the texture churn up thick.
- Remove the frozen mug and place it on a stable surface. Fit the motor onto the cover. Push the paddle in until you feel it click into its slot.
- Lock the cover onto the mug with a clockwise turn. Plug in the maker and switch it on. Pour the chilled mixture through the chute in a slow, even stream.
- Churn for 15 to 20 minutes. In the final two minutes, drop the cold apple bits through the chute a few at a time so they spread evenly.
- Turn off the motor, unlock the cover with a counterclockwise turn, and lift it away. Pull out the paddle and serve with a light sprinkle of cinnamon on top.
20. Vegan S’mores Ice Cream
⏱ Time
Prep Time: 15 minutes, plus 2 hours of chilling
Churn Time: 15-20 minutes
Total: About 2 hours 35 minutes
Servings: 1 mug
Campfire flavor, no fire needed. The chocolate base gives you the rich part, while marshmallow bits and graham cracker crumbs bring the sweet and crunchy parts. Many marshmallows contain gelatin, so look for a vegan brand and check the label. Add the crackers last, right before you finish. They soften fast in wet ice cream, and late timing keeps them crisp.
Ingredients
- 1/2 cup vegan cream
- 1/4 cup plant-based milk
- 1 tablespoon unsweetened cocoa powder
- 3 tablespoons granulated sugar
- 1/2 teaspoon pure vanilla extract
- 2 tablespoons mini vegan marshmallows, cut into small pieces
- 2 tablespoons crushed vegan graham crackers
- 1 tablespoon chopped dairy-free chocolate
Instructions
- Warm the plant milk in a small pot over low heat for about one minute. It only needs to feel hot to the touch. Take it off the burner right away.
- Whisk the cocoa powder and sugar into the milk until the mixture looks smooth and shiny. Check the bottom of the pot for dry cocoa and stir it back in.
- Pour the chocolate mixture into a bowl and let it cool for five minutes. Then whisk in the vegan cream and the vanilla until the color looks even and creamy.
- Cover the bowl and chill for at least two hours. A properly cold base makes the difference between a thick, scoopable ice cream and a runny one.
- Snip the marshmallows into pieces about the size of a pea using kitchen scissors. Dip the blades in water now and then to keep them from sticking. Place the pieces in the freezer for ten minutes.
- Crush the graham crackers in a zip bag with a rolling pin until you get coarse crumbs. Pour them into a cup and mix in the chopped chocolate. Keep this cup at room temperature.
- Take the mug out of the freezer and set it on a flat counter. Connect the motor to the cover, then press the paddle in until you hear it click.
- Lock the cover onto the mug with a clockwise turn. Plug in the maker and press the switch. Pour the cold base through the chute in a thin, slow stream.
- Churn for 15 to 20 minutes. At about the 15-minute mark, drop in the frozen marshmallow pieces. Add the cracker and chocolate mix in the last minute, sprinkling it slowly.
- Switch off the motor and rotate the cover counterclockwise. Lift off the cover, pull out the paddle, and serve. Top with a few more cracker crumbs for crunch.
How to Store Leftover Vegan Ice Cream
1. Plan to eat it from the mug. The Dash My Mug makes a small batch built for one person. Most of the time, there is nothing left to store.
2. Use a freezer-safe airtight container for extras. Choose a small, shallow container with a tight lid. A smaller container leaves less empty space, and less air means fewer ice crystals.
3. Press parchment or freezer-safe wrap on the surface. Lay it right against the ice cream before you close the lid. This thin layer blocks air and keeps the top smooth.
4. Label the container. Write the flavor and the date on a piece of tape. After a week, a few flavors look alike, especially chocolate, mocha, and coffee.
5. Expect a firmer texture after freezing. Homemade vegan ice cream has no stabilizers, so it turns hard after a few hours. The coconut fat sets up solid.
6. Let it soften before serving. Leave the container on the counter for 10 to 15 minutes, then scoop. Eat leftovers within one week for the best flavor and texture.
Conclusion
Twenty flavors give you plenty of room to play, from soft fruit scoops to rich chocolate and cozy fall spices. Each one makes a single mug, so a new flavor never means a big batch.
Start with vanilla, chocolate, or strawberry. They teach you how the mixture should look and feel, and every later flavor gets easier.
Keep a mug in the freezer, pick a flavor, and enjoy a cold, creamy treat any day of the week.