
Hot days call for something cold, sweet, and totally refreshing. That’s where the Iceman Slush-Ease Slushie Machine Recipes come in.
The Iceman Slush-Ease is a compact home slushie maker that turns your favorite drinks into thick, frozen slushies in minutes — no trip to the gas station required. You just pour in your drink, wait a short time, and out comes a perfectly slushy treat.
Homemade slushies are getting more popular every year. People want to control what goes into their drinks — less sugar, more real fruit, no artificial colors. Making slushies at home costs less too. A batch of homemade slushies costs a fraction of what you’d pay at a store.
The biggest benefit of making slushies at home is freedom. You pick the flavor, the sweetness, and even the mix-ins. Got kids? Make a kid-friendly fruit blend.
Want something for adults? Add a splash of something special. The Iceman Slush-Ease Slushie Machine Recipes in this guide cover all of that and more — from classic fruit flavors to dessert-style creations. And you don’t have Iceman Slushie Machine try our Ninja Slushi Recipes.

What Makes the Iceman Slush-Ease Slushie Machine Unique?
The Iceman Slush-Ease stands apart from other at-home drink tools in several clear ways. Here is what sets it apart:
1. Key Features of the Machine — The Iceman Slush-Ease uses a freeze-and-mix bowl system. You freeze the bowl overnight, attach it to the machine, pour in your liquid, and the machine slowly stirs it while the bowl cools everything down into a slushie texture. It’s simple, quiet, and easy to clean.
2. How It Differs from Traditional Blenders — A regular blender crushes ice to make a slushy drink, but the texture can be uneven and icy. The Slush-Ease creates a smooth, consistent slushie texture without any ice chunks. The result is closer to what you get from a slushie machine at a convenience store.
3. Types of Drinks You Can Create — The machine works with juice, soda, lemonade, fruit punch, sports drinks, flavored water, and even creamy dessert-style blends. Almost any liquid can become a slushie as long as it is pre-chilled before you pour it in.
4. Ideal Occasions for Homemade Slushies — Birthday parties, summer BBQs, school holidays, movie nights, pool days, or just a regular Tuesday afternoon — the Iceman Slush-Ease fits into any moment. It is also great for people who want a cold treat without leaving home.
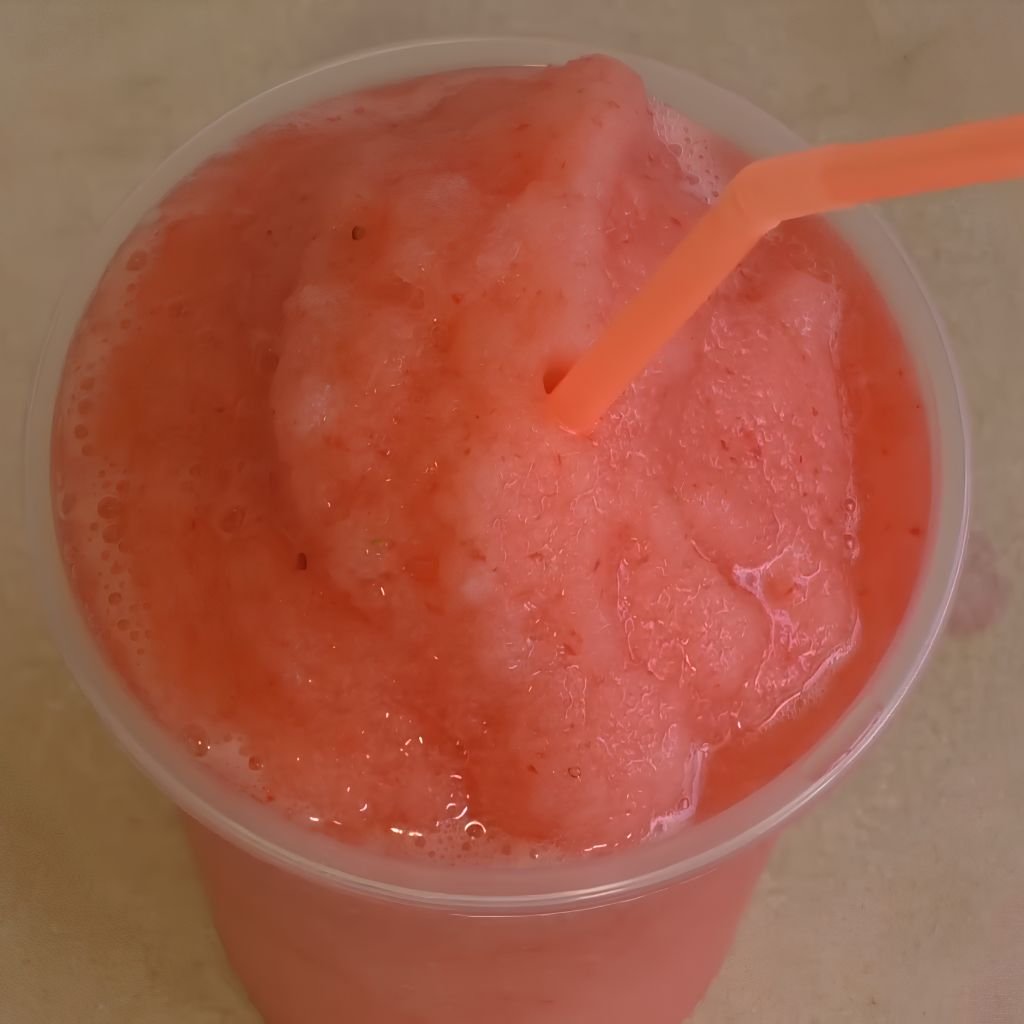
1. Classic Strawberry Slushie
Prep Time: 5 minutes | Slush Time: 25–30 minutes | Serves: 2
Strawberries are one of the most loved fruits for a reason. Sweet, bright, and naturally flavorful, a strawberry slushie made with the Iceman Slush-Ease comes out smooth and vibrant every time. Perfect for a hot afternoon at home or a weekend treat for the whole family.
Ingredients
- 1 cup fresh or frozen strawberries
- 1 cup strawberry juice or strawberry lemonade
- 2 tablespoons sugar (adjust to taste)
- 1 tablespoon fresh lemon juice
- 1/4 cup cold water
Instructions
Start by placing your Slush-Ease freeze bowl in the freezer the night before. The bowl must be fully frozen — at least 12 hours — before you start. This is the most important step and should never be skipped. A bowl that is not fully frozen will not produce a proper slushie texture.
Take your strawberries and wash them well under cold running water. If you are using fresh strawberries, remove the green tops and cut each berry into smaller pieces. Smaller pieces blend more easily and give you a smoother result. If you are using frozen strawberries, let them sit at room temperature for about 5 minutes to soften slightly before blending.
Place the strawberries into a blender. Add the strawberry juice or strawberry lemonade, sugar, lemon juice, and cold water. Blend everything on high speed for about 30 to 45 seconds, or until the mixture is completely smooth with no large fruit chunks visible. Stop the blender and taste the mixture. Add more sugar or lemon juice to get the flavor balance you want.
Once the mixture is blended and smooth, pour it into a container and place it in the refrigerator for at least 15 to 20 minutes. You want the liquid to be very cold before pouring it into the Slush-Ease machine. A warmer liquid will take much longer to slushify and may not give you the thick texture you want.
Take the frozen bowl out of the freezer and attach it to the Iceman Slush-Ease machine following the manufacturer’s setup instructions. Make sure the machine is placed on a flat, stable surface before you turn it on.
Turn the machine on and slowly pour your chilled strawberry mixture into the spinning bowl. Pour it in gradually rather than all at once. This gives the cold bowl time to start working on the liquid right away without overwhelming the system.
Let the machine run for 25 to 30 minutes. Check on it every 10 minutes or so. You will notice the liquid getting thicker and more slushy as time passes. The final texture should be thick, smooth, and spoonable — similar to what you would find at a slushie shop.
Once the slushie reaches your preferred thickness, use a large spoon or scoop to serve it into cups right away. Slushies from the Slush-Ease are best enjoyed immediately after making, as they will begin to melt once removed from the machine.
Variations
- Strawberry Mint: Add 4–5 fresh mint leaves to the blender for a cool, herby twist.
- Strawberry Coconut: Replace the water with coconut water for a tropical flavor.
- Strawberry Basil: Add 2 fresh basil leaves before blending for a sweet and slightly savory profile.
2. Blueberry Blast Slushie
Prep Time: 5 minutes | Slush Time: 25–30 minutes | Serves: 2
Blueberries pack a punch of natural flavor and color. A blueberry slushie turns a deep purple-blue and tastes sweet with a light tartness underneath. Great for kids and adults alike, this one is a crowd-pleaser that looks as good as it tastes.
Ingredients
- 1 cup fresh or frozen blueberries
- 1 cup white grape juice or blueberry juice
- 2 tablespoons sugar
- 1 tablespoon lemon juice
- 1/4 cup cold water
Instructions
The night before, place the Slush-Ease bowl in the freezer. Allow it to freeze completely for a minimum of 12 hours. If you have already used the bowl that day, it will need to re-freeze for the same amount of time before using it again.
Rinse your blueberries well. If using fresh blueberries, check for any soft or overripe ones and remove them. Overripe berries can make the mixture overly sweet or add a fermented taste to your slushie. Fresh, firm blueberries will give you the best color and flavor.
Add the blueberries to your blender along with the grape or blueberry juice, sugar, lemon juice, and cold water. Blend on high for 45 to 60 seconds. Blueberries have a slightly thicker skin that takes a moment longer to fully break down compared to strawberries. Stop the blender and check for any whole or partially blended berries.
If you prefer a very smooth texture without any berry skin bits, pour the blended mixture through a fine mesh strainer into a bowl or pitcher. Use a spoon to press the pulp against the strainer so all the liquid passes through. Discard the pulp or save it for another use, like stirring into yogurt.
Taste the strained or unstrained mixture. Blueberries can vary in sweetness depending on the season and where they were grown. Add a little more sugar or a splash more lemon juice to get the right balance.
Cover the blended mixture and refrigerate it for 15 to 20 minutes until it is thoroughly chilled. A cold mixture works better and faster in the Slush-Ease machine.
Remove the frozen bowl from the freezer and assemble the machine on a flat surface. Turn the machine on first, then slowly pour in the blueberry mixture. Watch it as it begins to thicken near the edges of the bowl where the cold is most intense.
Run the machine for 25 to 30 minutes. The slushie will build up along the cold bowl walls and gradually thicken throughout. Once you have a thick, smooth consistency, serve right away in chilled cups.
Variations
- Blueberry Lemonade: Use lemonade instead of grape juice for a tangier version.
- Blueberry Lavender: Add 1/4 teaspoon of dried culinary lavender to the blender for a floral note.
- Blueberry Pomegranate: Replace half the water with pomegranate juice for added depth.
3. Raspberry Lemon Slushie
Prep Time: 5 minutes | Slush Time: 25–30 minutes | Serves: 2
Tart raspberries and bright lemon are a natural match. Together they create a slushie that is bold, refreshing, and just the right amount of sour. A little sugar balances everything out and makes this one of the most satisfying Iceman Slush-Ease Slushie Machine Recipes in the collection.
Ingredients
- 1 cup fresh or frozen raspberries
- 3/4 cup fresh lemonade or lemon juice mixed with water
- 2 tablespoons sugar
- 1 teaspoon lemon zest (optional but recommended)
- 1/4 cup cold water
Instructions
Freeze the Slush-Ease bowl overnight as usual. Never rush this step — a properly frozen bowl is what creates the slushie texture.
Rinse the raspberries under cool water. Fresh raspberries are delicate, so handle them gently to avoid crushing them before they go in the blender. Frozen raspberries work just as well and often give a stronger color since they were picked at peak ripeness.
Add the raspberries to the blender. Pour in the lemonade or lemon-water mixture, sugar, lemon zest if using, and cold water. Blend everything on high for 45 seconds. Raspberries have small seeds that can create a gritty texture if left in, so straining is highly recommended for this recipe.
Set a fine mesh strainer over a bowl or large measuring cup. Pour the raspberry lemon mixture through it slowly. Use the back of a spoon to press the mixture through and extract as much liquid as possible. The seeds and most of the pulp will stay in the strainer. What comes through will be a smooth, bright pink-red liquid with a punchy raspberry lemon flavor.
Taste the strained liquid and adjust as needed. Raspberries can be quite tart, so you may want to add an extra teaspoon of sugar. Alternatively, add another squeeze of fresh lemon juice if you want to make the flavor even more vibrant and sharp.
Refrigerate the strained mixture for 15 to 20 minutes. The colder it is going into the machine, the better the slushie will turn out.
Assemble the Slush-Ease machine with the frozen bowl in place. Turn it on and pour the raspberry lemon mixture in slowly. The bright red color will be striking as it starts to slushify along the bowl walls.
Let the machine run for 25 to 30 minutes. The slushie will thicken gradually. Serve immediately in clear glasses so you can see the beautiful color. Add a thin slice of lemon to the rim of each glass as a garnish.
Variations
- Raspberry Rose: Add 1 teaspoon of rose water to the blender for a floral, elegant twist.
- Raspberry Peach: Replace half the lemonade with peach nectar for a sweeter, softer flavor.
- Sparkling Raspberry Lemon: Use sparkling lemonade instead of still for a bit of fizziness.
4. Watermelon Cooler Slushie
Prep Time: 10 minutes | Slush Time: 25–30 minutes | Serves: 2–3
Nothing says summer quite like watermelon. This slushie uses fresh watermelon blended into a smooth, lightly sweet liquid that turns into the most refreshing frozen treat you can make at home. Light on sugar naturally, it pairs perfectly with warm weather and outdoor gatherings.
Ingredients
- 2 cups fresh watermelon chunks, seeds removed
- 1/2 cup cold water
- 1 tablespoon sugar (optional — watermelon is naturally sweet)
- 1 tablespoon lime juice
- Pinch of salt
Instructions
Freeze the Slush-Ease bowl for at least 12 hours before starting. Remove it from the freezer only when you are ready to use it so it stays as cold as possible.
Cut the watermelon into chunks and remove all the seeds. Even small white seeds should be removed since they can make blending uneven. If you bought a seedless variety, you may still find occasional small seeds, so check carefully.
Place the watermelon chunks into the blender. Add cold water, lime juice, and a small pinch of salt. The salt is optional but it enhances the sweetness of the watermelon naturally without needing much extra sugar. Taste a piece of your watermelon first — if it is very sweet, you likely will not need any added sugar at all.
Blend on high for 30 to 45 seconds until completely smooth. Watermelon blends very easily and the result will be a bright pink, watery liquid. This is normal — watermelon has very high water content, which actually helps it slushify well in the machine.
Taste the blended mixture and decide if you want to add sugar. If the watermelon was ripe and sweet, skip it. If it is a bit bland, add one tablespoon of sugar and blend again for 10 seconds to dissolve.
Strain the mixture through a fine mesh strainer to remove any fibrous bits. This step is optional but gives you a cleaner, smoother slushie in the end.
Refrigerate the mixture for 20 minutes. Watermelon liquid is naturally close to room temperature after blending, so this extra chill time is important.
Assemble the machine and pour the watermelon mixture in slowly once it is running. The slushie will form beautifully within 25 to 30 minutes. Serve in tall glasses with a wedge of fresh lime on the side.
Variations
- Watermelon Mint: Add 6 fresh mint leaves to the blender before mixing for a cool contrast.
- Watermelon Jalapeño: Add a tiny slice of jalapeño for a sweet-heat combination that surprises in the best way.
- Watermelon Cucumber: Blend in 1/4 cup of peeled cucumber for extra hydration and a mild, fresh note.
5. Peach Paradise Slushie
Prep Time: 5 minutes | Slush Time: 25–30 minutes | Serves: 2
Soft, sweet, and full of warm-season flavor, the peach slushie is one of the most comforting cold drinks you can make. Frozen peaches work wonderfully here since they are already at peak sweetness when frozen. Add a touch of vanilla and you have a slushie that feels almost like a frozen dessert.
Ingredients
- 1 cup frozen peach slices
- 3/4 cup peach juice or white grape juice
- 1 tablespoon sugar
- 1/2 teaspoon vanilla extract
- 1 tablespoon lemon juice
Instructions
Prepare the Slush-Ease freeze bowl by placing it in the freezer the evening before you plan to use it. A minimum of 12 hours of freeze time is required for the bowl to perform correctly.
Let the frozen peach slices sit on a plate at room temperature for 5 minutes. They do not need to fully thaw — just soften enough to blend smoothly without straining the blender motor.
Add the softened peach slices to the blender. Pour in the peach juice or white grape juice. Add the sugar, vanilla extract, and lemon juice. The vanilla extract is a small addition that makes a big difference — it rounds out the peachy flavor and gives the slushie a slightly creamy, dessert-like quality.
Blend on high for 45 to 60 seconds. Peaches can have a slightly fibrous texture even after blending, so blend for a full minute to make sure everything is completely smooth.
Taste the mixture. Peaches vary greatly in sweetness. If the blend tastes a little flat, add another half teaspoon of lemon juice to brighten it. If it tastes too tart, add a tiny bit more sugar and blend again for 5 seconds.
Pour the blended peach mixture into a container and refrigerate for 15 to 20 minutes. The mixture should be very cold — close to refrigerator temperature — when you pour it into the Slush-Ease.
Assemble the machine with the frozen bowl and turn it on. Slowly pour the chilled peach mixture into the spinning bowl. Within the first few minutes you will see the edges beginning to frost and thicken.
Allow the machine to run for a full 25 to 30 minutes. The peach slushie will have a slightly creamy yellow-orange color and a smooth, thick texture when ready. Serve immediately in your favorite glass. A drizzle of honey on top is a lovely finishing touch.
Variations
- Peach Ginger: Add 1/4 teaspoon of freshly grated ginger for a warming, spiced version.
- Peach Raspberry: Layer a spoonful of raspberry slushie on top for a two-tone effect.
- Peach Cream: Stir in 2 tablespoons of cream before pouring into the machine for a richer texture.
6. Mixed Berry Slushie
Prep Time: 5 minutes | Slush Time: 25–30 minutes | Serves: 2
Why choose one berry when you can have them all? A mixed berry slushie combines strawberries, blueberries, and raspberries into one rich, colorful drink. The flavor is complex — sweet here, tart there, and deeply satisfying throughout every sip.
Ingredients
- 1/3 cup strawberries (fresh or frozen)
- 1/3 cup blueberries (fresh or frozen)
- 1/3 cup raspberries (fresh or frozen)
- 1 cup cranberry juice or mixed berry juice
- 2 tablespoons sugar
- 1 tablespoon lemon juice
Instructions
Freeze the Slush-Ease bowl the night before. This is always the first and most important step for any recipe using this machine.
Rinse all the berries well. If using fresh fruit, sort through and remove any berries that are overly soft, damaged, or beginning to turn. Those berries can make the mixture taste overly sweet or slightly off. The best slushies come from the best quality fruit.
Place all three types of berries into the blender. Pour in the cranberry or mixed berry juice. Add sugar and lemon juice. The cranberry juice adds a pleasant tartness that ties all three berries together beautifully. If you prefer a sweeter drink, use mixed berry juice instead.
Blend on high for 60 seconds. Mixed berries require a full minute of blending to make sure all the skins and seeds are broken down as much as possible. Stop once and scrape down the sides of the blender with a spatula halfway through if needed.
Strain the mixture through a fine mesh strainer to remove seeds and skin bits from the raspberries. This gives you a cleaner texture in the final slushie.
Taste and adjust. Mixed berry recipes often need just a touch more lemon to balance the sweetness of the strawberries. Add small amounts and taste as you go rather than adding too much at once.
Refrigerate the mixture for 15 to 20 minutes. Then assemble the machine and pour the chilled mixture in slowly while the machine is running.
Run for 25 to 30 minutes. The color will be a deep, beautiful purple-red. Serve immediately, topped with a few whole fresh berries if you like a bit of garnish.
Variations
- Berry Lemonade: Replace the cranberry juice with pink lemonade for a sweeter, lighter version.
- Berry Acai: Add 1 tablespoon of acai powder for an extra boost of flavor and color.
- Berry Hibiscus: Brew a cup of hibiscus tea, let it cool, and use it as the liquid base for a floral, bold flavor.
7. Mango Sunshine Slushie
Prep Time: 5 minutes | Slush Time: 25–30 minutes | Serves: 2
Mango is one of the sweetest, most fragrant fruits available, and it makes an absolutely incredible slushie. Bright yellow-orange in color and rich in flavor, this mango slushie feels like a vacation in a cup. Frozen mango chunks are the easiest option and work perfectly in the Iceman Slush-Ease Slushie Machine Recipes.
Ingredients
- 1 cup frozen mango chunks
- 3/4 cup mango juice or orange juice
- 1 tablespoon sugar (optional depending on mango sweetness)
- 1 tablespoon lime juice
- 1/4 cup cold water
Instructions
Always start by ensuring your Slush-Ease freeze bowl has been in the freezer for at least 12 hours. A perfectly frozen bowl is non-negotiable for good results.
Measure out the frozen mango chunks and let them sit at room temperature for about 5 minutes. They should be slightly softened but still very cold. Fully thawed mango will blend fine but results in a warmer liquid that takes longer to slushify.
Add the mango chunks to your blender. Pour in the mango juice or orange juice, lime juice, and cold water. Taste a small piece of mango first — if it is very sweet, skip the sugar. If it seems mild, add one tablespoon to boost the flavor.
Blend everything on high for 45 to 60 seconds until silky smooth. Mango blends beautifully and creates a thick, velvety liquid that works perfectly in the Slush-Ease. The color will be a gorgeous warm orange-yellow.
Check the texture of the blended mixture. If it feels too thick, add a splash more cold water and blend for another 10 seconds. The mixture should be pourable but not watery — similar to a smoothie consistency before it goes into the machine.
Refrigerate the blended mixture for 15 to 20 minutes to bring the temperature down before using the machine.
Turn on the Slush-Ease machine with the frozen bowl in place. Pour the mango mixture in slowly and steadily while the machine is spinning. The rich mango color will be stunning as it starts to thicken.
Run the machine for 25 to 30 minutes. The slushie will be thick, creamy-textured, and deeply flavorful when done. Serve right away in chilled glasses. A slice of fresh mango on the rim makes a beautiful garnish.
Variations
- Mango Chili: Add a pinch of chili powder and a squeeze of lime for a Mexican-inspired treat.
- Mango Coconut: Replace the cold water with coconut milk for a richer, tropical version.
- Mango Passion Fruit: Add 2 tablespoons of passion fruit pulp for an exotic, tangy layer of flavor.
8. Pineapple Tropical Slushie
Prep Time: 5 minutes | Slush Time: 25–30 minutes | Serves: 2
Sweet and tangy pineapple makes one of the most refreshing slushies you can create at home. It has a natural brightness that wakes up your senses and keeps you reaching for more. This tropical favorite works beautifully in the Iceman Slush-Ease Slushie Machine Recipes lineup.
Ingredients
- 1 cup canned or fresh pineapple chunks
- 3/4 cup pineapple juice
- 1 tablespoon sugar
- 1 tablespoon lime juice
- 1/4 cup cold water
Instructions
Freeze the Slush-Ease bowl for a full 12 hours minimum. Fresh pineapple liquid can sometimes take slightly longer to slushify due to natural enzymes, so a very cold bowl matters even more for this recipe.
If using fresh pineapple, peel and core it before cutting into chunks. Remove the tough core pieces — they do not blend well and can leave fibrous bits in the final drink. Canned pineapple is a perfectly good alternative and is already soft and ready to blend.
Place the pineapple chunks into the blender. Add pineapple juice, lime juice, sugar, and cold water. Pineapple juice is already quite sweet, so taste before adding sugar. Some brands of pineapple juice are much sweeter than others.
Blend on high for 45 seconds. Pineapple blends into a smooth, slightly thick liquid. If using canned pineapple in heavy syrup, you may want to skip the added sugar entirely and reduce the juice by a few tablespoons to keep it from being overly sweet.
Taste the blended mixture carefully. The lime juice is key — it adds a tartness that keeps the pineapple flavor from being one-dimensional. Add another small squeeze of lime if the mixture tastes flat or overly sweet.
Place the mixture in the refrigerator for 15 to 20 minutes to chill before use.
Assemble the machine with the pre-frozen bowl. Turn it on and pour the pineapple mixture in gradually. Watch as the edges begin to frost and thicken within the first few minutes.
Run for 25 to 30 minutes until thick and slushy throughout. Serve in tall glasses with a small pineapple wedge and a paper umbrella for a full tropical feel. Enjoy right away before it melts.
Variations
- Pineapple Mint: Add 5 fresh mint leaves to the blender for a cool, tropical flavor.
- Pineapple Orange: Replace half the pineapple juice with fresh orange juice for a citrusy twist.
- Pineapple Ginger: Add 1/4 teaspoon of ground ginger or a small slice of fresh ginger before blending.
9. Classic Lemon Slushie
Prep Time: 5 minutes | Slush Time: 25–30 minutes | Serves: 2
Bright, tangy, and naturally refreshing — a lemon slushie never goes out of style. Made with real lemon juice and balanced with just enough sweetness, this clean and simple recipe is one of those Iceman Slush-Ease Slushie Machine Recipes you will come back to again and again.
Ingredients
- 1/2 cup fresh lemon juice (about 4–5 lemons)
- 1 cup cold water
- 3 tablespoons sugar
- 1 teaspoon lemon zest
- 1/2 cup cold lemonade (storebought or homemade)
Instructions
Freeze the Slush-Ease bowl overnight. A lemon-based slushie needs a fully frozen bowl since the high water and acid content of lemon juice can make slushifying take longer without proper cooling.
Juice your lemons using a hand juicer or citrus press. Try to avoid getting seeds into the juice — a small strainer placed over your measuring cup while juicing works well. Freshly squeezed lemon juice makes a noticeably better slushie than bottled juice.
In a pitcher or large measuring cup, combine the fresh lemon juice, cold water, sugar, and lemon zest. Stir well until all the sugar is fully dissolved. If the sugar does not dissolve in cold liquid, warm a few tablespoons of the water first, dissolve the sugar in it, then add the rest of the cold water.
Add the cold lemonade to the mixture and stir again. The lemonade adds extra body and sweetness to the blend, making the final slushie feel fuller in texture than lemon juice and water alone.
Taste the mixture and adjust. A good lemon slushie should be noticeably tart but not mouth-puckering. Add more sugar one teaspoon at a time until you reach a balance you enjoy.
Refrigerate the mixture for 15 to 20 minutes. Lemon-based drinks benefit greatly from being well-chilled before going into the machine.
Assemble the Slush-Ease machine with the frozen bowl and start the machine. Slowly pour in the lemon mixture. You will see it begin to frost almost immediately due to the high water content reacting with the cold bowl.
Run for 25 to 30 minutes, checking periodically. The final slushie should be pale yellow and wonderfully thick. Serve in tall glasses with a lemon wheel garnish and a straw. Add a few fresh mint leaves on top if you like.
Variations
- Lavender Lemon: Steep 1/2 teaspoon dried lavender in warm water, cool it, and add to the mixture for a floral touch.
- Lemon Ginger: Add 1/2 teaspoon of freshly grated ginger for a spiced lemon slushie.
- Lemon Honey: Replace the sugar with pure honey for a more natural sweetener with extra depth.
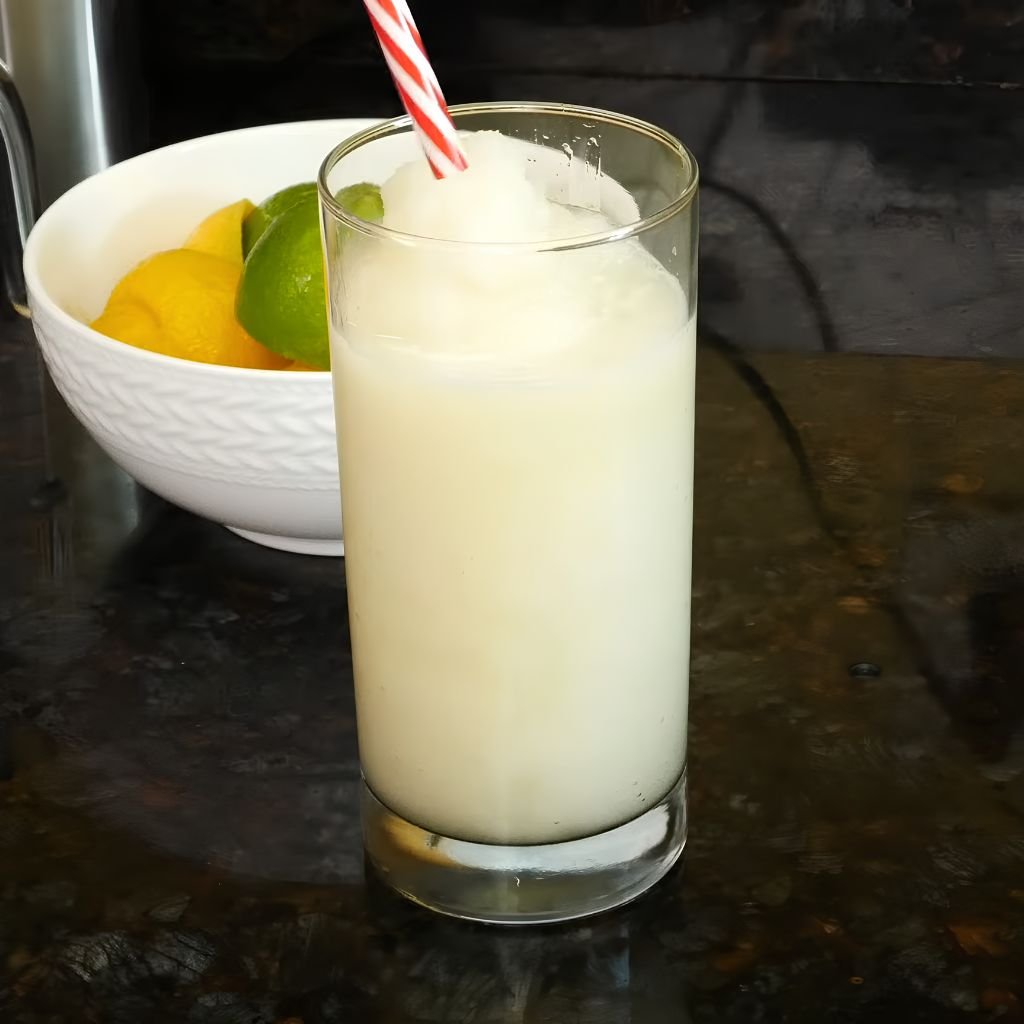
10. Lime Freeze Slushie
Prep Time: 5 minutes | Slush Time: 25–30 minutes | Serves: 2
Sharp, citrusy, and seriously refreshing, the lime freeze slushie is everything a hot day calls for. Fresh lime juice makes all the difference here — it delivers a punchy, bold flavor that bottled lime juice simply cannot match.
Ingredients
- 1/2 cup fresh lime juice (about 6–8 limes)
- 1 cup cold water
- 3 tablespoons sugar
- 1/2 cup cold limeade
- 1 teaspoon lime zest
Instructions
Freeze the Slush-Ease bowl for a minimum of 12 hours.
Juice the limes and strain out any seeds. Add the fresh lime juice to a pitcher along with the cold water, sugar, limeade, and lime zest. Stir until the sugar is completely dissolved. Taste the mixture — lime tends to be more tart than lemon, so you may need an extra teaspoon of sugar to balance it.
Refrigerate the lime mixture for 20 minutes. Because lime juice is quite acidic, a longer chill time helps it slushify more evenly in the machine.
Assemble the machine and pour the cold lime mixture in while it is running. The slushie will be a pale green-yellow color. Run for 25 to 30 minutes until thick. Serve with extra lime zest grated on top and a lime wheel on the side. Add a salted rim to your glass for a margarita-inspired presentation.
Variations
- Lime Coconut: Replace half the cold water with coconut water for a tropical pairing.
- Lime Cucumber: Blend in 2 thin slices of fresh cucumber for a cooling, spa-like flavor.
- Chili Lime: Add a tiny pinch of cayenne pepper and a light salt rim to your glass for heat and contrast.
11. Orange Crush Slushie
Prep Time: 5 minutes | Slush Time: 25–30 minutes | Serves: 2
Fresh oranges make a slushie that is naturally sweet, vibrantly colored, and full of vitamin C. This one is great for kids and feels like a more wholesome version of an orange soda treat.
Ingredients
- 1 cup fresh orange juice (about 3–4 oranges)
- 1/2 cup cold water
- 2 tablespoons sugar
- 1 tablespoon lemon juice
- 1/2 teaspoon orange zest
Instructions
Freeze the Slush-Ease bowl for at least 12 hours.
Juice the oranges and combine with cold water, sugar, lemon juice, and orange zest in a pitcher. Stir well until sugar is fully dissolved. The lemon juice brightens the orange flavor significantly and keeps the slushie from tasting flat.
Taste and adjust sweetness. Navel oranges are usually sweeter while blood oranges are tarter — adjust your sugar accordingly. Refrigerate the mixture for 15 to 20 minutes.
Assemble the machine and pour the orange mixture in slowly while running. Run for 25 to 30 minutes. The result is a gorgeous orange-colored slushie with a bright, natural citrus flavor. Serve immediately with a fresh orange slice on the rim.
Variations
- Blood Orange: Use blood oranges for a deeper ruby color and richer, berry-like flavor.
- Orange Vanilla: Add 1/4 teaspoon vanilla extract to the mixture for a creamsicle-inspired taste.
- Orange Carrot: Blend in 2 tablespoons of fresh carrot juice for added color and earthy sweetness.
12. Pink Grapefruit Slushie
Prep Time: 5 minutes | Slush Time: 25–30 minutes | Serves: 2
Pink grapefruit has a bittersweet flavor that makes it stand out from other citrus fruits. As a slushie, it is sophisticated, refreshing, and just different enough to be interesting. A touch of honey softens the bitterness beautifully.
Ingredients
- 1 cup fresh pink grapefruit juice (about 2 grapefruits)
- 1/2 cup cold water
- 2 tablespoons honey or sugar
- 1 tablespoon lemon juice
- 1/2 teaspoon grapefruit zest
Instructions
Freeze the Slush-Ease bowl for at least 12 hours as always.
Juice the grapefruits and strain the juice into a pitcher. Add cold water, honey or sugar, lemon juice, and grapefruit zest. If using honey, warm it slightly first so it dissolves evenly into the cold liquid. Stir the mixture well.
Taste the mixture. Grapefruit can be surprisingly bitter depending on the fruit’s ripeness. Add honey or sugar one teaspoon at a time until the bitterness is balanced but still present — that slight bitterness is actually what makes this slushie special.
Refrigerate for 20 minutes. Assemble the machine and pour the mixture in slowly while running. Run for 25 to 30 minutes. Serve in wide glasses with a pink grapefruit wedge. A thin strip of grapefruit peel twisted as a garnish adds a nice visual touch.
Variations
- Grapefruit Rosemary: Add one small sprig of fresh rosemary while the mixture chills in the fridge, then remove before pouring into the machine.
- Grapefruit Grenadine: Add 1 tablespoon of grenadine for a sweeter, redder version.
- Grapefruit Mint: Muddle 4 mint leaves into the mixture before refrigerating for a fresh herbal note.
13. Lemon-Lime Cooler Slushie
Prep Time: 5 minutes | Slush Time: 25–30 minutes | Serves: 2
The classic pairing of lemon and lime creates a double citrus slushie that is sharp, lively, and completely refreshing. It tastes like a frozen version of your favorite citrus soda, but made with real fruit juice and a lot less sugar.
Ingredients
- 1/3 cup fresh lemon juice
- 1/3 cup fresh lime juice
- 1 cup cold water
- 3 tablespoons sugar
- 1/2 cup cold lemon-lime soda (optional for extra fizz)
- 1 teaspoon each of lemon and lime zest
Instructions
Freeze the Slush-Ease bowl for at least 12 hours before use.
Juice the lemons and limes separately, then combine them in a pitcher. Add cold water, sugar, and both zests. Stir until the sugar completely dissolves. If using soda, add it last and stir gently to preserve some carbonation.
Taste the mixture. The combination of lemon and lime together is typically very tart. Adjust the sugar until the tartness is pleasantly sharp but not overwhelming. A ratio of slightly more sugar than you think you need is usually right for slushies since the freezing process mellows sweetness slightly.
Refrigerate for 15 to 20 minutes. Assemble the machine and pour in the mixture while it is running. Run for 25 to 30 minutes until the slushie is thick and frosty.
Serve immediately in tall glasses with ice-cold straws. A salt or sugar rim on the glass adds a nice finishing touch. Garnish with a thin slice of lemon and lime together.
Variations
- Triple Citrus: Add 2 tablespoons of orange juice to the mix for a third citrus layer.
- Citrus Mint Cooler: Add 5 fresh mint leaves to the refrigerating mixture, remove before pouring into machine.
- Sparkling Citrus: Use all sparkling water instead of still for a fizzy, carbonated slushie.
14. Cola Slushie
Prep Time: 2 minutes | Slush Time: 25–30 minutes | Serves: 2
Classic cola turned into a thick, slushy frozen drink — this one is pure nostalgia in a cup. Simple to make with just one main ingredient, the cola slushie is a hit with kids and anyone who loves that familiar caramel-sweet flavor in frozen form.
Ingredients
- 2 cups cold cola soda
- 1 tablespoon sugar (optional)
- 1 teaspoon vanilla extract (optional)
Instructions
Freeze the Slush-Ease bowl overnight — 12 full hours minimum. Soda-based slushies are some of the easiest recipes to make in this machine because the liquid is already pre-flavored and ready to use.
Open the cola and let it sit in the refrigerator for 30 minutes before using it. Cold, slightly flat cola works better in the machine than fully carbonated, fresh-from-the-can soda. Some carbonation will naturally dissipate during this time, which is fine — it will not affect the flavor.
If you want a vanilla cola slushie variation, add the vanilla extract to the cola and stir gently. Do not shake or stir aggressively as you want to keep as much carbonation as possible at this stage.
Taste the cola. If it tastes flat or mild, add one tablespoon of sugar and stir gently until dissolved. Most regular colas are sweet enough on their own and will not need extra sugar.
Once the cola is cold and ready, assemble the Slush-Ease machine with the frozen bowl. Turn the machine on and pour the cola in very slowly. The carbonation in the soda can cause it to foam slightly when it hits the cold bowl — pouring slowly prevents overflow.
Let the machine run for 25 to 30 minutes. The cola will thicken into a frosty, dark slushie with the same familiar cola flavor you love. Check on it at the 20-minute mark — soda-based slushies sometimes reach the right consistency a little faster than fruit-based ones.
Serve immediately in chilled glasses. Cola slushies melt a bit faster than fruit slushies, so have your glasses ready before you scoop.
Variations
- Cherry Cola: Add 2 tablespoons of cherry juice or grenadine before putting in the machine.
- Vanilla Cola Float Style: Top the finished slushie with a small scoop of vanilla ice cream.
- Caffeine-Free: Use a caffeine-free cola for an evening treat without the buzz.
15. Cherry Cola Slushie
Prep Time: 5 minutes | Slush Time: 25–30 minutes | Serves: 2
Cherry cola is already a beloved combination, but frozen into a slushie it becomes something even better. The sweetness of cherry and the deep caramel flavor of cola create a slushie that feels like a classic American soda shop treat.
Ingredients
- 1.5 cups cold cola soda
- 1/2 cup tart cherry juice
- 1 tablespoon sugar (optional)
- 1 teaspoon lemon juice
Instructions
Freeze the Slush-Ease bowl for at least 12 hours.
Combine the cold cola and cherry juice in a pitcher. Add lemon juice and stir very gently to avoid losing too much carbonation. The lemon juice cuts through the sweetness and keeps the flavor balanced. Taste and add sugar only if the mixture seems flat or needs more sweetness.
Keep the mixture refrigerator-cold until you are ready to use it. Assemble the machine and pour the cherry cola mixture in slowly while the machine is running. The carbonation will cause some light foaming — this is normal and will not affect the final result.
Run the machine for 25 to 30 minutes until thick and slushy. The color will be a deep mahogany-red. Serve right away in glasses with a maraschino cherry on top for a classic soda shop feel.
Variations
- Black Cherry Cola: Use black cherry juice instead of tart cherry for a deeper, more intense flavor.
- Cherry Vanilla Cola: Add 1/2 teaspoon vanilla extract to the mixture for a three-flavor combo.
- Diet Version: Use diet cola and unsweetened cherry juice to reduce calories.
16. Root Beer Slushie
Prep Time: 2 minutes | Slush Time: 25–30 minutes | Serves: 2
Root beer has a unique, herbal sweetness unlike any other soda. As a slushie, it keeps that distinctive flavor in a cool, thick format. Add a spoonful of vanilla and you have something that tastes like a root beer float minus the scooping.
Ingredients
- 2 cups cold root beer
- 1/2 teaspoon vanilla extract
- 1 tablespoon sugar (optional)
Instructions
Freeze the Slush-Ease bowl for at least 12 hours as required.
Let the root beer sit in the refrigerator for 30 minutes before using it. Cold and slightly degassed soda works best in the machine. Add vanilla extract and stir gently. Root beer with vanilla is a natural combination that enhances the already warm, spiced flavor of the soda.
Taste the mixture. Root beer is typically very sweet, so you are unlikely to need extra sugar. If you are using a lower-sugar or diet root beer, add one tablespoon of sugar to keep the flavor full.
Assemble the machine and pour the root beer mixture in slowly while it is running. Pour extra slowly to prevent foam from building up. Run for 25 to 30 minutes. Serve immediately in tall glasses. A small dollop of whipped cream on top makes this extra special.
Variations
- Root Beer Float Slushie: Stir in 2 tablespoons of cream before pouring into the machine for a float-inspired texture.
- Spiced Root Beer: Add a pinch of cinnamon and one clove to the chilling mixture, remove before pouring into machine.
- Root Beer and Cream Soda: Use half root beer and half cream soda for a softer, sweeter blend.
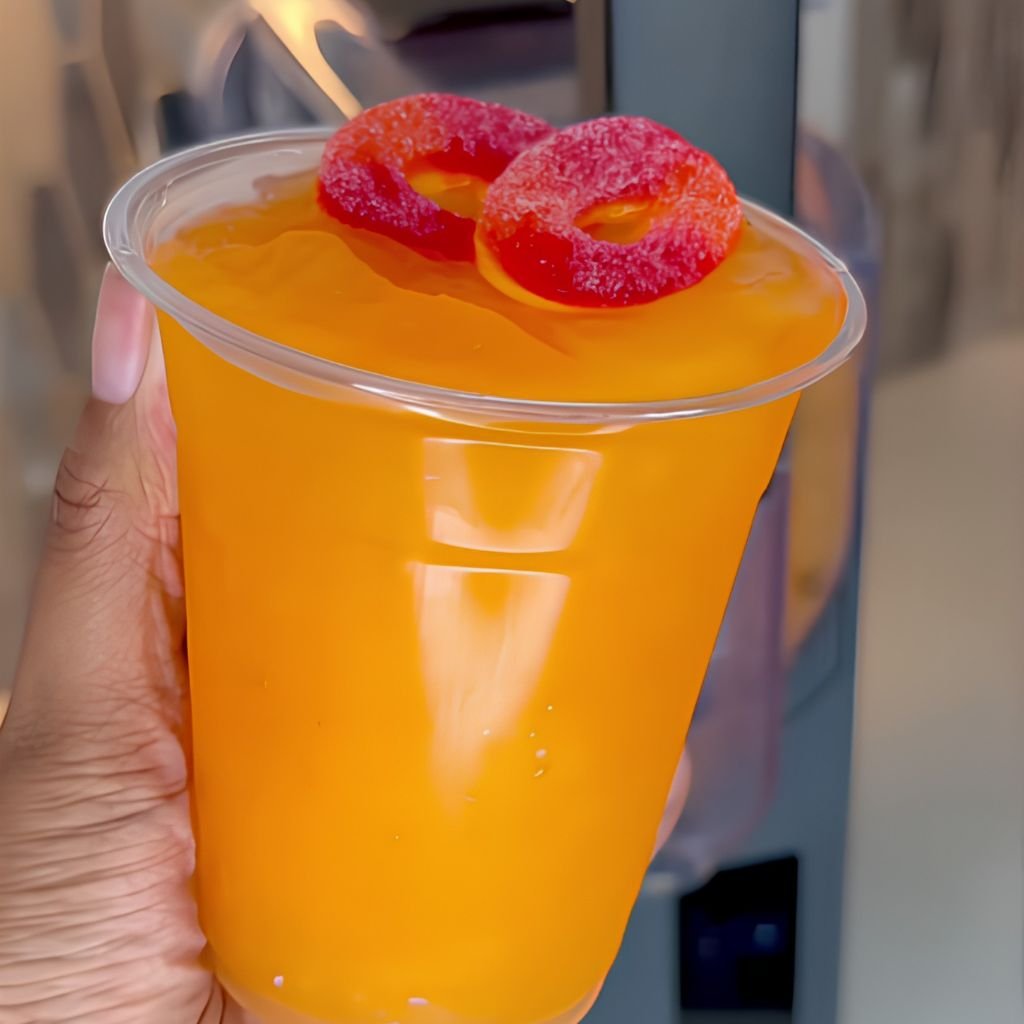
17. Orange Soda Slushie
Prep Time: 2 minutes | Slush Time: 25–30 minutes | Serves: 2
Orange soda in slushie form is a treat that kids absolutely love. Bright, colorful, and packed with sweet citrus flavor, this one is as easy as it gets. Pour, wait, and enjoy.
Ingredients
- 2 cups cold orange soda
- 1 tablespoon fresh orange juice (optional, adds freshness)
- 1/2 teaspoon orange zest (optional)
Instructions
Freeze the Slush-Ease bowl overnight. Refrigerate the orange soda until very cold.
If using, add the fresh orange juice and orange zest to the soda and stir very gently. These optional additions bring a note of real fruit to what is otherwise a fully soda-based drink, making it taste slightly more natural without changing the overall character.
Assemble the machine and slowly pour the orange soda in while it is running. Pour carefully to avoid foam overflow. Run for 25 to 30 minutes until slushy and thick. Serve right away in fun glasses — the bright orange color is part of the appeal.
Variations
- Orange Cream Soda: Mix equal parts orange soda and cream soda for a creamsicle-style slushie.
- Two-Tone: Layer orange slushie with vanilla cream slushie in the same glass for a visual effect.
- Orange Pineapple: Add 2 tablespoons of pineapple juice to the soda before processing.
18. Lemon-Lime Soda Slushie
Prep Time: 2 minutes | Slush Time: 25–30 minutes | Serves: 2
Lemon-lime soda is already one of the most refreshing drinks available, and turning it into a slushie makes it even more so. Clean, bright, and crisp — this one is perfect for hot days and easy to customize.
Ingredients
- 2 cups cold lemon-lime soda (like Sprite or 7UP)
- 1 tablespoon fresh lime juice
- 1 tablespoon fresh lemon juice
- 1/2 teaspoon each of lemon and lime zest
Instructions
Freeze the Slush-Ease bowl for at least 12 hours. Keep the soda cold in the refrigerator until ready.
Combine the lemon-lime soda with the fresh lemon juice, lime juice, and both zests in a pitcher. Stir very gently. The fresh juices add brightness that packaged soda alone does not have, making this feel closer to a real citrus slushie than a purely soda-based one.
Taste the mixture. It should be noticeably tart and clean with a light sweetness from the soda. If it tastes too sweet, add a touch more fresh lime juice. Do not add sugar — lemon-lime soda already has plenty.
Assemble the machine and pour the mixture in slowly while it is running. Run for 25 to 30 minutes. The clear, bubbly slushie will be light and refreshing. Garnish with a twist of lemon and lime peel. Serve immediately.
Variations
- Virgin Mojito Slushie: Add 6 muddled mint leaves and a splash of coconut water to the mixture.
- Citrus Punch: Add 2 tablespoons of fruit punch concentrate to the soda before processing.
- Rainbow Layered: Use this as a base layer under the raspberry or strawberry slushie for a two-tone look.
19. Piña Colada Style Slushie
Prep Time: 5 minutes | Slush Time: 25–30 minutes | Serves: 2
Pineapple and coconut are one of the most iconic tropical combinations in the world. As a slushie, this pairing creates a thick, creamy, sweet drink that feels straight out of a beach resort. Completely alcohol-free but fully satisfying — this is one of those Iceman Slush-Ease Slushie Machine Recipes that everyone asks for again.
Ingredients
- 3/4 cup pineapple juice
- 1/2 cup coconut cream
- 1/4 cup cold water
- 1 tablespoon sugar (optional)
- 1 tablespoon lime juice
Instructions
Freeze the Slush-Ease bowl overnight. Coconut cream-based mixtures need a fully frozen bowl because the fat content in the coconut cream can sometimes slow down the slushie process slightly compared to straight juice.
Combine the pineapple juice, coconut cream, cold water, and lime juice in a blender or a pitcher with a whisk. If using a whisk, stir vigorously until the coconut cream is fully mixed into the juice — coconut cream can be thick and needs thorough mixing to blend evenly.
Taste the mixture. Coconut cream is rich and slightly sweet, and pineapple juice is naturally sweet as well, so you may not need any added sugar. If the mixture tastes like it needs more brightness, add extra lime juice one teaspoon at a time.
Refrigerate the mixture for 20 minutes. Because coconut cream is fatty, it benefits from extra chill time before going into the machine. A colder mixture slushifies more evenly throughout.
Assemble the machine and pour the piña colada mixture in slowly while it is running. The mixture will be slightly thicker than a pure juice blend due to the coconut cream. Run for 25 to 30 minutes, checking at the 20-minute mark since richer mixtures sometimes slushify faster.
Serve immediately in wide glasses. Garnish with a slice of fresh pineapple, a cherry on top, and a mini paper umbrella for the full tropical experience. This slushie is particularly good when served in a chilled glass.
Variations
- Mango Piña Colada: Replace half the pineapple juice with mango juice for extra tropical depth.
- Strawberry Piña Colada: Add 1/4 cup of strawberry juice to the mix for a pink version.
- Light Version: Use coconut water instead of coconut cream for a lighter, less rich slushie.
20. Mango Pineapple Slushie
Prep Time: 5 minutes | Slush Time: 25–30 minutes | Serves: 2
Mango and pineapple are both tropical powerhouses on their own. Together, they create a slushie with layers of flavor — the mango brings a sweet, floral richness while the pineapple adds tartness and brightness. One sip and you are transported to somewhere with palm trees.

Ingredients
- 1/2 cup frozen mango chunks
- 1/2 cup pineapple juice
- 1/4 cup mango juice
- 1 tablespoon lime juice
- 1/4 cup cold water
- 1 tablespoon sugar
Instructions
Freeze the Slush-Ease bowl for 12 hours minimum.
Let the frozen mango chunks soften at room temperature for 5 minutes. Add them to the blender along with the pineapple juice, mango juice, lime juice, sugar, and cold water. Blend on high for 45 to 60 seconds until completely smooth.
Taste the blended mixture. Adjust lime juice or sugar as needed. The flavor should be bright and tropical with a good balance of sweetness and tartness. Refrigerate for 15 to 20 minutes.
Assemble the machine and pour the mixture in while it is running. Run for 25 to 30 minutes. The golden-yellow slushie is as beautiful to look at as it is to drink. Serve with a pineapple chunk and a thin mango slice as garnish.
Variations
- Mango Pineapple Coconut: Add 2 tablespoons of coconut cream for a piña colada-adjacent version.
- Mango Pineapple Chili: Add a tiny pinch of cayenne for a spicy-tropical kick.
- Frozen Version: Use both frozen mango and frozen pineapple chunks for an extra thick, extra cold result.
21. Coconut Mango Slushie
Prep Time: 5 minutes | Slush Time: 25–30 minutes | Serves: 2
Creamy coconut and sweet mango make a pairing that feels rich without being heavy. The coconut water base keeps things light while the mango brings all the sweetness you need. A gentle, luxurious slushie for any time of day.
Ingredients
- 1 cup frozen mango chunks
- 3/4 cup coconut water
- 2 tablespoons coconut cream
- 1 tablespoon lime juice
- 1 tablespoon sugar
Instructions
Freeze the bowl for at least 12 hours.
Let the mango soften slightly, then blend with coconut water, coconut cream, lime juice, and sugar until smooth. The coconut cream adds a mild richness without overpowering the mango. Taste and adjust sweetness or lime as needed.
Refrigerate the mixture for 20 minutes. Assemble the machine and pour the mixture in slowly while it is running. Run for 25 to 30 minutes. Serve in a glass with a sprinkle of toasted coconut on top for added texture and flavor.
Variations
- Coconut Mango Lime: Add extra lime zest to the top of each serving for a burst of citrus on every sip.
- Frozen Coconut Mango: Use full coconut milk instead of coconut water for an even creamier, richer result.
- Tropical Layered: Pour this over a Pineapple Tropical Slushie base for a layered tropical cup.
22. Passion Fruit Paradise Slushie
Prep Time: 5 minutes | Slush Time: 25–30 minutes | Serves: 2
Passion fruit has a flavor that is hard to describe until you have tried it — tropical, tangy, floral, and deeply fragrant. As a slushie it creates a drink that feels genuinely special. A little goes a long way with this boldly flavored fruit.
Ingredients
- 1/2 cup passion fruit pulp (fresh or thawed from frozen)
- 3/4 cup passion fruit juice or orange juice
- 2 tablespoons sugar
- 1/4 cup cold water
- 1 tablespoon lime juice
Instructions
Freeze the Slush-Ease bowl for 12 hours.
Combine the passion fruit pulp, juice, sugar, cold water, and lime juice in a blender. Blend for 30 seconds. If you want a smooth slushie without the crunchy seeds, strain the mixture through a fine mesh strainer. If you enjoy the texture of the seeds, leave them in — they add an interesting texture.
Taste the mixture. Passion fruit is very tart, so you will likely need the full 2 tablespoons of sugar. Add more if needed, one teaspoon at a time. Refrigerate for 15 to 20 minutes. Assemble the machine and pour in slowly while running. Run for 25 to 30 minutes. Serve garnished with half a fresh passion fruit resting on top of the glass.
Variations
- Passion Fruit Mango: Add 1/4 cup mango juice to soften the tartness and add tropical sweetness.
- Passion Fruit Lychee: Blend in 2 tablespoons of lychee juice for an exotic, floral pairing.
- Passion Fruit Ginger: Add 1/4 teaspoon fresh grated ginger for a warming, spiced tropical flavor.
23. Kiwi Pineapple Slushie
Prep Time: 5 minutes | Slush Time: 25–30 minutes | Serves: 2
Kiwi is bright green, slightly tart, and wonderfully unique in flavor. Paired with sweet pineapple, it makes a slushie that is both vibrant in color and complex in taste. A beautiful green drink that surprises in the best way.
Ingredients
- 3 kiwi fruits, peeled and sliced
- 3/4 cup pineapple juice
- 2 tablespoons sugar
- 1 tablespoon lime juice
- 1/4 cup cold water
Instructions
Freeze the Slush-Ease bowl for at least 12 hours.
Peel the kiwis and cut them into quarters. Place in the blender with pineapple juice, sugar, lime juice, and cold water. Blend on high for 45 to 60 seconds. Kiwi blends well but contains tiny seeds that can create a slightly gritty texture — strain the mixture if you prefer a perfectly smooth slushie.
Taste the mixture. Kiwi and pineapple together should be bright, sweet, and slightly tangy. Adjust sugar or lime as needed. Refrigerate for 15 to 20 minutes. Pour into the running machine slowly and let it run for 25 to 30 minutes. The slushie will be a lovely pale green color. Serve with a slice of fresh kiwi on the rim.
Variations
- Kiwi Strawberry: Replace half the kiwi with strawberries for a classic flavor combo in slushie form.
- Kiwi Mint: Add 4 fresh mint leaves to the blender for a cool, herby finish.
- Kiwi Apple: Swap the pineapple juice for green apple juice for a tarter, more refreshing version.
24. Vanilla Cream Slushie
Prep Time: 5 minutes | Slush Time: 25–30 minutes | Serves: 2
Sweet, smooth, and gently flavored — the vanilla cream slushie is one of the most comforting things you can make in the Iceman Slush-Ease. It pairs beautifully with other flavors as a base layer but holds its own as a standalone dessert treat.
Ingredients
- 1 cup cold whole milk
- 1/4 cup heavy cream
- 3 tablespoons sugar
- 1 teaspoon pure vanilla extract
- 1/4 cup cold water
Instructions
Freeze the Slush-Ease bowl overnight. Dairy-based mixtures need a very cold bowl since the fat content in milk and cream slows the freezing process slightly compared to plain juice.
Combine the cold milk, heavy cream, sugar, vanilla extract, and cold water in a pitcher. Whisk vigorously until all the sugar is fully dissolved. This is important — undissolved sugar will not distribute evenly throughout the slushie and can create sweet spots.
Taste the mixture. It should taste like sweet vanilla milk. If you want a stronger vanilla flavor, add another 1/4 teaspoon of vanilla extract. For a richer, dessert-style slushie, increase the heavy cream by 2 tablespoons and reduce the water by the same amount.
Refrigerate the mixture for 20 minutes. Dairy mixtures benefit from extra chill time before going into the machine.
Assemble the machine and pour the vanilla cream mixture in slowly while running. Dairy-based slushies can sometimes foam slightly — pour slowly and steadily to manage this. Run for 25 to 30 minutes.
The finished slushie should be white, soft, and creamy-textured — like a very thick frozen milkshake. Serve immediately in dessert cups or tall glasses. A drizzle of caramel sauce on top is a wonderful addition.
Variations
- Vanilla Bean: Use vanilla bean paste instead of extract for visible flecks and a more intense flavor.
- French Vanilla: Add one egg yolk to the mixture before refrigerating for a richer, custard-like taste.
- Vanilla Almond: Add 1/4 teaspoon of almond extract for a nutty, sophisticated twist.
25. Strawberry Cheesecake Slushie
Prep Time: 10 minutes | Slush Time: 25–30 minutes | Serves: 2
A dessert slushie that genuinely tastes like a frozen strawberry cheesecake — creamy, sweet, tangy from the cream cheese, and packed with strawberry flavor. Indulgent and completely worth every sip, this one is a real showstopper among Iceman Slush-Ease Slushie Machine Recipes.
Ingredients
- 1 cup fresh or frozen strawberries
- 3 tablespoons cream cheese, softened
- 3/4 cup cold milk
- 2 tablespoons sugar
- 1 teaspoon lemon juice
- 1/2 teaspoon vanilla extract
Instructions
Freeze the Slush-Ease bowl for at least 12 hours. Because this recipe contains cream cheese, a very cold bowl is critical for achieving the right texture.
Soften the cream cheese at room temperature for about 15 minutes before starting. Softened cream cheese blends much more smoothly than cold cream cheese, which tends to leave small lumps. Cut the softened cream cheese into small cubes to help it blend faster.
Add the strawberries to the blender first, then add the softened cream cheese, cold milk, sugar, lemon juice, and vanilla extract. Blend on high for 60 seconds. Stop and check for any cream cheese lumps — if you see any, blend for another 30 seconds. The mixture should be completely smooth and creamy pink.
Taste the mixture. The cream cheese adds a pleasant tanginess that mimics cheesecake filling. The lemon juice and cream cheese together create that classic cheesecake flavor. Adjust sugar if needed — the mixture should be sweet but with a noticeable tangy note underneath.
Refrigerate the mixture for 20 minutes. The cream cheese makes this a denser mixture, so extra chill time helps.
Assemble the machine and pour the mixture in slowly while it is running. Cream cheese-based mixtures are thicker than juice mixtures, so pour even more slowly and patiently than usual.
Run for 25 to 30 minutes. Check at the 20-minute mark. The finished slushie will be thick, creamy, and incredibly rich. Serve in small dessert cups — this is a rich recipe, so smaller servings are perfect. Top with a whole fresh strawberry and a small graham cracker piece for the full cheesecake effect.
Variations
- Blueberry Cheesecake: Replace strawberries with blueberries for a different berry cheesecake version.
- Raspberry Cheesecake: Use raspberries for a more tart, vibrant cheesecake slushie.
- No-Sugar: Use a sugar substitute and low-fat cream cheese for a lighter version.
26. Chocolate Milkshake Slushie
Prep Time: 5 minutes | Slush Time: 25–30 minutes | Serves: 2
Chocolate lovers, this one is for you. A thick, chocolatey slushie that sits somewhere between a frozen milkshake and a chocolate soft-serve. Made with cocoa powder and cold milk, it delivers serious chocolate flavor without needing ice cream.
Ingredients
- 1 cup cold whole milk
- 1/4 cup cold heavy cream
- 3 tablespoons unsweetened cocoa powder
- 3 tablespoons sugar
- 1 teaspoon vanilla extract
- 1/4 cup cold water
Instructions
Freeze the Slush-Ease bowl overnight. Chocolate-based dairy mixtures need the coldest possible bowl for the best texture.
Combine the cold milk, heavy cream, cocoa powder, sugar, vanilla extract, and cold water in a blender. Blend on high for 45 to 60 seconds. Cocoa powder needs time and agitation to fully dissolve — under-blending leaves a gritty texture. Stop after 30 seconds, scrape down the sides, and blend again.
Taste the mixture. Good chocolate slushie flavor is rich, slightly bitter from the cocoa, and sweet from the sugar. Add more sugar if it tastes too bitter, or add a bit more cocoa if it seems mild. The vanilla extract rounds out the chocolate and adds warmth to the flavor.
Pour the blended chocolate mixture through a fine mesh strainer to catch any un-dissolved cocoa lumps. This step takes an extra minute but makes a big difference in the final smoothness.
Refrigerate the strained mixture for 20 minutes. Assemble the machine and pour the cold chocolate mixture in very slowly while it is running. Dairy mixtures with cocoa can foam — go slowly and steadily.
Run for 25 to 30 minutes. The slushie will be a deep brown and incredibly thick. Serve right away in chilled glasses. Add a drizzle of chocolate syrup on top and a light dusting of cocoa powder for a finishing touch.
Variations
- Mocha: Add 1/2 teaspoon of instant espresso powder to the mix for a coffee-chocolate combination.
- Mint Chocolate: Add 1/4 teaspoon of peppermint extract for a mint chocolate chip-inspired slushie.
- Mexican Chocolate: Add a pinch of cinnamon and a tiny pinch of cayenne for a spiced chocolate drink.
27. Cookies and Cream Slushie
Prep Time: 10 minutes | Slush Time: 25–30 minutes | Serves: 2
Chocolate cookies crushed into a creamy vanilla slushie base — the result is a dessert drink that tastes like a frozen Oreo milkshake. Rich, fun, and deeply satisfying, this recipe is one of the more indulgent entries in this guide.
Ingredients
- 1 cup cold whole milk
- 1/4 cup heavy cream
- 3 tablespoons sugar
- 1 teaspoon vanilla extract
- 6 chocolate sandwich cookies, finely crushed
- 1/4 cup cold water
Instructions
Freeze the Slush-Ease bowl for a full 12 hours.
Crush the chocolate sandwich cookies by placing them in a zip-lock bag and rolling over them with a rolling pin. You want fine crumbs — not large chunks that could clog the machine. Finely crushed cookies blend into the slushie more evenly and give you that cookies-and-cream flavor in every bite.
Combine the cold milk, heavy cream, sugar, vanilla extract, and cold water in a blender. Blend for 20 seconds to mix everything well. Then add half the crushed cookies and blend for another 30 seconds. The cookie crumbs will partially dissolve into the liquid, giving it a light tan color and a faint chocolate flavor throughout.
Taste the mixture. It should taste like a cookies-and-cream milkshake in liquid form. Adjust sugar if needed. The remaining cookie crumbs will be added after the slushie is finished as a topping.
Refrigerate the mixture for 20 minutes. Assemble the machine and pour the cookie mixture in slowly while it is running. The fine cookie particles may settle slightly during pouring — give the mixture a gentle stir before you pour to redistribute them.
Run for 25 to 30 minutes. The slushie will be thick and creamy with small flecks of chocolate cookie throughout. Serve right away in dessert glasses. Sprinkle the reserved crushed cookies generously on top for the classic cookies-and-cream appearance and added crunch.
Variations
- Double Chocolate Cookies and Cream: Use a chocolate-flavored milk base instead of regular milk.
- Mint Cookies and Cream: Add 1/4 teaspoon of peppermint extract for a cool twist.
- Peanut Butter Cookies: Swap the chocolate cookies for peanut butter cookies and add 1 tablespoon of peanut butter to the blender.
28. Caramel Vanilla Slushie
Prep Time: 5 minutes | Slush Time: 25–30 minutes | Serves: 2
Warm caramel flavor meets cold vanilla cream in this dessert slushie that feels like a frozen caramel latte but without the coffee. Sweet, buttery, and deeply satisfying — this is a special-occasion slushie that always gets compliments.
Ingredients
- 1 cup cold whole milk
- 1/4 cup heavy cream
- 3 tablespoons caramel sauce (store-bought or homemade)
- 1 tablespoon sugar
- 1 teaspoon vanilla extract
- 1/4 cup cold water
Instructions
Freeze the Slush-Ease bowl overnight. Caramel-based dairy mixtures need maximum chill from the bowl.
Combine cold milk, heavy cream, caramel sauce, sugar, vanilla extract, and cold water in a blender. Blend on high for 45 seconds. Caramel sauce blends smoothly into dairy liquids but can sometimes stick to the sides of the blender — stop halfway through and scrape the sides down before continuing.
Taste the mixture. The caramel flavor should be noticeable but not overwhelmingly sweet. If it seems mild, add another teaspoon of caramel sauce. If it seems too sweet, add a tiny splash of lemon juice to balance it — you will not taste the lemon, but it cuts the sweetness slightly.
Refrigerate the caramel mixture for 20 minutes. Assemble the machine and pour the cold mixture in while it is running. Run for 25 to 30 minutes. The finished slushie will be a beautiful light tan-caramel color.
Serve immediately in glass cups. Drizzle caramel sauce in a spiral pattern inside the glass before adding the slushie for a beautiful presentation. Top with a tiny pinch of sea salt for a salted caramel experience.
Variations
- Salted Caramel: Add a pinch of fine sea salt to the mixture and sprinkle more on top when serving.
- Caramel Apple: Add 2 tablespoons of fresh apple juice to the mixture for a fall-inspired version.
- Caramel Coffee: Add 1/2 teaspoon of instant espresso powder for a caramel latte slushie.
29. Green Apple Slushie
Prep Time: 5 minutes | Slush Time: 25–30 minutes | Serves: 2
Green apple is sharp, bright, and full of that satisfying tartness that makes every sip interesting. Made with fresh green apple juice and balanced with a touch of lemon, this slushie is crisp and clean — a perfect pick-me-up on any day of the year.
Ingredients
- 1 cup fresh green apple juice (from 2–3 Granny Smith apples)
- 1/2 cup cold water
- 2 tablespoons sugar
- 1 tablespoon fresh lemon juice
- 1/4 teaspoon apple cider vinegar (optional, enhances tartness)
Instructions
Freeze the Slush-Ease bowl for at least 12 hours before starting. This is required for all recipes and should always be your first preparation step.
Juice the green apples using a juicer. If you do not have a juicer, blend the apples with a small amount of water and strain through a fine mesh strainer to extract the juice. Granny Smith apples are the best choice here — they are the most tart variety and give the clearest green apple flavor. Other green varieties like Golden Delicious are sweeter and milder if you prefer that direction.
Combine the green apple juice with cold water, sugar, and lemon juice in a pitcher. Stir well until the sugar is completely dissolved. If you want an extra-tart slushie, add the apple cider vinegar — just 1/4 teaspoon adds noticeable sharpness without making the drink taste like vinegar.
Taste the mixture. Green apple slushies should taste bright, tart, and refreshingly sour with a sweetness underneath. Add more sugar if the tartness is too intense, or more lemon juice if you want to push the brightness even further.
Refrigerate the green apple mixture for 15 to 20 minutes. Apple juice is relatively thin compared to other fruit juices, so a good chill is important before going into the machine.
Assemble the Slush-Ease machine with the frozen bowl in place and turn it on. Pour the cold green apple mixture in slowly and steadily. You will notice the slushie forming quickly along the edges of the bowl since apple juice slushifies efficiently due to its lower sugar and fat content.
Run the machine for 25 to 30 minutes. The finished slushie will be a pale, slightly golden-green color with a wonderfully tart flavor. Serve immediately in clear glasses so the color is visible. Add a thin slice of green apple on the rim as a garnish and a light dusting of cinnamon on top if you want a fall-flavored version.
Variations
- Caramel Apple Slushie: Drizzle caramel sauce inside the glass before serving and swirl lightly for a caramel apple effect.
- Green Apple Ginger: Add 1/4 teaspoon of freshly grated ginger to the mixture for a spiced, warming version.
- Green Apple Elderflower: Add 1 tablespoon of elderflower cordial to the pitcher for a floral, elegant twist.
Customizing Your Iceman Slush-Ease Recipes
One of the best things about the Iceman Slush-Ease Slushie Machine Recipes is how easy they are to customize. Once you know the basics, you can build your own signature flavors. Here are five great ways to make every slushie uniquely yours:
1. Adding Fresh Fruit Toppings — A finished slushie becomes even better with the right topping. Add sliced strawberries, fresh mango cubes, blueberries, or pomegranate seeds directly on top just before serving. The fresh fruit adds color, texture, and a burst of flavor that complements the frozen base underneath. Toppings are best added at the very last second so they do not sink or freeze to the surface.
2. Creating Layered Slushies — Make two different flavors in separate batches and carefully spoon one on top of the other in the same glass. Choose contrasting colors for the best visual effect — try watermelon pink over lemon yellow, or mango orange over raspberry red. Pour slowly and use the back of a spoon to gently guide the second layer without mixing them. Let the cups sit for 30 seconds before serving so the layers settle.
3. Making Creamier Textures — For a richer, creamier slushie, add 2 to 3 tablespoons of heavy cream or coconut cream to any fruit-based recipe. Stir it in before refrigerating the mixture. The fat from the cream slows down ice crystal formation slightly and creates a smoother, softer texture in the final product. Creamier slushies also melt more slowly, giving you more time to enjoy them.
4. Reducing Sugar Content — Many fruit recipes in this guide work perfectly with less sugar than the recipe calls for. If the fruit is very ripe and naturally sweet, start with half the sugar and taste before adding more. Using fresh fruit instead of juice also naturally reduces the total sugar content since you have more control over how much sweetener goes in. Stevia or monk fruit sweetener can also be used in equal measure to replace refined sugar.
5. Using Natural Sweeteners — Honey, pure maple syrup, agave nectar, and date syrup all work as substitutes for granulated sugar in most recipes. Honey adds a floral sweetness that pairs beautifully with citrus and tropical flavors. Maple syrup works particularly well in apple and pear-based slushies. Agave has a clean, neutral sweetness that works in almost any recipe. Add these sweeteners after blending and stir well to fully dissolve before chilling the mixture.
Conclusion
Making your own frozen drinks at home has never been easier, and these Iceman Slush-Ease Slushie Machine Recipes prove that with just a little prep time, you can create slushies that rival anything you would find at a shop. From the simple strawberry and lemon classics to the richer dessert-style caramel and cookies-and-cream versions, there is a recipe in this guide for every occasion and every preference.
The best part about working with the Iceman Slush-Ease is that no two batches need to be the same. Try combining two of your favorite flavors, swap out a juice for a soda, or add a fresh fruit topping you have not tried before. The machine makes experimentation easy since each batch only takes about 30 minutes from start to finish.
A few tips to get the most out of every use: always freeze the bowl for a full 12 hours, chill your liquid mixture before pouring it in, pour slowly and steadily, and serve as soon as the slushie reaches your preferred thickness. These small steps make the biggest difference in the quality of the final drink.
Whether you are making slushies for a backyard party, a movie night, or just a regular afternoon treat, the Iceman Slush-Ease Slushie Machine gives you the tools to do it well. Pick a recipe from this guide, start with the basics, and then make it your own. The possibilities are as wide as your imagination.