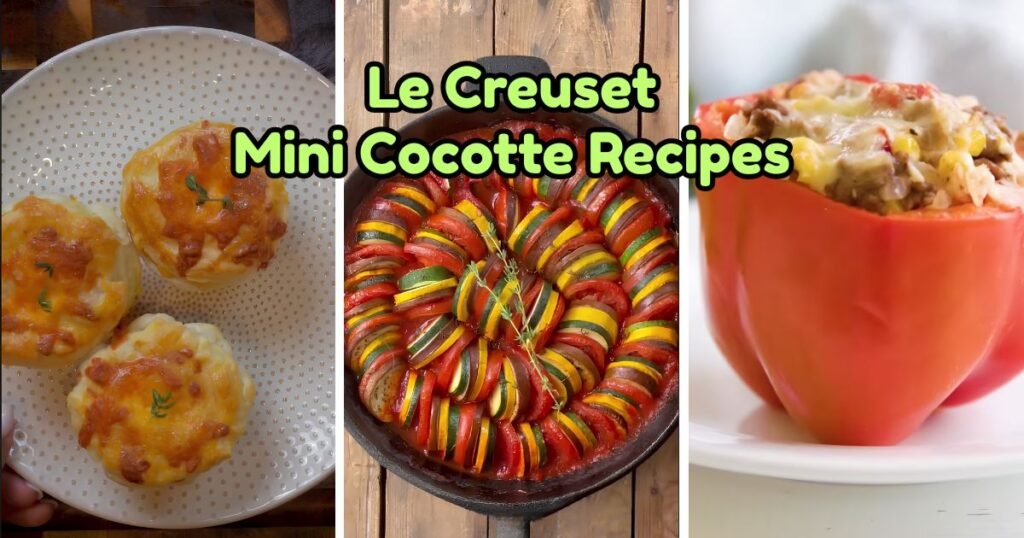
Le Creuset mini cocotte recipes are one of the best ways to enjoy home-cooked meals with great flavor and beautiful presentation. These small cast iron pots are not just cute — they work really well in the kitchen. The thick walls hold heat evenly, and food comes out perfectly cooked every time.
What makes mini cocottes special is how they handle individual servings. Each person gets their own little pot, which looks great at the table and keeps food warm longer. No more cold plates before everyone sits down!
These little pots work for so many meals. You can make savory dinners like chicken pot pie, creamy soups, and baked pasta. You can also bake sweet treats like chocolate lava cake and apple crumble. Even breakfast is more fun in a mini cocotte.
In this post, you will find 20 Le Creuset mini cocotte recipes — from hearty mains to cozy desserts. Each one is easy to follow and packed with flavor. Let’s get cooking!

Why Use Le Creuset Mini Cocottes for Cooking?
Using Le Creuset mini cocottes changes how you cook and serve food at home. Here is why these small pots are worth using:
1. Even Heat Distribution and Retention — Cast iron heats up slowly and holds that heat for a long time. This means your food cooks evenly from all sides. No burnt edges or cold centers. Every bite is cooked just right.
2. Perfect Portion Control — Each cocotte holds one serving. This makes it easy to plan meals, control how much you eat, and avoid wasted food. Great for families with different preferences too.
3. Oven-to-Table Presentation Appeal — These pots go straight from the oven to the table. They look beautiful as they are — no need to move food to a serving dish. The bright enamel colors make any meal feel special.
4. Great for Entertaining and Meal Prep — When you have guests, individual cocottes feel fancy without extra work. You can also prep them ahead of time, store in the fridge, and bake when ready. That makes weeknight dinners much easier.
1. Mini Chicken Pot Pie
Prep Time: 20 minutes | Cook Time: 35 minutes | Serves: 4
A golden, flaky crust on top of a rich and creamy chicken filling — this is comfort food at its best. Using Le Creuset mini cocotte recipes like this one means every person gets their own perfectly baked pot pie, warm and ready to eat straight from the oven.

Ingredients
- 1 ½ cups cooked chicken, shredded or diced
- 1 cup frozen peas and carrots, thawed
- ½ cup celery, diced
- ½ cup onion, diced
- 2 tablespoons butter
- 2 tablespoons all-purpose flour
- 1 cup chicken broth
- ½ cup whole milk
- Salt and black pepper to taste
- ½ teaspoon garlic powder
- ½ teaspoon thyme
- 1 sheet store-bought puff pastry, thawed
- 1 egg, beaten (for egg wash)
Instructions
Start by preheating your oven to 400°F (200°C). Place your mini cocottes on a baking sheet lined with parchment paper and set them aside.
In a medium skillet over medium heat, melt the butter. Once it foams, add the diced onion and celery. Cook for about 4 to 5 minutes, stirring often, until the onion turns soft and a little translucent. You want the vegetables to soften but not brown.
Sprinkle the flour over the vegetables and stir right away. Keep stirring for about 1 minute so the flour cooks and loses its raw taste. This step is what thickens your filling later, so don’t skip it.
Slowly pour in the chicken broth while stirring constantly. Add the milk next. Keep stirring as the mixture heats up — it will begin to thicken after about 3 to 4 minutes. Once it coats the back of a spoon nicely, it is ready.
Add the garlic powder, thyme, salt, and pepper. Stir well. Then add the shredded chicken and the thawed peas and carrots. Mix everything together so it is all coated in that creamy sauce. Remove from heat.
Divide the filling evenly among the four mini cocottes. Fill each one almost to the top, leaving a small gap at the rim.
Roll out your puff pastry on a lightly floured surface. Use a round cutter or a small bowl as a guide to cut circles slightly larger than the opening of your cocottes. Press each circle gently over the top of the filling, tucking the edges in a little or letting them hang over the side. Both work fine.
Brush the top of each pastry crust with the beaten egg. This gives it that beautiful golden-brown color when baked. Cut one or two small slits in the top of each crust so steam can escape during baking.
Place the baking sheet with the cocottes into the preheated oven. Bake for 25 to 30 minutes, or until the pastry is puffed up and deep golden brown. The filling should be bubbling gently around the edges.
Remove from the oven carefully — the cocottes and the filling will be very hot. Let them rest for 5 minutes before serving. This helps the filling settle slightly so it doesn’t spill out when the crust is broken open. Serve directly in the cocotte for the best presentation.
2. Baked Mac and Cheese
Prep Time: 15 minutes | Cook Time: 25 minutes | Serves: 4
Creamy on the inside, golden and crispy on top — baked mac and cheese in individual cocottes is the kind of dish everyone reaches for first. Each cocotte seals in all that cheesy goodness and keeps it hot right through the last bite.
Ingredients
- 2 cups elbow macaroni, cooked and drained
- 2 tablespoons butter
- 2 tablespoons all-purpose flour
- 1 ½ cups whole milk
- 1 cup sharp cheddar cheese, shredded
- ½ cup gruyère cheese, shredded
- Salt and black pepper to taste
- ½ teaspoon mustard powder
- ¼ teaspoon paprika
- ¼ cup breadcrumbs
- 1 tablespoon melted butter (for topping)
Instructions
Preheat your oven to 375°F (190°C). Lightly butter the inside of each mini cocotte and place them on a baking sheet.
Cook your macaroni according to package instructions. Drain it well and set aside. You want the pasta slightly al dente since it will continue cooking in the oven.
In a medium saucepan over medium heat, melt the butter. Once melted, whisk in the flour and stir continuously for about 1 minute until the mixture turns a pale yellow color and smells slightly nutty. This is called a roux and it is the base of your cheese sauce.
Slowly pour the milk into the roux while whisking constantly. Keep stirring so no lumps form. After about 4 minutes, the sauce will start to thicken. Once it coats the back of a spoon, remove from heat.
Add the shredded cheddar and gruyère cheese to the sauce. Stir until both cheeses melt completely and the sauce is smooth. Season with salt, pepper, mustard powder, and paprika. Give it one final taste and adjust seasoning.
Add the drained macaroni to the cheese sauce and fold gently until all the pasta is coated evenly.
Spoon the mac and cheese into each prepared cocotte, filling them just below the rim. In a small bowl, mix the breadcrumbs with the tablespoon of melted butter. Sprinkle this mixture evenly over the top of each cocotte.
Bake in the preheated oven for 20 to 25 minutes. The top should be golden brown and crispy, and you should see the cheese sauce bubbling slightly around the edges. If you want an even crispier top, switch the oven to broil for the last 2 minutes — just watch it closely so it doesn’t burn.
Remove from the oven and let rest for 3 to 4 minutes before serving. The crust on top stays crunchy while the inside remains perfectly creamy. Serve directly in the cocottes — they hold the heat beautifully.
3. French Onion Soup
Prep Time: 15 minutes | Cook Time: 55 minutes | Serves: 4
Few soups feel as comforting as a rich, slow-cooked French onion soup with a thick layer of melted cheese on top. Making it in Le Creuset mini cocottes gives you that classic brasserie look right at your own dinner table.
Ingredients
- 4 large yellow onions, thinly sliced
- 3 tablespoons butter
- 1 tablespoon olive oil
- 1 teaspoon sugar
- ½ cup dry white wine (optional)
- 4 cups beef broth
- 1 teaspoon Worcestershire sauce
- Salt and black pepper to taste
- 4 slices baguette, toasted
- 1 ½ cups Gruyère cheese, shredded
Instructions
In a large, heavy-bottomed pot, melt the butter with the olive oil over medium-low heat. Once the butter melts, add all the sliced onions and sprinkle the sugar over them. Stir to coat.
Cook the onions slowly, stirring every 5 to 8 minutes. This process takes about 35 to 40 minutes and should not be rushed. The onions will soften, shrink down, and slowly turn a deep amber-brown color. That caramelization is what gives this soup its deep, sweet flavor. If the onions start sticking to the pan, add a small splash of water and scrape up the bits from the bottom.
Once the onions are fully caramelized, pour in the white wine if using. Let it cook for 2 minutes so the alcohol evaporates and the flavor concentrates.
Add the beef broth and Worcestershire sauce. Stir well. Bring the soup to a gentle simmer and cook for 10 minutes. Season with salt and pepper. Taste and adjust.
Preheat your oven broiler. Ladle the soup evenly into each mini cocotte. Place one slice of toasted baguette on top of each. Then pile the shredded Gruyère generously over each slice of bread.
Place the cocottes on a baking sheet and slide them under the broiler. Watch them closely. The cheese needs about 2 to 4 minutes to melt, bubble, and turn golden-brown in spots.
Remove carefully — the cocottes will be extremely hot. Place each one on a small plate with a folded napkin underneath to protect the table. Serve immediately while the cheese is still melted and the soup is piping hot.
4. Individual Shepherd’s Pie
Prep Time: 25 minutes | Cook Time: 30 minutes | Serves: 4
Tender ground lamb under a layer of fluffy, golden mashed potato — shepherd’s pie in individual cocottes gives everyone their own perfectly portioned serving. The cast iron keeps the filling bubbling hot while the potato top crisps up just right.
Ingredients
- 1 lb ground lamb (or ground beef for cottage pie)
- 1 cup frozen peas and carrots
- ½ cup onion, diced
- 2 garlic cloves, minced
- 2 tablespoons tomato paste
- 1 tablespoon Worcestershire sauce
- ½ cup beef broth
- Salt and pepper to taste
- 1 teaspoon rosemary
- 3 cups mashed potatoes (prepared and seasoned)
- 2 tablespoons butter (for topping)
Instructions
Preheat oven to 400°F (200°C). Lightly grease your mini cocottes and set them aside on a baking sheet.
In a large skillet over medium-high heat, cook the ground lamb. Break it apart with a spoon as it cooks. Once fully browned with no pink remaining, drain off any excess fat from the pan.
Reduce heat to medium. Add the diced onion to the same pan. Cook for 3 to 4 minutes until softened. Add the minced garlic and cook for another minute, stirring so it doesn’t burn.
Stir in the tomato paste and Worcestershire sauce. Let it cook for 1 to 2 minutes — it will deepen in color and smell rich and savory. Add the beef broth and stir to combine. Let it simmer for 5 minutes until the liquid reduces slightly. Season with rosemary, salt, and pepper.
Add the frozen peas and carrots and stir. Remove from heat and let the filling cool slightly so it doesn’t melt the potato topping when layered.
Divide the meat filling evenly among the four cocottes. Spoon the mashed potatoes on top of each one. Use the back of a spoon to spread the potatoes to the edges of each cocotte, covering the filling completely. For a decorative look, use a fork to create ridges across the top of the mashed potato layer — these ridges will get beautifully crispy in the oven.
Place a small knob of butter on top of each cocotte’s potato layer.
Bake for 20 to 25 minutes until the potato top is golden and the filling is bubbling around the edges. For an extra crispy top, broil for 2 to 3 more minutes. Watch carefully during broiling.
Remove from oven and let rest for 5 minutes before serving. Serve directly in the cocottes — they look great and keep everything hot at the table.
5. Creamy Spinach and Artichoke Dip
Prep Time: 10 minutes | Cook Time: 20 minutes | Serves: 4
Hot, creamy, and loaded with spinach and artichoke — this dip baked in mini cocottes is the perfect sharing starter or party dish. The cast iron keeps it warm and bubbly right through the meal.

Ingredients
- 1 cup frozen spinach, thawed and squeezed dry
- 1 cup canned artichoke hearts, drained and chopped
- 4 oz cream cheese, softened
- ½ cup sour cream
- ¼ cup mayonnaise
- 1 cup mozzarella cheese, shredded
- ½ cup Parmesan cheese, grated
- 2 garlic cloves, minced
- Salt and pepper to taste
- Pinch of red pepper flakes (optional)
Instructions
Preheat your oven to 375°F (190°C). Lightly grease the inside of each mini cocotte.
Start by preparing the spinach. Once thawed, place it in a clean kitchen towel or a few layers of paper towel and squeeze out as much liquid as possible. This step is very important — too much water will make the dip runny instead of creamy.
In a large mixing bowl, combine the softened cream cheese, sour cream, and mayonnaise. Stir vigorously until smooth and well combined. If the cream cheese is still lumpy, use a hand mixer on low speed to get a perfectly smooth base.
Add the minced garlic, half the mozzarella, and all the Parmesan. Stir well. Add the squeezed spinach and chopped artichoke hearts. Season with salt, pepper, and red pepper flakes if using. Mix until everything is evenly distributed throughout the creamy base.
Divide the mixture evenly among the cocottes. Sprinkle the remaining mozzarella over the top of each one for that irresistible bubbly, golden top.
Bake for 18 to 20 minutes. The top should be golden and bubbling. For extra browning, broil for 1 to 2 final minutes.
Let the dip cool for 3 minutes before serving — it will be very hot straight from the oven. Serve each cocotte on a small plate alongside toasted bread, tortilla chips, or sliced vegetables for dipping. Everyone gets their own pot, which is perfect for a crowd.
6. Mini Lasagna
Prep Time: 30 minutes | Cook Time: 35 minutes | Serves: 4
Layers of pasta, rich meat sauce, and creamy béchamel — individual mini lasagnas baked in cocottes look impressive and taste even better. Each one comes out with perfectly cooked layers and a golden, bubbly cheese top.
Ingredients
- 8 to 10 lasagna noodles, cooked and cut to fit cocotte size
- 1 lb ground beef or Italian sausage
- 1 cup marinara sauce
- 1 cup ricotta cheese
- 1 egg
- 1 cup mozzarella cheese, shredded
- ½ cup Parmesan cheese, grated
- 2 garlic cloves, minced
- 1 teaspoon Italian seasoning
- Salt and pepper to taste
- Fresh basil to garnish
Instructions
Preheat oven to 375°F (190°C). Grease each mini cocotte lightly with cooking spray or butter.
Cook your lasagna noodles until just al dente — slightly firmer than you would normally cook them since they will continue to bake in the oven. Drain and lay them flat on a greased baking sheet so they don’t stick together.
In a skillet over medium-high heat, cook the ground beef or sausage, breaking it into small crumbles. Once cooked through, drain excess fat. Add the minced garlic and cook for 1 minute. Stir in the marinara sauce and Italian seasoning. Let it simmer for 5 minutes. Season with salt and pepper. Remove from heat.
In a small bowl, mix together the ricotta cheese and egg until smooth. Season lightly with salt and a little Parmesan. This mixture will become the creamy layer between your pasta sheets.
Now build your lasagna layers inside each cocotte. Start with a small spoonful of meat sauce on the bottom of each cocotte. Place a cut piece of lasagna noodle on top — trim the pieces to fit the shape of your cocotte. Add a spoonful of the ricotta mixture, then a layer of meat sauce, then a little mozzarella. Repeat the layers — noodle, ricotta, sauce, cheese — until you reach near the top of the cocotte.
Finish the top layer with a generous amount of mozzarella and a sprinkle of Parmesan. This top layer will melt and brown beautifully in the oven.
Cover each cocotte with foil and bake for 20 minutes. Remove the foil and bake uncovered for another 12 to 15 minutes until the top is golden and the edges are bubbling.
Let rest for 5 minutes before serving. Garnish each cocotte with a small leaf of fresh basil. Serve directly in the cocotte — the layers stay perfectly intact when served this way.
7. Baked Eggs with Spinach and Cheese (Shakshuka Style)
Prep Time: 10 minutes | Cook Time: 20 minutes | Serves: 4
Eggs nestled in a spiced tomato and spinach sauce, topped with crumbled feta — this shakshuka-style baked egg dish is bold, warming, and ready in under 30 minutes. Each cocotte holds its own little world of color and flavor.
Ingredients
- 4 large eggs
- 1 can (14 oz) crushed tomatoes
- 1 cup fresh spinach
- ½ onion, diced
- 2 garlic cloves, minced
- 1 tablespoon olive oil
- 1 teaspoon cumin
- ½ teaspoon smoked paprika
- ¼ teaspoon chili flakes
- Salt and pepper to taste
- ¼ cup feta cheese, crumbled
- Fresh parsley to garnish
Instructions
Preheat your oven to 375°F (190°C).
In a medium skillet, heat the olive oil over medium heat. Add the diced onion and cook for 4 to 5 minutes until soft and just starting to turn golden. Add the garlic and cook for 1 more minute.
Add the cumin, smoked paprika, and chili flakes to the pan. Stir quickly and let the spices cook in the oil for about 30 seconds — this step blooms the spices and brings out a deep, rich flavor.
Pour in the crushed tomatoes. Stir everything together. Let the sauce simmer for about 5 minutes, stirring occasionally. Season with salt and pepper. Add the fresh spinach and stir — it will wilt down within a minute or two.
Divide the tomato and spinach sauce evenly among the four mini cocottes. Each cocotte should have a good base of sauce. Use the back of a spoon to make a small well in the center of the sauce in each cocotte.
Carefully crack one egg into each well. Try to keep the yolk intact for the best presentation. Season the eggs lightly with a pinch of salt and pepper.
Sprinkle the crumbled feta over the sauce around the egg in each cocotte.
Place the cocottes on a baking sheet and slide into the preheated oven. Bake for 10 to 14 minutes. Check at the 10-minute mark — the whites should be just set and the yolk should still have a slight jiggle if you prefer it runny. Bake a couple of minutes longer for a fully set yolk.
Remove from oven and garnish with fresh parsley. Serve with warm pita bread or crusty toast for scooping. The cocottes hold the heat well, keeping the sauce warm right to the last scoop.
8. Garlic Butter Shrimp
Prep Time: 10 minutes | Cook Time: 15 minutes | Serves: 4
Plump shrimp in a rich garlic butter sauce with a hint of lemon and white wine — this is a simple but seriously impressive dish. Baked in individual cocottes, every serving stays hot and the sauce stays silky right through dinner.
Ingredients
- 1 lb large shrimp, peeled and deveined
- 4 tablespoons butter
- 4 garlic cloves, minced
- ¼ cup dry white wine
- 2 tablespoons fresh lemon juice
- ½ teaspoon red pepper flakes
- Salt and pepper to taste
- 2 tablespoons fresh parsley, chopped
- Lemon slices to serve
Instructions
Preheat your oven to 400°F (200°C).
Pat the shrimp dry with paper towels. Drying the shrimp is important — excess moisture makes them steam instead of cook properly in the butter sauce. Season lightly with salt and pepper.
In a small saucepan over medium heat, melt the butter. Add the minced garlic and cook gently for 1 to 2 minutes until fragrant. Don’t let the garlic brown — you want it soft and golden. Pour in the white wine and lemon juice. Let the mixture bubble gently for 2 minutes to cook off the alcohol. Remove from heat and stir in the red pepper flakes.
Divide the shrimp evenly among the four cocottes. Arrange them in a single layer so they cook evenly — overlapping too much means uneven cooking.
Pour the garlic butter sauce equally over each cocotte. Each shrimp should be lightly coated and there should be enough sauce pooling at the bottom to keep everything juicy.
Place the cocottes on a baking sheet and bake for 8 to 10 minutes. Shrimp cook fast — they are done when they turn pink and opaque. Overcooked shrimp turn rubbery, so check them at the 8-minute mark and pull them out as soon as the color changes.
Remove from oven and immediately sprinkle fresh parsley over each cocotte. Add a slice of lemon on the side. Serve with crusty bread for mopping up every drop of that buttery garlic sauce.
9. Mini Beef Stew
Prep Time: 20 minutes | Cook Time: 1 hour 30 minutes | Serves: 4
Chunks of tender beef, root vegetables, and a deep, savory broth — this mini beef stew is slow-cooked comfort in a small package. The cast iron of Le Creuset mini cocottes makes these ideal vessels for a long, slow braise that develops incredible flavor.
Ingredients
- 1 lb beef chuck, cut into small cubes
- 2 medium carrots, diced
- 2 medium potatoes, diced small
- 1 stalk celery, diced
- ½ onion, diced
- 2 garlic cloves, minced
- 2 tablespoons tomato paste
- 1 ½ cups beef broth
- ½ cup red wine
- 1 tablespoon all-purpose flour
- 2 tablespoons olive oil
- 1 teaspoon thyme
- 1 bay leaf
- Salt and pepper to taste
Instructions
Preheat oven to 325°F (165°C).
Season the beef cubes generously with salt and pepper. Dust them lightly with flour and toss to coat. The flour will help thicken the stew as it cooks.
Heat the olive oil in a large skillet over high heat. Add the beef cubes in a single layer — work in batches if needed, as crowding the pan stops them from browning. Sear the beef for 2 to 3 minutes per side until a deep brown crust forms. Brown beef = deep flavor. Transfer the seared beef to a bowl and set aside.
Reduce the heat to medium. In the same skillet, add the diced onion. Cook for 3 to 4 minutes until softened. Add the garlic and cook for 1 minute. Stir in the tomato paste and let it cook for 1 to 2 minutes, stirring frequently.
Pour in the red wine and stir, scraping up any browned bits from the bottom of the pan — this is flavor. Let the wine cook down for 2 minutes. Add the beef broth, thyme, and bay leaf. Stir well.
Divide the seared beef evenly among the four mini cocottes. Add the diced carrots, potatoes, and celery to each cocotte. Pour the broth mixture evenly over each one, making sure every cocotte has enough liquid to come about halfway up the ingredients.
Cover each cocotte with its lid. Place them on a baking sheet and slide into the oven. Cook for 1 hour 15 minutes to 1 hour 30 minutes. Check once at the halfway point — the liquid should be gently simmering and the beef should be becoming tender.
The stew is done when the beef is fork-tender and the vegetables are fully cooked through. Remove the bay leaf from each cocotte before serving. Let rest for 5 minutes with the lids on so the flavors settle. Serve in the cocottes with crusty bread on the side.
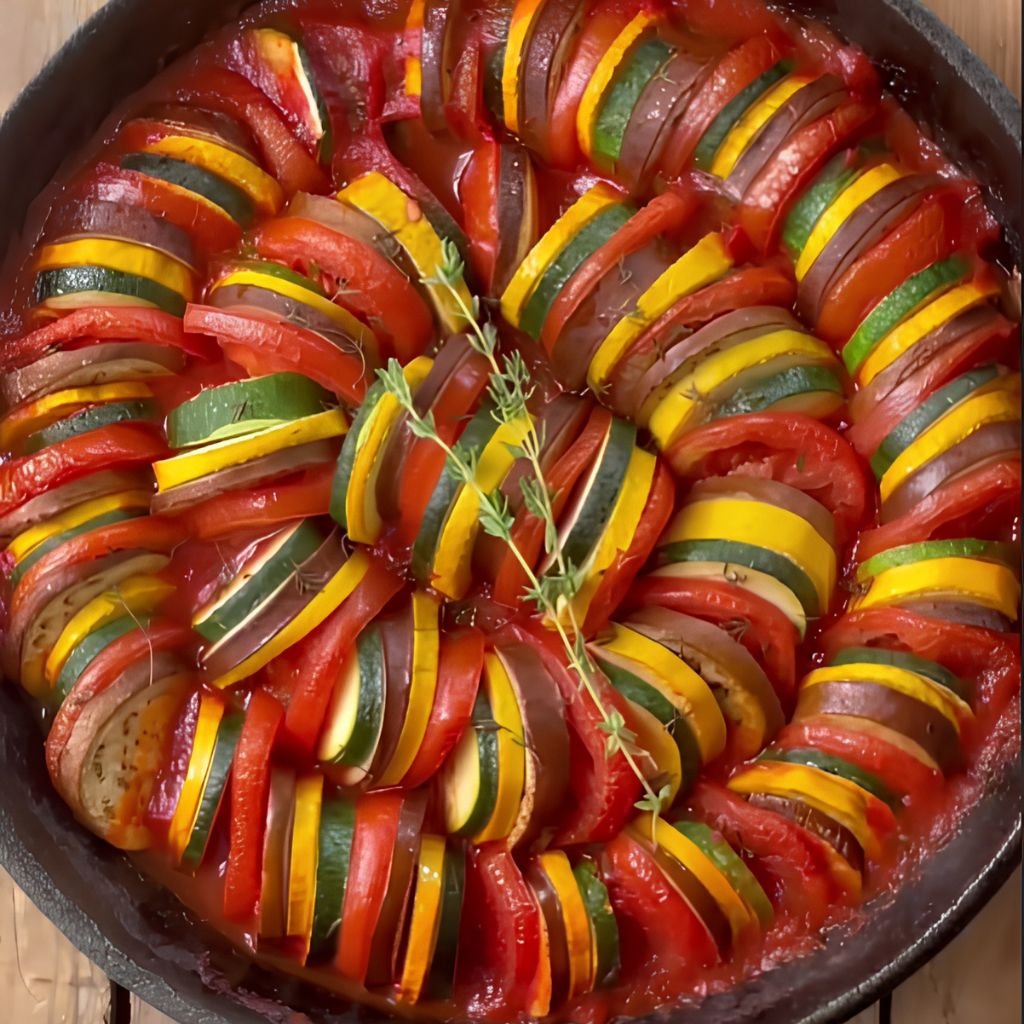
10. Ratatouille in a Cocotte
Prep Time: 20 minutes | Cook Time: 45 minutes | Serves: 4
Thin, overlapping rounds of zucchini, eggplant, and tomato baked in a herbed tomato base — ratatouille in individual cocottes looks as good as it tastes. This classic French vegetable dish becomes something truly beautiful when served this way.
Ingredients
- 1 small zucchini, thinly sliced into rounds
- 1 small yellow squash, thinly sliced
- 1 small eggplant, thinly sliced into rounds
- 2 medium tomatoes, thinly sliced
- 1 cup marinara or crushed tomatoes
- 2 garlic cloves, minced
- 2 tablespoons olive oil
- 1 teaspoon herbes de Provence
- Salt and pepper to taste
- Fresh thyme to garnish
Instructions
Preheat oven to 375°F (190°C). Lightly oil each mini cocotte.
Mix the minced garlic into the marinara or crushed tomatoes. Season with salt, pepper, and half the herbes de Provence. Spoon this tomato mixture evenly into the bottom of each cocotte to create a flavorful base layer.
Now the fun part — the vegetable arrangement. Working in a spiral or overlapping row pattern, alternate slices of zucchini, yellow squash, eggplant, and tomato, standing them slightly upright and overlapping each slice. Work from the outside edge of the cocotte toward the center. Pack them in fairly tightly because the vegetables will shrink as they cook.
Drizzle olive oil over the top of the arranged vegetables. Sprinkle the remaining herbes de Provence, salt, and pepper evenly over each cocotte.
Cover each cocotte with its lid or a piece of foil. Bake covered for 30 minutes — the steam trapped inside helps the vegetables soften evenly.
Remove the lids or foil. Continue baking uncovered for another 15 minutes. The vegetables should be tender, slightly caramelized at the edges, and the tomato sauce below should be thickened and fragrant.
Remove from oven. Garnish each cocotte with a small sprig of fresh thyme. Serve as a side dish or a light main course. A piece of crusty bread alongside is perfect for catching the herby tomato sauce at the bottom.
11. Baked Eggs with Avocado
Prep Time: 8 minutes | Cook Time: 15 minutes | Serves: 4
Creamy avocado paired with gently baked eggs — this breakfast or brunch dish is quick, fresh, and satisfying. Made in Le Creuset mini cocotte recipes, it looks far more elegant than the effort it takes.
Ingredients
- 4 large eggs
- 2 ripe avocados, peeled, pitted, and sliced
- Salt and black pepper to taste
- ¼ teaspoon red pepper flakes
- 1 tablespoon fresh lemon juice
- Fresh chives or parsley to garnish
- Toast to serve
Instructions
Preheat oven to 375°F (190°C). Lightly grease the inside of each cocotte.
Toss the avocado slices gently in lemon juice to keep them from browning and to add a bright, fresh flavor. Divide the avocado slices evenly among the four cocottes, arranging them in a layer across the bottom and slightly up the sides to create a natural nest for the egg.
Season the avocado lightly with salt, pepper, and a pinch of red pepper flakes.
Carefully crack one egg into each cocotte, letting it rest on top of the avocado. Try not to break the yolk if you prefer a runny result. Add another small pinch of salt and pepper on top of the egg.
Place the cocottes on a baking sheet and slide into the oven. Bake for 12 to 15 minutes. At 12 minutes, the whites should be mostly set with the yolk still soft and runny. At 14 to 15 minutes, the yolk will be jammy and partially set. Bake an extra minute or two for fully set yolks.
Remove from oven and immediately garnish with chopped fresh chives or parsley. Serve with toast strips on the side — perfect for dipping into the egg yolk and scooping up the soft avocado. This dish is best eaten straight away while warm.
12. Mini Breakfast Casserole
Prep Time: 15 minutes | Cook Time: 30 minutes | Serves: 4
Eggs, sausage, cheese, and vegetables all baked together in one small pot — this mini breakfast casserole is hearty, filling, and great for a weekend morning. Prep it the night before and bake it fresh in the morning for an even easier start to the day.
Ingredients
- 4 large eggs
- ½ cup whole milk
- ½ cup cooked breakfast sausage, crumbled
- ½ cup bell pepper, diced small
- ¼ cup onion, diced small
- ½ cup cheddar cheese, shredded
- Salt and pepper to taste
- ¼ teaspoon garlic powder
- 1 cup cubed bread or hash browns (optional base layer)
- Cooking spray
Instructions
Preheat oven to 350°F (175°C). Spray the inside of each mini cocotte thoroughly with cooking spray.
If using bread cubes or hash browns as a base, press a small handful into the bottom of each cocotte to create a starchy foundation that soaks up the egg mixture beautifully.
In a mixing bowl, crack all four eggs and add the milk. Whisk together until fully combined and slightly frothy. This extra air in the egg mixture makes the casserole lighter and fluffier once baked. Season the egg mixture with garlic powder, salt, and pepper.
Divide the crumbled sausage, diced bell pepper, and diced onion evenly among the four cocottes. Stir them slightly into the bread base if using.
Pour the egg mixture evenly over each cocotte, letting it soak down through the fillings. Sprinkle the shredded cheddar over the top of each one.
Bake uncovered for 25 to 30 minutes. The eggs should be fully set — no jiggle in the center — and the cheese on top should be melted and lightly golden. To check doneness, insert a small knife into the center of one cocotte. It should come out clean.
Let cool for 3 minutes before serving. Run a small spatula or butter knife around the edge of each cocotte if you want to pop the casserole out onto a plate. Alternatively, serve directly in the cocotte with a fork.
13. Cinnamon Roll Bake
Prep Time: 10 minutes | Cook Time: 25 minutes | Serves: 4
Soft, gooey cinnamon roll pieces baked in individual cocottes with a sweet cream cheese glaze — this is the kind of breakfast that makes a morning special. Each cocotte comes out warm, fragrant, and impossible to resist.
Ingredients
- 1 can store-bought cinnamon roll dough (8-count)
- 2 tablespoons melted butter
- 2 tablespoons brown sugar
- 1 teaspoon cinnamon
- For glaze: 2 oz cream cheese, ½ cup powdered sugar, 2 tablespoons milk, ½ teaspoon vanilla
Instructions
Preheat oven to 350°F (175°C). Butter the inside of each mini cocotte generously.
Open the cinnamon roll dough and separate each roll. Cut each roll into quarters using kitchen scissors or a sharp knife. You will have small pieces of dough loaded with cinnamon sugar swirls inside.
In a bowl, toss the dough pieces with melted butter, brown sugar, and cinnamon. Every piece should be coated.
Divide the coated dough pieces evenly among the four cocottes. Don’t pack them too tightly — they need a little room to puff and expand during baking.
Bake for 22 to 25 minutes. The rolls should be fully cooked through, puffed up, and deep golden on top. The cinnamon filling will have caramelized at the bottom and edges of each cocotte into a sticky, gorgeous glaze.
While the rolls bake, prepare the cream cheese glaze. In a small bowl, beat the cream cheese with a fork until smooth. Add the powdered sugar and mix. Add the milk one tablespoon at a time, mixing after each addition, until the glaze is pourable but still thick. Stir in the vanilla.
Remove the cocottes from the oven. Let them cool for just 2 minutes — you want them warm when you add the glaze. Drizzle the cream cheese glaze generously over each cocotte. Serve immediately while warm and gooey.
14. French Toast Bake
Prep Time: 15 minutes | Cook Time: 25 minutes | Serves: 4
Thick slices of bread soaked in a sweet custard and baked until golden and custardy — French toast in mini cocottes has a crispy top layer and a soft, rich interior that is so much better than the pan-fried version.
Ingredients
- 4 thick slices brioche or challah bread, cubed
- 3 large eggs
- ½ cup whole milk
- 2 tablespoons heavy cream
- 2 tablespoons maple syrup, plus more to serve
- 1 teaspoon vanilla extract
- ½ teaspoon cinnamon
- Pinch of nutmeg
- 2 tablespoons butter, melted
- Powdered sugar to garnish
- Fresh berries to serve
Instructions
Preheat oven to 350°F (175°C). Brush the inside of each mini cocotte with melted butter.
In a large mixing bowl, whisk together the eggs, milk, heavy cream, maple syrup, vanilla extract, cinnamon, and nutmeg. Whisk until the mixture is smooth and all the egg is fully incorporated. This custard is what soaks into the bread and turns it into something magical.
Add the cubed bread to the custard mixture. Press the bread down gently with a spoon so every piece is submerged. Let it soak for 5 minutes — this is the key step. Bread that soaks up the custard fully will bake into a soft, rich interior rather than dry, eggy chunks.
After soaking, use a spoon to divide the bread and any remaining custard evenly among the four cocottes. Make sure each cocotte gets a bit of the custard that pools at the bottom of the bowl.
Bake uncovered for 22 to 25 minutes. The top layer of bread should be golden and slightly crispy, while the inside remains soft and custard-like. A thin knife inserted into the center should come out mostly clean with just a little moist custard — that is exactly right.
Remove from oven. Dust lightly with powdered sugar. Serve immediately with a drizzle of maple syrup and a small handful of fresh berries on the side. These are best eaten straight from the oven while the top is still crisp.
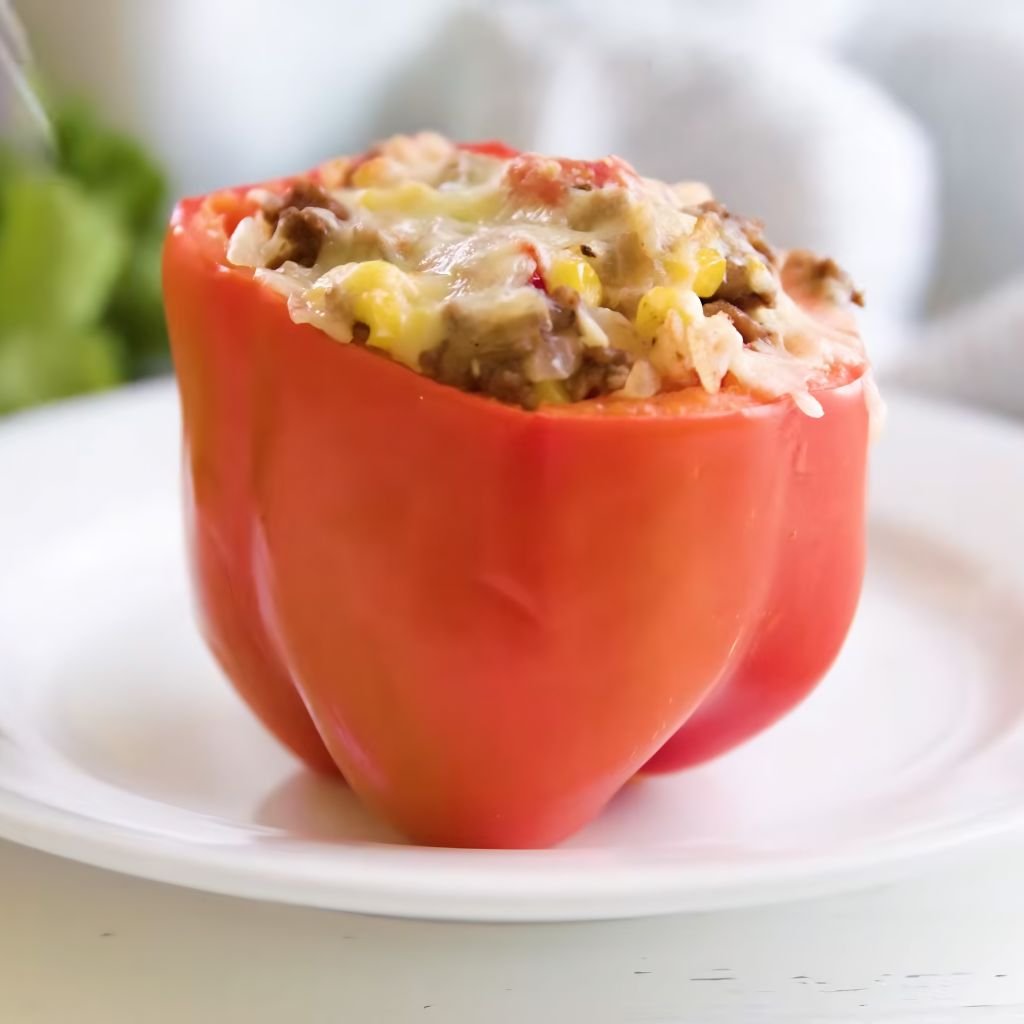
15. Stuffed Bell Peppers
Prep Time: 20 minutes | Cook Time: 40 minutes | Serves: 4
Colorful bell peppers packed with seasoned rice, beef, and melted cheese — but made smaller and nestled into cocottes so they cook in their own steam and come out incredibly juicy. A classic dinner made even better in individual portions.
Ingredients
- 4 small to medium bell peppers, tops cut off and seeds removed
- 1 lb ground beef
- 1 cup cooked rice
- ½ onion, diced
- 2 garlic cloves, minced
- 1 cup marinara sauce
- 1 cup mozzarella cheese, shredded
- 1 teaspoon Italian seasoning
- Salt and pepper to taste
- Fresh basil to garnish
Instructions
Preheat oven to 375°F (190°C).
In a skillet over medium-high heat, cook the ground beef until fully browned. Break into small crumbles as it cooks. Drain excess fat. Add the diced onion and cook for 3 more minutes. Add the garlic and cook for 1 minute. Stir in the marinara sauce and Italian seasoning. Let simmer for 3 minutes. Season with salt and pepper.
Remove from heat and fold in the cooked rice. The rice will absorb any extra sauce and bind the filling together. Let the filling cool slightly.
Place one prepared bell pepper inside each mini cocotte. The cocotte supports the pepper upright perfectly during cooking.
Spoon the filling into each pepper, pressing it down gently and packing it tightly. Fill each pepper all the way to the top.
Sprinkle shredded mozzarella generously over the top of each stuffed pepper.
Add a small splash of water — about 2 tablespoons — to the bottom of each cocotte (around the pepper, not inside it). This creates steam that helps the pepper soften evenly during baking.
Cover each cocotte with its lid. Bake covered for 25 minutes. Remove the lids and bake uncovered for another 10 to 15 minutes until the cheese is golden and bubbling and the pepper is fully tender.
Let rest for 5 minutes. Garnish with fresh basil. Serve directly in the cocottes — the pepper sits beautifully upright and the presentation is stunning.
16. Creamy Mushroom Gratin
Prep Time: 15 minutes | Cook Time: 25 minutes | Serves: 4
Earthy mushrooms in a rich cream sauce, topped with golden breadcrumbs and Gruyère — this gratin is luxurious and deeply satisfying. Each cocotte holds a generous portion of this French-inspired dish that works as a side or a light main.
Ingredients
- 3 cups mixed mushrooms, sliced (cremini, shiitake, or button)
- 2 tablespoons butter
- 2 shallots, thinly sliced
- 2 garlic cloves, minced
- ½ cup heavy cream
- ¼ cup chicken or vegetable broth
- 1 teaspoon fresh thyme leaves
- Salt and pepper to taste
- ½ cup Gruyère cheese, shredded
- ¼ cup breadcrumbs
- 1 tablespoon olive oil
Instructions
Preheat oven to 400°F (200°C). Lightly grease each mini cocotte.
In a large skillet over medium-high heat, melt the butter. Add the sliced shallots and cook for 2 to 3 minutes until soft. Add the mushrooms in a single layer — work in batches if needed. Cook without stirring for 2 to 3 minutes so the mushrooms get a good sear and release their moisture. Then stir and cook for another 2 to 3 minutes.
Add the garlic and thyme. Cook for 1 minute. Pour in the broth and let it cook for 1 to 2 minutes. Add the heavy cream and stir. Simmer gently for 3 to 4 minutes until the cream thickens slightly and coats the mushrooms. Season generously with salt and pepper.
Divide the creamy mushroom mixture evenly among the four cocottes.
In a small bowl, mix the breadcrumbs with olive oil until the crumbs are lightly coated. Stir in the Gruyère. Sprinkle this topping evenly over each cocotte.
Bake for 15 to 18 minutes until the topping is golden brown and crispy. The cream sauce should be bubbling gently underneath.
Remove from oven. Let rest for 2 minutes. Serve with crusty bread or alongside a simple green salad for a complete meal.
17. Vegetable Pot Pie
Prep Time: 20 minutes | Cook Time: 35 minutes | Serves: 4
A golden puff pastry crust over a hearty vegetable filling in a creamy herb sauce — this vegetarian pot pie is as satisfying as any meat version. Using Le Creuset mini cocotte recipes for this dish means the filling stays steaming hot under that flaky lid.
Ingredients
- 1 cup diced potatoes
- ½ cup frozen peas
- ½ cup frozen corn
- ½ cup diced carrot
- ½ cup diced celery
- ½ cup onion, diced
- 2 tablespoons butter
- 2 tablespoons all-purpose flour
- 1 cup vegetable broth
- ½ cup whole milk
- 1 teaspoon thyme
- Salt and pepper to taste
- 1 sheet puff pastry, thawed
- 1 egg, beaten
Instructions
Preheat oven to 400°F (200°C). Place cocottes on a lined baking sheet.
Boil the diced potatoes and carrot in salted water for 5 minutes. They should be just starting to soften but still firm. Drain and set aside.
In a medium saucepan, melt butter over medium heat. Add the onion and celery. Cook for 4 to 5 minutes until soft. Stir in the flour and cook for 1 minute. Slowly add the vegetable broth and milk while whisking. Cook for 3 to 4 minutes until thickened.
Add the par-cooked potato and carrot, peas, corn, and thyme to the sauce. Stir to combine. Season with salt and pepper. The filling should be thick and creamy. Remove from heat.
Divide the vegetable filling evenly among the cocottes. Cut circles from the puff pastry to fit over each cocotte opening. Press gently over the top, tucking the edges or leaving them to hang slightly. Cut one or two small slits in each pastry top for steam.
Brush with beaten egg. Bake for 25 to 30 minutes until the pastry is puffed and deep golden brown. Let rest 5 minutes before serving.
18. Chocolate Lava Cake
Prep Time: 15 minutes | Cook Time: 12 minutes | Serves: 4
A warm chocolate cake with a molten, flowing center — this is the dessert everyone wants but thinks is too hard to make at home. In individual cocottes, these lava cakes are easy to bake and look absolutely stunning when served.
Ingredients
- 4 oz dark chocolate (70% cacao), chopped
- ½ cup unsalted butter, plus more for greasing
- 2 whole eggs
- 2 egg yolks
- ¼ cup granulated sugar
- 2 tablespoons all-purpose flour
- Pinch of salt
- Cocoa powder for dusting
- Vanilla ice cream or powdered sugar to serve
Instructions
Preheat oven to 425°F (220°C). Butter the inside of each mini cocotte thoroughly, then dust with cocoa powder, tapping out any excess. This coating helps the cakes release cleanly.
In a heatproof bowl set over a pot of barely simmering water (double boiler), melt the chocolate and butter together. Stir gently as they melt — you want a smooth, glossy mixture. Remove from heat once fully melted and stir for another 30 seconds. Let cool for 5 minutes.
In a separate mixing bowl, whisk together the whole eggs, egg yolks, and sugar vigorously for about 2 minutes until the mixture turns pale yellow and slightly thick. This beating adds a little air and structure to the batter.
Pour the melted chocolate mixture into the egg mixture slowly, folding with a rubber spatula rather than stirring. Gentle folding keeps the batter light. Add the flour and salt and fold again until just combined — do not overmix.
Divide the batter evenly among the four prepared cocottes. At this point, you can refrigerate them for up to 2 hours if preparing ahead. If refrigerated, add 1 to 2 extra minutes to the baking time.
Bake for 10 to 12 minutes. The edges will be set and slightly pulling away from the sides of the cocotte, but the center will still look soft and underbaked — that is exactly what you want.
Remove from oven immediately. Let rest for exactly 1 minute. Run a small knife around the edge of each cake. Place a small plate over each cocotte and carefully flip to release the cake. Serve immediately with a scoop of vanilla ice cream or a dusting of powdered sugar. The lava flows when you break the center open.
19. Apple Crumble
Prep Time: 15 minutes | Cook Time: 30 minutes | Serves: 4
Tender cinnamon apples beneath a buttery, golden oat crumble — this is a dessert that never disappoints. Baked in individual cocottes, each serving comes out perfectly proportioned with a crispy topping and a soft, juicy fruit base.
Ingredients
- 3 medium apples, peeled, cored, and diced
- 2 tablespoons granulated sugar
- 1 teaspoon cinnamon
- 1 tablespoon lemon juice
- For crumble topping: ½ cup rolled oats, ¼ cup all-purpose flour, ¼ cup brown sugar, 3 tablespoons cold butter (cubed), ¼ teaspoon cinnamon, pinch of salt
- Vanilla ice cream or whipped cream to serve
Instructions
Preheat oven to 375°F (190°C). Lightly butter the inside of each cocotte.
In a mixing bowl, toss the diced apples with granulated sugar, cinnamon, and lemon juice. Stir until all the pieces are coated. The lemon juice prevents browning and adds a bright flavor that balances the sweetness.
Divide the apple mixture evenly among the four cocottes. Each one should be about ¾ full of apple pieces — they will shrink as they cook.
Now make the crumble topping. In a separate bowl, combine the rolled oats, flour, brown sugar, cinnamon, and salt. Add the cold cubed butter. Use your fingertips to rub the butter into the dry ingredients, working quickly. Pinch and press until the mixture looks like rough, clumpy breadcrumbs with some larger chunks. Those chunks are good — they create the best crumble texture.
Spoon the crumble topping generously over each cocotte of apples. Press it down very lightly — not too firm, just enough for it to stay in place.
Bake for 28 to 32 minutes until the topping is golden brown and crispy and the apple filling is bubbling through the sides. The kitchen will smell amazing.
Remove from oven and let cool for 5 minutes. Serve each cocotte warm with a scoop of vanilla ice cream or a dollop of freshly whipped cream. The contrast between the warm crumble and cold ice cream is the best part.
20. Crème Brûlée
Prep Time: 15 minutes | Cook Time: 45 minutes + 2 hours chilling | Serves: 4
Silky, chilled vanilla custard with a crisp caramelized sugar top that cracks when you tap it — crème brûlée is one of the most beloved French desserts. Made in Le Creuset mini cocotte recipes, this classic becomes even more special, with the cast iron holding the chill perfectly.
Ingredients
- 4 egg yolks
- ¼ cup granulated sugar (plus 4 tablespoons for brûlée topping)
- 1 ½ cups heavy cream
- 1 teaspoon pure vanilla extract (or ½ vanilla bean)
- Pinch of salt
Instructions
Preheat oven to 325°F (165°C). Place the four mini cocottes into a large, deep baking dish.
In a small saucepan over medium heat, warm the heavy cream with the vanilla extract (or scraped vanilla bean). Heat until you see small bubbles forming around the edges of the pan — do not let it fully boil. Remove from heat and let it steep for 5 minutes so the vanilla infuses into the cream.
In a mixing bowl, whisk the egg yolks with the ¼ cup of sugar and a pinch of salt. Whisk for about 2 minutes until the mixture turns pale yellow and slightly thick. This step prevents the eggs from scrambling when the hot cream is added.
Very slowly pour the warm cream into the egg mixture, adding just a tiny bit at a time at first while whisking constantly. This process is called tempering and it gradually brings the eggs up to temperature without cooking them. Once you’ve added about half the cream this way, you can pour the rest in more steadily while still whisking.
Strain the custard through a fine mesh sieve into a pouring jug. This removes any small lumps and ensures the smoothest possible texture.
Pour the custard evenly into the four mini cocottes. Carefully pour hot water into the large baking dish around the cocottes until it comes about halfway up their sides. This water bath (bain-marie) ensures the custard bakes gently and evenly, preventing cracking.
Carefully slide the baking dish into the oven. Bake for 35 to 40 minutes. The custard is ready when the edges are set but the center still has a gentle wobble when the cocotte is nudged.
Carefully remove each cocotte from the water bath. Let cool to room temperature. Then refrigerate for at least 2 hours, or overnight. The custard needs to be fully cold and firm before you can brûlée the top.
When ready to serve, remove the cocottes from the refrigerator. Pat the surface of each custard dry with a paper towel — any moisture on top will prevent the sugar from caramelizing properly. Sprinkle 1 tablespoon of granulated sugar evenly over the surface of each custard.
Using a kitchen torch, move the flame in small circles over the sugar. The sugar will melt, bubble, and then harden into a thin amber-colored caramel crust. Let it sit for 1 minute to fully harden before serving. When tapped with a spoon, it should crack with a satisfying snap.
Serving and Presentation Ideas
Making the most of your Le Creuset mini cocotte recipes means thinking about how everything looks on the table, not just how it tastes.
1. Garnishing Tips — Fresh herbs are your best friend. A sprig of thyme, a small bunch of parsley, or a few basil leaves placed right before serving adds color and a fresh aroma. For desserts, a light dusting of powdered sugar, a drizzle of cream, or fresh berries elevate even the simplest dish. Crumbles and gratins benefit from a final crack of black pepper right at the table.
2. Pairing Suggestions — For savory dishes like beef stew or shepherd’s pie, serve alongside a robust red wine or a cold craft beer. For lighter dishes like garlic butter shrimp or ratatouille, a chilled white wine or sparkling water with lemon is perfect. Desserts pair beautifully with a strong espresso, a dessert wine, or hot cocoa for a cozy evening feel.
3. Table Styling Ideas — Place each cocotte on a small wooden board, a folded linen napkin, or a ceramic plate to protect the table and frame the presentation. The bright enamel colors of Le Creuset cocottes make any table setting look vibrant. Mix and match colors for a fun, layered table look. Light a candle nearby for an effortless, warm atmosphere.
Conclusion
Le Creuset mini cocotte recipes prove that great home cooking doesn’t have to be complicated or reserved for special occasions. These small but powerful pots handle everything from slow-braised beef stew to delicate crème brûlée, all with even heat, beautiful presentation, and that distinct cast iron quality that makes food taste better.
The real joy of cooking with mini cocottes is how versatile they are. One day you can bake a showstopping chocolate lava cake for dessert, and the next morning use the same pot for a quick baked egg breakfast. There are no rules — just great ingredients, a reliable pot, and your own creativity.
Don’t feel you need to follow every recipe exactly. Swap proteins, change the vegetables, or try a different cheese. Cooking is about making food that works for you and the people you feed. These 20 recipes are just the beginning of what you can do with your cocottes.
Pick one recipe that caught your eye, gather your ingredients, and give it a go. Once you cook your first meal in a Le Creuset mini cocotte, you’ll understand exactly why so many home cooks love them. Share your results with family and friends — and if you try a recipe, pass it on to someone who would love it too.