
Baking bread at home used to take hours of mixing, kneading, and watching the dough rise. Today, a good bread machine does all of that hard work for you.
Bella bread maker recipes make it easy to bake fresh, warm loaves right in your own kitchen — no bakery trips needed. Bread makers have become a go-to tool for busy families because they save time, keep results consistent, and are simple enough for total beginners.
The Bella Bread Maker is a great pick for home bakers. It has easy-to-use settings, a clear LCD display, and multiple crust and loaf size options. Whether you want a soft white loaf or a hearty multigrain bread, the Bella handles it all without fuss.
Using a bread machine means less mess in the kitchen and more time doing what you love. You just add the ingredients in the right order, pick a setting, and walk away.
A few hours later, your home smells amazing and a fresh loaf is ready. That is the real magic of Bella bread maker recipes — simple steps, great results every time.

How to Use a Bella Bread Maker (Beginner’s Guide)
Getting started with your Bella Bread Maker may seem like a big task at first, but once you learn the basics, it becomes second nature. Here is a quick guide to help you get going:
1. Know Your Basic Components and Settings
Your Bella Bread Maker comes with a bread pan, a kneading paddle, and a control panel. The control panel lets you choose the bread type (white, wheat, sweet, gluten-free, etc.), crust color (light, medium, dark), and loaf size (1 lb, 1.5 lb, or 2 lb). Take a few minutes to read your machine’s manual so you understand what each button does.
2. Understanding Cycles: Knead, Rise, and Bake
The machine works in three main stages. First, it kneads the dough to build structure. Then, it lets the dough rise (sometimes two times) so it becomes light and airy. Finally, it bakes the bread until it is fully cooked through. Different programs use different time settings for each stage, so always match your recipe to the correct program.
3. Standard Order of Adding Ingredients
Always add ingredients in this order: liquids first (water, milk, oil), then dry ingredients (flour, sugar, salt), and finally yeast last on top. Keeping yeast away from liquid until the machine starts helps it activate at the right time and gives you a better rise.
4. Common Mistakes to Avoid
Do not open the lid during the baking cycle — this lets heat escape and can cause the bread to collapse. Always measure ingredients with proper measuring tools, not by guessing. Check that the kneading paddle is properly inserted before adding ingredients. Old yeast can cause flat bread, so check the expiration date on your yeast packet before using it.
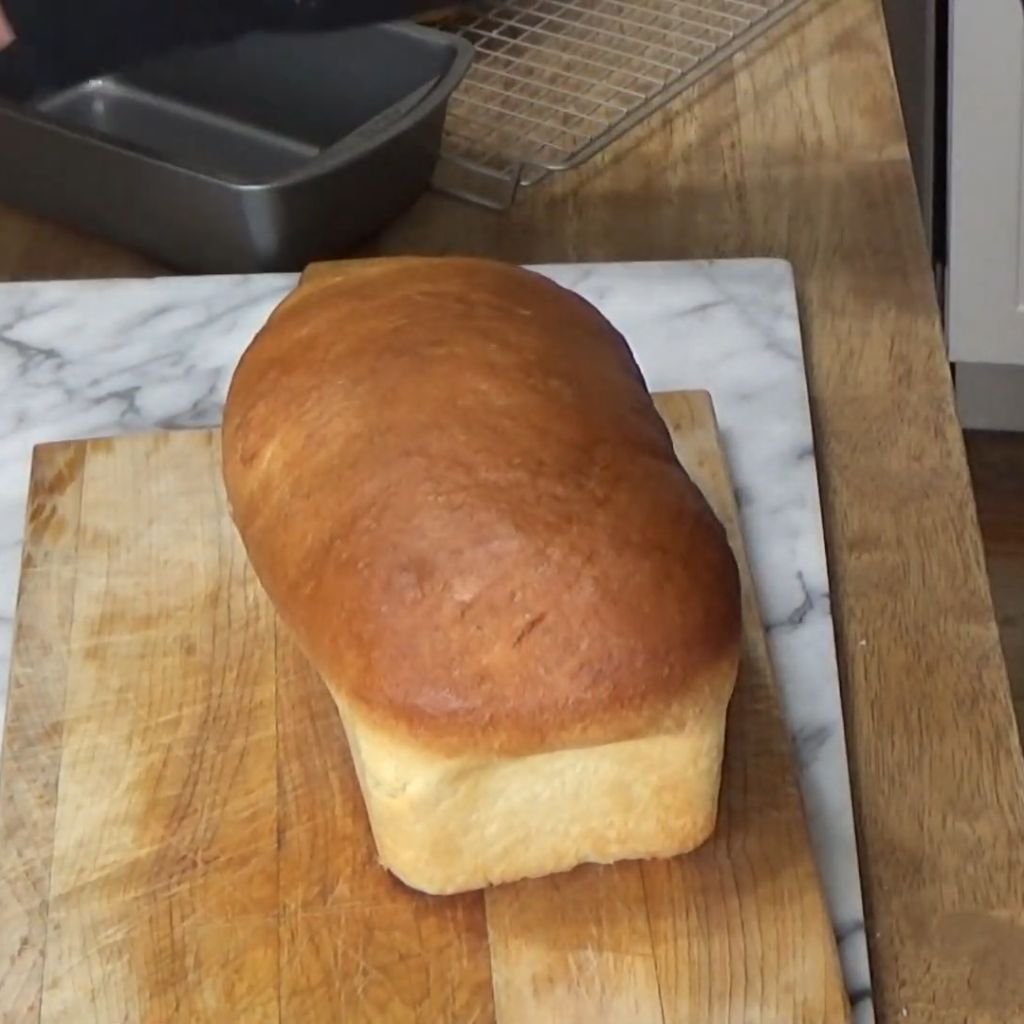
1. Basic White Bread
Prep Time: 10 minutes Bake Time: 3 hours Serve: 12 slices
Nothing beats a classic white loaf fresh from the bread machine. Soft, fluffy, and golden on top, this is the bread that goes with everything — from simple sandwiches to morning toast. Perfect for first-time users learning the Bella bread maker recipes basics.
Ingredients:
- 1 cup warm water (110°F)
- 2 tablespoons white sugar
- 1 teaspoon salt
- 2 tablespoons vegetable oil
- 3 cups bread flour
- 2 1/4 teaspoons active dry yeast (one standard packet)
Instructions:
1. Start by measuring your warm water carefully. The temperature matters — too hot and it kills the yeast, too cold and the yeast won’t activate properly. Aim for around 110°F, which feels warm but not hot to the touch.
2. Pour the warm water into the bread pan first. This is the standard order for Bella bread maker recipes — liquids always go in before dry ingredients. Add the vegetable oil right after the water.
3. Sprinkle the sugar and salt evenly over the liquid. These go in next because they dissolve easily and need to be separated from the yeast at this stage.
4. Now add all 3 cups of bread flour on top of the liquid and seasonings. Use a dry measuring cup and level it off for accuracy. Bread flour has more protein than all-purpose flour, which gives your loaf a better rise and chewier texture.
5. Make a small well in the center of the flour — just a little indent — and pour your yeast into that well. This keeps the yeast away from the liquid until the machine starts, giving it the best chance to activate properly.
6. Place the bread pan securely into the machine. Make sure it clicks into place so it doesn’t shift during kneading.
7. Close the lid and select the Basic or White Bread program on your Bella Bread Maker. Choose your crust color — medium works great for this recipe. Select the 1.5 lb loaf size if using the measurements above.
8. Press Start and let the machine do its work. During the kneading phase, you can peek through the window to see how the dough looks. It should come together into a smooth, slightly tacky ball. If it looks too dry and crumbly, add water one tablespoon at a time. If it looks too wet and sticky, add flour one tablespoon at a time.
9. Once the machine finishes all cycles — kneading, rising, and baking — it will beep to let you know the bread is ready. Use oven mitts to remove the bread pan from the machine, as it will be very hot.
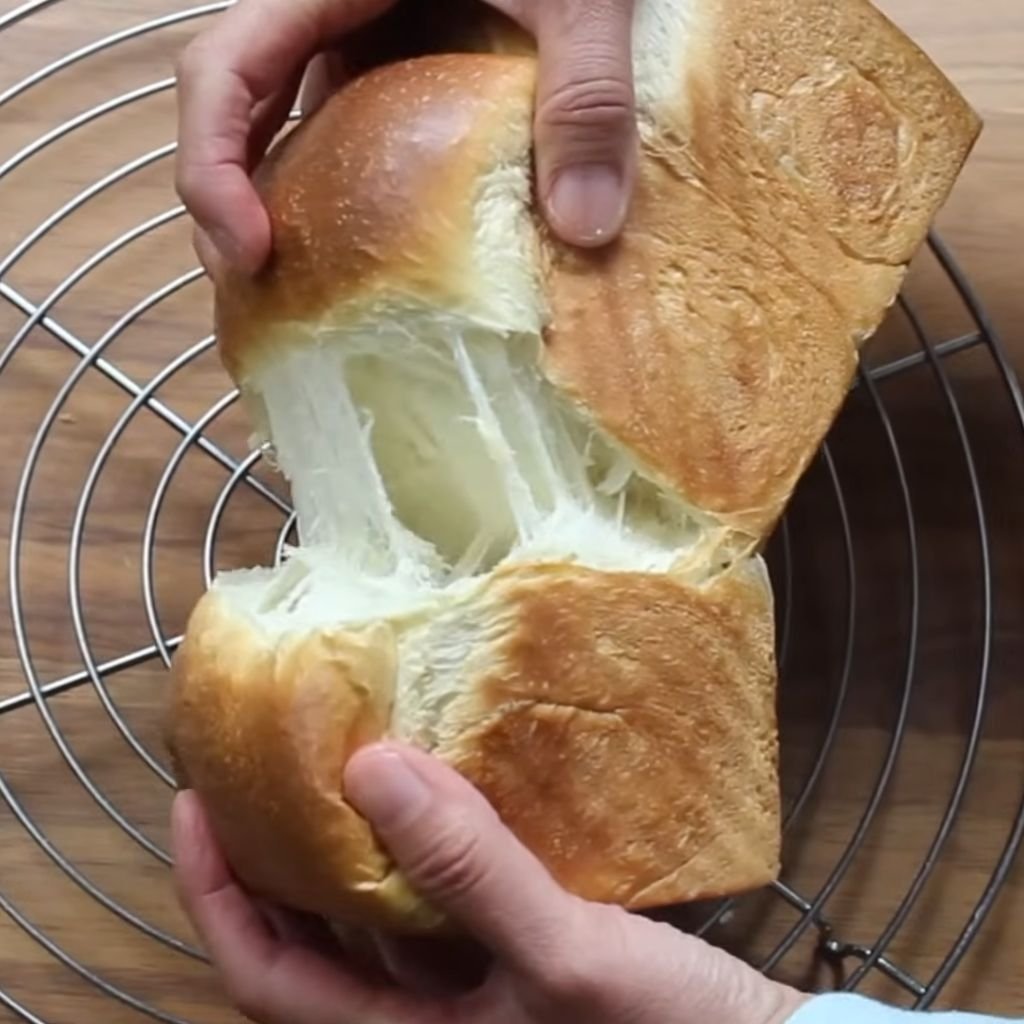
10. Turn the pan upside down and gently shake to release the bread. Let the loaf cool on a wire rack for at least 20 to 30 minutes before slicing. Cutting too soon lets the steam out and makes the bread gummy inside. Once cooled, slice and enjoy your freshly baked basic white bread.
2. Soft Sandwich Bread
Prep Time: 10 minutes Bake Time: 3 hours 30 minutes Serve: 14 slices
Soft, pillowy, and just the right size for sandwiches — this loaf is a weekly staple for many families. A touch of butter and extra sugar gives it that bakery-style softness you love. Great for kids’ lunchboxes and quick weekday meals.
Ingredients:
- 1 cup warm milk (110°F)
- 1/4 cup warm water (110°F)
- 2 tablespoons unsalted butter, softened
- 1 1/2 teaspoons salt
- 2 tablespoons sugar
- 3 cups bread flour
- 2 1/4 teaspoons active dry yeast
Instructions:
1. Warm your milk gently on the stovetop or in the microwave. Heat it until it is just warm — around 110°F. Do not boil it. Boiled milk kills yeast and gives a strange taste to the bread.
2. Add the warm milk and warm water into the bread pan first. The combination of milk and water is what gives this loaf its extra soft crumb compared to water-only recipes.
3. Add the softened butter next. Cut it into small pieces so it mixes in more easily during the kneading phase. The butter coats the flour proteins and creates a tender, soft texture.
4. Sprinkle the salt and sugar over the liquids. Salt controls yeast activity and adds flavor, while the extra sugar helps brown the crust and adds a slight sweetness that makes this bread so good for sandwiches.
5. Measure your bread flour carefully and add it on top of the liquid ingredients. Spoon the flour into the measuring cup and level it off — do not scoop straight from the bag or you will pack in too much flour.
6. Create a small well in the top of the flour and add the yeast there. Do not mix anything — the machine will do all of that for you.
7. Insert the bread pan into the Bella Bread Maker and secure it properly. Select the White Bread or Basic cycle, choose medium crust, and set the size to 2 lb if using all the ingredients listed.
8. Press Start. During the second kneading phase, check the dough ball. It should be smooth and just slightly sticky. Adjust with flour or water one tablespoon at a time as needed.
9. Allow the machine to run through all cycles without opening the lid. The longer rise time in this recipe helps develop a fluffier crumb and more complex flavor.
10. When the machine beeps at the end, carefully remove the bread pan using oven mitts. Let the pan sit for 5 minutes before turning it over to release the loaf. Place the bread on a wire rack and let it cool completely — at least 30 minutes — before slicing. The soft crumb needs time to set, and slicing too early will compress it and make it dense.
3. Whole Wheat Bread
Prep Time: 10 minutes Bake Time: 3 hours 40 minutes Serve: 12 slices
Hearty, nutty, and packed with fiber, whole wheat bread is a smart choice for health-conscious bakers. Great toasted with peanut butter or served alongside soups and stews. Whole wheat flour gives every slice more texture and a deeper, richer taste.
Ingredients:
- 1 1/8 cups warm water (110°F)
- 2 tablespoons honey
- 2 tablespoons vegetable oil
- 1 teaspoon salt
- 2 cups whole wheat flour
- 1 cup bread flour
- 1 tablespoon vital wheat gluten (optional but recommended)
- 2 1/4 teaspoons active dry yeast
Instructions:
1. Pour the warm water into the bread pan. Make sure it is the right temperature — around 110°F. Cold water will slow down the yeast and result in a dense loaf.
2. Add the honey directly into the water. Honey is a natural sweetener that also feeds the yeast, helping it activate faster. It adds a gentle sweetness and keeps the bread moist longer than regular sugar.
3. Pour in the vegetable oil. Oil adds moisture and helps create a softer crumb even with the denser whole wheat flour.
4. Sprinkle the salt over the liquid. Salt is essential for flavor but keep it away from the yeast for now to avoid slowing down activation.
5. Add the whole wheat flour first, then the bread flour on top. Using a mix of whole wheat and bread flour gives you a loaf that is healthy but still light enough to rise well. Pure whole wheat bread can sometimes be too dense without the bread flour blend.
6. If using vital wheat gluten, sprinkle it over the flour now. Vital wheat gluten strengthens the dough and helps whole wheat bread rise better and hold its shape during baking.
7. Make a small well in the top center of the flour and add the yeast. Keep it dry and separate from the liquid below.
8. Place the bread pan in the Bella Bread Maker and select the Whole Wheat cycle. This cycle has a longer rise time specifically designed for heavier whole wheat dough. Choose medium or dark crust and the 1.5 lb or 2 lb size depending on your measurements.
9. Press Start. During kneading, check that the dough forms a firm but not stiff ball. Whole wheat dough is naturally a bit stiffer than white bread dough, so a slightly tacky texture is normal.
10. Do not rush the process. Whole wheat bread needs its full rising time to develop proper texture. Once the cycle ends and the machine beeps, remove the bread pan carefully. Let the loaf cool on a rack for at least 45 minutes before slicing. Whole wheat bread holds together better when fully cooled, and the flavor actually improves as it rests.
4. Honey Wheat Bread
Prep Time: 10 minutes Bake Time: 3 hours 30 minutes Serve: 12 slices
A sweeter spin on classic wheat bread, this loaf has a beautiful golden crust and a soft, flavorful inside. Honey adds natural sweetness without being overpowering. Excellent for toast in the morning or as a base for turkey sandwiches.
Ingredients:
- 1 cup warm water (110°F)
- 1/4 cup honey
- 2 tablespoons butter, softened
- 1 1/4 teaspoons salt
- 1 1/2 cups whole wheat flour
- 1 1/2 cups all-purpose flour
- 2 teaspoons active dry yeast
Instructions:
1. Add the warm water to the bread pan first. The water temperature is especially important here because honey can sometimes slow yeast if things are too cold.
2. Pour the honey over the water. Honey is thicker than sugar, so let it drip in slowly and it will mix well once the machine starts kneading. Use a rubber spatula to scrape all of it from the measuring cup so none goes to waste.
3. Add the softened butter. Butter works with the honey to create a rich, slightly sweet flavor that makes this loaf stand out. Make sure the butter is soft, not melted, so it blends in evenly.
4. Sprinkle the salt over the wet ingredients. Salt controls how fast the yeast rises and also balances the sweetness from the honey.
5. Add the whole wheat flour first, then the all-purpose flour on top. The all-purpose flour keeps this bread lighter and more tender than a pure whole wheat loaf. The balance between the two flours is what gives this recipe its signature soft-yet-hearty texture.
6. Make a small indent in the center of the flour and add your yeast into that well. Do not stir.
7. Secure the bread pan in the machine. Select the Whole Wheat or Basic cycle, choose your preferred crust color, and press Start.
8. During the kneading cycle, check the dough. It should feel soft and slightly tacky, not wet or stiff. Because honey adds liquid, the dough might be a little softer than a standard wheat loaf — that is completely normal.
9. Let the machine run through all its cycles. Honey wheat bread gets its golden crust color naturally from the honey, so even a light crust setting can give you a beautiful result.
10. Once the machine finishes, use oven mitts to remove the bread pan. Shake the loaf out gently and place it on a wire rack. Let it cool for at least 30 minutes before slicing. The honey in this recipe keeps the bread moist for several days when stored in an airtight bag or bread box.
5. Milk Bread (Japanese Style)
Prep Time: 15 minutes Bake Time: 3 hours 20 minutes Serve: 10 slices
Pillowy soft, slightly sweet, and absolutely irresistible — Japanese milk bread is in a league of its own. Known for its cloud-like texture, this loaf melts in your mouth with every bite. A crowd favorite that works just as well plain as it does with butter or jam.
Ingredients:
- 2/3 cup warm whole milk (110°F)
- 1/4 cup heavy cream, room temperature
- 1 large egg, beaten
- 3 tablespoons sugar
- 1 teaspoon salt
- 3 cups bread flour
- 2 1/4 teaspoons instant yeast
- 3 tablespoons unsalted butter, softened and cut into small pieces
Instructions:
1. Warm the milk gently — just until it reaches about 110°F. Add it to the bread pan first, followed by the heavy cream. The combination of milk and cream is the key to the ultra-rich, soft texture that Japanese milk bread is known for.
2. Add the beaten egg to the pan. Eggs add protein and richness to the dough, which helps create that soft, pull-apart texture. Make sure the egg is at room temperature so it does not cool down the other liquids.
3. Sprinkle the sugar and salt over the liquid mixture. The sugar level here is intentionally a little higher than in regular bread because Japanese milk bread has that signature slight sweetness.
4. Add all 3 cups of bread flour on top of the liquid layer. Use bread flour specifically — it has higher protein than all-purpose flour and gives the bread its stretchy, soft crumb.
5. Place the small pieces of softened butter on top of the flour. Adding butter this way — rather than melted — allows the machine to incorporate it slowly during kneading, which develops a richer and more even texture.
6. Make a small well in the top of the flour and add your instant yeast. Instant yeast works slightly faster than active dry yeast, which is why it suits this recipe well.
7. Secure the bread pan and select the Sweet Bread cycle on your Bella Bread Maker. This cycle uses a slightly gentler heat during baking, which is perfect for enriched doughs like this one. Choose a light to medium crust since this bread colors quickly due to the egg and sugar content.
8. Press Start. During the kneading phase, the butter will slowly get worked into the dough. At first the dough might look rough and shaggy — that is fine. It will smooth out into a silky, elastic ball as kneading continues.
9. Allow the full cycle to run. Do not rush it or open the lid. Japanese milk bread needs its full rising time to develop that signature airy crumb.
10. Once done, remove the bread pan with oven mitts. Tip the loaf out onto a wire rack and let it cool for at least 20 minutes. This bread is especially good slightly warm, served with a little butter or a drizzle of honey. Store leftover slices in an airtight container to keep them soft for up to three days.
6. Gluten-Free Bread
Prep Time: 10 minutes Bake Time: 3 hours 30 minutes Serve: 10 slices
Soft, sliceable, and completely wheat-free — this gluten-free loaf proves that everyone deserves great homemade bread. Made with a blend of gluten-free flours, it holds together well and has a pleasant, mild flavor. Great for anyone managing celiac disease or gluten sensitivity.
Ingredients:
- 1 cup warm water (110°F)
- 2 large eggs, beaten
- 1/4 cup vegetable oil
- 1 teaspoon apple cider vinegar
- 2 tablespoons honey
- 1 teaspoon salt
- 2 1/2 cups gluten-free all-purpose flour blend (with xanthan gum)
- 1/4 cup tapioca starch
- 2 1/4 teaspoons active dry yeast
Instructions:
1. Pour the warm water into the bread pan. Check that your Bella Bread Maker has a Gluten-Free setting before starting — using the wrong cycle can result in a loaf that does not bake through properly.
2. Add the beaten eggs to the water. Eggs act as a binder in gluten-free baking, replacing some of the structure that gluten normally provides in regular bread recipes.
3. Pour in the vegetable oil and apple cider vinegar. The vinegar helps improve the texture of gluten-free bread and gives the yeast a slightly acidic environment that supports better rising.
4. Add the honey to the liquid. This adds a subtle sweetness and helps with browning since gluten-free breads can sometimes look pale even when fully cooked.
5. Sprinkle the salt over the liquid layer. Now add the gluten-free all-purpose flour blend. Make sure your blend already contains xanthan gum — this ingredient is critical because it acts as a binder and replaces the elasticity that gluten would normally provide.
6. Add the tapioca starch on top of the flour. Tapioca starch lightens the loaf and gives it a better, less dense texture. Many gluten-free breads are gummy in the middle, and tapioca starch helps prevent that.
7. Create a small well in the flour and add the yeast. Gluten-free dough behaves very differently from regular bread dough — it will look more like a thick batter than a smooth ball, and that is completely normal.
8. Select the Gluten-Free program on your Bella Bread Maker. This cycle skips the second rise that regular bread goes through, which is important for gluten-free recipes. Using a regular cycle will cause the bread to collapse.
9. Press Start. During kneading, use a rubber spatula to scrape down any flour that sticks to the sides of the pan — you can do this quickly in the first few minutes of kneading. The “dough” will look more like a batter throughout, which is expected.
10. When the cycle ends, remove the bread pan immediately and let the loaf rest in the pan for 10 minutes before turning it out. Gluten-free bread needs this extra rest to set up properly. Transfer to a wire rack and cool completely — at least 1 hour — before slicing. Slicing too early makes this bread crumble. Store in an airtight container or slice and freeze for best results.
7. Low-Carb Bread
Prep Time: 15 minutes Bake Time: 3 hours Serve: 10 slices
A lighter bread option for those watching their carb intake. Almond flour and flaxseed give this loaf a dense, filling texture with a nutty flavor. Perfect for open-faced sandwiches, avocado toast, or simply spread with butter.
Ingredients:
- 1 1/4 cups warm water (110°F)
- 3 eggs, beaten
- 1/4 cup olive oil
- 1 teaspoon apple cider vinegar
- 1 1/2 cups almond flour
- 1/2 cup ground flaxseed
- 1/4 cup coconut flour
- 1 tablespoon psyllium husk powder
- 2 teaspoons baking powder
- 1 teaspoon salt
- 1 tablespoon active dry yeast
Instructions:
1. Add the warm water to the bread pan first. Because this recipe uses almond and coconut flour instead of wheat flour, the liquid ratios work a bit differently from standard bread recipes.
2. Add the beaten eggs and olive oil to the water. These provide structure, moisture, and richness that wheat flour would normally supply. Olive oil also adds a subtle savory flavor that works well with the nutty flours.
3. Pour in the apple cider vinegar. This helps activate the baking powder and supports better rising with the low-carb flour blend.
4. In a separate bowl, mix together the almond flour, ground flaxseed, coconut flour, psyllium husk powder, baking powder, and salt. Mixing these dry ingredients together first ensures even distribution in the bread pan.
5. Add the dry flour mixture to the bread pan on top of the liquid ingredients. Coconut flour is very absorbent, which is why the liquid amounts in this recipe are higher than in standard bread recipes.
6. Sprinkle the active dry yeast on top of the dry ingredients. The yeast adds some lift, though this bread is denser than regular wheat bread by nature.
7. Select the Basic or Quick Bread cycle on your Bella Bread Maker, and choose a light crust setting. Low-carb flours tend to brown faster than wheat flour, so a lighter crust setting prevents over-browning.
8. Press Start. The dough will be thicker and stickier than regular bread dough. This is normal — do not add more liquid. The psyllium husk powder absorbs liquid slowly and the dough will firm up as it bakes.
9. During the baking phase, avoid opening the lid. Low-carb breads can sink in the center if the heat is disturbed.
10. Once the machine beeps, remove the bread pan carefully. Let the loaf cool in the pan for 10 minutes, then transfer it to a wire rack. Cool completely for at least 1 hour before slicing. This bread stores well in the refrigerator for up to 5 days or can be sliced and frozen for longer storage.
8. Vegan Bread
Prep Time: 10 minutes Bake Time: 3 hours Serve: 12 slices
Made without any eggs or dairy, this vegan loaf is soft, golden, and surprisingly simple to bake. Plant-based milk and a little flaxseed meal take the place of animal products without missing a beat. Great for anyone eating plant-based or sharing bread with guests who have dietary restrictions.
Ingredients:
- 1 cup warm oat milk or almond milk (110°F)
- 1/4 cup warm water (110°F)
- 2 tablespoons flaxseed meal mixed with 3 tablespoons water (flax egg, let sit 5 minutes)
- 2 tablespoons maple syrup
- 2 tablespoons coconut oil, melted
- 1 teaspoon salt
- 3 cups bread flour
- 2 1/4 teaspoons active dry yeast
Instructions:
1. Prepare your flax egg first by mixing 2 tablespoons of flaxseed meal with 3 tablespoons of water. Stir and set it aside for 5 minutes until it becomes gel-like. This simple mixture replaces a regular egg in the recipe and helps bind the dough.
2. Add the warm oat or almond milk to the bread pan. Either works well — oat milk gives a slightly sweeter and creamier result, while almond milk gives a lighter, more neutral flavor.
3. Add the warm water to the pan, followed by the melted coconut oil. Make sure the coconut oil is fully melted but not hot so it does not affect the temperature of the liquids.
4. Add the flax egg (which should now be thick and gel-like) into the pan. It will mix in during kneading and provide the binding function that eggs normally give.
5. Pour in the maple syrup. Maple syrup is a great vegan sweetener that also helps feed the yeast. It adds a very light, pleasant sweetness without making the bread taste like maple pancakes.
6. Sprinkle the salt over the liquid layer. Then add all 3 cups of bread flour on top.
7. Create a small indent in the center of the flour and add the yeast into it. Keep it away from the liquids until the machine starts.
8. Place the bread pan into the Bella Bread Maker. Select the Basic or White Bread cycle, choose medium crust, and pick the 1.5 lb or 2 lb size based on your recipe amount.
9. Press Start. During kneading, check the dough ball. Vegan dough tends to be slightly stickier than egg-based dough. If it is too wet, add flour one tablespoon at a time. It should form a smooth, slightly tacky ball.
10. Let the machine complete all its cycles. Once done, remove the bread pan with oven mitts and turn the loaf out onto a wire rack. Let it cool for at least 30 minutes before slicing. This bread stays soft for 2 to 3 days in an airtight container and slices beautifully for sandwiches, toast, or avocado bread.
9. Multigrain Bread
Prep Time: 15 minutes Bake Time: 3 hours 40 minutes Serve: 12 slices
Loaded with seeds, grains, and whole wheat flour, this multigrain loaf is as nutritious as it is delicious. Each slice has a hearty texture with a wonderful crunch. A go-to for anyone who wants bread with real substance and flavor.
Ingredients:
- 1 1/8 cups warm water (110°F)
- 2 tablespoons honey
- 2 tablespoons vegetable oil
- 1 teaspoon salt
- 1 cup whole wheat flour
- 1 cup bread flour
- 1/2 cup multigrain hot cereal (dry, uncooked)
- 2 tablespoons sunflower seeds
- 1 tablespoon flaxseeds
- 1 tablespoon rolled oats (plus extra for topping)
- 2 1/4 teaspoons active dry yeast
Instructions:
1. Add the warm water to the bread pan first. Honey goes in next — it sweetens the bread naturally and feeds the yeast for a better rise.
2. Pour in the vegetable oil. Sprinkle the salt over the liquid ingredients and make sure you add salt before the flour so it does not come into direct contact with the yeast.
3. Add the whole wheat flour and bread flour. Then add the dry multigrain hot cereal. This cereal blend is what gives the bread its deep, nutty multigrain character. Steel-cut oat blends or 7-grain cereal from the grocery store work well here.
4. Sprinkle the sunflower seeds, flaxseeds, and rolled oats on top of the flour mixture. These seeds add crunch, nutrition, and visual texture to every slice.
5. Make a small well in the flour and add the yeast last. Keep it dry and separate from the salt and liquid below until kneading starts.
6. Place the bread pan into the Bella Bread Maker and select the Whole Wheat cycle. This longer cycle gives the heavy, seed-filled dough time to rise fully before baking. Choose a medium or dark crust setting — multigrain bread looks and tastes better with a deeper crust color.
7. Press Start. During the kneading phase, the seeds will get worked into the dough. Check that the dough forms a cohesive ball — seeds can sometimes make it look uneven at first, but it smooths out. If it looks too dry, add water one tablespoon at a time.
8. If you want to add oats to the top, wait for the machine to give a signal (some Bella models have an add-in beep partway through the cycle). At that signal, open the lid quickly, spray a little water on top of the dough, and sprinkle rolled oats. Close the lid right away.
9. Allow the full cycle to complete without interrupting the baking phase. Once the machine beeps, remove the pan carefully and release the loaf. Place it on a wire rack and let it cool for at least 45 minutes. The seeds and grains need time to fully set inside the loaf before slicing. Multigrain bread also tastes better the next day as the flavors meld together.
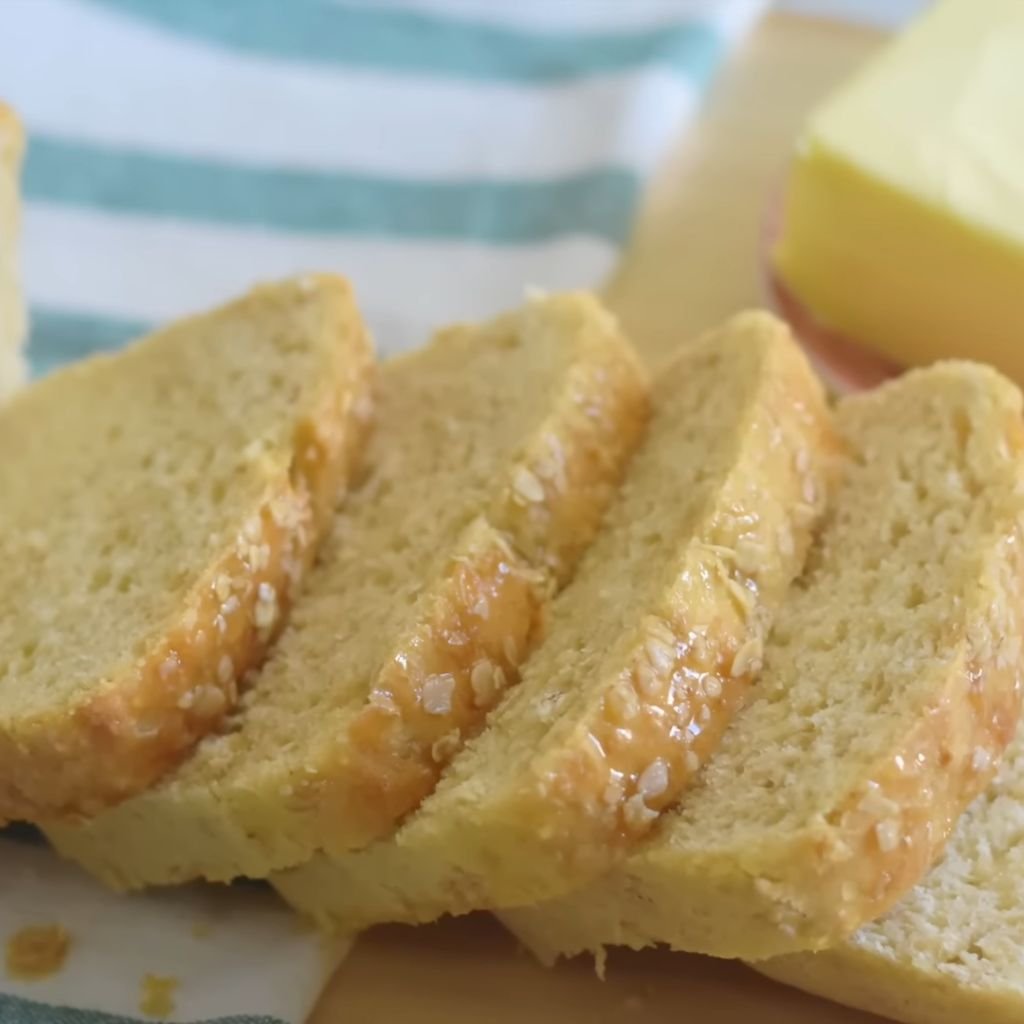
10. Oatmeal Bread
Prep Time: 10 minutes Bake Time: 3 hours 20 minutes Serve: 12 slices
Tender, slightly chewy, and lightly sweet — oatmeal bread has a comforting quality that regular white bread just cannot match. Rolled oats give every slice a hearty texture and extra fiber. Wonderful toasted in the morning with a smear of honey butter.
Ingredients:
- 1 cup warm water (110°F)
- 1/2 cup milk, warm
- 2 tablespoons butter, softened
- 2 tablespoons honey
- 1 teaspoon salt
- 1 cup rolled oats (old-fashioned, not instant)
- 2 1/2 cups bread flour
- 2 1/4 teaspoons active dry yeast
Instructions:
1. Add the warm water and warm milk to the bread pan. Using both water and milk creates a richer crumb than water alone, which pairs beautifully with the oats.
2. Add the softened butter and honey to the liquids. The butter adds a gentle richness and the honey gives a delicate sweetness that complements the mild, earthy flavor of oats.
3. Sprinkle the salt over the liquid mixture. Salt controls the rise and improves flavor throughout the loaf.
4. Add the rolled oats directly on top of the liquid. Old-fashioned oats — not instant or quick-cook oats — work best here because they absorb liquid more slowly and give a better texture after baking. Instant oats can make the bread a bit gummy.
5. Pour the bread flour on top of the oats. The flour goes over the oats to keep everything layered correctly for the machine.
6. Create a small well in the center of the flour and add the yeast into it. The yeast will stay dry until the machine starts kneading and the layers come together.
7. Place the bread pan securely into your Bella Bread Maker. Select the Basic or White Bread cycle, choose a medium crust, and pick the appropriate loaf size. Press Start.
8. During kneading, the oats will fully incorporate into the dough. You might notice the dough looks a little rough at first — that is completely normal. As the oats hydrate and the machine kneads, the dough will smooth out into a soft, slightly sticky ball.
9. Check the dough after the first 10 minutes of kneading. Because oats absorb liquid, the dough should not be too wet. Add flour one tablespoon at a time if it looks too wet, or a splash of water if it looks dry and crumbly.
10. Let the machine run all the way through to the end of the baking cycle. Once finished, remove the bread pan and gently release the loaf. Set it on a wire rack and allow it to cool for at least 30 minutes. Oatmeal bread slices cleanly when fully cooled and makes exceptional toast the next morning.
11. Banana Bread
Prep Time: 10 minutes Bake Time: 1 hour 30 minutes Serve: 10 slices
Moist, sweet, and packed with banana flavor — this classic quick bread is even easier when you let the bread machine do the mixing and baking. Ripe bananas are the key to deep sweetness and a tender crumb. A great way to use up overripe bananas sitting on the counter.
Ingredients:
- 3 ripe bananas, mashed (about 1 1/4 cups)
- 2 eggs, beaten
- 1/3 cup vegetable oil
- 1/2 cup granulated sugar
- 1 teaspoon vanilla extract
- 1 1/2 cups all-purpose flour
- 1/2 teaspoon baking soda
- 1/2 teaspoon baking powder
- 1/4 teaspoon salt
- 1/2 cup chopped walnuts (optional)
Instructions:
1. Peel and mash the ripe bananas in a bowl until they are completely smooth with only a few small lumps remaining. The riper the bananas — with lots of brown spots — the sweeter and more flavorful your bread will be. Very ripe bananas have more natural sugars and a deeper banana flavor than yellow or slightly green ones.
2. Add the mashed bananas to the bread pan. Pour in the beaten eggs, vegetable oil, and vanilla extract. The oil keeps the bread moist even after it cools, and the vanilla extract enhances the banana flavor without overpowering it.
3. Add the sugar on top of the liquid mixture.
4. In a separate bowl, whisk together the all-purpose flour, baking soda, baking powder, and salt. Mixing these dry ingredients together first prevents uneven distribution in the bread.
5. Add the flour mixture to the bread pan on top of the liquid ingredients. Note that this recipe uses baking soda and baking powder instead of yeast — this is a quick bread, not a yeast bread. Make sure your Bella Bread Maker has a Quick Bread or Cake cycle for this recipe.
6. Add the chopped walnuts on top if using. Some Bella models will beep during the cycle as a signal to add mix-ins — check your manual to see if this applies to yours.
7. Select the Quick Bread or Cake cycle on your Bella Bread Maker. Do not use the standard bread cycle — the kneading setting is too aggressive for quick bread batter and will deflate it. This cycle typically skips the kneading phase or uses a very gentle mix.
8. Press Start and let the machine mix and bake the bread. Banana bread batter should be thick and pourable, not dough-like. If it looks too thick, add a tablespoon of milk at a time.
9. The machine will bake the banana bread through completely. Do not open the lid during baking or the bread may sink in the center.
10. Once the cycle ends, insert a toothpick into the center of the bread. If it comes out clean, the bread is done. If it has wet batter on it, run the bake-only setting for an additional 10 to 15 minutes. Remove the pan and let the bread cool for 20 minutes before tipping it out onto a wire rack. Cool completely before slicing for the cleanest cuts and best texture.
12. Cinnamon Raisin Bread
Prep Time: 10 minutes Bake Time: 3 hours 10 minutes Serve: 12 slices
Sweet, spiced, and dotted with plump raisins — this bread smells incredible as it bakes and tastes even better toasted. The warm cinnamon flavor makes every slice feel like a treat. A hit at breakfast time or as an afternoon snack with a cup of tea.
Ingredients:
- 1 cup warm water (110°F)
- 2 tablespoons butter, softened
- 3 tablespoons sugar
- 1 teaspoon salt
- 2 teaspoons ground cinnamon
- 3 cups bread flour
- 2 1/4 teaspoons active dry yeast
- 3/4 cup raisins
Instructions:
1. Pour the warm water into the bread pan first. Add the softened butter, which will melt into the warm water during the early kneading phase. Butter gives this bread a tender crumb and a rich flavor that pairs perfectly with the cinnamon.
2. Add the sugar and salt to the liquids. The higher sugar amount compared to basic white bread is intentional — it feeds the yeast and adds sweetness that balances the cinnamon.
3. Sprinkle the cinnamon directly over the sugar and salt. Distributing the cinnamon at this layer helps it mix evenly throughout the dough during kneading instead of sitting in clumps.
4. Add all 3 cups of bread flour on top of the dry ingredients. Make a small well in the center and place the yeast into that well. Keep it dry and elevated above the liquid layer.
5. Do not add the raisins yet. Adding them at the start would cause the machine to break them apart during the long kneading phase, leaving you with a bread that is more pink-tinged than dotted with whole raisins.
6. Place the bread pan in the machine and select the Basic or Sweet cycle. Set the crust to medium and choose the 1.5 lb size. Press Start.
7. Many Bella Bread Maker models have an add-in beep during the kneading phase — usually about 30 to 40 minutes into the cycle. When you hear this beep, open the lid and add the raisins directly onto the dough. Close the lid immediately.
8. If your machine does not have an add-in beep, wait until just before the second rise begins (usually around 40 to 50 minutes into the cycle) and add the raisins then by briefly opening the lid.
9. Let the machine run the rest of the cycle without interruption. The raisins will get evenly distributed during the remaining kneading.
10. Once the machine beeps to signal it is done, remove the bread pan carefully. Tip the loaf onto a wire rack and let it cool for at least 20 minutes. This bread is phenomenal when slightly warm, but it slices best after it has fully cooled. Toast it lightly and serve with cream cheese or butter for a true treat.
13. Chocolate Chip Bread
Prep Time: 10 minutes Bake Time: 3 hours 15 minutes Serve: 12 slices
Semi-sweet chocolate chips melted into a soft, lightly sweet loaf — a real hit with kids and adults alike. This bread makes an amazing base for French toast or simply eaten in thick slices straight from the cutting board. A sweet bread that is not overly sweet.
Ingredients:
- 3/4 cup warm milk (110°F)
- 1/4 cup warm water (110°F)
- 2 eggs, beaten
- 3 tablespoons sugar
- 1 teaspoon salt
- 1/4 cup butter, softened
- 3 cups bread flour
- 2 teaspoons active dry yeast
- 3/4 cup semi-sweet chocolate chips
Instructions:
1. Add the warm milk and warm water to the bread pan first. Using a combination of milk and water gives this bread a richer base than water alone, which matters because chocolate chip bread needs a slightly denser, more cake-like crumb to hold up well to the added chips.
2. Add the beaten eggs to the liquids. Eggs give this loaf its slightly richer texture and help the crumb hold together, which is important when chocolate chips are mixed in since they can create weak spots in the dough if not properly supported.
3. Add the softened butter, sugar, and salt to the pan. The butter and sugar work together to create a soft, slightly enriched dough that is not quite as airy as a sandwich loaf but still light enough to slice cleanly.
4. Pour all 3 cups of bread flour on top of the liquid ingredients. Create a small well in the top of the flour and place the yeast inside it. Keep the yeast elevated and dry.
5. Do not add the chocolate chips yet — if added at the beginning, the kneading paddle will break them into tiny pieces and smear the chocolate throughout the dough instead of leaving intact chips.
6. Select the Sweet Bread cycle on your Bella Bread Maker. This cycle uses a lower baking temperature than the regular bread cycle, which is important for recipes that contain sugar and chocolate since both can burn at high heat. Choose a light or medium crust setting.
7. Press Start. When your Bella Bread Maker signals with its add-in beep — typically around 30 to 40 minutes into the cycle — open the lid and pour the chocolate chips directly over the dough. Close the lid right away to keep the heat inside.
8. If your machine does not have an add-in signal, add the chips approximately 5 minutes before the end of the final kneading phase. This gives them enough time to incorporate without getting too broken up.
9. Allow the cycle to run completely. The sweet bread cycle will bake the loaf gently and evenly. Once the beep signals the end, remove the bread pan using oven mitts.
10. Allow the bread to rest in the pan for 5 minutes before tipping it out. Some chocolate chips near the surface might look melted — this is normal and they will re-solidify as the loaf cools. Place the loaf on a wire rack and let it cool for at least 30 minutes before slicing. Cutting too early will give you gooey chocolate streaks rather than clean chips.
14. Apple Cinnamon Bread
Prep Time: 15 minutes Bake Time: 3 hours 20 minutes Serve: 12 slices
Chunks of fresh apple and warm cinnamon spice make this one of the coziest loaves you can bake. The apple adds natural moisture that keeps every slice soft for days. Wonderful on a cool morning with a hot cup of coffee or cider.
Ingredients:
- 3/4 cup warm apple juice or water (110°F)
- 1/4 cup unsweetened applesauce
- 2 tablespoons butter, softened
- 3 tablespoons brown sugar
- 1 teaspoon salt
- 1 1/2 teaspoons ground cinnamon
- 1/4 teaspoon nutmeg
- 3 cups bread flour
- 2 1/4 teaspoons active dry yeast
- 1/2 cup peeled, finely diced fresh apple (about 1 small apple)
Instructions:
1. Add the warm apple juice or water to the bread pan first. Apple juice adds a subtle sweetness and apple flavor to the loaf itself, beyond just the chunks of fruit you will add later.
2. Add the applesauce to the pan. Unsweetened applesauce adds moisture and a background apple flavor without adding too much extra sugar. It also helps keep the bread soft after baking.
3. Add the softened butter, brown sugar, and salt. Brown sugar adds a slight caramel-like depth that works wonderfully with the apple and cinnamon.
4. Sprinkle the ground cinnamon and nutmeg over the sugar and salt. These two spices together create that classic apple pie warmth that makes this bread so comforting.
5. Add all 3 cups of bread flour on top. Make a small indent in the center and place the yeast there, keeping it dry and separate.
6. Peel and finely dice your fresh apple into small cubes, about 1/4 inch in size. Smaller pieces incorporate better into the dough and distribute more evenly than large chunks. Peel the apple before dicing so the skin does not create tough spots in the bread.
7. Place the bread pan in the Bella Bread Maker and select the Sweet or Basic cycle. Choose medium crust and the 1.5 lb size. Press Start.
8. Wait for the add-in beep — when it sounds, open the lid and add the diced fresh apple to the dough. The machine will mix the apple pieces into the dough during the remaining kneading. Close the lid quickly after adding.
9. If your Bella model does not have an add-in beep, add the apple pieces during the last 5 minutes of the final kneading cycle. Avoid adding them too early as prolonged kneading can turn the apple pieces into mush.
10. Let the full cycle run to completion. Once the machine beeps at the end, remove the pan carefully. Tip the loaf onto a wire rack and let it cool for at least 30 to 40 minutes. The apple pieces near the surface will have softened beautifully during baking. Slice and enjoy this bread plain or toasted — it needs nothing else to be absolutely wonderful.
15. Coconut Sweet Bread
Prep Time: 10 minutes Bake Time: 3 hours Serve: 12 slices
Lightly sweet and wonderfully fragrant, coconut sweet bread is a tropical-inspired loaf that feels special without being complicated. Coconut milk and shredded coconut give every slice a soft, slightly chewy texture. Try it toasted with butter or a spread of coconut jam.
Ingredients:
- 3/4 cup warm coconut milk (110°F)
- 1/4 cup warm water (110°F)
- 2 tablespoons sugar
- 1 teaspoon salt
- 2 tablespoons coconut oil, melted
- 1 teaspoon vanilla extract
- 1/2 cup sweetened shredded coconut
- 3 cups bread flour
- 2 1/4 teaspoons active dry yeast
Instructions:
1. Warm the coconut milk gently — do not boil it. Coconut milk adds richness and a subtle coconut flavor to the bread that infuses every bite. Pour it into the bread pan, followed by the warm water.
2. Add the melted coconut oil and vanilla extract to the liquids. Coconut oil reinforces the coconut flavor from the milk, and vanilla adds a soft sweetness that rounds everything out.
3. Sprinkle the sugar and salt over the liquid mixture. The sugar amount is modest here because the shredded coconut also contributes sweetness — the two work together without making the bread overly sugary.
4. Add the shredded sweetened coconut directly to the pan at this stage. Unlike chocolate chips or raisins, the coconut can be added early and will soften and integrate beautifully into the dough during kneading.
5. Pour all 3 cups of bread flour over the top of the other ingredients. Make a small well in the center of the flour and add the yeast into it.
6. Secure the bread pan in your Bella Bread Maker. Select the Sweet Bread cycle and choose a light to medium crust setting. Sweet breads with coconut milk can brown more quickly due to the natural sugars in the coconut, so a lighter crust setting prevents over-browning.
7. Press Start. During kneading, the shredded coconut will get evenly worked into the dough. The dough will feel slightly stickier than standard white bread dough because of the coconut milk and oil — this is normal.
8. Check the dough ball during the first kneading phase. It should be soft and pliable. If it looks too wet and is not forming a ball, add flour one tablespoon at a time. If it looks too dry and crumbly, add a tablespoon of warm water.
9. Allow the full cycle to run without interrupting the baking phase. The bread will develop a golden, slightly caramelized crust due to the natural sugars in the coconut milk and shredded coconut.
10. Once done, remove the pan with oven mitts. Rest the bread in the pan for 5 minutes, then tip it out onto a wire rack. Let it cool for at least 25 minutes. The coconut flavor becomes even more pronounced as the bread cools and the crumb sets. Store in an airtight container and enjoy within 3 days for the best texture.
16. Garlic Herb Bread
Prep Time: 10 minutes Bake Time: 3 hours Serve: 12 slices
Bold garlic flavor and fragrant herbs baked right into a soft, golden loaf. This bread fills the whole house with the most wonderful smell as it bakes. Serve it alongside pasta dishes, soups, or simply slice it and eat it warm with olive oil for dipping.
Ingredients:
- 1 cup warm water (110°F)
- 2 tablespoons olive oil
- 1 teaspoon salt
- 1 tablespoon sugar
- 3 cloves garlic, minced finely
- 1 teaspoon dried Italian seasoning
- 1 teaspoon dried basil
- 1/2 teaspoon garlic powder
- 3 cups bread flour
- 2 1/4 teaspoons active dry yeast
Instructions:
1. Pour the warm water into the bread pan. Add the olive oil right away — the oil infuses the bread with a rich, slightly savory flavor that works beautifully with the garlic and herbs.
2. Mince the garlic cloves as finely as possible. You want the garlic to blend into the dough evenly rather than create large, sharp chunks. Add the minced garlic to the bread pan on top of the oil and water.
3. Sprinkle the salt and sugar over the garlic and liquid. The small amount of sugar balances the bold savory flavors and helps with browning.
4. Add the dried Italian seasoning, dried basil, and garlic powder. Using both fresh garlic and garlic powder creates a layered garlic flavor — the fresh garlic gives sharpness and depth, while the garlic powder adds a more mellow, roasted quality.
5. Pour all 3 cups of bread flour over the seasoning mixture. The flour layer separates the seasonings from the yeast temporarily, which is exactly what you want.
6. Create a small well in the top of the flour and add the yeast. Do not mix anything before pressing Start.
7. Place the bread pan in the Bella Bread Maker and select the Basic or Italian Bread cycle. Choose a medium or dark crust — garlic herb bread looks especially good with a slightly darker, crustier top. Select the 1.5 lb size.
8. Press Start. During kneading, the garlic and herbs will fully incorporate into the dough. You might catch the first hints of garlic fragrance during this phase — it gets even better during baking.
9. Check the dough ball during the early kneading phase. The olive oil makes this dough slightly softer than standard white bread dough, which is normal. It should be smooth and slightly tacky without being wet or sticky.
10. Let all cycles complete without interruption. Once the baking phase finishes and the machine beeps, remove the pan carefully. Release the loaf onto a wire rack. The garlic and herb aromas will be at their peak right out of the machine. Let the bread cool for 20 minutes before slicing, then serve warm with olive oil or alongside a big bowl of pasta.
17. Cheese Bread
Prep Time: 10 minutes Bake Time: 3 hours 10 minutes Serve: 12 slices
Rich, savory, and loaded with melted cheese in every bite. Cheddar gives this loaf a bold flavor and a beautiful golden color. Eat it fresh from the machine or use it for grilled cheese sandwiches that are truly next-level.
Ingredients:
- 1 cup warm water (110°F)
- 2 tablespoons butter, softened
- 1 1/2 teaspoons salt
- 1 tablespoon sugar
- 1 cup shredded sharp cheddar cheese
- 3 cups bread flour
- 2 1/4 teaspoons active dry yeast
- 1/2 teaspoon dry mustard powder (optional, adds depth)
Instructions:
1. Add the warm water to the bread pan. Place the softened butter on top of the water.
2. Sprinkle the salt, sugar, and dry mustard powder (if using) over the liquid. The mustard powder is optional but adds a gentle warmth that enhances the sharpness of the cheddar. It will not make the bread taste like mustard — just a subtle depth of flavor.
3. Add 3/4 cup of the shredded cheddar cheese into the pan at this stage. Reserve the remaining 1/4 cup for later. The cheese in the dough melts completely during baking and infuses the bread with rich, savory flavor throughout.
4. Pour all 3 cups of bread flour over the cheese and liquid. Make a small well in the top and place the yeast into it.
5. Secure the bread pan in the Bella Bread Maker. Select the Basic cycle, choose a medium crust, and set the size to 1.5 lb. Press Start.
6. During the kneading phase, the cheese will slowly incorporate into the dough. The dough might look a little orange-yellow from the cheddar — that is completely normal and creates the beautiful golden crumb you see when you slice the finished loaf.
7. When the machine signals with its add-in beep, open the lid and sprinkle the remaining 1/4 cup of shredded cheese directly on top of the dough. Close the lid immediately.
8. If your machine does not have an add-in feature, you can skip the extra cheese on top or wait until just after the final kneading phase ends. Sprinkling it then allows it to bake into the surface and create a cheesy, crispy top crust.
9. Allow the full cycle to run. The bread will rise beautifully and the cheese on top will melt and brown slightly during baking, creating an irresistible crust.
10. When the machine beeps, remove the pan carefully. Cheese bread can stick more than regular bread, so tap the pan gently a few times before tipping it out. Let the loaf rest on a wire rack for at least 25 minutes. It is very good warm but slices more cleanly after it cools slightly. Use leftovers for grilled cheese sandwiches — it makes arguably the best grilled cheese you will ever have.
18. Olive Bread
Prep Time: 15 minutes Bake Time: 3 hours 10 minutes Serve: 12 slices
Studded with briny olives and made with olive oil, this Mediterranean-inspired loaf is savory and rustic. The olives give each slice a salty, rich flavor that pairs perfectly with soft cheese or a simple tomato salad. An easy way to bring bold flavor to the bread basket.
Ingredients:
- 1 cup warm water (110°F)
- 3 tablespoons olive oil
- 1 teaspoon salt (reduce to 1/2 tsp if using very salty olives)
- 1 teaspoon sugar
- 1/2 teaspoon dried rosemary
- 3 cups bread flour
- 2 1/4 teaspoons active dry yeast
- 3/4 cup pitted Kalamata olives, drained and roughly chopped
Instructions:
1. Drain the Kalamata olives well and pat them dry with a paper towel. Removing extra moisture is important because too much brine liquid in the pan can throw off the recipe’s hydration ratio. Chop them into rough halves or thirds — not too small, as you want identifiable pieces in each slice.
2. Add the warm water and olive oil to the bread pan. Olive oil gives this bread its characteristic richness and works in harmony with the olive pieces throughout the loaf.
3. Sprinkle the salt, sugar, and dried rosemary over the liquid. Be mindful of the salt level here — Kalamata olives are naturally very salty. Reduce the salt to 1/2 teaspoon if your olives have been stored in heavy brine.
4. Add all 3 cups of bread flour over the liquid and spice layer. Create a small well in the center of the flour and place the yeast into it.
5. Insert the bread pan into the Bella Bread Maker. Choose the Basic or French Bread cycle, set crust to medium or dark, and select the 1.5 lb size. Press Start.
6. Do not add the olives yet. The long kneading would break them into tiny bits and smear their color throughout the dough.
7. When the add-in beep sounds, open the lid and drop the chopped olives onto the dough. Close the lid immediately. The remaining kneading will work the olives gently into the dough without completely destroying them.
8. If your machine lacks an add-in function, wait until the second kneading phase begins and add the olives through the lid opening at that point. They need only 5 to 10 minutes of kneading to distribute properly.
9. Allow all remaining cycles to run. The olive pieces will create pockets of savory, salty flavor in every slice. The crust will turn beautifully golden and slightly crisp.
10. Once the machine signals the end of the cycle, remove the bread pan with oven mitts. Tip the loaf onto a wire rack and let it cool for at least 30 minutes. The flavors in olive bread actually get better as the loaf rests and cools completely. Serve sliced with fresh mozzarella, ripe tomatoes, and a drizzle of olive oil for a simple and stunning snack.
19. Pizza Dough (Bread Maker Style)
Prep Time: 10 minutes Bake Time: 1 hour 30 minutes Serve: 2 pizza crusts
Let your Bella Bread Maker do the hard work of kneading pizza dough while you prep your favorite toppings. This recipe produces smooth, stretchy dough that bakes up with a perfectly chewy crust. Makes enough for two medium pizzas — freeze one ball for later.
Ingredients:
- 1 cup warm water (110°F)
- 2 tablespoons olive oil
- 1 teaspoon salt
- 1 teaspoon sugar
- 3 cups all-purpose flour (or bread flour for a chewier crust)
- 2 1/4 teaspoons active dry yeast
Instructions:
1. Add the warm water to the bread pan first, followed by the olive oil. The olive oil in pizza dough is essential — it keeps the crust pliable during stretching and adds flavor to the finished crust.
2. Sprinkle the salt and sugar over the liquids. These two simple seasonings make a noticeable difference in flavor. Skip either one and the crust will taste flat.
3. Add all 3 cups of flour on top of the liquids. All-purpose flour works perfectly well, but bread flour creates a slightly chewier, more authentic pizzeria-style crust due to its higher protein content. Use whichever you prefer based on your texture preference.
4. Make a small indent in the top of the flour and place the yeast into it. Keep it dry and separate until the machine starts.
5. Insert the bread pan into the Bella Bread Maker and select the Dough cycle. This cycle only kneads and rises the dough — it does not bake it. This is exactly what you want for pizza dough.
6. Press Start. During the kneading phase, check the dough after 10 minutes. It should form a smooth, elastic ball that is just slightly tacky. Pizza dough should feel like soft earlobes when pressed — smooth and supple without sticking to your fingers.
7. If the dough is too wet and sticking to the sides, add flour one tablespoon at a time. If it is too stiff and crumbly, add water one tablespoon at a time.
8. When the Dough cycle finishes, remove the bread pan. Turn the dough out onto a lightly floured surface. The dough should be smooth, elastic, and slightly puffy from the first rise.
9. Divide the dough into two equal balls. Use one ball immediately for your pizza, or wrap the second ball tightly in plastic wrap and refrigerate it for up to 3 days or freeze it for up to one month.
10. To shape the pizza: on a floured surface or on a piece of parchment paper, use your hands to stretch and press the dough outward from the center, working in a circular motion. Do not use a rolling pin if you can avoid it — hand-stretching creates a better crust texture with those characteristic uneven, bubbly edges. Top with your sauce, cheese, and toppings, then bake in an oven preheated to 450°F for 12 to 15 minutes until the crust is golden and the cheese is bubbling.
20. Rosemary Bread
Prep Time: 10 minutes Bake Time: 3 hours Serve: 12 slices
Fragrant, earthy rosemary baked into a golden loaf — simple and stunning. The herb fills the bread with an aroma that makes it impossible to wait for it to cool. Slice it thick and serve alongside roasted chicken or a bowl of tomato soup.
Ingredients:
- 1 cup warm water (110°F)
- 2 tablespoons olive oil
- 1 teaspoon salt
- 1 teaspoon sugar
- 1 tablespoon fresh rosemary, finely chopped (or 1 teaspoon dried)
- 1/2 teaspoon garlic powder
- 3 cups bread flour
- 2 1/4 teaspoons active dry yeast
Instructions:
1. Add the warm water to the bread pan. Pour in the olive oil — olive oil is the perfect complement to rosemary, and together they give this bread a Mediterranean character that feels rustic and special.
2. Sprinkle the salt and sugar over the liquid ingredients. Add the finely chopped fresh rosemary and garlic powder on top of the salt and sugar. Fresh rosemary gives a more vibrant flavor than dried, so use it when available. If using dried rosemary, crush it slightly between your fingers before adding to help release its oils.
3. Pour all 3 cups of bread flour on top of the rosemary and seasoning layer. The flour covers and holds the herbs in place until kneading begins, which prevents the rosemary from activating the yeast prematurely.
4. Make a small well in the center of the flour and add the yeast into it. The yeast should sit on top of the flour, away from the liquid and away from the salt below.
5. Secure the bread pan in your Bella Bread Maker. Select the Basic or French cycle, choose a medium to dark crust, and set the size to 1.5 lb. A darker crust suits rosemary bread well because it creates a slightly crispier exterior that pairs nicely with the herb flavor.
6. Press Start. During kneading, the rosemary will fully incorporate into the dough. Fresh rosemary holds up well through the kneading process. You will start to smell the rosemary and olive oil together almost immediately — it is one of the best aromas from any bread machine recipe.
7. Check the dough ball during the first kneading phase. The olive oil makes this dough slightly softer than standard dough, but it should still form a cohesive, smooth ball. Adjust with flour or water as needed.
8. Let the machine run all cycles without interruption. Allow the bread to bake through the full cycle. The longer it runs, the more the rosemary flavor infuses throughout the loaf.
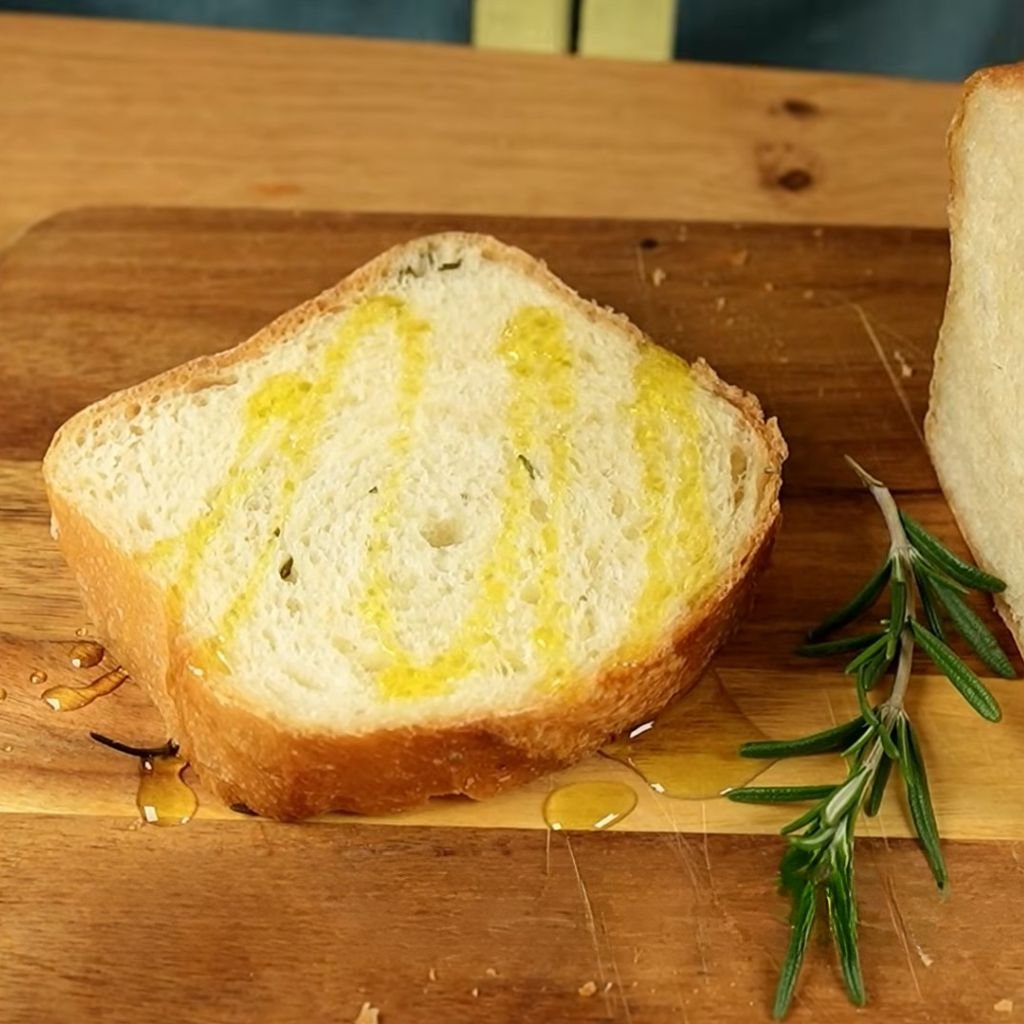
9. When the machine beeps at the end of the cycle, put on your oven mitts and carefully remove the bread pan. Tip the loaf out gently — bread with herbs can sometimes stick slightly. Place it on a wire rack and let it cool for at least 25 minutes. The crust will have a beautiful golden color and the rosemary will have darkened slightly, creating gorgeous green flecks throughout the bread. Serve with olive oil and sea salt for dipping or pair with any hearty dinner.
21. French Bread
Prep Time: 10 minutes Bake Time: 3 hours 30 minutes Serve: 12 slices
Crisp on the outside, soft and airy on the inside — French bread from the Bella Bread Maker is a close match to bakery-fresh baguette-style loaves. Just four simple ingredients create something extraordinary. Serve it with soup, spread it with garlic butter, or use it for crostini.
Ingredients:
- 1 cup warm water (110°F)
- 1 1/2 teaspoons salt
- 1 teaspoon sugar
- 3 cups bread flour
- 2 teaspoons active dry yeast
Instructions:
1. Add the warm water to the bread pan. French bread is one of the simplest recipes in the bread machine world — just a few ingredients, no fat, no eggs, no milk. That simplicity is what gives it that classic crisp crust and open, airy crumb.
2. Add the salt and sugar over the water. The absence of oil or butter in French bread is intentional — fat inhibits gluten development, and gluten is what gives French bread its chewy, open texture. Keeping fat out of the recipe is key.
3. Pour all 3 cups of bread flour on top of the water and seasonings. For the best French bread results, use high-quality bread flour with at least 12 to 13% protein content. This supports the strong gluten network that French bread depends on.
4. Create a small well in the flour and add the yeast. Do not mix or disturb the layers.
5. Insert the bread pan into your Bella Bread Maker and select the French Bread cycle. This cycle uses a longer rise time and a slightly higher baking temperature than the basic bread cycle, which helps develop the crisp exterior that French bread is known for. Choose medium or dark crust — French bread looks and tastes best with a well-browned, slightly firm crust.
6. Press Start. During kneading, the dough should come together into a firm, smooth ball. French bread dough is firmer and less tacky than most other bread machine doughs. If it seems dry, add water one teaspoon at a time — but be conservative, as too much water makes the crumb too dense.
7. Resist the urge to open the lid during the rising phases. The controlled environment inside the machine creates the perfect conditions for the dough to rise properly.
8. During the baking phase, some steam may escape from the machine — this is normal. French bread in a bread machine will not develop the same crackly crust as a traditional oven-baked baguette, but the crust will still be noticeably firmer than a standard white loaf.
9. When the cycle ends, remove the bread pan immediately. Do not leave the bread on the warm setting for extended periods, as the crust will soften and lose its character.
10. Tip the loaf out onto a wire rack right away and let it cool uncovered for at least 30 minutes. Leaving it uncovered helps the crust stay firmer as it cools, rather than steaming itself soft under a towel. Slice with a serrated bread knife and serve the same day for the best texture. French bread is best enjoyed fresh.
22. Italian Bread
Prep Time: 10 minutes Bake Time: 3 hours 20 minutes Serve: 12 slices
Soft inside with a thin, golden crust — Italian bread has a mild, slightly yeasty flavor that makes it the perfect companion for pasta, antipasto platters, or bruschetta. A little olive oil in the dough gives it a subtle richness that sets it apart from plain white bread.
Ingredients:
- 1 cup warm water (110°F)
- 2 tablespoons olive oil
- 1 1/2 teaspoons salt
- 1 teaspoon sugar
- 3 cups bread flour
- 2 1/4 teaspoons active dry yeast
- 1 teaspoon dried Italian herbs (optional)
Instructions:
1. Pour the warm water into the bread pan, then add the olive oil. The combination of water and olive oil is what defines the base of Italian bread — the olive oil keeps the crumb soft while allowing the crust to develop golden color.
2. Add the salt and sugar to the liquid mixture. If you are using dried Italian herbs, add them here as well so they can distribute evenly through the dough during kneading.
3. Add all 3 cups of bread flour on top. Make a small well in the center of the flour and place the yeast into it. Keep the yeast dry and elevated.
4. Insert the bread pan into the Bella Bread Maker. Select the Basic or French Bread cycle — either works well for Italian bread. The French cycle gives a slightly crisper crust, while the Basic cycle gives a softer result. Choose whichever you prefer based on how you plan to serve it.
5. Select a medium or dark crust setting and the 1.5 lb loaf size. Press Start.
6. During the kneading phase, check the dough. Italian bread dough should be smooth and just slightly tacky — similar in texture to French bread dough but slightly softer due to the olive oil. Adjust with flour or water one tablespoon at a time as needed.
7. The rise time for Italian bread is important — the longer rise develops a more complex, slightly tangy flavor that is characteristic of traditional Italian breads. Do not rush the process by pressing fast-bake settings.
8. During the baking phase, the olive oil in the dough will help the crust develop a beautiful, even golden color. The finished loaf should have a thin but firm crust with a soft, slightly open interior crumb.
9. Once the machine beeps to signal completion, remove the bread pan using oven mitts. Tip the loaf out carefully and place it on a wire rack.
10. Let the bread cool for at least 25 minutes before slicing. Italian bread is particularly good for making bruschetta — slice it thickly, grill or toast it, rub with a cut garlic clove, drizzle with olive oil, and top with diced tomatoes, basil, and a pinch of salt. Store leftovers in a paper bag rather than plastic to help maintain the crust texture.
23. Brioche
Prep Time: 15 minutes Bake Time: 3 hours 30 minutes Serve: 10 slices
Rich, buttery, and golden — brioche is the most luxurious bread you can make in a bread machine. Eggs and plenty of butter create an incredibly tender crumb that is almost cake-like. Use it for French toast, bread pudding, or eat it warm with jam for something truly special.
Ingredients:
- 1/4 cup warm milk (110°F)
- 3 large eggs, beaten, room temperature
- 1/2 cup unsalted butter, softened and cut into small pieces
- 3 tablespoons sugar
- 1 teaspoon salt
- 2 1/2 cups bread flour
- 2 1/4 teaspoons active dry yeast
Instructions:
1. Add the warm milk to the bread pan. Because this recipe is very butter and egg-heavy, the amount of liquid from the milk is much less than in standard bread recipes — the eggs and butter supply the majority of the moisture.
2. Add the beaten eggs to the warm milk. Make sure the eggs are at room temperature — cold eggs can lower the temperature of the mixture and slow yeast activation. The eggs are the backbone of brioche’s rich, golden crumb. Three eggs in one loaf is a lot, and that is exactly why brioche tastes so different from regular bread.
3. Add the sugar and salt to the egg and milk mixture.
4. Add the bread flour on top. Make a small well and place the yeast into it. Keep the yeast dry and away from the liquid for now.
5. Select the Sweet Bread cycle on your Bella Bread Maker before pressing Start. This cycle bakes at a lower, gentler temperature, which is essential for brioche — too much heat too fast causes the outside to brown before the inside cooks through.
6. Press Start. During the kneading phase, add the butter pieces gradually — not all at once. Wait until the dough has been kneading for about 5 minutes and has come together into a rough ball, then add the butter a few pieces at a time through the lid opening. Adding it slowly allows the dough to fully absorb each addition.
7. Once all the butter is incorporated, the dough will look quite different from standard bread dough — it will be very soft, shiny, and slightly sticky. This is correct. Brioche dough is not supposed to look like a firm, dry ball. It should be silky and elastic, pulling away from the sides of the pan.
8. Do not add more flour during kneading even if the dough looks soft and sticky. Adding too much flour will ruin the brioche’s characteristic richness and tender crumb.
9. Allow the full Sweet Bread cycle to run without opening the lid. Brioche rises beautifully and will fill the bread pan almost completely by the time baking starts.
10. When the cycle ends, remove the bread pan immediately. The loaf will be deeply golden on the outside. Tip it out onto a wire rack and let it cool for at least 30 to 45 minutes. Brioche firms up considerably as it cools — when warm it feels incredibly soft, almost too soft to slice cleanly. Cooled slices are perfect. Use leftovers for the most incredible French toast you have ever made.
24. Sourdough (Bread Machine Adaptation)
Prep Time: 10 minutes + starter prep Bake Time: 3 hours 30 minutes Serve: 12 slices
Traditional sourdough takes days, but this bread machine adaptation uses both sourdough starter and a little yeast to get you a tangy, chewy loaf without the long wait. You still get that signature sour flavor and rustic texture in a fraction of the time.
Ingredients:
- 1/2 cup active sourdough starter (fed and bubbly)
- 3/4 cup warm water (110°F)
- 1 tablespoon olive oil
- 1 1/2 teaspoons salt
- 1 teaspoon sugar
- 3 cups bread flour
- 1 teaspoon active dry yeast (helps the rise)
Instructions:
1. Make sure your sourdough starter is active and bubbly before using it. Feed your starter 4 to 8 hours before baking so it is at peak activity. An active starter should be full of bubbles and have a pleasantly tangy, yeasty smell. A flat or sluggish starter will result in a denser loaf.
2. Add the sourdough starter to the bread pan first. It goes in with the liquids because it contains water as part of its composition.
3. Pour the warm water over the starter. The combination of starter and warm water creates the liquid base for this recipe.
4. Add the olive oil, salt, and sugar to the pan.
5. Pour all 3 cups of bread flour on top. The flour creates the layer between the liquid and the yeast.
6. Make a small indent in the top of the flour and place the active dry yeast into it. The combination of sourdough starter and a small amount of commercial yeast gives you the best of both worlds — the tangy, complex flavor of sourdough with a reliable and consistent rise from the added yeast.
7. Insert the bread pan into the Bella Bread Maker and select the Basic or French Bread cycle. Choose medium or dark crust. Sourdough benefits from a firmer, slightly darker crust that adds to its character.
8. Press Start. During kneading, the dough should come together into a slightly tacky, smooth ball. Sourdough dough is often a little stickier than standard bread dough due to the starter — this is expected.
9. As the dough rises, you will notice a slightly different smell compared to regular bread — more tangy and fermented. That is the sourdough character developing. The longer the rise, the more tangy the finished loaf will taste.
10. Allow all cycles to complete. When the machine beeps, remove the bread pan and release the loaf onto a wire rack. Sourdough has a denser crumb than white bread, which is normal. Let it cool for at least 40 to 60 minutes before slicing — the crumb continues to set during this cooling time and slicing too early gives a gummy texture. The flavor improves even more on day two, as the tangy notes in sourdough deepen after baking.
25. Cornbread (Bread Maker Version)
Prep Time: 10 minutes Bake Time: 1 hour 30 minutes Serve: 8 slices
Golden, slightly sweet, and just a little crumbly — classic cornbread made easy in the Bella Bread Maker. A perfect companion for chili, pulled pork, or a bowl of beans. The bread machine keeps it moist and evenly baked without any monitoring required.
Ingredients:
- 1 cup buttermilk, warm
- 2 eggs, beaten
- 1/4 cup butter, melted
- 1/4 cup sugar
- 1 teaspoon salt
- 1 cup cornmeal (yellow)
- 1 cup all-purpose flour
- 2 teaspoons baking powder
- 1/2 teaspoon baking soda
Instructions:
1. Warm the buttermilk gently — just until it feels slightly warm, not hot. Buttermilk is the key ingredient in classic cornbread. Its slight acidity reacts with the baking soda to create lift, and its creamy richness keeps the crumb moist and tender.
2. Add the warm buttermilk to the bread pan first, then add the beaten eggs and melted butter. The butter adds richness and a slightly crispy bottom crust — a trademark of great cornbread.
3. Add the sugar and salt to the wet ingredients. The sugar amount here makes this a Southern-style slightly sweet cornbread. If you prefer unsweetened cornbread, reduce the sugar to 1 tablespoon or omit it completely.
4. In a separate bowl, whisk together the yellow cornmeal, all-purpose flour, baking powder, and baking soda. Mixing these dry ingredients together first ensures even distribution of the leavening agents so the cornbread rises evenly.
5. Add the dry ingredient mixture to the bread pan on top of the wet ingredients. Note that this is a quick bread recipe — it uses baking powder and baking soda instead of yeast, so it does not require a rise cycle.
6. Select the Quick Bread or Cake cycle on your Bella Bread Maker. This cycle skips the kneading and rising phases and goes directly to gentle mixing and baking. Using a standard bread cycle will over-mix the batter and create a dense, tough cornbread.
7. Press Start. The machine will mix the batter and then bake it. Cornbread batter is much looser than bread dough — it should pour easily and not form a ball during mixing.
8. During the baking phase, do not open the lid. Cornbread rises quickly and can sink in the center if the temperature is disrupted during baking.
9. When the machine finishes the cycle, insert a toothpick or skewer into the center of the cornbread. If it comes out clean with no wet batter, the cornbread is fully baked. If the toothpick comes out with wet batter, run the bake-only setting for an additional 10 minutes.
10. Remove the bread pan with oven mitts and let the cornbread rest in the pan for 10 minutes before tipping it out. Cornbread is more fragile than yeast bread when hot, so this rest time lets it firm up enough to hold together when you release it. Transfer to a wire rack and let it cool for at least 15 minutes. Serve warm with butter and honey — or cut it into squares and serve alongside a hearty bowl of chili. Cornbread is best eaten the day it is made.
Bella Bread Maker Recipe Customization Ideas
One of the best parts about using a bread machine is how easy it is to make each loaf your own. Here are some great ways to customize your Bella bread maker recipes:
1. Adding Flavors with Spices and Extracts
Spices like cinnamon, cardamom, cumin, or smoked paprika can completely change the character of a basic loaf. Add 1 to 2 teaspoons of your chosen spice with the dry ingredients. Extracts like vanilla, almond, or orange also work well in sweet bread recipes — just 1 teaspoon goes a long way. Try adding lemon zest to a sweet bread or smoked paprika to a savory loaf for a bold twist.
2. Swapping Ingredients for Different Results
You can easily swap milk for plant-based milk, butter for coconut oil, or honey for maple syrup in most Bella bread maker recipes without affecting the final result much. Try replacing half the all-purpose flour with whole wheat or spelt flour for a heartier texture. Swapping water for broth in savory bread recipes adds a whole new layer of flavor without any extra effort.
3. Making Dough-Only Recipes
Many people use the Bella Bread Maker just for the Dough cycle, then shape and bake the bread in the oven. This gives you more control over the final shape — perfect for making dinner rolls, baguette-style loaves, braided breads, and focaccia. Use the Dough cycle for any recipe, then shape the dough by hand, let it rise again for 30 minutes, and bake in a preheated oven at 375°F to 400°F.
4. Experimenting with Textures
Adding sunflower seeds, pumpkin seeds, sesame seeds, or chopped nuts changes the texture of any loaf significantly. Rolled oats, millet, or cracked wheat added to the dough create a chewier, more complex crumb. For a crispier crust, brush the loaf with water or egg wash after removing it from the machine and place it under the broiler for 2 to 3 minutes — it comes out looking bakery-perfect.
Conclusion
Bella bread maker recipes open up a whole new world of home baking that is easier, faster, and more rewarding than most people expect. Whether you are baking a simple white loaf for everyday sandwiches or trying something more adventurous like brioche or sourdough, your Bella Bread Maker handles the hard work so you can enjoy the results.
The real joy of using a bread machine is how consistent the results are. Once you find a recipe you love, it turns out the same way every single time. But the fun really starts when you begin experimenting — swapping ingredients, adding spices, trying new seeds or herbs, or using the dough cycle to hand-shape something beautiful. Every loaf teaches you something new about how ingredients work together.
From classic white and soft sandwich breads to honey wheat, Japanese milk bread, cheese bread, and cornbread, the 25 Bella bread maker recipes in this guide give you plenty of starting points. Start with the ones that appeal to you most, bake them a few times until you are comfortable, and then start making them your own. Add a handful of seeds here, swap the water for broth there, and before long you will have a personal collection of go-to loaves that your family requests every week.
Fresh bread at home is one of life’s simple, genuine pleasures — and your Bella Bread Maker makes it possible any day of the week. Pull out a recipe, add your ingredients, press Start, and let the machine work its magic. A warm, fragrant loaf will be waiting for you a few hours later, and it will taste better than anything from a grocery store shelf.