
Air frying has changed the way people cook at home — and Bella air fryers have become one of the most popular choices for everyday cooking.
Bella air fryers are compact, affordable, and easy to use, which is why so many home cooks keep one on the counter.
They use hot circulating air to cook food fast, giving you that golden, crispy texture without using a lot of oil. Compared to deep frying or oven cooking, air frying cuts cooking time and uses far less fat, which means your meals are lighter and healthier.
Bella air fryers come in different sizes and have simple controls, so even first-time users can start cooking right away.
The recipes in this guide are made specifically for Bella air fryer models, so the temperatures and times are already dialed in for the best results. From snacks to full dinners, these Bella air fryer recipes will keep your kitchen routine simple and your food tasting great.

Why Choose a Bella Air Fryer for Everyday Cooking?
1. Simple controls and easy setup. Bella air fryers have straightforward dials or digital buttons that are easy to understand. There is no long learning curve, making them great for beginners or anyone who wants a no-fuss cooking tool.
2. Faster cooking times. A Bella air fryer heats up almost instantly. Most foods cook 20–30% faster than a traditional oven because the hot air moves around the food from all directions.
3. Energy efficient. Because cooking times are shorter and the unit heats up quickly, a Bella air fryer uses less electricity than a full-size oven. This is good for your energy bill and the environment.
4. Less oil, same crunch. You only need a light spray or a teaspoon of oil to get crispy results. This makes meals lower in calories and fat compared to deep frying.
5. Versatile for many foods. Bella air fryers are great for chicken, fish, vegetables, frozen snacks, and even baked goods. The even airflow means food cooks consistently from all sides.
6. Easy to clean. Most Bella air fryer baskets are non-stick and dishwasher safe. Cleanup after cooking is quick and simple.
7. Compact size fits most kitchens. Bella models are designed to take up minimal counter space while still holding enough food for a family meal.
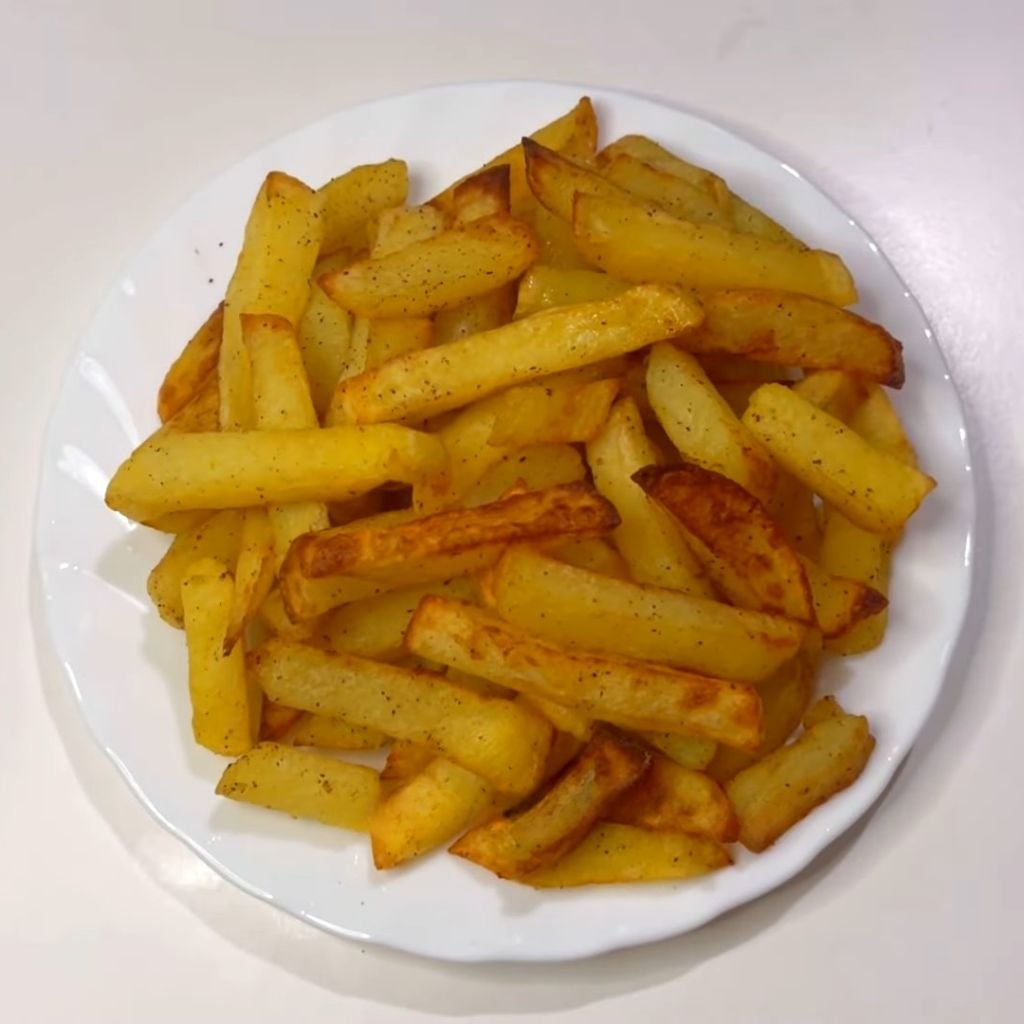
1. Bella Air Fryer French Fries
Prep Time: 10 minutes | Cook Time: 20 minutes | Serves: 3–4
Homemade French fries in the air fryer come out golden, crispy on the outside, and soft on the inside. Made with just a little oil and your favorite seasoning, they are a much lighter option than fast food fries. Perfect as a side dish or a snack anytime you want something satisfying.
Ingredients:
- 3 medium russet potatoes
- 1 tablespoon olive oil
- 1 teaspoon salt
- ½ teaspoon garlic powder
- ½ teaspoon paprika
- ¼ teaspoon black pepper
Instructions:
Start by washing and peeling your russet potatoes under cold running water. Once cleaned, place them on a cutting board and slice each potato into even sticks, roughly ¼ inch thick. Consistent thickness is very important here — if some fries are thicker than others, they will not cook at the same rate and you will end up with some undercooked and some overdone.
Once all your fries are cut, place them into a large bowl of cold water. Let them soak for at least 20 to 30 minutes. This step removes excess starch from the potatoes, which is what helps the fries get truly crispy in the air fryer. After soaking, drain the water completely and spread the fries out on a clean kitchen towel or paper towels. Pat them dry as thoroughly as you can — any remaining moisture will steam the fries instead of crisping them.
Transfer the dried fries back into the large bowl. Drizzle the olive oil over them and toss to coat evenly. Then sprinkle in the salt, garlic powder, paprika, and black pepper. Toss again until every fry is evenly coated with the seasoning mixture.
Preheat your Bella air fryer to 380°F (193°C) for about 3 minutes. This helps the basket get hot before the food goes in, which gives the fries a better crust right from the start.
Open the air fryer basket and add the fries in a single layer. Do not pile them on top of each other. If you have a large batch, cook them in two separate rounds. Overcrowding the basket traps steam and prevents crisping.
Cook at 380°F for 15 minutes, shaking the basket every 5 minutes so the fries move around and cook evenly on all sides. After 15 minutes, check the fries. Depending on their thickness, they may need an additional 4 to 6 minutes to reach a deep golden color. Increase the temperature to 400°F for the final few minutes if you want extra crunch.
Once done, carefully remove the fries and serve immediately. Taste and add a pinch more salt if needed. Serve with ketchup, ranch, or your favorite dipping sauce.
2. Bella Air Fryer Chicken Wings
Prep Time: 10 minutes | Cook Time: 25 minutes | Serves: 2–3
Crispy chicken wings with a juicy inside — the air fryer makes them perfectly every time without the mess of deep frying. Great for game day, a casual dinner, or any night you want something flavorful. Toss them in your favorite sauce right after cooking and they are ready to eat.
Ingredients:
- 1.5 lbs chicken wings (flats and drumettes separated)
- 1 teaspoon baking powder
- 1 teaspoon salt
- ½ teaspoon garlic powder
- ½ teaspoon onion powder
- ½ teaspoon smoked paprika
- ¼ teaspoon black pepper
- Your choice of sauce (buffalo, honey garlic, or BBQ)
Instructions:
Take the chicken wings out of the packaging and pat each one completely dry using paper towels. Drying the surface is the most important step for crispy wings. Any moisture on the skin will turn into steam during cooking and leave the wings soft instead of crispy.
Place the dried wings in a large mixing bowl. In a small bowl, stir together the baking powder, salt, garlic powder, onion powder, smoked paprika, and black pepper. Sprinkle this mixture over the wings and toss well, making sure every wing is evenly coated. The baking powder is a key ingredient here — it raises the pH of the skin slightly, which helps it crisp up at a lower temperature and turns golden brown much more effectively.
If you have time, let the coated wings rest uncovered in the refrigerator for at least 30 minutes, or up to overnight. This dries out the surface even further and makes the final texture noticeably crispier. It is an optional step but worth doing when you can plan ahead.
Preheat your Bella air fryer to 380°F (193°C) for 3 minutes. While it preheats, lightly spray the air fryer basket with a non-stick cooking spray.
Arrange the wings in a single layer in the basket, making sure none are touching or stacked. Cook at 380°F for 12 minutes, then flip each wing over using tongs. Cook for another 12 minutes on the second side.
After 24 minutes total, increase the temperature to 400°F and cook for an additional 3 to 5 minutes. This final blast of heat gives the skin that extra deep-golden crunch that makes air fryer wings so popular.
Remove the wings from the basket and immediately toss them in your preferred sauce while they are still hot. The heat helps the sauce cling to the skin. Serve right away with celery sticks, carrot sticks, and your favorite dipping sauce.
3. Bella Air Fryer Chicken Breast
Prep Time: 5 minutes | Cook Time: 18 minutes | Serves: 2
Juicy, tender chicken breast cooked in the air fryer is one of the easiest meals you can make. Season it simply or use your favorite marinade — either way, the result is moist inside and lightly golden outside. Great for slicing over salads, stuffing into wraps, or serving with any side dish you like.
Ingredients:
- 2 boneless, skinless chicken breasts (about 6–7 oz each)
- 1 tablespoon olive oil
- 1 teaspoon salt
- ½ teaspoon black pepper
- ½ teaspoon garlic powder
- ½ teaspoon onion powder
- ½ teaspoon smoked paprika
Instructions:
Begin by taking the chicken breasts out of the refrigerator about 10 minutes before cooking. Letting them sit at room temperature briefly helps them cook more evenly throughout.
Place the chicken breasts on a cutting board and check their thickness. Chicken breasts are often thicker on one end and thinner on the other. To ensure even cooking, use a meat mallet or the bottom of a heavy pan to gently pound the thicker end down until the breast is a more uniform thickness — ideally around ¾ inch throughout. This step prevents the thin end from drying out before the thick end is cooked through.
Pat both sides of the chicken completely dry with paper towels. This helps the seasoning stick and allows the surface to brown rather than steam.
Drizzle olive oil over both sides of each chicken breast and rub it in gently with your hands or a brush. In a small bowl, mix together the salt, black pepper, garlic powder, onion powder, and smoked paprika. Sprinkle the seasoning blend evenly over both sides of each breast, pressing lightly so it adheres well.
Preheat your Bella air fryer to 375°F (190°C) for about 3 minutes. Once preheated, place the chicken breasts in the basket in a single layer with some space between them. Do not stack or overlap.
Cook at 375°F for 9 minutes. Flip the chicken breasts over using tongs and cook for another 8 to 9 minutes on the second side. Cooking time will vary slightly depending on the exact thickness of your chicken.
To check for doneness, insert a meat thermometer into the thickest part of the breast. The internal temperature must reach 165°F (74°C) for safe consumption. If the temperature has not reached 165°F, return to the air fryer in 2-minute increments until it does.
Once done, remove the chicken and let it rest on a plate for 5 minutes before cutting. Resting allows the juices to redistribute throughout the meat, which keeps every slice moist and flavorful.
4. Bella Air Fryer Chicken Tenders
Prep Time: 15 minutes | Cook Time: 12 minutes | Serves: 3–4
Homemade chicken tenders with a golden, crunchy coating are a family favorite for a reason. The air fryer gives them a perfectly crispy outside while keeping the inside tender and juicy. These are great for kids, picky eaters, and anyone who loves a good crunch without the oil of deep frying.
Ingredients:
- 1 lb chicken tenders (or chicken breast cut into strips)
- ½ cup all-purpose flour
- 2 eggs, beaten
- 1 cup panko breadcrumbs
- ½ teaspoon salt
- ½ teaspoon garlic powder
- ½ teaspoon paprika
- ¼ teaspoon black pepper
- Cooking spray
Instructions:
Set up a breading station using three shallow bowls or plates. Add the flour to the first bowl. Beat the two eggs in the second bowl until smooth. In the third bowl, combine the panko breadcrumbs, salt, garlic powder, paprika, and black pepper, and mix well.
Panko breadcrumbs are highly recommended over regular breadcrumbs for this recipe because they are lighter and coarser, which creates a much crispier coating in the air fryer.
Pat the chicken tenders dry with paper towels. Take one tender at a time and first coat it completely in the flour, shaking off any excess. Then dip it in the beaten egg, letting the extra drip off. Finally, press it firmly into the seasoned panko mixture, turning it over and pressing again to make sure the crumbs fully coat every surface. Set the coated tender aside on a clean plate. Repeat with all remaining pieces.
Preheat your Bella air fryer to 400°F (204°C) for 3 minutes. While it preheats, lightly spray the air fryer basket with cooking spray.
Place the breaded chicken tenders in the basket in a single layer. Do not crowd them — leave at least a small gap between each piece so the air can circulate around them. Lightly spray the tops of the tenders with cooking spray as well. This helps the breadcrumbs brown and crisp instead of drying out or staying pale.
Cook at 400°F for 6 minutes. Open the basket and carefully flip each tender using tongs. Spray the second side lightly with cooking spray and cook for another 5 to 6 minutes until the coating is deep golden brown and the chicken is cooked through.
Check the internal temperature — it should read 165°F (74°C) at the thickest part. If any pieces need more time, add 2 minutes at a time.
Remove from the basket and serve hot with honey mustard, ranch dressing, ketchup, or any dipping sauce you enjoy. These tenders also work well inside a sandwich or wrap.
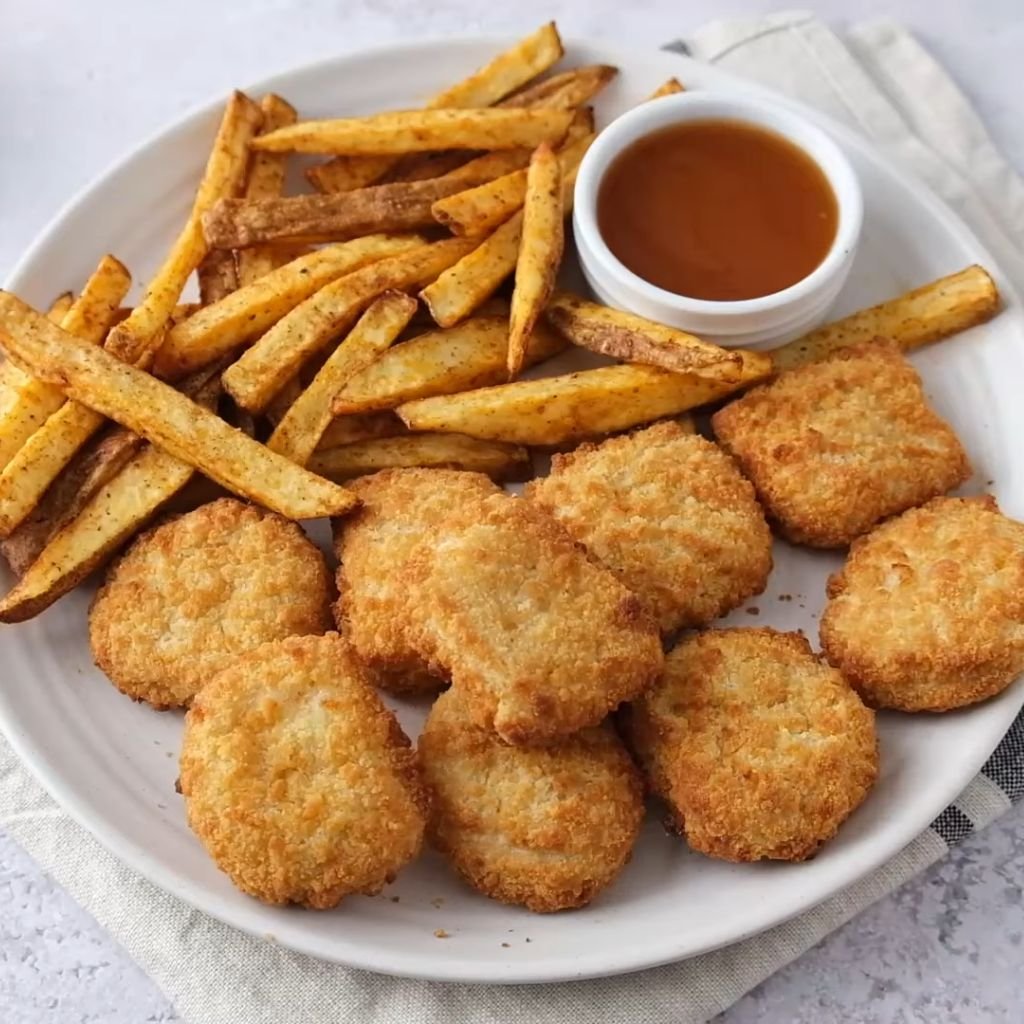
5. Bella Air Fryer Frozen Chicken Nuggets
Prep Time: 0 minutes | Cook Time: 10 minutes | Serves: 2–3
Straight from the freezer to the air fryer — frozen chicken nuggets come out hot, crispy, and way better than the microwave. No thawing, no prepping, just fast and easy cooking that the whole family will enjoy. A quick lunch or weeknight dinner that is ready in about ten minutes.
Ingredients:
- 1 bag (about 12–16 oz) frozen chicken nuggets
- Optional: dipping sauces of your choice
Instructions:
Remove the frozen chicken nuggets from the freezer and take out however many you plan to cook. There is no need to thaw them — they go directly into the air fryer from frozen, which is one of the best things about this method.
Preheat your Bella air fryer to 400°F (204°C) for 3 minutes. Preheating is important here because it helps the nuggets start crisping right away instead of slowly warming up in a cold basket.
Once preheated, place the frozen nuggets in the air fryer basket in a single layer. Avoid stacking them or piling them on top of each other. If you have a large amount to cook, do it in batches. Overlapping nuggets will steam instead of crisp, giving you a soggy result rather than the crunchy texture everyone loves.
Do not spray oil on the nuggets — they already contain enough fat in the coating and the meat to crisp up on their own.
Cook at 400°F for 5 minutes. Open the basket and shake it or flip the nuggets using tongs to ensure even browning on all sides. Close the basket and cook for another 4 to 5 minutes until the nuggets are golden brown and hot all the way through.
The cooking time can vary slightly depending on the brand and the size of the nuggets. Smaller nuggets may be done closer to the 9-minute mark, while larger ones might take a full 11 minutes. Always check that the nuggets are hot in the center before serving.
Remove from the basket and let them cool for a minute before eating, as they retain heat and can be very hot inside. Serve with ketchup, BBQ sauce, honey mustard, or any favorite dipping sauce.
6. Bella Air Fryer Mozzarella Sticks
Prep Time: 1 hour 15 minutes (includes freezing time) | Cook Time: 8 minutes | Serves: 3–4
Gooey melted cheese inside a crispy golden coating — homemade mozzarella sticks are easier than you think. The air fryer gives them a satisfying crunch without deep frying. Freezing them before cooking is the secret to keeping the cheese from leaking out.
Ingredients:
- 8 mozzarella string cheese sticks
- ½ cup all-purpose flour
- 2 eggs, beaten
- 1 cup Italian seasoned breadcrumbs
- ½ teaspoon garlic powder
- ½ teaspoon dried oregano
- Cooking spray
- Marinara sauce for serving
Instructions:
Start by unwrapping all of the mozzarella string cheese sticks and placing them on a baking sheet or plate lined with parchment paper. Set them aside while you prepare the breading station.
Set up three shallow bowls. Add the flour to the first bowl. Beat the eggs in the second bowl. In the third bowl, mix together the Italian breadcrumbs, garlic powder, and dried oregano.
Take one cheese stick and coat it in flour on all sides, shaking off the excess. Dip it into the egg wash, coating fully. Then roll it in the seasoned breadcrumbs, pressing firmly so the crumbs adhere. Return the coated stick to the egg wash and dip again, then coat one more time in the breadcrumbs. Double-coating is essential — it builds a thicker crust that seals in the cheese and prevents blowouts during cooking.
Place each double-coated mozzarella stick back on the parchment-lined sheet. Once all sticks are breaded, place the entire sheet in the freezer for at least 1 hour, or up to 24 hours. This step is critical. Freezing the breaded sticks firms them up so the cheese does not melt and leak out through the coating before the crust has had time to crisp.
When ready to cook, preheat your Bella air fryer to 390°F (199°C) for 3 minutes.
Lightly spray the air fryer basket with cooking spray. Remove the frozen mozzarella sticks from the freezer and place them in the basket in a single layer, with space between each one. Lightly spray the tops with cooking spray.
Cook at 390°F for 4 minutes. Gently flip each stick using tongs and cook for another 3 to 4 minutes. Watch closely during the last two minutes — when the coating is golden and you see just the slightest hint of melted cheese at the tips, they are ready.
Remove immediately and serve with warm marinara sauce. Eat while hot for the best melted cheese pull.
7. Bella Air Fryer Onion Rings
Prep Time: 15 minutes | Cook Time: 12 minutes | Serves: 3–4
Crunchy, seasoned onion rings made in the air fryer are a great snack or side dish. The batter crisps up beautifully with just a light spray of oil, and the onions inside become soft and sweet. Much lighter than restaurant-style deep fried rings and just as satisfying.
Ingredients:
- 2 large yellow onions
- ½ cup all-purpose flour
- 2 eggs, beaten
- 1 cup panko breadcrumbs
- ½ teaspoon salt
- ½ teaspoon garlic powder
- ½ teaspoon paprika
- ¼ teaspoon cayenne pepper (optional)
- Cooking spray
Instructions:
Peel and slice the onions into rounds that are about ½ inch thick. Separate each slice into individual rings. Discard the very small inner rings or save them for another recipe — the medium and large rings work best for this.
Set up a breading station with three shallow bowls. Place the flour in the first bowl. Pour the beaten eggs into the second bowl. In the third bowl, mix the panko breadcrumbs, salt, garlic powder, paprika, and cayenne pepper if using.
Working one ring at a time, dip it first into the flour and shake off any excess. Then coat it in the egg wash, allowing the extra to drip off. Next, press it firmly into the seasoned panko, flipping and pressing until the ring is fully coated. The panko will form a textured, bumpy coating that crisps up wonderfully in the air fryer.
Set each coated ring on a clean plate or tray while you bread the rest.
Preheat your Bella air fryer to 400°F (204°C) for 3 minutes. Spray the basket with cooking spray.
Place the onion rings in the basket in a single layer. Depending on the size of your air fryer, you may need to cook in two or three batches. Lightly spray the tops of the rings with cooking spray.
Cook at 400°F for 6 minutes, then carefully flip each ring with tongs. Spray the second side lightly and cook for another 5 to 6 minutes until the coating is golden brown and fully crisped.
Remove from the basket and season immediately with a little extra salt if desired. Serve hot with ranch dressing, ketchup, or spicy aioli.
8. Bella Air Fryer Sweet Potato Fries
Prep Time: 10 minutes | Cook Time: 18 minutes | Serves: 3–4
Sweet potato fries have a natural sweetness that gets even better in the air fryer. The outside turns lightly crispy while the inside stays soft and flavorful. A great alternative to regular fries and easy to make with just a handful of ingredients.
Ingredients:
- 2 large sweet potatoes
- 1 tablespoon olive oil
- ½ teaspoon salt
- ½ teaspoon cinnamon (optional, for sweet version)
- ½ teaspoon smoked paprika (for savory version)
- ¼ teaspoon black pepper
- 1 teaspoon cornstarch
Instructions:
Peel both sweet potatoes and cut them into uniform sticks about ¼ inch thick. Uniform sizing helps them cook at the same rate. Thin fries will get crispier; thicker cuts will stay softer inside. Choose your preferred thickness based on how you like them.
Place the cut fries in a large mixing bowl. Drizzle olive oil over them and toss to coat. Add the cornstarch and toss again. The cornstarch is the key to crispier fries — it absorbs surface moisture and creates a light shell around each fry that crisps up beautifully in the hot air.
Add the salt, black pepper, and either cinnamon or smoked paprika depending on the flavor direction you prefer. Toss everything together until the fries are evenly coated.
Preheat your Bella air fryer to 380°F (193°C) for 3 minutes.
Spread the sweet potato fries in the basket in as close to a single layer as possible. A small amount of overlap is okay, but try to keep them relatively spread out. Cook at 380°F for 10 minutes, shaking the basket every 4 to 5 minutes to move the fries around and prevent sticking.
After 10 minutes, check the fries. Increase the temperature to 400°F and cook for an additional 6 to 8 minutes, shaking once more halfway through. Sweet potatoes contain more natural sugar than regular potatoes, so watch them carefully in the final minutes — they can go from golden to too dark quickly.
Remove from the basket and taste for seasoning. Add a small pinch more salt if needed. Serve right away as a side dish or snack with your preferred dipping sauce.
9. Bella Air Fryer Bacon
Prep Time: 2 minutes | Cook Time: 10 minutes | Serves: 2–3
Cooking bacon in the air fryer is one of the cleanest and easiest methods you will find. No splatter on the stovetop, no greasy mess — just perfectly cooked bacon that comes out exactly how you like it, crispy or a little chewy.
Ingredients:
- 6–8 strips of bacon (regular or thick-cut)
- Optional: black pepper or brown sugar for flavor
Instructions:
Remove the bacon strips from the packaging and lay them out on a flat surface. Take a moment to look at the thickness. Regular-cut bacon cooks faster while thick-cut bacon will need a couple of extra minutes.
Preheat your Bella air fryer to 350°F (177°C) for 2 minutes. A slightly lower temperature than usual is best for bacon because it renders the fat slowly without burning the meat.
Open the basket and lay the bacon strips in a single layer, flat and without overlapping. Depending on the size of your air fryer basket and the length of your bacon strips, you may need to cut the strips in half to fit them properly without folding or bunching up.
If you want to add extra flavor, sprinkle a small pinch of black pepper or a light dusting of brown sugar over the top side of the strips before cooking.
Cook at 350°F for 5 minutes. Open the basket carefully — there will be hot fat and steam inside. Using tongs, flip each strip of bacon over. Cook for another 4 to 6 minutes depending on how crispy you want it.
For chewy bacon, 8 to 9 total minutes works well. For very crispy bacon, go the full 10 to 11 minutes or even a minute more for thick-cut strips.
Once the bacon reaches your preferred texture, remove it from the basket and place it on a paper towel-lined plate. The paper towel absorbs excess fat and the bacon crisps up just a little more as it cools. Let it rest for 1 to 2 minutes before serving.
The drippings in the bottom of the air fryer drawer can be carefully poured off and saved for cooking if desired — let the unit cool first.
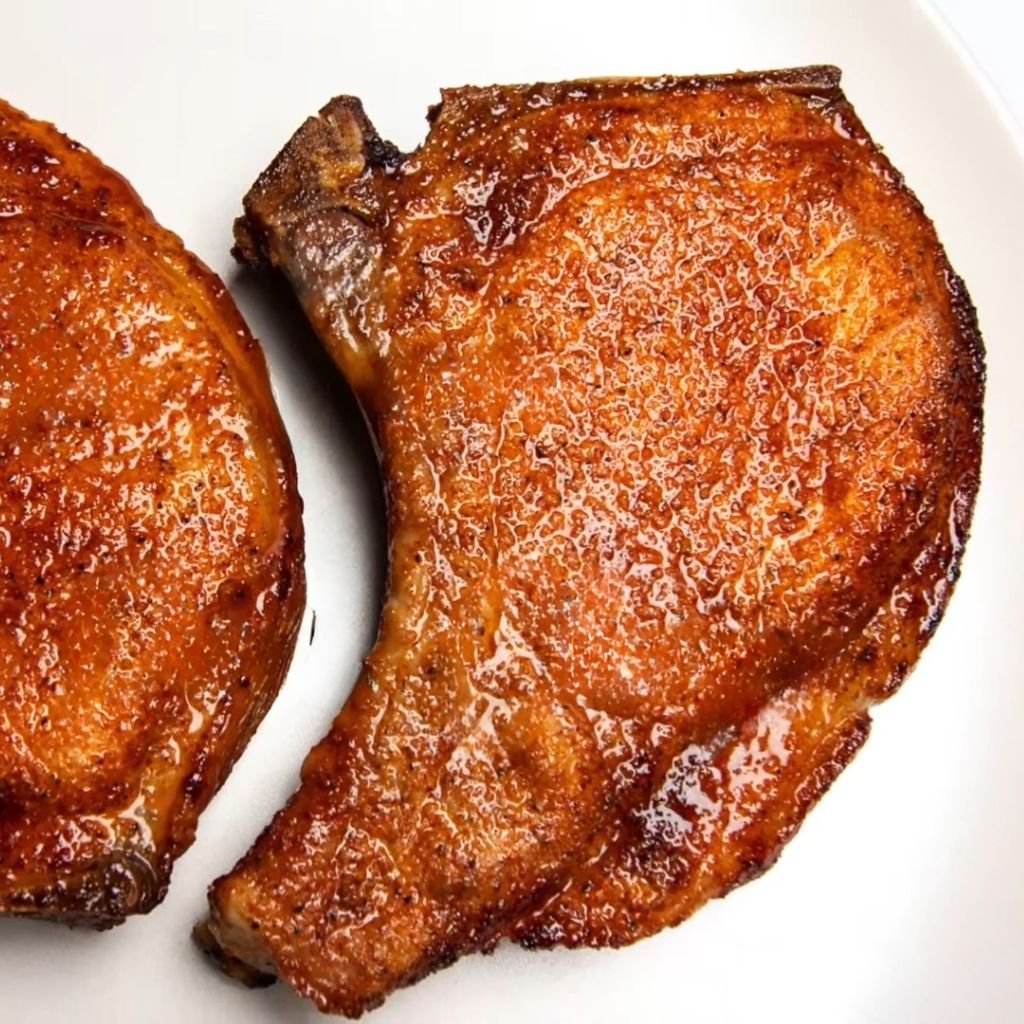
10. Bella Air Fryer Pork Chops
Prep Time: 5 minutes | Cook Time: 14 minutes | Serves: 2
Juicy pork chops with a nicely seasoned crust come together in about 20 minutes in the air fryer. Boneless or bone-in both work well. The hot circulating air seals in moisture while browning the outside for a great texture and flavor with minimal effort.
Ingredients:
- 2 boneless or bone-in pork chops (about ¾ to 1 inch thick)
- 1 tablespoon olive oil
- 1 teaspoon salt
- ½ teaspoon garlic powder
- ½ teaspoon onion powder
- ½ teaspoon smoked paprika
- ¼ teaspoon black pepper
- ¼ teaspoon dried thyme
Instructions:
Take the pork chops out of the refrigerator about 10 minutes before cooking and let them rest at room temperature. Cold meat straight from the fridge tends to cook unevenly — the outside overcooks before the inside reaches the right temperature.
Pat both sides of each pork chop very dry with paper towels. Removing surface moisture is important for getting a nicely browned crust rather than a steamed, grey exterior.
Brush or rub both sides of each chop with olive oil. In a small bowl, combine the salt, garlic powder, onion powder, smoked paprika, black pepper, and dried thyme. Mix the spices thoroughly, then sprinkle and rub the seasoning blend generously onto both sides of each pork chop.
Preheat your Bella air fryer to 375°F (190°C) for 3 minutes. Place the seasoned pork chops in the air fryer basket in a single layer, leaving space around each one for air circulation.
Cook at 375°F for 7 minutes. Flip the chops using tongs and cook for another 6 to 7 minutes on the second side.
Check the internal temperature using a meat thermometer inserted into the thickest part — away from any bone. Pork chops are safe to eat at 145°F (63°C) followed by a 3-minute rest. At this temperature the meat will still be slightly pink in the center, which is perfectly fine and results in a juicy chop. If you prefer it more well done, cook to 160°F, but be aware the texture will be firmer.
Let the pork chops rest for 3 to 5 minutes after removing them from the air fryer before cutting. Resting allows the juices to settle back into the meat. Serve with your preferred sides.
11. Bella Air Fryer Salmon
Prep Time: 5 minutes | Cook Time: 10 minutes | Serves: 2
Salmon in the air fryer comes out with a lightly crispy top and a soft, flaky inside. The cook time is short and the cleanup is easy. Season it simply with oil and spices or use a glaze — both ways produce excellent results with very little effort.
Ingredients:
- 2 salmon fillets (about 6 oz each), skin-on or skinless
- 1 tablespoon olive oil
- 1 teaspoon salt
- ½ teaspoon garlic powder
- ½ teaspoon paprika
- ¼ teaspoon black pepper
- Optional: 1 tablespoon soy sauce + 1 teaspoon honey for a glaze
Instructions:
Remove the salmon fillets from the refrigerator about 10 minutes before cooking. Pat both sides dry thoroughly with paper towels. Removing surface moisture helps the exterior of the salmon brown rather than steam.
If using the simple seasoning, brush both sides of each fillet with olive oil. Mix the salt, garlic powder, paprika, and black pepper together and rub the seasoning blend onto both sides of the salmon.
For the optional glaze version, whisk together the soy sauce and honey in a small bowl. After patting the fillets dry, brush this glaze generously over the top side of each piece. The sugars in the honey will caramelize slightly during cooking and create a beautiful finish.
Preheat your Bella air fryer to 400°F (204°C) for 3 minutes. Spray the basket lightly with cooking spray to prevent sticking, especially if using skinless fillets.
Place the salmon fillets in the basket, skin side down (or presentation side up if skinless). Leave space around each piece. Cook at 400°F for 8 to 10 minutes.
Salmon doneness is a matter of preference. At 8 minutes, the fish will be slightly translucent in the very center — some people prefer this. At 10 minutes, it will be cooked through completely and flake easily with a fork. The safe internal temperature for salmon is 145°F (63°C), but many prefer eating it at 125–130°F for a softer, more tender texture.
Remove carefully using a spatula and serve right away over rice, salad, or roasted vegetables.
12. Bella Air Fryer Shrimp
Prep Time: 10 minutes | Cook Time: 8 minutes | Serves: 2–3
Shrimp in the air fryer cook incredibly fast and come out juicy and flavorful. They work as a main dish over pasta or rice, as a taco filling, or as an appetizer with dipping sauce. The seasoning sticks well and gives every bite great flavor.
Ingredients:
- 1 lb large shrimp, peeled and deveined (thawed if frozen)
- 1 tablespoon olive oil
- 1 teaspoon salt
- ½ teaspoon garlic powder
- ½ teaspoon paprika
- ¼ teaspoon cumin
- ¼ teaspoon black pepper
- Juice of half a lemon
- Fresh parsley for garnish (optional)
Instructions:
Make sure the shrimp are fully thawed before starting. To thaw quickly, place them in a colander under cold running water for 5 to 7 minutes, then pat completely dry with paper towels. It is important to remove as much moisture as possible from the surface — wet shrimp will steam rather than roast, which changes the texture significantly.
Place the dried shrimp in a large mixing bowl. Drizzle the olive oil over them and toss to coat evenly. Add the salt, garlic powder, paprika, cumin, and black pepper. Toss everything together until every shrimp is well covered with the seasoning.
Preheat your Bella air fryer to 400°F (204°C) for 3 minutes. The high heat is what gives shrimp a lightly golden, slightly charred exterior in the short cooking time they need.
Arrange the shrimp in the basket in a single layer. Because shrimp are small and curved, they tend to fit quite well without much overlap. However, do not pile them — they need air circulating around each one.
Cook at 400°F for 4 minutes. Open the basket and flip the shrimp over using tongs. Cook for another 3 to 4 minutes. Shrimp cook very fast and are done when they turn from translucent grey to opaque white and pink, curling into a loose C shape. If they curl tightly into an O shape, they are slightly overcooked but still safe to eat — just aim for the C shape.
Remove the shrimp from the basket and squeeze the lemon juice over them while they are still hot. Toss to coat and garnish with fresh parsley if desired. Serve immediately.
13. Bella Air Fryer Tilapia
Prep Time: 5 minutes | Cook Time: 12 minutes | Serves: 2
Tilapia is a mild, flaky white fish that takes on seasoning beautifully. Air frying it gives the surface a lightly golden texture while the inside stays moist and tender. Ready in about 15 minutes and much lighter than pan-fried fish. Pairs well with almost any side dish.
Ingredients:
- 2 tilapia fillets (about 5–6 oz each)
- 1 tablespoon olive oil
- 1 teaspoon salt
- ½ teaspoon garlic powder
- ½ teaspoon onion powder
- ½ teaspoon lemon pepper seasoning
- ¼ teaspoon paprika
- Fresh lemon slices for serving
Instructions:
Start by rinsing the tilapia fillets under cold water, then pat them thoroughly dry on both sides with paper towels. Drying the surface well allows the seasoning to adhere and helps the exterior of the fish develop color during cooking rather than becoming watery.
Drizzle both sides of each fillet with olive oil and use your fingers or a brush to spread it evenly. In a small bowl, mix together the salt, garlic powder, onion powder, lemon pepper seasoning, and paprika. Sprinkle this blend generously over both sides of each tilapia fillet and press gently so it sticks to the surface.
Preheat your Bella air fryer to 390°F (199°C) for 3 minutes. While it heats up, spray the basket lightly with cooking spray to prevent the fish from sticking.
Place the tilapia fillets in the basket in a single layer. Tilapia fillets are usually thin, so they fit well in most basket sizes. Make sure the fillets are not bending or folded — lay them flat for even cooking.
Cook at 390°F for 6 minutes. Using a thin spatula, gently flip the fillets over. Take care here because tilapia is delicate and can break easily — slide the spatula fully under the fillet before flipping. Cook for another 5 to 6 minutes on the second side.
The fish is done when it turns from translucent to opaque white throughout and flakes easily when you press it gently with a fork. The internal temperature should reach 145°F (63°C).
Remove the fillets carefully and plate them immediately with fresh lemon slices on the side. Squeeze lemon juice over the top just before eating for a bright, fresh finish.
14. Bella Air Fryer Broccoli
Prep Time: 5 minutes | Cook Time: 10 minutes | Serves: 3–4
Air fried broccoli comes out with crispy, slightly charred edges and a tender inside — something that is hard to achieve with steaming or boiling. Season it simply with garlic and oil or toss it with parmesan cheese for extra flavor. Ready in ten minutes and great alongside any main dish.
Ingredients:
- 1 large head of broccoli, cut into florets
- 1.5 tablespoons olive oil
- ½ teaspoon salt
- ½ teaspoon garlic powder
- ¼ teaspoon black pepper
- Optional: 2 tablespoons grated parmesan, juice of half a lemon
Instructions:
Wash the broccoli head thoroughly under cold water. Shake off the excess water and spread the florets on a clean kitchen towel or paper towels. Pat them as dry as possible before continuing — moisture on the florets will create steam in the air fryer and prevent the edges from crisping.
Cut the broccoli into florets of similar size so they cook evenly. Florets that are too large will not cook through in the center before the outside is done, while very small pieces may burn at the tips.
Place all the broccoli florets in a large mixing bowl. Drizzle with olive oil and toss until every piece is lightly coated. Add the salt, garlic powder, and black pepper. Toss again until the seasoning is evenly distributed. If using parmesan, hold it back until the last two minutes of cooking.
Preheat your Bella air fryer to 380°F (193°C) for 3 minutes.
Add the broccoli to the air fryer basket and spread into as even a layer as possible. A small amount of overlap is acceptable, but avoid piling the pieces too high or the bottom pieces will steam rather than roast.
Cook at 380°F for 5 minutes. Open the basket and shake to toss the florets, or use tongs to rearrange them. Cook for another 4 to 5 minutes. During the final 2 minutes, sprinkle the parmesan cheese over the florets if using. The cheese will melt and lightly crisp onto the broccoli.
Remove from the basket and squeeze a little fresh lemon juice over the top before serving for a bright, fresh flavor. Serve hot as a side dish.
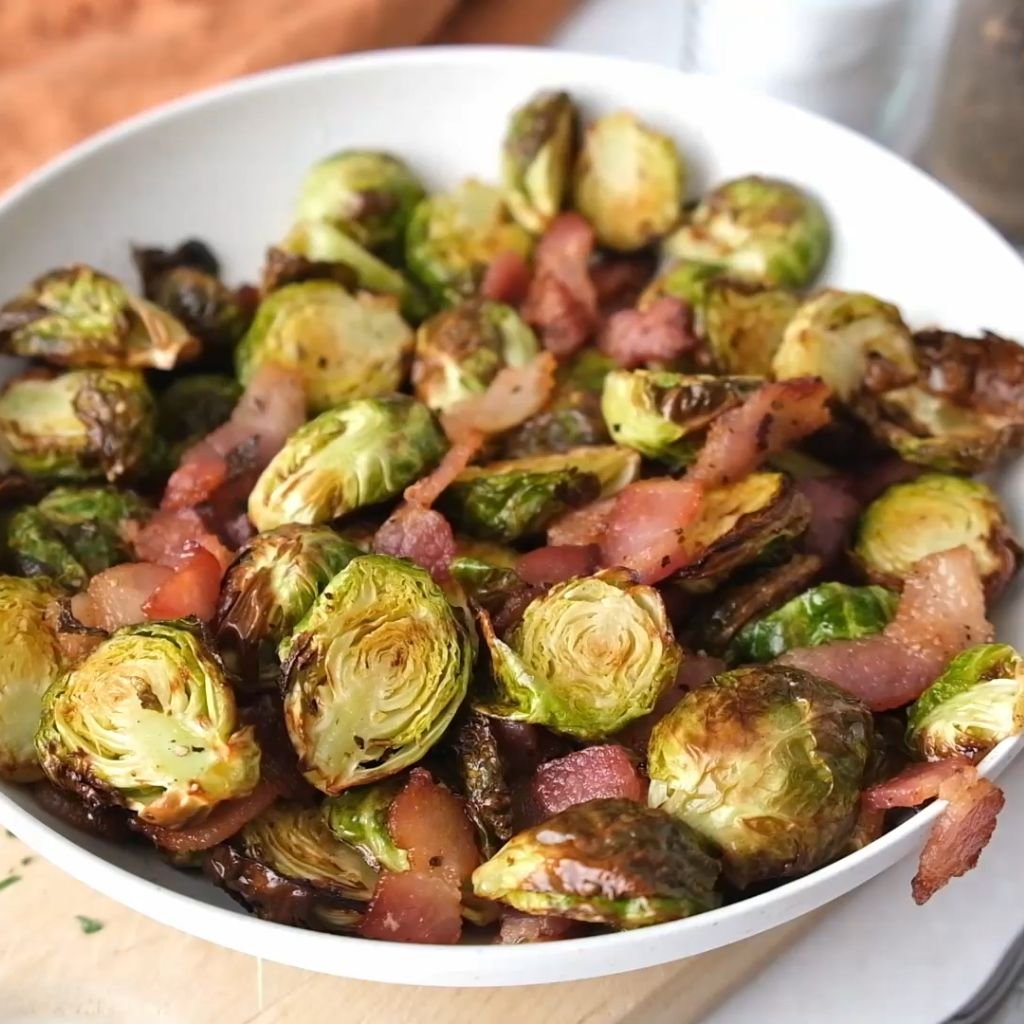
15. Bella Air Fryer Brussels Sprouts
Prep Time: 8 minutes | Cook Time: 15 minutes | Serves: 3–4
Crispy Brussels sprouts with caramelized edges are completely different from the soggy, bitter ones many people grew up eating. The air fryer roasts them quickly and evenly, bringing out their natural sweetness. A little oil and seasoning is all you need for a vegetable side dish that people actually want to eat.
Ingredients:
- 1 lb Brussels sprouts
- 1.5 tablespoons olive oil
- ½ teaspoon salt
- ½ teaspoon garlic powder
- ¼ teaspoon black pepper
- Optional: 1 tablespoon balsamic glaze, 2 strips cooked crumbled bacon, or shaved parmesan for topping
Instructions:
Rinse the Brussels sprouts under cold water. Remove any damaged or yellowed outer leaves by peeling them off gently. Trim off the tough, woody stem end of each sprout with a sharp knife — just a thin slice, about ¼ inch — without removing so much that the layers fall apart.
Slice each Brussels sprout in half from top to bottom through the stem. Cutting them in half dramatically increases the amount of flat surface area that will contact the air and crisp up during cooking. Whole sprouts take much longer and do not get nearly as caramelized as halved ones.
Place the halved sprouts in a large bowl. Add the olive oil and toss thoroughly so all cut surfaces and outer leaves are coated. Add the salt, garlic powder, and black pepper, and toss again.
Preheat your Bella air fryer to 375°F (190°C) for 3 minutes.
Place the Brussels sprouts in the basket cut-side down whenever possible. The flat cut side directly against the hot basket surface creates more caramelization. Arrange them in as close to a single layer as you can manage. Some overlap near the edges is fine, but the cut sides should face down.
Cook at 375°F for 8 minutes. Open the basket and shake or toss the sprouts. Cook for another 6 to 7 minutes until the edges are deeply golden and the outer leaves are crisped and slightly charred — this is the good part.
Remove from the basket and serve immediately. Add any optional toppings right away while the sprouts are still hot — the balsamic glaze will adhere beautifully, the crumbled bacon adds a smoky saltiness, and the parmesan melts slightly on contact.
16. Bella Air Fryer Zucchini Chips
Prep Time: 15 minutes (plus 10 minutes resting time) | Cook Time: 12 minutes | Serves: 2–3
Thin, crispy zucchini chips are a lighter snack alternative that is easy to make at home. The air fryer dries them out and crisps them without needing much oil at all. Season them any way you like — they work well with both savory spices and a simple sprinkle of parmesan.
Ingredients:
- 2 medium zucchini
- 1 teaspoon salt (for drawing out moisture)
- 1 tablespoon olive oil
- ½ teaspoon garlic powder
- ½ teaspoon paprika
- ¼ teaspoon black pepper
- Optional: 2 tablespoons grated parmesan
Instructions:
Wash the zucchini and trim off both ends. Using a sharp knife or a mandoline slicer, cut the zucchini into thin, even rounds about ⅛ inch thick. A mandoline gives the most consistent slices, but a sharp knife works too — just take your time to keep the slices even.
Lay the zucchini slices out in a single layer on a clean kitchen towel or a double layer of paper towels. Sprinkle salt lightly over the top side of all slices. Let them rest for 10 minutes. During this time, the salt draws excess moisture out of the zucchini, which is crucial for getting crispy chips rather than soft, chewy rounds.
After resting, use another paper towel to blot the top of the slices firmly, pressing down to absorb all the released moisture. Flip the slices and blot the undersides as well. The drier the slices are before cooking, the crispier the final chips will be.
Transfer the dried slices to a large bowl. Drizzle olive oil over them and toss gently to coat. Add the garlic powder, paprika, and black pepper, and toss again.
Preheat your Bella air fryer to 370°F (188°C) for 3 minutes.
Working in batches if needed, lay the zucchini slices in the air fryer basket in a single layer. Overlapping will cause steaming and soft spots rather than crisping. If using parmesan, sprinkle a little over the top of the slices in the basket before cooking.
Cook at 370°F for 6 minutes. Carefully flip each slice. Cook for another 5 to 6 minutes, watching closely in the last 2 minutes — thinner slices can go from perfectly crisp to too dark quickly.
Remove the chips and let them cool on a wire rack for 2 to 3 minutes. They will continue to crisp up slightly as they cool. Serve immediately for the best texture.
17. Bella Air Fryer Stuffed Mushrooms
Prep Time: 15 minutes | Cook Time: 12 minutes | Serves: 4 (as an appetizer)
Stuffed mushrooms make an impressive appetizer that is surprisingly easy to put together. The air fryer cooks them quickly and evenly, softening the mushroom caps while crisping the cheesy filling on top. Great for entertaining or a savory snack on a quiet evening at home.
Ingredients:
- 12 large cremini or white button mushrooms
- 4 oz cream cheese, softened
- ¼ cup shredded mozzarella cheese
- 2 tablespoons grated parmesan
- 2 cloves garlic, minced
- 2 tablespoons fresh parsley, finely chopped
- ¼ teaspoon salt
- ¼ teaspoon black pepper
- 2 tablespoons plain breadcrumbs
- 1 teaspoon olive oil
Instructions:
Wipe each mushroom clean with a damp paper towel. Avoid washing them under running water since mushrooms absorb water quickly and will become soggy during cooking. Remove the stems by gently twisting and pulling — they should come out easily. Set the caps aside and finely chop the stems; they will go into the filling.
In a medium mixing bowl, combine the softened cream cheese, shredded mozzarella, grated parmesan, minced garlic, chopped parsley, salt, and black pepper. Add the finely chopped mushroom stems to the bowl as well. Mix everything together until fully combined and uniform. The filling should be thick and spreadable.
In a separate small bowl, mix the breadcrumbs with the olive oil and stir until the crumbs are lightly coated. The oiled breadcrumbs will go on top of the filling and will toast during cooking to form a golden crust.
Use a small spoon or a piping bag to fill each mushroom cap generously with the cream cheese mixture. Mound the filling slightly above the rim of the cap. Once all caps are filled, sprinkle a small amount of the oiled breadcrumbs over the top of each stuffed mushroom.
Preheat your Bella air fryer to 370°F (188°C) for 3 minutes. Lightly spray the basket with cooking spray.
Place the stuffed mushrooms in the basket in a single layer, filling side up. Cook at 370°F for 10 to 12 minutes until the mushroom caps are tender and the topping is golden brown and bubbling slightly around the edges.
Remove carefully and let them rest for 2 minutes before serving — the filling holds heat and can be very hot. Serve on a platter with fresh parsley sprinkled on top.
18. Bella Air Fryer Garlic Bread
Prep Time: 5 minutes | Cook Time: 6 minutes | Serves: 4
Garlic bread from the air fryer comes out with crispy edges and a soft, buttery center. The outside gets golden and toasted while the inside stays warm and loaded with garlic flavor. Perfect alongside pasta, soups, or salads — and it takes less than ten minutes start to finish.
Ingredients:
- 1 French baguette or Italian loaf, sliced in half lengthwise
- 4 tablespoons unsalted butter, softened to room temperature
- 3 cloves garlic, finely minced (or ½ teaspoon garlic powder)
- 2 tablespoons fresh parsley, finely chopped
- ¼ teaspoon salt
- Optional: 2 tablespoons shredded mozzarella or parmesan for cheesy garlic bread
Instructions:
Start by allowing the butter to come to room temperature if it is still cold from the refrigerator. Softened butter is much easier to spread and mixes more evenly with the other ingredients. Do not melt it — you want it soft but still solid enough to spread.
In a small bowl, combine the softened butter, minced garlic, chopped fresh parsley, and salt. Mix well using a fork or small spatula until everything is evenly blended throughout the butter. Taste the mixture and adjust the garlic or salt to your preference before spreading.
Lay the baguette or loaf halves cut side up on a clean work surface. Spread the garlic butter mixture generously over the entire cut surface of each piece, going all the way to the edges. Do not be shy with the amount — you want every bite to be flavorful. If making cheesy garlic bread, sprinkle the shredded cheese evenly over the buttered surface now.
Preheat your Bella air fryer to 360°F (182°C) for 2 minutes. A slightly lower temperature is ideal here because butter can burn quickly in the air fryer at high heat.
Place the garlic bread halves in the air fryer basket, butter side up. Depending on the size of your loaf and your air fryer, you may need to cut the halves into smaller sections to fit. They should lay flat, not be propped up against the sides.
Cook at 360°F for 4 to 6 minutes. Check at the 4-minute mark — the edges should be lightly golden and the butter should be melted and sizzling. For a more deeply toasted finish, cook the full 6 minutes. For cheesy garlic bread, cook until the cheese is melted and has golden spots.
Remove immediately and slice into serving pieces. Serve hot while the butter is still warm and the bread is at its crispest.
19. Bella Air Fryer Grilled Cheese Sandwich
Prep Time: 5 minutes | Cook Time: 8 minutes | Serves: 1–2
A melted grilled cheese sandwich made in the air fryer is perfectly golden on the outside with fully melted, gooey cheese on the inside. No standing over the stove flipping it — just set it in the air fryer and let it do the work. Great for a quick lunch or a simple comfort meal.
Ingredients:
- 2 slices of sturdy sandwich bread (sourdough, Texas toast, or white bread)
- 2–3 slices of cheese (American, cheddar, or a mix)
- 1.5 tablespoons softened butter
- Optional: a thin layer of Dijon mustard on the inside of the bread
Instructions:
Start with room-temperature butter. Spread a generous, even layer of butter on one side of each bread slice. The buttered sides will be the outer surfaces of the sandwich that face the air fryer basket and the heat — this is what creates the golden crust.
Lay both bread slices butter side down on a clean surface. On the unbuttered top side of one slice, layer the cheese slices. If using the optional Dijon mustard, spread a very thin layer on the unbuttered side of the second slice before placing it on top. The mustard adds a subtle tangy depth that pairs especially well with cheddar. Place the second bread slice on top with the butter side facing out, sandwiching the cheese inside.
Preheat your Bella air fryer to 370°F (188°C) for 3 minutes.
Gently place the assembled sandwich in the air fryer basket, butter side down. The basket surface will start browning the bottom side of the sandwich immediately.
Cook at 370°F for 4 minutes. Using tongs or a thin spatula, carefully flip the sandwich over. The bottom should be golden and slightly crisped at this point. Cook for another 3 to 4 minutes on the second side.
Check the sandwich by pressing gently on the top — you should feel the cheese inside has melted and the bread has good resistance from the crust that has formed. If the bread is golden on both sides and the cheese feels melted inside, the sandwich is done. If you like extra crunch, cook for 1 additional minute.
Remove from the air fryer and let it rest for 1 minute before slicing. The cheese inside will be very hot. Slice diagonally and serve immediately.
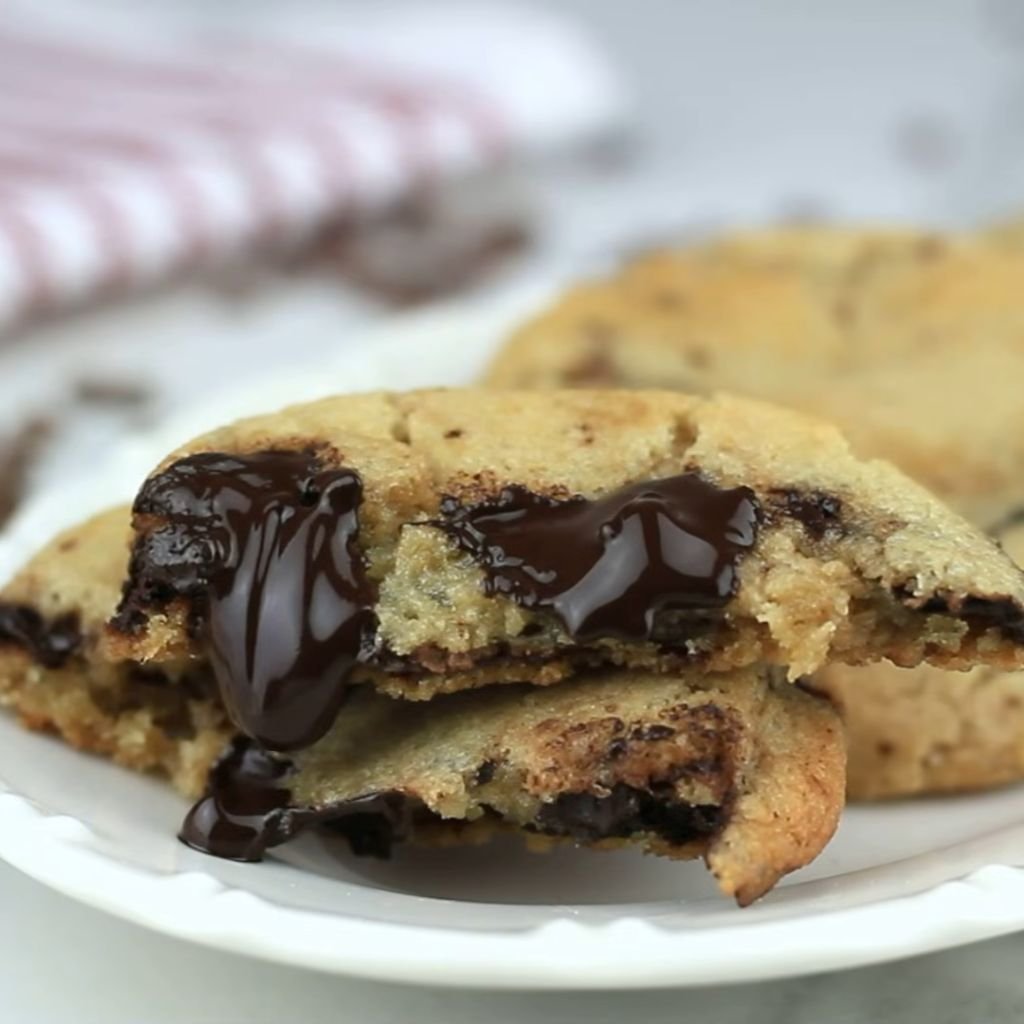
20. Bella Air Fryer Chocolate Chip Cookies
Prep Time: 15 minutes | Cook Time: 10 minutes per batch | Serves: About 12 cookies
Soft, chewy chocolate chip cookies made right in the air fryer — golden on the outside, soft in the center, and filled with melted chocolate chips. The air fryer bakes small batches quickly, so you can have fresh, warm cookies ready faster than a full oven batch. Perfect for a sweet treat any time.
Ingredients:
- 1 cup all-purpose flour
- ½ teaspoon baking soda
- ¼ teaspoon salt
- ½ cup (1 stick) unsalted butter, softened
- ½ cup granulated sugar
- ¼ cup brown sugar, packed
- 1 large egg
- 1 teaspoon vanilla extract
- ¾ cup chocolate chips
Instructions:
In a medium bowl, whisk together the flour, baking soda, and salt. Set this dry ingredient bowl aside.
In a separate large bowl, beat the softened butter together with both sugars using a hand mixer or a sturdy spatula until the mixture is light, pale, and fluffy. This typically takes about 2 minutes of vigorous mixing. Creaming the butter and sugars properly is what gives the cookies their soft, chewy texture — do not rush this step.
Add the egg and vanilla extract to the butter mixture and beat until fully incorporated and smooth. Scrape down the sides of the bowl with a spatula to make sure everything is mixed in evenly.
Add the dry ingredient mixture to the wet ingredients gradually, stirring gently with the spatula. Mix just until the flour disappears and the dough comes together — do not overmix, as that develops gluten and makes the cookies tough. Fold in the chocolate chips until they are evenly distributed throughout the dough.
Cover the bowl with plastic wrap and place in the refrigerator for 10 to 15 minutes. Chilling the dough slightly firms it up, which prevents the cookies from spreading too flat and thin during baking.
Cut a piece of parchment paper to fit the bottom of your air fryer basket. Preheat the Bella air fryer to 325°F (163°C) for 3 minutes. Note that cookies require a lower temperature than savory foods to avoid burning the outside before the inside bakes through.
Remove the dough from the refrigerator and scoop balls of dough about 1.5 tablespoons each. Place 3 to 4 dough balls on the parchment-lined basket, spacing them at least 2 inches apart. Cookies spread as they bake, and crowding them together causes them to merge and bake unevenly.
Cook at 325°F for 8 to 10 minutes. At the 8-minute mark, check the cookies. They should look set around the edges but still appear slightly underdone and soft in the center — this is correct. They will continue to firm up as they cool. If the edges are not yet golden, cook for 1 to 2 more minutes.
Do not remove the cookies from the basket immediately. Let them rest in the basket for 4 to 5 minutes before carefully lifting them with a thin spatula onto a wire cooling rack. The cookies are very soft and fragile right out of the air fryer and will firm up nicely as they cool. Repeat with remaining dough batches.
Recipe Conversion Guide for Bella Air Fryers
Converting your favorite oven or stovetop recipes for the air fryer is easier than most people expect. Here are the main things to keep in mind:
1. Reduce the temperature by 25°F (about 15°C). Air fryers circulate hot air much more efficiently than a conventional oven, which means the food is exposed to more intense heat. A recipe that calls for 400°F in the oven typically only needs 375°F in the air fryer.
2. Shorten the cooking time by 20–25%. As a general starting point, take the oven recipe’s total cooking time and reduce it by about one quarter. For example, a recipe that bakes for 20 minutes in the oven will often be done in 14 to 16 minutes in the air fryer.
3. Check early and often. Because air fryers cook faster, it is better to check your food a few minutes before the adjusted time is up rather than waiting until the end. Overcooking is easy to do if you are not watching.
4. Do not overcrowd the basket. Unlike an oven where you can use multiple racks, an air fryer needs space around the food for the air to flow. Always cook in a single layer or close to it, and work in batches if necessary.
5. Use less oil than oven recipes call for. Most air fryer recipes only need a light spray or a teaspoon of oil. Excess oil can drip into the bottom of the air fryer and cause smoke.
6. Preheat your Bella air fryer for best results. Most oven recipes assume a preheated cooking environment. Run your air fryer for 2 to 3 minutes before placing food inside to replicate this.
7. Shake or flip food halfway through. This replaces the role of turning a baking pan in the oven and ensures even browning on all sides.
Conclusion
Bella air fryers are one of the most practical and versatile cooking tools you can have in your kitchen. Whether you are making a quick snack, a full dinner, or even a batch of cookies, these machines handle a wide variety of foods with ease. The recipes in this guide cover everything from crispy French fries and chicken wings to tender salmon fillets and warm stuffed mushrooms — showing just how much a single appliance can do.
The beauty of air frying with a Bella is that it fits into any cooking routine. You do not need to be an experienced chef to use one, and you do not need a long list of ingredients to get great results. The cooking process is forgiving, the cleanup is minimal, and the results are consistently good.
Do not be afraid to experiment. Once you get comfortable with a few basic recipes, you will start to understand how your Bella air fryer works and feel more confident adjusting temperatures, times, and seasonings to match exactly what you like. Every family has different taste preferences, and the air fryer gives you the flexibility to customize your food easily.
Eating well does not have to mean spending hours in the kitchen or using large amounts of oil and fat. These Bella air fryer recipes prove that healthier cooking can also be faster, easier, and just as delicious as anything you would make the traditional way. Give a few of these recipes a try, keep notes on what you enjoy, and over time you will build a personal collection of go-to meals that your whole household loves.