
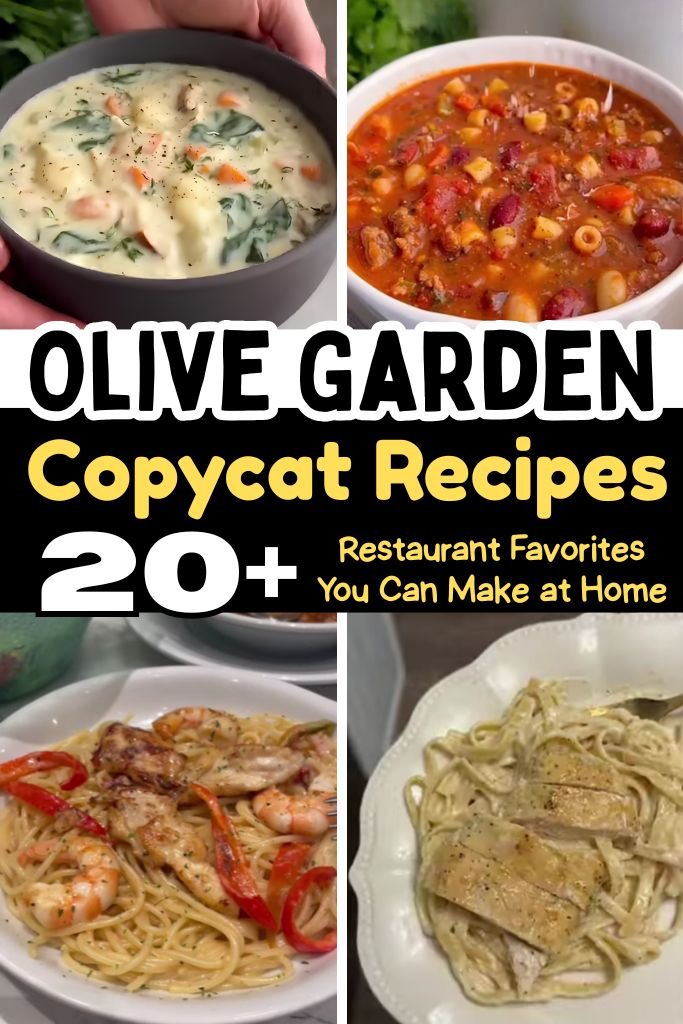
Olive Garden is one of the most loved restaurant chains in the United States. Millions of people visit each year just to enjoy warm breadsticks, creamy pasta, and hearty soups.
But eating out often adds up fast. That’s where Olive Garden copycat recipes come in. You can make the same rich, satisfying dishes right in your own kitchen — and save a lot of money doing it.
Cooking at home also lets you adjust ingredients to fit your diet, your taste, and your budget. Want more garlic? Go for it. Need a gluten-free version? Easy to swap.
These Olive Garden copycat recipes give you full control without giving up the flavor. Whether cooking for a busy weeknight or a special family dinner, these recipes make it easy to bring that restaurant experience home.
Why People Love Olive Garden’s Signature Dishes
Olive Garden has built a loyal fan base over decades, and it’s easy to see why. Here are the top reasons people keep coming back — and why these copycat recipes are so popular:
- Famous flavors and comfort-food appeal — Olive Garden’s food feels warm and satisfying. Creamy sauces, soft pasta, and seasoned proteins hit that comfort-food sweet spot that keeps people ordering again and again.
- Family-friendly Italian-American cuisine — The menu is made for everyone. Kids love the pasta, adults enjoy the soups and entrees, and there’s always something for picky eaters. It’s the kind of food that brings people together at the table.
- Popular menu items customers order repeatedly — Dishes like Zuppa Toscana, Chicken Alfredo, and the classic breadsticks have become icons. People don’t just order them once — they request them every single visit.
- The secret behind Olive Garden’s rich sauces and seasonings — The magic comes from simple, quality ingredients used well. Heavy cream, real Parmesan, fresh garlic, Italian sausage, and slow-simmered broths create layers of flavor that taste complex but are actually easy to recreate at home.
1. Olive Garden Breadsticks Copycat Recipe
Prep Time: 15 min | Cook Time: 15 min | Serves: 12 breadsticks
Soft, buttery, and brushed with garlic seasoning — these breadsticks are the first thing people reach for at the table. Making them at home gives you that same pillowy texture and golden crust that makes every meal feel complete.
Ingredients
- 1 packet (2¼ tsp) active dry yeast
- 1½ cups warm water (110°F)
- 2 tbsp granulated sugar, divided
- 4½ cups all-purpose flour
- 1½ tsp salt
- 3 tbsp unsalted butter, softened
For the garlic butter topping:
- 3 tbsp unsalted butter, melted
- ½ tsp garlic powder
- ½ tsp salt
Instructions
Start by activating the yeast. In a large mixing bowl, combine the warm water and 1 tablespoon of sugar. Sprinkle the active dry yeast over the top and let it sit for about 5 to 10 minutes. You’ll know it’s ready when it looks foamy and bubbly on the surface. If nothing happens after 10 minutes, your water may have been too hot or cold, and the yeast may be old — start fresh with a new packet.
Once the yeast is active and foamy, add the softened butter, the remaining tablespoon of sugar, and the salt to the yeast mixture. Stir everything together gently. Begin adding the flour one cup at a time, stirring with a wooden spoon after each addition. When the dough starts to come together and pull away from the sides of the bowl, switch to using your hands.
Turn the dough out onto a lightly floured surface. Knead the dough for about 8 to 10 minutes. Push the dough away from you with the heel of your hand, fold it back over itself, rotate a quarter turn, and repeat. The dough is ready when it feels smooth and elastic and springs back slightly when you press your finger into it. If it sticks to your hands or the surface, dust lightly with more flour — but don’t overdo it, or the breadsticks will be dense.
Place the kneaded dough in a lightly greased bowl. Cover with a clean kitchen towel or plastic wrap. Set the bowl in a warm spot — like near a warm oven or on top of the refrigerator — and let the dough rise for 1 hour or until it has doubled in size.
Once the dough has risen, punch it down gently to release the air. Divide the dough into 12 equal pieces. Roll each piece into a log shape, roughly 7 to 8 inches long. Place them on a parchment-lined baking sheet, spacing about 2 inches apart. Cover loosely and let them rise for another 30 minutes.
Preheat your oven to 400°F. Once the breadsticks have puffed up, bake them for 13 to 15 minutes or until they’re lightly golden on top. Remove from the oven right away.
While still hot, mix the melted butter with garlic powder and salt. Brush this mixture generously over every breadstick. Serve immediately for the best experience.
Expert Tips
- For extra soft breadsticks, brush them with butter right after baking while still hot.
- Don’t skip the second rise — it’s what gives them that light, airy texture inside.
- You can sprinkle a little Italian seasoning into the garlic butter for more flavor.
Storage Information
Store leftover breadsticks in an airtight container at room temperature for up to 2 days. To reheat, wrap in foil and warm in a 350°F oven for 8 minutes. You can also freeze baked breadsticks for up to 1 month — thaw at room temperature and reheat before serving.
2. Olive Garden Alfredo Sauce Copycat Recipe
Prep Time: 5 min | Cook Time: 15 min | Serves: 4
Rich, creamy, and packed with real Parmesan flavor, this Alfredo sauce comes together in just 15 minutes on the stovetop. Pour it over any pasta you love for a restaurant-worthy dinner any night of the week.
Ingredients
- ½ cup (1 stick) unsalted butter
- 2 cups heavy cream
- 2 cloves garlic, minced
- 2 cups freshly grated Parmesan cheese
- ½ tsp salt
- ¼ tsp white pepper
- Pinch of nutmeg (optional)
Instructions
Set a large saucepan or skillet over medium heat. Add the butter and let it melt completely, swirling the pan gently so it melts evenly without browning. Once the butter is melted and starting to sizzle lightly, add the minced garlic. Stir the garlic into the butter and cook for about 1 to 2 minutes. Keep the heat at medium — you want the garlic to soften and become fragrant, not brown. Browned garlic will make the sauce taste bitter.
Next, pour in the heavy cream slowly while stirring constantly. Bring the cream mixture to a gentle simmer over medium heat. Do not crank the heat up high — heavy cream can scorch on the bottom of the pan if the heat is too intense. Stir frequently and keep an eye on it. Let the cream simmer gently for about 5 minutes. During this time, it will thicken slightly and reduce a little, which helps the sauce cling to pasta better.
Now reduce the heat to low. Begin adding the grated Parmesan cheese a small handful at a time, stirring well after each addition. Adding the cheese gradually helps it melt smoothly into the sauce without clumping. Continue stirring until all the cheese is fully melted and the sauce looks glossy and thick. This step usually takes about 3 to 4 minutes.
Season the sauce with salt, white pepper, and a small pinch of nutmeg if using. The nutmeg adds a very subtle warmth that complements the cream beautifully — you won’t taste it directly, but it rounds out the flavor. Taste the sauce and adjust seasoning as needed.
Remove from heat and use immediately over freshly cooked, hot pasta. The sauce thickens as it sits, so serve right away for the creamiest result.
Expert Tips
- Always use freshly grated Parmesan — pre-shredded cheese contains anti-caking agents that make the sauce grainy.
- If the sauce gets too thick, add a splash of pasta water to loosen it up.
- White pepper gives a cleaner look than black pepper for a restaurant-style presentation.
Storage Information
Store leftover sauce in an airtight jar in the refrigerator for up to 3 days. Reheat slowly on the stove over low heat, adding a splash of cream or milk while stirring to bring it back to a smooth consistency. Freezing is not recommended — cream-based sauces tend to separate after thawing.
3. Olive Garden Chicken Alfredo Copycat Recipe
Prep Time: 10 min | Cook Time: 25 min | Serves: 4
Tender, seasoned chicken served over fettuccine and smothered in creamy Parmesan Alfredo sauce — this is the dish that keeps fans coming back to Olive Garden every time. Now you can make this classic at home with simple ingredients.
Ingredients
- 2 large boneless, skinless chicken breasts
- 1 tsp Italian seasoning
- ½ tsp garlic powder
- ½ tsp onion powder
- Salt and black pepper to taste
- 2 tbsp olive oil
- 12 oz fettuccine pasta
For the Alfredo sauce:
- ½ cup unsalted butter
- 2 cups heavy cream
- 2 cloves garlic, minced
- 2 cups freshly grated Parmesan cheese
- Salt and white pepper to taste
Instructions
Start by preparing the chicken. Place each chicken breast on a cutting board. If they are thick, slice them in half horizontally to create thinner cutlets — this helps them cook faster and more evenly. Pat the chicken dry with paper towels. Season both sides generously with Italian seasoning, garlic powder, onion powder, salt, and black pepper. Press the seasonings gently into the meat so they stick.
Heat a large skillet over medium-high heat and add the olive oil. Once the oil is hot and shimmering, carefully place the seasoned chicken into the pan. Do not move the chicken around — let it sit undisturbed for about 5 to 6 minutes so a golden sear develops on the bottom. Flip the chicken and cook for another 5 to 6 minutes on the other side. The internal temperature should reach 165°F when checked with a meat thermometer. Once cooked through, transfer the chicken to a cutting board and let it rest for 5 minutes before slicing. Resting keeps the juices inside so every bite stays moist.
While the chicken rests, cook the fettuccine. Bring a large pot of salted water to a boil. Add the fettuccine and cook according to package directions until al dente. Reserve about ½ cup of pasta cooking water before draining — this starchy water can help adjust the sauce consistency later. Drain the pasta and set aside.
Now make the Alfredo sauce in the same skillet used for the chicken. Reduce the heat to medium and add the butter. Once melted, add the minced garlic and cook for 1 to 2 minutes until fragrant. Pour in the heavy cream and bring to a gentle simmer. Stir frequently and let it cook for about 5 minutes to reduce slightly. Lower the heat and add the Parmesan in small handfuls, stirring between each addition until fully melted and smooth. Season with salt and white pepper to taste.
Add the drained fettuccine to the skillet and toss to coat evenly with the sauce. If the sauce feels too thick, add a splash of the reserved pasta water and toss again. Slice the rested chicken into strips or diagonal pieces and lay them over the pasta. Serve immediately with extra Parmesan on top.
Expert Tips
- Pound the chicken to an even thickness before cooking so it cooks uniformly.
- Toss the pasta into the sauce right away — letting pasta sit dry causes it to clump.
- Freshly grated Parmesan melts smoothly; bagged pre-shredded cheese will make the sauce gritty.
Storage Information
Store in an airtight container in the refrigerator for up to 3 days. Reheat on the stove over low heat with a splash of cream or milk, stirring gently. Microwaving works too — use 50% power and stir every 30 seconds. Freezing is not recommended for this dish.
4. Olive Garden Zuppa Toscana Copycat Recipe
Prep Time: 10 min | Cook Time: 35 min | Serves: 6
Hearty, smoky, and deeply satisfying — Zuppa Toscana is one of the most-ordered soups at Olive Garden. Made with spicy Italian sausage, tender potatoes, and fresh kale in a creamy broth, every spoonful is pure comfort.
Ingredients
- 1 lb spicy Italian sausage, casings removed
- 4 slices bacon, chopped
- 1 medium yellow onion, diced
- 4 cloves garlic, minced
- 4 cups chicken broth
- 2 cups water
- 4 medium russet potatoes, thinly sliced (skin on)
- 1 cup heavy cream
- 3 cups fresh kale, stems removed and roughly chopped
- Salt and black pepper to taste
- Red pepper flakes (optional, for extra heat)
Instructions
Place a large pot or Dutch oven over medium-high heat. Add the chopped bacon and cook, stirring occasionally, until the fat renders out and the bacon turns crispy. This should take about 5 to 6 minutes. Use a slotted spoon to transfer the bacon to a paper-towel-lined plate and set aside. Leave the bacon drippings in the pot — they add incredible flavor to the soup.
Add the Italian sausage to the same pot. Break it up into small crumbles using a wooden spoon or spatula. Cook over medium-high heat, stirring and breaking it apart as it cooks. Once the sausage is fully browned and no pink remains, use the slotted spoon to remove it from the pot. Set aside with the bacon. If there’s excess fat in the pot, drain most of it but leave about 1 tablespoon behind for cooking the aromatics.
Reduce the heat to medium. Add the diced onion to the pot. Cook, stirring occasionally, for about 4 minutes until the onion softens and becomes translucent. Add the minced garlic and stir for another 1 minute until fragrant. Be careful not to let the garlic burn — it goes from golden to bitter quickly.
Pour in the chicken broth and water. Stir everything together and bring the liquid to a boil over medium-high heat. Once boiling, add the sliced potatoes. The potatoes should be sliced about ¼-inch thick — thin enough to cook through in about 10 to 12 minutes but thick enough to hold their shape in the soup. Cook the potatoes until they are just fork-tender when pierced. Season with salt, pepper, and a pinch of red pepper flakes if desired.
Return the cooked sausage and half the crispy bacon to the pot. Pour in the heavy cream and stir to combine. Bring the soup back to a gentle simmer — do not boil hard after adding the cream, as this can cause it to curdle. Once the soup is simmering, add the chopped kale. Stir the kale into the soup and cook for just 3 to 4 minutes. Kale wilts quickly and softens nicely in the hot broth without becoming mushy.
Taste and adjust the seasoning with more salt and pepper as needed. Ladle the soup into bowls and top with the remaining crispy bacon. Serve hot with crusty bread or those copycat breadsticks.
Expert Tips
- Use russet potatoes for the starchiest, creamiest texture in the broth.
- Add the kale just before serving so it stays bright green and tender — not overcooked.
- For a milder soup, use mild Italian sausage instead of spicy.
Storage Information
Store in an airtight container in the refrigerator for up to 4 days. Reheat on the stove over medium heat. The potatoes will continue to absorb liquid as it sits, so add a splash of broth when reheating. This soup does not freeze well due to the cream and potato texture.
5. Olive Garden Pasta e Fagioli Copycat Recipe
Prep Time: 15 min | Cook Time: 45 min | Serves: 8
A thick, hearty Italian soup loaded with beans, vegetables, pasta, and seasoned ground beef in a tomato-based broth. Pasta e Fagioli is one of Olive Garden’s most beloved soup choices — and making it at home fills the whole kitchen with an incredible aroma.
Ingredients
- 1 lb lean ground beef
- 1 medium yellow onion, diced
- 3 stalks celery, diced
- 3 medium carrots, peeled and diced
- 4 cloves garlic, minced
- 1 can (14.5 oz) diced tomatoes
- 1 can (15 oz) tomato sauce
- 4 cups beef broth
- 2 cups water
- 1 can (15 oz) white cannellini beans, drained and rinsed
- 1 can (15 oz) red kidney beans, drained and rinsed
- 1 tsp dried oregano
- 1 tsp dried basil
- ½ tsp dried thyme
- Salt and black pepper to taste
- 8 oz ditalini pasta (small tube pasta)
- Fresh parsley for garnish (optional)
Instructions
Set a large heavy-bottomed pot over medium-high heat. Add the ground beef and cook, breaking it apart with a wooden spoon, until fully browned with no pink remaining. This should take about 6 to 8 minutes. Season lightly with salt and pepper while it cooks. Once browned, tilt the pot and use a spoon to remove any excess grease. You don’t need to drain every drop — a little fat adds flavor — but remove the obvious pooled grease.
Reduce the heat to medium. Add the diced onion, celery, and carrots to the pot with the beef. Stir everything together and cook for 5 to 6 minutes, stirring occasionally, until the vegetables begin to soften. The onion should turn translucent and the carrots should look slightly tender at the edges. Add the minced garlic and stir for 1 more minute until the garlic is fragrant and well mixed with the vegetables.
Pour in the diced tomatoes (with their juices), tomato sauce, beef broth, and water. Stir everything well to combine. Add the dried oregano, basil, and thyme. Bring the pot to a boil over medium-high heat, then reduce the heat to low. Cover the pot and let the soup simmer for 20 minutes. During this time, the vegetables will soften completely and the broth will develop a rich, deep flavor from the tomatoes and herbs.
After 20 minutes, add both cans of drained and rinsed beans to the pot. Stir to combine. Taste the broth and adjust the seasoning with more salt, pepper, or dried herbs as needed. Continue simmering for another 10 minutes to allow the beans to heat through and soak up some of that flavorful broth.
In a separate pot, cook the ditalini pasta in salted boiling water until just al dente — about 1 to 2 minutes less than the package directions suggest. Drain the pasta and add it directly to the soup just before serving. The pasta will continue to cook in the hot broth and absorb flavor as it does. Stir everything together, ladle into bowls, and garnish with fresh parsley if desired. Serve with toasted bread on the side.
Expert Tips
- Cook the pasta separately and add it just before serving to keep it from getting mushy.
- The soup thickens as it sits — add extra broth when reheating leftovers.
- A Parmesan rind simmered in the broth adds incredible depth of flavor — just remove it before serving.
Storage Information
Store the soup and pasta separately in the refrigerator for up to 5 days. The pasta gets very soft if stored in the broth overnight. Reheat on the stove over medium heat. This soup freezes well without the pasta — freeze in portions for up to 3 months and add freshly cooked pasta after thawing.
6. Olive Garden Chicken Gnocchi Soup Copycat Recipe
Prep Time: 15 min | Cook Time: 30 min | Serves: 6
Creamy, velvety, and loaded with pillowy gnocchi and tender chicken — this soup is one of those dishes that feels like a warm hug in a bowl. Every spoonful is packed with flavor from the vegetables, cream, and perfectly seasoned chicken.
Ingredients
- 1 lb cooked chicken breast, shredded or diced (rotisserie chicken works great)
- 1 tbsp olive oil
- 1 tbsp unsalted butter
- 1 small yellow onion, diced
- 2 stalks celery, diced
- 2 medium carrots, peeled and diced
- 4 cloves garlic, minced
- ¼ cup all-purpose flour
- 4 cups chicken broth
- 2 cups half-and-half
- 1 package (16 oz) potato gnocchi
- 1 cup fresh baby spinach
- 1 tsp Italian seasoning
- ½ tsp dried thyme
- Salt and black pepper to taste
Instructions
Heat the olive oil and butter together in a large pot over medium heat. Once the butter has melted and the mixture is hot, add the diced onion, celery, and carrots. Cook for 5 to 6 minutes, stirring occasionally, until the vegetables are softened and the onion has turned translucent. The carrots should still have a tiny bit of bite — they’ll continue to cook as the soup simmers.
Add the minced garlic to the pot and cook for 1 minute, stirring constantly to prevent burning. Then sprinkle the flour evenly over the vegetables. Stir continuously for about 2 minutes to cook out the raw flour taste. The mixture will look paste-like — this is normal and is what thickens the soup.
Slowly pour in the chicken broth, a little at a time, stirring constantly to prevent lumps from forming. Once all the broth is added, stir until the mixture is smooth and the flour is fully incorporated. Bring the soup to a medium simmer and add the Italian seasoning and dried thyme. Let the soup cook at a steady simmer for about 10 minutes, stirring occasionally. The broth will thicken nicely during this time.
Reduce the heat to medium-low and pour in the half-and-half. Stir to combine and bring the soup back to a gentle simmer — avoid a hard boil, which can cause the cream to curdle. Add the shredded or diced cooked chicken and stir to incorporate it throughout the soup. Let everything simmer together for 5 minutes so the chicken heats through completely and absorbs the flavors of the broth.
Add the gnocchi directly to the pot. Gnocchi cooks very quickly — it usually floats to the top in 2 to 3 minutes, which signals it’s done. Stir gently so the gnocchi doesn’t stick together or to the bottom of the pot. Once the gnocchi has floated, add the fresh baby spinach. Stir for about 1 minute until the spinach wilts down into the soup. Taste the soup one final time and season with salt and black pepper as needed. Serve immediately in deep bowls.
Expert Tips
- Rotisserie chicken saves a lot of time and adds excellent flavor.
- Don’t overcook the gnocchi — once it floats, it’s ready and you should serve right away.
- Stir the soup gently once gnocchi is added to avoid breaking the dumplings apart.
Storage Information
Store leftovers in an airtight container in the refrigerator for up to 3 days. The gnocchi will absorb liquid and expand as it sits. Reheat gently on the stove over low heat, adding extra broth or half-and-half to restore the creamy consistency. Freezing is not ideal because the gnocchi becomes very soft after thawing.
7. Olive Garden Minestrone Soup Copycat Recipe
Prep Time: 15 min | Cook Time: 40 min | Serves: 8
Packed with vegetables, beans, and pasta in a savory tomato broth — Minestrone is Olive Garden’s classic vegetarian soup option. Bright, nourishing, and incredibly filling, this is the kind of soup that gets better every day it sits in the fridge.
Ingredients
- 2 tbsp olive oil
- 1 medium yellow onion, diced
- 3 stalks celery, diced
- 3 medium carrots, peeled and diced
- 4 cloves garlic, minced
- 1 medium zucchini, diced
- 1 can (14.5 oz) diced tomatoes
- 1 can (15 oz) tomato sauce
- 4 cups vegetable broth
- 2 cups water
- 1 can (15 oz) white cannellini beans, drained and rinsed
- 1 can (15 oz) red kidney beans, drained and rinsed
- 1 cup frozen green beans
- 1 tsp dried oregano
- 1 tsp dried basil
- ½ tsp dried thyme
- Salt and black pepper to taste
- 1 cup small pasta (elbows or ditalini), cooked separately
- Fresh Parmesan cheese for serving
Instructions
Heat the olive oil in a large pot over medium heat. Add the diced onion, celery, and carrots. Cook for about 5 minutes, stirring occasionally, until the vegetables begin to soften and the onion becomes translucent. These three vegetables form the flavor base of the soup, so give them enough time to cook properly — rushing this step means less depth in the final broth.
Add the minced garlic and diced zucchini. Stir everything together and cook for 2 more minutes. The zucchini doesn’t need to cook completely right now — it will finish cooking as the soup simmers. The garlic should become fragrant and slightly golden, but not brown.
Pour in the diced tomatoes (with all their juices), the tomato sauce, vegetable broth, and water. Stir to combine everything thoroughly. Add the dried oregano, basil, and thyme. Bring the soup to a boil over medium-high heat, then reduce to a low simmer. Cover the pot and let the soup cook for 20 minutes, stirring every few minutes. The vegetables will become completely tender and the broth will darken in color and deepen in flavor.
After 20 minutes, add both cans of drained beans and the frozen green beans. Stir to combine. Continue simmering uncovered for another 10 minutes. Taste the broth and adjust the seasoning with additional salt and pepper. At this stage, the soup should taste balanced and slightly tangy from the tomatoes, with the herbs adding fragrance in the background.
Cook the pasta separately in salted boiling water until al dente, then drain. Add the cooked pasta to the soup right before serving. Stir it in gently. Ladle the soup into bowls and finish with freshly grated Parmesan cheese on top. Serve with warm crusty bread or homemade breadsticks on the side.
Expert Tips
- Add a Parmesan rind to the simmering broth for a restaurant-quality depth of flavor.
- Cook the pasta separately and add per bowl to prevent it from absorbing too much liquid.
- This soup improves in flavor overnight — make it ahead for even better results.
Storage Information
Store the soup (without pasta) in an airtight container in the refrigerator for up to 5 days, or freeze for up to 3 months. The pasta should be cooked fresh each time or stored separately. Reheat on the stove over medium heat, adding a little broth or water if the soup has thickened too much.
8. Olive Garden Five Cheese Ziti al Forno Copycat Recipe
Prep Time: 20 min | Cook Time: 40 min | Serves: 6
Bubbling, golden, cheesy baked pasta — the Five Cheese Ziti al Forno is the kind of dish that gets everyone excited at the dinner table. Five different cheeses layered with ziti pasta and marinara create something truly irresistible.
Ingredients
- 1 lb ziti pasta
- 2 cups marinara sauce (store-bought or homemade)
- 1 cup Alfredo sauce (from the recipe above or jarred)
- 1 cup ricotta cheese
- 1 cup shredded mozzarella cheese
- ½ cup freshly grated Parmesan cheese
- ½ cup shredded provolone cheese
- ½ cup shredded Romano cheese
- 1 tsp dried Italian seasoning
- Salt and pepper to taste
Instructions
Preheat your oven to 375°F. Bring a large pot of salted water to a boil and cook the ziti pasta until it is 2 minutes less than the package’s al dente time. The pasta will continue cooking in the oven, so undercooking it slightly at this stage prevents it from becoming mushy in the final bake. Once cooked, drain the pasta thoroughly and return it to the pot.
While the pasta drains, mix the marinara sauce and Alfredo sauce together in a bowl. Stir well until they are fully combined into a pink, blush-colored sauce. This combination is the signature flavor profile of this dish — the richness of the Alfredo balances the acidity of the marinara beautifully. Pour about half of this sauce mixture over the drained pasta. Toss the pasta to coat it evenly.
In a separate bowl, combine the ricotta cheese with a pinch of salt, pepper, and a little of the Italian seasoning. Stir to mix.
Lightly grease a 9×13-inch baking dish. Spread about a quarter cup of the remaining sauce on the bottom of the dish — this prevents the pasta from sticking. Transfer half of the sauced pasta into the baking dish and spread it into an even layer. Drop spoonfuls of the seasoned ricotta over the pasta layer, distributing it as evenly as possible. Sprinkle about half of the mozzarella, provolone, and Romano cheese over the ricotta.
Add the remaining pasta on top of the cheese layer. Pour the rest of the sauce evenly over the top. Finish with the remaining shredded cheeses — mozzarella, provolone, Romano — followed by an even, generous layer of freshly grated Parmesan. The Parmesan on top will form a beautiful golden crust as it bakes.
Cover the baking dish tightly with aluminum foil. Bake covered for 25 minutes, then remove the foil and bake uncovered for an additional 10 to 15 minutes until the top is golden and bubbly. Let the dish rest for 5 minutes before serving — this helps it set up so it’s easier to scoop.
Expert Tips
- Undercook the pasta by 2 minutes before baking — it finishes cooking in the oven.
- Mix the two sauces together before adding to the pasta for more even coverage.
- Let the dish rest before serving so the cheeses firm up slightly and each serving holds together.
Storage Information
Cover tightly and refrigerate for up to 4 days. Reheat individual portions in the microwave or reheat the whole dish in a 350°F oven covered with foil for 20 minutes. The baked ziti freezes well — portion into containers and freeze for up to 2 months. Thaw in the refrigerator overnight before reheating.
9. Olive Garden Shrimp Scampi Copycat Recipe
Prep Time: 10 min | Cook Time: 20 min | Serves: 4
Plump shrimp sautéed in a garlicky, buttery white wine sauce served over a bed of pasta — Shrimp Scampi is one of those meals that looks and tastes like it took hours but comes together in under 30 minutes.
Ingredients
- 1 lb large shrimp, peeled and deveined
- 12 oz angel hair pasta or linguine
- 4 tbsp unsalted butter, divided
- 2 tbsp olive oil
- 5 cloves garlic, minced
- ½ cup dry white wine (or chicken broth as substitute)
- ½ cup chicken broth
- Juice of 1 lemon
- ½ tsp red pepper flakes
- ¼ cup fresh parsley, chopped
- Salt and black pepper to taste
- Freshly grated Parmesan cheese for serving
Instructions
Start by prepping the shrimp. If frozen, thaw them completely under cold running water. Pat the shrimp dry with paper towels — drying them is important because excess moisture causes them to steam rather than sear, which changes the texture. Season the shrimp with salt, pepper, and a pinch of red pepper flakes. Set aside.
Bring a large pot of salted water to a boil. Cook the pasta according to package directions until just al dente. Reserve 1 cup of pasta water before draining, as you may need it to adjust the sauce. Drain and set the pasta aside.
Heat 2 tablespoons of butter and the olive oil in a large skillet over medium-high heat. When the butter has melted and the pan is hot, add the shrimp in a single layer. Do not overcrowd the pan — cook in batches if necessary. Sear the shrimp for about 2 minutes per side. They’re done when they turn pink and curl into a loose “C” shape. Overcooked shrimp curl tightly into an “O” and become rubbery. Transfer the cooked shrimp to a plate and set aside.
Reduce the heat to medium. Add the remaining 2 tablespoons of butter to the skillet. Once melted, add the minced garlic and cook for about 1 to 2 minutes, stirring constantly, until golden and fragrant. Pour in the white wine (or extra chicken broth) and let it cook for 2 minutes, allowing the alcohol to cook off. Then add the chicken broth and lemon juice. Stir and bring the sauce to a gentle simmer. Let it cook for about 3 to 4 minutes to reduce slightly and concentrate the flavors.
Add the red pepper flakes and taste the sauce. Adjust salt and pepper as needed. Return the shrimp to the skillet and add the drained pasta. Toss everything together, using tongs to coat the pasta in the buttery garlic sauce. If the sauce seems too tight, add a splash of the reserved pasta water and toss again. Sprinkle fresh parsley over everything. Serve immediately with freshly grated Parmesan on top.
Expert Tips
- Pat the shrimp completely dry before cooking for the best sear.
- Don’t overcook the shrimp — they only need about 2 minutes per side.
- Angel hair pasta works best here because it absorbs the light, delicate sauce beautifully.
Storage Information
Store in an airtight container in the refrigerator for up to 2 days. Shrimp can become rubbery when reheated, so warm gently in a skillet over low heat with a splash of broth or butter. Avoid microwaving shrimp when possible. This dish does not freeze well.
10. Olive Garden Lasagna Classico Copycat Recipe
Prep Time: 30 min | Cook Time: 1 hr | Serves: 8
Layers of rich meat sauce, creamy béchamel, and three cheeses nestled between flat lasagna noodles — this is the kind of classic Italian-American baked pasta that feeds a crowd and satisfies every single person at the table.
Ingredients
Meat sauce:
- 1 lb ground beef
- ½ lb Italian sausage, casings removed
- 1 medium onion, diced
- 4 cloves garlic, minced
- 1 can (28 oz) crushed tomatoes
- 1 can (6 oz) tomato paste
- 1 tsp dried oregano
- 1 tsp dried basil
- Salt and pepper to taste
Béchamel:
- 4 tbsp unsalted butter
- 4 tbsp all-purpose flour
- 2 cups whole milk
- Salt, pepper, and pinch of nutmeg
Cheese layer:
- 2 cups ricotta cheese
- 1 egg
- 1 tsp dried Italian seasoning
Assembly:
- 12 lasagna noodles, cooked
- 2 cups shredded mozzarella
- 1 cup freshly grated Parmesan
Instructions
Begin by making the meat sauce. In a large, deep skillet or pot, cook the ground beef and Italian sausage over medium-high heat, breaking the meat up as it cooks. Once fully browned, drain the excess fat. Add the diced onion to the skillet and cook for 4 minutes until softened. Add the garlic and stir for 1 more minute. Pour in the crushed tomatoes and tomato paste. Add the dried oregano, basil, salt, and pepper. Stir everything well and bring the sauce to a simmer. Reduce the heat to low and let the sauce simmer for at least 20 minutes, stirring occasionally. The longer it cooks, the deeper the flavor becomes.
While the meat sauce simmers, make the béchamel. Melt the butter in a medium saucepan over medium heat. Add the flour all at once and whisk constantly for about 2 minutes to cook out the raw flour taste. The mixture will look like a paste — this is the roux. Begin pouring in the milk very slowly while whisking continuously to prevent lumps. Once all the milk is added, keep whisking over medium heat until the sauce thickens enough to coat the back of a spoon, about 5 to 7 minutes. Season with salt, pepper, and a tiny pinch of nutmeg. Remove from heat.
Mix the ricotta cheese with the egg and Italian seasoning in a bowl. Stir until smooth and well combined.
Cook the lasagna noodles in a large pot of salted boiling water until just al dente. Drain and lay flat on a lightly oiled baking sheet so they don’t stick together.
Preheat the oven to 375°F. Grease a 9×13-inch baking dish. Spread a thin layer of meat sauce on the bottom. Place 3 or 4 lasagna noodles in a single layer on top. Spread a third of the ricotta mixture over the noodles. Spoon some béchamel over the ricotta. Add a layer of meat sauce. Sprinkle with mozzarella and Parmesan. Repeat these layers — noodles, ricotta, béchamel, meat sauce, mozzarella — until all components are used, finishing with a layer of noodles topped with the remaining béchamel, meat sauce, and a generous layer of both cheeses on top.
Cover tightly with foil and bake for 30 minutes. Remove the foil and bake for another 20 to 25 minutes until the cheese on top is golden and bubbling. Let the lasagna rest for at least 15 minutes before slicing. This resting time is critical — cutting too soon causes the layers to fall apart.
Expert Tips
- Let the lasagna rest for at least 15 minutes after baking — it holds together much better when cutting.
- The béchamel gives this dish its creamy, rich character that sets it apart from a standard lasagna.
- Make the meat sauce a day ahead for even better flavor.
Storage Information
Cover tightly and refrigerate for up to 5 days. Reheat slices in the microwave or reheat the whole pan covered in foil in a 350°F oven for 25 minutes. Lasagna freezes beautifully — slice into portions, wrap individually in plastic wrap, then foil, and freeze for up to 3 months. Thaw overnight in the refrigerator before reheating.
11. Olive Garden Stuffed Chicken Marsala Copycat Recipe
Prep Time: 20 min | Cook Time: 35 min | Serves: 4
Juicy chicken breasts stuffed with a creamy cheese and sun-dried tomato filling, then simmered in a rich Marsala wine and mushroom sauce — this show-stopping dish is one of the most impressive recipes on the Olive Garden menu.
Ingredients
Stuffed chicken:
- 4 boneless, skinless chicken breasts
- ½ cup cream cheese, softened
- ¼ cup sun-dried tomatoes, chopped
- ¼ cup fresh spinach, chopped
- ¼ cup shredded mozzarella cheese
- Salt and pepper to taste
- 2 tbsp olive oil
Marsala sauce:
- 2 tbsp unsalted butter
- 3 cups sliced cremini or baby bella mushrooms
- 3 cloves garlic, minced
- ¾ cup Marsala wine
- ¾ cup chicken broth
- 1 cup heavy cream
- Salt and pepper to taste
Instructions
Prepare the filling first. In a bowl, combine the softened cream cheese, chopped sun-dried tomatoes, chopped spinach, and shredded mozzarella. Mix well until everything is evenly combined. Season with a pinch of salt and pepper. Set the filling aside while you prepare the chicken.
Place each chicken breast flat on a cutting board. Hold your hand flat on top of the chicken and carefully slice through the thickness of the breast horizontally, cutting almost all the way through but leaving a hinge at one side — like opening a book. This creates a pocket for the filling. Season both the inside and outside of the chicken with salt and pepper. Spoon a generous amount of the cream cheese filling into the pocket of each breast. Fold the chicken closed and press the edges firmly. Secure with two or three toothpicks to keep the filling inside during cooking.
Heat the olive oil in a large oven-safe skillet over medium-high heat. Carefully place the stuffed chicken in the hot pan. Sear for about 4 to 5 minutes on one side without moving it, until a golden crust forms. Flip gently and sear the other side for another 3 to 4 minutes. The chicken does not need to be fully cooked at this stage — it will finish in the oven. Transfer the skillet to a preheated 375°F oven and bake for 15 to 18 minutes until the internal temperature reaches 165°F. Remove the chicken from the skillet and cover loosely with foil while you make the sauce.
Return the skillet to the stovetop over medium-high heat. Add the butter and let it melt. Add the sliced mushrooms in a single layer. Cook undisturbed for 3 to 4 minutes so they can develop golden color, then stir and cook another 2 minutes. Add the garlic and stir for 1 minute. Pour in the Marsala wine carefully — it will sizzle. Let the wine cook and reduce for about 3 minutes. Pour in the chicken broth and bring to a simmer. Reduce by half, about 5 minutes. Pour in the heavy cream and stir. Simmer for another 5 minutes until the sauce has thickened into a glossy, velvety consistency. Taste and season with salt and pepper.
Remove the toothpicks from the chicken before serving. Place each stuffed breast on a plate and spoon the Marsala mushroom sauce generously over the top. Serve with mashed potatoes or pasta on the side.
Expert Tips
- Use toothpicks to keep the stuffing inside during searing and baking.
- Don’t skip searing — the golden crust adds incredible flavor to both the chicken and the pan sauce.
- Let the Marsala wine reduce properly before adding the cream for the most concentrated sauce flavor.
Storage Information
Store in an airtight container in the refrigerator for up to 3 days. Reheat in a skillet over low heat with a splash of broth or reheat in the oven at 325°F covered with foil for 15 minutes. Freeze the chicken without sauce for up to 2 months; make fresh sauce when ready to serve.
12. Olive Garden Eggplant Parmigiana Copycat Recipe
Prep Time: 30 min | Cook Time: 40 min | Serves: 4
Crispy breaded eggplant layered with marinara sauce and melted cheese — Eggplant Parmigiana is the perfect satisfying vegetarian main course. When done right, the eggplant is tender inside and crispy outside, with layers of flavor from the sauce and cheese.
Ingredients
- 1 large eggplant, sliced into ½-inch rounds
- Salt (for drawing out moisture)
- 2 eggs, beaten
- 1 cup Italian breadcrumbs
- ½ cup freshly grated Parmesan cheese
- 1 tsp garlic powder
- 1 tsp dried Italian seasoning
- ¼ cup olive oil (or more as needed)
- 2 cups marinara sauce
- 1½ cups shredded mozzarella cheese
- Fresh basil for garnish
Instructions
Lay the eggplant slices on a baking sheet or cutting board. Sprinkle both sides generously with salt. Let the slices sit for 30 minutes. The salt draws out excess moisture from the eggplant, which is important for two reasons: it prevents the eggplant from being bitter, and it helps the slices crisp up better when frying rather than becoming soggy. After 30 minutes, you’ll notice moisture beading on the surface. Use paper towels to pat every slice completely dry on both sides.
While the eggplant rests, set up a breading station. In one shallow bowl or plate, beat the eggs with a splash of water. In another shallow bowl, mix together the Italian breadcrumbs, grated Parmesan, garlic powder, and dried Italian seasoning. Stir the breadcrumb mixture until everything is evenly distributed.
Dip each dried eggplant slice first into the beaten egg, allowing the excess to drip off. Then press it firmly into the breadcrumb mixture, coating both sides completely. Press the breadcrumbs gently onto the surface so they adhere well. Set each breaded slice aside on a clean plate.
Heat the olive oil in a large skillet over medium heat. Test the oil by dropping a tiny breadcrumb into the pan — if it sizzles immediately, the oil is ready. Cook the breaded eggplant slices in batches, being careful not to overcrowd the pan. Cook each side for about 3 to 4 minutes until deep golden brown and crispy. Add more oil between batches as needed. Transfer cooked slices to a paper-towel-lined plate to drain any excess oil.
Preheat your oven to 375°F. In a baking dish, spread a thin layer of marinara sauce on the bottom. Arrange the fried eggplant slices in a single layer. Spoon marinara generously over each slice. Top with shredded mozzarella. If you have more than one layer of eggplant, repeat the layering process. Finish with a final layer of mozzarella and a sprinkle of Parmesan on top.
Bake uncovered for 20 to 25 minutes until the cheese is melted, bubbly, and starting to turn golden at the edges. Let it rest for 5 minutes before serving. Garnish with fresh basil leaves.
Expert Tips
- Salting and drying the eggplant is a step you should never skip — it makes all the difference in texture.
- Don’t overcrowd the skillet — cook in small batches for even, crispy browning.
- Use whole milk mozzarella, not fresh mozzarella, for the best melt.
Storage Information
Store leftovers in an airtight container in the refrigerator for up to 3 days. Reheat in a 350°F oven for 15 minutes to restore some crispiness. Microwaving makes the breading soft, so oven reheating is preferred. The breaded eggplant can be fried ahead and frozen before baking — layer between parchment and freeze for up to 1 month.
13. Olive Garden Fettuccine Alfredo Copycat Recipe
Prep Time: 5 min | Cook Time: 20 min | Serves: 4
The simplest, most classic pasta dish on the Olive Garden menu — wide, flat fettuccine noodles tossed in a rich, buttery Parmesan cream sauce. Pure, simple, and absolutely perfect.
Ingredients
- 12 oz fettuccine pasta
- ½ cup unsalted butter
- 1½ cups heavy cream
- 1½ cups freshly grated Parmesan cheese
- 2 cloves garlic, minced
- Salt and white pepper to taste
- Fresh parsley for garnish (optional)
Instructions
Bring a large pot of heavily salted water to a full rolling boil. The water should taste like the sea — salting the pasta water is one of the most important flavor-building steps in Italian cooking, and it’s the only chance to season the pasta from the inside. Add the fettuccine and cook according to package directions until al dente — the pasta should still have a very slight chew to it when you bite. Before draining, use a ladle or measuring cup to scoop out 1 full cup of the pasta cooking water and set it aside. This starchy water is liquid gold for adjusting sauce consistency. Drain the pasta and set it aside briefly.
While the pasta cooks, start the Alfredo sauce. Place a large, wide skillet over medium heat. Add the butter and allow it to melt completely, swirling the pan occasionally. The butter should melt slowly — don’t rush it with high heat. Once melted, add the minced garlic. Cook for 1 to 2 minutes, stirring regularly, until the garlic is soft and fragrant but has not taken on any color.
Pour the heavy cream into the skillet slowly, stirring as you add it. Bring the cream mixture to a gentle simmer over medium heat — look for small bubbles forming around the edges, not a hard boil. Let it simmer for about 4 to 5 minutes, stirring frequently. During this time, the cream will reduce slightly, which concentrates the flavor and helps the sauce thicken. Reducing the heat to medium-low can help prevent scorching.
Begin adding the grated Parmesan cheese to the simmering cream. Add it in three or four additions, stirring well between each one to ensure it melts completely before adding more. Adding all the cheese at once can cause it to clump. Keep stirring until the sauce is completely smooth and velvety. Season with salt and white pepper to taste.
Add the drained fettuccine directly to the skillet with the sauce. Use tongs to toss the pasta repeatedly until every strand is generously coated. If the sauce feels thick or the pasta looks dry, add pasta water a splash at a time, tossing as you go, until the sauce reaches a loose, silky consistency that clings to the pasta without pooling at the bottom. Serve immediately in warmed bowls and garnish with a little fresh parsley and extra Parmesan if desired.
Expert Tips
- Use the pasta cooking water to loosen the sauce — it binds the sauce to the pasta far better than plain water.
- Keep the sauce on the lowest heat possible once the cheese is added to prevent it from seizing.
- Serve immediately — Fettuccine Alfredo does not hold well and tastes best fresh from the pan.
Storage Information
Store in an airtight container in the refrigerator for up to 2 days. Reheat gently on the stove over low heat with a splash of heavy cream, stirring often. Avoid the microwave if possible — it heats unevenly and can cause the sauce to separate. This dish does not freeze well.
14. Olive Garden Tour of Italy Copycat Recipe
Prep Time: 30 min | Cook Time: 1 hr | Serves: 4
A full tour of Italian-American cooking on a single plate — Chicken Parmigiana, Lasagna Classico, and Fettuccine Alfredo served together for the ultimate combination meal. This is the go-to order for anyone who can’t choose just one dish.
Ingredients
(Combine the following component recipes — see individual recipes above for full details)
Chicken Parmigiana (for 4):
- 4 chicken breasts, pounded thin
- 1 cup Italian breadcrumbs
- ½ cup Parmesan, grated
- 2 eggs, beaten
- Olive oil for frying
- 1 cup marinara sauce
- 1 cup shredded mozzarella
Mini Lasagna portion (for 4):
- 8 lasagna noodles, cooked
- 1½ cups meat sauce (see Lasagna Classico recipe)
- ¾ cup ricotta mixture (from Lasagna Classico recipe)
- ½ cup béchamel
- ½ cup mozzarella and Parmesan blend
Fettuccine Alfredo (for 4):
- 8 oz fettuccine pasta
- ¼ cup butter
- 1 cup heavy cream
- 1 cup freshly grated Parmesan
Instructions
This recipe is built by combining three of the most beloved Italian-American dishes into one organized meal. The key to pulling off the Tour of Italy at home is planning your cooking timeline so all three components finish close together.
Start with the lasagna since it takes the longest. Prepare the meat sauce by browning ground beef and sausage together, then simmering with crushed tomatoes and herbs for 20 minutes. Prepare the ricotta mixture and béchamel. Assemble individual-sized lasagna portions in small oven-safe ramekins or a baking dish — use two layers each of noodles, ricotta, béchamel, and meat sauce, finishing with cheese on top. Cover with foil and bake at 375°F for 30 minutes. Remove foil and bake another 10 minutes until golden. Keep warm covered with foil.
While the lasagna bakes, prepare the chicken. Pound the chicken breasts to an even ½-inch thickness using a meat mallet or rolling pin. Season with salt and pepper. Set up a breading station: one bowl with beaten eggs, one bowl with breadcrumbs mixed with Parmesan and Italian seasoning. Dip each chicken breast in egg, then coat in the breadcrumb mixture, pressing firmly to adhere. Heat olive oil in a skillet over medium-high heat. Fry each breast for 4 to 5 minutes per side until golden and cooked through to 165°F. Transfer to a baking sheet. Spoon marinara over each breast and top with mozzarella. Broil for 2 to 3 minutes just until the cheese melts and bubbles. Keep warm.
Finally, cook the fettuccine al dente in salted boiling water while you prepare the Alfredo sauce in a skillet — melt butter, add garlic, pour in heavy cream, simmer 5 minutes, add Parmesan gradually until smooth. Toss the drained fettuccine in the sauce and serve immediately.
To plate the Tour of Italy, use a large dinner plate. Place the lasagna portion on one section, the Chicken Parmigiana in another, and twirl a portion of Fettuccine Alfredo in the third section. Garnish with fresh parsley and extra Parmesan. Serve right away while everything is hot.
Expert Tips
- Start the lasagna first — it takes the longest and holds well in a warm oven.
- Have all three sauces and fillings prepped before cooking anything to keep your timeline smooth.
- Warm the serving plates in the oven for a few minutes so the food stays hot when plated.
Storage Information
Store each component separately in airtight containers in the refrigerator for up to 3 days. Reheat each part using the method best suited for it — oven for the lasagna and chicken, stovetop with cream for the Alfredo. Combining all three in one container makes reheating difficult and can result in uneven results.
15. Olive Garden Chicken Parmigiana Copycat Recipe
Prep Time: 15 min | Cook Time: 25 min | Serves: 4
Golden-fried chicken topped with savory marinara and bubbling melted mozzarella — Chicken Parmigiana is one of the all-time great comfort meals. Served over spaghetti or with a side salad, it’s a complete and satisfying dinner.
Ingredients
- 4 boneless, skinless chicken breasts
- Salt and black pepper to taste
- 1 cup Italian-style breadcrumbs
- ½ cup freshly grated Parmesan cheese
- 1 tsp garlic powder
- 1 tsp dried Italian seasoning
- 2 large eggs, beaten
- 3 tbsp olive oil
- 1½ cups marinara sauce
- 1½ cups shredded mozzarella cheese
- Fresh basil for garnish
Instructions
Place each chicken breast between two sheets of plastic wrap or inside a large zip-top bag. Using a meat mallet, rolling pin, or heavy skillet, pound each breast to an even thickness of about ½ inch. This step is important for two reasons: it ensures the chicken cooks evenly throughout without the edges drying out before the center is done, and it creates a wider, flatter surface that holds more breading and sauce. After pounding, season both sides of each breast generously with salt and black pepper.
Set up your breading station. In one shallow bowl, beat the eggs with a tablespoon of water and a pinch of salt. In a second shallow bowl, combine the Italian breadcrumbs, grated Parmesan, garlic powder, and dried Italian seasoning. Mix the breadcrumb mixture thoroughly so the seasonings are evenly distributed throughout.
Working one breast at a time, dip the chicken into the beaten egg. Let the excess drip off, then lay the breast in the breadcrumb mixture. Press the breadcrumbs firmly onto both sides and the edges to create a thick, even coating. Set each breaded breast aside on a clean plate.
Heat the olive oil in a large oven-safe skillet over medium-high heat. When the oil is hot and shimmering — but not smoking — carefully add the breaded chicken breasts. Cook in batches if needed to avoid overcrowding. Cook each side for 4 to 5 minutes without moving the chicken, until a deep golden crust forms. The chicken should release naturally from the pan when it’s ready to flip — if it sticks, give it another minute. Once both sides are golden, the internal temperature should be approaching 160°F.
Preheat your broiler to high. Transfer the fried chicken to a foil-lined baking sheet. Spoon marinara sauce generously over each breast, covering the top completely. Sprinkle a thick, even layer of shredded mozzarella over the sauce. Place the baking sheet under the broiler for 2 to 4 minutes, watching very carefully. The cheese should melt, bubble, and begin to turn golden brown in spots. Remove immediately from the broiler and let the chicken rest for 3 minutes before serving. Garnish with torn fresh basil and an extra drizzle of marinara on the side.
Expert Tips
- Pound the chicken to an even thickness for uniform cooking throughout.
- Don’t move the chicken while it fries — let the crust set completely before flipping.
- Watch the broiler closely — cheese can go from perfectly golden to burnt within seconds.
Storage Information
Store in an airtight container in the refrigerator for up to 3 days. Reheat in a 350°F oven for 15 minutes until the cheese re-melts and the chicken is heated through. Avoid microwaving — it makes the breading soft and rubbery. The chicken (untopped) can be frozen after frying for up to 1 month.
16. Olive Garden Ravioli Carbonara Copycat Recipe
Prep Time: 10 min | Cook Time: 20 min | Serves: 4
Cheese-filled ravioli tossed in a silky, smoky pancetta carbonara sauce — this is a fun, restaurant-style pasta dish that feels special but comes together fast. The creamy egg-based sauce clings to every ravioli perfectly.
Ingredients
- 1 package (18–20 oz) cheese ravioli (fresh or refrigerated)
- 6 oz pancetta or bacon, diced
- 3 cloves garlic, minced
- 3 large egg yolks
- 1 large whole egg
- 1 cup freshly grated Parmesan cheese
- ½ cup freshly grated Pecorino Romano cheese
- Black pepper, freshly cracked, to taste
- Salt for pasta water
- 2 tbsp reserved pasta water (or more as needed)
Instructions
Bring a large pot of salted water to a boil. The carbonara sauce is made almost entirely from egg yolks, cheese, and pasta water — there is no cream — so the quality and technique matter. Start the sauce process while you cook the pasta.
Place a large skillet over medium heat. Add the diced pancetta or bacon and cook slowly, stirring occasionally, until the fat has rendered out and the pancetta is golden and slightly crispy. This should take about 6 to 8 minutes. You want the fat fully rendered but the meat still slightly chewy, not hard and overcooked. Add the minced garlic to the skillet and cook for 1 minute, stirring frequently, until fragrant. Remove the skillet from the heat and let it cool for a minute or two. This is important — adding the egg sauce to a very hot pan will scramble the eggs.
In a medium bowl, whisk together the egg yolks, whole egg, Parmesan, and Pecorino Romano until a thick, smooth paste forms. Add a generous amount of freshly cracked black pepper. Black pepper is not just seasoning here — it’s a key flavor component of carbonara. Set the egg mixture aside.
Drop the ravioli into the boiling salted water. Fresh ravioli typically cooks in 3 to 5 minutes — look for it to float to the top and the pasta edges to look tender. Before draining, use a ladle to scoop out about ½ cup of the hot, starchy pasta water and set it aside.
Drain the ravioli carefully and transfer it directly into the skillet with the pancetta. Toss gently. Now pour the egg and cheese mixture over the ravioli in the skillet. Immediately begin tossing everything together using a spatula or tongs. The residual heat from the pasta and skillet will cook the egg gently, turning it into a smooth, creamy sauce that coats every piece of ravioli. Add pasta water a tablespoon at a time, tossing after each addition, to reach a silky, flowing consistency. The sauce should coat the ravioli without looking dry or clumpy. Serve immediately in warm bowls with extra black pepper and grated Parmesan on top.
Expert Tips
- Take the skillet off the heat before adding the egg mixture — residual heat is enough to create a smooth sauce without scrambling the eggs.
- Work quickly when tossing the egg into the pasta — the sauce sets fast.
- Freshly cracked pepper is non-negotiable in a true carbonara — use it generously.
Storage Information
Store in an airtight container in the refrigerator for up to 2 days. Reheat gently in a skillet over low heat with a tiny splash of water or broth, tossing to redistribute the sauce. The sauce may become thick upon refrigeration — a few drops of water will loosen it. Carbonara does not freeze well.
17. Olive Garden Italian Salad Copycat Recipe
Prep Time: 15 min | Cook Time: 0 min | Serves: 4–6
Crisp romaine lettuce, black olives, pepperoncini, croutons, tomatoes, and red onion — all tossed in that famous zesty Italian dressing. The Olive Garden salad is more than a side dish; it’s an experience people look forward to every single visit.
Ingredients
Salad:
- 1 large head romaine lettuce, chopped into bite-sized pieces
- ½ small red onion, thinly sliced
- 1 cup croutons
- ½ cup black olives, sliced
- 4 pepperoncini peppers
- 1 cup cherry tomatoes, halved
- ¼ cup freshly grated Parmesan cheese
Italian Dressing:
- ½ cup olive oil
- ¼ cup white wine vinegar
- 2 tsp lemon juice
- 1 tsp sugar
- ½ tsp garlic powder
- ½ tsp dried Italian seasoning
- ¼ tsp dried basil
- ¼ tsp dried oregano
- Salt and black pepper to taste
- 1 tbsp mayonnaise (for creaminess)
Instructions
Start by washing and thoroughly drying the romaine lettuce. Wet lettuce makes the dressing slide off and dilutes the flavor of the salad. You can use a salad spinner or pat the leaves dry with clean kitchen towels. Once dry, chop the romaine into rough, bite-sized pieces and place in a large salad bowl. The bowl should be large enough to allow you to toss everything comfortably without things falling out.
Slice the red onion as thinly as possible — thin slices are mild and add a pleasant bite without being overpowering. Add the red onion to the bowl along with the sliced black olives, halved cherry tomatoes, and pepperoncini peppers. The pepperoncini are one of the signature flavors of this salad — their tangy, mild heat is immediately recognizable and adds that characteristic Olive Garden sharpness. If the pepperoncini are whole, you can slice them for easier eating or leave them whole and let people pick them up as they go.
Now make the dressing. In a small mason jar or bowl with a tight-fitting lid, combine the olive oil, white wine vinegar, lemon juice, sugar, garlic powder, Italian seasoning, dried basil, dried oregano, salt, pepper, and mayonnaise. If using a jar, secure the lid and shake vigorously for about 30 seconds until the dressing is fully emulsified and creamy-looking. If using a bowl, whisk very briskly until the oil and vinegar come together. Taste the dressing and adjust — add more vinegar for tang, more sugar to balance acidity, or more garlic powder for punch.
Pour the dressing over the salad — start with about two-thirds of it and add more to taste. Toss the salad thoroughly, making sure every piece of lettuce is coated. Add the croutons last and toss gently once more so they don’t get soggy right away. Top with freshly grated Parmesan and serve immediately.
Expert Tips
- Dry the lettuce completely before dressing — wet greens make the dressing slide off.
- Add croutons right before serving to keep them crunchy.
- For a spot-on recreation of the Olive Garden experience, chill the salad bowl in the freezer for 10 minutes before assembling.
Storage Information
Store undressed salad in an airtight container in the refrigerator for up to 2 days. Store the dressing separately in a jar for up to 1 week — shake well before using. Once dressed, the salad is best eaten immediately. Croutons should always be added fresh.
18. Olive Garden Tiramisu Copycat Recipe
Prep Time: 30 min | Chill Time: 4 hrs | Serves: 8
Layers of espresso-soaked ladyfingers and cloud-like mascarpone cream dusted with rich cocoa powder — Tiramisu is the most beloved Italian dessert, and Olive Garden’s version has converted many people into devoted fans of this classic.
Ingredients
- 6 large egg yolks
- ¾ cup granulated sugar
- 1 cup mascarpone cheese, room temperature
- 1½ cups heavy cream
- 2 cups brewed espresso or very strong coffee, cooled
- 2 tbsp coffee liqueur (optional, like Kahlúa)
- 30 to 36 ladyfinger cookies (Savoiardi)
- Unsweetened cocoa powder for dusting
Instructions
Start by making the mascarpone cream. Place the egg yolks and granulated sugar in a large, heatproof mixing bowl. Whisk them together until the mixture turns pale yellow and slightly thick — this usually takes about 2 minutes of vigorous whisking by hand. Set this bowl over a pot of barely simmering water — the bottom of the bowl should not touch the water. Whisk the egg yolk mixture continuously over this gentle heat for about 8 to 10 minutes. The mixture should thicken, become very pale, and increase in volume. This process pasteurizes the egg yolks so the tiramisu is safe to eat without baking. Remove the bowl from the heat and let the mixture cool for 10 minutes, then place it in the refrigerator to cool completely.
Once the egg yolk mixture is fully cooled, add the mascarpone cheese to the bowl. Beat with an electric mixer or whisk until smooth and well combined. The mascarpone should blend in completely with no lumps remaining.
In a separate chilled bowl, whip the heavy cream to stiff peaks. This means the cream holds a firm shape when you lift the beaters — it should not be so stiff that it looks grainy, but firm enough not to droop. Gently fold the whipped cream into the mascarpone mixture using a large spatula. Use slow, gentle folding strokes to preserve the airiness of the whipped cream. Over-mixing will deflate the cream and result in a dense, heavy filling.
Mix the cooled espresso with the coffee liqueur in a shallow bowl wide enough to dip the ladyfingers. Work quickly when dipping the ladyfingers — dip each one for no more than 2 to 3 seconds per side. The ladyfingers should be soaked but not waterlogged and falling apart. Soggy ladyfingers make the tiramisu wet and heavy; quick-dipped ones stay slightly textured and give the dessert its beautiful layered structure.
Arrange a single layer of dipped ladyfingers in the bottom of a 9×13-inch baking dish or individual serving glasses. Spread half the mascarpone cream over the ladyfingers in an even layer, smoothing it to the edges. Add another layer of dipped ladyfingers on top of the cream. Spread the remaining mascarpone cream over the second layer and smooth the top.
Cover the dish tightly with plastic wrap and refrigerate for at least 4 hours, though overnight is strongly preferred. The chilling time allows all the layers to meld together and the flavors to deepen significantly. Just before serving, dust the top generously with unsweetened cocoa powder through a fine mesh sieve for a beautiful, even finish.
Expert Tips
- Dip the ladyfingers quickly — 2 to 3 seconds per side is enough. Over-soaking makes the tiramisu watery.
- Chill overnight for the best flavor and texture — the longer it sits, the better it gets.
- Use room temperature mascarpone so it blends smoothly without lumps.
Storage Information
Store covered in the refrigerator for up to 3 days. The flavor actually improves after the first day. Tiramisu can be frozen in portions wrapped tightly in plastic wrap for up to 1 month — thaw in the refrigerator overnight before serving. Do not dust with cocoa until ready to serve if making ahead.
19. Olive Garden Lemon Cream Cake Copycat Recipe
Prep Time: 30 min | Cook Time: 30 min | Chill Time: 2 hrs | Serves: 10
Bright, citrusy, and wonderfully creamy — the Lemon Cream Cake is one of those desserts that feels light even when it’s completely indulgent. Layers of moist lemon cake and silky cream cheese lemon frosting make every slice feel like a celebration.
Ingredients
Lemon cake:
- 2 cups all-purpose flour
- 2 tsp baking powder
- ½ tsp salt
- ¾ cup unsalted butter, softened
- 1½ cups granulated sugar
- 3 large eggs
- Zest of 2 lemons
- 3 tbsp fresh lemon juice
- 1 tsp vanilla extract
- ¾ cup whole milk
Lemon cream frosting:
- 8 oz cream cheese, softened
- 1½ cups powdered sugar
- Zest of 1 lemon
- 2 tbsp fresh lemon juice
- 1 tsp vanilla extract
- 2 cups heavy cream
Garnish:
- Thin lemon slices or twists
- Powdered sugar for dusting
Instructions
Preheat the oven to 350°F. Grease two 9-inch round cake pans and line the bottoms with circles of parchment paper. Grease the parchment as well. This double preparation ensures the cakes release cleanly from the pans.
Whisk together the flour, baking powder, and salt in a medium bowl. Set aside. In a large mixing bowl, beat the softened butter and granulated sugar together using an electric mixer on medium-high speed for 3 to 4 minutes until the mixture is light and very fluffy. This creaming step is important for creating a tender cake texture — don’t rush it. Add the eggs one at a time, beating well after each addition. Scrape down the sides of the bowl with a spatula between additions. Add the lemon zest, lemon juice, and vanilla extract and beat until incorporated — the batter may look slightly curdled at this point, which is normal.
With the mixer on low speed, add the flour mixture in three additions, alternating with the milk in two additions — flour, milk, flour, milk, flour. Begin and end with the flour mixture. Mix only until each addition is just incorporated — overmixing develops gluten and results in a tough cake. The finished batter should be smooth and thick.
Divide the batter evenly between the two prepared cake pans. Smooth the tops with a spatula. Bake for 28 to 32 minutes, or until a toothpick inserted in the center comes out clean and the cake springs back lightly when touched. Let the cakes cool in the pans for 10 minutes, then turn them out onto a wire rack and cool completely. The cakes must be completely cool before frosting — frosting a warm cake causes the frosting to melt and slide off.
Make the lemon cream frosting. Beat the softened cream cheese until completely smooth — no lumps — using an electric mixer. Add the powdered sugar, lemon zest, lemon juice, and vanilla extract, and beat until fully combined. In a separate chilled bowl, whip the heavy cream to stiff peaks. Gently fold the whipped cream into the cream cheese mixture in three additions using a large rubber spatula. Be patient and gentle so the frosting stays light and airy.
Place one cake layer on a serving plate. Spread a generous, thick layer of lemon cream frosting over the top. Place the second cake layer on top. Frost the top and sides of the entire cake, smoothing as you go. Garnish with thin lemon slices, twists, or a dusting of powdered sugar. Refrigerate the finished cake for at least 2 hours before slicing so the frosting firms up and the cake layers settle.
Expert Tips
- Cream the butter and sugar for the full 3 to 4 minutes for the lightest, most tender cake.
- Make sure the cream cheese is fully at room temperature — cold cream cheese makes lumpy frosting.
- Use fresh lemon juice and zest, not bottled — the difference in flavor is significant.
Storage Information
Store the frosted cake covered in the refrigerator for up to 4 days. Bring individual slices to room temperature for 15 minutes before eating for the best texture. The unfrosted cake layers can be wrapped tightly in plastic wrap and frozen for up to 1 month — thaw at room temperature before frosting.
20. Olive Garden Peach Bellini-Inspired Mocktail Recipe
Prep Time: 10 min | Cook Time: 0 min | Serves: 4
Sweet, bubbly, and beautifully peachy — this Peach Bellini mocktail captures the elegance of Olive Garden’s famous cocktail in a refreshing alcohol-free version perfect for all ages and any occasion.
Ingredients
- 2 cups frozen peaches (or fresh, ripe peaches)
- ¼ cup peach nectar or peach juice
- 2 tbsp honey or simple syrup (adjust to taste)
- 1 tbsp fresh lemon juice
- 2 cups sparkling water or lemon-lime soda (chilled)
- Ice cubes
- Peach slices or mint sprigs for garnish
Instructions
Begin by preparing the peach base, which is the heart of this mocktail. Place the frozen peaches (or peeled, pitted fresh peaches) in a blender. If using frozen peaches, there’s no need to thaw them — blending them frozen gives the drink a slightly slushy, chilled quality that is incredibly refreshing. Add the peach nectar or peach juice to the blender. The nectar adds an extra layer of concentrated peach flavor and helps the blender process the fruit smoothly. Add the honey (or simple syrup) and the fresh lemon juice. The lemon juice is important here — it brightens all the flavors and prevents the drink from tasting one-dimensionally sweet.
Blend everything on high speed for about 30 to 45 seconds until completely smooth. Stop and scrape down the sides if needed, then blend again briefly. The mixture should look like a thick, smooth peach puree with no chunks remaining. If the puree seems too thick, add another splash of peach juice and blend again. Taste the puree and adjust as needed — add more honey for sweetness or more lemon juice for tartness.
To serve, fill each glass halfway with ice cubes. Pour or spoon about ½ cup of the peach puree into each glass over the ice. Slowly pour the chilled sparkling water or lemon-lime soda on top of the peach puree. Pour slowly and down the side of the glass to preserve as many bubbles as possible — pouring too fast causes the carbonation to fizz out quickly and results in a flat drink. The sparkling water will naturally blend with the peach puree at the bottom, creating a beautiful gradient of color in the glass.
Stir very gently — just two or three slow strokes with a long spoon — to partially mix the layers while still keeping some of the gradient effect. Garnish each glass with a thin slice of fresh peach draped over the rim or a small sprig of fresh mint tucked into the ice. Serve immediately while still cold and bubbly.
Expert Tips
- Use frozen peaches for a naturally chilled, slightly slushy texture that keeps the drink cold without too much ice diluting it.
- Pour the sparkling water slowly down the side of the glass to preserve maximum fizz.
- For a party, pre-make the peach puree in a large batch and store in the refrigerator — add sparkling water per glass right before serving.
Storage Information
The peach puree base can be made ahead and stored in an airtight jar in the refrigerator for up to 3 days. Stir before using as it may settle. Do not mix with sparkling water in advance — the carbonation will go flat quickly. Freeze the puree base in ice cube trays for up to 1 month and blend from frozen for an instant batch.
Storage and Reheating Tips
Keeping your Olive Garden copycat recipes fresh and delicious after the first serving is simple when you follow a few smart guidelines:
- Cool before storing — Always let hot food cool down to room temperature before sealing in containers. Trapping steam inside leads to condensation, which makes food soggy and speeds up spoilage.
- Use airtight containers — Glass or BPA-free plastic containers with tight-fitting lids keep pasta, soups, and sauces fresh longer and prevent them from absorbing fridge odors.
- Store pasta and sauce separately — Pasta absorbs sauce as it sits, turning thick and clumpy. Storing them in different containers lets you reheat each part properly and keeps the texture better.
- Reheat soups low and slow — Cream-based soups like Zuppa Toscana and Chicken Gnocchi should be reheated over low to medium heat on the stove. Stir frequently and add a splash of broth or cream to restore consistency.
- Oven is better than microwave for baked dishes — Lasagna, Eggplant Parmigiana, and Five Cheese Ziti al Forno all reheat best in the oven at 350°F covered with foil for 20 minutes. This restores the texture without drying the dish out.
- Freeze smarter — Soups (without pasta), meat sauces, and unassembled lasagna layers freeze well for up to 3 months. Label containers with the date and contents. Cream-based sauces and dishes with fresh pasta do not freeze well and are best eaten within a few days.
Conclusion
These 20 Olive Garden copycat recipes bring the full restaurant experience straight to your kitchen. From the iconic soft breadsticks and creamy Chicken Alfredo to the hearty Zuppa Toscana and elegant Tiramisu, every recipe here captures the comforting, crowd-pleasing flavor that has made Olive Garden a favorite for decades.
The best part about cooking these recipes at home is the freedom it gives you. Adjust the spice level, swap proteins, make a dish vegetarian, or double a recipe for a large gathering — your kitchen, your rules. Start with one recipe that your family already loves from the restaurant. Get comfortable with it, make it your own, and then explore the rest of the menu.
For a complete Olive Garden-inspired dinner at home, try pairing the copycat Italian Salad and Breadsticks with Zuppa Toscana or Pasta e Fagioli as starters, then serve Chicken Parmigiana or the Five Cheese Ziti al Forno as the main course. Finish the meal with a slice of Tiramisu or Lemon Cream Cake and a Peach Bellini Mocktail for the full experience.
Go ahead and save this page, bookmark it, and share it with anyone who loves a great home-cooked Italian-American meal. These Olive Garden copycat recipes are worth coming back to again and again.