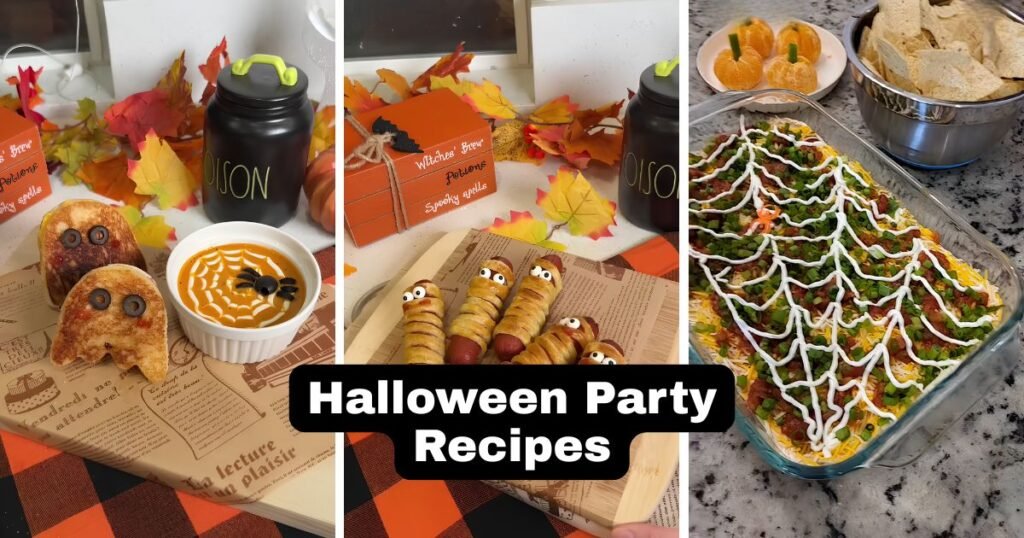
Last October my kitchen counter looked like a candy store had tipped over. My niece was sorting candy eyes by size while the oven timer beeped for the third time, and half the dough had gone soft in the warm room.
That night taught me something useful. The food that vanished first was never the complicated stuff.
Little cheese balls with pretzel horns disappeared before the baking sheet cooled. My party list has gotten shorter and a whole lot better since then.
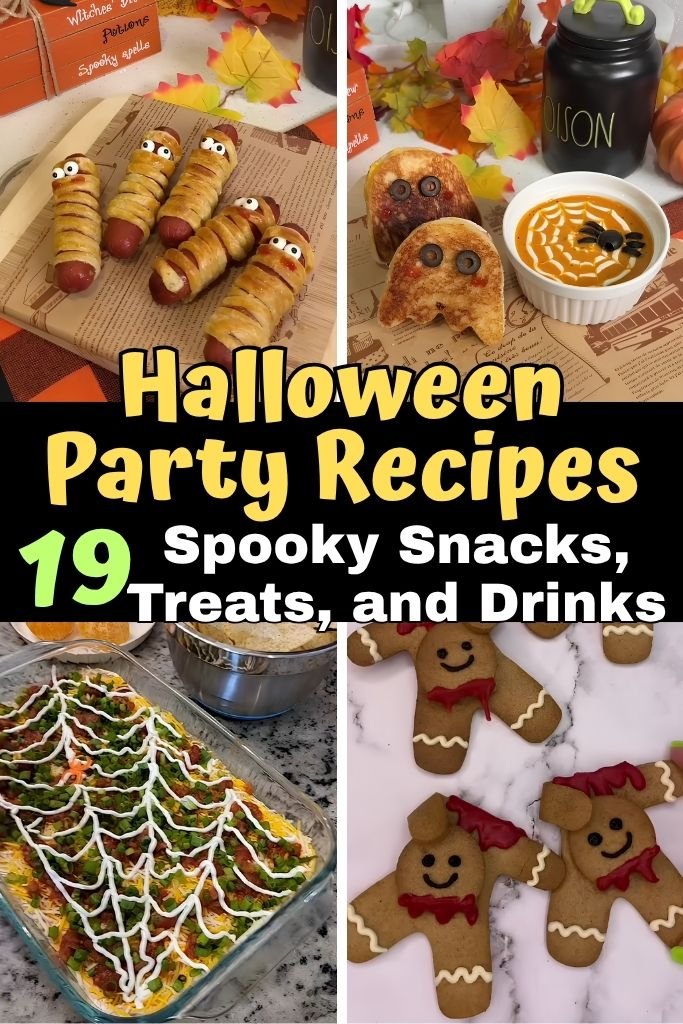
How to Plan the Food for a Halloween Party
Planning party food may seem intimidating or difficult, but it’s actually quite the opposite! Once you break it into small steps, the whole menu comes together in an afternoon.
1. Decide how many guests you are serving. Write the number down before you shop. Ten people need about four or five different dishes. Twenty-five people need closer to eight, with two or three of those made in big batches.
2. Mix sweet and savory foods. A table full of candy leaves people hungry in an hour. Balance every sugary tray with something cheesy, salty, or warm.
3. Add a few kid-friendly choices. Skip the spice on at least two dishes. Plain cheese pizza bites and hot dog mummies keep younger guests happy while adults pick at the jalapeño poppers.
4. Include easy finger foods that guests can grab. Anything needing a fork and knife slows the room down. Small bites let people hold a plate, talk, and eat at the same time.
5. Plan drinks and desserts along with the main snacks. Drinks get forgotten until the last hour. Put them on the shopping list first so you are not running out for ice at 6 p.m.
Choose Easy Foods That Guests Can Grab
- Bite-size snacks. Meatballs, poppers, pizza rounds, and mini cheese balls all work in one or two bites.
- Dips. One bowl of dip feeds a crowd. Set out crackers, chips, and sliced vegetables around it.
- Small sandwiches. Cut them into shapes with a cookie cutter and they become party food instead of lunch food.
- Handheld desserts. Brownie squares, cookies, bark pieces, and cereal treats need no plates and no forks.
Mix Sweet, Savory, and Halloween-Themed Foods
- Sweet treats. Cupcakes, cookies, and chocolate bark cover the sugar side of the table.
- Salty snacks. Pretzels, popcorn, and snack mix give people something to reach for between sweets.
- Spooky-looking foods. Mummy wraps, spider eggs, and monster faces turn plain recipes into party recipes.
- Colorful Halloween drinks. Orange, green, and deep purple drinks pull the whole table together visually.
Prepare Some Recipes Ahead of Time
- Foods that can be refrigerated. Deviled eggs, cheese balls, and sandwich fillings hold well for a day in the fridge.
- Make-ahead desserts. Bark, brownie bites, and cereal treats actually taste better after resting a few hours.
- Party dips. Mix them the night before so the flavors settle.
- Chilled drinks. Punch base can sit in a pitcher overnight. Add the bubbly part right before guests show up.
Halloween Party Recipes
Here are the 19 recipes I come back to every October. They cover appetizers, kid-friendly finger foods, desserts, and drinks, so you can build a full table from this one list.
Easy Halloween Party Appetizers and Savory Snacks
These five savory bites go out first. They fill people up, they hold their shape on a tray, and every one of them can be prepped before guests arrive.
1. Halloween Meatball Mummies
⏱ Time
- Prep Time: 25 minutes
- Cook Time: 18 minutes
- Total: 43 minutes
- Servings: 24 meatball mummies (8 people as an appetizer)
Wrapping meatballs in thin strips of dough turns a freezer staple into the most-photographed thing on my table. The dough bakes up golden and slightly crisp on the edges while the meatball stays juicy underneath. Two dots of mustard become the eyes, and suddenly plain party meatballs look like tiny wrapped mummies. They reheat well, which matters a lot when guests arrive in waves.
What makes them good for a Halloween party: they are warm, filling, and need no utensils. Kids grab them because of the faces, and adults grab them because they are basically a mini pizza roll. Marinara on the side does double duty as dipping sauce and as a blood-red pop of color.
Ingredients
- 24 frozen cooked meatballs (about 1 lb / 450 g), thawed
- 1 can (8 oz / 226 g) refrigerated crescent roll dough or pizza dough
- 1 tablespoon olive oil
- 1/2 teaspoon garlic powder
- 1/4 teaspoon dried oregano
- 2 tablespoons grated Parmesan cheese
- Yellow mustard or black food-writing gel, for the eyes
- 1 cup (240 ml) marinara sauce, warmed, for serving
Instructions
- Heat your oven to 375°F (190°C) and line a large baking sheet with parchment paper. Pat the thawed meatballs dry with a paper towel so the dough sticks properly. Wet meatballs make the strips slide off during baking.
- Unroll the dough onto a lightly floured cutting board and press the seams closed with your fingers. Using a pizza cutter or a sharp knife, slice the sheet into strips about 1/4 inch (6 mm) wide. Thin strips give you that wrapped-bandage look, while thick ones puff up and swallow the meatball.
- Take one strip and wrap it around a meatball at an angle, leaving small gaps between the layers. Cross a second strip over the first in the opposite direction, then tuck the ends underneath. Leave a bare spot near the top where the eyes will go.
- Set each wrapped meatball on the lined sheet, seam side down, spacing them about 1 inch (2.5 cm) apart. Stir the olive oil together with the garlic powder and oregano, then brush the mixture lightly over the dough. Sprinkle the Parmesan on top.
- Bake for 15 to 18 minutes, until the dough turns light golden brown and feels firm when tapped. Rotate the pan halfway through so the back row browns evenly with the front. Watch the last few minutes closely, since thin dough strips go from golden to dark quickly.
- Move the tray to a wire rack and let the mummies cool for 5 minutes. Hot dough tears easily, and the eyes will slide right off a steaming surface. This short rest also lets the meatball centers settle.
- Squeeze two small dots of yellow mustard or black gel onto the bare spot of each mummy. Keep the dots close together and slightly uneven, which reads as a face far better than two perfect circles.
Serving ideas: pile them on a dark slate board or a black serving tray with a small bowl of warm marinara in the center. Stick a toothpick in every third mummy so guests have something to grab. Leftovers reheat in a 350°F (175°C) oven for 6 minutes and come back almost as crisp as fresh.
2. Halloween Monster Cheese Balls
⏱ Time
- Prep Time: 20 minutes
- Chill Time: 1 hour
- Total: 1 hour 20 minutes
- Servings: 20 mini cheese balls
Full-size cheese balls always end up as a smeared mess by the second hour of a party. Rolling the same mixture into golf-ball sizes solved that problem for me completely. Each one gets its own candy eyes and pretzel horns, so guests pick up a whole monster instead of hacking at a crumbling mound. The sharp cheddar keeps the flavor grown-up even though the faces are silly.
Creamy cheese mixture: softened cream cheese is the base, and it must be genuinely soft or the mixture stays lumpy. Sharp cheddar brings the flavor, green onion adds bite, and a little smoked paprika gives the whole thing warmth without heat.
Ingredients
- 16 oz (450 g) cream cheese, fully softened at room temperature
- 2 cups (200 g) sharp cheddar cheese, finely shredded
- 1/4 cup (25 g) green onion, finely chopped
- 1 teaspoon smoked paprika
- 1/2 teaspoon garlic powder
- 1/4 teaspoon black pepper
- 1/4 teaspoon salt
- 1 1/2 cups (150 g) shredded cheddar or crushed cheese crackers, for coating
- 40 candy eyes
- 40 small pretzel sticks
- Crackers and sliced vegetables, for serving
Instructions
- Put the softened cream cheese in a large bowl and beat it with a hand mixer on medium speed for about 1 minute, until smooth and slightly fluffy. Scrape down the sides once. Starting with cold cream cheese leaves lumps that never fully break up.
- Add the shredded cheddar, green onion, smoked paprika, garlic powder, black pepper, and salt. Mix on low speed just until everything is evenly combined, roughly 30 seconds. Overmixing at this stage makes the cheese release oil and turn greasy.
- Cover the bowl and refrigerate for 45 minutes. The mixture needs to firm up before rolling, otherwise it sticks to your palms and refuses to hold a round shape.
- Line a baking sheet with parchment paper. Scoop the chilled mixture with a tablespoon measure and roll each portion between your palms into a ball about 1 1/4 inches (3 cm) wide. Set them on the sheet as you go, spacing them slightly apart.
- Spread the coating cheese or crushed crackers in a shallow bowl. Roll each ball through the coating, pressing gently so it sticks on all sides. Give the ball a light squeeze at the end to lock the coating in place.
- Return the coated balls to the sheet and chill for another 15 minutes. Firm cheese holds decorations much better than soft cheese, and this short second chill makes a noticeable difference.
Fun monster decorations: press two candy eyes onto each ball at slightly different heights, which gives every monster its own goofy expression. Push two pretzel sticks into the top as horns, angling them outward. For a few extra characters, use three eyes on some and a single large eye on others.
Easy serving ideas: arrange the monsters on a wooden board with crackers and cucumber rounds tucked between them. Keep half the batch in the fridge and refill the board as it empties, since they soften after about 90 minutes at room temperature. Add the pretzel horns within an hour of serving so they stay crunchy.
3. Halloween Spider Deviled Eggs
⏱ Time
- Prep Time: 30 minutes
- Cook Time: 12 minutes
- Total: 42 minutes (plus cooling)
- Servings: 24 halves
Black olive legs turn an ordinary deviled egg into the creepiest thing on the table, and the whole trick takes about five extra minutes. My first attempt used olive slices that were too thick, and the legs looked like stubby little logs. Cutting the olives lengthwise into thin slivers fixed it right away. The filling itself stays traditional, because this is one recipe nobody wants reinvented.
Classic deviled egg filling: mayonnaise for creaminess, Dijon for sharpness, a splash of vinegar to cut the richness, and a pinch of paprika. That combination has held up at every gathering I have brought it to.
Ingredients
- 12 large eggs
- 1/3 cup (75 g) mayonnaise
- 1 1/2 teaspoons Dijon mustard
- 1 teaspoon white vinegar
- 1/4 teaspoon salt
- 1/8 teaspoon black pepper
- 1/4 teaspoon smoked paprika, plus more for dusting
- 12 large pitted black olives
- Fresh chives, for garnish (optional)
Instructions
- Place the eggs in a single layer in a large saucepan and cover them with cold water by about 1 inch (2.5 cm). Bring the water to a full rolling boil over medium-high heat, then immediately turn off the burner and cover the pan.
- Let the covered eggs sit in the hot water for exactly 12 minutes. This gentle method keeps the yolks bright yellow instead of that gray-green ring you get from hard boiling. Set a timer, because two extra minutes changes the color.
- Transfer the eggs straight into a bowl of ice water and leave them for 10 minutes. The sudden cold pulls the membrane away from the shell, which makes peeling far less frustrating. Crack each egg gently on the counter and roll it before peeling under running water.
- Slice every peeled egg in half lengthwise and pop the yolks into a medium bowl. Set the whites cut-side up on a serving platter. Wipe your knife between cuts so the whites stay clean and unmarked.
- Mash the yolks with a fork until no large pieces remain, then add the mayonnaise, Dijon, vinegar, salt, pepper, and smoked paprika. Stir hard for about a minute until the filling turns completely smooth and glossy. A few extra seconds of mixing gives you a much nicer piped texture.
- Spoon the filling into a piping bag fitted with a round tip, or use a zip-top bag with one corner snipped off. Pipe a mound into each egg white half, filling them generously so the spiders sit up high.
Black olive spider decoration: cut 12 olives in half crosswise and place one half, dome side up, on the center of each egg as the spider body. Slice the remaining olive halves lengthwise into thin slivers, then tuck four slivers on each side of the body as legs. Angle the outer legs slightly forward.
Tips for making them ahead: boil, peel, and halve the eggs up to two days early and store the whites in a covered container lined with a damp paper towel. Keep the filling in a sealed piping bag in the fridge. Assemble within two hours of serving, then dust with paprika and scatter chive pieces just before the platter goes out.
4. Mummy Jalapeño Poppers
⏱ Time
- Prep Time: 30 minutes
- Cook Time: 22 minutes
- Total: 52 minutes
- Servings: 20 poppers
Poppers wrapped in dough strips solve two problems at once. The pastry tames the heat for anyone nervous about peppers, and the wrapped look fits the theme without any extra decorating work. Bacon inside the filling adds smokiness that plain cream cheese poppers miss. Adults tend to clear this tray first, usually while standing right next to it.
Cream cheese filling: cream cheese, shredded cheddar, crumbled bacon, and a little garlic powder. The cheddar keeps the filling from going runny in the oven, and the bacon means you can skip any other seasoning.
Ingredients
- 10 large jalapeño peppers
- 8 oz (225 g) cream cheese, softened
- 3/4 cup (75 g) sharp cheddar cheese, shredded
- 4 slices bacon, cooked crisp and crumbled
- 1/2 teaspoon garlic powder
- 1/4 teaspoon onion powder
- 1 can (8 oz / 226 g) refrigerated crescent dough
- 1 large egg, beaten with 1 teaspoon water
- 40 candy eyes or small mozzarella dots
- Ranch dressing, for dipping
Instructions
- Heat the oven to 400°F (205°C) and line a baking sheet with parchment. Put on a pair of disposable gloves before touching the peppers, since jalapeño oil clings to skin for hours and stings badly later.
Jalapeño preparation:
- Slice each jalapeño in half lengthwise, straight through the stem. Scrape out every seed and every bit of the pale inner membrane with a small spoon. That white membrane holds most of the heat, so thorough scraping gives you mild poppers.
- Rinse the hollowed halves under cold water and dry them completely inside and out with paper towels. Any moisture left behind turns to steam in the oven and pushes the filling out.
- Stir the cream cheese, cheddar, crumbled bacon, garlic powder, and onion powder together in a bowl until evenly blended. Spoon the mixture into each pepper half, mounding it slightly but keeping it level with the rim. Overstuffed poppers spill and burn on the pan.
Mummy-style topping:
- Unroll the crescent dough and press all the seams together into one solid sheet. Cut it into strips roughly 1/4 inch (6 mm) wide using a pizza cutter, working lengthwise for longer pieces.
- Drape the strips across each filled popper at uneven angles, leaving small gaps so the cheese peeks through. Tuck the ends under the pepper to hold them in place. Two or three strips per popper is plenty.
Baking instructions:
- Brush the dough lightly with the beaten egg wash, avoiding the exposed cheese. Bake for 18 to 22 minutes, until the strips are deep golden and the filling bubbles at the edges.
- Cool the poppers on the pan for 5 full minutes before moving them. The filling reaches an unpleasant temperature straight from the oven, and the dough firms up as it rests. Press two candy eyes into a gap on each one and serve with ranch alongside.
5. Halloween Pizza Bites
⏱ Time
- Prep Time: 25 minutes
- Cook Time: 12 minutes
- Total: 37 minutes
- Servings: 30 bites
Every party needs one thing that picky eaters will actually eat, and small pizzas fill that role better than anything else. Cutting the dough with a pumpkin cookie cutter takes maybe three extra minutes and completely changes how they look on the tray. Pepperoni cut into small circles becomes eyes, and a sliver of black olive becomes a crooked mouth.
Small pizza bases: refrigerated pizza dough works best here because it holds a shape when cut. Biscuit dough puffs too much and loses the outline you just cut.
Ingredients
- 1 lb (450 g) refrigerated pizza dough, at room temperature
- 3/4 cup (180 ml) pizza sauce
- 2 cups (200 g) low-moisture mozzarella, shredded
- 30 slices pepperoni
- 10 black olives, sliced
- 2 tablespoons olive oil
- 1 teaspoon Italian seasoning
- 1/4 cup (25 g) grated Parmesan cheese
- Extra pizza sauce, warmed, for dipping
Instructions
- Heat the oven to 425°F (220°C) and line two baking sheets with parchment. Let the dough rest on the counter for 20 minutes before you start, since cold dough springs back and refuses to hold a cut shape.
- Roll the dough out on a floured surface to about 1/4 inch (6 mm) thick. Keep the thickness even across the whole sheet, because thin spots burn while thick spots stay doughy in the center.
Halloween shapes:
- Cut out rounds, pumpkins, ghosts, and bats using 2 1/2-inch (6 cm) cookie cutters. Press straight down without twisting, then lift the cutter cleanly. Twisting seals the edges and stops the dough from rising properly.
- Gather the scraps, press them together gently, and re-roll once to get more shapes. Re-rolling a second time makes the dough tough, so use whatever is left for plain rounds.
- Arrange the shapes on the lined sheets with about 1 inch (2.5 cm) between them. Brush the edges with olive oil and prick the centers two or three times with a fork to stop them from ballooning.
Cheese and toppings:
- Spread about 1 teaspoon of pizza sauce on each shape, staying 1/4 inch (6 mm) from the edge. Sprinkle mozzarella over the sauce, then dust lightly with Italian seasoning and Parmesan.
- Add the pepperoni in small pieces to make faces. Two small circles work as eyes and a thin olive sliver works as a mouth. Press the toppings down gently so they do not slide off as the cheese melts.
- Bake one sheet at a time for 10 to 12 minutes, until the cheese bubbles and the edges turn golden brown. Rotate the pan at the halfway mark. Let the bites cool for 3 minutes, then serve with warm sauce for dipping.
Halloween Finger Foods for Kids and Families
These five recipes travel well from the kitchen to the table and back again. Nothing here needs a fork, nothing here is spicy, and most of it can be assembled by whoever happens to be standing in your kitchen at the time.
6. Halloween Hot Dog Mummies
⏱ Time
- Prep Time: 20 minutes
- Cook Time: 14 minutes
- Total: 34 minutes
- Servings: 16 mummies
My nephew calls these “the ones with the faces” and asks for them before he asks for candy. The dough shrinks slightly as it bakes, which pulls the wrapped strips tighter and makes the bandage look sharper than it does going into the oven. Cutting the hot dogs in half turns eight franks into sixteen servings, which stretches a small package a long way on a busy table.
Easy ingredients: a package of hot dogs, one tube of crescent dough, and mustard for the eyes. That is the whole list, and all three keep well in the fridge for days before the party.
Ingredients
- 8 regular hot dogs, cut in half crosswise (16 pieces)
- 1 can (8 oz / 226 g) refrigerated crescent roll dough
- 1 tablespoon melted butter
- 1/2 teaspoon garlic powder
- Yellow mustard, for the eyes
- Ketchup and mustard, for dipping
Instructions
- Heat your oven to 375°F (190°C) and line a baking sheet with parchment paper. Blot the hot dog pieces dry with a paper towel, because the surface moisture on franks makes dough strips slide around while you wrap.
- Unroll the crescent dough onto a floured cutting board and pinch every perforated seam closed. Roll it once with a rolling pin to even out the thickness, then cut the sheet into long strips about 1/4 inch (6 mm) wide with a pizza wheel.
Wrapping the hot dogs:
- Start wrapping near the bottom of a hot dog piece and wind the strip upward at a slant, overlapping slightly in places and leaving gaps in others. Uneven wrapping looks far more like real bandages than neat spirals do.
- Stop about 1/2 inch (1 cm) from the top and leave that section completely bare. That exposed strip is where the mustard eyes go, and covering it means the face gets lost. Tuck the loose end of the dough underneath the base.
- Set each wrapped mummy on the lined sheet with the tucked seam facing down, spacing them 1 inch (2.5 cm) apart. Crowded mummies steam against each other and stay pale on the touching sides.
Baking tips:
- Stir the melted butter with the garlic powder and brush it lightly over the dough only. Bake for 12 to 14 minutes, until the strips turn golden and feel dry to a light tap.
- Check them at the 10-minute mark, since thin dough browns quickly near the pan edges. Rotate the sheet front to back if one side is running ahead of the other.
- Cool for 4 minutes on a wire rack before decorating. Squeeze two small mustard dots onto the bare section of each mummy, placing them slightly off-center so every face looks a little different.
Serving suggestions: lay them in rows on a long rectangular tray with small bowls of ketchup and mustard at both ends. Keep a second batch unbaked in the fridge and pop it in the oven when the first tray empties, which takes about twenty minutes at most parties.
7. Halloween Monster Sandwiches
⏱ Time
- Prep Time: 25 minutes
- Cook Time: 0 minutes
- Total: 25 minutes
- Servings: 20 small sandwiches
Sandwiches sound plain until you cut them into shapes and give them faces. A friend suggested using a round cutter and a bit of cheese for a tongue, and that small change turned a boring platter into the one kids gathered around. Soft sandwich bread cuts cleanest when it is slightly chilled, a trick worth knowing before you start.
Bread and filling options: white or wheat sandwich bread both work. For fillings, stick with ham and cheese, turkey and cream cheese, or plain cheese for anyone avoiding meat. Skip anything wet like tomato slices, since soggy bread tears when you cut shapes.
Ingredients
- 20 slices soft sandwich bread
- 8 oz (225 g) sliced deli ham or turkey
- 10 slices cheddar or American cheese
- 4 oz (115 g) cream cheese, softened
- 3 tablespoons mayonnaise
- 2 slices orange cheddar, for tongues
- 40 candy eyes or sliced black olives
- Small round and square cookie cutters
Instructions
- Put the bread slices in the refrigerator for 20 minutes before you begin. Cold bread holds its structure under a cookie cutter, while room-temperature bread compresses and leaves squashed edges.
- Stir the cream cheese and mayonnaise together in a small bowl until smooth and spreadable. This mixture acts as glue as much as flavor, holding the layers together when the sandwich is cut.
- Spread a thin layer of the cream cheese mixture on one side of every bread slice, going all the way to the edges. Thin and even matters here, because thick spreads squeeze out during cutting.
- Build each sandwich with one slice of cheese and a folded layer of ham or turkey, keeping the filling inside the bread outline. Meat that hangs over the edge gets sliced away and wasted when you cut the shape.
Cutting fun shapes:
- Press a round or square cutter straight down through the center of each sandwich, using firm steady pressure rather than a sawing motion. Lift the cutter and push the sandwich out gently from the top.
- Cut a small triangle or wavy strip from the orange cheddar and tuck it between the bread layers at the bottom so it sticks out like a tongue. A tiny dab of cream cheese holds it in place.
- For a toothy version, cut narrow white cheese triangles and line them along the opening above the tongue. Three or four teeth per sandwich is enough, and uneven spacing looks better than perfect rows.
Adding edible eyes: press two candy eyes into small dots of cream cheese on the top slice, or use olive slices for a savory option. Place them close together and at different heights for a proper monster look. Cover the finished platter with plastic wrap and refrigerate until serving, but no longer than three hours.
8. Halloween Pretzel Bites
⏱ Time
- Prep Time: 20 minutes
- Set Time: 25 minutes
- Total: 45 minutes
- Servings: 40 bites
Salt and chocolate together is the reason this bowl empties faster than any dessert tray. The first batch I made used regular baking chocolate that never set firm, and the pieces stuck together in one solid clump. Candy melts fixed that completely, since they harden at room temperature without any tempering. The whole thing takes less than an hour and requires no oven.
Soft or crunchy pretzel options: crunchy mini pretzels or pretzel snaps give the best contrast against the chocolate. Soft pretzel bites work too, though they need to be served the same day and dipped only halfway so they stay chewy.
Ingredients
- 4 cups (about 200 g) mini pretzel twists or pretzel snaps
- 10 oz (280 g) orange candy melts
- 10 oz (280 g) purple or black candy melts
- 4 oz (115 g) white candy melts, for drizzling
- 1/4 cup (50 g) Halloween sprinkles
- 40 candy eyes
- 1 teaspoon coconut oil, divided (only if needed)
Instructions
- Line two baking sheets with parchment paper and set them within arm’s reach of your melting bowl. Dipped pretzels need to move to the paper fast, and hunting for a tray mid-dip leaves drips everywhere.
- Place the orange candy melts in a microwave-safe bowl and heat at 50 percent power for 30 seconds. Stir well, then continue in 15-second bursts, stirring every time. Candy melts scorch quickly and turn grainy, so short bursts matter more than total time.
- Stir until the last few pieces dissolve from the residual heat rather than microwaving them away. If the melted coating seems thick, stir in 1/2 teaspoon of coconut oil to loosen it into a smooth, pourable texture.
- Drop a pretzel into the bowl and use a fork to flip it once, then lift it out and tap the fork against the rim several times. Tapping sheds the extra coating and prevents thick puddles from forming at the base.
- Set the dipped pretzel on the parchment and repeat, working in batches of eight to ten. Melt the purple batch in a separate bowl once the orange pretzels are done, following the same heating method.
Chocolate or candy decorations:
- Add sprinkles and candy eyes within about 30 seconds of dipping each piece. The coating starts setting fast, and decorations pressed onto hardened candy fall off in the bowl later.
- Melt the white candy last and spoon it into a small zip-top bag. Snip a tiny corner and drizzle thin lines back and forth over the tray in quick sweeping motions for a webbed effect.
- Leave the trays undisturbed at room temperature for 25 minutes until fully firm. Refrigerating speeds this up but can leave a dull, sweaty finish once the pieces come back to room temperature.
Easy party presentation: pile them in a clear glass jar so the orange and purple layers show through, or spread them across a black tray in loose rows. Stored in an airtight container away from heat, they hold their snap for a full week.
9. Halloween Popcorn Mix
⏱ Time
- Prep Time: 15 minutes
- Set Time: 30 minutes
- Total: 45 minutes
- Servings: 12 cups (about 12 servings)
Popcorn stretches a party budget further than almost anything else on the table. Three bags of microwave popcorn turn into twelve cups of snack mix for a few dollars, and the candy does all the decorating work. One thing worth knowing: unpopped kernels ruin the experience, so pour the popcorn through your fingers into the bowl and leave the hard bits behind in the bag.
Popcorn base: plain or lightly salted popcorn only. Butter-flavored varieties fight with the white chocolate coating and leave the mix greasy instead of crisp.
Ingredients
- 12 cups popped popcorn (about 3 bags), unpopped kernels removed
- 12 oz (340 g) white chocolate or white candy melts
- 1 cup (150 g) candy corn
- 1 cup (170 g) Halloween-colored candy-coated chocolates
- 1 cup (50 g) mini pretzel twists, broken in half
- 1/2 cup (80 g) orange and black sprinkles
- 1/4 teaspoon salt
Instructions
- Spread the popcorn across two large parchment-lined baking sheets in a single loose layer. Working in a wide flat area instead of a deep bowl keeps the coating even and stops the bottom pieces from getting crushed.
- Pick through the popcorn once more and remove any hard kernels you missed. Guests bite down on these without warning, and it takes two minutes to avoid the problem entirely.
- Melt the white chocolate in a microwave-safe bowl at 50 percent power in 30-second intervals, stirring between each one. Stop while a few small pieces remain and stir them smooth off the heat. White chocolate seizes faster than dark, so patience pays off.
Halloween candy:
- Drizzle about two-thirds of the melted chocolate over the spread popcorn in thin zigzag lines. Toss gently with a silicone spatula, lifting from underneath rather than stirring in circles, which breaks the popcorn apart.
- Scatter the candy corn, candy-coated chocolates, and broken pretzels over the coated popcorn while the chocolate is still tacky. Working fast here means the candy actually sticks instead of rolling to the bottom of the pan.
Pretzels and other mix-ins:
- Drizzle the remaining melted chocolate over the top to lock the candy in place, then shower the sprinkles across the whole surface immediately. Sprinkle from about 12 inches (30 cm) up for even coverage.
- Sprinkle the salt lightly over everything. That small amount balances the sweetness and keeps the mix from tasting flat after a few handfuls.
- Let the trays sit at room temperature for 30 minutes until the chocolate sets completely. Break the sheet into clusters with your hands, leaving some pieces joined together for texture.
How to portion for guests: scoop about 1 cup into paper cones, small treat bags, or striped paper cups. Individual portions keep hands out of a shared bowl and give guests something easy to carry around while they talk.
10. Halloween Snack Mix
⏱ Time
- Prep Time: 10 minutes
- Cook Time: 0 minutes
- Total: 10 minutes
- Servings: 16 cups (about 16 servings)
This is the bowl I fill first and refill three times. There is no melting, no baking, and no waiting, which makes it the thing I throw together when guests are already on their way. The mix of textures does all the work: crunchy cereal, chewy candy, salty nuts, and smooth chocolate pieces in every scoop.
Sweet and salty ingredients: the ratio that works for me is roughly half savory to half sweet. Too much candy and people stop after one handful. Too much cereal and it tastes like a lunchbox.
Ingredients
- 4 cups (120 g) square corn or rice cereal
- 3 cups (150 g) mini pretzel twists
- 2 cups (100 g) cheese crackers
- 1 1/2 cups (220 g) salted peanuts or roasted cashews
- 2 cups (300 g) candy corn
- 1 1/2 cups (255 g) orange, black, and purple candy-coated chocolates
- 1 cup (170 g) chocolate chips or mini peanut butter cups
- 1/2 cup (80 g) Halloween sprinkles
Instructions
- Choose the largest bowl in your kitchen, then choose one size larger if you have it. A crowded bowl means candy stays trapped at the bottom no matter how much you stir.
- Add the cereal, pretzels, cheese crackers, and nuts first and toss them together with two large spoons. Building the sturdy ingredients as a base protects the softer candy from getting crushed.
- Pour in the candy corn and candy-coated chocolates, then fold them through with a lifting motion from the bottom of the bowl. Scooping from underneath distributes candy far better than stirring across the top.
- Add the chocolate chips or peanut butter cups last and fold them in with just three or four gentle turns. Chocolate softens from handling, and extra mixing leaves smears on the cereal.
- Shower the sprinkles over the top and give the bowl one final light toss. The sprinkles settle through naturally as guests serve themselves, so heavy mixing at this stage is unnecessary.
How to make a large batch: double everything in a clean dishpan or a large stockpot instead of a bowl. Mix the dry base first, then divide it between two bowls before adding candy, which keeps the mixing manageable and the candy evenly spread.
Storage tips: keep it in airtight containers at room temperature for up to two weeks, away from any sunny windowsill. Chocolate pieces bloom and turn chalky in warm spots. Portion leftovers into small bags and hand them to guests on their way out.
Spooky Halloween Desserts and Sweet Treats
The dessert table is where the theme gets loudest. Every recipe below can be made a day ahead, which is exactly what you want when the oven is busy with savory food on party day.
11. Halloween Brownie Bites
⏱ Time
- Prep Time: 15 minutes
- Cook Time: 22 minutes
- Total: 37 minutes (plus cooling)
- Servings: 36 bites
Cutting a full pan of brownies into small squares gives you three dozen servings from one recipe, which beats bar-sized portions at a party where people want to taste everything. The edges are the best part, so I use a square pan and cut all the way to the sides. A plastic knife makes cleaner cuts than a metal one, something a reader mentioned to me years ago and I have used ever since.
Simple brownie base: cocoa powder rather than melted chocolate keeps the crumb dense and fudgy, and it means fewer steps. Pull them from the oven while the center still looks slightly underdone.
Ingredients
- 3/4 cup (170 g) unsalted butter, melted
- 1 1/2 cups (300 g) granulated sugar
- 1/4 cup (50 g) light brown sugar, packed
- 3 large eggs, at room temperature
- 2 teaspoons vanilla extract
- 3/4 cup (75 g) unsweetened cocoa powder
- 1 cup (125 g) all-purpose flour
- 1/2 teaspoon salt
- 1/4 teaspoon baking powder
- 1 cup (170 g) semisweet chocolate chips
- Orange and black sprinkles, candy eyes, and chopped Halloween candy, for topping
Instructions
- Heat the oven to 350°F (175°C). Line a 9×13-inch (23×33 cm) pan with parchment, leaving an overhang on two sides. That overhang lifts the whole slab out later and makes clean cutting possible.
- Whisk the melted butter with both sugars in a large bowl for a full minute, until the mixture turns glossy and slightly thickened. This step builds the shiny crackled top that everyone looks for.
- Add the eggs one at a time, whisking well after each addition, then stir in the vanilla. Room-temperature eggs blend smoothly, while cold eggs firm up the butter and leave a grainy batter.
- Sift the cocoa powder, flour, salt, and baking powder over the wet mixture. Fold with a spatula just until the last streaks of flour disappear. Overmixing develops gluten and turns fudgy brownies cakey.
- Fold in the chocolate chips with three or four turns, then pour the batter into the lined pan. Spread it into the corners with an offset spatula and tap the pan twice on the counter to release air pockets.
- Bake for 20 to 22 minutes. A toothpick inserted 2 inches (5 cm) from the edge should come out with moist crumbs clinging to it, not wet batter and not clean. Clean means you baked too long.
- Cool in the pan for 30 minutes, then lift the slab out by the parchment onto a wire rack. Let it cool completely, which takes another hour. Warm brownies smear under a knife no matter how careful you are.
Cutting or decorating ideas: trim the outer 1/4 inch (6 mm) from all four sides, then cut a 6×6 grid for 36 even squares. Wipe the blade clean between every cut. Spread a thin layer of orange frosting on some squares and leave others plain for contrast.
Halloween sprinkles and candy: press two candy eyes into the frosted squares, scatter orange and black sprinkles across the tray, and tuck small pieces of chopped candy bars onto a few. Vary the decorations instead of matching every square, which makes the platter look handmade rather than assembly-line.
12. Halloween Monster Cookies
⏱ Time
- Prep Time: 25 minutes
- Chill Time: 30 minutes
- Cook Time: 11 minutes
- Total: 1 hour 6 minutes
- Servings: 24 cookies
Decorating these is the part of party prep my family actually volunteers for. The dough itself is a soft sugar cookie that stays thick instead of spreading thin, which gives you a proper surface for icing and candy. Chilling is not optional here. My first batch went in warm and came out as one giant connected sheet.
Soft cookie base: butter and brown sugar together keep the centers chewy for days. A little cornstarch in the flour adds tenderness without making the cookies fragile.
Ingredients
- 1 cup (226 g) unsalted butter, softened
- 1 cup (200 g) granulated sugar
- 1/2 cup (100 g) light brown sugar, packed
- 2 large eggs
- 2 teaspoons vanilla extract
- 3 cups (375 g) all-purpose flour
- 2 teaspoons cornstarch
- 1 teaspoon baking soda
- 1/2 teaspoon salt
- 2 cups (400 g) powdered sugar
- 3 tablespoons milk
- Green, purple, and orange food coloring
- 48 candy eyes
- Halloween sprinkles
Instructions
- Beat the softened butter with both sugars on medium speed for 3 minutes, until the mixture turns pale and fluffy. Scrape the bowl twice during this time. Properly creamed butter is what keeps these cookies soft rather than dense.
- Add the eggs one at a time, beating for 20 seconds after each, then mix in the vanilla. The batter may look slightly split at this point, which sorts itself out once the flour goes in.
- Whisk the flour, cornstarch, baking soda, and salt together in a separate bowl, then add it to the butter mixture in two additions on low speed. Stop the mixer the moment the flour disappears.
- Cover the bowl and chill the dough for 30 minutes. Cold dough holds its round shape in the oven and gives you thick cookies with defined edges instead of flat spreading discs.
- Heat the oven to 350°F (175°C) and line two sheets with parchment. Scoop the dough into 2-tablespoon balls and space them 2 inches (5 cm) apart. Roll each ball smooth between your palms for an even surface.
- Bake for 10 to 11 minutes, until the edges are set and the centers still look slightly puffy and underdone. They finish baking on the hot pan, so pulling them early is exactly right.
- Leave the cookies on the sheet for 5 minutes, then move them to a wire rack to cool completely. Icing applied to warm cookies runs straight off the sides and pools on the counter.
Colored icing:
- Whisk the powdered sugar with the milk until smooth, then divide it between three bowls and tint each one green, purple, or orange. Aim for a consistency that flows slowly off the spoon and settles back into itself in about 10 seconds.
- Spoon icing onto each cooled cookie and spread it toward the edges with the back of the spoon. Leave a thin bare border so the icing does not drip over the sides as it settles.
Candy eyes: press two, three, or one eye into the wet icing within a minute of spreading. Odd numbers and uneven placement make better monsters than symmetrical faces. Add sprinkles immediately, then leave the cookies undisturbed for an hour until the icing firms up.
Tips for decorating with kids: set up a station with small bowls of icing, a plate of candy eyes, and sprinkles in shaker jars. Give each child their own tray of four cookies so nobody reaches across anyone else. Cover the table first, because this gets messy in the best way.
13. Halloween Rice Krispie Treats
⏱ Time
- Prep Time: 15 minutes
- Cook Time: 8 minutes
- Set Time: 45 minutes
- Total: 1 hour 8 minutes
- Servings: 20 treats
Two things separate great cereal treats from the tough ones you get from a package. Melt the marshmallows over low heat, and press the mixture into the pan lightly instead of packing it down. Firm pressing feels productive but it compacts the cereal and makes the squares dense enough to crack a tooth.
Classic cereal treat mixture: butter, marshmallows, and crisp rice cereal. Adding a handful of extra marshmallows off the heat gives you soft pockets throughout the slab.
Ingredients
- 6 tablespoons (85 g) unsalted butter
- 1 bag (16 oz / 450 g) mini marshmallows, divided
- 1/2 teaspoon vanilla extract
- 1/4 teaspoon salt
- 8 cups (200 g) crisp rice cereal
- 6 oz (170 g) white candy melts
- 4 oz (115 g) orange candy melts
- Candy eyes and Halloween sprinkles
Instructions
- Butter a 9×13-inch (23×33 cm) pan and line it with parchment, then butter the parchment too. Cereal treats stick to anything they touch, and a doubled barrier saves the slab.
- Melt the butter in a large pot over low heat until it foams gently. Keep the heat low the entire time, since browned butter here leads to hard, chewy treats rather than soft ones.
- Add 14 oz (400 g) of the marshmallows and stir constantly with a buttered spatula until they melt into a smooth glossy mixture, about 4 minutes. Rushing this over high heat is the single most common mistake.
- Take the pot off the burner and stir in the vanilla and salt. Let it sit for 1 minute so the mixture cools slightly, which stops the remaining marshmallows from dissolving in the next step.
- Pour in the cereal along with the reserved marshmallows and fold everything together with the buttered spatula. Work quickly but gently, aiming for even coating rather than perfect uniformity.
- Turn the mixture into the prepared pan and press it out with buttered hands or a sheet of parchment. Use light pressure, just enough to fill the corners and level the surface.
- Let the slab set at room temperature for 45 minutes before cutting. Refrigerating makes the treats hard and slightly stale-tasting, so counter cooling is worth the wait.
Halloween shapes: cut into 20 rectangles with a buttered knife, or press cookie cutters straight down for ghosts, pumpkins, and bats. Grease the cutter between shapes. Press the scraps into a small dish for a second, messier round.
Chocolate and candy decorations: melt the white candy melts in 30-second microwave bursts at 50 percent power, stirring each time. Dip ghost shapes fully, or spoon white coating over rectangles and let it run down the sides. Add candy eyes while the coating is wet, drizzle melted orange over the top, and finish with sprinkles before everything sets.
14. Halloween Cupcakes
⏱ Time
- Prep Time: 25 minutes
- Cook Time: 19 minutes
- Total: 44 minutes (plus cooling)
- Servings: 18 cupcakes
Four decorating styles from one batch of cupcakes is the trick that saves me every year. Same batter, same frosting, four completely different looks on the platter. A neighbor once asked which bakery they came from, and the answer was one bowl and about twenty minutes of piping. Buttermilk in the batter keeps the crumb tender enough that they stay soft into the next day.
Easy cupcake base: a straightforward vanilla cupcake takes any color of frosting and any candy topping without fighting the flavor. Chocolate works too, though the orange frosting shows up better against pale cake.
Ingredients
- 1 1/2 cups (190 g) all-purpose flour
- 1 cup (200 g) granulated sugar
- 1 1/2 teaspoons baking powder
- 1/4 teaspoon salt
- 1/2 cup (113 g) unsalted butter, softened
- 2 large eggs, at room temperature
- 1/2 cup (120 ml) buttermilk
- 2 teaspoons vanilla extract
- 1 cup (226 g) unsalted butter, softened, for frosting
- 4 cups (480 g) powdered sugar
- 3 tablespoons heavy cream
- Orange, green, and black food coloring
- Candy eyes, chocolate chips, orange sprinkles, and pretzel sticks
Instructions
- Heat the oven to 350°F (175°C) and line 18 muffin cups with paper liners. Fill any empty wells in the tin with a tablespoon of water so the pan heats evenly and does not warp.
- Whisk the flour, sugar, baking powder, and salt together in a large bowl. Add the softened butter and mix on low speed for 90 seconds, until the mixture looks like damp sand with no dry flour remaining.
- Whisk the eggs, buttermilk, and vanilla together in a measuring cup, then pour half into the flour mixture. Beat on medium for 30 seconds, add the rest, and beat another 30 seconds until smooth.
- Divide the batter among the liners, filling each about two-thirds full. A cookie scoop keeps the portions even, and even portions mean every cupcake finishes baking at the same moment.
- Bake for 17 to 19 minutes, until the tops spring back when pressed lightly in the center. Rotate the pan at the halfway mark. Avoid opening the oven before minute 15, since the rush of cool air sinks the centers.
- Cool in the tin for 5 minutes, then move the cupcakes to a wire rack. Let them cool fully for at least an hour. Frosting a warm cupcake melts the butter and leaves a slumped, greasy top.
- For the frosting, beat the butter alone on medium-high for 4 minutes until very pale and fluffy. Add the powdered sugar 1 cup at a time on low speed, then pour in the cream and beat for 2 more minutes.
Halloween frosting ideas: divide the frosting into three bowls and tint one orange, one green, and leave one white. Add coloring a few drops at a time and mix fully between additions, since the shade deepens as it sits.
Spider, ghost, pumpkin, and monster decorations:
- Spiders: swirl orange frosting flat, place a chocolate-covered candy in the center as the body, and push eight small pretzel pieces around it as legs. Two candy eyes go on the body.
- Ghosts: pipe white frosting in a tall spiral, pulling straight up at the end to form a peak. Press in two chocolate chips point-first for eyes and one sideways for the mouth.
- Pumpkins: pipe orange frosting into a rounded dome, then drag the back of a knife down the sides to make ridges. Push a short pretzel stick into the top as the stem.
- Monsters: pipe green frosting with a star tip in short overlapping bursts for a shaggy fur texture. Add three candy eyes at different heights and scatter sprinkles over the top.
15. Halloween Chocolate Bark
⏱ Time
- Prep Time: 15 minutes
- Set Time: 1 hour
- Total: 1 hour 15 minutes
- Servings: 24 pieces
Bark is the recipe I make when the rest of the menu has run long and I need something impressive without another pan in the oven. Swirling two colors together takes one pass with a toothpick and looks far more involved than it is. The key detail nobody mentions: spread the chocolate to an even thickness, because thin patches shatter into crumbs while thick patches refuse to break cleanly.
Melted chocolate: semisweet chocolate as the base with orange candy melts swirled through gives you both flavor and color. Real chocolate tastes better, and the candy melts handle the color without any tempering worry.
Ingredients
- 16 oz (450 g) semisweet chocolate, chopped
- 8 oz (225 g) orange candy melts
- 4 oz (115 g) white candy melts
- 1 cup (150 g) candy corn
- 3/4 cup (130 g) Halloween candy-coated chocolates
- 1/2 cup (25 g) mini pretzel pieces
- 1/4 cup (40 g) orange and black sprinkles
- 24 candy eyes
- 1/2 teaspoon flaky sea salt
Instructions
- Line a rimmed 11×17-inch (28×43 cm) baking sheet with parchment, pressing it flat into the corners. Wrinkled paper leaves ridges in the finished bark that break in the wrong places.
- Set out every topping in small bowls beside the pan before melting anything. Chocolate sets faster than you expect, and hunting for the candy corn mid-spread costs you the window for pressing toppings in.
- Melt the semisweet chocolate in a microwave-safe bowl at 50 percent power in 30-second intervals, stirring after each. Stop when about a quarter of the pieces are still solid and stir until they dissolve from residual heat.
- Pour the chocolate onto the lined pan and spread it with an offset spatula to about 1/4 inch (6 mm) thick. Work from the center outward and stop about 1 inch (2.5 cm) from the pan edges.
- Melt the orange candy melts separately in the same stop-and-stir way. Drizzle thick lines of orange across the dark chocolate in one direction, spacing them about 2 inches (5 cm) apart.
- Drag a toothpick through the lines in the opposite direction, alternating up and down. Four or five passes gives a marbled effect. More than that muddies the two colors into a single brown shade.
- Scatter the candy corn, candy-coated chocolates, and pretzel pieces across the surface and press each one down lightly with your fingertips. Pressing sets them into the chocolate instead of leaving them perched on top.
Halloween candy toppings:
- Melt the white candy melts and drizzle thin web-like lines over everything using a spoon or a corner-snipped bag. Add the candy eyes into the wet white drizzle so they anchor properly.
- Finish with the sprinkles and a light scatter of flaky sea salt. That pinch of salt cuts through the sweetness and is the reason adults come back for a second piece.
Easy chilling and cutting method: leave the pan at room temperature for 1 hour, or refrigerate for 25 minutes if you are short on time. Lift the slab out by the parchment onto a cutting board and break it into irregular pieces by hand. Uneven shards look better than knife-cut squares. Store in an airtight container between layers of parchment for up to two weeks.
Halloween Party Drinks Everyone Can Enjoy
Drinks pull double duty as decoration. All four below skip alcohol entirely, so kids and adults reach for the same pitcher, and every one can be mixed ahead except for the bubbly step.
16. Halloween Punch
⏱ Time
- Prep Time: 15 minutes
- Chill Time: 2 hours
- Total: 2 hours 15 minutes
- Servings: 20 cups
A punch bowl means you pour once and then stop thinking about drinks for the rest of the night. My early attempts went watery within the hour because of regular ice cubes. Freezing punch base into a ring solved it, and the ring chills the bowl while slowly adding more flavor as it melts. Orange sherbet floating on top creates a foamy layer that looks like something bubbling out of a cauldron.
Fruit juice base: orange juice and pineapple juice together taste brighter than either one alone. The pineapple keeps it from tasting like plain breakfast juice.
Ingredients
- 4 cups (950 ml) orange juice, chilled
- 3 cups (710 ml) pineapple juice, chilled
- 2 cups (475 ml) lemon-lime soda, chilled
- 2 cups (475 ml) ginger ale, chilled
- 1 quart (about 950 ml) orange sherbet
- 2 cups (475 ml) extra orange juice, for the ice ring
- 1 orange, thinly sliced
- 1 cup fresh cranberries
- Gummy worms and plastic spiders, for garnish
Instructions
- Make the ice ring the day before. Pour the extra orange juice into a bundt pan, drop in a few orange slices and cranberries, and freeze for at least 8 hours until solid all the way through.
- Chill every liquid ingredient thoroughly in the refrigerator. Room-temperature juice hitting the bowl forces the ice ring to work overtime and dilutes the punch within minutes.
- Pour the orange juice and pineapple juice into a large punch bowl and stir gently to combine. Do this up to two hours ahead and keep the bowl in the refrigerator.
Sparkling ingredients:
- Add the lemon-lime soda and ginger ale right before guests arrive, pouring down the inside edge of the bowl rather than into the center. Pouring gently preserves the carbonation instead of knocking it flat.
- Dip the bundt pan into warm water for 10 seconds to release the ice ring, then slide it into the punch, decorated side facing up. Twisting it free while frozen solid cracks the ring.
- Scoop the sherbet in rounded spoonfuls and float them across the surface. Six to eight scoops is enough. Every scoop melts into the punch and makes it creamier over the course of the party.
Halloween-colored presentation: scatter the remaining orange slices and cranberries over the foamy top and drape a few gummy worms over the rim of the bowl. Set clean plastic spiders around the base of the bowl, never inside the punch.
Serving in a large punch bowl: set the bowl on a black tablecloth with a ladle and a stack of clear cups within reach. Keep a backup pitcher of mixed juice in the fridge and top the bowl off rather than mixing a whole second batch.
17. Halloween Orange Slush
⏱ Time
- Prep Time: 10 minutes
- Freeze Time: 4 hours
- Total: 4 hours 10 minutes
- Servings: 10 cups
Slush disappears faster than any drink I have served, especially when the house gets warm from the oven running all afternoon. Freezing the mixture in a shallow pan and scraping it with a fork gives a fluffier texture than blending ice does, and it never turns into a watery puddle at the bottom of the cup. The orange color needs no food dye at all.
Orange-flavored ingredients: orange juice concentrate carries much more flavor per cup than regular juice, and it freezes to exactly the right texture when mixed with soda.
Ingredients
- 1 can (12 oz / 355 ml) frozen orange juice concentrate, thawed
- 3 cups (710 ml) cold water
- 2 cups (475 ml) lemon-lime soda
- 1/3 cup (65 g) granulated sugar
- 2 tablespoons fresh lemon juice
- 2 cups (475 ml) pineapple juice
- Orange slices and gummy worms, for garnish
Instructions
- Stir the sugar into the cold water in a large bowl until it fully dissolves, which takes about a minute of steady stirring. Undissolved sugar sinks and freezes into gritty crystals at the bottom.
- Whisk in the thawed orange juice concentrate, pineapple juice, and lemon juice until the mixture looks uniform in color. The lemon juice sharpens the orange flavor and stops it tasting flat once frozen.
- Pour the mixture into a 9×13-inch (23×33 cm) metal baking pan. A shallow metal pan freezes faster and more evenly than a deep plastic container, which matters for the final texture.
Frozen slush texture:
- Freeze for 1 hour, then drag a fork through the mixture, breaking up the ice crystals forming at the edges. Push the frozen parts toward the center and the liquid toward the sides.
- Repeat the fork scraping every 45 minutes for about 4 hours total. Each pass builds those light, separate crystals that make a proper slush instead of one solid block.
- About 20 minutes before serving, pull the pan out and let it soften slightly on the counter. Scrape the whole surface thoroughly with a fork until it looks fluffy and loose throughout.
- Pour the lemon-lime soda over the scraped ice and fold it through with a spoon. The soda loosens the texture and adds fizz right at serving time rather than freezing away hours earlier.
How to serve it at a party: spoon into clear cups so the layers of orange crystal show, then top each with a small splash of extra soda. Set the pan back in the freezer between rounds and scrape again before the next serving.
Kid-friendly serving option: freeze the mixture in ice pop molds for individual portions kids can carry outside. Hang a gummy worm over the rim of each cup and add a half orange slice on the edge.
18. Halloween Grape Mocktail
⏱ Time
- Prep Time: 10 minutes
- Chill Time: 1 hour
- Total: 1 hour 10 minutes
- Servings: 8 glasses
Deep purple grape juice against a black straw looks genuinely eerie in a clear glass, and the color costs nothing extra. Someone at last year’s party assumed it was wine, which is exactly the effect you want for adults who are not drinking. The lime juice is what keeps it from tasting like a juice box, so please do not skip it.
Grape juice: 100 percent purple grape juice, well chilled. Grape drink with added sugar makes the finished mocktail cloying once the sparkling mixer goes in.
Ingredients
- 4 cups (950 ml) 100 percent purple grape juice, chilled
- 2 cups (475 ml) sparkling water or lemon-lime soda, chilled
- 1/4 cup (60 ml) fresh lime juice
- 2 tablespoons honey or simple syrup
- 1 cup ice cubes
- Black sanding sugar, for the rims
- 1 lime, cut into wedges
- Green grapes and gummy eyeballs, for garnish
- Fresh mint sprigs (optional)
Instructions
- Stir the honey into the lime juice in a small bowl until it dissolves completely. Honey seizes into stringy clumps when it hits cold juice directly, so blending it with the room-temperature lime juice first is essential.
- Pour the grape juice into a large pitcher and stir in the lime and honey mixture. Refrigerate for at least an hour so everything chills to the same temperature and the flavors settle together.
- Spread the black sanding sugar on a small flat plate. Run a lime wedge around the rim of each glass, then press the rim into the sugar and give it a small twist for full coverage.
- Set the rimmed glasses upright and let them sit for 5 minutes so the sugar dries in place. Rushing this step means the sugar slides off the moment the glass gets picked up.
- Add three or four ice cubes to each glass, dropping them in carefully so they do not knock against the sugared rim on the way down.
- Fill each glass about two-thirds full with the chilled grape mixture, pouring into the center to avoid disturbing the rim.
Sparkling mixer:
- Top each glass with sparkling water, pouring slowly down the side of the glass. Slow pouring keeps the bubbles alive and creates a foamy purple head that lasts several minutes.
- Give each glass one gentle stir with a straw, going around just once. Heavy stirring flattens the carbonation immediately.
Halloween garnish: thread two green grapes onto a small skewer with a gummy eyeball between them and lay it across the rim. A mint sprig tucked at the side adds a bit of green against the purple.
Individual serving ideas: mix the juice base ahead and keep it in the pitcher, then let guests top their own glasses from a bottle of sparkling water on the drink table. Rim eight glasses in advance and line them up on a tray so the station looks ready before anyone arrives.
19. Halloween Monster Milkshake
⏱ Time
- Prep Time: 15 minutes
- Cook Time: 0 minutes
- Total: 15 minutes
- Servings: 4 shakes
This one is more dessert than drink, and it gets made to order because the whipped cream collapses within ten minutes. Dripping green icing down the inside of the glass before pouring is the detail that makes it look like something from a movie. My first version used softened ice cream and ended up thin and sad, so keep the ice cream frozen solid right until the blender starts.
Creamy milkshake base: vanilla ice cream with a small amount of milk. Too much milk gives you a drinkable but disappointing shake, and the straw should have to work a little.
Ingredients
- 6 cups (about 1.4 L) vanilla ice cream, frozen firm
- 1/2 cup (120 ml) whole milk
- 1 teaspoon vanilla extract
- Green and purple food coloring
- 1/3 cup (80 g) green candy melts or green icing, for the glass drips
- 1 cup heavy cream, whipped to stiff peaks
- 2 tablespoons powdered sugar
- 8 candy eyes
- Halloween sprinkles, crushed cookies, and gummy worms
- 4 chocolate-dipped pretzel rods
Instructions
- Chill four tall glasses in the freezer for 20 minutes before you start. Cold glass slows the melting dramatically and gives guests a few extra minutes with a proper thick shake.
- Melt the green candy melts in 20-second microwave bursts at 50 percent power, stirring each time until smooth and pourable. Let it cool for 2 minutes so it thickens slightly and clings instead of running straight to the bottom.
- Spoon the green coating around the inside rim of each chilled glass, letting it run down in uneven drips of different lengths. Rotate the glass as you spoon for drips all the way around, then return the glasses to the freezer for 5 minutes to set.
- Whip the heavy cream with the powdered sugar until it holds stiff peaks that stand straight up when the beater lifts. Soft peaks slide off the shake immediately, so whip until it is genuinely firm.
- Add the ice cream, milk, and vanilla to a blender. Pulse in short bursts rather than running it continuously, scraping down the sides between pulses. Continuous blending heats the mixture and thins it out.
Halloween colors:
- Add two or three drops of green food coloring and pulse twice more, just enough to streak the color through without fully blending it in. Marbled color looks more interesting than a flat even shade.
- Pour the shake into the prepared glasses, filling to about 1/2 inch (1 cm) below the rim. Work quickly while the mixture is at its thickest.
Whipped cream:
- Pipe a tall swirl of whipped cream on top of each glass using a star tip, building upward in decreasing circles for height. A generous mound gives you a surface to decorate.
Candy and sprinkle toppings: press two candy eyes into the whipped cream at slightly different heights, push a chocolate-dipped pretzel rod in at an angle, and drape a gummy worm over the edge. Finish with crushed cookies and sprinkles across the whole top. Serve immediately with a wide straw and a small spoon.
How to Make Halloween Party Food Look Spooky
Making food look spooky may seem intimidating or difficult, but it’s actually quite the opposite! A few candy eyes and the right colors do almost all the work for you.
1. Use Halloween colors such as orange, black, purple, and green. Pick two of these as your main pair and repeat them across drinks, frosting, and serving dishes. Repetition is what makes a table look planned rather than random.
2. Add candy eyes. Two dots turn anything into a character. They stick to wet frosting, melted chocolate, cream cheese, and warm cheese without any extra effort.
3. Use Halloween cookie cutters. One set of bats, ghosts, and pumpkins reshapes sandwiches, pizza dough, cookies, cereal treats, and sliced cheese. Press straight down, never twist.
4. Create mummy, spider, ghost, monster, and pumpkin shapes. Strips of dough make mummies, pretzel pieces make spider legs, white frosting piped tall makes ghosts, green frosting makes monsters, and a rounded dome with ridges makes a pumpkin.
5. Use themed plates, cups, and serving trays. Black trays make orange food pop, clear glass shows off layered drinks, and dark slate boards make pale cheese and dough look dramatic.
Easy Halloween Decorations for Food
- Candy eyes. Buy more than you think you need. A single party easily uses a hundred of them.
- Black and orange sprinkles. Scatter from high above the tray for even coverage rather than dumping in one spot.
- Chocolate drizzle. Melted chocolate in a corner-snipped bag makes web lines across bark, cookies, and popcorn in seconds.
- Edible decorations. Candy corn, gummy worms, pretzel sticks, and chocolate-covered candies double as legs, horns, stems, and teeth.
- Halloween-themed cupcake toppers. Paper picks and printed liners dress up a plain cupcake when you have run out of time to pipe.
Turn Simple Recipes Into Halloween Food
- Shape sandwiches. Chill the bread first, then cut with a round or square cutter and add a cheese tongue.
- Decorate cupcakes. Same batter, four different toppings, four different characters on one platter.
- Add faces to cookies. Uneven eye placement beats symmetry every time for a monster look.
- Use colored frosting. Divide one batch into three bowls and tint each separately for variety with no extra work.
- Arrange snacks in Halloween shapes. Lay pretzels and crackers into a spiderweb pattern on a round tray, or line cheese cubes into a pumpkin outline.
How to Serve These Halloween Party Recipes
Setting the table well matters almost as much as the cooking. Here is how I lay everything out:
1. Arrange food by category. Group savory bites together, snacks together, desserts together, and drinks apart. Guests find what they want without circling the table twice.
2. Keep finger foods easy to reach. Put the grab-and-go trays at the front edge where people can serve themselves without leaning over other dishes.
3. Put drinks in a separate area. A drink station away from the food breaks up the crowd and stops one bottleneck from forming at the main table.
4. Label foods for guests. Small cards naming each dish save you from answering the same question thirty times and help anyone avoiding nuts, spice, or meat.
5. Keep cold foods chilled. Set deviled eggs, cheese balls, and sandwiches over a shallow tray of ice, and bring out only half the batch at once.
6. Refill smaller serving plates instead of putting everything out at once. A half-full small plate looks better than a picked-over platter, and the food stays fresher in the kitchen.
Halloween Food Table Ideas
- Appetizer section. Meatball mummies, poppers, and pizza bites, with warm dipping sauces nearby.
- Snack section. Popcorn mix, snack mix, and pretzel bites in bowls and jars at different heights.
- Dessert table. Cupcakes raised on a stand, brownie bites and cereal treats on flat trays, bark piled in a shallow bowl.
- Drink station. Punch bowl at the center, glasses rimmed ahead, sparkling water and garnishes off to one side.
How Much Food Do You Need?
- Estimate portions based on guest count. Plan on roughly 6 to 8 small bites per person for a two-hour gathering, plus 2 desserts and 2 drinks each.
- Plan extra food for longer parties. Anything running past three hours needs about 40 percent more, especially savory items.
- Offer several small choices instead of one large dish. Six modest trays get eaten more completely than two enormous ones, and the table looks fuller.
Conclusion
Nineteen recipes give you plenty of room to build a menu that fits your crowd. Savory bites like meatball mummies and poppers keep everyone full, while snack mixes and pretzel bites fill the gaps between meals.
The dessert side covers brownies, cookies, cereal treats, cupcakes, and bark, so there is something for every sweet tooth at the table.
Four drinks round it out, from a big punch bowl to individual mocktails and shakes.
Pick five or six based on your guest list and how much time you have. These Halloween party recipes work just as well for a small gathering as they do for a full house.