
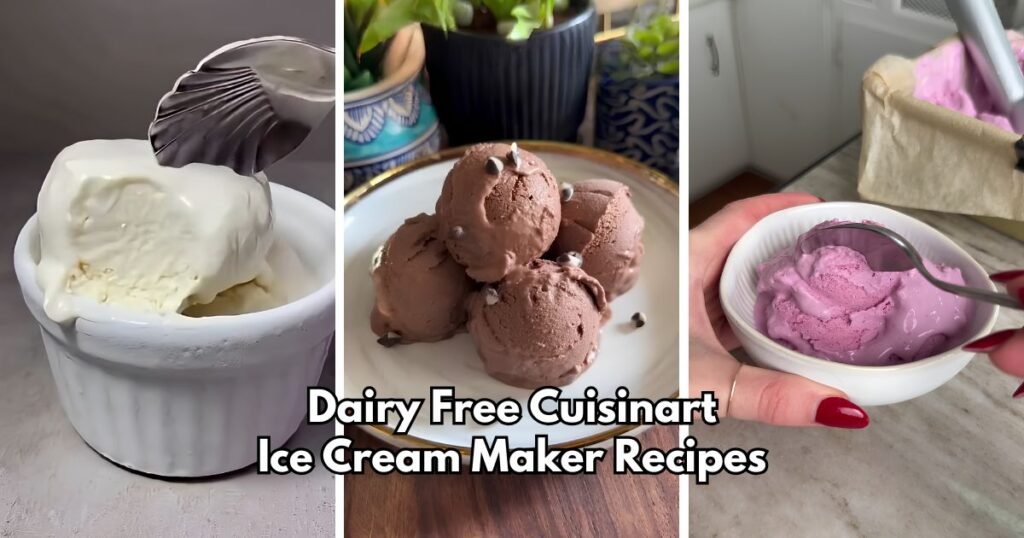
My freezer bowl sat in the back of the freezer for two days before my sister came over. She can’t have milk, so I had a plan.
The first batch came out soft and a little icy. I had let the bowl sit out on the counter while I mixed the base.
Batch two was smooth and thick. She asked for a second scoop and then a third.
That day taught me a lot about dairy free Cuisinart ice cream maker recipes.
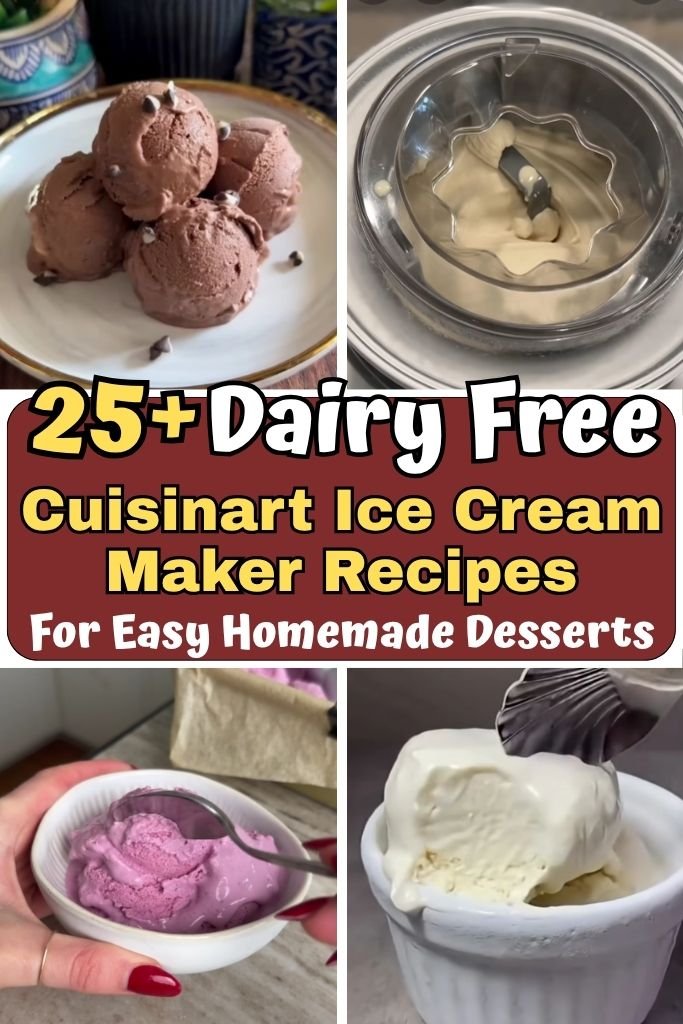
How to Use a Cuisinart Ice Cream Maker for Dairy-Free Recipes
Making ice cream at home may sound hard. It’s actually quite the opposite! You need a frozen bowl, a cold base, and about 25 minutes. Here are the four steps I follow every time.
Freeze the Cuisinart Freezer Bowl First
- Wash and dry the bowl, then set it in the freezer for 12 to 24 hours.
- Shake the bowl before you use it. When you hear no liquid sloshing, the cooling liquid is frozen solid.
- Keep your freezer at 0°F. A warmer freezer can leave the bowl only half frozen.
- Store the bowl in the back of the freezer, where it stays coldest. I keep mine there all the time, so it’s ready when I am.
Prepare the Dairy-Free Ice Cream Base
- Whisk your dairy-free milk with the sweetener until it melts in. Then add the fruit, cocoa, vanilla, or any other flavor.
- Chill the base in the fridge for an hour or two. A cold base freezes faster and turns out smoother.
- Keep the batch at 2 quarts or less. The mix grows as it churns, so leave about half an inch of room at the top of the bowl.
Add the Mixture Through the Ingredient Spout
- Set the bowl on the base, place the mixing arm in the center, and lock the lid. Start the machine first so the bowl is already turning.
- Pour the cold base through the spout right away. The arm scrapes the frozen wall and folds in air, which makes the ice cream thick and light.
- Add chocolate chips, nuts, or cookie pieces through the same spout in the last few minutes. You don’t need to stop the machine.
Choose the Right Cuisinart Function
- Pick Ice Cream for most creamy recipes made with coconut milk, oat milk, or nut milk.
- Pick Sorbet for fruit-based recipes.
- Dairy-free frozen yogurt-style recipes also use the Ice Cream function, just as the manual says.
- Choose the function before you press Start. It can’t be changed once the cycle begins.
25+ Dairy Free Cuisinart Ice Cream Maker Recipes
Every recipe below uses the same simple flow: chill the base, start the machine, then pour. Most batches are done in 15 to 35 minutes.
1. Dairy-Free Vanilla Coconut Ice Cream
⏱ Time
Prep Time: 10 minutes (plus 2 hours to chill the base)
Churn time: 25 minutes
Total: 2 hours 35 minutes
Servings: 6 (about 1 quart)
This is the first flavor I make for anyone new to dairy-free ice cream. Full-fat coconut milk gives the base a rich, smooth body with no dairy at all. The vanilla stays clean and simple, so it goes well with warm brownies or a bowl of berries. A small splash of oat milk keeps the texture soft instead of heavy.
Ingredients
- 2 cans (13.5 oz each) full-fat coconut milk
- 1 cup unsweetened oat milk
- 1/2 cup granulated sugar
- 1 tablespoon pure vanilla extract
- 1 teaspoon vanilla bean paste (optional)
- 1/4 teaspoon fine sea salt
Instructions
- Shake both cans of coconut milk hard before you open them. The cream and the water often split inside the can. Pour everything into a large bowl or a jug with a spout.
- Add the oat milk, sugar, and salt. Whisk for about two minutes. Rub a drop between your fingers, and when it feels smooth, the sugar has melted.
- Stir in the vanilla extract and the vanilla bean paste. Cover the bowl and chill it for at least 2 hours. A cold base gives you smaller ice crystals and a silkier scoop.
- Take the freezer bowl out and give it a shake. You should hear no liquid inside. Set it on the base, drop in the mixing arm, and turn the lid to lock it.
- Select the Ice Cream function and press Start. Let the bowl spin for a few seconds. Then pour the cold base through the spout and set the cap back on the lid.
- Let it churn for 20 to 25 minutes. It is ready when it looks like soft-serve and clings to a spoon. Coconut bases stay a little softer than dairy ones, and that is normal.
- Scoop the ice cream into a shallow airtight container. Press a sheet of parchment paper right onto the top and close the lid. Freeze for 2 hours for firm scoops.
- Let the container sit on the counter for 5 minutes before serving. Dip your scoop in warm water first for clean, round scoops.
2. Dairy-Free Chocolate Ice Cream
⏱ Time
Prep Time: 15 minutes (plus 3 hours to chill the base)
Churn time: 25 minutes
Total: 3 hours 40 minutes
Servings: 6 (about 1 quart)
Chocolate is the flavor my family asks for most. My first version used only cocoa, and it tasted a little flat. Melting a small bar of dairy-free chocolate into the warm milk fixed that right away. The coconut cream makes it thick and smooth, and the cocoa keeps the flavor deep and rich.
Ingredients
- 2 cups unsweetened oat milk
- 1 cup canned coconut cream
- 2/3 cup granulated sugar
- 1/2 cup unsweetened cocoa powder
- 3 ounces dairy-free dark chocolate, finely chopped
- 2 teaspoons vanilla extract
- 1/4 teaspoon fine sea salt
Instructions
- Whisk the cocoa powder and sugar together in a medium saucepan. Pour in 1 cup of the oat milk slowly while you whisk. This keeps dry lumps from forming.
- Warm the pan over medium-low heat for 4 to 5 minutes, stirring often. You want steam to rise from the top. Do not let it boil.
- Take the pan off the heat and add the chopped chocolate. Stir until every piece melts and the mixture looks shiny.
- Whisk in the rest of the oat milk, the coconut cream, the vanilla, and the salt. The coconut cream can be thick, so whisk until no white streaks remain.
- Pour the base into a jug and cover it. Chill for 3 hours. It should feel cold all the way through, not just on top.
- Lock the frozen bowl, the mixing arm, and the lid onto the base. Choose the Ice Cream function, press Start, and pour the base through the spout.
- Churn for about 25 minutes. The texture should look like thick pudding. It will firm up a lot in the freezer, so do not wait for it to get hard in the machine.
- Move the ice cream to an airtight container and freeze for 2 hours. Serve with a warm scoop, and add a pinch of flaky salt on top for a sweet and salty bite.
3. Dairy-Free Strawberry Ice Cream
⏱ Time
Prep Time: 15 minutes (plus 30 minutes for the berries to rest and 2 hours to chill)
Churn time: 25 minutes
Total: 3 hours 10 minutes
Servings: 6 (about 1 quart)
Ripe strawberries do most of the work here. Letting them sit in sugar for half an hour pulls out their juice and deepens the color. I leave a few small berry bits in the base, so you find tiny pieces in each spoonful. Coconut milk keeps the texture rich, and a splash of lemon keeps the flavor bright.
Ingredients
- 1 pound fresh strawberries, hulled and sliced (about 3 cups)
- 1/3 cup granulated sugar
- 1 can (13.5 oz) full-fat coconut milk
- 1/2 cup unsweetened oat milk
- 1/4 cup maple syrup
- 2 teaspoons lemon juice
- 1 teaspoon vanilla extract
- 1/8 teaspoon fine sea salt
Instructions
- Toss the sliced strawberries with the sugar in a bowl. Let them rest on the counter for 30 minutes. Juice will pool at the bottom, and that juice carries a lot of flavor.
- Pour the berries and all the juice into a blender. Pulse 5 or 6 times. Stop while you can still see small bits of fruit.
- Add the coconut milk, oat milk, maple syrup, lemon juice, vanilla, and salt. Blend for 20 seconds more, just until the color turns an even pink.
- Pour the base into a covered container and chill for 2 hours. Fruit bases can taste less sweet once cold, so give it a quick taste and add a spoonful of maple syrup when needed.
- Check that the freezer bowl is fully frozen. Set up the bowl, arm, and lid, then choose the Ice Cream function and press Start.
- Pour the chilled base through the spout in one smooth stream. Place the cap on top and let the machine run for 20 to 25 minutes.
- Stop when the ice cream is thick and light pink, with the texture of soft-serve. Spoon it into a shallow container and freeze for 2 hours.
- Serve with a few fresh berry slices on top. This flavor tastes best within the first week, when the fruit is still bright.
4. Dairy-Free Banana Ice Cream
⏱ Time
Prep Time: 10 minutes (plus 1 hour to chill the base)
Churn time: 25 minutes
Total: 1 hour 35 minutes
Servings: 5 (about 3 1/2 cups)
The riper the bananas, the better this one tastes. I wait until the peels are covered in brown spots, since that is when the fruit turns sweet and soft. There is no need for a lot of added sugar. A little coconut milk gives the base body, and a hint of cinnamon makes the kitchen smell like fresh banana bread.
Ingredients
- 4 very ripe bananas, peeled (about 1 1/2 cups mashed)
- 1 1/2 cups unsweetened cashew milk or oat milk
- 1/2 cup full-fat coconut milk
- 1/4 cup maple syrup
- 2 teaspoons lemon juice
- 1 teaspoon vanilla extract
- 1/2 teaspoon ground cinnamon (optional)
- Pinch of fine sea salt
Instructions
- Break the bananas into chunks and drop them in a blender. Add the lemon juice right away. It stops the fruit from turning gray while you work.
- Pour in the cashew milk, coconut milk, and maple syrup. Blend on high for 30 to 40 seconds, until the mixture looks completely smooth.
- Add the vanilla, cinnamon, and salt. Blend for 5 seconds more. Taste it, and add another drizzle of maple syrup when your bananas were not very sweet.
- Transfer the base to a jug and chill it for 1 hour. Banana bases get thick in the fridge, so stir well before you pour.
- Set the frozen bowl on the base, add the mixing arm, and lock the lid. Select the Ice Cream function and press Start.
- Pour the base through the spout as soon as the bowl starts to turn. Let it churn for about 25 minutes, until it looks fluffy and holds its shape.
- Freeze the ice cream in an airtight container for 2 hours. It scoops best after a few minutes on the counter.
- Top each bowl with sliced banana, crushed nuts, or a swirl of peanut butter. Eat leftovers within 5 days, because banana flavor fades in the freezer.
5. Dairy-Free Mango Ice Cream
⏱ Time
Prep Time: 10 minutes (plus 2 hours to chill the base)
Churn time: 25 minutes
Total: 2 hours 35 minutes
Servings: 6 (about 1 quart)
Mango and coconut milk are a natural pair, and this batch tastes like a summer trip in a bowl. I use frozen mango on busy days, and the results are just as good. The lime juice is small but important, since it keeps the fruit from tasting too sweet. The color comes out a bright golden yellow.
Ingredients
- 3 cups mango chunks, fresh or frozen (about 2 large mangoes)
- 1 can (13.5 oz) full-fat coconut milk
- 1/4 cup water
- 1/3 cup granulated sugar
- 2 tablespoons fresh lime juice
- 1 teaspoon lime zest
- Pinch of fine sea salt
Instructions
- Let frozen mango thaw on the counter for 15 minutes. Fresh mango needs no wait. Cut away any tough fibers near the pit.
- Put the mango in a blender with the sugar and the water. Blend until you see no lumps. Stop the blender and scrape the sides once to catch any stray chunks.
- Add the coconut milk, lime juice, lime zest, and salt. Blend for another 15 seconds. The mixture should pour like a thick smoothie.
- Pour it into a covered container and chill for 2 hours. Cold fruit puree churns faster, and the ice cream comes out smoother.
- Take the bowl from the freezer and shake it to be sure it is frozen. Place the bowl, arm, and lid on the base.
- Press the Ice Cream function, then Start. Pour the chilled base in through the spout. Set the cap on the lid and let the machine work for 20 to 25 minutes.
- Watch the mixture thicken along the sides of the bowl. When it looks like soft frozen custard, it is ready. Mango ice cream may stay slightly softer than chocolate, and that is fine.
- Move it to a shallow airtight container and freeze for 2 hours. Sprinkle toasted coconut flakes or extra lime zest on top when serving.
6. Dairy-Free Chocolate Peanut Butter Ice Cream
⏱ Time
Prep Time: 15 minutes (plus 3 hours to chill the base)
Churn time: 25 minutes
Total: 3 hours 40 minutes
Servings: 6 (about 1 quart)
Peanut butter and chocolate belong together, and this batch proves it. I tried smooth and crunchy peanut butter, and smooth blends in better, so the base stays silky. The cocoa gives it a deep color, and the chopped chocolate adds little crunchy bits to every scoop. Nobody in my house ever leaves a spoonful behind.
Ingredients
- 1 can (13.5 oz) full-fat coconut milk
- 1 1/2 cups unsweetened oat milk
- 1/2 cup creamy peanut butter
- 1/3 cup unsweetened cocoa powder
- 1/2 cup granulated sugar
- 2 tablespoons maple syrup
- 2 teaspoons vanilla extract
- 1/4 teaspoon fine sea salt
- 1/2 cup chopped dairy-free dark chocolate (about 3 ounces)
- 2 tablespoons creamy peanut butter, for the swirl
Instructions
- Pour the coconut milk, oat milk, 1/2 cup peanut butter, cocoa powder, sugar, and maple syrup into a blender. Blend on high for 45 seconds. Peanut butter likes to stick to the bottom, so stop once and scrape the sides.
- Add the vanilla and salt, then blend for 10 seconds more. Taste a small spoonful. Cold temperatures mute sweetness, so the base should taste a touch sweeter than you want the final scoop to be.
- Pour the base into a covered jug and chill it for 3 hours. Nut butter bases thicken as they cool, so whisk it for a few seconds before it goes into the machine.
- Chop the chocolate into pieces about the size of a pea. Big chunks turn rock hard in a frozen dessert. Keep the pieces in a small bowl in the fridge until you need them.
- Set the frozen freezer bowl on the base, drop in the mixing arm, and lock the lid. Choose the Ice Cream function and press Start. Give the bowl a few seconds to begin turning.
- Pour the chilled base through the spout and place the cap on top. Churn for 20 to 25 minutes, until the mixture looks like thick frosting. In the last 3 minutes, add the chopped chocolate through the spout, a spoonful at a time.
- Scoop half of the ice cream into a shallow airtight container. Warm the 2 tablespoons of peanut butter for 10 seconds, drizzle it over the top, and add the rest of the ice cream. Press a sheet of parchment paper onto the surface.
- Freeze for at least 2 hours. Let the container sit on the counter for 5 minutes before you scoop. A warm scoop cuts through the peanut butter ribbons cleanly.
7. Dairy-Free Mint Chocolate Chip Ice Cream
⏱ Time
Prep Time: 10 minutes (plus 2 hours to chill the base)
Churn time: 25 minutes
Total: 2 hours 35 minutes
Servings: 6 (about 1 quart)
The mint chip I grew up eating at diners tasted more like toothpaste than dessert. Real peppermint extract fixes that, as long as the amount stays small. Coconut milk gives the base a cool, smooth feel, and mini chocolate chips spread evenly through every scoop. I leave the color pale most days, but a pinch of spirulina makes it green for parties.
Ingredients
- 1 can (13.5 oz) full-fat coconut milk
- 1 1/2 cups unsweetened almond milk
- 1/2 cup granulated sugar
- 3/4 to 1 teaspoon peppermint extract
- 1 teaspoon vanilla extract
- 1/4 teaspoon spirulina powder or a few drops of natural green coloring (optional)
- 1/8 teaspoon fine sea salt
- 3/4 cup mini dairy-free chocolate chips
Instructions
- Peppermint extract is strong, so measure it with care. Start with 3/4 teaspoon for this batch. You can always add more after tasting, but you cannot take it back out.
- Whisk the coconut milk, almond milk, and sugar in a large bowl for about 2 minutes, until you can no longer feel any grains of sugar. Add the vanilla, peppermint extract, and salt.
- For a soft green color, whisk in the spirulina or the coloring one small pinch or drop at a time. Spirulina can add a faint earthy taste, so keep it to 1/4 teaspoon at most. The color fades a little once the ice cream churns.
- Taste the base. It should feel cool and fresh, not sharp. Cover the bowl and chill for 2 hours.
- Lock the frozen bowl, the mixing arm, and the lid onto the base. Select the Ice Cream function and press Start. Pour the base through the spout as the bowl spins.
- Let the machine run for 20 to 25 minutes. About 3 minutes before the end, add the chocolate chips through the spout. Mini chips spread out evenly and stay small enough to bite easily.
- Pack the ice cream into a shallow airtight container and cover the top with parchment paper. Freeze for 2 hours. Serve in chilled bowls with a fresh mint leaf on top.
8. Dairy-Free Cookies and Cream Ice Cream
⏱ Time
Prep Time: 15 minutes (plus 2 hours to chill the base)
Churn time: 25 minutes
Total: 2 hours 40 minutes
Servings: 6 (about 1 quart)
This one gets a lot of requests at my house, mostly from kids who want the cookie bits. The vanilla base stays simple, so the chocolate cookies get all the attention. Crushed cookies soften a little in the freezer, which gives you that classic cookies-and-cream bite. Always read the cookie label first, since some brands contain milk.
Ingredients
- 1 can (13.5 oz) full-fat coconut milk
- 1 1/2 cups unsweetened oat milk
- 1/2 cup granulated sugar
- 2 teaspoons vanilla extract
- 1/4 teaspoon fine sea salt
- 12 dairy-free chocolate sandwich cookies (10 for the mix, 2 for the top)
Instructions
- Shake the coconut milk can well and pour it into a large bowl. Add the oat milk, sugar, and salt. Whisk for 2 minutes, until the sugar melts into the liquid.
- Stir in the vanilla extract. Cover the bowl and place it in the fridge for 2 hours. The base should feel very cold when you touch the side of the bowl.
- While the base chills, put 10 cookies in a zip-top bag and crush them with a rolling pin. Aim for a mix of small crumbs and pea-sized pieces. Fine dust turns the ice cream gray, while small pieces keep the black-and-white look.
- Set the crushed cookies aside in a bowl. Break the remaining 2 cookies into large chunks for the top and keep them separate.
- Set up the frozen bowl, mixing arm, and lid on the base. Press the Ice Cream function, then Start. Pour the cold base through the spout right away.
- Churn for 20 to 25 minutes, until thick like soft-serve. During the last 2 minutes, sprinkle the crushed cookies through the spout. Adding them late keeps the pieces from turning into mush.
- Spoon a layer of ice cream into a shallow container, then scatter a handful of cookie pieces on top. Repeat with the rest, ending with ice cream. Press parchment on the surface and freeze for 2 hours.
- Top each serving with the cookie chunks. Leftovers keep well for 2 weeks, though the cookie pieces get softer each day.
9. Dairy-Free Coffee Ice Cream
⏱ Time
Prep Time: 10 minutes (plus 20 minutes to cool the coffee and 2 hours to chill)
Churn time: 25 minutes
Total: 2 hours 55 minutes
Servings: 6 (about 1 quart)
A cup of strong coffee turns this base into the kind of scoop I used to buy from a shop near my old apartment. Coconut milk softens the bitter edge, and maple syrup adds a warm, deep sweetness. Cool the coffee all the way before you mix anything. A warm base melts the frozen bowl and slows down the whole churn.
Ingredients
- 1 cup strong brewed coffee or espresso, cooled to room temperature
- 1 can (13.5 oz) full-fat coconut milk
- 3/4 cup unsweetened oat milk
- 1/2 cup maple syrup
- 2 tablespoons granulated sugar
- 1 teaspoon instant espresso powder (optional)
- 2 teaspoons vanilla extract
- 1/4 teaspoon fine sea salt
Instructions
- Brew the coffee double strength, using about 2 tablespoons of ground coffee for every 6 ounces of water. Pour it into a bowl and let it cool for about 20 minutes. Touch the side of the bowl to check that it feels cool, not warm.
- Add the maple syrup, sugar, and espresso powder to the coffee. Whisk until the powder and sugar melt away and the liquid looks clear.
- Pour in the coconut milk and oat milk. Whisk well, since the coconut cream tends to float in clumps at first. Stir in the vanilla and salt.
- Cover the bowl and chill for 2 hours. Coffee bases smell strong at first, and the flavor mellows a bit as it rests in the fridge.
- Place the frozen bowl, arm, and lid on the base. Select the Ice Cream function and press Start. Pour the cold base through the spout and top it with the cap.
- Churn for 20 to 25 minutes. The color changes from dark brown to a soft latte shade as air mixes in. Stop when it looks thick and holds a ridge from the spoon.
- Transfer the ice cream to a shallow airtight container and freeze for 2 hours. Try a scoop in a small cup with a shot of hot espresso poured over the top. It makes a quick dairy-free affogato.
10. Dairy-Free Salted Caramel Ice Cream
⏱ Time
Prep Time: 10 minutes (plus 2 hours to chill the base)
Churn time: 25 minutes
Total: 2 hours 35 minutes
Servings: 6 (about 1 quart)
Salted caramel is the flavor friends bring up when they miss dairy ice cream. The trick is layering the caramel into the container, so you find sticky ribbons instead of one hard lump. A good pinch of sea salt keeps the sweetness in check. Look for a caramel sauce that says dairy-free on the jar, since many contain butter.
Ingredients
- 1 can (13.5 oz) full-fat coconut milk
- 1 cup unsweetened oat milk
- 1/3 cup maple syrup
- 1/2 cup dairy-free caramel sauce, for the base
- 1/4 cup dairy-free caramel sauce, for swirling
- 1 teaspoon vanilla extract
- 1/2 teaspoon fine sea salt
- Flaky sea salt, for the top
Instructions
- Warm all of the caramel sauce in the microwave for 15 seconds. It should pour like honey. Cold caramel clumps when it hits a cold base, so this step matters.
- Whisk the coconut milk, oat milk, and maple syrup together in a large bowl. Pour in 1/2 cup of the warm caramel while whisking. Keep going until no brown streaks remain.
- Add the vanilla and the fine sea salt. Taste a spoonful. It should taste slightly salty and very sweet, since freezing tones both down.
- Cover the bowl and chill for 2 hours. Save the remaining 1/4 cup of caramel at room temperature for swirling later.
- Lock the frozen bowl, mixing arm, and lid onto the base. Choose the Ice Cream function and press Start. Pour in the chilled base through the spout.
- Let the ice cream churn for about 25 minutes. It should look thick, smooth, and a little tan in color. Turn the machine off once it holds its shape.
- Spoon one third of the ice cream into a shallow container and drizzle a little caramel on top. Repeat two more times. Draw a butter knife through the layers once to make ribbons.
- Press parchment paper on top and freeze for 2 hours. Finish each scoop with a few flakes of sea salt just before serving.
11. Dairy-Free Blueberry Ice Cream
⏱ Time
Prep Time: 15 minutes (plus 2 hours 30 minutes to cool and chill)
Churn time: 25 minutes
Total: 3 hours 10 minutes
Servings: 6 (about 1 quart)
Blueberries turn deep purple when cooked for a few minutes, and that color carries into the finished scoop. Cooking also breaks the skins, so the flavor spreads through the whole base. I use fresh berries in July, but thawed frozen ones work too when you cook them 2 minutes longer. A little lemon juice keeps the berry taste bright.
Ingredients
- 3 cups fresh blueberries (about 15 ounces)
- 1/3 cup granulated sugar
- 2 tablespoons fresh lemon juice
- 1 can (13.5 oz) full-fat coconut milk
- 1/2 cup unsweetened oat milk
- 1/4 cup maple syrup
- 1 teaspoon vanilla extract
- 1/8 teaspoon fine sea salt
Instructions
- Combine the blueberries, sugar, and lemon juice in a small saucepan. Set it over medium heat and stir now and then. In about 6 minutes, the berries will burst and the liquid will turn dark and syrupy.
- Remove the pan from the heat and let the berries cool for 20 minutes. Hot fruit warms the coconut milk and can make the base separate.
- Pour the cooled berries into a blender. Pulse 4 to 5 times for a chunky texture, or blend longer for a smooth purple ice cream. I like a few berry pieces left in.
- Add the coconut milk, oat milk, maple syrup, vanilla, and salt. Blend for 20 seconds. The color should look even, like a thick berry smoothie.
- Pour into a covered container and chill for 2 hours. Give it a quick stir and a taste before churning. Add another spoonful of maple syrup when the flavor seems flat.
- Set the frozen bowl, arm, and lid on the base. Select Ice Cream, press Start, and pour the cold base through the spout.
- Churn for 20 to 25 minutes, until it looks like thick purple soft-serve. Move it to an airtight container and freeze for 2 hours. Serve with a handful of fresh blueberries and a lemon zest sprinkle.
12. Dairy-Free Peach Ice Cream
⏱ Time
Prep Time: 20 minutes (plus 2 hours to chill the base)
Churn time: 25 minutes
Total: 2 hours 45 minutes
Servings: 6 (about 1 quart)
Ripe peaches smell sweet the second you pick them up, and that smell is the best sign they are ready. I peel mine, since the skins turn chewy in ice cream. A mix of oat milk and coconut milk keeps the flavor light, so the peach stays in front. On a hot day, it tastes like peach cobbler without turning on the oven.
Ingredients
- 4 ripe peaches (about 1 1/2 pounds), peeled and sliced (about 3 cups)
- 1 can (13.5 oz) full-fat coconut milk
- 1/2 cup unsweetened oat milk
- 1/3 cup maple syrup
- 2 tablespoons granulated sugar
- 1 tablespoon fresh lemon juice
- 1 teaspoon vanilla extract
- 1/8 teaspoon fine sea salt
Instructions
- Bring a pot of water to a boil and fill a large bowl with ice water. Cut a small X in the bottom of each peach. Lower them into the pot for 30 seconds.
- Lift the peaches out with a slotted spoon and drop them into the ice water. The skins should slide right off with your fingers. Slice the fruit away from the pits.
- Place the peach slices in a blender with the sugar and lemon juice. Blend until smooth. Leave a few small pieces behind for texture when you like.
- Pour in the coconut milk, oat milk, and maple syrup. Add the vanilla and salt. Blend for 15 seconds, until the mixture turns a soft golden orange.
- Chill the base in a covered jug for 2 hours. Peach bases can separate a little in the fridge, so shake or stir before pouring.
- Assemble the frozen bowl, mixing arm, and lid on the base. Pick the Ice Cream function and press Start. Pour the cold base through the spout and add the cap.
- Let it churn for 20 to 25 minutes. The ice cream is ready when it looks thick and pale peach, with tiny flecks of fruit.
- Spoon into a shallow airtight container and freeze for 2 hours. Serve with sliced fresh peaches and a small drizzle of maple syrup on top.
13. Dairy-Free Raspberry Ice Cream
⏱ Time
Prep Time: 20 minutes (plus 2 hours to chill the base)
Churn time: 25 minutes
Total: 2 hours 45 minutes
Servings: 6 (about 1 quart)
Raspberries have a sharp, sweet flavor that stays bold even after freezing. The seeds are the only problem, since they get stuck in your teeth. Pressing the puree through a strainer takes two extra minutes and leaves you with a silky scoop. Coconut cream adds body, and the color turns a deep ruby pink.
Ingredients
- 3 cups fresh raspberries (about 12 ounces)
- 1 can (13.5 oz) coconut cream
- 1 cup unsweetened almond milk
- 1/3 cup maple syrup
- 1/4 cup granulated sugar
- 1 tablespoon fresh lemon juice
- 1/2 teaspoon vanilla extract
- 1/8 teaspoon fine sea salt
Instructions
- Rinse the raspberries in a colander and let them drain for a minute. Too much water on the fruit can thin the base. Tip them into a blender with the sugar and lemon juice.
- Blend for 20 seconds, until the fruit turns into a loose puree. Set a fine mesh strainer over a large bowl. Pour the puree in and press it with a rubber spatula until only the seeds are left.
- Scrape the underside of the strainer to catch every last bit of the puree. Throw away the seeds. You should end up with about 1 1/2 cups of smooth, bright red liquid.
- Whisk the coconut cream, almond milk, maple syrup, vanilla, and salt into the puree. Keep whisking until the coconut cream breaks up and the color looks even and pink.
- Cover the bowl and chill for 2 hours. Give the base a taste before you churn. A few drops more lemon juice can wake up the flavor when it seems dull.
- Lock the frozen bowl, mixing arm, and lid onto the base. Select the Ice Cream function and press Start. Pour the base through the spout as soon as the bowl begins to turn.
- Let the machine run for 20 to 25 minutes. The mixture is done when it looks thick and glossy, like raspberry mousse. Scoop it into a shallow airtight container and press parchment on top.
- Freeze for 2 hours. Serve with a few whole raspberries and a little grated dark chocolate on top.
14. Dairy-Free Coconut Ice Cream
⏱ Time
Prep Time: 15 minutes (plus 2 hours to chill the base)
Churn time: 25 minutes
Total: 2 hours 40 minutes
Servings: 6 (about 1 quart)
Coconut lovers should try this one. It leans on both coconut milk and coconut cream, so the base tastes rich and tropical. Toasted flakes are the secret here. Ten minutes in a dry pan makes them nutty and golden, and they stay crisp in the cold. Each scoop has a soft, creamy middle and a little chew from the flakes.
Ingredients
- 1 can (13.5 oz) full-fat coconut milk
- 1 can (13.5 oz) coconut cream
- 1/2 cup granulated sugar
- 2 teaspoons vanilla extract
- 1/4 teaspoon fine sea salt
- 1 cup unsweetened coconut flakes, divided
Instructions
- Heat a dry skillet over medium-low heat. Add 3/4 cup of the coconut flakes and stir constantly for 3 to 4 minutes. Pull the pan off the heat the moment the edges turn light gold, since they burn fast.
- Tip the toasted flakes onto a plate and let them cool completely. Warm flakes will melt the ice cream as soon as they touch it. Keep the untoasted 1/4 cup for garnish.
- Pour the coconut milk and coconut cream into a large bowl. Stir with a whisk until the two blend into one smooth, pale liquid with no lumps.
- Add the sugar, vanilla, and salt. Whisk for 2 minutes, then rub a drop between your fingers to check for grains. When it feels smooth, cover the bowl and chill it for 2 hours.
- Set the frozen bowl on the base, place the mixing arm inside, and lock on the lid. Choose Ice Cream and press Start. Pour the cold base through the spout.
- Churn for 20 to 25 minutes. During the final 3 minutes, sprinkle the toasted flakes through the spout. The machine folds them in without breaking them up.
- Spoon the ice cream into a shallow airtight container and freeze for 2 hours. Coconut ice cream turns hard when left for days, so give it 10 minutes on the counter before you scoop.
- Sprinkle the plain flakes on top just before serving. A squeeze of lime over the bowl adds a bright, clean finish.
15. Dairy-Free Pistachio Ice Cream
⏱ Time
Prep Time: 20 minutes (plus 30 minutes to soak the nuts and 2 hours to chill)
Churn time: 25 minutes
Total: 3 hours 15 minutes
Servings: 6 (about 1 quart)
Store-bought pistachio ice cream is usually bright green from dye. The real thing is a soft, pale olive color, and the flavor is much deeper. Soaking the nuts makes them blend into a creamy paste. A small splash of almond extract brings out that classic pistachio taste. Plan on a longer blend, since a smooth base takes patience.
Ingredients
- 1 1/2 cups shelled, unsalted pistachios
- 2 cups unsweetened cashew milk
- 1/2 cup canned coconut cream
- 1/2 cup maple syrup
- 2 teaspoons vanilla extract
- 1/4 teaspoon almond extract (optional)
- 1/4 teaspoon fine sea salt
- 1/4 cup chopped pistachios, for mixing in
Instructions
- Put the pistachios in a heatproof bowl and cover them with very hot water. Let them sit for 30 minutes. The nuts turn soft, which helps them blend into a silky liquid.
- Drain the nuts and rinse them under cool water. Tip them into a high-speed blender with the cashew milk. Blend on high for a full 2 minutes, until the mixture looks like a thick green-tan milk.
- Add the coconut cream, maple syrup, vanilla, almond extract, and salt. Blend for another 30 seconds. Rub a small drop between your fingers to check for grit, and blend longer when you feel any.
- Pour the base through a mesh strainer for the smoothest texture, or skip this step for a rustic, nutty scoop. Cover and chill for 2 hours.
- Chop the extra 1/4 cup of pistachios into small bits. Set them in a bowl beside the machine. Lock the frozen bowl, arm, and lid onto the base, then press Ice Cream and Start.
- Pour the cold base through the spout and set the cap in place. Churn for 20 to 25 minutes, until the mixture holds soft peaks on a spoon.
- Add the chopped pistachios through the spout during the last 2 minutes. Move the ice cream to a shallow airtight container, cover the top with parchment, and freeze for 2 hours.
- Serve with a few crushed pistachios and a thin drizzle of maple syrup. This flavor pairs well with a warm slice of almond cake.
16. Dairy-Free Almond Butter Ice Cream
⏱ Time
Prep Time: 10 minutes (plus 2 hours to chill the base)
Churn time: 25 minutes
Total: 2 hours 35 minutes
Servings: 6 (about 1 quart)
Almond butter makes a mellow, toasty ice cream that feels a bit like a frozen cookie dough. It is less strong than peanut butter, so the vanilla and maple can shine through. Pick a runny, stirrable jar, since stiff butter can leave lumps. The whole batch comes together in one blender, which keeps the dishes to a minimum.
Ingredients
- 1/2 cup creamy, unsalted almond butter (well stirred)
- 2 cups unsweetened almond milk
- 3/4 cup canned coconut cream
- 1/3 cup maple syrup
- 2 tablespoons granulated sugar
- 2 teaspoons vanilla extract
- 1/4 teaspoon fine sea salt
- 1/4 cup chopped roasted almonds
Instructions
- Stir the almond butter jar until the oil and paste are blended together. Measure 1/2 cup and drop it into a blender. A well-mixed jar gives a smoother base.
- Add the almond milk, coconut cream, maple syrup, and sugar. Blend on high for 40 seconds. Stop once to scrape down the sides, as the nut butter tends to cling to the blades.
- Pour in the vanilla and salt and blend for 10 seconds. The liquid should look pale tan and feel thick, like a milkshake. Taste it, and add a little more maple syrup for a sweeter scoop.
- Pour the base into a covered jug and chill for 2 hours. Almond butter thickens as it cools, so whisk it well before you pour it into the machine.
- While the base chills, toast the chopped almonds in a dry pan for 3 minutes. Cool them on a plate. Toasting brings out their flavor and keeps them crunchy in the freezer.
- Set up the frozen bowl, mixing arm, and lid. Select Ice Cream and press Start. Pour in the chilled base through the spout and place the cap on top.
- Churn for 20 to 25 minutes, then add the cooled almonds through the spout for the last 2 minutes. Pack the ice cream into a shallow container and freeze for 2 hours.
- Serve with a drizzle of warm maple syrup over each bowl. A sliced banana on the side makes it a quick weekend treat.
17. Dairy-Free Chocolate Coconut Ice Cream
⏱ Time
Prep Time: 20 minutes (plus 3 hours to chill the base)
Churn time: 25 minutes
Total: 3 hours 45 minutes
Servings: 6 (about 1 quart)
Think of a chocolate coconut bar turned into a cold, creamy scoop. This version uses a blender to melt the chocolate into hot coconut milk, which gives you a very smooth base. The toasted flakes add chew, and the chocolate gives each bite a deep, dark flavor. It is a bit richer than a plain chocolate batch, so small scoops go a long way.
Ingredients
- 1 can (13.5 oz) full-fat coconut milk
- 1 cup unsweetened oat milk
- 2/3 cup granulated sugar
- 1/3 cup unsweetened cocoa powder
- 4 ounces dairy-free dark chocolate, chopped
- 1 1/2 teaspoons vanilla extract
- 1/4 teaspoon fine sea salt
- 3/4 cup unsweetened coconut flakes, toasted and cooled
Instructions
- Put the cocoa powder and chopped chocolate into a blender jar. Set it beside the stove. Having them ready lets you blend right after the milk heats up.
- Warm the coconut milk, oat milk, and sugar in a saucepan over medium heat. Stir until small bubbles appear at the edges, about 5 minutes. Keep it from boiling, since boiled coconut milk can turn grainy.
- Pour the hot liquid over the cocoa and chocolate in the blender. Let it sit for 1 minute so the chocolate begins to melt. Then blend on low for 30 seconds, and raise it to high for 15 more.
- Add the vanilla and salt and pulse a few times. The base should look glossy and dark brown, with no specks of cocoa. Pour it into a bowl and let it cool on the counter for 15 minutes.
- Cover and chill for 3 hours. This base should feel very cold before it goes in the machine. A warm one can melt the frozen bowl and lead to a soft, runny result.
- Lock the freezer bowl, arm, and lid into place. Pick Ice Cream and press Start. Pour the cold base through the spout and let it churn for 20 to 25 minutes.
- Sprinkle the toasted coconut flakes through the spout in the last 3 minutes. Spoon the ice cream into a shallow airtight container and freeze for 2 hours.
- Serve in small bowls with extra shaved chocolate on top. This flavor tastes best straight from the container after 10 minutes on the counter.
18. Dairy-Free Lemon Sorbet
⏱ Time
Prep Time: 15 minutes (plus 30 minutes to cool the syrup and 2 hours to chill)
Churn time: 25 minutes
Total: 3 hours 10 minutes
Servings: 6 (about 1 quart)
Lemon sorbet is the simplest recipe in this whole post, with only four main ingredients. It tastes clean, sharp, and cold, which makes it a nice reset between rich dishes. Lemon zest in the syrup adds a floral note that juice alone can’t give. Sorbet has no milk in it, so it is dairy-free by nature and needs no swaps at all.
Ingredients
- 1 cup fresh lemon juice (from 5 to 6 large lemons)
- 2 tablespoons lemon zest
- 1 cup granulated sugar
- 2 cups water, divided
- Pinch of fine sea salt
Instructions
- Wash the lemons well and zest them before you cut them open. Zesting a whole lemon is much easier than zesting a squeezed half. Measure out 2 tablespoons of zest.
- Juice the lemons through a small strainer to catch the seeds. You need 1 cup of juice. Set it in the fridge while you make the syrup.
- Pour the sugar and 1 cup of the water into a small saucepan. Heat over medium, stirring often, until every grain melts and the liquid looks clear. This takes about 4 minutes.
- Remove the pan from the heat and stir in the zest and salt. Let the syrup steep for 10 minutes. The zest gives off its oils into the warm liquid, which builds a deeper lemon taste.
- Add the remaining 1 cup of cold water and the lemon juice. Stir well and let the mixture cool to room temperature, about 20 minutes. Cover it and chill for 2 hours.
- Set the frozen bowl, mixing arm, and lid on the base. Select the Sorbet function before you press Start. Pour the cold mixture through the spout while the bowl turns.
- Churn for 20 to 25 minutes. The sorbet is ready when it looks like thick, pale slush and clings to the arm. Move it to a shallow airtight container and freeze for 2 hours.
- Let the container rest for 5 minutes before scooping. Serve in chilled glasses with a sprig of fresh mint or a thin lemon slice on the rim.
19. Dairy-Free Strawberry Sorbet
⏱ Time
Prep Time: 15 minutes (plus 20 minutes to macerate and 2 hours to chill)
Churn time: 25 minutes
Total: 3 hours
Servings: 5 (about 3 cups)
Strawberry sorbet tastes like the fruit itself, only colder and a little sweeter. Nothing hides the berry flavor, so ripe, red berries matter most. Pale or white centers make a dull sorbet. A splash of lemon juice keeps the taste bright, and a pinch of salt makes the sweetness clearer. It is light enough to serve after a big dinner.
Ingredients
- 1 pound fresh strawberries, hulled and halved (about 3 cups)
- 1/2 cup granulated sugar
- 1/2 cup water
- 2 tablespoons fresh lemon juice
- Pinch of fine sea salt
Instructions
- Pick out the ripest strawberries you can find. Look for a deep red color and a sweet smell from the stem end. Hull them, cut them in half, and drop them into a bowl.
- Sprinkle the berries with the sugar and toss gently. Let them sit for 20 minutes. Sugar draws out the juices and forms a bright red syrup at the bottom of the bowl.
- Tip the berries and all their juice into a blender. Add the water, lemon juice, and salt. Blend for about 40 seconds, until the puree looks completely smooth and shiny.
- Pour the puree through a strainer when you want a super smooth sorbet, or leave the seeds in for a more rustic feel. Both ways taste great. Cover the bowl and chill for 2 hours.
- Give the puree a quick stir and a taste. The flavor will seem a bit sweeter than the final result, since freezing dulls sugar. Add a teaspoon of lemon juice when it tastes flat.
- Lock the frozen bowl, mixing arm, and lid onto the base. Turn to the Sorbet function first, then press Start. Pour the cold puree through the spout and place the cap on top.
- Churn for 20 to 25 minutes, until it thickens into a soft, pink slush. Spoon it into a shallow airtight container and freeze for 2 hours to get scoopable, firm sorbet.
- Serve within 3 days for the best flavor and texture. Homemade sorbet has no stabilizers, so it gets icier the longer it sits. Top each scoop with a fresh strawberry fan.
20. Dairy-Free Mango Sorbet
⏱ Time
Prep Time: 10 minutes (plus 2 hours to chill the base)
Churn time: 25 minutes
Total: 2 hours 35 minutes
Servings: 6 (about 1 quart)
Mango sorbet is the easiest way to get a bright, golden dessert with only a handful of pantry items. Ripe mangoes are sweet enough that the sugar stays low. A splash of lime juice keeps the flavor from getting flat. Agave works well too, and it gives the sorbet a softer, smoother scoop.
Ingredients
- 4 cups mango chunks, fresh or thawed frozen (about 3 large mangoes)
- 1/3 cup granulated sugar or agave nectar
- 1/2 cup water
- 3 tablespoons fresh lime juice
- Pinch of fine sea salt
- Chili-lime seasoning, for serving (optional)
Instructions
- Slice the cheeks off each mango and score the flesh in a grid pattern. Scoop the cubes into a bowl and trim the fruit left near the pit. You need 4 cups in total.
- Stir the sugar and water together in a small saucepan over medium heat for about 2 minutes. Once the liquid turns clear, take it off the heat and let it cool for 10 minutes. When you use agave, skip the heat and stir it into the cold water.
- Add the mango, the cooled syrup, and the lime juice to a blender. Blend for 40 seconds, then stop and scrape the sides. Blend again until you see no fibers or lumps.
- Add the salt and pulse twice. Taste a small spoonful. Mangoes vary a lot in sweetness, so add a teaspoon of sugar when the fruit tastes a bit sharp.
- Pour the puree into a covered jug and chill it for 2 hours. A very cold base freezes faster in the bowl and makes smaller ice crystals.
- Take the freezer bowl out and give it a good shake. Hearing no liquid means it is ready. Set it on the base, place the mixing arm inside, and lock the lid.
- Choose the Sorbet function and press Start. Pour the cold puree through the spout while the bowl turns. Churn for 20 to 25 minutes, until it looks like a thick, smooth slush that clings to the arm.
- Spoon the sorbet into a shallow airtight container and freeze for 2 hours. Serve in small bowls with a thin lime wedge and a light sprinkle of chili-lime seasoning.
21. Dairy-Free Raspberry Sorbet
⏱ Time
Prep Time: 15 minutes (plus 30 minutes to cool the syrup and 2 hours to chill)
Churn time: 25 minutes
Total: 3 hours 10 minutes
Servings: 5 (about 3 1/2 cups)
Raspberry sorbet packs a sharp, tangy punch and a color that looks like jewels in a bowl. A simple sugar syrup softens the tartness without hiding the berry taste. Straining out the seeds is a small job that pays off with a silky texture. Serve it after a heavy meal, and everyone at the table will reach for a second spoonful.
Ingredients
- 4 cups fresh raspberries (about 16 ounces)
- 3/4 cup granulated sugar
- 3/4 cup water
- 2 tablespoons fresh lemon juice
- Pinch of fine sea salt
Instructions
- Rinse the raspberries gently in a colander and spread them on a paper towel to dry. Sort through them and toss any soft or moldy ones. Wet berries can water down the sorbet.
- Heat the sugar and water in a saucepan over medium heat for 3 to 4 minutes, stirring often. Remove it when the liquid looks clear. Let the syrup cool for 30 minutes so it does not cook the fruit.
- Drop the berries into a blender and pour in the cooled syrup. Blend for about 20 seconds, just long enough to break the fruit into a loose puree.
- Set a fine mesh strainer over a large bowl and pour the puree through it. Press with a rubber spatula until only the seeds remain. Scrape the bottom of the strainer, since a lot of puree clings there.
- Stir in the lemon juice and salt. Taste it, since raspberries can be quite tart. A teaspoon of sugar mixed in will round off any sharp edge. Cover the bowl and chill for 2 hours.
- Place the frozen bowl on the base, set the arm inside, and twist the lid into place. Pick the Sorbet function first, then press Start. Pour the puree in through the spout and add the cap.
- Let it churn for 20 to 25 minutes. The sorbet should look deep pink and hold a soft peak on a spoon. It will be thicker than the puree but still soft.
- Freeze in a shallow airtight container for 2 hours. Scoop into chilled glasses and top with a few whole raspberries and a small mint leaf.
22. Dairy-Free Watermelon Sorbet
⏱ Time
Prep Time: 15 minutes (plus 2 hours to chill the base)
Churn time: 25 minutes
Total: 2 hours 40 minutes
Servings: 6 (about 1 quart)
Watermelon is mostly water, so this sorbet comes out light and icy, like a snow cone with a soft center. Fresh mint blends right into the puree and gives each spoonful a cool finish. A little sweetener and lime juice bring out the fruit flavor. Pick a heavy melon with a creamy yellow spot on the rind, since that spot signals ripeness.
Ingredients
- 6 cups cubed seedless watermelon (about 2 pounds, rind removed)
- 1/3 cup agave nectar or granulated sugar
- 3 tablespoons fresh lime juice
- 1/4 cup packed fresh mint leaves
- Pinch of fine sea salt
- Extra mint leaves, for serving
Instructions
- Slice the rind off the watermelon and cut the flesh into 1-inch cubes. Pick out any stray black seeds. Seedless melons often hide a few small white ones, and those are fine to leave in.
- Put half of the watermelon and all of the mint into a blender. Blend for 20 seconds, until the mint breaks down into tiny green flecks. Add the rest of the melon and blend once more.
- Pour the puree through a strainer set over a large bowl. Skim off the pale foam on top with a spoon. Removing the foam helps the sorbet freeze into a smoother texture.
- Whisk in the agave, lime juice, and salt. Taste the base and add more lime when it seems too sweet. Cold temperatures dull both sweetness and tang, so aim for slightly bold flavors.
- Cover the bowl and chill for a full 2 hours. Watermelon bases are thin, so they need to be very cold before they meet the bowl.
- Pull the frozen bowl from the freezer and set it on the base. Drop in the mixing arm and lock on the lid. Turn to the Sorbet function and press Start.
- Pour the chilled base through the spout and churn for about 25 minutes. It will look lighter and slushier than other sorbets, more like fine shaved ice. Stop when it holds together on the arm.
- Move it to a shallow airtight container and freeze for at least 3 hours. Watermelon sorbet needs a bit more time to firm up. Serve with a fresh mint leaf and a tiny pinch of flaky salt on top.
23. Dairy-Free Pineapple Sorbet
⏱ Time
Prep Time: 15 minutes (plus 2 hours to chill the base)
Churn time: 25 minutes
Total: 2 hours 40 minutes
Servings: 6 (about 1 quart)
Pineapple gives this sorbet a sweet and tangy flavor that feels like a trip to the beach. Coconut water replaces plain water, so the base has a soft, tropical undertone. A ripe pineapple smells sweet at the bottom and gives a little when you press it. Use the core too, as it blends fine and adds extra flavor.
Ingredients
- 4 cups fresh pineapple chunks (about half of a large pineapple)
- 1 cup coconut water
- 1/3 cup granulated sugar
- 3 tablespoons fresh lime juice
- Pinch of fine sea salt
- Toasted coconut flakes, for serving
Instructions
- Cut the top and bottom off the pineapple and stand it upright. Slice the skin away in long strips, then cut out any brown eyes left behind. Quarter the fruit and cut it into chunks.
- Add 4 cups of chunks to a blender with the coconut water. Blend on high for 45 seconds, until the fruit turns into a thin, frothy puree with no big pieces.
- Sprinkle in the sugar and blend for another 20 seconds. Rub a drop between two fingers to feel for grains. When it feels smooth, the sugar has melted into the puree.
- Pour in the lime juice and add the salt. Give it one quick pulse. Taste it, and add a teaspoon more sugar when the pineapple is on the tart side.
- Pour the mixture into a covered container and chill for 2 hours. For an extra smooth sorbet, strain it first to remove the fibers.
- Set the frozen bowl on the base and place the arm in the middle. Lock on the lid, choose Sorbet, and press Start. Pour the cold puree through the spout while the bowl spins.
- Churn for 20 to 25 minutes, until it turns into a thick, pale yellow slush. The texture should be a little softer than a snow cone. Spoon it into a shallow airtight container.
- Freeze for 2 hours, then let it sit for 5 minutes before scooping. Serve in small bowls topped with toasted coconut flakes.
24. Dairy-Free Peach Sorbet
⏱ Time
Prep Time: 20 minutes (plus 30 minutes to cool and 2 hours to chill)
Churn time: 25 minutes
Total: 3 hours 15 minutes
Servings: 6 (about 1 quart)
Peach sorbet is what I make when the farmers market has a bin of soft, fuzzy peaches nobody else picked. Simmering the fruit for a few minutes deepens the flavor and turns the color a warm apricot shade. The lemon juice keeps the puree from browning. This sorbet tastes like a slice of summer with no cream at all.
Ingredients
- 2 pounds ripe peaches (about 5), peeled and sliced (about 4 cups)
- 1/2 cup granulated sugar
- 1/2 cup water
- 2 tablespoons fresh lemon juice
- Pinch of fine sea salt
- Fresh basil or mint leaves, for serving (optional)
Instructions
- Peel the peaches with a sharp vegetable peeler. Ripe fruit gives up its skin easily. Cut each peach away from the pit and slice the flesh into thin wedges.
- Place the slices, sugar, and water in a saucepan over medium heat. Bring to a gentle simmer and cook for 5 to 6 minutes, stirring now and then. The fruit should look soft and glossy.
- Take the pan off the heat and let everything cool for 30 minutes. Pouring hot fruit into a blender can build up pressure and splatter, so patience helps here.
- Move the cooled peaches and all the syrup into a blender. Add the lemon juice and salt. Blend for about 30 seconds, until the puree looks completely smooth and pale orange.
- Pour the puree into a covered container and chill for 2 hours. Cooked fruit tastes sweeter when warm, so give the cold puree a taste. Add a squeeze of lemon when it seems too mellow.
- Set the frozen bowl on the base, add the mixing arm, and lock the lid. Choose the Sorbet function and press Start. Pour the puree through the spout and add the cap.
- Let the machine run for 20 to 25 minutes. Watch for a soft, thick texture that clings to the sides of the bowl. The color will lighten as air blends in.
- Spoon it into a shallow airtight container and freeze for 2 hours. Serve with a torn basil leaf on top, which adds a fresh, green note that pairs nicely with the fruit.
25. Dairy-Free Orange Sorbet
⏱ Time
Prep Time: 15 minutes (plus 30 minutes to cool and 2 hours to chill)
Churn time: 25 minutes
Total: 3 hours 10 minutes
Servings: 6 (about 1 quart)
This last recipe tastes like a creamsicle without the cream. Fresh orange juice makes a big difference, so skip the bottled kind. Orange zest gives the sorbet a floral, oily aroma that juice can’t match. A little lemon juice adds tang and stops it from tasting too sweet. Kids and grown-ups both ask for seconds.
Ingredients
- 2 1/2 cups fresh orange juice (from about 7 medium oranges), strained
- 2 tablespoons orange zest
- 2/3 cup granulated sugar
- 2 tablespoons fresh lemon juice
- Pinch of fine sea salt
- Orange slices, for serving
Instructions
- Wash the oranges and zest 2 or 3 of them before juicing. Measure out 2 tablespoons of zest and avoid the bitter white pith underneath. A microplane grater works best.
- Cut the oranges in half and squeeze out the juice. Pour it through a strainer to remove the seeds and most of the pulp. You should end up with 2 1/2 cups.
- Pour 1/2 cup of the juice into a small saucepan with the sugar and zest. Warm over medium-low heat for 3 minutes, stirring until the sugar melts. Do not let it boil, since boiling dulls the fresh orange taste.
- Remove the pan from the heat and let it steep for 10 minutes. The zest releases its oils into the warm juice, which gives the sorbet a stronger citrus aroma.
- Stir the warm mixture into the rest of the orange juice. Add the lemon juice and salt. Let it cool to room temperature, then cover and chill for 2 hours.
- Place the frozen bowl on the base and set the mixing arm in the center. Twist the lid until it locks. Pick the Sorbet function and press Start.
- Pour the cold juice mixture through the spout and churn for 20 to 25 minutes. It should look like a bright orange slush and cling gently to the arm. Move it to a shallow airtight container.
- Freeze for 2 hours. Scoop into glasses and top with sparkling water for an easy float-style drink, or serve in bowls with a thin orange slice on the side.
How to Store Dairy-Free Cuisinart Ice Cream
Choose an Airtight Freezer Container
- Use a shallow, wide container with a tight lid. A shallow tub cools the ice cream quickly and evenly, which keeps ice crystals small.
- Press a sheet of parchment paper or plastic wrap right onto the surface before closing the lid. Less air touching the top means less frost.
How Long to Freeze Homemade Dairy-Free Ice Cream
- Right out of the machine, the dessert has a soft-serve texture. It is ready to eat at this point, and many people love it this way.
- For a firmer scoop, move it to an airtight container and freeze for at least 2 hours. Coconut-heavy batches may need a bit longer.
- Ice cream tastes best in the first 1 to 2 weeks, while sorbet is at its best in the first few days.
How to Make Frozen Ice Cream Easier to Scoop
- Let the container sit on the counter for 5 to 10 minutes before you scoop.
- Dip your scoop in warm water and wipe it dry. The warm metal glides through the frozen dessert.
- Skip repeated thawing and refreezing, since that builds up ice crystals. Scoop what you need into a bowl and return the tub to the freezer right away.
Conclusion
From creamy vanilla coconut to bright lemon sorbet, these dairy free Cuisinart ice cream maker recipes give you 25 ways to fill a freezer tub.
Before you start any batch, make sure the freezer bowl is fully frozen. That one habit matters more than any other step.
One machine and simple plant-based ingredients can turn out ice cream, sorbet, and frozen yogurt-style treats.
Try your own fruit, chocolate, nuts, and dairy-free mix-ins next. Your best flavor may be the one you invent.




Pingback: 19 Cuisinart Deluxe Ice Cream Maker Recipes You'll Actually Make Again -