
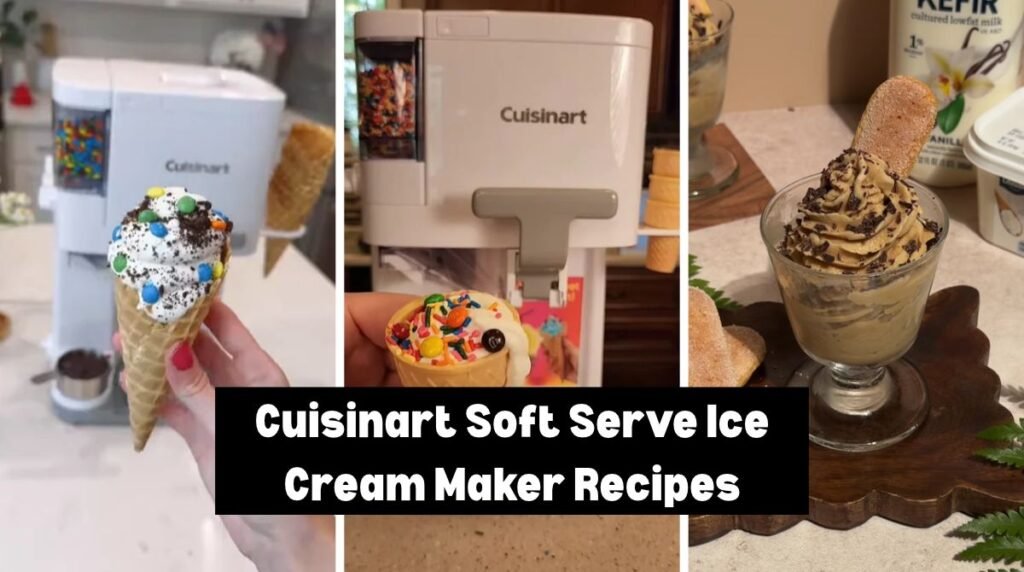
The bowl sat in the back of my freezer for two days before a hot Sunday finally called for it.
My nephew stood by the counter with an empty cone, watching the paddle spin through the little lid window.
Fifteen minutes later, thick vanilla swirled out of the chute, and he asked for a second cone before the first one was gone.
That one afternoon is why this machine stays on my counter all summer.

How to Use the Cuisinart Soft Serve Ice Cream Maker
- Freeze the bowl ahead of time. Put the bowl in the back of your freezer for at least 24 hours. Your freezer should be at 0°F or colder. Shake the bowl before you use it. You should not hear any liquid sloshing inside.
- Keep your ingredients cold. Chill your mix in the fridge until it is very cold. A cold mix churns faster and comes out smoother.
- Put the machine together. Snap the paddle into the lid. Lock the dispenser arm in place with the handle pointing up. Slide the drip tray under the chute. Set the lid on the frozen bowl until it clicks.
- Add the mix through the lid opening. Turn the power dial on first so the paddle is moving. Then pour your mix in through the opening. Stop about half an inch from the top, since the mix grows as it freezes.
- Check the texture while it churns. Set a timer for 15 minutes. Pull the handle down and let a small spoonful fall into a cup. It should flow slowly and look creamy.
- Dispense with the paddle still moving. Hold your cone under the chute and pull the handle down. Turn the cone as you go to make a swirl. Never turn the machine off during this step.
- Add toppings last. Turn a mix-in dial after the soft serve is in your cone. Small sprinkles and fine crumbs drop out smoothly this way.
Tips for Making Better Soft Serve
1. Use a fully frozen bowl. A bowl that is only partly frozen gives you thin, runny ice cream. Give it a full day in the back of the freezer, where it is coldest.
2. Chill the liquid ingredients before churning. Warm milk or cream adds minutes to the churn time. I keep my mix in the fridge for at least two hours, and sometimes overnight.
3. Avoid overfilling the bowl. The mix swells as air gets pushed in. Too much mix can climb the sides and leak out of the lid.
4. Don’t wait until the ice cream is too thick. Thick soft serve will not move through the chute. Check the texture at the 15 minute mark and serve it right then. When it gets too stiff, scoop it out with a spoon.
5. Keep the machine running while serving. The paddle keeps the ice cream moving toward the chute. When the paddle stops, the mix freezes solid around it.
6. Use small, dry mix-ins that can move through the dispenser. Sprinkles, mini chips, and fine cookie crumbs all work. Large pieces and wet toppings jam the chute.
7. Store leftovers in an airtight freezer container. Scoop any extra into a covered container. Leaving it in the bowl makes it stick to the walls and can harm the bowl.
Cuisinart Soft Serve Ice Cream Maker Recipes
Making soft serve at home may sound hard, but it’s actually quite the opposite! Every recipe below makes about four cups of mix, which fills the bowl just right. That gives you six to eight small cones. Chill your mix, freeze your bowl, and the machine does the rest.
1. Classic Vanilla Soft Serve
⏱ Time
Prep Time: 10 minutes (plus 2 hours chilling)
Churn Time: 15–20 minutes
Total: About 2 hours 30 minutes
Servings: 6–8 small cones
This is the first recipe I make with any new batch of sprinkles. The flavor is mellow, creamy, and clean, so it works with every topping in the pantry. The milk and cream give it a smooth body. The vanilla smells warm and sweet the moment you open the bottle. A tiny pinch of salt makes the vanilla taste rounder. Serve it plain in a cone, or keep it as the base for other flavors.
Ingredients
- 2 cups whole milk, very cold
- 1 cup heavy cream, very cold
- ⅔ cup granulated sugar
- 1 tablespoon pure vanilla extract
- ⅛ teaspoon fine salt
- ½ cup rainbow sprinkles, for the dispenser (optional)
Instructions
- Pour the milk and sugar into a large bowl or a measuring pitcher with a spout. Whisk for about two minutes. The sugar should melt away, and you should feel no grit when you rub a drop between your fingers.
- Whisk in the cream, vanilla, and salt. Stir gently to keep the mix from foaming. Foam takes up room in the bowl and makes the first pour messy.
- Cover the mix and slide it into the back of the fridge for at least 2 hours. Taste a small spoonful when it is cold. It should taste a touch sweeter than you want, since cold dulls sugar.
- Take the bowl out of the freezer only when the mix is cold and the machine is built. Set the bowl into the base and lock the lid with the paddle on top. Make sure the dispenser handle points straight up.
- Switch the power dial on. Pour the mix through the lid opening in one slow, steady stream. Check that the level sits about half an inch below the rim.
- Set a timer for 15 minutes. Watch the mix through the lid window. It will go from thin and shiny to thick and pale as air works in.
- Pull the handle down at the 15 minute mark and let a spoonful drop into a small cup. It should fall slowly and hold a soft curl. When it runs like cream, wait three more minutes and test again.
- Hold a cone just under the chute and pull the handle all the way down. Turn the cone in a slow circle to build a swirl. Push the handle up the moment the cone is full.
- Turn the sprinkle dial for a second or two over each cone. Serve right away while the swirl is still soft.
2. Chocolate Soft Serve Ice Cream
⏱ Time
Prep Time: 15 minutes (plus 3 hours chilling)
Churn Time: 15–20 minutes
Total: About 3 hours 30 minutes
Servings: 6–8 small cones
Cocoa powder needs a little heat to melt into milk, and that small step is the whole secret here. Skip it and you get tiny dry specks in each swirl. Warm the cocoa first and the mix turns glossy and dark. The result tastes like a cold cup of rich hot chocolate. I like it with a few chocolate sprinkles on top, since they add a light crunch.
Ingredients
- 1¾ cups whole milk, divided
- 1 cup heavy cream, very cold
- ¾ cup granulated sugar
- ½ cup unsweetened cocoa powder
- 1 teaspoon pure vanilla extract
- ⅛ teaspoon fine salt
- ½ cup chocolate sprinkles, for the dispenser (optional)
Instructions
- Measure 1 cup of the milk into a small saucepan. Add the sugar, cocoa powder, and salt. Whisk everything together before you turn on the burner. This keeps the cocoa from clumping on the bottom.
- Set the pan over medium-low heat. Stir without stopping for about 4 minutes. The mix is ready when it looks smooth and steams a little, and no grains of sugar remain.
- Take the pan off the heat and pour the mix into a large bowl. Stir in the remaining ¾ cup of cold milk right away. This cools the chocolate base and thins it so it can chill faster.
- Whisk in the cream and the vanilla. Taste a drop. The chocolate flavor should be strong, with a mild sweetness behind it.
- Cover the bowl and chill it for at least 3 hours. Cocoa mixes need extra time, and a warm base will slow the churn. Stir once before pouring, since the cocoa can settle.
- Set up the machine with the frozen bowl, paddle, and lid. Check that the handle is up, then turn the power dial on. Pour the chilled mix through the lid opening in a thin stream.
- Let it churn for 15 minutes. Chocolate mixes often look darker and thicker than vanilla, so use the spoon test. Dispense a little into a cup and see how slowly it falls.
- Once the texture holds a gentle curl, fill your cones. Turn each one as you pull the handle. A chocolate swirl looks best when it is thick, so serve it quickly.
- Add a quick turn of the sprinkle dial. Clean the dispenser right after you finish, since cocoa dries into a hard film.
3. Strawberry Soft Serve
⏱ Time
Prep Time: 15 minutes (plus 2 hours chilling)
Churn Time: 15–20 minutes
Total: About 2 hours 35 minutes
Servings: 6–8 small cones
Ripe summer strawberries make this pink swirl taste like a berry patch. Mashing them with sugar first pulls out their juice and deepens the color. A splash of lemon juice keeps the flavor bright and fresh. I strain half of the seeds out, because seeds can speckle the chute. The soft serve comes out light, sweet, and a little tangy.
Ingredients
- 2 cups fresh strawberries, hulled and sliced (about 10 ounces)
- ½ cup granulated sugar
- 1 tablespoon fresh lemon juice
- 1 cup whole milk, very cold
- 1½ cups heavy cream, very cold
- 1 teaspoon pure vanilla extract
- ⅛ teaspoon fine salt
Instructions
- Toss the sliced strawberries with the sugar and lemon juice in a medium bowl. Let them sit for 20 minutes, stirring now and then. The sugar will pull out a bright red syrup.
- Pour the berries and all their syrup into a blender. Blend on high for about 30 seconds until the puree looks smooth. Choose a pulse setting when you want a little texture to remain.
- Press the puree through a fine mesh strainer into a large bowl. Use the back of a spoon to push it through. Throw away about half of the seeds, since a few small ones are fine.
- Whisk in the milk, cream, vanilla, and salt. The color should turn a soft, creamy pink. Taste a spoonful and add a teaspoon more sugar only when the berries seem tart.
- Cover the bowl and chill for at least 2 hours. Fruit mixes need to be very cold, because fruit sugar slows freezing a little.
- Get the machine ready with the frozen bowl and lid. Turn the power dial on and pour the mix in slowly through the opening. Keep an eye on the fill line.
- Churn for about 16 minutes. Fruit soft serve often sets up a bit softer than vanilla. Test it in a cup and look for a slow, steady drop.
- Dispense into cones with a gentle turn of your wrist. Add a few thin strawberry slices on top for color. Serve at once, since this swirl melts a little faster than creamy flavors.
4. Cookies and Cream Soft Serve
⏱ Time
Prep Time: 15 minutes (plus 2 hours chilling)
Churn Time: 15–20 minutes
Total: About 2 hours 35 minutes
Servings: 6–8 small cones
Chocolate sandwich cookies make this one a favorite with kids at my house. Half of the crumbs go into the mix, so the whole swirl has a light cocoa taste. The other half goes in the dispenser for a crunchy topping. The cookies must be crushed very fine, almost like sand. Big chunks will clog the chute and stop the flow.
Ingredients
- 2 cups whole milk, very cold
- 1 cup heavy cream, very cold
- ⅔ cup granulated sugar
- 2 teaspoons pure vanilla extract
- ⅛ teaspoon fine salt
- 12 chocolate sandwich cookies, divided
Instructions
- Place the cookies in a zip-top bag and press out the air. Roll over the bag with a rolling pin until you see no pieces larger than a pea. Then rub the crumbs between your hands to make them finer.
- Pour the crumbs through a fine strainer into a small bowl. Any bits left in the strainer go back in the bag for another round of crushing. Measure out about ¼ cup of the finest crumbs for the mix and set the rest aside.
- Whisk the milk and sugar in a large bowl for two minutes until the sugar melts. Add the cream, vanilla, and salt. Stir gently so the mix stays smooth and free of foam.
- Stir the ¼ cup of fine crumbs into the mix. The liquid will turn a light gray-brown. Cover it and chill for at least 2 hours so the crumbs soften and flavor the milk.
- Fill the condiment container with the remaining dry crumbs. Make sure the container and chute are fully dry. Even a drop of water will turn the crumbs into paste.
- Build the machine with the frozen bowl, paddle, and lid. Turn the power dial on. Stir the cold mix once, then pour it in through the lid opening.
- Churn for 15 minutes and check the texture. The mix will look speckled and thick. Dispense a spoonful into a cup and make sure it moves slowly and smoothly.
- Fill each cone with a gentle swirl. Turn the crumb dial for a moment right after. Serve straight away so the crumbs stay crisp.
5. Chocolate Chip Soft Serve
⏱ Time
Prep Time: 15 minutes (plus 2 hours chilling)
Churn Time: 15–20 minutes
Total: About 2 hours 35 minutes
Servings: 6–8 small cones
Whole chocolate chips are too big for this machine, so I chop them into tiny flakes first. Those flakes melt on the tongue, just like the chips in a scoop shop. A vanilla base keeps the flavor simple and lets the chocolate shine. Half of the flakes get stirred into the mix. The other half go in the dispenser for a last sprinkle on top.
Ingredients
- 2 cups whole milk, very cold
- 1 cup heavy cream, very cold
- ⅔ cup granulated sugar
- 2 teaspoons pure vanilla extract
- ⅛ teaspoon fine salt
- ¾ cup semisweet mini chocolate chips, finely chopped and divided
Instructions
- Spread the mini chips on a cutting board. Chop them with a large knife until the pieces look like coarse sand. Pour the pieces into a fine strainer and shake off the powder, then keep both the flakes and the powder.
- Whisk the milk and sugar in a large bowl for two minutes. The sugar should fully melt. Add the cream, vanilla, and salt, and stir gently.
- Stir the chocolate powder from the strainer into the mix. It will turn the milk a pale tan. Cover the bowl and chill it for at least 2 hours.
- Add half of the chocolate flakes to the condiment container. Check that the container and chute are dry. Cold, damp chocolate sticks to plastic and will block the flow.
- Assemble the machine with the frozen bowl, paddle, and lid. Turn the power dial on, then pour the chilled mix through the lid opening. Keep the handle pointing up.
- Let the mix churn for about 12 minutes. Open the lid window and sprinkle the other half of the flakes into the bowl a little at a time. Slow additions spread the flakes evenly.
- Check the texture at 15 minutes with a spoonful in a cup. It should fall slowly and keep a soft curl. Give it a few more minutes when it still runs.
- Fill each cone with a slow turn of your wrist. Turn the dial for a short burst of flakes. Serve right away.
6. Mint Chocolate Chip Soft Serve
⏱ Time
Prep Time: 15 minutes (plus 2 hours chilling)
Churn Time: 15–20 minutes
Total: About 2 hours 35 minutes
Servings: 6–8 small cones
A little peppermint extract goes a long way, so I measure it with care. Too much tastes like toothpaste, and just enough tastes cool and clean. The pale green color comes from one or two drops of food coloring, and you can skip it. The chocolate flakes add a soft crunch in every bite. This one tastes best on a very hot day.
Ingredients
- 2 cups whole milk, very cold
- 1 cup heavy cream, very cold
- ⅔ cup granulated sugar
- ¾ teaspoon pure peppermint extract
- ½ teaspoon pure vanilla extract
- ⅛ teaspoon fine salt
- 2 drops green food coloring (optional)
- ¾ cup semisweet mini chocolate chips, finely chopped
Instructions
- Chop the mini chips into tiny flakes on a cutting board. Aim for pieces no bigger than a grain of rice. Set them in the freezer for 10 minutes so they stay hard and crisp.
- Whisk the milk and sugar in a large bowl or pitcher for two minutes. Add the cream, peppermint extract, vanilla, and salt. Taste a drop. The mint should be gentle, since it grows stronger as it freezes.
- Add the food coloring a drop at a time, whisking after each one. Stop when the mix looks like a soft spring green. Cover and chill for at least 2 hours.
- Pour the cold chocolate flakes into the dry condiment container. Close the lid. Set up the machine with the frozen bowl, paddle, and lid.
- Turn the power dial on and pour in the mix. Watch the color deepen to a creamy pastel as the paddle moves. Keep the handle pointing up during the pour.
- Test the texture at the 15 minute mark. Dispense a little into a cup and look for a slow, thick drop. Wait two more minutes when it seems loose.
- Swirl the soft serve into cones and turn the flake dial for a moment. Serve fast. Mint soft serve softens quickly because of its light body.
7. Peanut Butter Cup Soft Serve
⏱ Time
Prep Time: 20 minutes (plus 3 hours chilling)
Churn Time: 15–20 minutes
Total: About 3 hours 40 minutes
Servings: 6–8 small cones
Peanut butter does not mix well into cold milk, and I learned that the messy way. Warming it with a little milk first makes it smooth and silky. The base tastes like a creamy peanut shake. Chopped peanut butter cups go into the dispenser as a salty-sweet topping. Chop them very small, or they will jam the chute.
Ingredients
- 1¾ cups whole milk, divided
- 1 cup heavy cream, very cold
- ½ cup creamy peanut butter
- ½ cup granulated sugar
- 1 teaspoon pure vanilla extract
- ⅛ teaspoon fine salt
- 6 mini peanut butter cups, frozen and finely chopped
- ¼ cup finely crushed salted peanuts
Instructions
- Warm 1 cup of the milk in a small saucepan over low heat for about 3 minutes. Add the peanut butter and sugar. Whisk until the mix looks smooth and no lumps remain.
- Remove the pan from the heat and pour the warm mix into a large bowl. Add the remaining ¾ cup of cold milk right away. Whisk in the vanilla and salt, and then the cream.
- Cover the bowl and chill for at least 3 hours. This base is thicker than the others, so it needs the extra time. Whisk it for 10 seconds before pouring, since the peanut butter can settle.
- Freeze the mini peanut butter cups for 20 minutes. Chop them into pieces about the size of a lentil. Mix them with the crushed peanuts and spoon the blend into the dry condiment container.
- Build the machine with the frozen bowl, paddle, and lid. Switch the power dial on. Pour the mix in through the lid opening in a steady stream.
- Churn for about 15 minutes. Peanut butter soft serve thickens a little faster than the others. Check the texture at 12 minutes so it does not get too stiff.
- Pull the handle and test a spoonful in a cup. It should move slowly and look thick and glossy. Fill your cones with a gentle swirl.
- Turn the topping dial for a quick pass of crunchy pieces. Serve at once.
8. Salted Caramel Soft Serve
⏱ Time
Prep Time: 25 minutes (plus 3 hours chilling)
Churn Time: 15–20 minutes
Total: About 3 hours 45 minutes
Servings: 6–8 small cones
Homemade caramel has a deep, toasty flavor that store-bought sauce cannot match. The sugar turns amber in a few minutes, and the smell fills the kitchen. A pinch of sea salt keeps the sweetness balanced. Cooking the caramel feels tricky at first, but it takes only a little patience. Keep a close eye on the pan, because sugar goes from golden to burnt very fast.
Ingredients
- ¾ cup granulated sugar
- 3 tablespoons water
- 1 cup heavy cream, divided
- 1 tablespoon unsalted butter
- ¾ teaspoon flaky sea salt, plus a pinch for the cones
- 2 cups whole milk, very cold
- 1 teaspoon pure vanilla extract
Instructions
- Warm ½ cup of the cream in a small cup in the microwave for 30 seconds. Set it next to the stove. Warm cream blends into hot sugar without sputtering.
- Stir the sugar and water in a medium saucepan over medium heat until the sugar looks wet. Stop stirring once it starts to bubble. Swirl the pan gently now and then, and let it cook for 6 to 8 minutes.
- Watch for a deep amber color, like honey or an old penny. Take the pan off the heat. Pour in the warm cream slowly while you whisk. The mix will bubble up hard, so stand back a little.
- Whisk in the butter and the sea salt until the caramel is smooth. Let it cool in the pan for 10 minutes. It should feel warm, not hot, before it meets the milk.
- Pour the cold milk into a large bowl. Slowly whisk in the warm caramel a little at a time. Add the remaining ½ cup of cold cream and the vanilla.
- Cover the bowl and chill for at least 3 hours. The mix should feel very cold to the touch. A warm caramel base will slow the churn and make the soft serve runny.
- Set up the machine with the frozen bowl, paddle, and lid. Turn the power dial on. Pour the mix through the lid opening and keep the handle pointing up.
- Churn for 15 to 18 minutes. Check a spoonful in a cup and look for a slow, silky drop. Fill each cone with a smooth swirl.
- Finish each cone with a tiny pinch of flaky salt. Serve right away.
9. Birthday Cake Soft Serve
⏱ Time
Prep Time: 15 minutes (plus 2 hours chilling)
Churn Time: 15–20 minutes
Total: About 2 hours 35 minutes
Servings: 6–8 small cones
A tiny splash of almond extract gives this soft serve its bakery-style flavor. It smells like fresh vanilla cake batter. Crushed vanilla wafer cookies stand in for cake crumbs and move through the dispenser easily. Sprinkles bring in the party colors. I made this for a small family gathering, and the cones were gone in minutes.
Ingredients
- 2 cups whole milk, very cold
- 1 cup heavy cream, very cold
- ⅔ cup granulated sugar
- 1½ teaspoons pure vanilla extract
- ¼ teaspoon almond extract
- ⅛ teaspoon fine salt
- 10 vanilla wafer cookies, finely crushed
- ½ cup rainbow sprinkles, divided
Instructions
- Place the cookies in a zip-top bag and crush them with a rolling pin. Keep going until the crumbs look like fine sand. Pass them through a strainer to catch any large pieces.
- Whisk the milk and sugar in a large bowl for two minutes. Add the cream, vanilla, almond extract, and salt. Taste a drop. The almond flavor should be light and in the background.
- Stir in half of the cookie crumbs and ¼ cup of the sprinkles. Cover the bowl and chill for at least 2 hours. The crumbs will soften and give the mix a cake-batter taste.
- Mix the remaining crumbs with the remaining ¼ cup of sprinkles. Spoon the blend into the dry condiment container. Close the lid tight.
- Put the machine together with the frozen bowl, paddle, and lid. Turn the power dial on. Stir the chilled mix once, then pour it in through the lid opening.
- Churn for about 15 minutes. The mix will look pale yellow and flecked with color. Dispense a small spoonful into a cup to check that it flows slowly and holds a soft curl.
- Swirl the soft serve into cones. Turn the dial for a quick shower of crumbs and sprinkles. Serve right away, while the colors are still bright.
10. Chocolate Brownie Soft Serve
⏱ Time
Prep Time: 20 minutes (plus 3 hours chilling)
Churn Time: 15–20 minutes
Total: About 3 hours 40 minutes
Servings: 6–8 small cones
Brownie edges are the secret here, because they dry out and crumble into perfect little bits. The base is a deep cocoa mix with a soft, fudgy flavor. Dry brownie crumbs go into the dispenser for a chewy, chocolatey topping. A day-old brownie works better than a warm one, since it breaks apart cleanly instead of smearing.
Ingredients
- 1¾ cups whole milk, divided
- 1 cup heavy cream, very cold
- ¾ cup granulated sugar
- ⅓ cup unsweetened cocoa powder
- 1 teaspoon pure vanilla extract
- ⅛ teaspoon fine salt
- 1 cup baked brownie edges, from a day-old pan
Instructions
- Cut the brownie edges into small cubes and spread them on a baking sheet. Dry them in a 250°F oven for 15 minutes. They should feel firm and a little crisp when you press one.
- Let the cubes cool fully, then rub them between your fingers over a bowl. Press the crumbs through a coarse strainer. Anything too big goes back for more crumbling.
- Whisk 1 cup of the milk, the sugar, cocoa, and salt in a small saucepan. Heat over medium-low for 4 minutes, stirring the whole time. The mix should turn smooth, glossy, and slightly steamy.
- Pour the warm cocoa into a large bowl and add the remaining cold milk. Whisk in the cream and vanilla. Stir in ¼ cup of the brownie crumbs.
- Cover the bowl and chill for at least 3 hours. The crumbs will soak up a little liquid and add a fudgy flavor. Stir the mix well before pouring.
- Put the dry crumbs that remain into the condiment container. Build the machine with the frozen bowl, paddle, and lid. Turn the power dial on and pour the mix through the opening.
- Churn for about 15 minutes. This base gets thick quickly, so check it at the 13 minute mark. Dispense a spoonful into a cup and look for a slow, heavy drop.
- Swirl the soft serve into cones and turn the dial for a quick burst of crumbs. Serve right away, while the brownie bits stay soft and chewy.
11. Blueberry Cheesecake Soft Serve
⏱ Time
Prep Time: 25 minutes (plus 3 hours chilling)
Churn Time: 15–20 minutes
Total: About 3 hours 45 minutes
Servings: 6–8 small cones
Cream cheese gives this soft serve the tangy, rich bite of a real cheesecake slice. Cooked blueberries turn the mix a pretty lavender color. Graham cracker crumbs fill in for the crust and go in the dispenser. The cream cheese must be soft before mixing, or small white lumps will show up in each swirl.
Ingredients
- 8 ounces cream cheese, softened
- 1½ cups whole milk, very cold
- ¾ cup heavy cream, very cold
- ¾ cup granulated sugar, divided
- 1 cup fresh or frozen blueberries
- 1 tablespoon fresh lemon juice
- 1 teaspoon pure vanilla extract
- ⅛ teaspoon fine salt
- ½ cup graham cracker crumbs, finely ground
Instructions
- Combine the blueberries, ¼ cup of the sugar, and the lemon juice in a small saucepan. Cook over medium heat for 6 minutes, stirring now and then. The berries will burst and make a thick purple syrup.
- Pour the blueberries into a blender and blend for 20 seconds until smooth. Press the puree through a fine strainer into a bowl. Let it cool for 15 minutes in the fridge.
- Beat the softened cream cheese and the remaining ½ cup of sugar in a large bowl. Use a whisk or hand mixer for about 2 minutes. The mix should look creamy and fluffy, with no lumps.
- Add the milk a splash at a time while you whisk. Pour in the cream, vanilla, and salt. Fold in the cooled blueberry puree until the color looks even.
- Cover the bowl and chill for at least 3 hours. Whisk the mix for 10 seconds before pouring, since the cream cheese can settle a little.
- Check that your graham crumbs are fine and dry, then spoon them into the condiment container. Set up the machine with the frozen bowl, paddle, and lid. Turn the power dial on.
- Pour the mix in through the lid opening. Churn for about 16 minutes. Dispense a spoonful into a cup. It should drop slowly and feel smooth, with a slight tang.
- Fill your cones with a gentle swirl. Turn the dial for a light dusting of crumbs. Serve at once.
12. Banana Cream Soft Serve
⏱ Time
Prep Time: 15 minutes (plus 2 hours chilling)
Churn Time: 15–20 minutes
Total: About 2 hours 35 minutes
Servings: 6–8 small cones
Bananas with brown freckles on the peel give the best flavor, since they turn sweet and soft as they ripen. Mashed well, they blend into the milk and make a thick, creamy base. The taste reminds me of banana pudding from a church potluck. Crushed vanilla wafers on top finish it off with a gentle crunch.
Ingredients
- 2 large ripe bananas, peeled (about 1 cup mashed)
- 1½ cups whole milk, very cold
- 1 cup heavy cream, very cold
- ½ cup granulated sugar
- 1 tablespoon fresh lemon juice
- 1 teaspoon pure vanilla extract
- ⅛ teaspoon ground cinnamon
- ⅛ teaspoon fine salt
- ½ cup vanilla wafer crumbs, finely crushed
Instructions
- Mash the bananas in a bowl with a fork until almost no lumps remain. Stir in the lemon juice right away. This keeps the fruit from turning gray in the fridge.
- Add the sugar, cinnamon, and salt to the bananas and mash again. Press the mixture against the side of the bowl to blend it into a thick paste. Pour it into a blender with the milk.
- Blend for 30 seconds until the liquid looks smooth and pale yellow. Pour it into a large bowl. Whisk in the cream and the vanilla.
- Cover the bowl and chill for at least 2 hours. Banana mixes thicken as they sit, so do not worry when the bowl looks heavy. A quick stir before pouring loosens it.
- Crush the vanilla wafers into fine crumbs and spoon them into the dry condiment container. Build the machine with the frozen bowl, paddle, and lid. Turn the power dial on.
- Pour the chilled mix through the opening. Keep the fill level half an inch from the top. Let the machine churn for about 14 minutes.
- Pull the handle and check a spoonful in a cup. Banana soft serve gets thick faster than milk-based flavors, so serve it as soon as it holds a soft curl.
- Swirl the soft serve into cones, then turn the dial for a sprinkle of wafer crumbs. Serve right away.
13. Peach Soft Serve Ice Cream
⏱ Time
Prep Time: 25 minutes (plus 3 hours chilling)
Churn Time: 15–20 minutes
Total: About 3 hours 45 minutes
Servings: 6–8 small cones
Peaches at the peak of summer are juicy, soft, and so fragrant that the whole kitchen smells sweet. Cooking them briefly with sugar deepens the flavor and softens the skin. A touch of cinnamon adds a warm note, like a fresh peach cobbler. The soft serve comes out pale orange, with a smooth body and a gentle fruit tang.
Ingredients
- 3 large ripe peaches, pitted and chopped (about 2 cups)
- ½ cup granulated sugar
- 1 tablespoon fresh lemon juice
- ¼ teaspoon ground cinnamon
- 1 cup whole milk, very cold
- 1¼ cups heavy cream, very cold
- 1 teaspoon pure vanilla extract
- ⅛ teaspoon fine salt
Instructions
- Chop the peaches into small chunks. There is no need to peel them when the skin is thin and soft. Toss them in a saucepan with the sugar, lemon juice, and cinnamon.
- Cook the peaches over medium heat for 8 minutes, stirring often. They should turn soft and syrupy, and the liquid should look golden. Take the pan off the heat and let it cool for 15 minutes.
- Pour the peaches and syrup into a blender. Blend for 30 seconds until the puree is smooth. Leave a few tiny bits for texture, or blend longer for a silky mix.
- Pour the puree into a large bowl. Whisk in the milk, cream, vanilla, and salt. The color should look like a creamy sunrise.
- Cover the bowl and chill for at least 3 hours. Cooked fruit holds warmth, so the mix must be very cold before it goes in the machine. Stir it once more before pouring.
- Set up the machine with the frozen bowl, paddle, and lid. Turn the power dial on. Pour the mix through the lid opening in a slow, steady stream.
- Churn for about 17 minutes. Fruit mixes often take a little longer to set. Check a spoonful in a cup, and look for a slow, smooth drop.
- Fill each cone with a gentle swirl and serve right away. A few thin peach slices on top add color.
14. Mango Soft Serve
⏱ Time
Prep Time: 15 minutes (plus 2 hours chilling)
Churn Time: 15–20 minutes
Total: About 2 hours 35 minutes
Servings: 6–8 small cones
Mango makes the smoothest fruit soft serve I have ever churned, because its flesh is so soft and free of seeds. The color is a bright sunny gold. A squeeze of lime keeps the sweetness in check and adds a tropical zing. Frozen mango chunks work well here, as long as you thaw them first.
Ingredients
- 2 cups ripe mango chunks, fresh or thawed (about 2 large mangoes)
- ½ cup granulated sugar
- 2 tablespoons fresh lime juice
- 1 cup whole milk, very cold
- 1¼ cups heavy cream, very cold
- ½ teaspoon pure vanilla extract
- ⅛ teaspoon fine salt
Instructions
- Cut the mango flesh away from the pit and scoop it out of the skin. Chop it into chunks and measure out 2 cups. Drain thawed mango on a paper towel so the puree does not turn watery.
- Add the mango, sugar, and lime juice to a blender. Blend for about 45 seconds until the puree feels silky and has no strings. Stop once to scrape down the sides.
- Taste a small spoonful. It should taste a bit sweeter than you want, since cold mutes sugar. Blend in one more tablespoon of sugar when the fruit seems sour.
- Pour the puree into a large bowl. Whisk in the milk, cream, vanilla, and salt. The mix should look thick and golden, with no streaks of white.
- Cover and chill for at least 2 hours. Mango can separate a little while it rests, and that is normal. Whisk it for 15 seconds before pouring.
- Build the machine with the frozen bowl, paddle, and lid. Turn the power dial on. Pour the mix in through the opening and keep the handle pointing up.
- Let it churn for 15 to 17 minutes. Dispense a spoonful into a cup and watch the drop. It should fall slowly and keep its shape for a moment.
- Swirl the soft serve into cones. Serve right away, since mango soft serve melts quickly in warm air.
15. Pineapple Coconut Soft Serve
⏱ Time
Prep Time: 15 minutes (plus 2 hours chilling)
Churn Time: 15–20 minutes
Total: About 2 hours 35 minutes
Servings: 6–8 small cones
Pineapple and coconut make a pairing that tastes like a piña colada without the drink. Canned crushed pineapple works better than fresh here, since it blends smooth and has a steady sweetness. Coconut milk adds a silky body and a gentle island flavor. Toasted coconut flakes on top give a nutty crunch. Chop the flakes small, so they glide through the chute.
Ingredients
- 1 can (8 ounces) crushed pineapple in juice, undrained
- 1 cup full-fat canned coconut milk, very cold and well shaken
- 1 cup heavy cream, very cold
- ¾ cup whole milk, very cold
- ½ cup granulated sugar
- 1 tablespoon fresh lime juice
- ½ teaspoon pure vanilla extract
- ⅛ teaspoon fine salt
- ⅓ cup unsweetened shredded coconut, toasted and finely chopped
Instructions
- Heat a dry skillet over medium-low heat. Add the shredded coconut and stir for 2 to 3 minutes. Pull it off the heat when the edges turn light gold, since coconut browns fast.
- Spread the toasted coconut on a plate to cool. Chop it with a knife until the pieces look like coarse crumbs. Spoon it into the dry condiment container once it feels fully cool.
- Pour the crushed pineapple and its juice into a blender with the sugar and lime juice. Blend for about 30 seconds. The mix should look smooth and pale yellow.
- Pour the pineapple puree into a large bowl. Whisk in the coconut milk, cream, whole milk, vanilla, and salt. Whisk well, since coconut milk can leave small fatty clumps.
- Cover the bowl and chill for at least 2 hours. The mix should feel very cold and a little thick. Give it a good stir before pouring.
- Build the machine with the frozen bowl, paddle, and lid. Turn the power dial on. Pour the mix through the lid opening in a slow stream.
- Churn for about 16 minutes. Check a spoonful in a cup. The soft serve should drop slowly and look creamy and light.
- Fill your cones with a gentle swirl and turn the dial for a shower of toasted coconut. Serve right away.
16. Raspberry White Chocolate Soft Serve
⏱ Time
Prep Time: 25 minutes (plus 3 hours chilling)
Churn Time: 15–20 minutes
Total: About 3 hours 45 minutes
Servings: 6–8 small cones
Tart raspberries and sweet white chocolate balance each other so well. The berries bring a sharp, bright flavor, while the white chocolate adds a smooth, buttery richness. Straining out the seeds is the most important step, because raspberry seeds are tiny and gritty. The finished color is a lovely rosy pink.
Ingredients
- 2 cups fresh or frozen raspberries, thawed
- ½ cup granulated sugar
- 1 tablespoon fresh lemon juice
- 4 ounces white chocolate, finely chopped
- 1¼ cups whole milk, divided and very cold
- 1¼ cups heavy cream, very cold
- 1 teaspoon pure vanilla extract
- ⅛ teaspoon fine salt
Instructions
- Combine the raspberries, sugar, and lemon juice in a blender. Blend for 20 seconds until smooth. Press the puree through a fine strainer into a bowl, using the back of a spoon to push it through.
- Scrape the underside of the strainer to catch every bit of puree. Throw away the seeds. You should have about 1 cup of bright red puree.
- Place the chopped white chocolate in a heatproof bowl. Warm ½ cup of the milk in a small saucepan until it just starts to steam. Pour the hot milk over the chocolate and let it sit for 2 minutes.
- Whisk the chocolate and milk until the mix looks smooth and glossy. Whisk in the rest of the cold milk, then the cream, vanilla, and salt. Fold in the raspberry puree until the color looks even.
- Cover the bowl and chill for at least 3 hours. White chocolate makes the base richer, so it needs extra time to cool through. Stir before pouring.
- Set up the machine with the frozen bowl, paddle, and lid. Turn the power dial on. Pour the mix in through the opening and keep the handle pointing up.
- Churn for about 16 minutes. Dispense a small spoonful into a cup and look for a slow, silky drop.
- Swirl the soft serve into cones. Serve at once, since the fruit makes this one soften fast.
17. Lemon Berry Soft Serve
⏱ Time
Prep Time: 20 minutes (plus 3 hours chilling)
Churn Time: 15–20 minutes
Total: About 3 hours 40 minutes
Servings: 6–8 small cones
Lemon zest holds most of the lemon flavor, so I rub it into the sugar first. The sugar turns pale yellow and smells like a lemon grove. Mixed berries add a sweet, jammy swirl. This one tastes light and tangy, almost like a lemonade made creamy. Keep the lemon juice measured, because too much can make the milk curdle.
Ingredients
- ¾ cup granulated sugar
- Zest of 2 lemons
- 3 tablespoons fresh lemon juice
- 1½ cups mixed berries (strawberries, blueberries, raspberries)
- 1½ cups whole milk, very cold
- 1¼ cups heavy cream, very cold
- ½ teaspoon pure vanilla extract
- ⅛ teaspoon fine salt
Instructions
- Put the sugar and lemon zest in a small bowl. Rub them together with your fingertips for about a minute. The sugar will turn damp and pale yellow.
- Add the berries to a blender with the lemon sugar. Blend for 20 seconds until smooth. Press the puree through a fine strainer to remove seeds.
- Pour the milk into a large bowl. Whisk in the cream, vanilla, and salt first. Then pour in the berry puree and whisk well.
- Add the lemon juice last, one tablespoon at a time. Whisk gently after each one. Adding it slowly keeps the mix smooth and prevents any curdling.
- Cover the bowl and chill for at least 3 hours. The flavor mellows as it rests. Taste a spoonful and add a pinch more sugar when it seems too sharp.
- Build the machine with the frozen bowl, paddle, and lid. Turn the power dial on. Pour in the mix through the lid opening in a slow stream.
- Churn for about 16 minutes. Check a spoonful in a cup and look for a slow, smooth drop. It will look pale pink and creamy.
- Fill cones with a soft swirl. Serve right away with a few fresh berries on the side.
18. S’mores Soft Serve
⏱ Time
Prep Time: 20 minutes (plus 3 hours chilling)
Churn Time: 15–20 minutes
Total: About 3 hours 40 minutes
Servings: 6–8 small cones
Campfire flavor comes to the kitchen in this one. Toasting marshmallows under the broiler gives them a smoky, golden edge. Graham crumbs bring the toasty crunch, and chocolate adds richness. Mini marshmallows are sticky, so I leave them out of the dispenser. They go into the base instead, where they melt into the milk.
Ingredients
- 1¾ cups whole milk, divided
- 1 cup heavy cream, very cold
- ½ cup granulated sugar
- 2 ounces semisweet chocolate, finely chopped
- 1 cup mini marshmallows
- 1 teaspoon pure vanilla extract
- ⅛ teaspoon fine salt
- ½ cup graham cracker crumbs, finely ground
- ¼ cup mini chocolate chips, finely chopped
Instructions
- Heat the broiler to high. Spread the marshmallows on a lined baking sheet. Broil for 45 to 60 seconds, watching closely, until the tops turn deep golden brown.
- Scrape the marshmallows into a saucepan with 1 cup of the milk and the sugar. Warm over low heat for 4 minutes, stirring often. The marshmallows will melt into the milk and turn it light tan.
- Add the chopped chocolate and whisk until smooth. Take the pan off the heat. Pour the mix into a large bowl and add the remaining cold milk.
- Whisk in the cream, vanilla, and salt. Strain the mix through a fine sieve to catch any bits of marshmallow that did not melt. Taste a drop and look for a toasty, sweet flavor.
- Cover the bowl and chill for at least 3 hours. Marshmallow mixes get thick as they cool, so a good stir before pouring helps.
- Combine the graham crumbs and chopped chocolate chips. Spoon the blend into the dry condiment container. Close the lid.
- Build the machine with the frozen bowl, paddle, and lid. Turn the power dial on. Pour the mix in through the opening and churn for about 15 minutes.
- Check a spoonful in a cup. It should fall slowly and look thick and creamy. Fill cones with a swirl, then turn the dial for a dusting of crumbs. Serve right away.
19. Nutella Chocolate Soft Serve
⏱ Time
Prep Time: 15 minutes (plus 3 hours chilling)
Churn Time: 15–20 minutes
Total: About 3 hours 15 minutes
Servings: 6–8 small cones
Hazelnut spread melts into warm milk and makes a base that tastes like chocolate and toasted nuts. Because the spread is already sweet, I cut back on the sugar. A little cocoa powder deepens the chocolate flavor. Chopped roasted hazelnuts on top add a crisp bite. Chop them fine, or the dispenser will clog.
Ingredients
- 1¾ cups whole milk, divided
- 1 cup heavy cream, very cold
- ⅔ cup chocolate hazelnut spread
- ¼ cup granulated sugar
- 2 tablespoons unsweetened cocoa powder
- 1 teaspoon pure vanilla extract
- ⅛ teaspoon fine salt
- ⅓ cup roasted hazelnuts, finely chopped
Instructions
- Warm 1 cup of the milk in a small saucepan over low heat for 3 minutes. Whisk in the hazelnut spread, sugar, cocoa powder, and salt. Keep whisking until the mix looks smooth and glossy.
- Pour the warm mix into a large bowl. Stir in the remaining cold milk right away to bring the temperature down. Whisk in the cream and vanilla.
- Cover the bowl and chill for at least 3 hours. The spread can settle at the bottom, so whisk well before pouring.
- Chop the hazelnuts until they look like coarse sand. Shake them through a fine strainer to remove large bits. Spoon the nuts into the dry condiment container.
- Set up the machine with the frozen bowl, paddle, and lid. Turn the power dial on. Pour the mix through the opening in a slow, steady stream.
- Churn for about 15 minutes. Check a spoonful at the 13 minute mark, since this base thickens fast. It should drop slowly and look dark and creamy.
- Fill cones with a gentle swirl. Turn the dial for a quick sprinkle of nuts. Serve right away.
20. Coffee Mocha Soft Serve
⏱ Time
Prep Time: 15 minutes (plus 3 hours chilling)
Churn Time: 15–20 minutes
Total: About 3 hours 35 minutes
Servings: 6–8 small cones
Instant espresso powder gives this soft serve a strong coffee flavor without adding extra liquid. Cocoa brings the chocolate side, so each bite tastes like a cold café mocha. Dissolving the powder in warm milk keeps the swirl smooth, with no bitter specks. Chocolate sprinkles on top add a light crunch and a little sweetness.
Ingredients
- 1¾ cups whole milk, divided
- 1 cup heavy cream, very cold
- ¾ cup granulated sugar
- ¼ cup unsweetened cocoa powder
- 2 tablespoons instant espresso powder
- 1 teaspoon pure vanilla extract
- ⅛ teaspoon fine salt
- ½ cup chocolate sprinkles, for the dispenser
Instructions
- Pour 1 cup of the milk into a small saucepan. Whisk in the sugar, cocoa powder, espresso powder, and salt before you turn on the heat. This keeps the powders from clumping.
- Warm the pan over medium-low heat for about 4 minutes, stirring the whole time. The mix is ready when it looks glossy and steams a little. Rub a drop between your fingers to check that no grit remains.
- Pour the warm mix into a large bowl. Add the remaining cold milk right away to cool it down. Whisk in the cream and vanilla, then taste a drop. The coffee should come through, with chocolate right behind it.
- Cover the bowl and chill for at least 3 hours. Coffee mixes taste stronger after resting, so hold off on adding more powder. Stir well before pouring, since cocoa settles at the bottom.
- Spoon the sprinkles into the dry condiment container. Build the machine with the frozen bowl, paddle, and lid. Turn the power dial on and keep the handle pointing up.
- Pour the chilled mix through the lid opening in a slow stream. Let it churn for about 15 minutes. The color will lighten from dark brown to a creamy mocha shade.
- Pull the handle and let a spoonful fall into a cup. It should drop slowly and hold a soft curl. Wait two more minutes when it still runs.
- Fill each cone with a slow, even swirl. Turn the sprinkle dial for a moment. Serve right away.
21. Cinnamon Roll Soft Serve
⏱ Time
Prep Time: 20 minutes (plus 3 hours chilling)
Churn Time: 15–20 minutes
Total: About 3 hours 40 minutes
Servings: 6–8 small cones
Brown sugar and cinnamon give this soft serve the warm smell of a roll fresh from the oven. A little cream cheese stands in for the icing and adds a soft tang. The base turns a pale caramel color. Crushed cinnamon graham crackers on top bring the crunch of a baked edge. Whisk the cream cheese until it is silky, so no lumps get stuck in the chute.
Ingredients
- 2 ounces cream cheese, softened
- 1¾ cups whole milk, divided
- 1 cup heavy cream, very cold
- ¾ cup packed light brown sugar
- 1½ teaspoons ground cinnamon
- 1½ teaspoons pure vanilla extract
- ⅛ teaspoon fine salt
- ½ cup cinnamon graham cracker crumbs, finely ground
Instructions
- Warm 1 cup of the milk in a small saucepan over low heat for 3 minutes. Whisk in the brown sugar, cinnamon, and salt. Keep whisking for 2 minutes, until the sugar melts and the mix smells warm and sweet.
- Place the softened cream cheese in a large bowl. Pour in a few spoonfuls of the warm mix and whisk hard until the cheese turns smooth. Slowly add the rest of the warm mix while you whisk.
- Pour in the remaining cold milk to cool the base. Whisk in the cream and the vanilla. Taste a drop and look for a balance of spice, sugar, and a light tang.
- Cover the bowl and chill for at least 3 hours. Cinnamon can sink to the bottom as the mix rests. Whisk for 15 seconds before you pour it in.
- Crush the graham crackers into fine crumbs and pass them through a strainer. Spoon them into the dry condiment container. Close the lid tight.
- Put the machine together with the frozen bowl, paddle, and lid. Turn the power dial on. Pour the mix through the opening in a steady stream.
- Churn for about 15 minutes. Dispense a small spoonful into a cup and check that it drops slowly and looks creamy. This base thickens a bit fast, so look at the 13 minute mark.
- Swirl the soft serve into cones and turn the dial for a quick dusting of crumbs. Serve at once, while the swirl is soft.
How to Store Leftover Soft Serve
Soft serve tastes best right out of the machine. Still, a little often remains, and the right storage keeps it good for later.
- Move leftovers into an airtight container. Scoop the extra ice cream out of the bowl as soon as you finish serving. Choose a shallow, covered freezer container. Press a piece of parchment paper onto the top before you close the lid, which stops ice crystals from forming.
- Expect the texture to change. Soft serve is light and airy because it is served right as it churns. In the freezer it firms up and turns into regular scoopable ice cream. It still tastes great, but it will not feel like fresh soft serve.
- Give it extra time to thaw before serving again. Set the container on the counter for 10 to 15 minutes. Stir it gently with a spoon until it softens. Frozen mix-ins like cookie crumbs may soften too, which is normal.
- Never use the ice cream bowl for long-term storage. Frozen dessert sticks to the walls of the bowl and can damage it. Always empty the bowl and clean it as soon as you finish.
Conclusion
Soft serve at home is simple once you know the basics. A frozen bowl, a cold mix, and a quick check on the texture are all it takes.
Pick a new flavor each time you make a batch. The bowl holds a small amount, so you can churn only what you plan to eat. That means fresh swirls every time, with very little left over.




Pingback: 19 Halloween Alcoholic Drink Recipes for a Spooky Grown-Up Party -