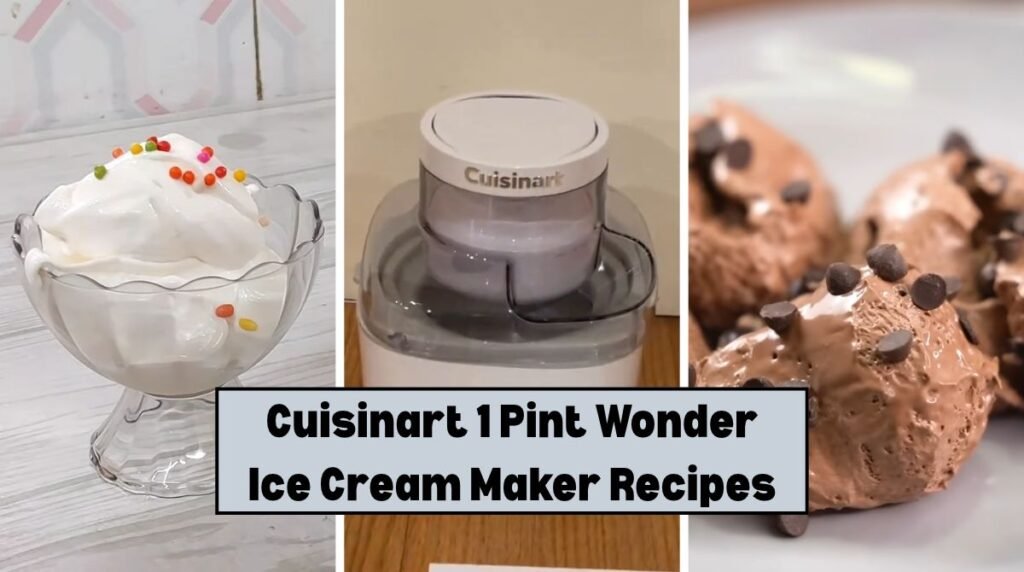
The freezer bowl sat in the back of my freezer for two days before I thought about using it. Then one hot Sunday, my niece asked for ice cream, and the store carton was empty.
Twenty minutes later, a soft, cold scoop of vanilla sat in her bowl. The paddle was still turning. Nobody asked for sprinkles. That tiny batch was gone before I finished rinsing the lid.
Since then, this little machine has become my go-to for quick, small batches.
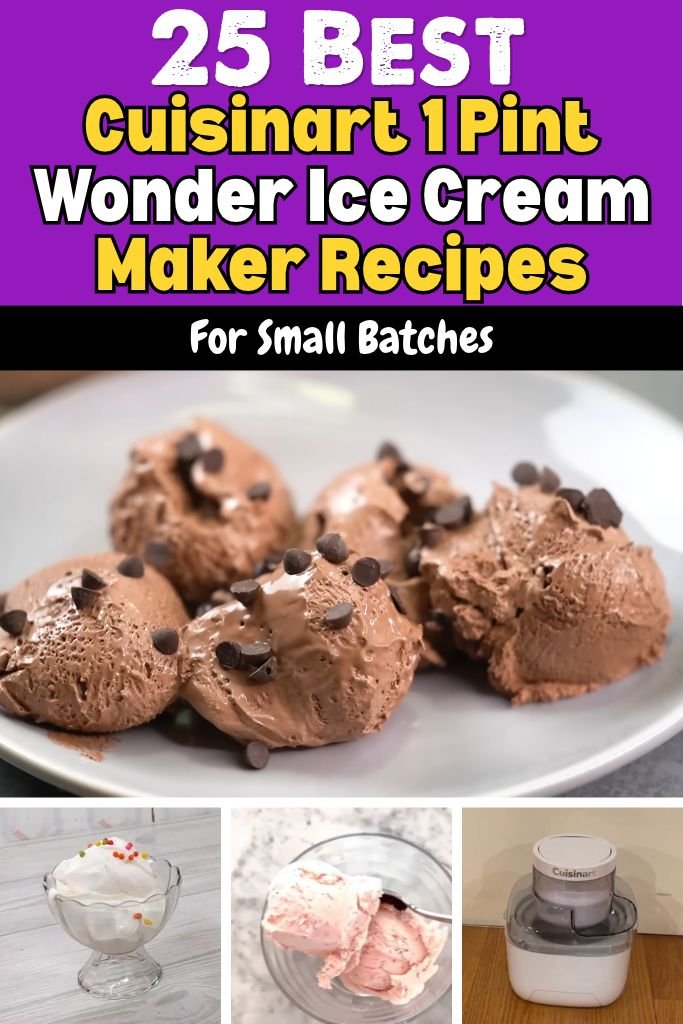
How the Cuisinart 1 Pint Wonder Ice Cream Maker Works
This machine may seem tricky at first glance. It’s actually quite the opposite! Here is the whole process in plain steps.
- Freeze the bowl ahead of time. The bowl has a special liquid sealed inside its double wall. That liquid must freeze solid, which takes about 16 to 24 hours. I keep mine upright in the back of the freezer, where it’s coldest. Shake it before you start. When you hear liquid sloshing, give it more time.
- Chill your ice cream mixture. Cold mix freezes faster and turns out smoother. I stir mine together the day before and keep it in the fridge for at least four hours. A warm mixture melts the bowl’s frozen wall and leaves you with soupy results.
- Start the machine, then add the mixture. Put the bowl, paddle, and lid together first. Turn the switch on and let the paddle spin. Then pour the mix through the little funnel in the lid. Pouring into a moving bowl keeps the mix from freezing in a hard clump at the bottom.
- Watch the churning time and texture. The mixture takes about 20 minutes to thicken. It will look like soft serve, and it will grow in size as air mixes in. When the paddle starts to wobble or slow down, the ice cream is ready. Turn the machine off right away.
- Move the ice cream to a freezer-safe container. Soft serve is great right out of the bowl. For a firmer scoop, spoon it into an airtight container and freeze it for two hours or more. Never leave it in the bowl, because it sticks to the walls.
Tips for Making Ice Cream in the Cuisinart 1 Pint Wonder
These small habits saved me from a lot of runny batches.
- Keep the freezer bowl fully frozen. A half-frozen bowl gives you cold milk, not ice cream. Leave the bowl in the freezer all the time, so it’s always ready to go.
- Chill the mixture before churning. Cold mix goes in, thick ice cream comes out. Four hours in the fridge is the least I’d give it. Overnight is even better.
- Don’t overfill the bowl. The limit is 1¼ cups of mix. The ice cream grows as it churns, and a full bowl will push up against the lid. Fill it only about halfway for the best volume.
- Add mix-ins near the end. Chocolate chips, crushed cookies, nuts, and candy pieces go in through the funnel during the last few minutes. Adding them early lets the paddle break them down into dust.
- Cut mix-ins small. Big chunks can jam the paddle. Pieces about the size of a pea move through the bowl with no trouble.
- Use a freezer-safe container for storage. Shallow, flat containers with tight lids freeze evenly and keep ice crystals away.
- Let very firm ice cream sit before scooping. Five minutes on the counter softens it enough to scoop with no struggle.
- Don’t put finished ice cream back into the freezer bowl. It freezes to the wall and can damage the bowl. Wash the bowl, dry it well, and put it back in the freezer for the next round.
Cuisinart 1 Pint Wonder Ice Cream Maker Recipes
Every recipe below makes about one pint, which is two generous servings. All of them stay under the 1¼ cup mix limit, so nothing spills over the top.
Classic Ice Cream Recipes
1. Vanilla Bean Ice Cream
⏱ Time
Prep Time: 10 minutes (plus 4 hours chilling)
Churn time: 20 minutes
Total: 4 hours 30 minutes, plus 2 hours of firming time if you want a harder scoop
Servings: 2 (about 1 pint)
This is the flavor I make most often. The tiny black seeds make it look like the kind sold in a fancy shop, but the work is almost nothing. Vanilla paste is the easiest way to get those seeds. Keep the sugar fully dissolved, and the texture comes out smooth every time. It’s a great base for any topping you have around.
Ingredients
- ½ cup cold heavy cream
- ½ cup cold whole milk
- ⅓ cup granulated sugar
- 1 teaspoon vanilla bean paste (or seeds from ½ vanilla bean)
- 1 pinch fine salt
Instructions
- Put the freezer bowl in the back of your freezer at least 24 hours before you start. Shake it once before use. You should hear no liquid sloshing around.
- Pour the milk and sugar into a medium bowl. Whisk for about two minutes, until you can’t feel any grains of sugar when you rub a drop between your fingers.
- Add the heavy cream, vanilla paste, and salt. Whisk gently, just until everything looks the same color. Avoid whipping the cream, since that adds too much air too early.
- Cover the bowl and place it in the fridge for at least four hours. Overnight works well. Cold mix is the secret to a smooth finish.
- When you’re ready to churn, set the collar on the base and set the base on a flat counter. Take the bowl from the freezer and place it right in the base. Work fast, because the bowl starts to warm up quickly.
- Attach the paddle to the motor, set the lid on the bowl, and twist it until it locks. Plug in the machine and flip the switch on. The paddle should be spinning before anything goes in.
- Whisk the chilled mix one more time, then pour it slowly through the funnel. Let it churn for about 20 minutes. The ice cream is done when it looks like thick soft serve.
- Turn off the switch and unplug the machine. Spoon the ice cream into an airtight, freezer-safe container. Freeze it for two hours for firm scoops, or eat it soft right away.
2. Chocolate Ice Cream
⏱ Time
Prep Time: 15 minutes (plus 4 hours chilling)
Churn time: 20 minutes
Total: 4 hours 35 minutes, plus 2 hours of firming time
Servings: 2 (about 1 pint)
Cocoa powder alone can taste a little flat in ice cream. Adding a small piece of melted chocolate fixes that and gives the flavor real depth. I warm the cocoa in the milk first, because cold cocoa clumps and never fully mixes. The result is dark, smooth, and rich without being heavy. A tiny pinch of salt makes the chocolate taste stronger.
Ingredients
- ½ cup heavy cream
- ½ cup whole milk
- ⅓ cup granulated sugar
- 3 tablespoons unsweetened cocoa powder
- 1 ounce semisweet chocolate, finely chopped
- ½ teaspoon vanilla extract
- 1 pinch fine salt
Instructions
- Place the freezer bowl in the freezer a full day ahead. A solid, frozen bowl does most of the work here, so don’t rush this part.
- Pour the milk into a small saucepan. Whisk in the sugar and cocoa powder while the pan is still cold. Doing it this way keeps the cocoa from forming dry lumps.
- Set the pan over medium-low heat. Stir often for about three minutes, until the mixture is steamy and the sugar is gone. Don’t let it boil. You only want it warm.
- Take the pan off the heat and add the chopped chocolate. Let it sit for one minute, then whisk until the chocolate melts into the milk and the mixture looks glossy.
- Stir in the cream, vanilla, and salt. Pour the mixture into a bowl or jar, cover it, and refrigerate for at least four hours. It should feel very cold when you touch the container.
- Set up the machine with the frozen bowl, paddle, and lid. Turn it on and let the paddle spin before you pour anything in.
- Whisk the cold mix to loosen it. Pour it through the funnel and let it churn for 18 to 20 minutes. The ice cream should look thick and hold soft ridges.
- Switch off the machine, then scoop the ice cream into a freezer-safe container. Press a piece of parchment onto the top, close the lid, and freeze it for two hours for a firm texture.
3. Strawberry Ice Cream
⏱ Time
Prep Time: 20 minutes (plus 4 hours chilling)
Churn time: 20 minutes
Total: 4 hours 40 minutes, plus 2 hours of firming time
Servings: 2 (about 1 pint)
Real strawberries make this one taste like summer, and the color is a soft pink with no dye. Letting the berries sit in sugar for a bit pulls out their juice. That juice is where the flavor lives. I mash most of the berries but leave a few small bits, so you get tiny pieces of fruit in each bite. Ripe, red berries give the best taste.
Ingredients
- ¾ cup chopped fresh strawberries (about 4½ ounces)
- 3 tablespoons granulated sugar
- 1 teaspoon fresh lemon juice
- ⅓ cup cold heavy cream
- ¼ cup cold whole milk
- ¼ teaspoon vanilla extract
- 1 pinch fine salt
Instructions
- Keep the freezer bowl in the freezer until the moment you need it. A bowl that has been frozen for a full day gives the thickest, smoothest results.
- Wash the berries, cut off the green tops, and chop them into small pieces. Put them in a bowl with the sugar and lemon juice. Stir gently so all the berries get coated.
- Let the berries sit on the counter for 15 minutes. You’ll see red juice gather at the bottom of the bowl. This step makes the flavor much stronger.
- Mash the berries with a fork or potato masher. Leave some small bits for texture. For a smoother ice cream, press a few seconds with a hand blender instead.
- Stir in the cream, milk, vanilla, and salt. The mixture should smell sweet and fruity. Cover it and chill it in the fridge for at least four hours.
- Put the machine together, turn it on, and wait for the paddle to start spinning. Give the cold mix a quick stir, since fruit tends to sink to the bottom.
- Pour the mix through the funnel and churn for about 20 minutes. The ice cream will look pale pink and thick, a bit like a milkshake that holds its shape.
- Turn off the machine and move the ice cream to an airtight container. Freeze it for two hours. Let it sit on the counter for five minutes before you scoop.
4. Cookies and Cream Ice Cream
⏱ Time
Prep Time: 10 minutes (plus 4 hours chilling)
Churn time: 20 minutes
Total: 4 hours 30 minutes, plus 2 hours of firming time
Servings: 2 (about 1 pint)
This one is a favorite with kids and grown-ups alike. The base is a simple vanilla mix, and the cookies go in at the very end. That small timing detail keeps the cookie pieces crunchy and the ice cream white with dark flecks, not gray. I break the cookies by hand into pea-size bits so nothing catches on the paddle.
Ingredients
- ½ cup cold heavy cream
- ½ cup cold whole milk
- ⅓ cup granulated sugar
- ½ teaspoon vanilla extract
- 1 pinch fine salt
- 4 chocolate sandwich cookies, broken into small pieces
Instructions
- Make sure the freezer bowl has been in the freezer for 24 hours. Shake it near your ear to check that nothing sloshes inside.
- Whisk the milk and sugar in a bowl for about two minutes. Keep going until the sugar melts and the liquid turns clear and smooth.
- Add the cream, vanilla, and salt. Whisk lightly until blended. Cover the bowl and chill it for four hours or overnight.
- Place the cookies in a zip bag and tap them with a rolling pin. You want chunks about the size of a pea. Keep them in a small bowl until the ice cream is almost done.
- Assemble the machine, switch it on, and watch the paddle begin to turn. Pour the cold vanilla mix slowly through the funnel.
- Let the mixture churn for about 15 minutes, until it looks like thick soft serve. At this point, the ice cream is almost ready.
- Add the cookie pieces a few at a time through the funnel, and let the paddle mix them in for the last 3 to 5 minutes. Adding them slowly keeps the paddle moving freely.
- Turn off the machine and spoon the ice cream into a freezer-safe container. Freeze it for two hours. Store any leftover cookie crumbs for sprinkling on top.
5. Mint Chocolate Chip Ice Cream
⏱ Time
Prep Time: 15 minutes (plus 4 hours chilling)
Churn time: 20 minutes
Total: 4 hours 35 minutes, plus 2 hours of firming time
Servings: 2 (about 1 pint)
Store-bought mint chip is often bright green and tastes like toothpaste. This homemade one is softer and cooler, with a mint flavor that fades out slowly. Peppermint extract is strong, so I start with a small amount and add more only after tasting the cold mix. Chopped chocolate gives better flecks than round chips, because the pieces come out thin and snap apart in your mouth.
Ingredients
- ½ cup cold heavy cream
- ½ cup cold whole milk
- ⅓ cup granulated sugar
- ¼ teaspoon peppermint extract (plus a few drops more, to taste)
- 1 pinch fine salt
- 1 to 2 drops green food coloring (optional)
- 2 ounces semisweet chocolate, chopped into small bits
Instructions
- Leave the freezer bowl in the coldest corner of your freezer for a full day. Set it upright on a flat spot so the liquid inside freezes evenly.
- Whisk the milk and sugar together until the sugar disappears. This takes about two minutes. Pour in the cream, peppermint extract, and salt, then stir slowly.
- Taste a small spoonful of the mix. The mint should taste a little weaker than you want, since cold dulls flavors. Add a few more drops of extract only when it seems too faint.
- Stir in the food coloring now, a single drop at a time. Without it, the ice cream will be a creamy off-white, which looks natural and tastes the same.
- Cover the mixture and refrigerate it for at least four hours. While it chills, chop the chocolate on a cutting board into bits smaller than a pea. Keep the pieces in the fridge as well.
- Set the bowl into the base, attach the paddle and lid, and plug in the machine. Switch it on and let the paddle spin freely for a few seconds.
- Pour the cold mix through the funnel in one slow, steady stream. Churn for about 15 minutes, until it thickens to a soft-serve look and clings to the paddle.
- Sprinkle the chopped chocolate in through the funnel, a spoonful at a time, over the next 3 to 5 minutes. Turn off the machine as soon as the pieces look evenly spread.
- Move the ice cream into a shallow freezer-safe container and cover it tightly. Freeze for two hours to get scoops that hold their shape.
6. Butter Pecan Ice Cream
⏱ Time
Prep Time: 20 minutes (plus 4 hours chilling)
Churn time: 20 minutes
Total: 4 hours 40 minutes, plus 2 hours of firming time
Servings: 2 (about 1 pint)
My grandfather ate butter pecan every Friday night, and the smell of toasted nuts in butter brings him right back to the kitchen. Brown sugar gives the base a deep, caramel-like flavor. Toasting the pecans in butter is the step that matters most, because it makes them crisp and keeps them from turning soft in the cold. Cool the nuts all the way before you use them.
Ingredients
- 1 tablespoon unsalted butter
- ¼ cup chopped pecans
- ½ cup cold heavy cream
- ½ cup cold whole milk
- ¼ cup packed light brown sugar
- ½ teaspoon vanilla extract
- 1 pinch fine salt
Instructions
- Check that your freezer bowl has been frozen for 24 hours. The bowl is the most important part of the whole process, so give it plenty of time.
- Melt the butter in a small skillet over medium heat. Add the pecans and stir for about three minutes, until they smell nutty and look a shade darker.
- Sprinkle a little salt over the nuts, then tip them onto a plate. Spread them out and let them cool for at least 20 minutes. Warm nuts would melt the ice cream, so be patient.
- In a bowl, whisk the milk with the brown sugar. Break up any hard lumps with the back of a spoon. Keep whisking until the liquid looks smooth and tan.
- Pour in the cream and vanilla, then add the pinch of salt. Mix gently. Cover the bowl and chill it in the fridge for four hours, or leave it overnight.
- Put the machine together and turn it on. Wait until the paddle is turning at a steady pace, then pour in the chilled mix through the funnel.
- Let the mixture churn for around 16 minutes. It should look thick and glossy, a little like wet sand with a light tan color.
- Add the cooled pecans through the funnel a spoonful at a time. Let the paddle fold them in for about three minutes, then switch off the machine.
- Scoop the ice cream into an airtight, freezer-safe container. Freeze it for two hours. Let it sit out for five minutes before scooping, so the nuts don’t pull away from the cream.
7. Coffee Ice Cream
⏱ Time
Prep Time: 10 minutes (plus 4 hours chilling)
Churn time: 20 minutes
Total: 4 hours 30 minutes, plus 2 hours of firming time
Servings: 2 (about 1 pint)
Brewed coffee waters down the base, so I use instant espresso powder instead. It melts right into warm milk and gives a strong, clean coffee flavor with no extra liquid. The color turns a pretty light brown, like a latte. Keep the amount to one tablespoon for this size, since too much makes the ice cream bitter. A splash of vanilla rounds everything out.
Ingredients
- ½ cup cold heavy cream
- ½ cup whole milk, divided
- ⅓ cup granulated sugar
- 1 tablespoon instant espresso powder
- ½ teaspoon vanilla extract
- 1 pinch fine salt
Instructions
- Get the freezer bowl ready a day early and keep it in the freezer until the last second. A solid bowl makes a thick, creamy result.
- Warm two tablespoons of the milk in the microwave for about 15 seconds. It should feel hot, not boiling. Stir the espresso powder into it until you see no grains.
- Pour the coffee mixture into a bowl with the rest of the milk and the sugar. Whisk for two minutes, until the sugar is gone and the liquid is an even tan.
- Add the cream, vanilla, and salt. Give it a slow stir. Taste a tiny spoonful, and keep in mind the flavor will seem milder once it’s frozen.
- Cover the bowl and chill the mix in the fridge for four hours. It must be very cold before it goes into the machine.
- Set up the base, bowl, paddle, and lid, then switch the machine on. Let the paddle turn for a moment so it’s moving at full speed.
- Pour the mix through the funnel in a slow stream. Churn for 18 to 20 minutes. The ice cream is ready when it looks thick, smooth, and holds soft peaks.
- Turn off the switch and transfer the ice cream into a freezer-safe container. Seal it and freeze for two hours for a firmer texture.
8. Chocolate Chip Ice Cream
⏱ Time
Prep Time: 15 minutes (plus 4 hours chilling)
Churn time: 20 minutes
Total: 4 hours 35 minutes, plus 2 hours of firming time
Servings: 2 (about 1 pint)
Regular chips can feel hard and waxy once they freeze solid. A trick I learned from trial and error is to melt chocolate with a little coconut oil and pour it in at the end. It hardens into thin, crackly shards that melt on your tongue. The vanilla base stays simple, so the chocolate is the star. Every spoonful gets a few crunchy flecks.
Ingredients
- ½ cup cold heavy cream
- ½ cup cold whole milk
- ⅓ cup granulated sugar
- ¾ teaspoon vanilla extract
- 1 pinch fine salt
- 2 ounces semisweet chocolate, chopped
- 1 teaspoon coconut oil
Instructions
- Freeze the bowl for a full 24 hours. Place it upright and keep it away from the freezer door, where the temperature changes the most.
- Whisk the milk and sugar in a medium bowl for about two minutes. Add the cream, vanilla, and salt, and stir until the color looks even.
- Cover the mix and refrigerate it for at least four hours. Overnight chilling gives you the creamiest texture.
- About 20 minutes before churning, put the chopped chocolate and coconut oil in a small microwave-safe bowl. Heat in 15-second bursts, stirring each time, until the chocolate is smooth and runny.
- Let the melted chocolate cool for about 10 minutes. It should feel barely warm. Hot chocolate would melt the ice cream and leave you with a soft mess.
- Assemble the machine, turn it on, and wait for the paddle to move smoothly. Pour the cold base through the funnel and let it churn for 15 minutes.
- When the ice cream looks like thick soft serve, drizzle the chocolate in through the funnel in a thin, slow line. The paddle will break it into small, crisp ribbons as it hardens.
- Churn for two more minutes, then switch off the machine. Spoon the ice cream into an airtight, freezer-safe container and freeze for two hours.
Fruit and Fresh Flavor Recipes
9. Peach Ice Cream
⏱ Time
Prep Time: 20 minutes (plus 4 hours chilling)
Churn time: 20 minutes
Total: 4 hours 40 minutes, plus 2 hours of firming time
Servings: 2 (about 1 pint)
Ripe peaches are the whole story here. Pick ones that smell sweet at the stem and give a little when you press them. I blend half of the fruit smooth and chop the other half small, so you get a creamy base with soft bits of peach in every scoop. A squeeze of lemon keeps the color bright and the flavor fresh.
Ingredients
- 1 medium ripe peach (about 5 ounces), peeled and pitted
- 3 tablespoons granulated sugar
- 1 teaspoon fresh lemon juice
- ⅓ cup cold heavy cream
- ¼ cup cold whole milk
- ¼ teaspoon vanilla extract
- 1 pinch fine salt
Instructions
- Keep the freezer bowl in the freezer until the very last minute. It needs a full day of freezing to churn a thick, smooth batch.
- Cut a small X in the bottom of the peach and drop it in boiling water for 30 seconds. Move it to cold water, and the skin will slip right off.
- Chop half of the peach into pea-size pieces and put them in a small bowl with the sugar and lemon juice. Let them sit for 10 minutes, until the sugar turns into a light syrup.
- Blend or mash the other half of the peach until it’s smooth. Stir the puree into the chopped peaches. The mixture should look thick and golden.
- Add the cream, milk, vanilla, and salt. Stir slowly, so you don’t whip the cream. Cover the bowl and chill it in the fridge for at least four hours.
- Set up the machine and turn it on. Wait until the paddle spins at a steady speed. Stir the cold mix once, because the fruit sinks to the bottom while it rests.
- Pour the mix through the funnel and churn for about 20 minutes. It will look thick and creamy, like a peach milkshake that holds its shape.
- Switch off the machine, then spoon the ice cream into an airtight, freezer-safe container. Freeze for two hours. Let it sit for five minutes before scooping.
10. Blueberry Cheesecake Ice Cream
⏱ Time
Prep Time: 25 minutes (plus 4 hours chilling)
Churn time: 20 minutes
Total: 4 hours 45 minutes, plus 2 hours of firming time
Servings: 2 (about 1 pint)
Cream cheese gives this ice cream the tangy, thick feel of a real cheesecake slice. The blueberries cook down into a quick jam that you swirl in by hand, which keeps the purple streaks bright. A crushed graham cracker on top stands in for the crust. Let the cream cheese soften fully first, or tiny lumps will stay in the mix.
Ingredients
- 2 ounces cream cheese, softened
- ⅓ cup cold heavy cream
- ⅓ cup cold whole milk
- ¼ cup granulated sugar
- ½ teaspoon vanilla extract
- 1 pinch fine salt
- ⅓ cup fresh or frozen blueberries
- 1 tablespoon granulated sugar (for the jam)
- 1 teaspoon lemon juice
- 1 graham cracker, crushed
Instructions
- Place the freezer bowl in the freezer a full day ahead. Leave it upright and shake it once before using to check that it’s solid.
- Add the blueberries, 1 tablespoon sugar, and lemon juice to a small pot. Cook over medium heat for about five minutes, pressing the berries with a spoon, until the sauce looks thick and dark.
- Pour the jam into a small dish and let it cool on the counter. Then move it to the fridge. Warm jam would melt the ice cream, so it must be cold.
- Beat the softened cream cheese and ¼ cup sugar in a bowl with a whisk until the mixture looks smooth. Slowly pour in the milk, whisking as you go, so no lumps form.
- Stir in the cream, vanilla, and salt. Cover the bowl and refrigerate for at least four hours. The mix will thicken a little as it gets cold.
- Put the machine together and switch it on. Wait for the paddle to turn smoothly, then pour in the cold mix through the funnel.
- Churn for 18 to 20 minutes, until the ice cream looks thick and creamy. Turn off the machine and unplug it.
- Spoon a third of the ice cream into a freezer-safe container. Dot it with a spoonful of jam, then repeat twice more. Drag a knife through the layers once or twice to make loose swirls.
- Sprinkle the crushed graham cracker over the top and cover the container. Freeze for two hours before serving.
11. Raspberry Swirl Ice Cream
⏱ Time
Prep Time: 25 minutes (plus 4 hours chilling)
Churn time: 20 minutes
Total: 4 hours 45 minutes, plus 2 hours of firming time
Servings: 2 (about 1 pint)
Raspberry sauce is sharp and a little sour, which makes the creamy vanilla base taste even sweeter. I strain out the seeds, since they get stuck in your teeth and spoil the smooth texture. The sauce goes in by hand after churning, so the ribbons stay thick and red. Cool it fully first, or it will blend in and turn the whole batch pink.
Ingredients
- ½ cup cold heavy cream
- ½ cup cold whole milk
- ⅓ cup granulated sugar
- ½ teaspoon vanilla extract
- 1 pinch fine salt
- ½ cup fresh or frozen raspberries
- 2 tablespoons granulated sugar (for the sauce)
- 1 teaspoon lemon juice
Instructions
- Make sure the freezer bowl has had a full 24 hours in the freezer. Keep it near the back, where it stays coldest.
- Add the raspberries, 2 tablespoons sugar, and lemon juice to a small pot. Warm over medium heat for four minutes, mashing the berries as they soften, until the mixture bubbles gently.
- Press the sauce through a fine strainer into a small bowl. Use the back of a spoon to push the juice through. Throw away the seeds left behind.
- Chill the sauce in the fridge for at least two hours. It will thicken into a glossy, spoonable syrup as it cools.
- Whisk the milk and ⅓ cup sugar for about two minutes, until the grains are gone. Stir in the cream, vanilla, and salt. Cover and chill the base for four hours.
- Turn on the machine with the bowl, paddle, and lid in place. Pour the cold base through the funnel and let it churn for about 20 minutes.
- The ice cream is ready when it looks thick and holds its shape on the paddle. Switch off the machine and unplug it.
- Spoon half of the ice cream into a freezer-safe container. Drizzle on half of the sauce, then add the rest of the ice cream and the last of the sauce. Swirl once with a butter knife.
- Cover the container tightly and freeze for two hours. Too much swirling blends the sauce in, so keep it to one or two passes.
12. Mango Ice Cream
⏱ Time
Prep Time: 15 minutes (plus 4 hours chilling)
Churn time: 20 minutes
Total: 4 hours 35 minutes, plus 2 hours of firming time
Servings: 2 (about 1 pint)
Mango has a natural creaminess, so this ice cream turns out silky with very little cream. The color is a deep sunny yellow. Sweet, ripe mangoes work best, and frozen chunks that have thawed are a good backup in winter. Lime juice adds a light tang that keeps the flavor bright instead of heavy. Blend the fruit until it’s completely smooth.
Ingredients
- 1 cup ripe mango chunks (about 6 ounces)
- 3 tablespoons granulated sugar
- 2 teaspoons fresh lime juice
- ⅓ cup cold heavy cream
- ¼ cup cold whole milk
- 1 pinch fine salt
Instructions
- Take a moment to check the freezer bowl. It should have been frozen for a full day and make no sound when you shake it.
- Put the mango chunks, sugar, and lime juice in a blender. Blend for about 30 seconds, until the puree looks smooth and has no stringy bits.
- Taste the puree. Mangoes vary a lot in sweetness, so add another teaspoon of sugar only when it tastes sour. Remember that cold dulls sweetness.
- Pour in the cream, milk, and salt. Blend for just 5 seconds, or stir by hand. Long blending can whip the cream too much.
- Pour the mixture into a jar or bowl, cover it, and chill it for at least four hours. The color will deepen a little as it rests.
- Assemble the machine and switch it on. Give the cold mix a quick stir, since the mango tends to settle at the bottom.
- Pour the mix through the funnel and let it churn for 18 to 20 minutes. It will turn thick, smooth, and bright yellow.
- Turn off the machine and spoon the ice cream into an airtight container. Freeze for two hours. This flavor gets firm, so let it rest on the counter for five to eight minutes before scooping.
13. Lemon Ice Cream
⏱ Time
Prep Time: 15 minutes (plus 4 hours chilling)
Churn time: 20 minutes
Total: 4 hours 35 minutes, plus 2 hours of firming time
Servings: 2 (about 1 pint)
Lemon and cream sound like an odd pair, but they work well together. The zest brings the lemon smell, and the juice brings the tang. Rub the zest into the sugar first, and the sugar turns pale yellow and smells strong. Add the juice slowly at the end. Fast pouring can make the cream thicken in a funny way, so go slow and keep whisking.
Ingredients
- ½ cup cold heavy cream
- ⅓ cup cold whole milk
- ⅓ cup granulated sugar
- 1 teaspoon finely grated lemon zest
- 3 tablespoons fresh lemon juice
- ¼ teaspoon vanilla extract
- 1 pinch fine salt
Instructions
- Place the freezer bowl in the freezer a full day ahead, standing upright. Check that it’s solid before you plan to churn.
- Wash the lemon and grate only the yellow skin. Stay away from the white layer under it, since that part tastes bitter.
- Put the sugar and zest in a bowl. Rub them together with your fingertips for about one minute, until the sugar looks damp and smells like fresh lemon.
- Pour in the milk and whisk for two minutes, until the sugar is gone. Add the cream, vanilla, and salt, then stir gently.
- Pour the lemon juice in a little at a time, whisking after each splash. The mix will thicken slightly. That’s normal and a good sign.
- Cover the bowl and chill for at least four hours. A very cold mix is key, especially with a tangy flavor like this one.
- Set up the machine, turn it on, and let the paddle spin. Pour the mix through the funnel and churn for about 20 minutes, until the texture looks like soft, thick custard.
- Switch off the machine and spoon the ice cream into a freezer-safe container. Seal it and freeze for two hours. Let it soften on the counter for five minutes before scooping.
14. Banana Cream Ice Cream
⏱ Time
Prep Time: 15 minutes (plus 4 hours chilling)
Churn time: 20 minutes
Total: 4 hours 35 minutes, plus 2 hours of firming time
Servings: 2 (about 1 pint)
Spotty, soft bananas are the secret to this one. The browner the peel, the sweeter and more fragrant the fruit. I mash the banana with a fork and leave a few tiny lumps for texture. A little cinnamon and a few vanilla wafer crumbs on top give it the feel of a banana pudding. Eat it soon after freezing, because the banana flavor is at its best in the first few days.
Ingredients
- 1 large very ripe banana (about 5 ounces), peeled
- 3 tablespoons granulated sugar
- ⅓ cup cold heavy cream
- ¼ cup cold whole milk
- ½ teaspoon vanilla extract
- ⅛ teaspoon ground cinnamon
- 1 pinch fine salt
- 3 vanilla wafer cookies, crushed
Instructions
- Keep the freezer bowl in the freezer until you’re ready to churn. A full 24 hours of freezing gives the best texture.
- Mash the banana in a bowl with a fork. Press until it looks like thick, lumpy porridge. A few small bits are fine.
- Stir in the sugar, cinnamon, and salt. Let the bowl sit for five minutes, so the sugar starts to melt into the fruit.
- Pour in the milk and whisk until the mix looks smooth. Add the cream and vanilla, then stir gently with a spoon.
- Press a piece of plastic wrap right onto the surface of the mix. This stops the banana from turning brown. Chill in the fridge for at least four hours.
- Put the machine together and switch it on. Wait until the paddle is moving at a steady pace. Stir the cold mix once before pouring.
- Pour the mix through the funnel and churn for about 18 minutes. The ice cream will look thick, pale gold, and a bit speckled.
- Turn off the machine, then add the crushed wafers on top or fold them in by hand. Spoon the ice cream into an airtight container and freeze for two hours.
15. Pineapple Coconut Ice Cream
⏱ Time
Prep Time: 15 minutes (plus 4 hours chilling)
Churn time: 20 minutes
Total: 4 hours 35 minutes, plus 2 hours of firming time
Servings: 2 (about 1 pint)
This one tastes like a drink you would sip on a beach, only creamier. Coconut milk gives it a rich base, and pineapple adds a sweet, sharp bite. Fresh pineapple holds an enzyme that can make dairy turn bitter, so I use canned pineapple, which is heated and safe. Drain it well, or extra juice will make the ice cream icy.
Ingredients
- ½ cup canned crushed pineapple, drained very well
- ⅔ cup full-fat canned coconut milk, well shaken
- ¼ cup cold heavy cream
- 3 tablespoons granulated sugar
- ½ teaspoon vanilla extract
- 1 pinch fine salt
- 2 tablespoons unsweetened shredded coconut, toasted
Instructions
- Check the freezer bowl a day before you plan to churn. It should be fully frozen and silent when you shake it.
- Pour the crushed pineapple into a fine strainer. Press it with a spoon for about a minute, until no more juice drips out. Dry fruit means smoother ice cream.
- Spread the shredded coconut in a dry skillet over medium-low heat. Stir for two minutes, until it turns light gold. Pour it onto a plate to cool.
- Shake the coconut milk can hard before opening, since the cream and liquid separate. Measure ⅔ cup into a bowl and whisk in the sugar until the grains are gone.
- Add the cream, vanilla, and salt. Stir in the drained pineapple. The mix should look thick and slightly lumpy.
- Cover the bowl and refrigerate for at least four hours. Coconut milk gets thicker as it chills, which is just what you want here.
- Switch on the machine with the bowl, paddle, and lid in place. Stir the cold mix, then pour it through the funnel. Churn for about 20 minutes.
- Turn off the machine and spoon the ice cream into a freezer-safe container. Top with the toasted coconut and freeze for two hours before serving.
Dessert-Inspired Ice Cream Recipes
16. Chocolate Brownie Ice Cream
⏱ Time
Prep Time: 15 minutes (plus 4 hours chilling)
Churn time: 20 minutes
Total: 4 hours 35 minutes, plus 2 hours of firming time
Servings: 2 (about 1 pint)
Brownie pieces are chewy and soft, even when frozen, which makes them better than most mix-ins. Use a fudgy brownie with a moist center, not a cakey one. Chilling the brownie before you cut it keeps the pieces from crumbling. I like them about the size of a dice cube, big enough to find but small enough for the paddle.
Ingredients
- ½ cup cold heavy cream
- ½ cup cold whole milk
- ⅓ cup granulated sugar
- 2 tablespoons unsweetened cocoa powder
- ½ teaspoon vanilla extract
- 1 pinch fine salt
- 1 fudgy brownie (about 2 ounces), chilled and cut into small cubes
Instructions
- Keep the freezer bowl in the freezer for a full day. Place it at the back, where it stays coldest.
- Whisk the sugar and cocoa powder together in a bowl while they’re both dry. This stops the cocoa from clumping when the liquid goes in.
- Pour in the milk a little at a time, whisking after each pour. Keep going until the mixture looks dark and smooth, with no dry spots.
- Add the cream, vanilla, and salt. Stir slowly. Cover the bowl and chill in the fridge for at least four hours.
- Place the brownie in the freezer for 30 minutes, then cut it into small cubes. Firm brownies cut cleanly and keep their shape.
- Set up the machine, turn it on, and wait for the paddle to spin smoothly. Pour the cold mix through the funnel.
- Churn for about 16 minutes, until the ice cream looks thick and holds soft ridges. Add the brownie cubes a spoonful at a time through the funnel.
- Let the paddle mix for three more minutes, then switch off the machine. Spoon the ice cream into an airtight container and freeze for two hours.
17. Peanut Butter Cup Ice Cream
⏱ Time
Prep Time: 15 minutes (plus 4 hours chilling)
Churn time: 20 minutes
Total: 4 hours 35 minutes, plus 2 hours of firming time
Servings: 2 (about 1 pint)
Creamy peanut butter makes the base taste like the filling of a candy cup. Smooth peanut butter blends best, and the kind that comes in a jar from the grocery shelf works well. Warm it for a few seconds so it stirs in easily. Chop the candy cups into small bits and chill them first, so they stay firm and don’t smear in the bowl.
Ingredients
- ¼ cup creamy peanut butter
- ½ cup cold heavy cream
- ⅓ cup cold whole milk
- ¼ cup granulated sugar
- ½ teaspoon vanilla extract
- 1 pinch fine salt
- 3 mini peanut butter cups, chopped and chilled
Instructions
- Make sure the freezer bowl is frozen solid after at least 24 hours. A soft bowl won’t thicken this heavier mixture well.
- Microwave the peanut butter for 10 seconds, until it’s loose and easy to stir. Add the sugar and half of the milk, then whisk hard until no streaks remain.
- Pour in the rest of the milk, the cream, the vanilla, and the salt. Whisk until the color looks even and the mix feels smooth.
- Cover the bowl and refrigerate for at least four hours. Peanut butter thickens in the cold, so give the mix a good stir before churning.
- Chop the candy cups into small bits and keep them in the fridge until needed. Cold candy keeps its shape better.
- Put the machine together and switch it on. Wait for the paddle to spin, then pour in the mix through the funnel.
- Churn for about 16 minutes, until the ice cream looks thick and tan. Sprinkle in the candy pieces slowly through the funnel and let the paddle blend them for three minutes.
- Turn off the machine and spoon the ice cream into a freezer-safe container. Freeze for two hours. Let it rest on the counter for five minutes before you scoop.
18. Birthday Cake Ice Cream
⏱ Time
Prep Time: 15 minutes (plus 4 hours chilling)
Churn time: 20 minutes
Total: 4 hours 35 minutes, plus 2 hours of firming time
Servings: 2 (about 1 pint)
A small splash of almond extract is what makes this taste like real bakery cake. It adds a soft, sweet note that plain vanilla can’t reach. Crumbled yellow cake goes in at the end, and the sprinkles go on top. Add sprinkles to the mix too early, and the color bleeds into the cream. Keep them for the final minute.
Ingredients
- ½ cup cold heavy cream
- ½ cup cold whole milk
- ⅓ cup granulated sugar
- ½ teaspoon vanilla extract
- ⅛ teaspoon almond extract
- 1 pinch fine salt
- ⅓ cup crumbled plain yellow cake or cupcake
- 1 tablespoon rainbow sprinkles
Instructions
- Put the freezer bowl in the freezer a full day ahead. Keep it upright and shake it once before you begin.
- Whisk the milk and sugar for about two minutes, until the sugar melts. Pour in the cream, vanilla, almond extract, and salt. Stir slowly until smooth.
- Cover the bowl and chill the mix for at least four hours. The almond smell will mellow as it rests.
- Tear the cake into small crumbs, about the size of a pea. Spread them on a plate and set them in the fridge so they dry out a little. Dry crumbs stay soft, not soggy.
- Turn on the machine with the bowl, paddle, and lid in place. Let the paddle spin freely, then pour in the cold mix through the funnel.
- Churn for about 15 minutes. The ice cream should look thick and pale, like whipped frosting.
- Add the cake crumbs a spoonful at a time and let them mix for two minutes. Pour in half of the sprinkles during the last minute.
- Switch off the machine and scoop the ice cream into a freezer-safe container. Press the rest of the sprinkles on top, cover, and freeze for two hours.
19. S’mores Ice Cream
⏱ Time
Prep Time: 15 minutes (plus 4 hours chilling)
Churn time: 20 minutes
Total: 4 hours 35 minutes, plus 2 hours of firming time
Servings: 2 (about 1 pint)
Campfire flavor is easy to get at home with a kitchen torch or the broiler. Toasted marshmallow gives the base a sweet, smoky edge. Graham crackers add crunch, and chopped chocolate brings the bittersweet part. I fold the marshmallow in by hand at the end, because the sticky strings can wrap around the paddle.
Ingredients
- ½ cup cold heavy cream
- ½ cup cold whole milk
- ¼ cup granulated sugar
- ½ teaspoon vanilla extract
- 1 pinch fine salt
- 6 mini marshmallows, plus 6 more for toasting
- 1 whole graham cracker, broken into small pieces
- 1 ounce milk chocolate, chopped
Instructions
- Check that the freezer bowl has frozen for 24 hours. It should be silent when you shake it.
- Heat the broiler to high. Spread 6 marshmallows on a small baking sheet lined with foil. Broil for 30 to 60 seconds, watching closely, until they turn deep golden brown.
- Let the toasted marshmallows cool fully, then chop them into small bits. Keep the chopped pieces in the fridge. Cold marshmallow is less sticky.
- Whisk the milk and sugar for two minutes until smooth. Add the cream, vanilla, and salt. Stir slowly, then cover and chill for four hours.
- Put the machine together and switch it on. Pour the cold mix through the funnel once the paddle is spinning at a steady speed.
- Churn for about 16 minutes, until the ice cream looks thick and creamy. Add the graham pieces and chopped chocolate a spoonful at a time through the funnel.
- Let the paddle mix for two minutes, then turn off the machine. Spoon half of the ice cream into a freezer-safe container.
- Scatter the toasted marshmallow over it, then add the rest of the ice cream. Cover tightly and freeze for two hours.
20. Cinnamon Roll Ice Cream
⏱ Time
Prep Time: 20 minutes (plus 4 hours chilling)
Churn time: 20 minutes
Total: 4 hours 40 minutes, plus 2 hours of firming time
Servings: 2 (about 1 pint)
Warm cinnamon, brown sugar, and a thick icing swirl make this taste like a Saturday morning bake. The base gets its color from brown sugar, which also adds a soft caramel note. A cinnamon-sugar ribbon runs through the middle. Make the icing thin enough to drizzle but thick enough to hold, so it doesn’t vanish into the cream.
Ingredients
- ½ cup cold heavy cream
- ½ cup cold whole milk
- ¼ cup packed light brown sugar
- ¾ teaspoon ground cinnamon
- ½ teaspoon vanilla extract
- 1 pinch fine salt
- 1 tablespoon cream cheese, softened
- 2 tablespoons powdered sugar
- 1 teaspoon milk (for the icing)
- 1 teaspoon brown sugar mixed with ¼ teaspoon cinnamon (for the ribbon)
Instructions
- Freeze the bowl for a full 24 hours, standing upright at the back of the freezer.
- Whisk the milk with the brown sugar and ¾ teaspoon cinnamon for two minutes. Press out any hard lumps with the back of a spoon.
- Add the cream, vanilla, and salt, then stir. Cover and refrigerate for at least four hours. The cinnamon will settle, so stir again before churning.
- Make the icing by stirring the cream cheese, powdered sugar, and 1 teaspoon milk until smooth. It should fall off the spoon in a slow ribbon. Chill it until needed.
- Switch on the machine with the bowl, paddle, and lid in place. Pour in the cold base through the funnel and churn for about 18 minutes.
- When the ice cream looks thick and tan, turn off the machine. Spoon a third of it into a freezer-safe container.
- Drizzle on some icing and sprinkle a pinch of the brown sugar and cinnamon mix. Repeat with two more layers, ending with icing.
- Cut through the layers once with a knife for a loose swirl. Cover and freeze for two hours.
21. Chocolate Fudge Brownie Ice Cream
⏱ Time
Prep Time: 20 minutes (plus 4 hours chilling)
Churn time: 20 minutes
Total: 4 hours 40 minutes, plus 2 hours of firming time
Servings: 2 (about 1 pint)
This one is the richest flavor on the list, with a dark chocolate base, brownie bits, and a thick fudge ribbon. A small amount of corn syrup keeps the fudge soft even after freezing. Without it, the sauce turns hard and chewy. Cool the fudge completely before it touches the ice cream, or the swirl will melt away.
Ingredients
- ½ cup cold heavy cream
- ½ cup cold whole milk
- ⅓ cup granulated sugar
- 3 tablespoons unsweetened cocoa powder
- ½ teaspoon vanilla extract
- 1 pinch fine salt
- 1 fudgy brownie (about 2 ounces), chilled and cubed
- 2 tablespoons semisweet chocolate chips
- 2 tablespoons heavy cream (for the fudge)
- 1 teaspoon light corn syrup
Instructions
- Make sure the freezer bowl has been frozen for a full day. Place it in the coldest part of your freezer.
- Put the chocolate chips, 2 tablespoons cream, and corn syrup in a small microwave-safe bowl. Heat for 20 seconds, then stir until glossy. Heat in 10-second bursts if needed.
- Let the fudge cool on the counter for 15 minutes, then chill it. It should be thick enough to hold a trail when you drag a spoon through it.
- Whisk the sugar and cocoa together while dry. Pour in the milk slowly, whisking until the mix looks dark and smooth. Add ½ cup cream, vanilla, and salt.
- Cover the bowl and refrigerate the base for four hours. While it chills, freeze the brownie for 30 minutes and cut it into small cubes.
- Turn on the machine and pour in the cold base through the funnel. Churn for about 16 minutes, until it looks thick and holds soft ridges.
- Add the brownie cubes a spoonful at a time and let the paddle mix for two minutes. Switch off the machine.
- Layer the ice cream and fudge in a freezer-safe container, starting and ending with ice cream. Swirl once with a knife, cover, and freeze for two hours.
Simple Small-Batch Flavors
22. Salted Caramel Ice Cream
⏱ Time
Prep Time: 25 minutes (plus 4 hours chilling)
Churn time: 20 minutes
Total: 4 hours 45 minutes, plus 2 hours of firming time
Servings: 2 (about 1 pint)
Making caramel can feel scary, but it’s actually quite the opposite! You only need sugar, a pan, and a few minutes of patience. The sugar melts, turns amber, and smells like toasted candy. Cream goes in next and bubbles wildly, so use a deep pot. Stop stirring once the sugar melts, and swirl the pan instead.
Ingredients
- ¼ cup granulated sugar
- 1 tablespoon water
- ½ cup heavy cream, divided
- ½ cup cold whole milk
- ½ teaspoon vanilla extract
- ¼ teaspoon flaky sea salt, plus a pinch for the top
Instructions
- Place the freezer bowl in the freezer a full day ahead. Keep it upright at the back.
- Put the sugar and water in a small, deep saucepan. Stir once to wet the sugar, then set the pan over medium heat. Don’t stir again.
- Cook for 5 to 7 minutes, swirling the pan now and then, until the sugar turns deep amber. Pull it off the heat right away if it starts to smoke.
- Pour in ¼ cup of the cream slowly. The caramel will bubble up and harden in spots. Whisk over low heat for one minute until smooth.
- Move the caramel to a bowl and whisk in the milk, the remaining ¼ cup cream, the vanilla, and ¼ teaspoon salt. Let it cool for 20 minutes.
- Cover the bowl and chill for at least four hours. Taste a small spoonful and add a tiny pinch more salt if the flavor seems flat.
- Switch on the machine and pour in the cold mix through the funnel. Churn for about 20 minutes, until it looks thick, smooth, and light brown.
- Spoon the ice cream into a freezer-safe container, sprinkle the pinch of salt on top, and freeze for two hours.
23. Nutella Ice Cream
⏱ Time
Prep Time: 10 minutes (plus 4 hours chilling)
Churn time: 20 minutes
Total: 4 hours 30 minutes, plus 2 hours of firming time
Servings: 2 (about 1 pint)
Hazelnut spread makes this the easiest chocolate ice cream you can make. It already has sugar, cocoa, and nuts in it, so the list of ingredients stays short. Warm the spread for a few seconds so it blends without lumps. Chopped toasted hazelnuts on top add crunch, but the ice cream is great without them.
Ingredients
- ⅓ cup chocolate hazelnut spread
- ½ cup cold heavy cream
- ⅓ cup cold whole milk
- 2 tablespoons granulated sugar
- ½ teaspoon vanilla extract
- 1 pinch fine salt
- 1 tablespoon chopped toasted hazelnuts (optional)
Instructions
- Keep the freezer bowl in the freezer for a full 24 hours. It should be silent when shaken.
- Spoon the hazelnut spread into a bowl and microwave for 10 seconds. It should look loose and glossy.
- Whisk in the sugar and half of the milk. Keep whisking hard until the mixture looks smooth and has no streaks.
- Pour in the rest of the milk, then add the cream, vanilla, and salt. Whisk gently. The color should be a medium, milky brown.
- Cover the bowl and chill for four hours. Stir it well before churning, because the spread can settle at the bottom.
- Put the machine together and switch it on. Pour in the cold mix through the funnel after the paddle begins to turn.
- Churn for 18 to 20 minutes, until it looks thick and creamy. Turn off the machine.
- Spoon the ice cream into a freezer-safe container, top with hazelnuts, and freeze for two hours. Let it sit for five minutes before scooping.
24. Strawberry Cheesecake Ice Cream
⏱ Time
Prep Time: 25 minutes (plus 4 hours chilling)
Churn time: 20 minutes
Total: 4 hours 45 minutes, plus 2 hours of firming time
Servings: 2 (about 1 pint)
Cream cheese gives this ice cream a slight tang, and cooked strawberries add a jammy sweetness. I cook the berries down for a few minutes so the extra water leaves the pan, not the ice cream. Watery fruit turns icy in the freezer. Crushed graham crackers go on top as a quick crust. Soften the cream cheese all the way, so the base stays smooth.
Ingredients
- 2 ounces cream cheese, softened
- ⅓ cup cold heavy cream
- ⅓ cup cold whole milk
- ¼ cup granulated sugar
- ½ teaspoon vanilla extract
- 1 pinch fine salt
- ½ cup chopped fresh strawberries
- 1 tablespoon granulated sugar (for the berries)
- 1 teaspoon lemon juice
- 1 graham cracker, crushed
Instructions
- Put the freezer bowl in the freezer a full day ahead. Stand it upright and keep it in the coldest spot.
- Place the strawberries, 1 tablespoon sugar, and lemon juice in a small pot. Cook over medium heat for about five minutes, mashing with a spoon, until the fruit looks thick and jammy.
- Scrape the berries into a small dish and let them cool on the counter. Move the dish to the fridge for at least one hour. Cold jam keeps its shape in the ice cream.
- Whisk the cream cheese and ¼ cup sugar in a bowl until no lumps remain. Pour in the milk a little at a time, whisking after each pour.
- Add the cream, vanilla, and salt. Stir slowly. Cover the bowl and chill in the fridge for at least four hours.
- Switch on the machine with the bowl, paddle, and lid in place. Let the paddle spin, then pour in the cold mix through the funnel.
- Churn for about 18 to 20 minutes, until the ice cream looks thick and creamy. Turn off the machine and unplug it.
- Spoon half of the ice cream into a freezer-safe container. Add half of the strawberry jam in spoonfuls, then top with the rest of the ice cream and jam.
- Swirl once with a knife and sprinkle the graham cracker on top. Cover and freeze for two hours.
25. Oreo Peanut Butter Ice Cream
⏱ Time
Prep Time: 15 minutes (plus 4 hours chilling)
Churn time: 20 minutes
Total: 4 hours 35 minutes, plus 2 hours of firming time
Servings: 2 (about 1 pint)
Salty peanut butter and sweet chocolate cookies are a classic pair. The base is thick and nutty, and the cookie bits add a dark crunch. Cookies lose their snap if they sit in the mix too long, so they go in during the last few minutes. Break them by hand into pieces about the size of a pea. Large chunks can catch on the paddle.
Ingredients
- ¼ cup creamy peanut butter
- ½ cup cold heavy cream
- ⅓ cup cold whole milk
- ¼ cup granulated sugar
- ½ teaspoon vanilla extract
- 1 pinch fine salt
- 4 chocolate sandwich cookies, broken into small pieces
Instructions
- Check that the freezer bowl has been frozen for 24 hours. A solid bowl is needed for this thick mixture.
- Microwave the peanut butter for 10 seconds, until it’s soft and stirs easily. Add the sugar and half of the milk, then whisk until you see no streaks.
- Add the remaining milk, cream, vanilla, and salt. Whisk gently until the mix looks smooth and light tan.
- Cover the bowl and refrigerate for at least four hours. Stir it well before churning, since the peanut butter thickens in the cold.
- Break the cookies into small pieces and keep them in a bowl on the counter. Dry cookies stay crisp longer.
- Put the machine together and turn it on. Wait for the paddle to spin at a steady pace, then pour the cold mix through the funnel.
- Churn for about 16 minutes, until the ice cream looks thick. Add the cookie pieces a spoonful at a time and let the paddle mix for three minutes.
- Switch off the machine and spoon the ice cream into a freezer-safe container. Cover and freeze for two hours. Let it rest for five minutes before scooping.
How to Store Homemade Ice Cream
Homemade ice cream has no stabilizers, so it needs a little care after churning. These steps keep every pint creamy.
- Use an airtight freezer-safe container. A flat, shallow container with a tight lid works best. Press a piece of parchment paper onto the surface before closing it. This keeps ice crystals from forming on top.
- Keep it away from warm areas of the freezer. The door shelf warms up every time you open it. Store your ice cream at the back, where the temperature stays steady.
- Expect a firm texture. Homemade ice cream can become quite firm after freezing, since it has less air and no added gums. This is normal and does not mean anything went wrong.
- Allow a short resting period before scooping. Set the container on the counter for five to ten minutes. Run your scoop under warm water for easier serving.
- Never use the freezer bowl as long-term storage. Ice cream sticks to the walls and can damage the bowl. Wash it, dry it well, and put it back in the freezer for your next batch.
For the best taste and texture, eat your ice cream within one week.
Conclusion
Every flavor here makes just one pint, so you can try a new one each weekend without a freezer full of leftovers. Small batches mean fresh ice cream whenever you want it.
Start with vanilla, then pick a flavor that matches your mood. Swap in your favorite mix-ins and make each batch your own. These cuisinart 1 pint wonder ice cream maker recipes are easy, quick, and made for trying new ideas.