American dinner food has a long, rich story. For hundreds of years, families across the country have cooked hearty meals that bring people together.
From the smoky kitchens of the South to the cozy farmhouses of the Midwest, these meals were built on simple, filling ingredients. Classic American dinner recipes grew out of necessity — cooks used what they had, and they made it taste amazing.
Over time, those home-cooked dishes became part of who we are as a people. Today, classic American dinner recipes are just as loved as ever.
People still want food that feels warm, real, and satisfying after a long day. Southern cooking brings bold spice and soul. New England adds seafood and creamy sauces.
The Midwest gives us casseroles and slow-cooked meats. The Western US brings grilled flavors and fresh produce. These regional roots give American food its depth and variety. No matter where you are from, there is a dish here that will feel like home.

Why These Classic Dinner Recipes Still Matter Today
Classic American dinner recipes have stayed popular for good reasons. Here is why they keep showing up on dinner tables every week:
1. They bring back good memories. Many of these dishes are tied to family gatherings, holiday meals, and childhood dinners. Eating them again feels warm and comforting, like a hug in food form.
2. The ingredients are simple and easy to find. You do not need fancy items from a specialty store. Most of these recipes use everyday staples like chicken, ground beef, potatoes, and canned goods that you probably already have at home.
3. The cooking methods are straightforward. Baking, pan-frying, slow roasting — these are basic techniques that any home cook can handle. You do not need to be a chef to make these meals well.
4. They feed a crowd without stress. Classic American dinner recipes are made to serve a full table. They scale up easily and work perfectly for family gatherings, potlucks, or a regular weeknight at home.
5. They are budget-friendly. Stretching a meal to feed many people without spending a lot of money is exactly what these recipes were designed to do. They deliver big flavor with modest cost.
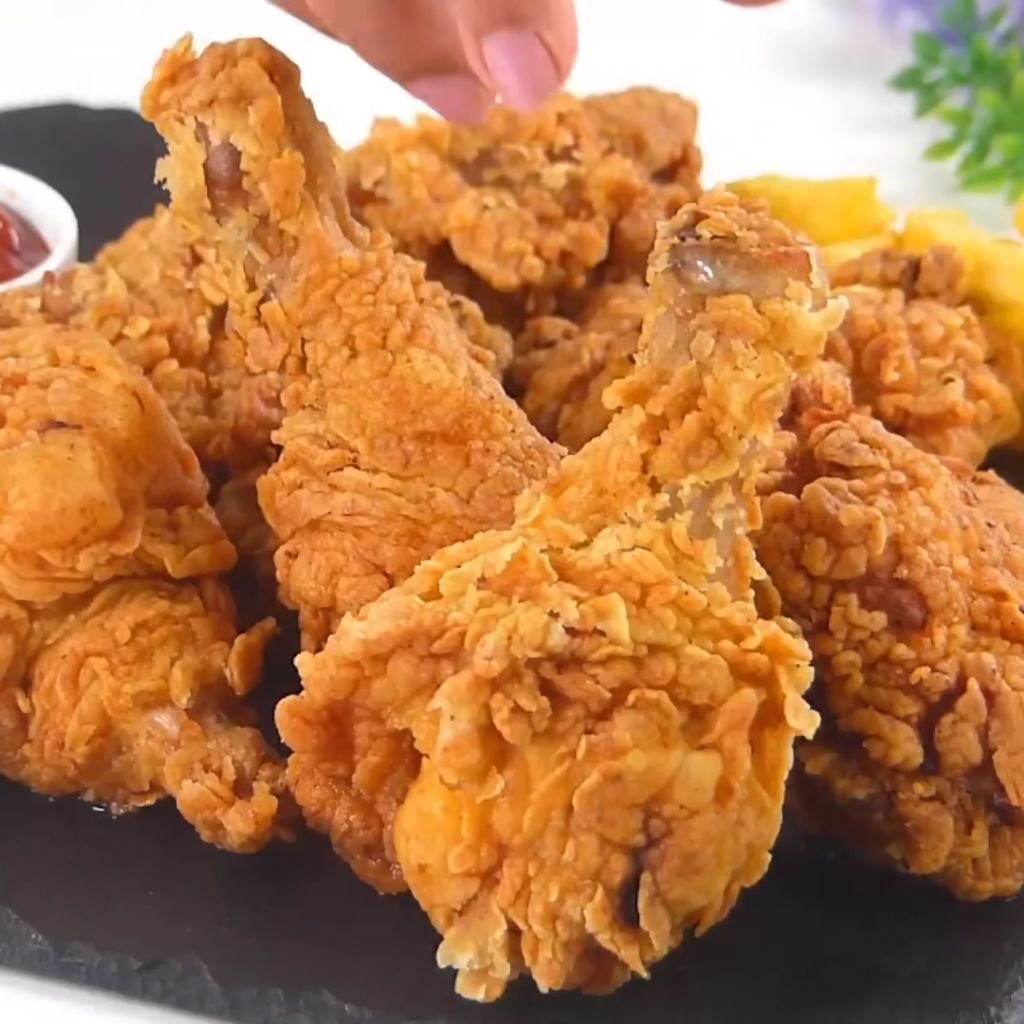
1. Southern Fried Chicken
Prep Time: 20 minutes | Cook Time: 30 minutes | Serves: 4–6
Golden, crispy, and packed with bold seasoning on every bite, Southern Fried Chicken is one of the most iconic plates in American cooking. The secret lies in the buttermilk soak and a well-seasoned flour coating that crisps up perfectly in hot oil. Great for Sunday dinners, cookouts, or any night you want something truly satisfying.
Ingredients
- 3 lbs chicken pieces (legs, thighs, breasts, wings)
- 2 cups buttermilk
- 2 cups all-purpose flour
- 1 tsp garlic powder
- 1 tsp onion powder
- 1 tsp smoked paprika
- 1 tsp cayenne pepper
- 1 tsp black pepper
- 1½ tsp salt
- ½ tsp dried thyme
- Vegetable oil for frying (enough to fill a deep skillet 2–3 inches)
Instructions
Start by placing all of your chicken pieces into a large mixing bowl. Pour the buttermilk over the chicken, making sure every piece is fully submerged. Cover the bowl tightly with plastic wrap and place it in the refrigerator. Let the chicken soak for at least 2 hours, though overnight is better. The buttermilk tenderizes the meat and helps the coating stick.
When you are ready to cook, remove the chicken from the refrigerator and let it sit at room temperature for about 20 minutes. This helps the chicken cook more evenly. While the chicken rests, mix together the flour, garlic powder, onion powder, smoked paprika, cayenne pepper, black pepper, salt, and dried thyme in a large shallow dish or zip-lock bag. Stir or shake the mixture until all the spices are fully combined with the flour.
Pour vegetable oil into a large, deep cast-iron skillet or heavy-bottomed pot. Fill it to about 2–3 inches deep. Heat the oil over medium-high heat until it reaches 350°F. Use a cooking thermometer to be accurate. The right temperature is key — too cool and the chicken will be greasy, too hot and the outside will burn before the inside cooks through.
One piece at a time, lift the chicken from the buttermilk and let the excess liquid drip off. Then press each piece firmly into the seasoned flour, turning it over and pressing again to coat every surface thoroughly. Make sure there are no bare spots. Set the coated pieces aside on a clean plate while you coat the rest.
Carefully lower the coated chicken into the hot oil using tongs. Do not overcrowd the pan — work in two batches if needed. Overcrowding drops the oil temperature and leads to soggy coating. Cook thighs and drumsticks for about 12–14 minutes per side, and breasts for 10–12 minutes per side. Turn the pieces only once during cooking. The chicken is done when the crust is deep golden brown and the internal temperature reads 165°F on a meat thermometer.
Remove each piece with tongs and place it on a wire rack set over a baking sheet. Do not use paper towels flat on a plate — resting on a rack keeps the bottom crispy. Let the chicken rest for 5 minutes before serving. This locks in the juices and gives the crust time to fully set. Serve hot with mashed potatoes, coleslaw, or biscuits on the side.
2. Chicken Pot Pie
Prep Time: 25 minutes | Cook Time: 45 minutes | Serves: 6
Few things are more comforting than a warm Chicken Pot Pie pulled fresh from the oven. The flaky golden crust breaks open to reveal a rich, creamy filling packed with tender chicken and hearty vegetables. A true classic American dinner recipe that has been a family staple for generations. Easy to make and even easier to love.
Ingredients
- 2 cups cooked chicken, shredded or diced
- 1 cup frozen peas
- 1 cup diced carrots
- ½ cup diced celery
- ½ cup diced onion
- ⅓ cup unsalted butter
- ⅓ cup all-purpose flour
- 1¾ cups chicken broth
- ⅔ cup whole milk
- ½ tsp salt
- ½ tsp black pepper
- ¼ tsp garlic powder
- 1 package refrigerated pie crust (top and bottom), or homemade double-crust pastry
- 1 egg (for egg wash)
Instructions
Preheat your oven to 425°F. Take your pie crust out of the refrigerator and let it sit at room temperature for about 10 minutes before unrolling. This prevents cracking when you press it into the dish.
In a large saucepan over medium heat, melt the butter. Add the diced onion and celery, and cook for 4–5 minutes, stirring occasionally, until the vegetables soften and the onion becomes translucent. Add the carrots and cook for another 3 minutes. Sprinkle the flour over the vegetables and stir constantly for about 1 minute. This step cooks out the raw flour taste and forms the base of your sauce.
Slowly pour in the chicken broth a little at a time, stirring continuously as you go. Then add the milk the same way. Keep stirring until the mixture is smooth and begins to thicken — this takes about 4–6 minutes over medium heat. Once the sauce coats the back of a spoon, season with salt, black pepper, and garlic powder. Taste and adjust the seasoning as needed.
Remove the pan from heat. Stir in the shredded chicken and frozen peas. The peas do not need to be pre-cooked — they will finish cooking in the oven. Mix everything together until the filling is evenly combined. It should look thick, creamy, and full of colorful vegetables.
Press one pie crust into the bottom of a 9-inch pie dish, letting the edges hang over slightly. Pour the filling into the crust, spreading it evenly with a spoon. Lay the second pie crust over the top. Press the edges of the top and bottom crusts together and crimp with your fingers or a fork to seal. Use a sharp knife to cut four or five small slits in the top crust — this lets steam escape during baking and prevents the top from puffing up and cracking.
In a small bowl, beat the egg with one tablespoon of water to make an egg wash. Brush the egg wash evenly over the top crust using a pastry brush. This gives the crust that beautiful golden shine when it bakes.
Place the pie on the center rack of your preheated oven. Bake for 30–35 minutes, until the crust is deep golden brown and the filling is bubbling around the edges. Keep an eye on it after the 25-minute mark — every oven is a little different. If the edges start to brown too fast, loosely cover them with aluminum foil strips.
Let the pie rest for 10 minutes after removing it from the oven. This allows the filling to set slightly so it does not pour out when you slice it. Serve in big wedges with a simple green salad or dinner rolls on the side.
3. Roasted Herb Chicken with Vegetables
Prep Time: 20 minutes | Cook Time: 1 hour 20 minutes | Serves: 4–5
A whole roasted chicken seasoned with fresh herbs and surrounded by golden vegetables makes for a meal that looks impressive but asks very little from the cook. The skin crisps up beautifully while the inside stays incredibly juicy. Every part of this dish roasts together in one pan, which means less cleanup and more flavor.
Ingredients
- 1 whole chicken (about 4 lbs)
- 3 tbsp olive oil
- 1 tbsp fresh rosemary, chopped (or 1 tsp dried)
- 1 tbsp fresh thyme leaves (or 1 tsp dried)
- 4 garlic cloves, minced
- 1 tsp salt
- ½ tsp black pepper
- 1 lemon, halved
- 3 medium carrots, cut into chunks
- 3 medium Yukon Gold potatoes, cut into chunks
- 2 cups Brussels sprouts or green beans
- 1 medium onion, cut into wedges
Instructions
Take the chicken out of the refrigerator 30 minutes before cooking. A cold chicken placed straight into the oven cooks unevenly. While it comes to room temperature, preheat your oven to 425°F and prepare your vegetables.
In a small bowl, mix together the olive oil, rosemary, thyme, minced garlic, salt, and pepper. Stir it into a paste-like mixture. Pat the chicken completely dry on all sides using paper towels. Dry skin is the key to crispy skin — any moisture will cause it to steam rather than roast.
Rub the herb mixture all over the outside of the chicken, getting into every crease. Slide your fingers under the breast skin and rub some of the mixture directly onto the breast meat beneath the skin. Stuff the cavity with both halves of the lemon, squeezing them slightly as you push them in. The lemon will release steam and aroma as it roasts, flavoring the meat from the inside.
Place all the cut vegetables into a large roasting pan. Drizzle with a little olive oil, season with salt and pepper, and toss to coat. Spread them out in an even layer. Set the chicken on top of the vegetables, breast side up. The chicken will rest on the vegetables and absorb their flavors as everything roasts together.
Place the pan in the preheated oven on the center rack. Roast at 425°F for 20 minutes to get the skin crisping started. Then reduce the heat to 375°F and continue roasting for another 55–65 minutes. The exact time depends on the size of your chicken. The chicken is done when the thigh reads 165°F at its thickest point on a meat thermometer, and the juices run clear when you pierce the thigh with a knife.
Halfway through cooking, use a large spoon to baste the chicken with the pan juices. This keeps the meat moist and adds flavor to the skin. You can also stir the vegetables at this point so they cook and brown evenly.
Once the chicken is done, remove the pan from the oven and let the chicken rest for 10–15 minutes before carving. Do not skip the resting time — it allows the juices to redistribute throughout the meat. Carve and serve directly over the roasted vegetables for a complete one-pan meal.
4. Classic Meatloaf with Tomato Glaze
Prep Time: 15 minutes | Cook Time: 1 hour | Serves: 6
Meatloaf might just be the most comforting entry on any list of classic American dinner recipes. A well-made meatloaf is moist, packed with savory flavor, and topped with a sweet-tangy tomato glaze that caramelizes as it bakes. Leftovers make incredible sandwiches the next day. Serve with mashed potatoes and green beans for the full classic experience.
Ingredients
- 1½ lbs ground beef (80/20)
- ½ lb ground pork
- ½ cup breadcrumbs
- ½ cup whole milk
- 1 egg, beaten
- ½ cup diced onion
- 3 garlic cloves, minced
- 2 tbsp Worcestershire sauce
- 1 tsp salt
- ½ tsp black pepper
- ½ tsp dried thyme
- For the Glaze:
- ½ cup ketchup
- 2 tbsp brown sugar
- 1 tbsp apple cider vinegar
- 1 tsp Worcestershire sauce
Instructions
Preheat your oven to 350°F. Line a 9×5 loaf pan with parchment paper or lightly grease it with cooking spray.
In a small bowl, combine the breadcrumbs and milk. Stir and let them sit for about 5 minutes. The breadcrumbs will absorb the milk and become a paste called a panade. This is the secret to a moist meatloaf — it keeps the meat from drying out during the long baking time.
In a large mixing bowl, add the ground beef, ground pork, egg, diced onion, garlic, Worcestershire sauce, salt, pepper, and thyme. Pour the soaked breadcrumb mixture in as well. Now, use your hands to mix everything together. Work the mixture gently — do not overwork it or compact it too much. Over-mixing develops the proteins and makes the meatloaf dense and tough. Mix just until everything is evenly combined.
Transfer the mixture to your prepared loaf pan. Press it in gently and smooth the top with the back of a spoon or your palm. Make sure there are no air pockets inside.
In a separate small bowl, whisk together the ketchup, brown sugar, apple cider vinegar, and Worcestershire sauce for the glaze. Stir until the brown sugar dissolves. Spread half of the glaze evenly over the top and sides of the meatloaf.
Place the meatloaf in the oven and bake for 45 minutes. Then remove it, spread the remaining glaze over the top, and return it to the oven for another 15 minutes. The meatloaf is done when the internal temperature reaches 160°F and the glaze is caramelized, sticky, and slightly darker than when you put it on.
Remove the meatloaf from the oven and let it rest in the pan for 10 minutes before slicing. Resting allows the loaf to firm up so it slices cleanly rather than crumbling apart. Slice with a sharp knife and serve with creamy mashed potatoes and your favorite vegetable side.
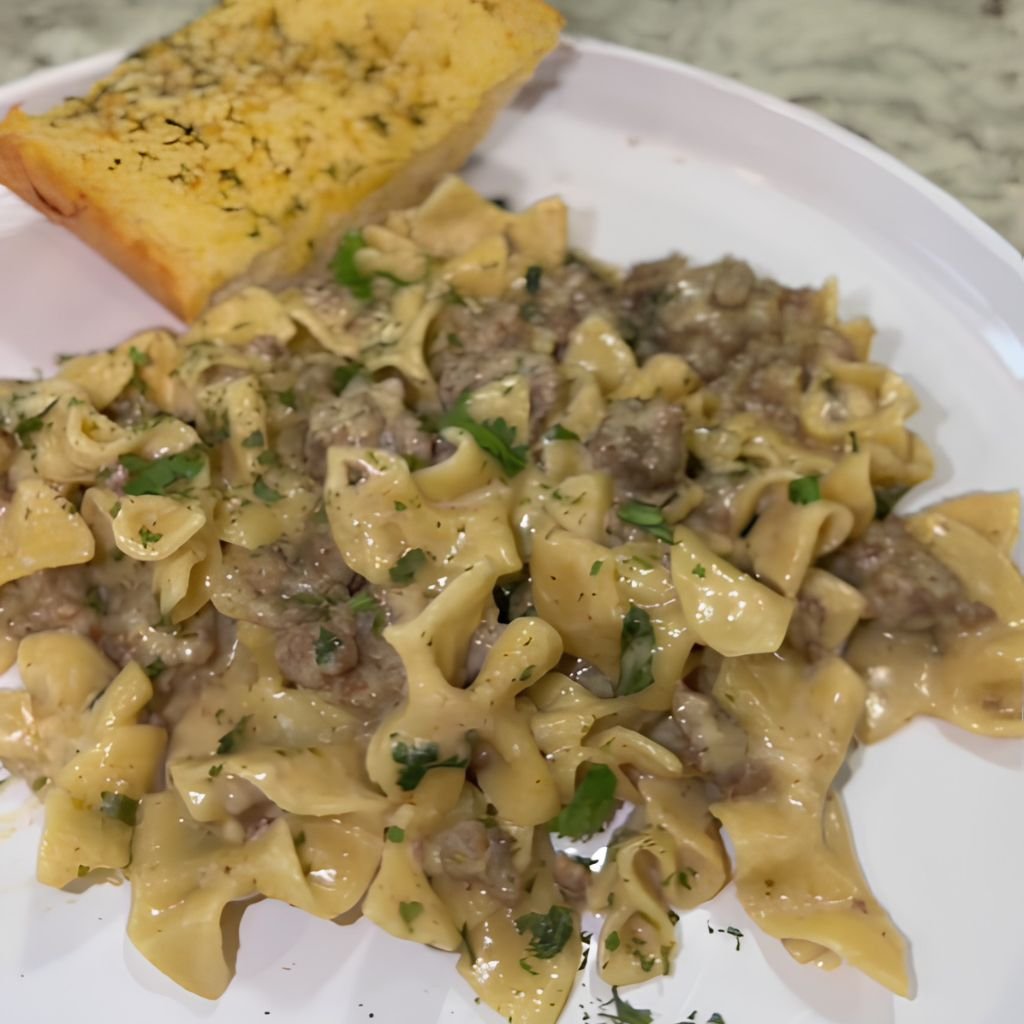
5. Beef Stroganoff
Prep Time: 15 minutes | Cook Time: 30 minutes | Serves: 4
Beef Stroganoff is a rich, creamy pasta dish that has earned a permanent place on the American dinner table. Tender strips of beef are cooked with mushrooms and onions in a savory sour cream sauce, then spooned over egg noodles or rice. Deeply satisfying and ready in under an hour — this one is a true weeknight hero.
Ingredients
- 1½ lbs beef sirloin or tenderloin, thinly sliced into strips
- 2 tbsp olive oil
- 2 tbsp unsalted butter
- 1 medium onion, thinly sliced
- 3 garlic cloves, minced
- 2 cups sliced mushrooms (cremini or button)
- 2 tbsp all-purpose flour
- 1½ cups beef broth
- 1 tbsp Worcestershire sauce
- 1 tsp Dijon mustard
- ¾ cup sour cream
- Salt and pepper to taste
- 12 oz egg noodles, cooked according to package directions
- Fresh parsley, chopped, for garnish
Instructions
Begin by slicing the beef into thin strips, about ¼ inch thick. Cut against the grain for the most tender result. Pat the strips dry with paper towels and season generously with salt and pepper on all sides.
Heat one tablespoon of olive oil in a large skillet over high heat. When the oil is shimmering and hot, add the beef strips in a single layer. Do not stir them right away — let them sear for 1–2 minutes without moving so they develop a brown crust. Flip and sear the other side for another minute. Work in batches if your skillet is not large enough to hold all the beef at once. Overcrowding the pan causes the beef to steam rather than sear, and you lose that important browned flavor. Once all the beef is seared, remove it from the skillet and set it aside on a plate.
Reduce the heat to medium. Add the butter and the remaining tablespoon of olive oil to the same skillet. Add the onion and cook, stirring occasionally, for 4–5 minutes until softened. Add the garlic and cook for 1 minute more. Then add the mushrooms and cook for 5–6 minutes until they release their liquid and that liquid evaporates. The mushrooms should be golden and slightly caramelized at this point.
Sprinkle the flour over the mushrooms and onions and stir for about 1 minute to cook out the raw taste. Then slowly pour in the beef broth, stirring constantly to prevent lumps. Add the Worcestershire sauce and Dijon mustard. Stir to combine and let the sauce simmer on medium-low heat for 5–7 minutes until it thickens.
Reduce the heat to low. Stir in the sour cream and mix until the sauce is smooth and creamy. Do not let the sauce boil after adding the sour cream — boiling will cause it to curdle and separate. Return the seared beef to the skillet and stir to coat it in the sauce. Let everything heat together for 2–3 minutes.
Taste the sauce and adjust salt and pepper as needed. Serve the stroganoff hot over cooked egg noodles or steamed rice. Garnish with fresh parsley for a bright finishing touch.
6. Salisbury Steak with Gravy
Prep Time: 15 minutes | Cook Time: 35 minutes | Serves: 4
Salisbury Steak with Gravy is one of the most beloved classic American dinner recipes — and one that never gets old. Seasoned beef patties are pan-seared and finished in a rich, dark onion mushroom gravy that soaks right into mashed potatoes or egg noodles. Pure comfort on a plate.
Ingredients
- 1½ lbs ground beef (80/20)
- ¼ cup breadcrumbs
- 1 egg
- 2 tbsp ketchup
- 1 tsp garlic powder
- 1 tsp onion powder
- 1 tsp Worcestershire sauce
- Salt and pepper to taste
For the Gravy:
- 2 tbsp butter
- 1 medium onion, thinly sliced
- 2 cups sliced mushrooms
- 2 tbsp all-purpose flour
- 2 cups beef broth
- 1 tbsp Worcestershire sauce
- Salt and pepper to taste
Instructions
In a large mixing bowl, combine the ground beef, breadcrumbs, egg, ketchup, garlic powder, onion powder, Worcestershire sauce, and a good pinch of salt and pepper. Mix with your hands until just combined — do not overwork the meat. Divide the mixture into four equal portions and shape each one into an oval patty, about ¾ inch thick. Press the center of each patty slightly thinner than the edges so they cook flat rather than doming up in the middle.
Heat a large heavy skillet over medium-high heat and add a drizzle of oil. Once the oil is hot, place the patties in the skillet and cook for 4–5 minutes on the first side without moving them. You want a deep brown sear on the bottom. Flip and cook for another 3–4 minutes on the second side. The patties do not need to be fully cooked through at this point — they will finish cooking in the gravy. Remove them from the pan and set aside.
Lower the heat to medium and add the butter to the same pan. Add the sliced onions and cook for 6–8 minutes, stirring frequently, until they turn soft and start to caramelize to a golden color. Add the mushrooms and cook for another 4–5 minutes until they are tender and browned.
Sprinkle the flour over the onion and mushroom mixture and stir for one minute. Then slowly pour in the beef broth while stirring continuously, scraping up any browned bits from the bottom of the pan. Those bits are packed with flavor. Add the Worcestershire sauce and stir everything together. Let the gravy simmer for 4–5 minutes until it thickens to a spoonable consistency.
Return the beef patties to the skillet, nestling them into the gravy. Spoon the gravy over the tops of the patties. Cover the pan with a lid and let everything simmer together on low heat for 10 minutes. This finishes cooking the patties all the way through and allows them to absorb the gravy flavor. Taste and season the gravy with salt and pepper as needed. Serve over creamy mashed potatoes with extra gravy spooned on top.
7. Pot Roast with Root Vegetables
Prep Time: 20 minutes | Cook Time: 3–4 hours | Serves: 6
A slow-cooked Pot Roast with Root Vegetables is Sunday dinner perfection. The beef becomes so tender it falls apart at the touch of a fork, and the vegetables soak up all the rich, savory cooking liquid. This dish requires patience, but very little active work — the oven does everything. One of the true champions among classic American dinner recipes.
Ingredients
- 3–4 lb chuck roast
- 2 tbsp vegetable oil
- Salt and pepper to taste
- 1 large onion, cut into large chunks
- 4 garlic cloves, smashed
- 3 medium carrots, cut into 2-inch pieces
- 3 medium potatoes, cut into chunks
- 2 stalks celery, cut into pieces
- 2 cups beef broth
- 1 cup red wine (or extra broth)
- 2 tbsp tomato paste
- 1 tbsp Worcestershire sauce
- 2 sprigs fresh rosemary (or 1 tsp dried)
- 2 sprigs fresh thyme (or 1 tsp dried)
- 1 bay leaf
Instructions
Preheat your oven to 325°F. Take the chuck roast out of the refrigerator 20–30 minutes before cooking and pat it completely dry on all sides with paper towels. Dry the meat thoroughly — moisture is the enemy of a good sear. Season all sides very generously with salt and pepper.
Heat the vegetable oil in a large Dutch oven or oven-safe pot over high heat. When the oil is nearly smoking, carefully place the roast in the pot. Do not move it for 3–4 minutes. Let it develop a deep, dark, caramelized crust on the bottom. Flip and sear all sides, including the edges, until the entire roast is well browned. This searing step builds the flavor base for the entire dish. Remove the roast and set it on a plate.
Reduce the heat to medium. Add the onion and celery to the pot and cook for 3–4 minutes, stirring to pick up the browned bits stuck to the bottom. Add the garlic and cook for 1 minute more. Stir in the tomato paste and let it cook for 2 minutes, stirring it into the onion mixture. Pour in the red wine and stir, scraping the bottom of the pot clean. Let the wine cook for 2–3 minutes to reduce slightly. Then pour in the beef broth, add the Worcestershire sauce, rosemary, thyme, and bay leaf. Stir everything together.
Place the seared roast back into the pot, nestling it into the liquid. The liquid should come about halfway up the sides of the roast. If it does not, add a little more broth. Add the carrots and potatoes around the roast.
Cover the pot with a tight-fitting lid and place it in the preheated oven. Cook for 3–4 hours. Check the roast after 3 hours by poking it with a fork — it should be very tender and beginning to pull apart. Thick roasts may need the full 4 hours or even a bit longer. Once it is fork-tender, remove the pot from the oven. Discard the rosemary sprigs, thyme sprigs, and bay leaf. Taste the cooking liquid and adjust seasoning. Spoon the vegetables and generous amounts of the braising liquid over each serving.
8. Cheeseburger Casserole
Prep Time: 15 minutes | Cook Time: 30 minutes | Serves: 6
All the flavors of a classic cheeseburger — but baked into a creamy, satisfying casserole. Ground beef, pasta, and a cheesy sauce come together in one baking dish for an easy weeknight dinner the whole family will want again and again. A crowd-pleaser among classic American dinner recipes that children and adults both love.
Ingredients
- 1 lb ground beef
- 1 medium onion, diced
- 3 garlic cloves, minced
- 1 can (14 oz) diced tomatoes, drained
- 2 tbsp ketchup
- 1 tbsp mustard
- 1 tbsp Worcestershire sauce
- Salt and pepper to taste
- 2 cups uncooked elbow macaroni or rotini
- 1 can (10.5 oz) condensed cheddar cheese soup
- ½ cup milk
- 2 cups shredded cheddar cheese, divided
- ½ cup sour cream
Instructions
Preheat your oven to 375°F. Cook the pasta according to the package directions until just barely al dente — about one minute less than the package says. Drain and set aside. The pasta will continue cooking in the oven, so you do not want it fully soft at this stage.
In a large oven-safe skillet or sauté pan over medium-high heat, cook the ground beef with the diced onion. Break the beef apart with a wooden spoon as it browns. Cook for about 7–8 minutes until no pink remains and the onion is soft. Drain off excess fat by tilting the pan and spooning it out, or by transferring the meat to a strainer briefly. Return the beef to the pan, add the garlic, and cook for 1 minute.
Stir in the drained diced tomatoes, ketchup, mustard, and Worcestershire sauce. Season with salt and pepper. Let this simmer for 3–4 minutes so the flavors come together and the mixture thickens slightly.
In a separate bowl, whisk together the condensed cheddar cheese soup, milk, sour cream, and one cup of the shredded cheddar until smooth. Pour this cheese sauce over the beef mixture in the skillet. Add the drained pasta and stir everything together until evenly combined.
Sprinkle the remaining one cup of shredded cheddar cheese evenly over the top. If your pan is oven-safe, place it directly in the oven. Otherwise, transfer everything to a greased 9×13 baking dish first.
Bake uncovered for 20–25 minutes until the cheese on top is melted, bubbly, and starting to turn golden around the edges. Let it sit for 5 minutes after removing from the oven before scooping and serving. Top with diced pickles, sliced green onions, or a drizzle of extra ketchup and mustard for that true cheeseburger experience.
9. BBQ Pork Ribs
Prep Time: 20 minutes | Cook Time: 3 hours | Serves: 4
Slow-baked and slathered in barbecue sauce, these BBQ Pork Ribs are fall-off-the-bone tender with a caramelized, smoky crust. You do not need a grill or smoker for great ribs — your oven does all the hard work. One of the most requested classic American dinner recipes for cookouts, game days, and weekend dinners.
Ingredients
- 2 racks baby back ribs (about 4–5 lbs total)
Dry Rub:
- 2 tbsp brown sugar
- 1 tbsp smoked paprika
- 1 tsp garlic powder
- 1 tsp onion powder
- 1 tsp salt
- ½ tsp black pepper
- ½ tsp cayenne pepper
For Finishing:
- 1½ cups your favorite BBQ sauce
Instructions
Preheat your oven to 275°F. Line two large baking sheets with aluminum foil — you will need enough foil to wrap each rack completely.
Prepare the ribs by removing the membrane from the bone side of each rack. Flip the ribs so the bones are facing up. Slide a butter knife under the thin, papery membrane that runs along the back, then grip it with a dry paper towel and pull it off. It should come off in one long piece. Removing the membrane allows the seasoning to penetrate the meat and prevents a tough, chewy texture in the finished ribs.
Mix together all the dry rub ingredients in a small bowl — brown sugar, smoked paprika, garlic powder, onion powder, salt, black pepper, and cayenne. Stir until combined. Apply the dry rub to both sides of each rib rack, pressing it firmly into the meat with your hands. Get into every crack between the bones and coat the sides as well. Do not be shy with the seasoning.
Place each rack of ribs, meat side down, on a sheet of foil. Wrap them tightly, crimping and sealing all the edges so no steam escapes during cooking. Place the wrapped racks on the lined baking sheets and put them in the oven.
Bake at 275°F for 2 hours and 30 minutes. The low, slow temperature breaks down the tough connective tissue and fat, making the ribs incredibly tender. After 2 hours 30 minutes, remove the ribs from the oven and carefully open the foil — be cautious of hot steam escaping from inside the packet.
Turn the oven up to 375°F or set your broiler to high. Transfer the ribs to the baking sheet, meat side up. Brush a generous layer of BBQ sauce over the top and sides of both racks. Return them to the oven (or under the broiler, about 6 inches from the element) for 10–15 minutes, brushing on a second coat of sauce halfway through. The sauce will caramelize and develop a beautifully sticky, slightly charred glaze.
Remove from the oven and let rest for 5 minutes. Cut between the bones with a sharp knife to separate the ribs. Pile them onto a platter and serve with extra BBQ sauce on the side.
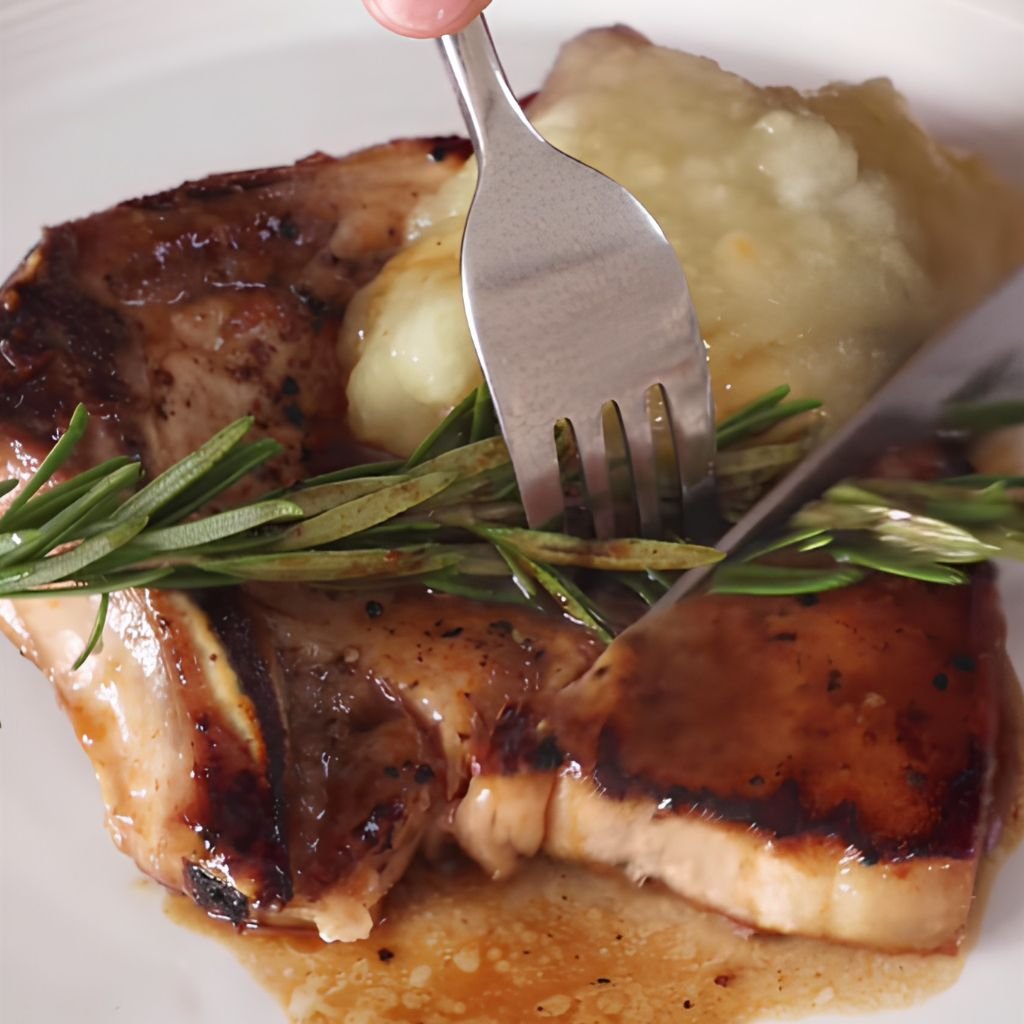
10. Pork Chops with Apple Sauce
Prep Time: 10 minutes | Cook Time: 25 minutes | Serves: 4
Pan-seared pork chops with warm, homemade apple sauce is a classic American pairing that never goes out of style. The juicy, seasoned chops get a beautiful golden crust in the pan, and the simple apple sauce comes together in minutes. A quick and elegant dinner that feels special without much effort at all.
Ingredients
- 4 bone-in pork chops, about 1 inch thick
- Salt and pepper
- ½ tsp garlic powder
- ½ tsp smoked paprika
- 1 tbsp olive oil
- 1 tbsp butter
Apple Sauce:
- 4 medium apples (Granny Smith or Honeycrisp), peeled, cored, and chopped
- ¼ cup water
- 2 tbsp brown sugar
- ½ tsp cinnamon
- Pinch of salt
Instructions
Start with the apple sauce so it is ready when the chops are done. Place the peeled and chopped apples into a medium saucepan along with the water, brown sugar, cinnamon, and a pinch of salt. Stir to combine. Set the pan over medium heat and cook, stirring occasionally, for 15–20 minutes until the apples are very soft and have broken down into a thick, chunky sauce. Taste and add more sugar if needed depending on the tartness of your apples. If you prefer a smoother sauce, use a fork or potato masher to mash it further. Keep the apple sauce warm over very low heat while you cook the chops.
Pat the pork chops dry on both sides with paper towels. Season both sides generously with salt, pepper, garlic powder, and smoked paprika. Press the seasoning into the surface of the meat.
Heat the olive oil in a large, heavy skillet (cast iron works best) over medium-high heat until shimmering. Add the pork chops and cook without moving them for 4–5 minutes on the first side. You want a deep, golden-brown crust to form. Flip the chops and cook for another 4 minutes on the second side.
Add the butter to the pan and let it melt. As it foams, tilt the pan slightly and use a spoon to baste the top of the chops with the melted butter repeatedly. This adds richness and helps the crust on the top side deepen. Cook until the internal temperature of the pork reaches 145°F on a meat thermometer.
Remove the chops from the skillet and place them on a cutting board. Let them rest for 5 minutes — this is important for keeping the juices inside the meat. Plate the chops and spoon a generous portion of warm apple sauce alongside or directly over the top. Serve with roasted sweet potatoes or steamed green beans.
11. Ham Steak with Brown Sugar Glaze
Prep Time: 5 minutes | Cook Time: 15 minutes | Serves: 4
Ham Steak with Brown Sugar Glaze is one of the fastest meals on this list of classic American dinner recipes — and one of the most satisfying. A thick-cut ham steak is cooked in a skillet and glazed with a sweet, buttery brown sugar sauce that caramelizes into something absolutely wonderful. Ready in under 20 minutes from start to finish.
Ingredients
- 2 ham steaks (about 1 inch thick, approximately 1 lb each)
- 2 tbsp unsalted butter
- 3 tbsp brown sugar
- 2 tbsp Dijon mustard
- 1 tbsp apple cider vinegar
- ¼ tsp black pepper
- Pinch of cinnamon (optional)
Instructions
Remove the ham steaks from their packaging and pat them lightly dry with a paper towel. If the steaks have a fat ring around the edge, make small cuts through the fat every inch or so. This prevents the steak from curling up as it cooks.
In a small bowl, mix together the brown sugar, Dijon mustard, apple cider vinegar, black pepper, and cinnamon if using. Stir until the sugar dissolves into the other ingredients and the glaze is smooth and pourable. Set it aside.
Heat a large skillet over medium-high heat. You do not need to add oil because ham has enough natural fat to prevent sticking. Place one or both ham steaks in the pan depending on how large your skillet is. Cook for 3–4 minutes on the first side. The ham will begin to sizzle, and the edges will start to brown. Flip and cook for another 3 minutes on the second side.
Add the butter to the pan and let it melt. Once the butter is foaming, pour the brown sugar glaze mixture directly over the ham steaks. The glaze will immediately start to bubble and reduce. Tilt the pan and spoon the glaze over the steaks repeatedly for 2–3 minutes. Watch carefully during this step — the sugar can burn quickly if left unattended. The glaze is ready when it has reduced and looks thick, sticky, and deep golden brown.
Remove the ham steaks from the pan and let them rest for 2–3 minutes. Spoon any remaining glaze from the pan directly over the top of each steak before serving. Pair with scrambled eggs for a brunch feel, or serve with roasted sweet potatoes and green beans for a proper dinner plate.
12. Southern Fried Catfish
Prep Time: 15 minutes | Cook Time: 20 minutes | Serves: 4
Crispy on the outside and flaky on the inside, Southern Fried Catfish is a true regional treasure. Coated in a well-seasoned cornmeal crust and pan-fried to golden perfection, this fish is bold, flavorful, and pairs perfectly with hush puppies, coleslaw, and tartar sauce. One of the most cherished classic American dinner recipes from the Deep South.
Ingredients
- 4 catfish fillets (about 6 oz each)
- 1 cup buttermilk
- 1 cup cornmeal
- ½ cup all-purpose flour
- 1 tsp salt
- 1 tsp black pepper
- 1 tsp garlic powder
- 1 tsp smoked paprika
- ½ tsp cayenne pepper
- Vegetable oil for frying
Instructions
Place the catfish fillets in a shallow dish and pour the buttermilk over them, turning to coat. Let the fish soak for at least 15 minutes — this removes any strong fishy taste and helps the coating adhere well.
While the fish soaks, mix the cornmeal, flour, salt, black pepper, garlic powder, smoked paprika, and cayenne together in a large shallow dish. Stir well to distribute the spices evenly throughout the coating mixture.
Pour about 1 inch of vegetable oil into a large, deep skillet. Heat the oil over medium-high heat to 350°F. While the oil heats, lift each fillet from the buttermilk one at a time and let the excess liquid drip off. Press each fillet into the cornmeal mixture, turning it over and pressing firmly to coat both sides completely. Make sure the coating is thick and even.
Carefully lower the coated fillets into the hot oil using tongs, laying them away from you to prevent oil splatter. Do not overcrowd the pan — cook two fillets at a time if needed. Fry for 4–5 minutes on the first side without moving the fish. The coating should turn deep golden brown. Flip carefully with a fish spatula and fry for another 4 minutes on the second side.
The catfish is done when it flakes easily when pressed gently in the center and the coating is crisp and golden all over. Remove with a spatula or tongs and place on a wire rack to drain — resting on a rack rather than paper towels keeps the bottom crust from going soft.
Season lightly with extra salt while still hot. Serve with tartar sauce, hot sauce, lemon wedges, and classic sides like coleslaw or hush puppies.
13. New England Baked Cod
Prep Time: 10 minutes | Cook Time: 20 minutes | Serves: 4
New England Baked Cod is a simple, elegant dish rooted in the seafood traditions of the northeastern United States. Tender cod fillets are topped with a buttery, seasoned cracker crust and baked until just flaky. Light enough for weeknights yet refined enough for company, this is one of those classic American dinner recipes that proves simple cooking done right is always the best.
Ingredients
- 4 cod fillets (about 6 oz each)
- 1 cup crushed Ritz crackers (about 25 crackers)
- 4 tbsp unsalted butter, melted
- 2 tbsp fresh parsley, chopped
- 1 garlic clove, minced
- 1 tsp lemon zest
- ½ tsp paprika
- Salt and white pepper to taste
- Lemon wedges for serving
Instructions
Preheat your oven to 400°F. Lightly butter a baking dish large enough to hold all four fillets in a single layer without overlapping.
Pat the cod fillets dry with paper towels and place them in the baking dish. Season both sides lightly with salt and white pepper. Arrange them skin side down.
In a small bowl, mix together the crushed crackers, melted butter, parsley, minced garlic, lemon zest, and paprika. Stir until everything is moistened and the crumbs hold together slightly when pressed. The mixture should resemble wet sand. Taste a pinch — it should be savory, buttery, and fragrant.
Spoon the cracker topping evenly over each fillet, pressing it gently into the fish with the back of a spoon. You want a thick, even layer that covers the entire surface of each piece. Do not press so hard that the fish begins to flatten — just enough to help the topping adhere.
Place the baking dish on the center rack of the oven. Bake for 16–20 minutes. The timing depends on the thickness of your fillets — a good rule is 10 minutes per inch of thickness. The fish is done when it flakes easily at the center when pressed with a fork and the cracker topping is golden brown and crispy.
Do not overbake cod — it goes from perfect to dry very quickly. Remove the dish from the oven as soon as the fish flakes cleanly. Let it rest for 3 minutes in the dish before serving. Plate each fillet with a lemon wedge and a sprinkle of extra fresh parsley. Serve with roasted asparagus, buttered rice, or a simple green salad.
14. Shrimp and Grits
Prep Time: 15 minutes | Cook Time: 30 minutes | Serves: 4
Shrimp and Grits is one of the great dishes of the American South, born along the coast of the Carolinas and Georgia. Creamy, cheesy grits form the base for plump, garlicky shrimp cooked in a smoky, savory sauce. Rich, warming, and deeply flavorful — this is a dish that makes everyone quiet at the table because they are too busy eating to talk.
Ingredients
- 1 lb large shrimp, peeled and deveined
- 4 strips bacon, chopped
- 1 small green bell pepper, diced
- ½ small onion, diced
- 3 garlic cloves, minced
- 1 cup cherry tomatoes, halved (optional)
- ½ cup chicken broth
- 1 tbsp lemon juice
- 1 tsp smoked paprika
- Salt and black pepper to taste
- Sliced green onions for garnish
For the Grits:
- 1 cup stone-ground grits
- 4 cups water or chicken broth
- 1 cup sharp cheddar cheese, shredded
- 2 tbsp butter
- Salt to taste
Instructions
Begin with the grits. Bring 4 cups of water or chicken broth to a boil in a medium saucepan over high heat. Add a pinch of salt. Once boiling, slowly whisk in the grits in a steady stream to prevent lumps. Reduce the heat to low, cover, and cook for 20–25 minutes, stirring every few minutes to prevent sticking. Stone-ground grits need more time than instant — do not rush this step. When the grits are thick, creamy, and fully cooked, stir in the butter and cheddar cheese until both are fully melted. Taste and season with salt. Keep warm with the lid on while you cook the shrimp.
Season the shrimp lightly with smoked paprika, salt, and pepper on both sides. Set aside.
In a large skillet over medium heat, cook the chopped bacon until the fat renders and the pieces become crispy. Remove the bacon with a slotted spoon and set it on a plate, leaving the drippings in the pan.
Add the diced onion and bell pepper to the bacon drippings. Cook over medium heat for 4–5 minutes until softened. Add the garlic and cook for 1 minute more. If using cherry tomatoes, add them now and cook for 2–3 minutes until they begin to soften and burst.
Increase the heat to medium-high and add the seasoned shrimp to the skillet in a single layer. Cook for 1–2 minutes on the first side without moving. Flip and cook for another minute on the second side. The shrimp are done as soon as they turn pink and curl into a C shape. Overcooked shrimp curl into a tight O shape and become rubbery — pull them off the heat the moment they turn pink.
Pour in the chicken broth and lemon juice, scraping any browned bits from the bottom of the pan. Stir to combine and let the sauce bubble for 1 minute. Stir the crispy bacon back into the pan.
To serve, spoon a generous mound of cheesy grits into a bowl or onto a plate. Ladle the shrimp and sauce over the top. Garnish with sliced green onions.
15. Baked Macaroni and Cheese
Prep Time: 20 minutes | Cook Time: 30 minutes | Serves: 8
Homemade Baked Macaroni and Cheese is comfort food at its most pure. A creamy, made-from-scratch cheese sauce coats every noodle, and a golden breadcrumb topping gives you that perfect crunch in every bite. Far better than anything from a box, and not much harder to make. One of the most universally loved classic American dinner recipes of all time.

Ingredients
- 1 lb elbow macaroni
- 4 tbsp unsalted butter
- ¼ cup all-purpose flour
- 3 cups whole milk, warmed
- 1 cup heavy cream
- 2 cups sharp cheddar cheese, shredded
- 1 cup Gruyère or Fontina cheese, shredded
- 1 tsp mustard powder
- ½ tsp garlic powder
- ½ tsp onion powder
- Salt, black pepper, and cayenne to taste
Topping:
- 1 cup panko breadcrumbs
- 2 tbsp butter, melted
- ½ cup shredded cheddar
Instructions
Preheat your oven to 375°F. Grease a large 9×13 baking dish with butter or cooking spray. Cook the macaroni in a large pot of well-salted boiling water until just barely al dente — about 1–2 minutes less than the package directions. Drain and set aside. Slightly undercooked pasta is intentional here because it finishes in the oven.
Melt the butter in a large, deep saucepan over medium heat. Once the butter is foamy, whisk in the flour and stir constantly for 2 minutes. This forms a roux, which is the thickening base for the sauce. The roux should smell slightly nutty but not brown.
Begin adding the warmed milk in a slow, steady stream while whisking vigorously. Then add the cream the same way. Keep whisking until the sauce is smooth and begins to thicken — about 5–7 minutes over medium heat. The sauce should be thick enough to coat the back of a spoon. Remove from heat.
Stir in the mustard powder, garlic powder, onion powder, and a good amount of salt, black pepper, and a pinch of cayenne. Then add the shredded cheeses a handful at a time, stirring after each addition until fully melted before adding the next handful. This prevents the cheese from clumping. Taste the sauce and adjust the seasoning as needed. The sauce should be rich, creamy, and very flavorful on its own.
Add the drained pasta to the cheese sauce and stir to coat every piece evenly. Pour everything into the prepared baking dish and spread it into an even layer.
In a small bowl, toss the panko breadcrumbs with the melted butter until the crumbs are evenly coated. Mix in the remaining shredded cheddar. Sprinkle this topping mixture evenly over the macaroni.
Bake uncovered for 25–30 minutes until the top is golden brown and the sauce is bubbling around the edges. For extra browning on the breadcrumbs, turn the broiler on for the last 2–3 minutes — watch it carefully at this stage. Let the mac and cheese rest for 5–10 minutes before scooping and serving.
16. Tuna Noodle Casserole
Prep Time: 15 minutes | Cook Time: 30 minutes | Serves: 6
Tuna Noodle Casserole is the kind of dish that has been feeding American families for decades. Egg noodles, tender tuna, peas, and a creamy sauce come together in one pan, topped with a crispy cracker or breadcrumb crust. Budget-friendly, filling, and ready in under an hour — a true staple among classic American dinner recipes.
Ingredients
- 12 oz wide egg noodles
- 2 cans (5 oz each) tuna in water, drained
- 1 cup frozen peas
- 1 can (10.5 oz) condensed cream of mushroom soup
- 1 cup sour cream
- ½ cup mayonnaise
- 1 cup shredded cheddar cheese, divided
- ½ cup diced celery
- ½ cup diced onion
- 1 tsp garlic powder
- Salt and pepper to taste
- 1 cup crushed Ritz crackers or panko
- 2 tbsp butter, melted
Instructions
Preheat the oven to 375°F. Grease a 9×13 baking dish. Cook the egg noodles in salted boiling water until just al dente, about 1 minute less than the package says. Drain and set aside.
In a large skillet over medium heat, cook the diced onion and celery with a small drizzle of oil for 4–5 minutes until softened.
In a large mixing bowl, combine the condensed cream of mushroom soup (straight from the can, do not add water), sour cream, mayonnaise, and garlic powder. Stir until smooth. Add the cooked onion and celery, drained tuna, frozen peas, and half a cup of the shredded cheddar. Mix everything together gently. Fold in the cooked egg noodles, making sure they are fully coated in the sauce. Season the mixture with salt and pepper to taste.
Pour the mixture into the prepared baking dish and spread it evenly. Scatter the remaining half cup of cheddar cheese over the top.
In a small bowl, mix the crushed crackers with the melted butter until the crumbs are evenly coated. Spread them over the top of the casserole in an even layer.
Bake for 25–30 minutes until the topping is golden brown and the casserole is bubbling at the edges. Let it rest for 5 minutes before serving. Scoop with a large spoon and serve alongside a green salad or steamed broccoli.
17. Chicken Alfredo Bake
Prep Time: 20 minutes | Cook Time: 30 minutes | Serves: 6
Creamy pasta, tender chicken, and a golden, bubbly cheese topping — Chicken Alfredo Bake has everything you want in a weeknight dinner. Lighter and more approachable than restaurant Alfredo but just as satisfying. One of the easiest and most crowd-pleasing classic American dinner recipes you can put together on a busy evening.
Ingredients
- 12 oz penne or rigatoni
- 2 cups cooked chicken, cubed or shredded
- 2 tbsp butter
- 4 garlic cloves, minced
- 2 cups heavy cream
- 1 cup whole milk
- 1½ cups Parmesan cheese, grated
- 1 cup mozzarella cheese, shredded
- 1 tsp Italian seasoning
- ½ tsp garlic powder
- Salt and white pepper to taste
- Extra mozzarella and Parmesan for topping
- Fresh parsley for garnish
Instructions
Preheat the oven to 375°F. Grease a 9×13 baking dish. Cook the pasta in heavily salted boiling water until barely al dente — 2 minutes less than the package time. Drain and toss lightly with a drizzle of olive oil to prevent sticking. Set aside.
In a large saucepan over medium heat, melt the butter. Add the garlic and cook, stirring constantly, for 1–2 minutes until fragrant. Do not let the garlic brown. Pour in the heavy cream and milk. Stir and bring to a gentle simmer — do not boil. Let the cream mixture simmer for 4–5 minutes, stirring frequently, until it reduces slightly.
Remove the pan from heat. Stir in the Parmesan cheese in small handfuls, stirring after each addition until fully melted. Add the mozzarella cheese and stir until smooth. Season the sauce with Italian seasoning, garlic powder, salt, and white pepper. Taste and adjust as needed. The sauce should be creamy, richly flavored, and slightly thicker than pourable.
Add the cooked chicken and drained pasta to the sauce and stir gently until everything is evenly coated. Pour the mixture into the prepared baking dish and spread flat with a spoon.
Top with a generous layer of additional shredded mozzarella and a handful of grated Parmesan. Bake uncovered for 25–30 minutes until the top is golden, bubbly, and spotted with brown. The edges should be bubbling actively.
Let the casserole rest for 5 minutes after removing from the oven. Serve hot, garnished with fresh chopped parsley and extra Parmesan at the table.
18. Shepherd’s Pie (Beef and Potato Mash)
Prep Time: 25 minutes | Cook Time: 45 minutes | Serves: 6
A comforting, deeply savory meat filling topped with a thick layer of creamy mashed potato — Shepherd’s Pie is the kind of meal that fills you up from the inside out. Loaded with vegetables and bold flavors, then baked until the potato top turns golden, this is one of the most beloved classic American dinner recipes for cold nights and family dinners.
Ingredients
- 1½ lbs ground beef
- 1 medium onion, diced
- 2 garlic cloves, minced
- 2 carrots, diced
- 1 cup frozen peas
- 2 tbsp tomato paste
- 1 cup beef broth
- 1 tbsp Worcestershire sauce
- 1 tsp thyme
- Salt and pepper to taste
Mashed Potato Topping:
- 2 lbs Russet potatoes, peeled and cubed
- 4 tbsp butter
- ½ cup warm milk or cream
- Salt and white pepper to taste
Instructions
Preheat the oven to 400°F. Begin by making the mashed potatoes. Place the peeled, cubed potatoes in a large pot and cover with cold salted water. Bring to a boil over high heat and cook for 15–18 minutes until the potatoes are completely tender and a fork slides in without resistance. Drain very well and return the potatoes to the hot pot. Let them sit for 2 minutes on the still-warm burner to allow any remaining moisture to evaporate — dry potatoes make creamier mash. Add the butter and let it melt into the potatoes. Mash with a potato masher or ricer until smooth. Add the warm milk or cream gradually, stirring between additions, until the mash reaches a thick, creamy, spreadable consistency. Season generously with salt and white pepper. Cover to keep warm.
While the potatoes boil, prepare the filling. In a large oven-safe skillet over medium-high heat, cook the ground beef, breaking it apart with a spoon. Cook until browned and no pink remains, about 7–8 minutes. Drain excess fat. Add the onion and carrots and cook for 5 minutes until beginning to soften. Add the garlic and cook for 1 minute. Stir in the tomato paste and cook for 2 minutes, letting it darken slightly. Add the beef broth, Worcestershire sauce, and thyme. Stir well and let the mixture simmer for 8–10 minutes, until the liquid reduces and the filling becomes thick and saucy. Stir in the frozen peas. Taste and season with salt and pepper.
If your skillet is oven-safe, spread the mashed potato topping directly over the meat filling, using a spoon or spatula to spread it all the way to the edges of the pan. Drag a fork across the surface of the potato topping to create ridges — these will brown and crisp up beautifully in the oven. Otherwise, transfer the meat filling to a greased baking dish first, then add the potato topping.
Bake for 20–25 minutes until the potato topping is golden and slightly crusty, and the filling is bubbling around the edges. Let it cool for 5 minutes before scooping and serving.
19. Loaded Baked Potato Skillet
Prep Time: 10 minutes | Cook Time: 30 minutes | Serves: 4
All the flavors of a fully loaded baked potato — crispy bacon, melted cheese, sour cream, and chives — turned into a hearty skillet dinner. Quick, filling, and endlessly customizable, this dish is perfect for weeknights when you want something satisfying without a lot of fuss. A fun, bold entry among classic American dinner recipes that the whole family can build to their liking.
Ingredients
- 4 medium Russet potatoes, scrubbed and diced (about ½ inch cubes)
- 6 strips bacon, chopped
- 1 small onion, diced
- 3 garlic cloves, minced
- 1½ cups shredded cheddar cheese
- Salt and pepper to taste
- ½ tsp smoked paprika
Toppings:
- Sour cream
- Sliced green onions or chives
- Extra crumbled bacon
Instructions
Cook the bacon in a large cast-iron skillet over medium heat until it renders its fat and turns crispy. Remove the bacon pieces with a slotted spoon and set them aside on a paper towel-lined plate, leaving the drippings in the pan.
Add the diced potatoes to the pan in a single layer. Season with salt, pepper, and smoked paprika. Cook over medium-high heat without stirring for 5–7 minutes until the bottom of the potatoes develops a golden-brown crust. Flip the potatoes and cook for another 5–6 minutes. Continue cooking, flipping occasionally, for a total of about 20–25 minutes, until the potatoes are completely cooked through and crispy on many sides. Insert a fork into the center of a piece — it should go in without resistance.
Reduce the heat to medium. Add the diced onion to the potatoes and cook together for 3–4 minutes until the onion softens. Add the garlic and cook for 1 minute more, stirring so it does not burn.
Stir the reserved crispy bacon back into the skillet. Taste and adjust seasoning.
Sprinkle the shredded cheddar cheese evenly over the top of the potato mixture. Cover the pan with a lid or a sheet of foil and let the cheese melt for 2–3 minutes over low heat. Once the cheese is fully melted and slightly bubbly, remove from heat.
Serve directly from the skillet with sour cream, sliced green onions or chives, and extra bacon crumbles on top. Each person can scoop their own portion and add toppings as they like.
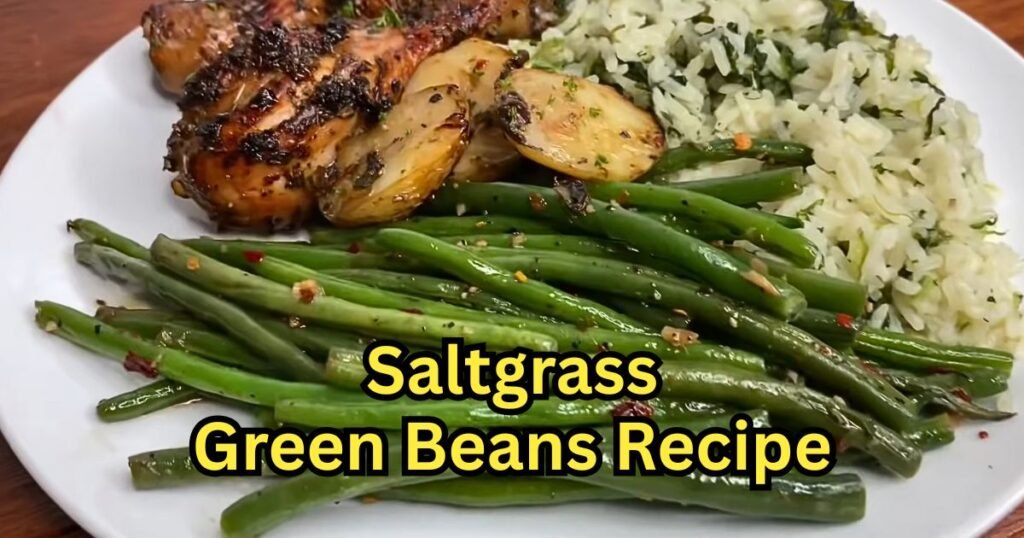
20. Green Bean Casserole
Prep Time: 10 minutes | Cook Time: 35 minutes | Serves: 8
No list of classic American dinner recipes would be complete without Green Bean Casserole. Creamy, savory, and topped with crispy fried onions, this dish has been a staple at holiday tables and Sunday dinners since the 1950s. Simple to put together and always a crowd-pleaser, it pairs with nearly everything.
Ingredients
- 4 cups fresh green beans, trimmed and cut into bite-size pieces (or 2 cans, drained)
- 1 can (10.5 oz) condensed cream of mushroom soup
- ¾ cup whole milk
- 1 tsp soy sauce
- ½ tsp black pepper
- ¼ tsp garlic powder
- 1⅓ cups French’s crispy fried onions, divided
Instructions
Preheat your oven to 350°F. If using fresh green beans, bring a large pot of salted water to a boil. Add the green beans and blanch for 4–5 minutes until bright green and just barely tender. Do not overcook — they should still have a bite to them. Drain and rinse under cold water immediately to stop the cooking and preserve the color. If using canned green beans, simply drain and rinse them.
In a large mixing bowl, combine the condensed cream of mushroom soup (straight from the can), milk, soy sauce, black pepper, and garlic powder. Whisk until smooth and creamy. Taste the sauce — it should be savory and seasoned well.
Add the blanched or drained green beans to the sauce. Add ⅔ cup of the fried onions (reserving the rest for the top) and stir gently to combine everything evenly.
Pour the mixture into a greased 1.5-quart or 2-quart baking dish. Spread into an even layer.
Bake for 25 minutes until the sauce is bubbling around the edges and heated through. Remove the dish from the oven and scatter the remaining fried onions over the top in an even layer. Return to the oven and bake for an additional 5 minutes, until the onions on top are hot and crispy. Watch closely during this final step — the onions can go from perfectly crispy to burnt quickly.
Let the casserole rest for 5 minutes before serving. Serve straight from the baking dish with a large spoon.
21. Sloppy Joes
Prep Time: 10 minutes | Cook Time: 20 minutes | Serves: 4–6
Sloppy Joes are a true American classic — messy, saucy, sweet, and completely delicious. Ground beef cooked in a tangy, slightly sweet tomato sauce, piled high on a soft bun. This has been a favorite lunch and dinner for American families for generations. Quick to make and endlessly satisfying, it earns its place firmly among the classic American dinner recipes that never get old.
Ingredients
- 1½ lbs ground beef
- 1 medium onion, finely diced
- 1 green bell pepper, finely diced
- 3 garlic cloves, minced
- 1 cup ketchup
- ½ cup tomato sauce
- 2 tbsp brown sugar
- 1 tbsp Worcestershire sauce
- 1 tbsp yellow mustard
- 1 tsp apple cider vinegar
- Salt and pepper to taste
- 4–6 hamburger buns, toasted
Instructions
Heat a large skillet over medium-high heat. Add the ground beef and cook, breaking it apart with a wooden spoon, for 6–8 minutes until fully browned and no pink remains. Drain off the excess fat by tilting the pan and spooning it out.
Add the diced onion and bell pepper to the beef. Cook over medium heat for 4–5 minutes, stirring occasionally, until the vegetables soften. Add the minced garlic and cook for 1 minute more.
Stir in the ketchup, tomato sauce, brown sugar, Worcestershire sauce, mustard, and apple cider vinegar. Mix everything together until the beef is evenly coated in the sauce. Reduce the heat to medium-low and let the mixture simmer uncovered for 10–12 minutes, stirring every few minutes. As it simmers, the sauce will thicken and become glossy. The finished Sloppy Joe filling should be thick enough to hold its shape on a bun without running off immediately — if it is too loose, let it simmer for a few more minutes.
Taste the filling and season with salt and pepper. Adjust the balance as you like — a little more brown sugar for sweetness, a splash more vinegar for tang, or a pinch more mustard for sharpness.
Toast the hamburger buns by placing them cut-side down in a dry skillet over medium heat for 1–2 minutes until lightly golden. Toasting the buns is a small step that makes a big difference — a toasted bun holds up to the saucy filling far better than a soft one.
Scoop a generous portion of the Sloppy Joe filling onto the bottom half of each toasted bun and press the top on. Serve immediately with chips, pickles, or a side of coleslaw. Have plenty of napkins ready.
22. Philly Cheesesteak Sandwich
Prep Time: 15 minutes | Cook Time: 20 minutes | Serves: 4
The Philly Cheesesteak Sandwich is one of the most iconic sandwiches in American food history, born on the streets of Philadelphia and loved across the country. Thin-sliced beef, caramelized onions and peppers, and melted cheese stuffed into a toasted hoagie roll — it is bold, juicy, and completely satisfying. A worthy final entry in this collection of classic American dinner recipes.
Ingredients
- 1½ lbs ribeye steak or beef sirloin, very thinly sliced (freeze for 30 minutes for easier slicing)
- 1 large onion, thinly sliced
- 1 green bell pepper, thinly sliced
- 1 red bell pepper, thinly sliced
- 8 oz cremini mushrooms, sliced (optional)
- 2 tbsp butter
- 1 tbsp vegetable oil
- Salt and pepper to taste
- 8 slices provolone cheese (or Cheez Whiz for a more traditional Philadelphia version)
- 4 hoagie rolls, split and toasted
Instructions
Place the steak in the freezer for 25–30 minutes before slicing. Partially frozen meat is much easier to slice paper-thin. Once the beef is firm, use a very sharp knife to slice it as thinly as possible against the grain. The slices should be nearly translucent. Set aside and season lightly with salt and pepper.
Heat a large griddle or wide skillet over medium-high heat and add the butter and oil together. Once the butter is foamy, add the sliced onions, green pepper, and red pepper. Cook for 8–10 minutes, stirring occasionally, until the onions are soft, golden, and lightly caramelized. Add the mushrooms if using and cook for another 3–4 minutes until tender. Season with salt and pepper. Push the vegetable mixture to one side of the pan.
Add the sliced beef to the empty side of the pan. Let it sear for 1–2 minutes without stirring. Once the beef begins to brown, use a spatula to chop and toss it continuously — you want the meat in small, irregular pieces, not large strips. Cook for 2–3 minutes total until the beef is fully cooked through. Combine the beef and vegetables together in the pan, tossing to mix well.
Divide the beef and vegetable mixture into four equal portions in the pan. Lay two slices of provolone cheese over each portion and cover the pan with a lid or tent with foil. Let the cheese melt for 1–2 minutes.
While the cheese melts, place the split hoagie rolls cut-side down in a separate dry skillet or under the broiler for 1–2 minutes until toasted and golden. A toasted roll is critical — it gives structure to the sandwich and holds up to the juicy filling without becoming soggy.
Use a wide spatula to scoop each cheese-covered portion directly onto a toasted hoagie roll. The entire filling should slide into the roll cleanly. Serve immediately while the cheese is still hot and melted. Classic toppings include hot peppers, banana peppers, and a drizzle of hot sauce.
Serving Suggestions and Side Dishes
Classic American dinner recipes taste even better with the right sides and drinks at the table. Here are some combinations worth knowing:
1. Mashed potatoes are the most universal side dish in American cooking. Creamy, buttery, and filling, they pair well with meatloaf, Salisbury steak, pot roast, Shepherd’s Pie, and just about anything that comes with gravy. For variation, try garlic mashed potatoes or mashed sweet potatoes.
2. Coleslaw adds a cool, crunchy contrast to rich, fried, or BBQ dishes. Serve it next to Southern Fried Chicken, BBQ Pork Ribs, Sloppy Joes, and Southern Fried Catfish. A vinegar-based slaw cuts through the richness especially well.
3. Cornbread is the Southern table’s best companion. Serve warm, buttered slices with anything from fried chicken to chili. Skillet cornbread with a crispy bottom is especially good alongside ribs and soups.
4. Beverages make a difference too. Iced sweet tea, lemonade, or sparkling water with citrus pair naturally with heavier plates. For more casual meals like Sloppy Joes or cheeseburger casserole, cold soda or root beer keeps the vibe relaxed and fun. A light beer works well alongside ribs and steak sandwiches.
5. Dessert rounds out the meal. Apple pie, peach cobbler, banana pudding, or a simple brownie are all classic American endings. For lighter meals like baked cod or shrimp and grits, lemon sorbet or a fruit crisp offers a refreshing finish without overloading the table.
Conclusion
These 22 classic American dinner recipes represent the very heart of American home cooking. From the crispy crunch of Southern Fried Chicken to the bubbling, golden top of Baked Macaroni and Cheese, from the smoky tenderness of BBQ Pork Ribs to the cozy depth of a slow-cooked Pot Roast with Root Vegetables — every recipe on this list has earned its place at the American dinner table through generations of cooking and sharing.
These dishes are meant to be tried, tested, and made your own. Swap out an ingredient to fit what your family loves. Adjust the seasoning to your taste. Add a regional twist that reflects where you are from. The best thing about classic American cooking is that it was always built on adaptation — cooks using what they had and making it delicious. That spirit is still alive today.
Food traditions matter. They connect us to the people who cooked before us, to the places we have lived, and to the moments that have brought us together around a table. By cooking these classic American dinner recipes, you are not just feeding people — you are keeping something real and meaningful alive. And that is always worth doing.