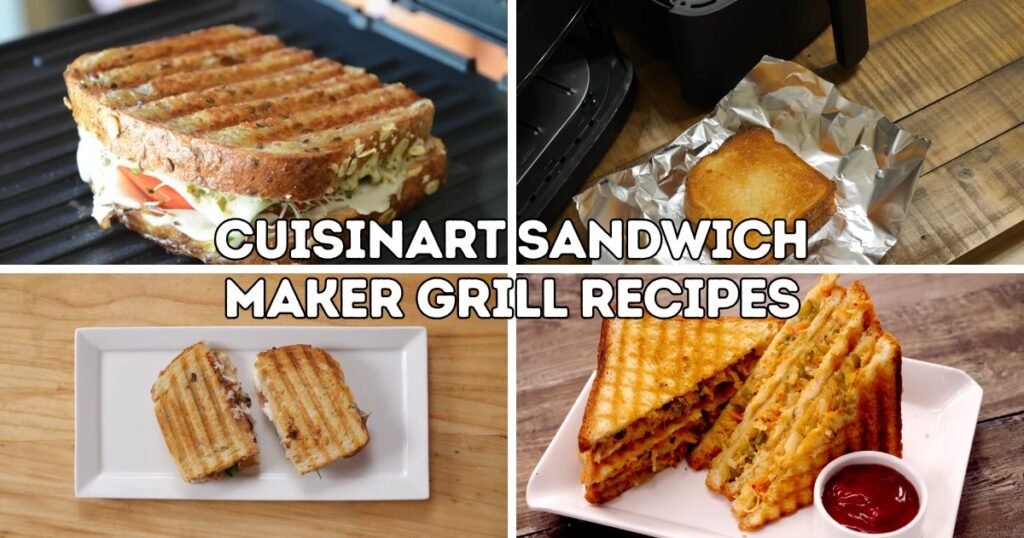
A Cuisinart sandwich maker turns plain bread and a few simple ingredients into a warm, melty meal in minutes.
This small kitchen tool presses, seals, and toasts sandwiches evenly, giving every bite a golden crust and a gooey center without much mess or extra effort.
Busy mornings, quick lunches, and last-minute dinners get a lot easier with one compact appliance sitting on the counter.
This collection of Cuisinart Sandwich Maker Grill Recipes covers breakfast, lunch, dinner, vegetarian, healthy, and dessert options, so there is something here for nearly every craving and every schedule. From a classic grilled cheese to a sweet dessert melt, these recipes show how flexible this small grill can truly be.
Each recipe below lists exact ingredients, clear step-by-step instructions, cooking time, and a practical tip to help the sandwich turn out right the first time.
Anyone who wants fast, tasty meals without extra pots and pans will find plenty of ideas here. Pick some bread, choose a filling, and get the grill heating up.

Why Use a Cuisinart Sandwich Maker Grill?
- Faster Cooking Than Stovetop — The grill plates heat up quickly and cook both sides of a sandwich at once, cutting total cooking time nearly in half compared to a skillet.
- Even Heat Distribution — Non-stick plates spread heat evenly from edge to edge, so the bread toasts at the same rate and the filling warms all the way through.
- Crispy Texture With Less Oil — The sealed design locks in heat and moisture, creating a crunchy outer layer while using only a light brush of butter or oil.
- Easy Cleanup — Removable, non-stick plates wipe clean in seconds, and most models are simple to rinse or wash right after use.
- Perfect For Beginners — Simple controls and a clamshell design make this appliance easy for new cooks, kids learning to cook, or anyone short on time.
- Suitable For Many Foods — This grill handles more than sandwiches. Wraps, quesadillas, grilled vegetables, paninis, and even dessert melts all cook well between the plates.
1. Classic Grilled Cheese Sandwich
Prep Time: 5 minutes | Cook Time: 5 minutes | Serve: 1
A buttery, golden sandwich packed with melted cheddar and a crisp outer crust, this simple recipe proves that a Cuisinart sandwich maker can turn basic pantry staples into a satisfying meal. It comes together fast, needs almost no cleanup, and pleases picky eaters and cheese lovers alike, any day of the week.
Ingredients
- 2 slices white or sourdough bread
- 2 slices cheddar cheese
- 1 tablespoon softened butter
- Pinch of salt (optional)
Instructions
Plug in the Cuisinart sandwich maker and let it preheat for about three minutes, until the ready light turns on or the plates feel warm to the touch.
While the grill heats, lay both bread slices flat on a cutting board or plate. Spread softened butter evenly across one side of each slice, making sure the butter reaches every corner so the crust browns evenly during cooking.
Flip one slice so the buttered side faces down. Place both slices of cheddar cheese on top of this slice, layering them so the cheese covers the bread almost completely, leaving a small border around the edges.
Add a light pinch of salt over the cheese layer for extra flavor, though this step can be skipped for a plainer taste.
Place the second bread slice on top, buttered side facing up, so the sandwich has butter on the outside of both slices once assembled.
Open the preheated grill and carefully place the sandwich in the center of the lower plate, keeping it aligned so the top plate closes evenly over the bread.
Close the lid gently and press down until it locks into place. Avoid pressing too hard at first, since the bread needs a moment to soften before it compresses fully.
Cook for four to five minutes, checking around the three-minute mark by lifting the lid slightly to check the color of the bread.
Once the bread turns golden brown and the cheese has melted completely, open the grill and use tongs or a heat-safe spatula to remove the sandwich.
Let the sandwich rest on a plate for one minute before slicing it diagonally. This short rest keeps the melted cheese from spilling out the moment the knife cuts through.
Serve warm, paired with tomato soup, a side salad, or simply on its own for a quick, comforting meal.
Tip: Use room-temperature cheese slices for faster, more even melting inside the grill.
2. Ham and Cheddar Melt
Prep Time: 5 minutes | Cook Time: 6 minutes | Serve: 1
Salty ham and sharp cheddar come together between crisp, buttery bread in this hearty sandwich that works well for lunch or a fast dinner. The layers heat through evenly in the sandwich maker, and the combination of smoky meat with melted cheese makes this recipe a dependable favorite for both kids and adults.
Ingredients
- 2 slices whole wheat or white bread
- 2 slices deli ham
- 2 slices cheddar cheese
- 1 tablespoon softened butter
- 1 teaspoon Dijon mustard (optional)
Instructions
Turn on the Cuisinart sandwich maker and allow it to preheat fully for around three minutes so the plates reach an even cooking temperature before the sandwich goes in.
Lay out both bread slices and spread a thin layer of softened butter on one side of each slice, covering the surface completely for an even golden crust once cooked.
Turn the bread over so the unbuttered sides face up. Spread a thin layer of Dijon mustard on one slice for extra flavor, or skip this step for a milder taste.
Layer the deli ham evenly across the mustard-covered slice, folding the slices slightly so they fit within the bread without hanging over the edges.
Place both slices of cheddar cheese directly on top of the ham, positioning them so the cheese sits between the meat and the top slice of bread for the best melt.
Set the second bread slice on top, buttered side facing outward, so both outer sides of the finished sandwich will crisp up nicely during cooking.
Open the grill and place the assembled sandwich carefully in the center, then close the lid slowly and press down until the plates lock together.
Cook the sandwich for five to six minutes, since the added ham layer takes slightly longer to heat through compared to a plain cheese sandwich.
Around the four-minute mark, lift the lid gently to check that the bread has turned a deep golden color and the cheese has started to bubble at the edges.
Once fully cooked, open the grill and lift the sandwich out using a spatula, taking care since the cheese will be very hot and soft right after cooking.
Allow the sandwich to sit for one to two minutes before cutting it in half, giving the cheese time to set slightly so it holds its shape when sliced.
Serve the sandwich warm with a pickle spear or a small side salad for a balanced, filling meal.
Tip: Pat the ham dry with a paper towel first to prevent extra moisture from making the bread soggy.
3. Chicken Pesto Panini
Prep Time: 8 minutes | Cook Time: 6 minutes | Serve: 1
Grilled chicken, fresh basil pesto, and melted mozzarella combine in this Italian-style panini that feels special enough for a weekend lunch yet simple enough for a weeknight dinner. The sandwich maker presses the layers together, letting the pesto flavor soak into the bread while the cheese melts into every bite.
Ingredients
- 2 slices ciabatta or Italian bread
- 1/2 cup cooked, sliced chicken breast
- 2 tablespoons basil pesto
- 2 slices mozzarella cheese
- 2 slices tomato
- 1 tablespoon olive oil
Instructions
Preheat the Cuisinart sandwich maker for about three minutes so the grill plates are fully hot before the panini goes in for cooking.
Slice the ciabatta bread into two even pieces and lay them flat on a clean surface, ready for spreading and layering the panini fillings.
Brush a thin, even layer of olive oil on the outer side of each bread slice, which will help the bread crisp up nicely once pressed in the grill.
Turn the bread over so the inner sides face up, then spread one tablespoon of pesto on each slice, covering the surface generously for bold flavor in every bite.
Arrange the sliced cooked chicken evenly across one slice of bread, spreading the pieces out so every bite of the finished sandwich contains a good portion of chicken.
Layer the tomato slices on top of the chicken, followed by both slices of mozzarella cheese placed directly over the tomato so the cheese melts closest to the top bread slice.
Place the second bread slice on top, pesto side facing down, so the pesto flavor touches the cheese and chicken directly inside the sandwich.
Open the preheated grill and place the panini in the center of the plate, then close the lid firmly and press down until it locks into position.
Cook the panini for five to six minutes, since the chicken and tomato add extra thickness that needs slightly longer to heat through completely.
Check the panini around the four-minute mark by lifting the lid slightly to see whether grill marks have formed and the cheese has begun to melt at the edges.
Once the bread shows deep golden grill marks and the cheese has fully melted, open the grill and remove the panini carefully using a spatula.
Let the panini rest for one minute before slicing it in half on a diagonal, which helps the melted cheese set slightly and keeps the layers from sliding apart.
Serve warm on its own or with a light side salad for a complete meal.
Tip: Pat tomato slices dry before adding them, since extra juice can make the bread soggy during cooking.
4. Turkey Avocado Sandwich
Prep Time: 6 minutes | Cook Time: 5 minutes | Serve: 1
Lean turkey breast and creamy avocado make a lighter, fresher sandwich option that still gets the crisp, toasted texture the Cuisinart sandwich maker is known for. This recipe works well for a quick lunch and offers a good source of protein alongside heart-healthy fats from the avocado.
Ingredients
- 2 slices whole grain bread
- 3 ounces sliced turkey breast
- 1/2 ripe avocado, mashed
- 1 slice Swiss or provolone cheese
- 1 teaspoon lemon juice
- Salt and pepper to taste
Instructions
Preheat the Cuisinart sandwich maker for roughly three minutes, giving the plates enough time to reach a steady, even cooking temperature.
In a small bowl, mash the avocado with a fork until mostly smooth, then stir in the lemon juice along with a pinch of salt and pepper to keep the color fresh and add mild flavor.
Lay both slices of whole grain bread on a flat surface and spread the mashed avocado mixture evenly across one slice, covering it from edge to edge.
Arrange the sliced turkey breast on top of the avocado layer, folding the slices gently so they sit neatly within the borders of the bread.
Place the slice of Swiss or provolone cheese directly on top of the turkey, positioning it so it will melt down into the meat as the sandwich cooks.
Set the second slice of bread on top to close the sandwich, pressing down lightly by hand so the layers stay in place before cooking begins.
Lightly brush the outer sides of both bread slices with a small amount of butter or olive oil to help the bread turn golden and crisp in the grill.
Open the preheated sandwich maker and place the sandwich carefully in the center of the lower plate, keeping the filling balanced so nothing spills out the sides.
Close the lid and press down gently until it locks, then let the sandwich cook for four to five minutes total.
Around the three-minute mark, lift the lid slightly to check that the bread has turned golden brown and the cheese has started to soften and melt.
Once fully cooked, open the grill and use a spatula to lift the sandwich out carefully, since the avocado filling can be quite warm and soft.
Let the sandwich rest for a minute before cutting it in half, then serve right away while the bread is still crisp and the cheese is melted.
Tip: Add the avocado just before cooking to keep it from turning brown too quickly.
5. Buffalo Chicken Grilled Sandwich
Prep Time: 8 minutes | Cook Time: 6 minutes | Serve: 1
Spicy buffalo sauce, tender shredded chicken, and cool ranch dressing combine in this bold sandwich that turns a simple dinner into something memorable. The sandwich maker presses the layers into a crisp, handheld package, making this a great option for game nights or anyone craving a bit of heat.
Ingredients
- 2 slices bread of choice
- 1/2 cup shredded cooked chicken
- 2 tablespoons buffalo sauce
- 1 tablespoon ranch or blue cheese dressing
- 2 slices cheddar or pepper jack cheese
- 1 tablespoon softened butter
Instructions
Preheat the Cuisinart sandwich maker for about three minutes, allowing the plates to warm evenly before the sandwich goes in for cooking.
In a small bowl, combine the shredded cooked chicken with the buffalo sauce, stirring thoroughly so every piece of chicken is coated evenly in the spicy sauce.
Lay both slices of bread flat on a cutting board and spread the softened butter on one side of each slice, which will become the outer crust once cooked.
Turn the bread over so the unbuttered sides face up, then spread the ranch or blue cheese dressing across one slice to add a cool, creamy layer beneath the chicken.
Spoon the buffalo chicken mixture evenly over the dressing, spreading it out so the filling reaches close to the edges without falling over the sides of the bread.
Place both slices of cheese on top of the chicken mixture, layering them so the cheese will melt down into the spicy filling as the sandwich cooks.
Set the second slice of bread on top, buttered side facing outward, then press down gently by hand to help the layers settle together before cooking.
Open the preheated grill and place the sandwich carefully in the center, closing the lid slowly and pressing down until the plates lock securely in place.
Cook the sandwich for five to six minutes, since the shredded chicken filling needs a little extra time to heat through completely and the cheese needs time to melt.
Check the sandwich around the four-minute mark by lifting the lid slightly to confirm the bread has turned golden and the cheese has begun to bubble at the edges.
Once fully cooked, open the grill and remove the sandwich carefully with a spatula, since the buffalo sauce filling will be hot and may be slightly runny.
Let the sandwich rest for one to two minutes before slicing it in half, giving the filling time to settle so it stays inside the bread when cut.
Serve warm with celery sticks and extra ranch dressing on the side for dipping.
Tip: Drain any excess buffalo sauce from the chicken mixture before assembling to prevent the bread from becoming soggy.
6. BBQ Chicken Melt
Prep Time: 7 minutes | Cook Time: 6 minutes | Serve: 1
Sweet and smoky barbecue sauce pairs with tender chicken and melted cheese in this satisfying sandwich that tastes like a backyard cookout in handheld form. The Cuisinart sandwich maker caramelizes the sauce slightly against the hot plates, adding a rich depth of flavor to every bite.
Ingredients
- 2 slices bread of choice
- 1/2 cup cooked, shredded or sliced chicken
- 3 tablespoons barbecue sauce
- 2 slices cheddar or Monterey Jack cheese
- 2 tablespoons thinly sliced red onion
- 1 tablespoon softened butter
Instructions
Preheat the Cuisinart sandwich maker for around three minutes so the grill plates are fully heated and ready before the sandwich is assembled and placed inside.
In a small bowl, toss the cooked chicken with the barbecue sauce, mixing well so the sauce coats every piece evenly and no dry spots remain.
Lay both slices of bread on a flat surface and spread softened butter on one side of each slice, covering the surface fully for a crisp, golden crust after cooking.
Flip the bread so the unbuttered sides face upward, then layer the barbecue chicken mixture evenly across one slice, spreading it close to the edges of the bread.
Scatter the thinly sliced red onion over the chicken layer, distributing the pieces evenly so each bite gets a bit of sharp, fresh crunch.
Place both slices of cheese directly on top of the onion and chicken layers, positioning them so the cheese will melt down through the filling as it cooks.
Set the second bread slice on top, buttered side facing out, then press down lightly with the palm of a hand to help the sandwich hold together before cooking.
Open the preheated grill and place the sandwich in the center of the plate, then close the lid carefully and press down until it locks securely into place.
Cook for five to six minutes total, since the barbecue sauce and chicken filling need enough time to warm through and the cheese needs time to fully melt.
Around the four-minute mark, lift the lid slightly to check that the bread has turned a deep golden brown and the sauce has started to caramelize slightly at the edges.
Once fully cooked, open the grill and lift the sandwich out with a spatula, being careful since the barbecue sauce filling will be very hot right after cooking.
Allow the sandwich to rest for one to two minutes before cutting it in half, which helps the sauce and cheese settle so the filling stays in place.
Serve warm with extra barbecue sauce on the side for dipping, along with coleslaw or a simple green salad.
Tip: Choose a thick barbecue sauce rather than a thin one to keep the bread from getting soggy during cooking.
7. Philly Cheesesteak Sandwich
Prep Time: 10 minutes | Cook Time: 6 minutes | Serve: 1
Thin strips of steak, sautéed peppers, and melted provolone come together in this hearty sandwich inspired by the classic Philadelphia favorite. The Cuisinart sandwich maker presses the filling into a compact, crisp package, turning a diner staple into an easy meal that comes together right in the kitchen.
Ingredients
- 2 slices hoagie roll or sturdy bread
- 1/2 cup thinly sliced cooked steak
- 1/4 cup sliced green bell pepper
- 1/4 cup sliced onion
- 2 slices provolone cheese
- 1 tablespoon olive oil
- 1 tablespoon softened butter
Instructions
Heat the olive oil in a small pan over medium heat, then add the sliced onion and green pepper, cooking for about five minutes until softened and lightly browned.
Add the thinly sliced steak to the pan with the vegetables, stirring occasionally and cooking for two to three minutes until the meat is heated through completely.
While the filling cooks, preheat the Cuisinart sandwich maker for about three minutes so the grill plates reach a steady, even temperature.
Slice the hoagie roll or bread into two even pieces, then spread softened butter on the outer side of each slice for a crisp, golden crust once cooked.
Turn the bread over so the inner sides face up, then spoon the steak and vegetable mixture evenly onto one slice, spreading it out close to the edges.
Place both slices of provolone cheese directly on top of the warm steak filling, allowing the heat from the meat to begin softening the cheese slightly before cooking.
Set the second bread slice on top, buttered side facing outward, then press down gently by hand to help the sandwich hold its shape before it goes into the grill.
Open the preheated sandwich maker and place the sandwich carefully in the center of the plate, then close the lid slowly and press down until it locks securely.
Cook the sandwich for five to six minutes, since the meat and vegetable filling adds extra thickness that needs a bit more time to heat through fully.
Around the four-minute mark, lift the lid slightly to check that the bread has turned golden brown and the provolone cheese has melted completely over the filling.
Once fully cooked, open the grill and remove the sandwich carefully using a spatula, taking care since the filling inside will be very hot.
Let the sandwich rest for one to two minutes before slicing it in half, which allows the cheese to set slightly and keeps the filling from spilling out.
Serve warm on its own or with a side of chips or a small green salad for a complete meal.
Tip: Slice the steak as thin as possible before cooking so it heats through quickly and stays tender inside the sandwich.
8. Tuna Melt Sandwich
Prep Time: 8 minutes | Cook Time: 5 minutes | Serve: 1
Creamy tuna salad and melted cheese combine in this comforting sandwich that turns canned tuna into a warm, satisfying meal. The sandwich maker crisps the bread while gently warming the tuna filling, creating a classic lunchtime dish that comes together with just a few pantry staples.
Ingredients
- 2 slices bread of choice
- 1/2 cup canned tuna, drained
- 2 tablespoons mayonnaise
- 1 teaspoon chopped celery
- 1 teaspoon lemon juice
- 2 slices cheddar or American cheese
- 1 tablespoon softened butter
Instructions
In a small bowl, combine the drained tuna with the mayonnaise, chopped celery, and lemon juice, stirring until the mixture is evenly blended and holds together well.
Preheat the Cuisinart sandwich maker for about three minutes, giving the plates time to warm evenly before the sandwich is placed inside for cooking.
Lay both slices of bread on a flat surface and spread softened butter on one side of each slice, which will crisp up nicely once pressed in the hot grill.
Turn the bread over so the unbuttered sides face upward, then spoon the tuna mixture evenly onto one slice, spreading it out close to the edges of the bread.
Place one slice of cheese directly on top of the tuna mixture, allowing it to sit close to the filling so it melts down into the tuna as the sandwich cooks.
Add the second slice of cheese on top of the first, doubling the cheese layer for extra melt and a richer flavor throughout the sandwich.
Set the second bread slice on top, buttered side facing outward, then gently press down by hand to help the layers settle together before cooking begins.
Open the preheated grill and place the sandwich carefully in the center of the lower plate, then close the lid slowly and press down until it locks into place.
Cook the sandwich for four to five minutes, checking around the three-minute mark to see whether the bread has started turning golden brown.
Once the bread reaches a deep golden color and the cheese has melted fully, open the grill and use a spatula to lift the sandwich out carefully.
Let the sandwich rest for about one minute before slicing it in half, which helps the warm tuna filling stay in place once cut.
Serve the sandwich warm with a side of pickles or a light salad for a balanced, filling meal.
Tip: Drain the tuna thoroughly and pat it dry with a paper towel to keep the filling from making the bread soggy.
9. Caprese Panini
Prep Time: 6 minutes | Cook Time: 5 minutes | Serve: 1
Fresh mozzarella, ripe tomato, and fragrant basil come together in this simple Italian-inspired panini, finished with a drizzle of balsamic glaze for a touch of sweetness. Light yet satisfying, this vegetarian sandwich makes a great lunch option and shows how well fresh ingredients work in the sandwich maker.
Ingredients
- 2 slices ciabatta or Italian bread
- 3 slices fresh mozzarella
- 4 slices ripe tomato
- 4 to 5 fresh basil leaves
- 1 tablespoon olive oil
- 1 teaspoon balsamic glaze
Instructions
Preheat the Cuisinart sandwich maker for roughly three minutes so the grill plates reach an even, steady temperature before the panini is placed inside.
Slice the ciabatta bread into two even pieces and lay them flat on a cutting board, ready for layering the fresh ingredients.
Brush a thin, even layer of olive oil on the outer side of each bread slice, which helps the crust turn golden and slightly crisp once cooked.
Flip the bread so the inner sides face upward, then layer the tomato slices evenly across one slice, arranging them so they cover the bread almost completely.
Season the tomato slices lightly with a pinch of salt and pepper, then place the fresh basil leaves directly on top, spreading them out evenly across the layer.
Arrange the mozzarella slices over the basil leaves, positioning them so the cheese sits close to the top bread slice for the best possible melt during cooking.
Drizzle a small amount of balsamic glaze over the mozzarella, then set the second bread slice on top, oiled side facing outward, to close the sandwich.
Open the preheated grill and place the panini carefully in the center of the plate, then close the lid gently and press down until it locks securely.
Cook the panini for four to five minutes, since fresh mozzarella melts fairly quickly and the tomato only needs a short time to warm through.
Check around the three-minute mark by lifting the lid slightly to see whether the bread has developed golden grill marks and the cheese has begun to soften.
Once the cheese is fully melted and the bread shows deep golden color, open the grill and remove the panini carefully using a spatula.
Let the sandwich rest for a minute before slicing it in half on a diagonal, which allows the melted cheese to set slightly before serving.
Serve warm, with an extra drizzle of balsamic glaze on top for added flavor and a nice presentation.
Tip: Pat the tomato slices dry with a paper towel before assembling to keep the bread from turning soggy during cooking.
10. Spinach and Mozzarella Sandwich
Prep Time: 6 minutes | Cook Time: 5 minutes | Serve: 1
Tender wilted spinach and melted mozzarella create a simple, satisfying vegetarian sandwich that works well for a light lunch or a quick dinner side. A touch of garlic adds warmth to the filling, while the sandwich maker crisps the bread and melts the cheese into every bite.
Ingredients
- 2 slices whole wheat bread
- 1 cup fresh spinach leaves
- 2 slices mozzarella cheese
- 1 small garlic clove, minced
- 1 tablespoon olive oil
- 1 tablespoon softened butter
Instructions
Heat the olive oil in a small pan over medium heat, then add the minced garlic and cook for about thirty seconds until fragrant, stirring constantly to prevent burning.
Add the fresh spinach to the pan, tossing it in the garlic oil and cooking for one to two minutes until the leaves wilt down and reduce in size.
Remove the pan from the heat and set the wilted spinach aside to cool slightly while the Cuisinart sandwich maker preheats for about three minutes.
Lay both slices of bread on a flat surface and spread softened butter on one side of each slice, covering the surface fully for a crisp finish once cooked.
Turn the bread over so the unbuttered sides face up, then spread the wilted spinach evenly across one slice, distributing it close to the edges of the bread.
Place both slices of mozzarella cheese directly on top of the spinach layer, positioning them so the cheese will melt down into the greens as the sandwich cooks.
Set the second bread slice on top, buttered side facing outward, then press down gently by hand to help the sandwich hold together before cooking.
Open the preheated grill and place the sandwich carefully in the center of the lower plate, then close the lid slowly and press down until it locks into place.
Cook the sandwich for four to five minutes, checking around the three-minute mark to see whether the bread has begun turning a deep golden color.
Once the bread is golden brown and the mozzarella has melted completely, open the grill and use a spatula to remove the sandwich carefully.
Let the sandwich rest for about one minute before slicing it in half, which helps the melted cheese settle so it stays inside the bread.
Serve warm on its own or alongside a small bowl of soup for a light, well-rounded meal.
Tip: Squeeze any extra water from the wilted spinach before adding it to the sandwich to keep the bread from becoming soggy.
11. Mushroom Swiss Melt
Prep Time: 8 minutes | Cook Time: 6 minutes | Serve: 1
Earthy sautéed mushrooms and nutty Swiss cheese pair beautifully in this savory vegetarian sandwich, finished with a touch of thyme for extra depth. The sandwich maker melts the cheese into the mushrooms, creating a rich, warm filling between two crisp slices of bread.
Ingredients
- 2 slices bread of choice
- 1 cup sliced mushrooms
- 2 slices Swiss cheese
- 1/2 teaspoon dried thyme
- 1 tablespoon olive oil
- 1 tablespoon softened butter
Instructions
Heat the olive oil in a small pan over medium heat, then add the sliced mushrooms and cook for four to five minutes, stirring occasionally, until they turn golden and release their moisture.
Sprinkle the dried thyme over the mushrooms during the last minute of cooking, stirring to coat the pieces evenly, then remove the pan from the heat.
While the mushrooms cool slightly, preheat the Cuisinart sandwich maker for about three minutes so the plates are fully warmed before cooking begins.
Lay both slices of bread on a cutting board and spread softened butter on one side of each slice, covering the surface completely for an even golden crust.
Turn the bread over so the unbuttered sides face up, then spoon the cooked mushrooms evenly across one slice, spreading them close to the edges of the bread.
Place both slices of Swiss cheese directly on top of the mushroom layer, positioning them so the cheese melts down into the filling as the sandwich cooks.
Set the second bread slice on top, buttered side facing outward, then press down gently with the palm of a hand to help the layers settle together.
Open the preheated grill and place the sandwich carefully in the center of the plate, then close the lid slowly and press down until it locks securely into place.
Cook the sandwich for five to six minutes, since the mushroom filling holds moisture and needs a little extra time to heat through fully.
Around the four-minute mark, lift the lid slightly to check that the bread has turned golden brown and the cheese has melted completely over the mushrooms.
Once fully cooked, open the grill and remove the sandwich carefully with a spatula, taking care since the filling will be quite hot right after cooking.
Let the sandwich rest for one to two minutes before slicing it in half, which allows the cheese to set slightly and keeps the filling in place.
Serve warm on its own or with a small side salad for a complete, comforting meal.
Tip: Cook the mushrooms until most of their liquid has evaporated to prevent the finished sandwich from turning soggy.
12. Veggie Supreme Grill Sandwich
Prep Time: 10 minutes | Cook Time: 6 minutes | Serve: 1
Loaded with bell peppers, zucchini, red onion, and melted cheese, this hearty vegetarian sandwich proves that plant-based meals can be just as satisfying as meat-filled ones. The sandwich maker presses the layered vegetables into a crisp, easy-to-hold package packed with color and flavor.
Ingredients
- 2 slices whole grain bread
- 1/4 cup sliced bell pepper
- 1/4 cup sliced zucchini
- 2 tablespoons sliced red onion
- 2 slices provolone or mozzarella cheese
- 1 tablespoon olive oil
- 1 tablespoon softened butter
Instructions
Heat the olive oil in a small pan over medium heat, then add the bell pepper, zucchini, and red onion, cooking for five to six minutes until the vegetables soften and lightly brown.
Season the vegetables with a small pinch of salt and pepper while they cook, stirring occasionally so they cook evenly on all sides.
Remove the pan from the heat and set the cooked vegetables aside while the Cuisinart sandwich maker preheats for about three minutes.
Lay both slices of bread on a flat surface and spread softened butter on one side of each slice, covering it fully for a crisp, golden crust once cooked.
Turn the bread over so the unbuttered sides face up, then spoon the cooked vegetable mixture evenly across one slice, spreading it close to the edges of the bread.
Place both slices of cheese directly on top of the vegetable layer, positioning them so the cheese will melt down into the mixture as the sandwich cooks.
Set the second bread slice on top, buttered side facing outward, then press down gently by hand to help the sandwich hold together before it goes into the grill.
Open the preheated sandwich maker and place the sandwich carefully in the center of the plate, then close the lid slowly and press down until it locks into place.
Cook the sandwich for five to six minutes, since the mixed vegetable filling adds extra thickness that needs a bit more time to heat through completely.
Around the four-minute mark, lift the lid slightly to check that the bread has turned golden brown and the cheese has melted fully over the vegetables.
Once fully cooked, open the grill and remove the sandwich carefully using a spatula, taking care since the vegetable filling will be hot and slightly soft.
Let the sandwich rest for one to two minutes before slicing it in half, which allows the cheese to set slightly and keeps the filling from falling out.
Serve warm on its own or with a light side salad for a well-rounded vegetarian meal.
Tip: Cook the vegetables until most of their liquid evaporates so the finished sandwich does not turn soggy.
13. Pizza Sandwich
Prep Time: 7 minutes | Cook Time: 5 minutes | Serve: 1
Marinara sauce, mozzarella, and pepperoni combine in this playful sandwich that tastes just like a slice of pizza folded into a handheld meal. Quick to assemble and loved by kids and adults alike, this recipe makes a great after-school snack or a fast dinner option.
Ingredients
- 2 slices bread of choice
- 3 tablespoons marinara or pizza sauce
- 2 slices mozzarella cheese
- 8 to 10 pepperoni slices
- 1/2 teaspoon Italian seasoning
- 1 tablespoon softened butter
Instructions
Preheat the Cuisinart sandwich maker for about three minutes, giving the grill plates enough time to reach a steady, even cooking temperature.
Lay both slices of bread on a cutting board and spread softened butter on one side of each slice, covering the surface completely for a crisp crust after cooking.
Turn the bread over so the unbuttered sides face up, then spread the marinara sauce evenly across one slice, leaving a small border around the edges to prevent spilling.
Sprinkle the Italian seasoning over the sauce, then place one slice of mozzarella cheese directly on top, covering the sauce layer as completely as possible.
Arrange the pepperoni slices evenly over the cheese, spacing them out so each bite of the finished sandwich contains a good amount of pepperoni.
Add the second slice of mozzarella cheese on top of the pepperoni, allowing this layer to melt down and hold the filling together as it cooks.
Set the second bread slice on top, buttered side facing outward, then press down gently by hand to help the sandwich hold its shape before cooking begins.
Open the preheated grill and place the sandwich carefully in the center of the lower plate, then close the lid slowly and press down until it locks securely.
Cook the sandwich for four to five minutes, checking around the three-minute mark to see whether the bread has started turning golden brown.
Once the bread reaches a deep golden color and both cheese layers have melted fully, open the grill and use a spatula to remove the sandwich carefully.
Let the sandwich rest for about one minute before slicing it in half, which helps the sauce and cheese settle so the filling stays inside.
Serve warm with a small bowl of extra marinara sauce on the side for dipping.
Tip: Use a small amount of sauce to prevent the bread from becoming soggy during cooking.
14. Breakfast Egg and Cheese Sandwich
Prep Time: 5 minutes | Cook Time: 5 minutes | Serve: 1
Fluffy scrambled egg and melted cheese fill this simple breakfast sandwich, a quick option for busy mornings when time is short. The Cuisinart sandwich maker cooks the egg and toasts the bread together in one step, making this recipe faster than cooking eggs separately on a stovetop.
Ingredients
- 2 slices bread of choice
- 1 large egg
- 1 slice cheddar or American cheese
- 1 tablespoon softened butter
- Salt and pepper to taste
Instructions
Crack the egg into a small bowl, season with a pinch of salt and pepper, then whisk thoroughly until the yolk and white are fully combined and slightly frothy.
Lightly grease a small microwave-safe dish or small pan with a bit of butter, then cook the egg quickly, either in the microwave for about forty-five seconds or in a pan over medium heat for one to two minutes, stirring gently until just set.
While the egg cooks, preheat the Cuisinart sandwich maker for about three minutes so the plates are ready when the sandwich is assembled.
Lay both slices of bread on a flat surface and spread softened butter on one side of each slice, covering the surface completely for a crisp, golden crust once cooked.
Turn the bread over so the unbuttered sides face up, then place the cooked egg on one slice, spreading it out gently so it covers most of the bread evenly.
Place the slice of cheese directly on top of the warm egg, allowing the residual heat to begin softening the cheese before the sandwich goes into the grill.
Set the second bread slice on top, buttered side facing outward, then press down lightly by hand to help the sandwich hold together before cooking.
Open the preheated grill and place the sandwich carefully in the center of the lower plate, then close the lid slowly and press down until it locks into place.
Cook the sandwich for three to four minutes, since the egg is already cooked and the sandwich mainly needs time to toast the bread and melt the cheese.
Around the two-minute mark, lift the lid slightly to check that the bread has started turning golden brown and the cheese has begun to melt at the edges.
Once the bread reaches a deep golden color and the cheese has melted fully, open the grill and use a spatula to remove the sandwich carefully.
Let the sandwich rest for about one minute before slicing it in half, then serve right away while the egg is warm and the cheese is soft.
Tip: Cook the egg only until just set, since it will continue cooking slightly once pressed inside the hot sandwich maker.
15. Bacon Egg Breakfast Melt
Prep Time: 8 minutes | Cook Time: 5 minutes | Serve: 1
Crispy bacon, fluffy egg, and melted cheese combine in this filling breakfast sandwich built for mornings that call for something heartier. The sandwich maker brings all three ingredients together into one warm, satisfying handheld meal that takes only minutes from start to finish.
Ingredients
- 2 slices bread of choice
- 1 large egg
- 2 slices cooked bacon
- 1 slice cheddar cheese
- 1 tablespoon softened butter
- Salt and pepper to taste
Instructions
Cook the bacon in a pan over medium heat until crispy, about four to five minutes, then transfer it to a paper towel-lined plate to drain excess grease.
Crack the egg into a small bowl, season lightly with salt and pepper, then whisk until fully blended and slightly frothy in texture.
Cook the egg in the same pan used for the bacon over medium heat, stirring gently for one to two minutes until just set, then remove from the heat.
Preheat the Cuisinart sandwich maker for about three minutes while the bacon and egg cool slightly, giving the grill plates time to reach a steady temperature.
Lay both slices of bread on a flat surface and spread softened butter on one side of each slice, covering it fully for an even golden crust once cooked.
Turn the bread over so the unbuttered sides face up, then place the cooked egg on one slice, spreading it gently so it covers most of the surface.
Lay the crispy bacon slices on top of the egg, breaking them in half if needed so they fit neatly within the borders of the bread.
Place the slice of cheddar cheese directly on top of the bacon, positioning it so the cheese will melt down over the filling as the sandwich cooks.
Set the second bread slice on top, buttered side facing outward, then press down gently by hand to help the layers settle together before cooking begins.
Open the preheated grill and place the sandwich carefully in the center of the plate, then close the lid slowly and press down until it locks securely into place.
Cook the sandwich for four to five minutes, checking around the three-minute mark to see whether the bread has turned golden and the cheese has started to melt.
Once fully cooked, open the grill and remove the sandwich carefully with a spatula, then let it rest for about one minute before slicing it in half.
Serve warm right away, paired with fresh fruit or a small glass of juice for a complete breakfast.
Tip: Pat the cooked bacon dry with a paper towel before adding it to remove excess grease and keep the bread crisp.
16. Peanut Butter Banana Grill Sandwich
Prep Time: 5 minutes | Cook Time: 4 minutes | Serve: 1
Creamy peanut butter and sweet banana slices melt together in this warm, comforting sandwich that works as a quick breakfast or a simple dessert. A light sprinkle of cinnamon adds extra warmth, and the sandwich maker turns this humble pairing into a soft, gooey treat.
Ingredients
- 2 slices bread of choice
- 3 tablespoons peanut butter
- 1 small banana, sliced
- 1/4 teaspoon ground cinnamon
- 1 tablespoon softened butter
Instructions
Preheat the Cuisinart sandwich maker for about three minutes so the plates are fully warmed before the sandwich is assembled and placed inside for cooking.
Lay both slices of bread on a flat surface and spread the peanut butter evenly across one side of each slice, covering the surface generously from edge to edge.
Arrange the banana slices evenly over the peanut butter on one slice of bread, layering them so they cover most of the surface without stacking too high.
Sprinkle the ground cinnamon evenly over the banana slices, distributing it lightly so a small amount of warm spice reaches every bite of the finished sandwich.
Set the second bread slice on top, peanut butter side facing down, so the peanut butter touches the banana and cinnamon layer directly inside the sandwich.
Spread softened butter on the outer side of both bread slices, covering the surface completely to help the bread turn golden and slightly crisp once cooked.
Open the preheated grill and place the sandwich carefully in the center of the lower plate, then close the lid slowly and press down until it locks into place.
Cook the sandwich for three to four minutes, since the banana and peanut butter filling heats through quickly and mainly needs time to soften and warm.
Around the two-minute mark, lift the lid slightly to check that the bread has started turning golden brown and the filling has begun to soften inside.
Once the bread reaches a deep golden color, open the grill and remove the sandwich carefully using a spatula, since the filling will be soft and warm.
Let the sandwich rest for about one minute before slicing it in half, which helps the warm banana filling settle so it does not spill out immediately.
Serve warm, with an optional light drizzle of honey on top for extra sweetness.
Tip: Use a slightly firm banana rather than an overly ripe one to keep the slices from turning too mushy during cooking.
17. Nutella Strawberry Sandwich
Prep Time: 5 minutes | Cook Time: 4 minutes | Serve: 1
Rich chocolate hazelnut spread and fresh strawberry slices create a sweet, dessert-style sandwich that feels like a treat while still coming together in just a few minutes. The warm grill softens the chocolate spread into a smooth, melty layer that pairs perfectly with the fruit.
Ingredients
- 2 slices bread of choice
- 3 tablespoons chocolate hazelnut spread
- 6 to 8 fresh strawberries, sliced
- 1 tablespoon softened butter
Instructions
Preheat the Cuisinart sandwich maker for about three minutes, allowing the plates to reach a steady, even temperature before the sandwich is placed inside.
Lay both slices of bread on a flat surface and spread the chocolate hazelnut spread evenly across one side of each slice, covering the surface generously.
Arrange the sliced strawberries evenly over the chocolate spread on one slice of bread, layering them so they cover most of the surface in a single layer.
Set the second bread slice on top, chocolate spread side facing down, so the two spread layers meet and hold the strawberry slices in place inside.
Spread softened butter on the outer side of both bread slices, covering the surface completely to help the bread turn golden and slightly crisp during cooking.
Open the preheated grill and place the sandwich carefully in the center of the lower plate, then close the lid gently and press down until it locks securely.
Cook the sandwich for three to four minutes, since the filling mainly needs time to warm and soften rather than cook through completely.
Around the two-minute mark, lift the lid slightly to check that the bread has started turning golden brown and the chocolate spread has begun to soften.
Once the bread reaches a deep golden color, open the grill and remove the sandwich carefully using a spatula, since the warm filling can be quite soft.
Let the sandwich rest for about one minute before slicing it in half, which helps the melted chocolate spread settle so it does not spill out right away.
Serve warm, with a light dusting of powdered sugar on top for a nicer presentation, though this step is entirely optional.
Tip: Slice the strawberries thin and pat them dry before adding them to keep the bread from turning soggy.
18. Apple Cinnamon Dessert Sandwich
Prep Time: 8 minutes | Cook Time: 5 minutes | Serve: 1
Soft, spiced apple slices and a touch of brown sugar create a warm, dessert-style sandwich that tastes similar to a simple apple pie filling tucked between crisp bread. This recipe makes a cozy treat for cooler days and fills the kitchen with a warm, spiced aroma while it cooks.
Ingredients
- 2 slices bread of choice
- 1 small apple, thinly sliced
- 1 tablespoon brown sugar
- 1/2 teaspoon ground cinnamon
- 1 tablespoon softened butter, divided
Instructions
Heat one teaspoon of butter in a small pan over medium heat, then add the thinly sliced apple, brown sugar, and cinnamon, stirring to coat the apple pieces evenly.
Cook the apple mixture for four to five minutes, stirring occasionally, until the slices soften slightly and the sugar melts into a light glaze around them.
Remove the pan from the heat and set the apple mixture aside to cool slightly while the Cuisinart sandwich maker preheats for about three minutes.
Lay both slices of bread on a flat surface and spread the remaining softened butter on one side of each slice, covering the surface completely for a crisp crust.
Turn the bread over so the unbuttered sides face up, then spoon the cooked apple mixture evenly across one slice, spreading it close to the edges of the bread.
Set the second bread slice on top, buttered side facing outward, then press down gently by hand to help the sandwich hold its shape before cooking begins.
Open the preheated grill and place the sandwich carefully in the center of the lower plate, then close the lid slowly and press down until it locks into place.
Cook the sandwich for four to five minutes, since the apple filling needs a short amount of time to warm through and the bread needs time to crisp.
Around the three-minute mark, lift the lid slightly to check that the bread has turned golden brown and the filling has started to bubble slightly at the edges.
Once fully cooked, open the grill and remove the sandwich carefully using a spatula, taking care since the apple filling will be hot right after cooking.
Let the sandwich rest for one to two minutes before slicing it in half, which allows the filling to settle and cool slightly before serving.
Serve warm, with a small scoop of vanilla ice cream on the side for an extra special dessert.
Tip: Slice the apple thin and evenly so every piece cooks at the same rate and softens fully.
19. S’mores Grilled Sandwich
Prep Time: 5 minutes | Cook Time: 4 minutes | Serve: 1
Melted chocolate, gooey marshmallow, and crushed graham cracker come together in this dessert sandwich inspired by the classic campfire treat, minus the campfire. The sandwich maker melts the marshmallow and chocolate into a soft, sticky filling between two warm, slightly crisp slices of bread.
Ingredients
- 2 slices bread of choice
- 1/3 cup mini marshmallows
- 1/4 cup chocolate chips
- 2 tablespoons crushed graham crackers
- 1 tablespoon softened butter
Instructions
Preheat the Cuisinart sandwich maker for about three minutes, giving the plates enough time to reach a steady, even temperature before cooking begins.
Lay both slices of bread flat on a cutting board, then scatter the chocolate chips evenly across one slice, spreading them close to the edges of the bread.
Sprinkle the mini marshmallows over the chocolate chips, distributing them evenly so the filling forms a fairly even layer across the bread.
Sprinkle the crushed graham crackers over the marshmallows, adding a light, even layer that will soften slightly once the sandwich starts cooking.
Set the second bread slice on top, pressing down very gently by hand just enough to help the sandwich hold together without crushing the marshmallows.
Spread softened butter on the outer side of both bread slices, covering the surface completely to help the bread crisp up nicely during cooking.
Open the preheated grill and place the sandwich carefully in the center of the lower plate, then close the lid slowly and press down gently until it locks into place.
Cook the sandwich for three to four minutes, watching closely since the marshmallows and chocolate melt quickly and can overflow the edges when overcooked.
Around the two-minute mark, lift the lid slightly to check that the bread has started turning golden brown and the marshmallows have begun to soften and puff.
Once the bread reaches a light golden color and the filling looks soft and melted, open the grill and remove the sandwich carefully using a spatula.
Let the sandwich rest for one to two minutes before slicing it in half, since the marshmallow filling will be extremely hot right after cooking.
Serve warm, and enjoy the gooey filling while it is still soft, ideally with a napkin close by for the sticky, sweet mess.
Tip: Keep a close eye on the sandwich near the end of cooking, since the sugary filling can burn quickly compared to savory fillings.
Storage and Reheating Tips
- Refrigeration — Store leftover sandwiches in an airtight container for up to two days, placing a sheet of parchment paper between layers to prevent sticking.
- Freezing — Wrap cooled sandwiches tightly in plastic wrap, then place them in a freezer bag for up to one month, labeling each bag with the date.
- Reheating in the Sandwich Maker — Preheat the grill, then warm the sandwich for two to three minutes until heated through and the outside turns crisp again.
- Oven Method — Place the sandwich on a baking sheet and warm it at 350°F for about eight to ten minutes, flipping once halfway through for even heating.
- Air Fryer Method — Set the air fryer to 350°F and heat the sandwich for four to five minutes, checking partway through to prevent over-browning.
- Avoiding Soggy Leftovers — Let sandwiches cool completely before storing, and always reheat with a dry heat method rather than a microwave to keep the bread crisp instead of limp.
Conclusion
A Cuisinart sandwich maker proves itself as one of the most versatile tools in a home kitchen, capable of turning breakfast, lunch, dinner, and even dessert into a warm, pressed meal within minutes. These recipes show just how far the appliance can stretch beyond a basic grilled cheese, covering everything from spicy buffalo chicken to sweet apple cinnamon filling.
Home cooks are encouraged to branch out from familiar favorites and try recipes that push the flavor combinations further, since the grill handles meats, vegetables, cheeses, and sweet fillings equally well. Swapping in different bread styles, trying new cheese blends, or experimenting with seasonal produce can turn a simple sandwich into a new household staple.
Save this guide for quick meal ideas on busy days, and feel free to share favorite combinations with family and friends who might enjoy discovering new ways to use their own Cuisinart sandwich maker. With a bit of creativity, this small appliance can support meals for every part of the day.