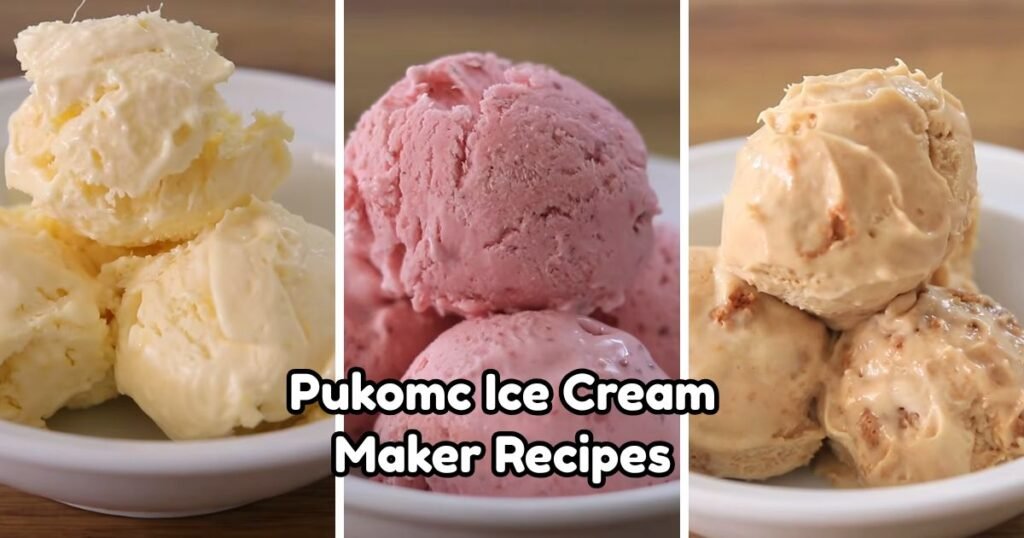
Homemade ice cream turns simple ingredients into a rich, creamy treat that beats anything from a store shelf. Making ice cream at home lets you control every ingredient, skip artificial additives, and create flavors that match your family’s taste.
Pukomc ice cream makers have grown popular among home cooks because they churn smooth, creamy batches with little effort and no complicated steps. This handy machine makes the process simple for beginners, and it delivers professional-style results right in your kitchen.
Making ice cream at home comes with plenty of perks. You save money compared to buying pints at the store, you control sugar and fat levels, and you get to experiment with mix-ins your family loves. Fresh, homemade ice cream also tastes richer and creamier than most packaged versions, since it goes straight from the machine to your bowl.
This collection of Pukomc Ice Cream Maker Recipes brings you nineteen tested flavors, from classic vanilla to bold combinations like salted caramel and pistachio. Each recipe includes clear steps, helpful tips, and flavor variations, so anyone can turn out smooth, creamy scoops on the first try. Grab your machine, and let’s get started.

Why You’ll Love These Pukomc Ice Cream Maker Recipes
1. Beginner-Friendly Recipes — Each recipe uses simple steps anyone can follow with a Pukomc ice cream maker, even with no previous experience.
2. Simple Pantry Ingredients — Most recipes call for basic items already sitting in your kitchen, like milk, cream, sugar, and eggs.
3. Customizable Flavors and Mix-Ins — Swap ingredients, add extra chocolate chips, or blend in fresh fruit to match your cravings.
4. Healthier Than Many Store-Bought Options — Control sugar levels and skip preservatives found in packaged ice cream.
5. Perfect for Kids, Parties, and Family Desserts — These recipes work great for birthday parties, weekend treats, and everyday family dessert nights.
1. Classic Vanilla Ice Cream
Prep Time: 15 minutes | Churn Time: 25 minutes | Serve: 6
Classic vanilla ice cream forms the base for countless desserts and stands as a family favorite on its own. Rich cream, real vanilla, and a touch of sugar blend into a smooth, velvety treat that pairs well with pie, cake, or fresh fruit. Simple ingredients and a short prep time make this recipe a great starting point for anyone new to homemade ice cream making.
Ingredients
- 2 cups heavy cream
- 1 cup whole milk
- 3/4 cup granulated sugar
- 1 tablespoon pure vanilla extract
- Pinch of salt
- 4 large egg yolks
Instructions
Begin by placing a medium mixing bowl in the refrigerator to chill for about ten minutes; a cold bowl helps keep your base cool during preparation. In a saucepan over medium heat, combine the heavy cream, whole milk, and half of the sugar. Warm the mixture gently, stirring often with a whisk, until small bubbles form around the edges of the pan. Avoid letting the mixture come to a full boil, since scorched cream changes the flavor.
While the cream mixture warms, place the egg yolks and remaining sugar in a separate bowl. Whisk them together until the mixture turns pale yellow and slightly thick, roughly two minutes of steady whisking. This step, called tempering, prevents the eggs from scrambling once combined with hot cream.
Once the cream mixture reaches temperature, remove it from heat. Slowly pour about half a cup of the warm cream into the egg mixture, whisking constantly. Adding the hot liquid gradually keeps the eggs smooth rather than curdled. Continue whisking, then pour the egg mixture back into the saucepan with the remaining cream.
Return the saucepan to low heat and cook the custard base, stirring constantly with a wooden spoon or silicone spatula. Cook until the mixture thickens enough to coat the back of the spoon, about five to seven minutes. Test doneness by running a finger over the coated spoon; a clear line that holds its shape means the custard is ready. Remove the pan from heat immediately once thickened, since overcooking causes the eggs to curdle.
Pour the custard through a fine mesh strainer into the chilled bowl, catching any small bits of cooked egg. Stir in the vanilla extract and salt, then cover the bowl with plastic wrap, pressing it directly onto the surface to prevent a skin from forming. Refrigerate the mixture for at least four hours, though overnight chilling gives the best texture and flavor development.
Once fully chilled, pour the base into your Pukomc ice cream maker bowl. Churn according to the manufacturer’s instructions, typically twenty to twenty-five minutes, until the mixture reaches a soft-serve consistency and pulls away from the sides of the bowl. Transfer the finished ice cream into a freezer-safe container, smoothing the top with a spatula. Freeze for at least two hours before serving to allow the texture to firm up fully.
Recipe Tips
- Use full-fat dairy for the creamiest texture.
- Chill the base overnight for smoother results.
- Store the bowl attachment in the freezer ahead of time for faster churning.
Flavor Variations
- Add crushed cookies for a cookies and cream twist.
- Swirl in caramel sauce before freezing.
- Mix in fresh berries during the last few minutes of churning.
Storage Tips
- Keep ice cream in an airtight container.
- Press parchment paper directly on the surface before sealing.
- Store in the back of the freezer where temperature stays most consistent.
2. Rich Chocolate Ice Cream
Prep Time: 15 minutes | Churn Time: 25 minutes | Serve: 6
Deep, dark chocolate flavor makes this recipe a favorite among chocolate lovers of every age. Cocoa powder and melted chocolate combine to create an intensely rich base, while a splash of espresso powder brings out even more depth without adding coffee flavor. Smooth and creamy, this treat satisfies chocolate cravings better than most store-bought pints.
Ingredients
- 2 cups heavy cream
- 1 cup whole milk
- 3/4 cup granulated sugar
- 1/2 cup unsweetened cocoa powder
- 4 ounces semisweet chocolate, chopped
- 1/2 teaspoon espresso powder (optional)
- Pinch of salt
- 1 teaspoon vanilla extract
Instructions
Start by combining the milk, half the sugar, and cocoa powder in a medium saucepan. Whisk the ingredients together over medium heat until the cocoa fully dissolves and no lumps remain, roughly three minutes. Add the chopped chocolate to the warm mixture, stirring continuously until it melts completely and blends into the liquid, creating a glossy, dark base.
Pour in the heavy cream and continue heating the mixture gently, watching closely to prevent boiling. Small bubbles forming around the edge of the pan signal the right temperature. Remove the saucepan from heat at this point and set it aside for a moment.
In a separate bowl, whisk together the remaining sugar with the espresso powder and salt. Slowly ladle about a cup of the warm chocolate mixture into this bowl, stirring constantly to combine the two temperatures smoothly. Pour the combined mixture back into the saucepan with the rest of the chocolate base, whisking everything together until fully blended.
Place the saucepan back over low heat and cook for another three to four minutes, stirring often with a spatula to prevent scorching on the bottom of the pan. The mixture should thicken slightly and turn glossy and smooth. Remove from heat and stir in the vanilla extract, mixing until fully incorporated.
Strain the chocolate base through a fine mesh sieve into a clean bowl to catch any small bits of unmelted chocolate or cocoa clumps. This step creates an ultra-smooth texture in the finished ice cream. Cover the bowl with plastic wrap, pressing it against the surface of the mixture to stop a skin from forming during chilling.
Refrigerate the base for a minimum of four hours, though chilling overnight produces deeper flavor and better texture once churned. The mixture should feel completely cold to the touch before moving to the churning step, since a warm base leads to icy, grainy results.
Pour the chilled chocolate base into the frozen bowl of your ice cream maker. Churn for twenty to twenty-five minutes, checking periodically for a thick, soft-serve texture. Transfer the finished ice cream to a freezer-safe container, pressing out any air pockets as you go. Smooth the top, cover tightly, and freeze for two to three hours before scooping and serving.
Recipe Tips
- Use high-quality cocoa powder for the richest flavor.
- Espresso powder deepens chocolate flavor without adding coffee taste.
- Strain the base twice for an extra smooth texture.
Variations
- Add chopped nuts for crunch.
- Swirl in peanut butter before freezing.
- Mix in mini marshmallows for a rocky road twist.
3. Fresh Strawberry Ice Cream
Prep Time: 20 minutes | Churn Time: 25 minutes | Serve: 6
Sweet, ripe strawberries turn this recipe into a bright, fruity treat perfect for warm afternoons. Fresh berries get mashed and folded into a creamy base, giving every bite real fruit flavor and a soft pink color. A splash of lemon juice brightens the sweetness and keeps the strawberry flavor front and center throughout each scoop.
Ingredients
- 2 cups fresh strawberries, hulled and chopped
- 3/4 cup granulated sugar, divided
- 1 tablespoon lemon juice
- 1 1/2 cups heavy cream
- 1/2 cup whole milk
- 1 teaspoon vanilla extract
- Pinch of salt
Instructions
Begin preparing the strawberries first, since they need time to release their natural juices. Place the chopped strawberries in a bowl with a quarter cup of sugar and the lemon juice. Stir gently to coat every piece, then let the mixture sit at room temperature for about thirty minutes. During this time, the sugar draws out juice from the berries, creating a syrupy, flavorful mixture.
Once the strawberries have softened and released their juice, transfer about two-thirds of the mixture to a blender or food processor. Pulse a few times until mostly smooth, leaving small chunks for texture. Keep the remaining one-third of the strawberries chopped for added texture in the finished ice cream, and set both portions aside.
In a separate saucepan, combine the heavy cream, milk, and remaining sugar over medium heat. Warm the mixture, stirring frequently, until the sugar dissolves completely and small bubbles appear along the edges of the pan. Remove the saucepan from heat right away to prevent the cream from scalding or developing a cooked flavor.
Let the cream mixture cool for about ten minutes on the counter, then stir in the vanilla extract and salt. Add the blended strawberry puree to the cream base, whisking until fully combined and evenly colored throughout. Taste the mixture at this point and adjust sweetness with a spoonful of extra sugar, in case the berries were on the tart side.
Cover the bowl and refrigerate the combined mixture for at least three hours, allowing the flavors to meld and the base to chill completely. A fully cold base churns faster and produces a smoother final texture, so avoid rushing this step.
When ready to churn, pour the chilled strawberry base into your ice cream maker bowl. Churn for twenty to twenty-five minutes until the mixture thickens to a soft-serve consistency. During the final two minutes of churning, add the reserved chopped strawberries, letting the machine fold them evenly throughout the mixture.
Transfer the finished ice cream to a freezer-safe container, layering in any remaining fruit pieces as desired. Smooth the top with a spatula, cover tightly, and freeze for two hours before serving to let the texture firm up properly.
Tips
- Choose ripe, in-season strawberries for the best flavor.
- Macerating the berries first deepens their natural sweetness.
- Add a few chocolate chips for extra flavor contrast.
4. Cookies and Cream Ice Cream
Prep Time: 15 minutes | Churn Time: 25 minutes | Serve: 6
Crushed chocolate sandwich cookies turn a simple vanilla base into a beloved classic loved by kids and adults alike. Chunks of cookie mix throughout the creamy base, giving every spoonful little bursts of chocolate and crunch. The recipe comes together with pantry staples and works well for birthday parties or casual weekend treats.
Ingredients
- 2 cups heavy cream
- 1 cup whole milk
- 3/4 cup granulated sugar
- 1 tablespoon vanilla extract
- Pinch of salt
- 4 large egg yolks
- 15 chocolate sandwich cookies, roughly chopped
Instructions
Separate four egg yolks into a medium bowl, saving the whites for another use, like meringue or an omelet later in the week. Whisk the yolks together with half the sugar until the mixture turns pale and slightly thickened, about two minutes of steady whisking by hand or with an electric mixer on low speed.
In a saucepan, combine the heavy cream, milk, and remaining sugar over medium heat. Stir the mixture often as it warms, watching for small bubbles forming around the edge of the pan, which signals the cream is ready. Remove the pan from heat once you notice this bubbling.
Temper the egg yolks by slowly pouring about half a cup of the warm cream mixture into the bowl with the yolks, whisking the entire time to keep the eggs from cooking too quickly. Once combined, pour the egg mixture back into the saucepan with the remaining cream, whisking to blend everything into one smooth base.
Return the pan to low heat and cook the custard, stirring constantly with a wooden spoon. The base is ready once it thickens enough to coat the back of the spoon, usually within five to seven minutes. Watch the heat carefully during this stage, since custard can curdle quickly on high heat.
Remove the thickened custard from heat and pour it through a fine strainer into a clean bowl, removing any small cooked egg bits along the way. Stir in the vanilla extract and salt, then cover the surface directly with plastic wrap to stop a skin from forming as it cools.
Chill the base in the refrigerator for a minimum of four hours, or overnight for the best results. The custard needs to reach a fully cold temperature before churning, since a warm base leads to a softer, less creamy final texture.
Once chilled, pour the base into your ice cream maker and churn for twenty to twenty-five minutes. During the last three minutes of churning, add the chopped cookies gradually, letting the machine fold them evenly throughout the mixture without over-mixing.
Scoop the finished ice cream into a freezer-safe container, layering in a few extra cookie pieces between scoops for good measure. Cover tightly and freeze for at least two hours before serving, allowing the ice cream to firm up to a scoopable consistency.
Tips
- Crush cookies by hand for uneven, chunky pieces.
- Save a few cookie pieces to press on top before serving.
- Use a dark cocoa cookie for a deeper chocolate flavor.
5. Mint Chocolate Chip Ice Cream
Prep Time: 15 minutes | Churn Time: 25 minutes | Serve: 6
Cool mint flavor paired with chunks of chocolate creates a refreshing treat loved during warm months. Fresh mint leaves or pure peppermint extract give the base its signature flavor, while chopped chocolate adds crunch in every bite. A light green tint, made naturally or with food coloring, gives this classic flavor its familiar look.
Ingredients
- 2 cups heavy cream
- 1 cup whole milk
- 3/4 cup granulated sugar
- 1 teaspoon peppermint extract
- Pinch of salt
- 4 large egg yolks
- 4 ounces semisweet chocolate, finely chopped
- A few drops green food coloring (optional)
Instructions
Combine the heavy cream, milk, and half the sugar in a medium saucepan over medium heat. Warm the mixture gently, stirring with a whisk every so often, until small bubbles start forming around the edges of the pan. This gentle warming process usually takes about five minutes on a standard stovetop burner.
While the cream warms, whisk together the egg yolks and remaining sugar in a separate bowl until the mixture turns pale yellow and slightly thick. This step builds the custard base that gives the finished ice cream its rich, smooth texture rather than an icy one.
Once the cream reaches temperature, remove the pan from heat. Slowly pour about half a cup of the warm cream into the egg mixture, whisking constantly to combine without scrambling the eggs. Pour the tempered egg mixture back into the saucepan with the rest of the cream, whisking everything together thoroughly.
Return the saucepan to low heat and cook the custard, stirring constantly using a wooden spoon or heat-safe spatula. Cook until the mixture coats the back of the spoon and holds a clear line when you run a finger through it, roughly five to seven minutes total.
Remove the custard from heat immediately once thickened and strain it through a fine mesh sieve into a clean bowl. Stir in the peppermint extract, salt, and a few drops of green food coloring, mixing until the color spreads evenly throughout the base.
Cover the bowl with plastic wrap, pressing it directly onto the surface of the custard to prevent a skin from forming as it cools. Refrigerate the mixture for a minimum of four hours, though overnight chilling produces the smoothest, creamiest texture once churned.
When the base has chilled completely, pour it into your ice cream maker bowl and churn for twenty to twenty-five minutes. During the final two to three minutes, add the chopped chocolate gradually, allowing the machine to distribute the pieces evenly without breaking them into tiny bits.
Transfer the finished ice cream into a freezer-safe container, smoothing the top and pressing out any air pockets. Cover tightly with a lid or plastic wrap and freeze for at least two hours before scooping, giving the mint flavor time to settle and the texture time to firm up.
Tips
- Use fresh mint leaves steeped in warm cream for natural flavor.
- Chop chocolate by hand for varied chunk sizes.
- Skip food coloring for a more natural, pale cream color.
6. Salted Caramel Ice Cream
Prep Time: 20 minutes | Churn Time: 25 minutes | Serve: 6
Buttery caramel and a touch of sea salt combine into a rich, grown-up flavor that balances sweet and savory perfectly. Homemade caramel sauce swirls through a smooth custard base, creating pockets of gooey sweetness in every scoop. Flaky salt sprinkled on top brings out the caramel flavor and keeps the sweetness from feeling heavy.
Ingredients
- 1 cup granulated sugar
- 6 tablespoons unsalted butter, cubed
- 1/2 cup heavy cream (for caramel)
- 1 teaspoon flaky sea salt
- 2 cups heavy cream (for base)
- 1 cup whole milk
- 4 large egg yolks
- 1/4 cup granulated sugar (for base)
- 1 teaspoon vanilla extract
Instructions
Start the caramel sauce first, since it needs time to cool before joining the ice cream base. Place the sugar in a heavy-bottomed saucepan over medium heat, spreading it evenly over the bottom. Allow the sugar to melt slowly without stirring, gently swirling the pan every so often to help it melt evenly. The sugar will turn from clear to golden and eventually a deep amber color, a process that takes roughly six to eight minutes.
Once the sugar reaches a deep amber shade, add the cubed butter carefully, since the mixture will bubble rapidly. Whisk the butter into the melted sugar until fully combined, working quickly to prevent burning. Slowly pour in the half cup of heavy cream, whisking constantly as the mixture bubbles and steams. Continue whisking until the caramel turns smooth and glossy, then remove from heat and stir in the flaky salt. Set the caramel aside to cool completely at room temperature.
Meanwhile, prepare the custard base using the remaining cream, milk, egg yolks, and quarter cup of sugar. Warm the cream and milk together in a saucepan over medium heat until small bubbles form around the edges. In a separate bowl, whisk the egg yolks with sugar until pale, then temper them by slowly adding warm cream while whisking constantly.
Pour the tempered eggs back into the saucepan and cook over low heat, stirring constantly, until the mixture thickens enough to coat the back of a spoon, about five to seven minutes. Remove from heat and strain through a fine mesh sieve into a clean bowl. Stir in the vanilla extract, then fold about two-thirds of the cooled caramel sauce into the custard base, reserving the rest for layering later.
Cover the bowl and refrigerate the base for a minimum of four hours, allowing it to chill completely and the flavors to deepen. A fully cold base gives the smoothest churned texture, so patience during this step pays off.
Pour the chilled base into your ice cream maker and churn for twenty to twenty-five minutes until thick and creamy. As you transfer the finished ice cream into a freezer-safe container, drizzle in the reserved caramel sauce between layers, creating ribbons throughout. Sprinkle a pinch of flaky salt on top, cover, and freeze for at least two hours before serving.
Tips
- Watch the sugar closely while it melts, since it can burn quickly once it starts to color.
- Cool the caramel fully before mixing it into the base to avoid melting the custard.
- Add extra caramel swirls right before serving for a more dramatic presentation.
7. Coffee Ice Cream
Prep Time: 15 minutes | Churn Time: 25 minutes | Serve: 6
Bold coffee flavor makes this recipe a favorite for anyone who loves a mocha-style dessert. Coarsely ground coffee beans steep directly in warm cream, pulling out deep flavor without any bitterness. Smooth and rich, this treat pairs well with a slice of chocolate cake or a dusting of cocoa powder on top.
Ingredients
- 2 cups heavy cream
- 1 cup whole milk
- 1/2 cup coarsely ground coffee beans
- 3/4 cup granulated sugar
- Pinch of salt
- 4 large egg yolks
- 1 teaspoon vanilla extract
Instructions
Combine the heavy cream, milk, and ground coffee beans in a saucepan over medium heat. Warm the mixture gently, stirring occasionally, until small bubbles form around the edges of the pan, roughly five minutes. Once warmed, remove the pan from heat and cover it, letting the coffee steep in the cream for about twenty minutes. Longer steeping produces a bolder coffee flavor, so adjust the time based on personal taste.
After steeping, strain the mixture through a fine mesh sieve lined with cheesecloth, pressing gently to extract as much flavored cream as possible while catching the coffee grounds. Discard the grounds and return the strained coffee cream to the saucepan, warming it again over medium heat until small bubbles reappear.
While the cream reheats, whisk the egg yolks with the sugar in a separate bowl until pale and slightly thick, about two minutes of steady whisking. Temper the eggs by slowly pouring in about half a cup of the warm coffee cream, whisking constantly to keep the eggs smooth. Pour the tempered mixture back into the saucepan with the remaining cream, blending everything together.
Cook the custard over low heat, stirring constantly with a wooden spoon, until it thickens enough to coat the back of the spoon, about five to seven minutes. Keep the heat low throughout this stage, since coffee custard can scorch easily and develop a burnt flavor. Remove from heat once thickened and stir in the salt and vanilla extract.
Strain the finished custard once more through a clean fine mesh sieve into a bowl, removing any remaining bits of coffee or cooked egg. Cover the surface directly with plastic wrap and refrigerate for at least four hours, though overnight chilling develops a smoother, more balanced flavor.
Once fully chilled, pour the coffee base into your ice cream maker and churn for twenty to twenty-five minutes, until it reaches a thick, soft-serve texture. Transfer the finished ice cream into a freezer-safe container, smoothing the top with a spatula. Freeze for at least two hours before serving, allowing the texture to firm up and the coffee flavor to settle fully.
Tips
- Use freshly ground coffee beans for the boldest flavor.
- Steep the coffee longer for a stronger, more pronounced taste.
- Add chocolate chunks during the last few minutes of churning for a mocha variation.
8. Peanut Butter Ice Cream
Prep Time: 15 minutes | Churn Time: 25 minutes | Serve: 6
Creamy peanut butter blends into a rich custard base, creating a nutty, slightly salty treat loved by peanut butter fans everywhere. This flavor pairs naturally with chocolate chips, pretzel pieces, or a drizzle of extra peanut butter on top. Smooth and satisfying, the recipe delivers deep peanut flavor in every single bite.
Ingredients
- 2 cups heavy cream
- 1 cup whole milk
- 3/4 cup creamy peanut butter
- 1/2 cup granulated sugar
- 1/4 cup brown sugar
- Pinch of salt
- 4 large egg yolks
- 1 teaspoon vanilla extract
Instructions
Combine the heavy cream, milk, granulated sugar, and brown sugar in a saucepan over medium heat. Whisk the mixture together as it warms, making sure the sugars dissolve fully and no clumps remain at the bottom of the pan. Continue heating until small bubbles form around the edges, roughly five minutes total.
Add the peanut butter to the warm cream mixture, whisking steadily until it melts completely and blends smoothly into the liquid. Peanut butter can seize slightly at first contact with hot liquid, so keep whisking briskly until the mixture turns silky and uniform in color, with no visible streaks remaining.
In a separate bowl, whisk the egg yolks until they turn slightly thick and pale. Temper the yolks by slowly pouring in about half a cup of the warm peanut butter mixture, whisking the entire time to prevent the eggs from cooking too fast. Pour the tempered egg mixture back into the saucepan with the rest of the base, stirring to combine everything fully.
Return the saucepan to low heat and cook the custard, stirring constantly with a wooden spoon or spatula. The peanut butter makes the mixture thicker than a standard custard, so watch closely and stir along the bottom and edges of the pan to prevent scorching. Cook for about five to seven minutes, until the mixture coats the back of a spoon evenly.
Remove the custard from heat and stir in the salt and vanilla extract, mixing until fully combined. Strain the base through a fine mesh sieve into a clean bowl to remove any small lumps of peanut butter or cooked egg, pressing gently with a spatula to push the mixture through.
Cover the bowl with plastic wrap, pressing it against the surface to stop a skin from forming, then refrigerate for a minimum of four hours. Overnight chilling allows the peanut flavor to deepen and blend more fully with the cream base.
Once chilled, pour the base into your ice cream maker and churn for twenty to twenty-five minutes until thick and creamy. Transfer to a freezer-safe container, layering in chopped peanuts or chocolate chips between scoops for extra texture. Freeze for at least two hours before serving to let the ice cream firm up completely.
Tips
- Use natural peanut butter sparingly, since it can make the base greasy compared to processed varieties.
- Swirl in extra peanut butter right before freezing for a marbled look.
- Add chopped pretzels for a salty crunch alongside the creamy base.
9. Chocolate Chip Cookie Dough Ice Cream
Prep Time: 25 minutes | Churn Time: 25 minutes | Serve: 6
Chunks of edible cookie dough hide throughout a smooth vanilla base, creating a treat loved by kids and dessert fans of all ages. The dough gets made without eggs, so it stays perfectly safe to eat raw, mixed straight into the churned ice cream. This recipe combines two favorites into one indulgent, chunky dessert.
Ingredients For the base:
- 2 cups heavy cream
- 1 cup whole milk
- 3/4 cup granulated sugar
- 1 tablespoon vanilla extract
- Pinch of salt
- 4 large egg yolks
For the cookie dough:
- 4 tablespoons unsalted butter, softened
- 1/4 cup brown sugar
- 2 tablespoons granulated sugar
- 1/2 teaspoon vanilla extract
- 1/2 cup all-purpose flour, heat-treated
- 2 tablespoons milk
- 1/3 cup mini chocolate chips
Instructions
Begin by preparing the cookie dough, since it needs time to chill before adding to the ice cream. Spread the flour on a baking sheet and bake at 350 degrees for about five minutes to eliminate any bacteria, then let it cool completely. In a bowl, cream together the softened butter, brown sugar, and granulated sugar until light and fluffy, using a hand mixer or sturdy whisk.
Add the vanilla extract and cooled flour to the butter mixture, stirring until a thick dough forms. Pour in the milk gradually, adding just enough to bring the dough together into a soft, scoopable texture. Fold in the mini chocolate chips, then roll the dough into small pea-sized pieces. Place the pieces on a plate and freeze while you prepare the ice cream base.
For the base, combine the heavy cream, milk, and half the sugar in a saucepan over medium heat, warming until small bubbles form around the edges. In a separate bowl, whisk the egg yolks with the remaining sugar until pale and slightly thick. Temper the eggs by slowly adding warm cream while whisking constantly, then pour the mixture back into the saucepan.
Cook the custard over low heat, stirring constantly, until it thickens enough to coat the back of a spoon, roughly five to seven minutes. Remove from heat, strain through a fine mesh sieve into a clean bowl, and stir in the vanilla extract and salt. Cover the surface with plastic wrap and refrigerate for at least four hours, or overnight for best results.
Once the base has chilled fully, pour it into your ice cream maker and churn for twenty to twenty-five minutes until thick and creamy. During the last two minutes of churning, add the frozen cookie dough pieces gradually, letting the machine fold them evenly throughout without breaking them apart.
Transfer the finished ice cream to a freezer-safe container, scattering a few extra dough pieces on top for good measure. Cover tightly and freeze for at least two hours before serving, giving the dough pieces time to firm back up alongside the ice cream.
Tips
- Heat-treating the flour removes bacteria risk and makes the dough safe to eat raw.
- Freeze the dough pieces solid before churning to prevent them from breaking apart.
- Use a mix of chocolate chips and chunks for varied texture in every bite.
10. Mango Ice Cream
Prep Time: 15 minutes | Churn Time: 25 minutes | Serve: 6
Ripe, tropical mango blends into a smooth, creamy base, creating a bright and fruity dessert perfect for hot days. Fresh or frozen mango works equally well, giving the finished ice cream a naturally sweet flavor and a warm golden color. A touch of lime juice balances the sweetness and keeps the mango flavor tasting fresh.
Ingredients
- 2 1/2 cups ripe mango, peeled and chopped
- 3/4 cup granulated sugar, divided
- 1 tablespoon lime juice
- 1 1/2 cups heavy cream
- 1/2 cup whole milk
- Pinch of salt
Instructions
Start by placing the chopped mango in a blender along with a quarter cup of sugar and the lime juice. Blend until completely smooth, scraping down the sides of the blender as needed to catch any larger pieces. The mixture should turn into a thick, smooth puree with a bright golden-orange color throughout.
Set the mango puree aside and combine the heavy cream, milk, and remaining sugar in a saucepan over medium heat. Warm the mixture, stirring frequently, until the sugar dissolves completely and small bubbles begin forming around the edges of the pan. Remove the saucepan from heat once you notice this bubbling to prevent the cream from scalding.
Let the cream mixture cool on the counter for about ten minutes, since combining it with the mango puree while still hot can cause the mixture to separate. Once cooled slightly, stir in the salt and slowly whisk in the mango puree, blending until the color and flavor spread evenly throughout the base.
Taste the combined mixture and adjust sweetness as needed, since mango sweetness can vary depending on ripeness. Add an extra spoonful of sugar in case the fruit tastes tart, whisking it in fully before moving forward. Cover the bowl and refrigerate the mixture for at least three hours, allowing the base to chill completely and the flavors to blend together fully.
A fully cold base churns more efficiently and produces a smoother finished texture, so avoid rushing the chilling process. Once ready, pour the chilled mango base into your ice cream maker bowl and churn for twenty to twenty-five minutes, checking periodically for a thick, soft-serve consistency.
Transfer the finished ice cream into a freezer-safe container, smoothing the top with a spatula and pressing out any air pockets along the way. Cover tightly with a lid or plastic wrap and freeze for at least two hours before serving, allowing the texture to firm up into a scoopable consistency.
Tips
- Choose mango that gives slightly when pressed for the ripest, sweetest flavor.
- Frozen mango works well during months when fresh fruit is out of season.
- Add shredded coconut for a tropical twist on the classic flavor.
11. Blueberry Cheesecake Ice Cream
Prep Time: 20 minutes | Churn Time: 25 minutes | Serve: 6
Tangy cream cheese and sweet blueberry sauce combine into a rich dessert that tastes just like a slice of cheesecake in frozen form. Graham cracker pieces add a satisfying crunch, mimicking the crust found in a traditional baked cheesecake. Every scoop delivers layers of tangy, sweet, and crunchy in one creamy bite.
Ingredients For the base:
- 8 ounces cream cheese, softened
- 1 1/2 cups heavy cream
- 1/2 cup whole milk
- 3/4 cup granulated sugar
- 1 teaspoon vanilla extract
- Pinch of salt
For the blueberry swirl:
- 1 1/2 cups fresh or frozen blueberries
- 3 tablespoons granulated sugar
- 1 tablespoon lemon juice
Mix-in:
- 1 cup crushed graham crackers
Instructions
Start by making the blueberry swirl, since it needs time to cool before layering into the ice cream. Combine the blueberries, sugar, and lemon juice in a small saucepan over medium heat. Cook the mixture, stirring occasionally and gently mashing some of the berries with a spoon, until it thickens into a syrupy sauce, roughly eight to ten minutes. Remove from heat and let the sauce cool completely, then refrigerate it while preparing the base.
In a large bowl, beat the softened cream cheese with an electric mixer or sturdy whisk until completely smooth, with no lumps remaining. This step matters greatly, since any leftover lumps will show up in the finished ice cream. Gradually add the sugar to the cream cheese, beating continuously until fully combined and light in texture.
Slowly pour in the heavy cream and milk, whisking constantly to keep the mixture smooth throughout. Add the vanilla extract and salt, stirring until everything blends into one silky, pourable base. Taste the mixture at this stage and adjust sweetness slightly, since cream cheese sharpness varies between brands.
Cover the bowl and refrigerate the cream cheese base for a minimum of three hours, allowing it to chill completely before churning. A fully cold base produces the smoothest texture once churned, so patience during this step makes a real difference in the final result.
Once chilled, pour the base into your ice cream maker and churn for twenty to twenty-five minutes, until thick and creamy. During the final two minutes, add the crushed graham crackers, letting the machine distribute the pieces evenly throughout the base without turning them to mush.
Layer the finished ice cream into a freezer-safe container, alternating scoops of ice cream with spoonfuls of the cooled blueberry sauce. Use a butter knife to gently swirl the sauce through the layers, creating ribbons throughout without fully blending the colors together. Cover tightly and freeze for at least two hours before serving.
Tips
- Beat the cream cheese thoroughly to avoid lumps in the finished ice cream.
- Cool the blueberry sauce completely before swirling to keep the layers distinct.
- Save a few extra graham cracker pieces to sprinkle on top before serving.
12. Lemon Ice Cream
Prep Time: 15 minutes | Churn Time: 25 minutes | Serve: 6
Bright, tangy lemon flavor makes this recipe a refreshing choice for warm weather gatherings. Fresh lemon juice and zest bring a bold citrus punch, while a rich cream base keeps the tartness balanced and smooth. Light and zesty, this treat pairs beautifully with berries or a simple shortbread cookie on the side.
Ingredients
- 1 1/2 cups heavy cream
- 1 cup whole milk
- 3/4 cup granulated sugar
- Zest of 2 lemons
- 1/2 cup fresh lemon juice
- Pinch of salt
- 4 large egg yolks
Instructions
Combine the heavy cream, milk, sugar, and lemon zest in a saucepan over medium heat. Warm the mixture gently, stirring occasionally, allowing the zest to infuse its oils into the cream as it heats. Continue warming until small bubbles form around the edges of the pan, roughly five minutes, then remove from heat and let the mixture steep for ten minutes to deepen the citrus flavor.
While the cream steeps, whisk the egg yolks in a separate bowl until they turn slightly thick, about two minutes of steady whisking. After steeping, reheat the cream mixture briefly over low heat until warm again, then slowly pour about half a cup into the egg yolks, whisking constantly to temper them without scrambling.
Pour the tempered egg mixture back into the saucepan with the remaining cream, whisking to combine everything into one smooth base. Return the pan to low heat and cook the custard, stirring constantly with a wooden spoon, until it thickens enough to coat the back of the spoon, about five to seven minutes.
Remove the custard from heat and strain it through a fine mesh sieve into a clean bowl, catching the lemon zest and any small bits of cooked egg. Stir in the salt, then slowly whisk in the fresh lemon juice, adding it gradually to prevent the acidity from curdling the warm custard.
Cover the bowl with plastic wrap, pressing it directly onto the surface to stop a skin from forming during chilling. Refrigerate the base for a minimum of four hours, though overnight chilling allows the citrus flavor to mellow and blend more fully with the cream.
Once fully chilled, pour the lemon base into your ice cream maker and churn for twenty to twenty-five minutes, until it reaches a thick, soft-serve texture. Transfer the finished ice cream into a freezer-safe container, smoothing the top with a spatula. Freeze for at least two hours before serving, giving the flavor time to settle and the texture time to firm up fully.
Tips
- Zest the lemons before juicing them, since zesting a juiced lemon becomes far more difficult.
- Add the lemon juice slowly to prevent the warm custard from curdling.
- Fold in fresh blueberries for a lemon-blueberry variation.
13. Coconut Ice Cream
Prep Time: 15 minutes | Churn Time: 25 minutes | Serve: 6
Rich coconut milk and shredded coconut combine into a tropical, dairy-forward treat with a naturally sweet flavor. Toasted coconut flakes add texture and a deeper, nuttier taste throughout the finished dessert. Smooth and satisfying, this flavor works well on its own or alongside fresh pineapple and mango.
Ingredients
- 1 can (13.5 ounces) full-fat coconut milk
- 1 1/2 cups heavy cream
- 3/4 cup granulated sugar
- 1/2 cup sweetened shredded coconut, toasted
- Pinch of salt
- 1 teaspoon vanilla extract
- 4 large egg yolks
Instructions
Begin by toasting the shredded coconut in a dry skillet over medium-low heat, stirring frequently to prevent burning. Toast until the coconut turns golden brown and fragrant, roughly three to four minutes, then remove from heat and set aside to cool completely on a plate.
In a saucepan, combine the coconut milk, heavy cream, and half the sugar over medium heat. Warm the mixture, stirring occasionally, until small bubbles form around the edges of the pan, about five minutes. Coconut milk can separate slightly during heating, so whisk the mixture thoroughly to keep it smooth and well combined throughout.
While the coconut cream warms, whisk the egg yolks with the remaining sugar in a separate bowl until pale and slightly thick. Temper the eggs by slowly pouring in about half a cup of the warm coconut mixture, whisking constantly to prevent scrambling. Pour the tempered mixture back into the saucepan with the rest of the coconut cream, blending everything together smoothly.
Return the saucepan to low heat and cook the custard, stirring constantly with a wooden spoon or spatula. Cook until the mixture thickens enough to coat the back of the spoon, about five to seven minutes, watching closely since coconut milk can scorch more easily than regular dairy.
Remove the custard from heat once thickened and stir in the salt and vanilla extract. Strain the mixture through a fine mesh sieve into a clean bowl, removing any small lumps or cooked egg bits along the way. Cover the surface directly with plastic wrap and refrigerate for at least four hours, or overnight for the smoothest results.
Once fully chilled, pour the coconut base into your ice cream maker and churn for twenty to twenty-five minutes. During the final two minutes, add most of the toasted coconut, reserving a small amount for topping later. Let the machine fold the coconut evenly throughout the mixture.
Transfer the finished ice cream into a freezer-safe container, sprinkling the reserved toasted coconut on top. Cover tightly and freeze for at least two hours before serving, allowing the tropical flavor to settle and the texture to firm up completely.
Tips
- Toast the coconut carefully, since it can burn quickly once it starts turning golden.
- Shake the coconut milk can well before opening to blend the cream and liquid evenly.
- Add a splash of rum extract for a piña colada style variation.
14. Banana Ice Cream
Prep Time: 15 minutes | Churn Time: 25 minutes | Serve: 6
Ripe bananas bring natural sweetness and a smooth, creamy texture to this simple, comforting flavor. A touch of brown sugar and cinnamon deepens the banana taste, giving the finished dessert a warm, homey quality. This recipe works wonderfully with overripe bananas that might otherwise go to waste.
Ingredients
- 4 very ripe bananas, mashed
- 1 tablespoon lemon juice
- 1 1/2 cups heavy cream
- 1/2 cup whole milk
- 1/2 cup brown sugar
- 1/4 teaspoon ground cinnamon
- Pinch of salt
- 1 teaspoon vanilla extract
Instructions
Peel the ripe bananas and place them in a bowl, mashing thoroughly with a fork until mostly smooth with a few small lumps remaining for texture. Stir in the lemon juice right away, since this helps prevent the bananas from browning while the rest of the base comes together.
In a saucepan, combine the heavy cream, milk, brown sugar, and cinnamon over medium heat. Whisk the mixture as it warms, making sure the brown sugar dissolves completely and no clumps remain at the bottom of the pan. Continue heating until small bubbles form around the edges, roughly five minutes total.
Remove the saucepan from heat and let the mixture cool slightly for about five minutes, since combining it with the mashed banana while extremely hot can cause separation. Once cooled slightly, stir in the mashed banana mixture, blending until fully combined and evenly colored throughout the base.
Add the vanilla extract and salt, stirring until everything mixes into one smooth, fragrant base. For an extra smooth texture, transfer the mixture to a blender and pulse a few times to break down any remaining banana chunks, or leave it as is for a chunkier final texture.
Cover the bowl and refrigerate the mixture for a minimum of three hours, allowing the flavors to blend and the base to chill completely. A cold base churns more efficiently, producing a smoother, creamier finished texture once ready.
Once fully chilled, pour the banana base into your ice cream maker and churn for twenty to twenty-five minutes, checking periodically for a thick, soft-serve consistency. Transfer the finished ice cream into a freezer-safe container, smoothing the top with a spatula and pressing out any air pockets.
Cover tightly with a lid or plastic wrap and freeze for at least two hours before serving, allowing the texture to firm up into a scoopable consistency. The banana flavor deepens slightly after freezing, making this treat taste even better the following day.
Tips
- Use bananas with plenty of brown spots for the sweetest, most flavorful results.
- Blend the base fully for an ultra-smooth texture with no banana chunks.
- Add chopped walnuts for a banana bread inspired variation.
15. Raspberry Swirl Ice Cream
Prep Time: 20 minutes | Churn Time: 25 minutes | Serve: 6
Tart raspberries cooked into a thick sauce swirl through a smooth vanilla base, creating a beautiful, ribboned dessert. The tangy fruit balances the sweetness of the cream, giving every bite a pleasant contrast of flavors. Bright red streaks running through the pale base also make this flavor a real showstopper on the table.
Ingredients For the base:
- 2 cups heavy cream
- 1 cup whole milk
- 3/4 cup granulated sugar
- 1 tablespoon vanilla extract
- Pinch of salt
- 4 large egg yolks
For the raspberry swirl:
- 2 cups fresh or frozen raspberries
- 1/4 cup granulated sugar
- 1 tablespoon lemon juice
Instructions
Begin with the raspberry swirl, since it needs time to cool before layering into the finished ice cream. Combine the raspberries, sugar, and lemon juice in a small saucepan over medium heat. Cook the mixture, stirring occasionally and mashing the berries gently with a spoon, until it thickens into a jam-like consistency, roughly eight to ten minutes.
Remove the raspberry sauce from heat and strain it through a fine mesh sieve into a bowl, pressing firmly to remove the seeds while keeping the smooth, thick puree. Discard the seeds and let the sauce cool completely, then refrigerate it while preparing the vanilla base.
For the base, combine the heavy cream, milk, and half the sugar in a saucepan over medium heat, warming until small bubbles form around the edges of the pan. In a separate bowl, whisk the egg yolks with the remaining sugar until pale and slightly thick, about two minutes of steady whisking.
Temper the eggs by slowly pouring in about half a cup of the warm cream, whisking constantly to prevent scrambling. Pour the tempered mixture back into the saucepan with the remaining cream, whisking everything together into one smooth base. Return the pan to low heat and cook the custard, stirring constantly, until it thickens enough to coat the back of a spoon, about five to seven minutes.
Remove the custard from heat and strain it through a fine mesh sieve into a clean bowl, catching any small bits of cooked egg. Stir in the vanilla extract and salt, then cover the surface directly with plastic wrap. Refrigerate the base for a minimum of four hours, or overnight for the best texture and flavor.
Once fully chilled, pour the vanilla base into your ice cream maker and churn for twenty to twenty-five minutes, until it reaches a thick, soft-serve consistency. Transfer the finished ice cream into a freezer-safe container in layers, spooning the cooled raspberry sauce between each layer of ice cream.
Use a butter knife or skewer to gently swirl the raspberry sauce through the layers, creating ribbons without fully blending the colors together. Cover tightly and freeze for at least two hours before serving, allowing the swirls to set and the texture to firm up completely.
Tips
- Strain the raspberry sauce thoroughly to remove seeds for a smoother swirl.
- Layer the sauce between scoops rather than mixing it in fully for the prettiest presentation.
- Frozen raspberries work just as well as fresh, especially outside of peak berry season.
16. Pistachio Ice Cream
Prep Time: 20 minutes | Churn Time: 25 minutes | Serve: 6
Toasted pistachios blend into a rich custard base, giving this recipe a nutty flavor and a naturally soft green color. A small amount of almond extract enhances the nutty notes without overpowering the pistachio taste. Chopped nuts folded in near the end add a satisfying crunch throughout the finished dessert.
Ingredients
- 1 cup shelled pistachios, divided
- 2 cups heavy cream
- 1 cup whole milk
- 3/4 cup granulated sugar
- 1/4 teaspoon almond extract
- Pinch of salt
- 4 large egg yolks
Instructions
Toast three-quarters of a cup of the pistachios in a dry skillet over medium-low heat, stirring often to prevent burning, until fragrant and lightly golden, about four minutes. Set the nuts aside to cool completely, then chop the remaining raw quarter cup of pistachios finely and set aside separately for folding in later.
Once the toasted pistachios have cooled, place them in a food processor with a splash of the milk. Blend until the nuts turn into a thick, slightly grainy paste, scraping down the sides as needed. This paste carries most of the pistachio flavor into the base, so blend thoroughly for the best results.
In a saucepan, combine the heavy cream, remaining milk, and half the sugar over medium heat. Warm the mixture, stirring occasionally, until small bubbles form around the edges of the pan. Whisk in the pistachio paste, stirring until it fully dissolves into the warm cream, creating a pale green, fragrant base.
In a separate bowl, whisk the egg yolks with the remaining sugar until pale and slightly thick. Temper the eggs by slowly pouring in about half a cup of the warm pistachio cream, whisking constantly to prevent scrambling. Pour the tempered mixture back into the saucepan, blending everything together into one smooth base.
Return the pan to low heat and cook the custard, stirring constantly with a wooden spoon, until it thickens enough to coat the back of the spoon, about five to seven minutes. Remove from heat and stir in the almond extract and salt, mixing until fully combined.
Strain the custard through a fine mesh sieve into a clean bowl, pressing gently to extract as much flavored liquid as possible while removing larger nut bits. Cover the surface with plastic wrap and refrigerate for at least four hours, or overnight for the deepest flavor.
Once chilled, pour the base into your ice cream maker and churn for twenty to twenty-five minutes. During the last two minutes, fold in the reserved chopped pistachios. Transfer to a freezer-safe container and freeze for at least two hours before serving.
Tips
- Blend the toasted pistachios thoroughly for the smoothest, most flavorful base.
- Unsalted pistachios work best, since salted varieties can make the flavor uneven.
- Add a few drops of green food coloring in case a bolder color is preferred.
17. Pumpkin Spice Ice Cream
Prep Time: 15 minutes | Churn Time: 25 minutes | Serve: 6
Warm spices and real pumpkin puree combine into a cozy, autumn-inspired treat perfect for cooler months. Cinnamon, nutmeg, and ginger blend seamlessly into the creamy base, giving each scoop a familiar, comforting flavor. This recipe tastes wonderful on its own or served alongside a slice of warm pie.
Ingredients
- 1 cup pumpkin puree (not pumpkin pie filling)
- 2 cups heavy cream
- 1 cup whole milk
- 3/4 cup brown sugar
- 1 teaspoon ground cinnamon
- 1/4 teaspoon ground nutmeg
- 1/4 teaspoon ground ginger
- Pinch of salt
- 4 large egg yolks
- 1 teaspoon vanilla extract
Instructions
Combine the heavy cream, milk, brown sugar, cinnamon, nutmeg, and ginger in a saucepan over medium heat. Whisk the mixture thoroughly as it warms, making sure the spices distribute evenly throughout the liquid rather than clumping together. Continue heating until small bubbles form around the edges of the pan, roughly five minutes total.
While the spiced cream warms, whisk the egg yolks in a separate bowl until they turn slightly thick and pale, about two minutes of steady whisking. Temper the eggs by slowly pouring in about half a cup of the warm spiced cream, whisking constantly to keep the eggs from scrambling.
Pour the tempered egg mixture back into the saucepan with the remaining cream, whisking everything together into one smooth base. Return the pan to low heat and cook the custard, stirring constantly with a wooden spoon, until it thickens enough to coat the back of the spoon, about five to seven minutes.
Remove the custard from heat and stir in the pumpkin puree, whisking until fully blended and evenly colored throughout the mixture. Add the vanilla extract and salt, stirring once more to combine everything into a fragrant, spiced base.
Strain the mixture through a fine mesh sieve into a clean bowl to remove any small bits of cooked egg, pressing gently with a spatula to push the thicker pumpkin puree through as well. Cover the surface directly with plastic wrap and refrigerate for a minimum of four hours, though overnight chilling allows the spices to blend more fully.
Once the base has chilled completely, pour it into your ice cream maker and churn for twenty to twenty-five minutes, checking periodically for a thick, soft-serve consistency. The pumpkin puree adds body to the base, so the churned texture may feel slightly denser than a standard vanilla recipe.
Transfer the finished ice cream into a freezer-safe container, smoothing the top with a spatula. Cover tightly and freeze for at least two hours before serving, allowing the spiced flavor to settle and the texture to firm up completely.
Tips
- Use pure pumpkin puree rather than pie filling, since the filling contains added sugar and spices.
- Toast the spices briefly in the warm cream to deepen their flavor.
- Add crushed graham crackers for a pumpkin pie inspired variation.
18. Butter Pecan Ice Cream
Prep Time: 20 minutes | Churn Time: 25 minutes | Serve: 6
Buttery toasted pecans bring a rich, nutty crunch to this classic Southern-style flavor. Browning the butter first adds a deep, caramelized note that sets this recipe apart from a standard vanilla base. Every bite delivers a satisfying balance of creamy custard and toasted nut pieces.
Ingredients
- 1 cup pecan halves, chopped
- 4 tablespoons unsalted butter
- 2 cups heavy cream
- 1 cup whole milk
- 3/4 cup brown sugar
- Pinch of salt
- 4 large egg yolks
- 1 teaspoon vanilla extract
Instructions
Melt the butter in a skillet over medium heat, swirling the pan occasionally as it foams and eventually turns a deep golden-brown color, releasing a nutty aroma. This process, known as browning butter, takes about four to five minutes and requires close attention, since the butter can burn quickly once it starts to change color.
Add the chopped pecans to the browned butter, stirring to coat them evenly. Toast the nuts in the butter for about two minutes, stirring constantly, until fragrant. Remove the pan from heat and transfer the buttery pecans to a plate lined with paper towel, sprinkling lightly with a pinch of salt. Set aside to cool completely.
In a saucepan, combine the heavy cream, milk, and brown sugar over medium heat. Whisk the mixture as it warms, making sure the brown sugar dissolves fully into the cream. Continue heating until small bubbles form around the edges of the pan, roughly five minutes total, then remove from heat.
In a separate bowl, whisk the egg yolks until slightly thick. Temper the eggs by slowly pouring in about half a cup of the warm cream mixture, whisking constantly to prevent scrambling. Pour the tempered eggs back into the saucepan, whisking everything together into one smooth base.
Return the pan to low heat and cook the custard, stirring constantly with a wooden spoon, until it thickens enough to coat the back of the spoon, about five to seven minutes. Remove from heat and stir in the vanilla extract and salt, mixing until fully combined.
Strain the custard through a fine mesh sieve into a clean bowl, then cover the surface with plastic wrap and refrigerate for a minimum of four hours, or overnight for deeper flavor. Once fully chilled, pour the base into your ice cream maker and churn for twenty to twenty-five minutes.
During the final two minutes of churning, add the cooled buttery pecans gradually, letting the machine distribute them evenly. Transfer the finished ice cream to a freezer-safe container and freeze for at least two hours before serving.
Tips
- Watch the butter closely while browning, since it moves quickly from golden to burnt.
- Toast the pecans just briefly, since they continue cooking slightly from residual heat off the burner.
- Add extra pecans on top right before serving for added crunch.
19. Birthday Cake Ice Cream
Prep Time: 20 minutes | Churn Time: 25 minutes | Serve: 6
Colorful sprinkles and a hint of cake batter flavor turn this recipe into a celebratory treat perfect for any birthday gathering. A touch of almond and vanilla extract mimics the flavor of classic yellow cake, while rainbow sprinkles add color and a light crunch. This flavor brings a festive touch to any dessert table.
Ingredients
- 2 cups heavy cream
- 1 cup whole milk
- 3/4 cup granulated sugar
- 1 tablespoon vanilla extract
- 1/4 teaspoon almond extract
- Pinch of salt
- 4 large egg yolks
- 1/2 cup rainbow sprinkles, plus extra for topping
Instructions
Combine the heavy cream, milk, and half the sugar in a saucepan over medium heat. Warm the mixture gently, stirring occasionally, until small bubbles form around the edges of the pan, roughly five minutes. Remove the saucepan from heat once the bubbling starts to prevent the cream from scalding.
While the cream warms, whisk the egg yolks with the remaining sugar in a separate bowl until pale and slightly thick, about two minutes of steady whisking. Temper the eggs by slowly pouring in about half a cup of the warm cream mixture, whisking constantly to keep the eggs from scrambling.
Pour the tempered egg mixture back into the saucepan with the remaining cream, whisking everything together into one smooth base. Return the pan to low heat and cook the custard, stirring constantly with a wooden spoon, until it thickens enough to coat the back of the spoon, about five to seven minutes.
Remove the custard from heat once thickened and stir in the vanilla extract, almond extract, and salt, mixing until fully combined and fragrant. Strain the mixture through a fine mesh sieve into a clean bowl, catching any small bits of cooked egg along the way.
Cover the bowl with plastic wrap, pressing it directly onto the surface to prevent a skin from forming during chilling. Refrigerate the base for a minimum of four hours, though overnight chilling produces the smoothest, most developed flavor once churned.
Once fully chilled, pour the base into your ice cream maker and churn for twenty to twenty-five minutes, checking periodically for a thick, soft-serve consistency. During the final one to two minutes of churning, add the sprinkles quickly, since they can bleed color into the base the longer they mix.
Transfer the finished ice cream into a freezer-safe container immediately after churning, layering in a few extra sprinkles as you go. Top with an additional handful of sprinkles for a colorful, festive finish. Cover tightly and freeze for at least two hours before serving, allowing the texture to firm up fully.
Tips
- Add sprinkles only during the last minute of churning to prevent excessive color bleeding.
- Use oil-based sprinkles specifically labeled for baking, since some varieties dissolve in cream.
- Serve alongside a small slice of yellow cake for a full birthday celebration theme.
How to Store Homemade Ice Cream
- Best Containers for Storage — Choose a shallow, airtight container with a tight-fitting lid. Wide, flat containers freeze faster and more evenly than tall, narrow ones, helping ice cream keep a smooth texture.
- Preventing Ice Crystals — Press a piece of parchment paper or plastic wrap directly onto the surface of the ice cream before sealing the lid. This extra layer blocks air from reaching the surface, which cuts down on icy buildup over time.
- How Long Homemade Ice Cream Lasts — Homemade ice cream tastes best within one to two weeks of churning, since it lacks the stabilizers found in store-bought pints. Beyond two weeks, texture and flavor start to fade, though it typically stays safe to eat for up to a month when stored properly.
- Softening Before Serving — Homemade ice cream tends to freeze harder than store-bought varieties. Let a container sit on the counter for five to ten minutes before scooping, giving the texture time to soften into a smooth, scoopable consistency.
Conclusion
These nineteen Pukomc Ice Cream Maker Recipes give you a wide range of flavors to explore, from timeless classics to bold, creative combinations.
Every recipe uses simple steps and common ingredients, so both beginners and experienced home cooks can turn out smooth, creamy results with confidence. Don’t hesitate to swap mix-ins, adjust sweetness levels, or blend two flavors together to create something entirely your own — homemade ice cream leaves plenty of room for personal touches.
Bookmark this collection and return to it often, trying a new flavor each week until every recipe has made its way into your freezer. These recipes work equally well for serving a crowd at a birthday party or simply treating your family on a warm afternoon, offering something for every taste and occasion. Grab your ingredients, load up the machine, and enjoy the process of creating rich, homemade ice cream one batch at a time.