The Cuisinart Griddler is one of those kitchen tools that makes cooking so much easier. It works as a contact grill, a flat griddle, a full grill, and a panini press — all in one compact unit.
That is why so many home cooks love it. No need for multiple pans or a big outdoor grill. Just plug it in, set the temperature, and start cooking.
Cuisinart Griddler recipes cover everything from fluffy morning pancakes to juicy steaks and even sweet desserts.
The machine heats up fast, uses little to no oil, and cooks food evenly every time. It is great for people living in small apartments, busy families, and anyone who wants a hot meal without a lot of cleanup.
In this guide, you will find over 20 Cuisinart Griddler recipes for breakfast, lunch, dinner, snacks, and desserts. Each one is easy to follow, even for beginners.

Why the Cuisinart Griddler Is Perfect for Everyday Cooking
The Cuisinart Griddler has become a go-to appliance for good reason. Here is why it works so well for daily cooking:
1. Multi-function cooking capabilities. It works as a panini press, contact grill, full grill, and flat griddle. One machine handles dozens of different recipes without swapping equipment.
2. Saves time and kitchen space. The Griddler heats up in minutes and takes up very little counter space. No need to pull out multiple pots and pans.
3. Ideal for small kitchens and apartments. Its compact size fits easily on any counter. It is a perfect solution for studio apartments or small kitchen setups.
4. Great for healthy cooking with less oil. The sloped plates let fat and grease drain away from food. You can cook lean meats, vegetables, and eggs with very little added oil.
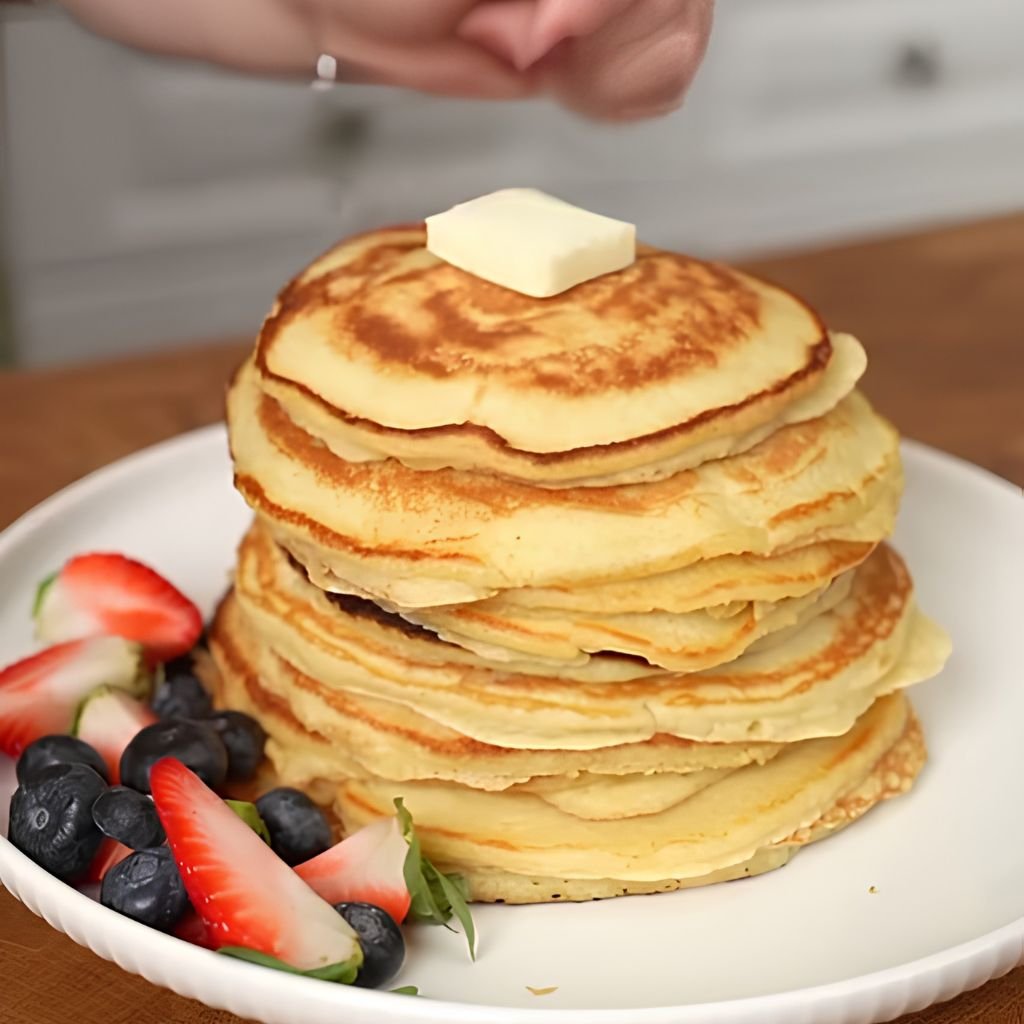
1. Classic Griddler Pancakes
Prep Time: 10 minutes | Cook Time: 15 minutes | Serves: 4
Soft, golden pancakes made right on the flat griddle plates — no stovetop needed. The even heat gives every pancake a perfectly brown surface and a fluffy inside. A quick weekend breakfast that the whole family will ask for again.
Ingredients
- 1 ½ cups all-purpose flour
- 2 tablespoons sugar
- 1 teaspoon baking powder
- ½ teaspoon baking soda
- ¼ teaspoon salt
- 1 cup buttermilk
- ½ cup whole milk
- 1 large egg
- 2 tablespoons melted butter
- 1 teaspoon vanilla extract
- Cooking spray or butter for greasing
Instructions
Start by setting up your Cuisinart Griddler with the flat griddle plates on both the top and bottom. Open the unit so it lays flat like a full griddle surface. Set the temperature to 375°F and allow it to fully preheat. This usually takes about 5 minutes. While the Griddler heats up, prepare your pancake batter.
In a large mixing bowl, add the all-purpose flour, sugar, baking powder, baking soda, and salt. Use a whisk to stir these dry ingredients together until they are fully combined with no clumps remaining. In a separate medium-sized bowl, whisk together the buttermilk, whole milk, egg, melted butter, and vanilla extract. Make sure the egg is fully beaten into the liquid mixture before moving forward.
Pour the wet ingredients into the bowl with the dry ingredients. Use a spatula or wooden spoon to gently stir everything together. Mix just until the batter comes together — do not overmix. A few small lumps in the batter are totally fine. Overmixing develops the gluten in the flour and makes pancakes tough instead of fluffy.
Once the Griddler is preheated, lightly coat the surface with cooking spray or a small amount of butter. Use a paper towel to spread it evenly if needed. Use a ¼-cup measuring cup to scoop the batter onto the griddle surface. Pour each scoop leaving about 2 inches of space between each pancake so they have room to spread without touching.
Close the top lid lightly — or leave it open, depending on your preference. If you leave it open, cook the pancakes for about 2 to 3 minutes on the first side. Watch for bubbles forming on the top surface of each pancake. When the edges look set and the bubbles pop without filling back in, it is time to flip. Use a thin spatula to gently slide under each pancake and flip it over in one smooth motion.
Cook the second side for another 1 to 2 minutes until the bottom is golden brown. Remove the pancakes and place them on a plate. Continue cooking the remaining batter in batches, re-greasing the surface lightly between each batch if needed. Serve the pancakes warm with maple syrup, fresh berries, a dusting of powdered sugar, or a pat of softened butter. Stacking two or three pancakes per plate makes a great presentation.
2. Crispy Bacon and Eggs Breakfast Plate
Prep Time: 5 minutes | Cook Time: 10 minutes | Serves: 2
A full breakfast plate made on one surface. The bacon comes out crispy and the eggs cook to your liking, all at the same time. Perfect for busy mornings when you want something filling without spending a lot of time in the kitchen.
Ingredients
- 4 strips thick-cut bacon
- 4 large eggs
- Salt and black pepper to taste
- 1 tablespoon butter
- Optional: hot sauce, shredded cheese, fresh chives
Instructions
Set the Griddler with flat griddle plates on both top and bottom and open it into full griddle mode. Turn the temperature dial to 400°F and let it heat up completely. The surface should be hot enough that a drop of water flicked onto it sizzles immediately. While it heats, lay your bacon strips out flat on a cutting board and pat them dry with paper towels. Removing surface moisture helps the bacon crisp up instead of steaming.
Place the bacon strips directly onto the preheated griddle in a single layer. Do not overlap them. Let them cook undisturbed for about 3 to 4 minutes. You will see the edges begin to curl and the fat start to render and turn translucent. Use tongs to carefully flip each strip. Cook the second side for another 2 to 3 minutes. For extra crispy bacon, press the strips lightly with a spatula while cooking. Once done to your preference, move the bacon to a plate lined with paper towels to drain any excess grease.
While the bacon is draining, carefully wipe away excess grease from the griddle surface using folded paper towels held with tongs — the surface is still very hot, so be careful. Add a small amount of butter to the surface and let it melt. Crack each egg carefully onto the surface, keeping the yolks intact. Season the tops lightly with salt and freshly cracked black pepper.
For sunny-side-up eggs, do not flip them. Let the whites set fully while the yolks remain runny, about 3 to 4 minutes. For over-easy, wait until the whites are fully set, then carefully slide a thin spatula under each egg and flip gently. Cook just 30 seconds more on the second side so the yolk stays soft and runny. For over-hard eggs, cook for about 1 additional minute after flipping until the yolk is fully cooked through.
Remove the eggs with a spatula and plate them alongside the crispy bacon. Add a sprinkle of shredded cheese over the warm eggs if desired — it will melt from the residual heat. Top with freshly chopped chives and a dash of hot sauce for extra flavor. Serve immediately with toast or sliced avocado on the side.
3. Grilled Breakfast Sandwich
Prep Time: 8 minutes | Cook Time: 10 minutes | Serves: 2
A hearty morning sandwich with egg, cheese, and meat pressed together until golden. The Griddler gives the bread a beautiful crisp outside while everything inside stays warm and melted. Great for a grab-and-go breakfast or a lazy weekend morning.
Ingredients
- 2 English muffins or sandwich rolls, split
- 2 large eggs
- 2 slices cheddar or American cheese
- 2 slices Canadian bacon or cooked ham
- 1 tablespoon butter, softened
- Salt and black pepper to taste
- Optional: hot sauce, baby spinach, sliced tomato
Instructions
Start by preheating the Cuisinart Griddler with the flat griddle plates installed on both sides. Open the unit fully and set the temperature to 375°F. Let the surface heat for about 4 to 5 minutes until it is fully up to temperature.
While the Griddler heats, butter the cut sides of each English muffin or roll lightly with softened butter. Set them aside. In a small bowl or on a flat surface, crack both eggs. If you prefer a flat egg that fits nicely on a sandwich, use a round egg ring on the griddle surface to keep the egg from spreading too wide.
Place the buttered muffins cut-side down on the griddle. Press them gently with a spatula to get good contact. Let them toast for about 2 minutes until golden and lightly crispy. Remove them and set aside.
Next, place the Canadian bacon or ham slices on the griddle. Cook for about 1 minute per side, just until lightly browned and heated through. Remove and set on top of the bottom half of each muffin. Lay a slice of cheese over the hot meat so it starts to melt from the warmth.
Now cook the eggs. Add a tiny bit of butter to the surface, crack each egg into a ring mold or free-form onto the griddle. Season with salt and pepper. Cook until the whites are set — about 2 to 3 minutes. Flip carefully for over-easy eggs and cook 30 more seconds. Slide each egg on top of the cheese-covered meat layer.
Add any optional toppings such as baby spinach, tomato slices, or a few drops of hot sauce. Place the top half of the muffin over the egg. Press down gently. Return both assembled sandwiches to the Griddler surface, close the lid, and press for about 1 to 2 minutes until the outside is golden and the cheese is fully melted. Serve hot.
4. French Toast on the Griddler
Prep Time: 8 minutes | Cook Time: 12 minutes | Serves: 4
Thick slices of bread soaked in a sweet egg custard, then cooked on the flat griddle until golden. The Griddler’s even heat creates a perfectly caramelized crust on every slice. A comforting breakfast that tastes like it took a lot more effort than it actually did.
Ingredients
- 8 thick slices brioche or Texas toast
- 3 large eggs
- ½ cup whole milk
- 2 tablespoons heavy cream
- 2 tablespoons sugar
- 1 teaspoon vanilla extract
- ½ teaspoon ground cinnamon
- ¼ teaspoon nutmeg
- Butter for greasing
- Powdered sugar, maple syrup, and fresh fruit for serving
Instructions
Open the Cuisinart Griddler to full flat griddle mode by installing the flat plates and laying the unit open. Set the temperature to 350°F and let it preheat completely while you prepare the custard mixture.
Crack the eggs into a wide, shallow bowl — wide enough to lay a bread slice flat in it. Add the milk, heavy cream, sugar, vanilla extract, cinnamon, and nutmeg to the eggs. Whisk everything together until fully combined and smooth. The custard should look slightly frothy from the whisking. Taste it — it should smell fragrant and sweet.
Once the Griddler is at temperature, add a small knob of butter to the surface. Let it melt and spread it around with a folded paper towel held with tongs, being careful of the heat. The butter adds flavor and helps prevent sticking.
Take one bread slice and place it flat in the custard bowl. Let it soak for about 20 to 30 seconds on the first side, then flip it and soak the other side for another 20 seconds. The bread should absorb the custard without falling apart. Thick-cut brioche works best because it holds its structure while soaking.
Lift the soaked slice carefully with your fingers or a fork, letting any excess custard drip back into the bowl. Place it gently onto the buttered griddle surface. Repeat with as many slices as fit without crowding. Cook for about 2 to 3 minutes per side.
Watch the underside — when it turns deep golden brown and starts to look set rather than wet, it is ready to flip. Use a wide spatula to carefully turn each slice over. The second side usually cooks a little faster — about 1 to 2 minutes. When both sides are golden and the inside is cooked through (not wet or eggy), remove from the griddle.
Serve immediately with a generous dusting of powdered sugar, warm maple syrup, and fresh berries or sliced banana on top.
5. Hash Browns and Sausage Patties
Prep Time: 15 minutes | Cook Time: 20 minutes | Serves: 4
Crispy shredded potatoes cooked flat on the griddle alongside juicy sausage patties. Everything cooks at the same time on the same surface. A classic diner-style breakfast made simple at home.
Ingredients
- 2 large russet potatoes, peeled and shredded
- ½ teaspoon garlic powder
- ½ teaspoon onion powder
- Salt and black pepper to taste
- 2 tablespoons vegetable oil
- 4 pork breakfast sausage patties (store-bought or homemade)
Instructions
Peel and shred the russet potatoes using a box grater. Place the shredded potato into a clean kitchen towel or several layers of paper towel. Wrap it tightly and squeeze out as much moisture as possible. This step is critical — removing water from the potato makes the hash browns crispy instead of soggy. Discard the liquid.
Transfer the dry shredded potato to a bowl. Season with garlic powder, onion powder, a generous pinch of salt, and several cracks of black pepper. Toss everything together until the seasoning is evenly distributed.
Set up the Griddler with flat griddle plates in full open mode. Set the temperature to 400°F and preheat for about 5 minutes. Drizzle the vegetable oil over the surface and use a folded paper towel with tongs to spread it evenly across both halves of the griddle.
Place the sausage patties on one side of the griddle. On the other side, scoop the shredded potato mixture into four equal mounds. Use the back of a spatula to press each mound down firmly into a flat round patty shape about ½ inch thick. Pressing them flat ensures even browning.
Let both the sausage and hash browns cook undisturbed for 4 to 5 minutes. Do not move them — letting them sit allows a golden crust to form on the bottom. After 4 to 5 minutes, flip the sausage patties and check the underside of the hash browns. The bottom should be deeply golden and crispy.
Flip the hash browns carefully using a wide spatula. If they stick slightly, let them cook another 30 seconds before trying again. Cook the second side for another 4 to 5 minutes until the hash browns are crispy and golden all over and cooked through in the center.
Check the sausage patties — the internal temperature should reach 160°F for pork. Remove everything from the griddle and serve hot. Plate the hash browns alongside the sausage with fried eggs or a side of ketchup.
6. Classic Grilled Cheese Sandwich
Prep Time: 5 minutes | Cook Time: 8 minutes | Serves: 2
Golden, buttery bread pressed together with gooey melted cheese inside. The Griddler’s panini press mode does all the work — pressing and grilling both sides at the same time. A comforting lunch that takes less than 15 minutes from start to finish.
Ingredients
- 4 slices white or sourdough bread
- 4 slices cheddar cheese (or a mix of cheddar and Gruyère)
- 2 tablespoons softened butter
- Optional: Dijon mustard, sliced tomato, crispy bacon
Instructions
Install the grill/panini plates on the Cuisinart Griddler — these are the ribbed plates, not the flat ones. Close the unit into panini press mode. Set the temperature to 375°F and allow it to fully preheat, which takes about 4 to 5 minutes.
While the Griddler heats, build your sandwiches. Take two slices of bread and spread softened butter evenly all the way to the edges on one side of each slice. Butter should cover the whole surface so every part gets golden and crispy during cooking. Lay two slices of cheese on the non-buttered side of one bread slice. If using optional add-ins like a smear of Dijon mustard or a layer of sliced tomato, add those now on top of the cheese. Top with the second bread slice, buttered side facing outward.
Once the Griddler is preheated, carefully open the lid and place the assembled sandwiches on the lower grill plate. Space them so they are not touching. Gently close the lid down onto the sandwiches. Apply light pressure to get good contact but do not push down so hard that the filling squeezes out.
Cook for about 3 to 4 minutes. Peek by carefully lifting the lid — the bread should be deep golden with grill marks and the cheese inside should be fully melted and soft. If it needs more time, close the lid and cook another minute.
Remove the sandwiches with a spatula. Let them rest for 1 minute before cutting — this allows the melted cheese to settle slightly so it does not all pour out when sliced. Cut diagonally in half and serve immediately with tomato soup, a side salad, or a bowl of chips.
7. Chicken Panini with Mozzarella
Prep Time: 10 minutes | Cook Time: 12 minutes | Serves: 2
A restaurant-quality panini made at home. Grilled chicken, fresh mozzarella, roasted peppers, and basil pressed inside crusty ciabatta. The Griddler gives it those beautiful grill marks and a perfectly crispy crust on the outside.
Ingredients
- 2 ciabatta rolls, split horizontally
- 2 boneless, skinless chicken breast halves (thin-sliced or pounded thin)
- 4 slices fresh mozzarella
- ½ cup roasted red peppers, sliced
- 6 fresh basil leaves
- 2 tablespoons olive oil
- 1 teaspoon Italian seasoning
- Salt and black pepper to taste
- 1 tablespoon softened butter for bread
Instructions
Install the grill plates on the Griddler and preheat to 400°F. While it heats, prepare the chicken. If the chicken breasts are thick, place them between two sheets of plastic wrap and pound them with a meat mallet or rolling pin until they are about ½ inch thick. This ensures even cooking throughout.
Drizzle the olive oil over the chicken pieces and rub it in with your hands. Season both sides generously with Italian seasoning, salt, and black pepper. Make sure the seasoning is pressed into the meat.
Once the Griddler is fully preheated, open the lid and place the seasoned chicken breasts on the grill plates. Close the lid and cook for about 5 to 6 minutes. Because the Griddler cooks from both sides simultaneously, thin chicken breasts cook quickly. Check that the internal temperature reaches 165°F with a meat thermometer. Remove the chicken and let it rest for 3 minutes, then slice each breast into strips.
While the chicken rests, butter the cut sides of each ciabatta roll. Return the Griddler to medium heat. Build the sandwiches: on the bottom half of each roll, layer sliced chicken, two slices of fresh mozzarella, a few strips of roasted red pepper, and three fresh basil leaves. Place the top half of the roll on and press gently.
Place the assembled panini on the Griddler and close the lid. Cook for 3 to 4 minutes until the outside of the bread is golden and crispy with grill marks and the mozzarella inside is melted. Remove carefully with a spatula and cut in half. Serve immediately.
8. Turkey Avocado Melt
Prep Time: 8 minutes | Cook Time: 8 minutes | Serves: 2
Sliced turkey, creamy avocado, and melted Swiss cheese pressed between golden bread. A lighter sandwich option that still feels satisfying and filling. The avocado adds a rich creaminess that pairs perfectly with the warm melted cheese.
Ingredients
- 4 slices whole wheat or sourdough bread
- 6 oz deli-sliced turkey breast
- 1 ripe avocado, sliced
- 4 slices Swiss cheese
- 1 tablespoon Dijon mustard
- 1 tablespoon mayonnaise
- Salt and black pepper
- 2 tablespoons softened butter
Instructions
Preheat the Cuisinart Griddler with grill/panini plates installed. Set to 375°F and let it fully heat for 5 minutes.
Mix the Dijon mustard and mayonnaise together in a small bowl. This spread adds flavor and a bit of moisture to the sandwich. Lay out all four slices of bread on your work surface. Spread the mustard-mayo mixture evenly on one side of each slice — this side will be the inside of the sandwich.
On two of the bread slices (mustard side up), layer three ounces of deli turkey. Try to fold the turkey slices rather than laying them flat — this creates a little lift in the sandwich and makes each bite more substantial. Place two slices of Swiss cheese over the turkey on each sandwich. Layer the avocado slices evenly on top of the cheese. Season the avocado lightly with salt and pepper. Place the remaining bread slices on top, mustard side down. Butter the outer sides of each sandwich generously with softened butter.
Set the sandwiches on the preheated Griddler. Close the lid and press lightly. Cook for 3 to 4 minutes, checking after 3 minutes. The outside should be golden and crispy with defined grill marks. The cheese should be fully melted. If the bread is golden but the cheese needs more time, keep the lid closed and cook one more minute.
Remove the sandwiches carefully. Let them sit for 1 minute before slicing. Cut diagonally and serve warm.
9. Philly Cheesesteak Sandwich
Prep Time: 10 minutes | Cook Time: 15 minutes | Serves: 2
Thinly sliced ribeye, sautéed onions and peppers, and provolone melted over everything — piled into a toasted hoagie roll. The Griddler’s flat griddle surface is ideal for getting that perfect sear on the meat and cooking the vegetables at the same time.
Ingredients
- 12 oz ribeye steak, thinly sliced (or shaved steak)
- 1 large green bell pepper, thinly sliced
- 1 medium yellow onion, thinly sliced
- 4 slices provolone cheese (or Cheez Whiz for traditional style)
- 2 hoagie rolls, split
- 2 tablespoons vegetable oil
- 1 teaspoon Worcestershire sauce
- Salt and black pepper to taste
Instructions
If the ribeye is not already thinly sliced, place it in the freezer for 20 to 30 minutes before cooking — this firms up the meat and makes it much easier to slice thin with a sharp knife. Slice against the grain into pieces as thin as possible.
Set the Griddler to flat griddle mode, open flat, and set to 425°F. Drizzle the vegetable oil on the surface. Once hot, add the sliced onions and bell pepper. Spread them out in a single layer. Season with a little salt and pepper. Cook, tossing occasionally with a spatula, for about 5 to 6 minutes until the onions are soft and starting to caramelize and the peppers are tender. Push the vegetables to one side of the griddle.
On the now-open side of the griddle, add the thinly sliced steak in a single layer. Season immediately with salt, pepper, and a splash of Worcestershire sauce. Let the meat cook for about 1 to 2 minutes per side, breaking it apart with a spatula as it cooks. Shaved steak cooks very fast — do not overdo it. Toss the steak together with the vegetables once the meat is no longer pink.
Divide the steak and vegetable mixture into two portions on the griddle. Lay two slices of provolone over each portion. Close the Griddler lid for about 1 minute just to melt the cheese quickly, or use the residual heat with a cover.
Meanwhile, place the hoagie rolls cut-side down on the empty part of the griddle to toast for 1 to 2 minutes. Scoop the cheesesteak filling into the toasted rolls using a spatula and serve immediately.
10. BBQ Chicken Quesadillas
Prep Time: 10 minutes | Cook Time: 10 minutes | Serves: 4
Smoky BBQ chicken, melted cheese, and red onion tucked inside crispy tortillas. The Griddler presses them perfectly golden on both sides without any flipping needed. A crowd-pleasing snack or easy weeknight dinner.

Ingredients
- 2 cups cooked chicken, shredded
- ½ cup BBQ sauce
- 1 cup shredded Monterey Jack or cheddar cheese
- ¼ red onion, thinly sliced
- 4 large flour tortillas
- 1 tablespoon butter or cooking spray
- Sour cream and salsa for serving
Instructions
Preheat the Cuisinart Griddler with flat griddle plates in closed panini press mode. Set to 375°F and allow 4 to 5 minutes to preheat fully.
In a medium bowl, mix the shredded chicken with the BBQ sauce until every piece is coated. Taste and adjust — add more BBQ sauce for extra smokiness or a pinch of salt if needed.
Lay two flour tortillas flat on your work surface. On one half of each tortilla, spread a thin, even layer of shredded cheese. Spoon the BBQ chicken mixture over the cheese layer, spreading it evenly across the same half of the tortilla. Scatter the red onion slices over the chicken. Add another light sprinkle of cheese on top of the chicken — this helps everything stick together when the quesadilla is folded. Fold the empty half of each tortilla over the filled half to create a half-moon shape.
Lightly spray the Griddler surface with cooking spray or brush lightly with melted butter. Place one folded quesadilla on the lower plate. Close the lid carefully and press down gently. Cook for 3 to 4 minutes.
Open the lid — the quesadilla should be golden and slightly crispy on both sides with the cheese fully melted inside. Remove carefully with a spatula. Repeat with the remaining quesadillas. Cut each one into 3 triangular wedges and serve hot with sour cream and salsa on the side.
11. Grilled Lemon Herb Chicken Breast
Prep Time: 10 minutes (plus 30 min marinating) | Cook Time: 12 minutes | Serves: 4
Juicy grilled chicken marinated in lemon, garlic, and fresh herbs. The Griddler gives each breast beautiful grill marks and locks in all that flavor. A clean, simple meal that works for lunch, dinner, or meal prep for the week.
Ingredients
- 4 boneless, skinless chicken breasts
- 3 tablespoons olive oil
- Juice and zest of 1 large lemon
- 3 cloves garlic, minced
- 1 teaspoon dried oregano
- 1 teaspoon dried thyme
- ½ teaspoon paprika
- Salt and black pepper to taste
- Fresh parsley for garnish
Instructions
Start by preparing the chicken. If the breasts are thick and uneven, place them between plastic wrap and pound to an even thickness of about ¾ inch. Even thickness ensures the chicken cooks at the same rate across the whole piece.
In a medium bowl, combine the olive oil, lemon juice, lemon zest, minced garlic, oregano, thyme, paprika, salt, and black pepper. Stir well to combine into a marinade. Place the chicken breasts in the bowl and turn them to coat every surface thoroughly. Cover and refrigerate for at least 30 minutes, or up to 4 hours for deeper flavor. Do not marinate longer than 4 hours — the lemon juice will start to break down the texture of the meat if left too long.
When ready to cook, remove the chicken from the refrigerator and let it sit at room temperature for about 10 minutes. This helps it cook more evenly. Preheat the Cuisinart Griddler with the grill plates installed. Set to 400°F and allow it to fully preheat — about 5 minutes.
Remove the chicken from the marinade, letting excess liquid drip off. Do not shake it dry completely — a thin coating of marinade helps create flavor on the outside. Place the chicken breasts on the preheated grill plates. Close the lid. Cook for 5 to 7 minutes depending on the thickness. The Griddler cooks from both sides simultaneously, so it is significantly faster than a traditional grill.
Use a meat thermometer to check doneness — the internal temperature should read 165°F at the thickest part. Do not go by color alone. Once done, transfer to a cutting board and let the chicken rest for 5 minutes. Resting allows the juices to redistribute throughout the meat so it stays moist when cut. Slice each breast and garnish with freshly chopped parsley and a wedge of lemon. Serve alongside roasted vegetables, a fresh green salad, or rice.
12. Juicy Griddler Burgers
Prep Time: 10 minutes | Cook Time: 10 minutes | Serves: 4
Thick, juicy beef patties grilled on the Griddler and loaded with all your favorite toppings. The grill plates give each burger a beautiful crust on both sides at once. A weeknight dinner that feels like a weekend cookout.
Ingredients
- 1 ½ lbs ground beef (80/20 blend for best flavor)
- 1 teaspoon garlic powder
- 1 teaspoon onion powder
- ½ teaspoon smoked paprika
- Salt and black pepper to taste
- 4 burger buns, toasted
- 4 slices American or cheddar cheese
- Lettuce, tomato, onion, pickles, ketchup, mustard for serving
Instructions
Remove the ground beef from the refrigerator about 10 to 15 minutes before cooking. Cold meat right from the fridge can cook unevenly. Place it in a large bowl. Add garlic powder, onion powder, smoked paprika, salt, and black pepper. Use your hands to mix the seasonings into the meat gently. The key here is to not over-mix — working the meat too much makes the patties dense and tough rather than tender and juicy.
Divide the seasoned beef into four equal portions. Each portion should weigh about 6 ounces. Roll each portion into a loose ball, then press it down flat between your palms to form a round patty about ¾ inch thick. Use your thumb to press a shallow indentation into the center of each patty. This small depression prevents the center from puffing up during cooking, keeping your burger flat and even.
Preheat the Griddler with grill plates at 425°F. Once the surface is fully hot, place the burger patties directly onto the lower grill plate. Close the lid firmly. Because the Griddler applies heat from both top and bottom simultaneously, burgers cook much faster than on a traditional grill.
Cook for about 4 to 5 minutes for medium doneness. For medium-well, cook 6 minutes. For well-done, cook 7 to 8 minutes. Avoid opening the lid repeatedly — each time you open it, you release heat and disrupt the crust formation.
During the last minute of cooking, lay a cheese slice on top of each patty and close the lid to let it melt. Once done, remove the patties from the Griddler and let them rest on a plate for 2 to 3 minutes. Meanwhile, toast the burger buns cut-side down on the still-hot Griddler for 1 to 2 minutes. Build your burgers with your preferred toppings and serve immediately.
13. Garlic Butter Shrimp
Prep Time: 10 minutes | Cook Time: 6 minutes | Serves: 4
Plump shrimp cooked in garlic butter on the flat griddle — fast, flavorful, and incredibly easy. Ready in under 10 minutes. Serve over rice, pasta, or with crusty bread to soak up all that garlicky butter.
Ingredients
- 1 lb large shrimp, peeled and deveined (tails on or off)
- 3 tablespoons unsalted butter
- 4 cloves garlic, minced
- ½ teaspoon red pepper flakes
- 1 tablespoon fresh lemon juice
- Salt and black pepper to taste
- 2 tablespoons fresh parsley, chopped
Instructions
Pat the shrimp completely dry with paper towels before cooking. Moisture on shrimp causes them to steam rather than sear. Dry shrimp will develop a slightly golden crust and cook with better texture. Season the shrimp lightly with salt and black pepper on both sides.
Set the Cuisinart Griddler to flat griddle mode. Open flat and set the temperature to 400°F. Let the surface heat fully, about 4 to 5 minutes.
Once hot, add the butter to the center of the griddle. Let it melt and begin to sizzle — it should start to foam slightly. Add the minced garlic and red pepper flakes. Let the garlic cook in the butter for about 30 to 45 seconds, stirring continuously with a silicone spatula. Watch carefully — garlic burns fast and will turn bitter. As soon as it turns fragrant and just barely golden at the edges, it is ready.
Spread the shrimp across the griddle surface in a single layer. Do not pile them on top of each other — each shrimp needs contact with the hot surface to cook properly. Let them cook undisturbed for 1 to 2 minutes until the bottoms turn pink and slightly golden.
Use tongs or a spatula to flip each shrimp individually. Cook the second side for another 1 to 2 minutes. Shrimp are done when they are pink and opaque all the way through and have curled into a loose C-shape. If shrimp curl very tightly into an O-shape, they are overcooked. Remove them from the heat immediately once done.
Drizzle the lemon juice over the finished shrimp and toss gently. Taste and adjust salt. Transfer to a serving dish and scatter the chopped parsley over the top. Serve right away over steamed rice, buttered pasta, or alongside warm crusty bread.
14. Grilled Salmon Fillets
Prep Time: 8 minutes | Cook Time: 8 minutes | Serves: 4
Perfectly grilled salmon with a golden crust and a moist, flaky interior. The Griddler’s even heat cooks salmon fast and consistently. A healthy and impressive meal that comes together in under 20 minutes.
Ingredients
- 4 salmon fillets (about 6 oz each), skin on or off
- 2 tablespoons olive oil
- 1 teaspoon garlic powder
- 1 teaspoon smoked paprika
- ½ teaspoon dried dill or fresh dill
- Salt and black pepper to taste
- Lemon wedges for serving
Instructions
Take the salmon fillets out of the refrigerator about 15 minutes before cooking and let them come to room temperature. Cold fish on a hot cooking surface can cause uneven cooking — the outside overcooks before the center is done. Pat each fillet dry with paper towels to remove any surface moisture.
In a small bowl, mix together the garlic powder, smoked paprika, dill, salt, and pepper. Brush both sides of each salmon fillet with olive oil. Then sprinkle the spice mixture evenly over all surfaces, pressing the seasoning gently into the fish.
Install the grill plates on the Cuisinart Griddler and preheat to 400°F. Allow the full preheating cycle before adding the fish — this ensures a proper sear rather than sticking.
Once fully preheated, open the lid and place each salmon fillet on the lower grill plate. Close the lid gently. Do not press down hard on delicate fish. The Griddler applies pressure and heat from both sides simultaneously, which speeds up cooking considerably compared to a pan.
Cook for 4 to 5 minutes for medium — the center will still be slightly darker pink and very moist. For fully cooked salmon, go 6 to 7 minutes. The safe internal temperature for salmon is 145°F, though many prefer it at 125 to 130°F for a silkier texture. Use a thermometer for accuracy.
Carefully open the lid. The salmon should release from the grill plates fairly easily when done — if it sticks, give it 30 more seconds. Use a wide spatula to gently lift each fillet off the grill. Transfer to plates and serve with fresh lemon wedges, steamed vegetables, or a crisp green salad.
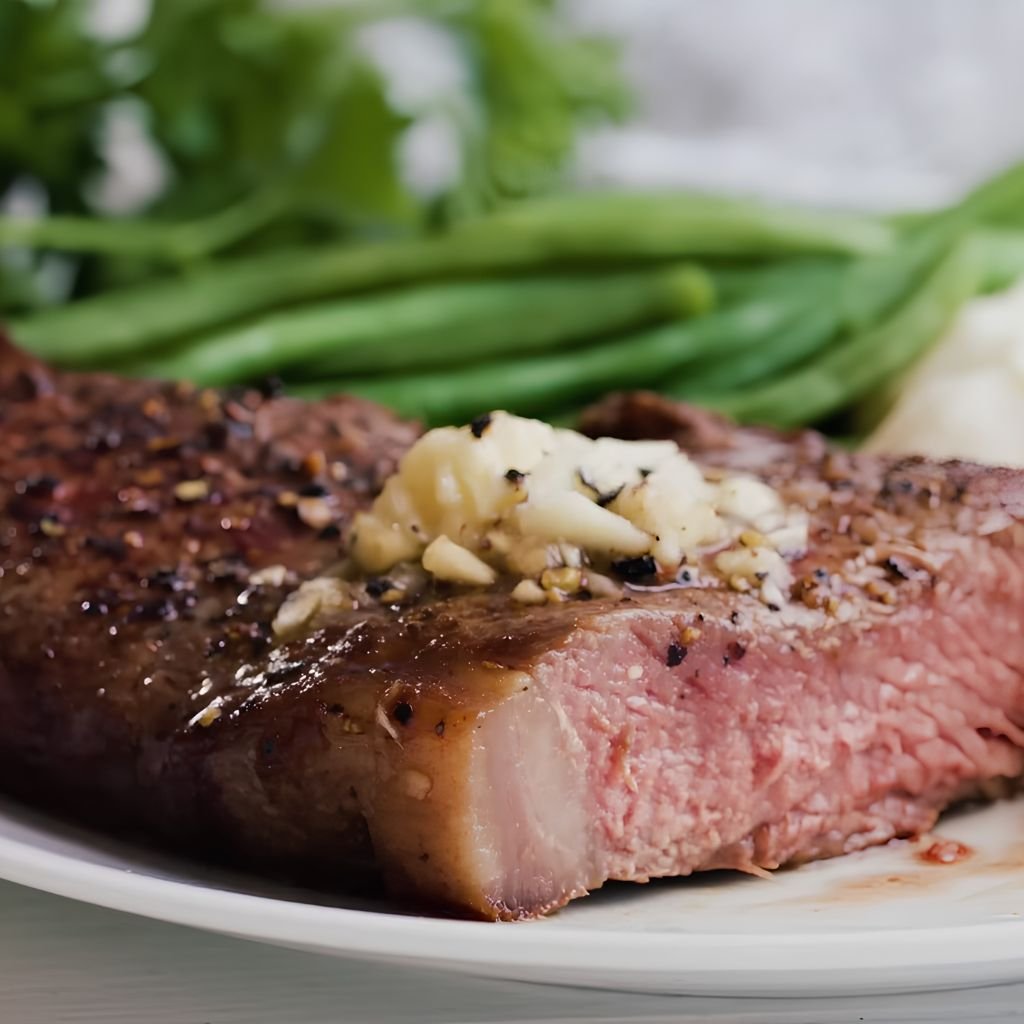
15. Steakhouse-Style Ribeye Steak
Prep Time: 10 minutes (plus 30 min resting) | Cook Time: 10 minutes | Serves: 2
A thick, juicy ribeye with a beautiful char and a buttery crust — cooked entirely on the Griddler. The intense heat creates a steakhouse-quality sear in your own kitchen. A special meal that is surprisingly simple to make.
Ingredients
- 2 ribeye steaks (about 10–12 oz each, 1 inch thick)
- 2 tablespoons olive oil
- 1 teaspoon coarse sea salt
- 1 teaspoon coarse black pepper
- ½ teaspoon garlic powder
- 2 tablespoons unsalted butter
- 2 sprigs fresh rosemary or thyme
- 2 garlic cloves, crushed
Instructions
Remove the ribeye steaks from the refrigerator 30 to 45 minutes before cooking and set them on the counter. Bringing the steak to room temperature before cooking helps achieve more even doneness from edge to center. Pat each steak completely dry with paper towels. Dry surfaces create a better sear — moisture on the surface creates steam instead of crust.
In a small bowl, mix the coarse salt, black pepper, and garlic powder together. Drizzle olive oil over both sides of each steak and rub it in. Then apply the salt and pepper mixture generously to both sides and all edges of each steak. Press the seasoning firmly into the meat.
Set the Cuisinart Griddler with grill plates to its highest temperature setting — typically 450°F. Let it preheat fully, at least 5 to 6 minutes. A very hot surface is critical for a proper steak sear. If the surface is not fully preheated, the steak will steam rather than sear.
Place the steaks on the preheated grill plates. Close the lid and cook for 3 minutes for medium-rare on a 1-inch thick steak. For medium, cook 4 to 4.5 minutes. For medium-well, cook 5 to 6 minutes. Do not lift the lid during cooking — every second the lid is open, you lose heat.
Use a meat thermometer inserted into the thickest part of the steak away from any bone to check doneness: 130°F for medium-rare, 140°F for medium, 150°F for medium-well. Remove the steaks from the Griddler and immediately place a tablespoon of butter, a sprig of rosemary or thyme, and a crushed garlic clove on top of each hot steak. Tent loosely with foil.
Let the steaks rest for at least 5 to 7 minutes. Resting is not optional — it allows the juices to settle back into the muscle fibers. A steak cut immediately after cooking loses most of its juices. After resting, slice against the grain and serve with roasted potatoes, grilled asparagus, or a wedge salad.
16. Chicken Fajitas
Prep Time: 15 minutes (plus 20 min marinating) | Cook Time: 15 minutes | Serves: 4
Smoky seasoned chicken with colorful bell peppers and onions, cooked on the open griddle. The high heat caramelizes the vegetables and gives the chicken a slight char. Served in warm tortillas with all your favorite toppings — a weeknight dinner everyone loves.
Ingredients
- 1 ½ lbs boneless chicken thighs or breasts, sliced into strips
- 2 bell peppers (red and yellow), sliced thin
- 1 medium white onion, sliced thin
- 3 tablespoons vegetable oil, divided
- 1 tablespoon chili powder
- 1 teaspoon cumin
- 1 teaspoon garlic powder
- ½ teaspoon smoked paprika
- Salt and black pepper to taste
- Flour tortillas, sour cream, salsa, shredded cheese, lime wedges for serving
Instructions
Combine the chili powder, cumin, garlic powder, smoked paprika, salt, and pepper in a small bowl. Toss the sliced chicken strips with 2 tablespoons of the vegetable oil and the spice blend. Use your hands or a spoon to make sure every piece of chicken is coated. Let the chicken marinate for at least 20 minutes at room temperature, or cover and refrigerate for up to 4 hours.
Set the Griddler with flat griddle plates in open full griddle mode. Set to 425°F and preheat for 5 minutes. Drizzle the remaining tablespoon of vegetable oil onto the surface.
Add the sliced bell peppers and onions to one side of the griddle. Spread them in a single layer. Season lightly with salt. Let them cook for 4 to 5 minutes without stirring too much — allowing them to sit lets them char slightly and caramelize, which adds a lot of flavor. After 4 minutes, toss with a spatula and push to one side.
On the other side of the griddle, spread the marinated chicken strips in a single layer. Do not pile them — each piece should have direct contact with the surface. Cook for 3 to 4 minutes until the underside is caramelized and slightly charred. Flip each strip and cook another 2 to 3 minutes until cooked through to 165°F internal temperature.
Once the chicken is done, combine it with the peppers and onions on the griddle and toss everything together for about 1 minute so the flavors blend. Remove from heat. Warm the tortillas briefly on the still-hot edge of the griddle for 30 seconds per side. Serve the fajita filling in the warm tortillas with sour cream, fresh salsa, shredded cheese, and a squeeze of lime.
17. Grilled Vegetable Medley
Prep Time: 10 minutes | Cook Time: 12 minutes | Serves: 4
A colorful mix of zucchini, peppers, mushrooms, and asparagus grilled with olive oil and herbs. The Griddler brings out the natural sweetness in every vegetable. A simple and healthy side dish that goes with almost any main course.
Ingredients
- 1 medium zucchini, sliced into ¼-inch rounds
- 1 red bell pepper, cut into wide strips
- 1 cup mushrooms, halved
- 8 asparagus spears, trimmed
- 2 tablespoons olive oil
- 1 teaspoon dried Italian herbs
- ½ teaspoon garlic powder
- Salt and black pepper to taste
- Fresh lemon juice for finishing
Instructions
Wash and prep all the vegetables. Dry them with a paper towel — extra moisture will cause steaming instead of grilling. In a large bowl, combine the zucchini rounds, bell pepper strips, halved mushrooms, and asparagus spears. Drizzle the olive oil over the vegetables and toss to coat evenly. Sprinkle the Italian herbs, garlic powder, salt, and pepper over the top. Toss again until every piece is well seasoned.
Preheat the Cuisinart Griddler with grill plates installed. Open the unit to flat open grill mode or use it in contact grill mode depending on your vegetable thickness. Set to 400°F and preheat fully.
Once hot, arrange the vegetables on the grill plates in a single layer. Avoid crowding — vegetables need space so they grill rather than steam. Thicker items like asparagus and bell pepper strips can go closest to the back where heat tends to be most intense. Thin items like mushroom halves can go toward the front.
If using open grill mode, cook for 4 to 5 minutes, then use tongs to flip each piece and cook for another 3 to 4 minutes. The vegetables should have visible grill marks and be tender but still hold their shape with a slight bite. Asparagus should be bright green and just tender. Zucchini should be soft with golden grill marks. Bell peppers should be slightly charred at the edges.
If using contact grill mode, close the lid gently. Cook for 5 to 6 minutes total without flipping. Remove the vegetables to a serving plate. Squeeze a bit of fresh lemon juice over everything right before serving. The brightness of the lemon lifts the whole dish. Serve as a side for grilled chicken, steak, or fish, or enjoy over a grain bowl with a drizzle of tahini.
18. Teriyaki Chicken Skewers
Prep Time: 15 minutes (plus 30 min marinating) | Cook Time: 12 minutes | Serves: 4
Tender chicken pieces glazed in a sweet and savory teriyaki sauce and grilled until caramelized. The sugars in the teriyaki sauce create a gorgeous sticky glaze on the outside. Serve with steamed rice and sesame seeds for a complete meal.
Ingredients
- 1 ½ lbs boneless chicken thighs, cut into 1-inch cubes
- ½ cup soy sauce
- ¼ cup honey
- 2 tablespoons rice vinegar
- 1 tablespoon sesame oil
- 2 cloves garlic, minced
- 1 teaspoon fresh ginger, grated
- 1 tablespoon cornstarch + 2 tablespoons cold water
- Wooden skewers, soaked in water for 30 minutes
- Sesame seeds and sliced green onions for serving
Instructions
Soak the wooden skewers in water for at least 30 minutes before cooking. Soaked skewers resist burning on the grill surface. While the skewers soak, make the teriyaki sauce and marinade.
In a small saucepan over medium heat, combine the soy sauce, honey, rice vinegar, sesame oil, minced garlic, and grated ginger. Stir well and bring to a gentle simmer. In a small bowl, whisk the cornstarch with the cold water until smooth. Pour this slurry into the simmering sauce while stirring constantly. Cook for 1 to 2 minutes until the sauce thickens to a syrupy consistency. Remove from heat. Let it cool to room temperature.
Place the chicken cubes in a bowl or zip-lock bag. Pour half of the teriyaki sauce over the chicken. Reserve the other half for glazing during cooking. Toss to coat every piece. Marinate for at least 30 minutes in the refrigerator, or up to 2 hours.
Thread the marinated chicken pieces onto the soaked skewers — about 5 to 6 pieces per skewer. Do not pack them too tightly; a small gap between each piece allows heat to circulate.
Preheat the Cuisinart Griddler with grill plates to 400°F. Once fully preheated, place the skewers on the lower grill plate. Close the lid and cook for about 5 minutes. Open the lid and brush the top of the skewers with the reserved teriyaki sauce using a pastry brush. Close the lid and cook for another 4 to 5 minutes.
Check that the internal temperature of the chicken reaches 165°F. The outside should be deeply caramelized and glossy. Remove the skewers from the Griddler. Brush one final coat of the reserved sauce over the finished skewers. Sprinkle generously with sesame seeds and sliced green onions. Serve immediately over steamed white or brown rice.
19. Crispy Grilled Nachos
Prep Time: 10 minutes | Cook Time: 8 minutes | Serves: 4
Loaded tortilla chips with melted cheese, jalapeños, and black beans — all crisped up on the flat griddle. Not the usual baked nachos. The griddle gives the bottom chips an extra crunch that the oven cannot match. A perfect game day snack or party appetizer.
Ingredients
- 4 oz tortilla chips
- 1 cup shredded cheddar or Mexican blend cheese
- ½ cup black beans, drained and rinsed
- ¼ cup pickled jalapeño slices
- ¼ cup diced red onion
- Cooking spray
- Sour cream, guacamole, and salsa for serving
Instructions
Set up the Cuisinart Griddler with flat griddle plates in open full griddle mode. Set to 350°F — lower than normal because the chips and toppings just need to warm and melt, not sear. Let the surface preheat fully.
Lightly spray the griddle surface with cooking spray. This prevents the chips from sticking and adds a small amount of crispness to the bottom layer. Arrange a single layer of tortilla chips across the entire griddle surface, working quickly. The chips should lay mostly flat with minimal overlap — too many layers means the bottom chips char before the cheese on top melts.
Sprinkle the shredded cheese evenly over the chips. Try to get cheese on as many chips as possible. Scatter the black beans, jalapeño slices, and diced red onion over the cheese layer.
Keep the Griddler in open mode — do not close the lid over nachos. The goal is to melt the cheese and warm the toppings from below and from the open ambient heat above, not to press or grill the top. Cook for 5 to 6 minutes. Check the edges first — if the chips around the outside look very dark, the nachos are ready. The cheese should be fully melted and bubbly.
Very carefully slide a wide spatula under the nacho layer and transfer in sections to a large serving plate. Try to keep toppings from sliding off as you transfer. Top with cold sour cream and guacamole dolloped over the center. Serve the salsa on the side for dipping. Eat immediately — nachos are best when hot and crispy right off the griddle.
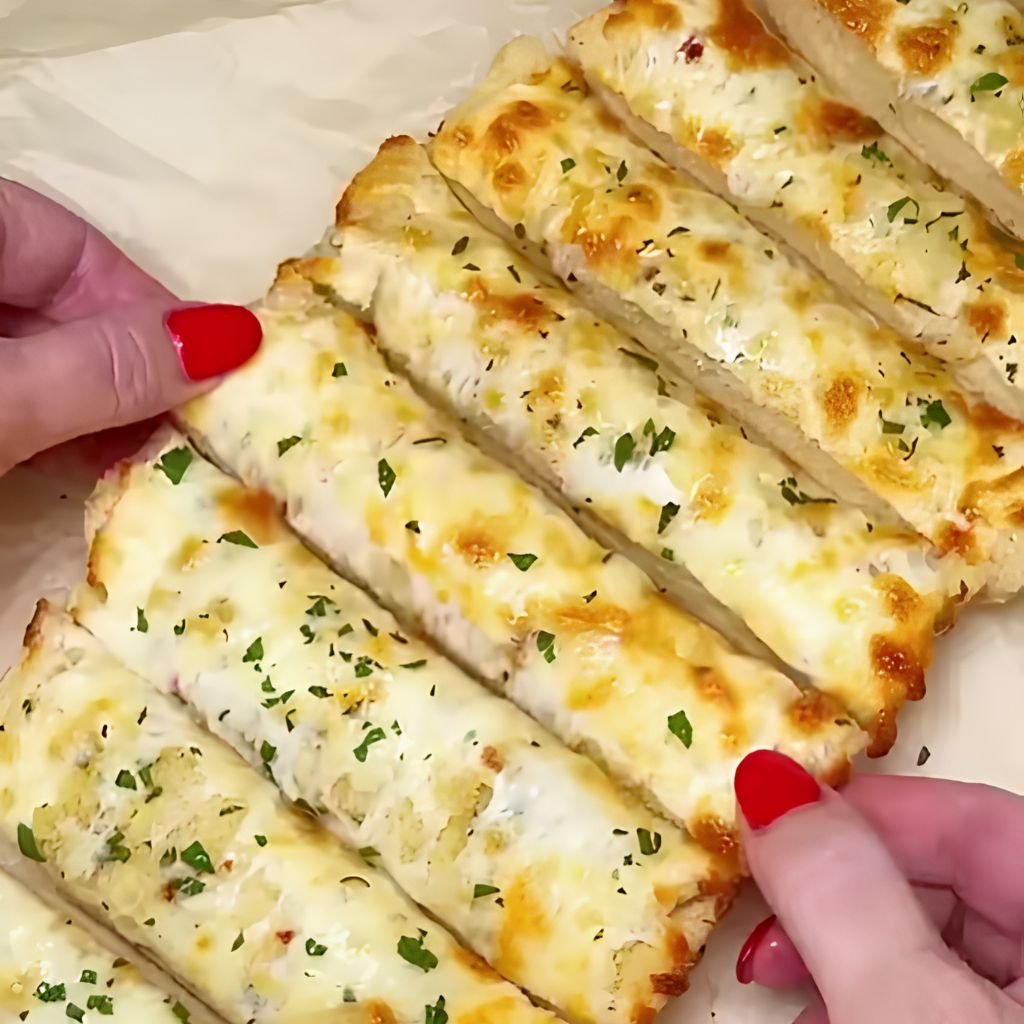
20. Garlic Breadsticks
Prep Time: 10 minutes | Cook Time: 10 minutes | Serves: 4
Soft on the inside, crispy on the outside, and loaded with garlic butter. These breadsticks come together fast using store-bought pizza dough and cook perfectly on the flat Griddler surface. A great side dish or snack with marinara dipping sauce.
Ingredients
- 1 lb store-bought pizza dough (room temperature)
- 3 tablespoons unsalted butter, melted
- 3 cloves garlic, minced
- 1 teaspoon dried parsley
- ½ teaspoon garlic powder
- ¼ cup grated Parmesan cheese
- Salt to taste
- Marinara sauce for dipping
Instructions
Take the pizza dough out of the refrigerator 30 minutes before cooking. Room-temperature dough is much easier to stretch and shape without snapping back. Dust a clean work surface lightly with flour. Place the dough on the surface and use your hands or a rolling pin to roll it out into a rough rectangle about ½ inch thick.
Using a sharp knife or pizza cutter, cut the dough into strips about 1 inch wide and 6 to 7 inches long. You should get about 12 to 14 strips from one pound of dough. Lay the strips on the floured surface and let them rest for 5 minutes.
In a small bowl, combine the melted butter, minced garlic, garlic powder, and dried parsley. Stir well. This is your garlic butter mixture.
Preheat the Cuisinart Griddler with flat griddle plates in open mode. Set to 375°F and preheat fully. Lightly brush the griddle surface with a small amount of the garlic butter to prevent sticking.
Lay the dough strips on the preheated griddle surface, spacing them about ½ inch apart so they do not merge as they expand. Brush the tops generously with the garlic butter mixture. Close the Griddler lid lightly — just enough to give them a little compression without fully pressing. Cook for 3 to 4 minutes.
Open the lid. The bottoms of the breadsticks should be golden and cooked. Use tongs to flip each breadstick carefully. Brush the newly exposed side with more garlic butter. Close the lid and cook for another 3 to 4 minutes until both sides are golden and the dough is cooked through — puffy, slightly crispy on the outside, and soft in the center.
Remove the breadsticks from the Griddler and immediately sprinkle the grated Parmesan over the hot surface so it sticks. Add a pinch of salt if needed. Serve immediately with warm marinara sauce for dipping.
21. Grilled Pizza Pockets
Prep Time: 15 minutes | Cook Time: 10 minutes | Serves: 4
Pizza flavors sealed inside a golden, pressed dough pocket. These little hand-held pizza pockets are crispy on the outside and gooey with cheese inside. A fun dinner option or after-school snack that kids and adults both enjoy.
Ingredients
- 1 lb store-bought pizza dough
- ½ cup pizza sauce
- 1 cup shredded mozzarella cheese
- ½ cup mini pepperoni slices
- 1 teaspoon Italian seasoning
- 1 tablespoon olive oil
- Flour for dusting
- Extra pizza sauce for dipping
Instructions
Let the pizza dough sit at room temperature for at least 30 minutes so it becomes soft and easy to work with. Dust your work surface with flour. Divide the dough into 8 equal portions. Roll each portion into a small round, about 5 to 6 inches in diameter and ¼ inch thick.
On one half of each dough round, spread about 1 tablespoon of pizza sauce, leaving a ½-inch border around the edge. Add a small handful of shredded mozzarella — about 2 tablespoons per pocket. Place a small amount of mini pepperoni over the cheese. Sprinkle a tiny pinch of Italian seasoning over the filling.
Fold the empty half of the dough over the filled half to create a half-moon shape. Press the edges firmly together with your fingers to seal. Then use the tines of a fork to crimp the edges all the way around — this creates a tight seal that prevents the filling from leaking out during cooking.
Preheat the Cuisinart Griddler with grill or flat plates and set to 375°F. Brush the outer surface of each pocket lightly with olive oil on both sides.
Place the pizza pockets on the Griddler and close the lid. Cook for 4 to 5 minutes. Open the lid — the outside should be golden with grill marks or a golden crust. The pocket should feel firm and no longer doughy in the center when pressed gently. If it still feels soft and raw in the middle, close the lid and cook for 1 more minute.
Remove from the Griddler and let rest for 2 minutes before serving — the filling inside gets extremely hot and needs a moment to cool slightly. Serve with warm pizza sauce on the side for dipping.
22. Cinnamon Sugar Grilled Donuts
Prep Time: 8 minutes | Cook Time: 8 minutes | Serves: 4
Store-bought biscuit dough transformed into warm, golden grilled donuts coated in cinnamon sugar. A quick and easy dessert or sweet breakfast treat that requires almost no prep. The Griddler cooks them evenly on both sides for a perfect golden crust.
Ingredients
- 1 can (16 oz) refrigerated biscuit dough (8 biscuits)
- ½ cup granulated sugar
- 1 ½ teaspoons ground cinnamon
- 3 tablespoons melted butter
- Cooking spray
Instructions
Open the can of refrigerated biscuit dough and separate all 8 biscuits. Place them on a clean surface. Use a small round cookie cutter or the wide end of a piping tip — about 1 inch in diameter — to cut a small hole in the center of each biscuit. Press straight down without twisting to get a clean cut. Set the small dough circles (the holes) aside — these make great mini donut holes. Gently stretch each ring very slightly if needed to open the center hole up a bit.
In a wide, shallow bowl, mix the granulated sugar and ground cinnamon together until evenly blended. Set aside. Melt the butter in a small bowl.
Preheat the Cuisinart Griddler with flat griddle plates in closed mode. Set to 350°F and allow to fully preheat. Lightly spray the griddle surface with cooking spray.
Place the donut rings on the lower plate. Do not overcrowd — work in batches if needed. Close the lid gently — the Griddler will apply light pressure which is fine for biscuit dough. Cook for 3 to 4 minutes. The bottoms should be deeply golden and the dough should be puffed up.
Open the lid and carefully remove the donuts with a silicone spatula. While still hot, use a pastry brush to coat both sides of each donut with the melted butter. Then immediately roll each donut in the cinnamon sugar mixture, pressing gently so the sugar sticks to the buttered surface.
Cook the donut holes the same way — they will only need about 2 to 3 minutes total. Coat them in butter and cinnamon sugar as well. Arrange all the donuts and holes on a plate. Serve warm. These are best eaten right away while the sugar coating is still slightly crispy from the heat.
23. Grilled Banana & Nutella Dessert Sandwich
Prep Time: 5 minutes | Cook Time: 6 minutes | Serves: 2
A warm, gooey dessert sandwich with creamy Nutella and caramelized banana pressed between golden brioche bread. The Griddler toasts the outside perfectly while everything inside gets warm and melty. A simple dessert that tastes incredibly indulgent.
Ingredients
- 4 slices thick brioche bread
- 4 tablespoons Nutella (or any chocolate hazelnut spread)
- 1 large ripe banana, sliced
- 1 tablespoon softened butter
- Optional: a drizzle of honey, a pinch of sea salt, powdered sugar for serving
Instructions
Preheat the Cuisinart Griddler with grill or flat plates in closed panini press mode. Set the temperature to 350°F and let it preheat fully for about 4 to 5 minutes. A slightly lower temperature works best here — the natural sugars in the banana and Nutella can burn quickly at high heat, so a moderate temperature gives you time to get even color without scorching.
While the Griddler preheats, lay out all four slices of brioche bread on your work surface. Spread a generous, even layer of Nutella on one side of each slice — go all the way to the edges. Use about 2 tablespoons per sandwich so you get a thick, rich chocolate layer in every bite. On two of the Nutella-covered slices, arrange the banana slices in a single layer. Overlap them slightly to ensure banana in every bite. If you want extra sweetness, add a thin drizzle of honey over the banana slices at this point. You can also add a tiny pinch of flaky sea salt over the banana for a sweet-salty contrast that deepens the overall flavor.
Place the remaining two Nutella-covered slices on top, Nutella side down, to form two sandwiches. Press them gently together. Butter the outer sides of each sandwich with the softened butter, covering the entire surface evenly. Buttering the outside is what gives the brioche its golden, slightly crispy exterior as it grills.
Carefully place both sandwiches on the lower plate of the preheated Griddler. Close the lid and apply gentle downward pressure. The lid should rest on the sandwiches naturally without needing to force it down. Brioche is a soft, enriched bread that compresses easily, and the goal is a golden crust — not a flat pressed sandwich.
Cook for 2.5 to 3 minutes. Peek by opening the lid slightly. The bottom should be a deep golden brown with the bread looking caramelized and slightly glossy. The Nutella will be completely melted and warm, and the banana slices will be soft and lightly caramelized from the heat. If the bread needs more color, close the lid and cook for another 30 to 60 seconds.
Remove the sandwiches carefully using a wide spatula. Let them rest on a cutting board for 1 minute — the filling gets very hot and needs just a moment to settle. Slice each sandwich diagonally to reveal the melty, chocolate-banana interior. Dust the tops lightly with powdered sugar. Serve immediately while everything is still warm and soft. A small scoop of vanilla ice cream on the side turns this into a truly special dessert.
Healthy Cooking Tips for Cuisinart Griddler Recipes
Making Cuisinart Griddler recipes healthier is easier than most people think. Here are some simple tips to keep your meals clean without losing flavor:
1. Use minimal oil. The Griddler’s non-stick plates need very little oil to prevent sticking. A light spray of cooking spray or a brush of olive oil is enough. Skip heavy butter coatings on proteins.
2. Choose lean proteins. Chicken breast, turkey, shrimp, fish fillets, and lean ground beef all work beautifully on the Griddler. These options are lower in saturated fat and still cook up juicy with the right seasoning.
3. Swap salty seasonings for herbs and spices. Instead of relying on high-sodium sauces, season with fresh garlic, lemon juice, cumin, paprika, fresh herbs like parsley or cilantro, and black pepper. These add bold flavor with no added sodium or sugar.
4. Load up on vegetables. Add grilled peppers, zucchini, mushrooms, asparagus, or spinach to any recipe. They add volume, nutrients, and color without a lot of extra calories.
5. Watch portion sizes. The Griddler makes it easy to cook exactly the amount you need. Cook one or two portions at a time to avoid overeating. Pair your protein with a large green salad or steamed vegetables to round out the meal.
6. Drain excess fat. The sloped grill plates on the Griddler channel fat and grease away from the food into a drip tray. This means burgers, sausage, and bacon naturally shed extra fat as they cook — without you having to do anything extra.
Conclusion
The Cuisinart Griddler is one of the most useful cooking tools you can own. As this collection of Cuisinart Griddler recipes shows, it handles everything from a simple morning egg to a thick ribeye steak with ease. Breakfast, lunch, dinner, snacks, and even desserts — this one machine covers it all without taking up much space or requiring a lot of cooking experience. The best part is how fast everything comes together. Most recipes are table-ready in under 30 minutes, and cleanup is as easy as wiping down the removable plates.
Making restaurant-quality meals at home is no longer something that takes special skills or a full kitchen. The Griddler handles the hard part for you. All you need are good ingredients and a little confidence, and the results will surprise you every time.
Now it is your turn. Pick a recipe from this list and give it a try. Maybe start with something simple like classic pancakes or a grilled cheese sandwich, then work your way up to the ribeye or teriyaki skewers. The more you use it, the more you will discover just how many meals it can make. Have a favorite Griddler recipe of your own? Drop it in the comments below — would love to see what you are cooking.