Making ice cream at home used to feel like a lot of work. But now, more and more people are skipping the store and making their own frozen treats right in their kitchen.
Cuisinart 1.5 Qt Ice Cream Maker Recipes are spreading fast because they give you full control over every scoop — no mystery ingredients, no artificial stuff, just real flavors made your way.
The Cuisinart 1.5 Qt Ice Cream Maker is a huge reason for this comeback. It’s small enough to fit on any counter, easy enough for beginners, and fast enough to have ice cream ready in under 30 minutes.
Homemade ice cream just tastes different — richer, fresher, and made exactly how you like it. Store-bought can’t match that.
In this guide, you’ll find 25 tested recipes that cover everything from classic vanilla to bold creative flavors. There’s something for every taste — kid-friendly picks, dairy-free options, low-sugar choices, and party-ready scoops. Each recipe is written simply so anyone can follow along, even on the first try.
Why Choose the Cuisinart 1.5 Qt Ice Cream Maker?
Before getting into the recipes, here’s a quick look at what makes this machine worth using.
1. Compact Size Perfect for Families The 1.5-quart bowl makes just the right amount for a family of four. It doesn’t take up your whole freezer or counter. It stores easily, which means it actually gets used instead of sitting in a cabinet.
2. Beginner-Friendly Ice Cream Machine No ice, no salt, no complicated steps. Freeze the bowl overnight, pour in your mixture, turn it on, and the machine does the rest. It’s that simple. Even kids can help with most of the steps.
3. Fast Churning Time for Homemade Desserts Most recipes churn in 20 to 25 minutes. That means you can mix your base in the morning and have fresh ice cream ready by afternoon. It’s much faster than most people expect.
4. Easy Cleaning and Maintenance Tips The bowl, lid, and paddle all come apart easily. Most parts can be hand-washed in warm soapy water in just a couple of minutes. The machine itself just needs a quick wipe. No heavy scrubbing needed.
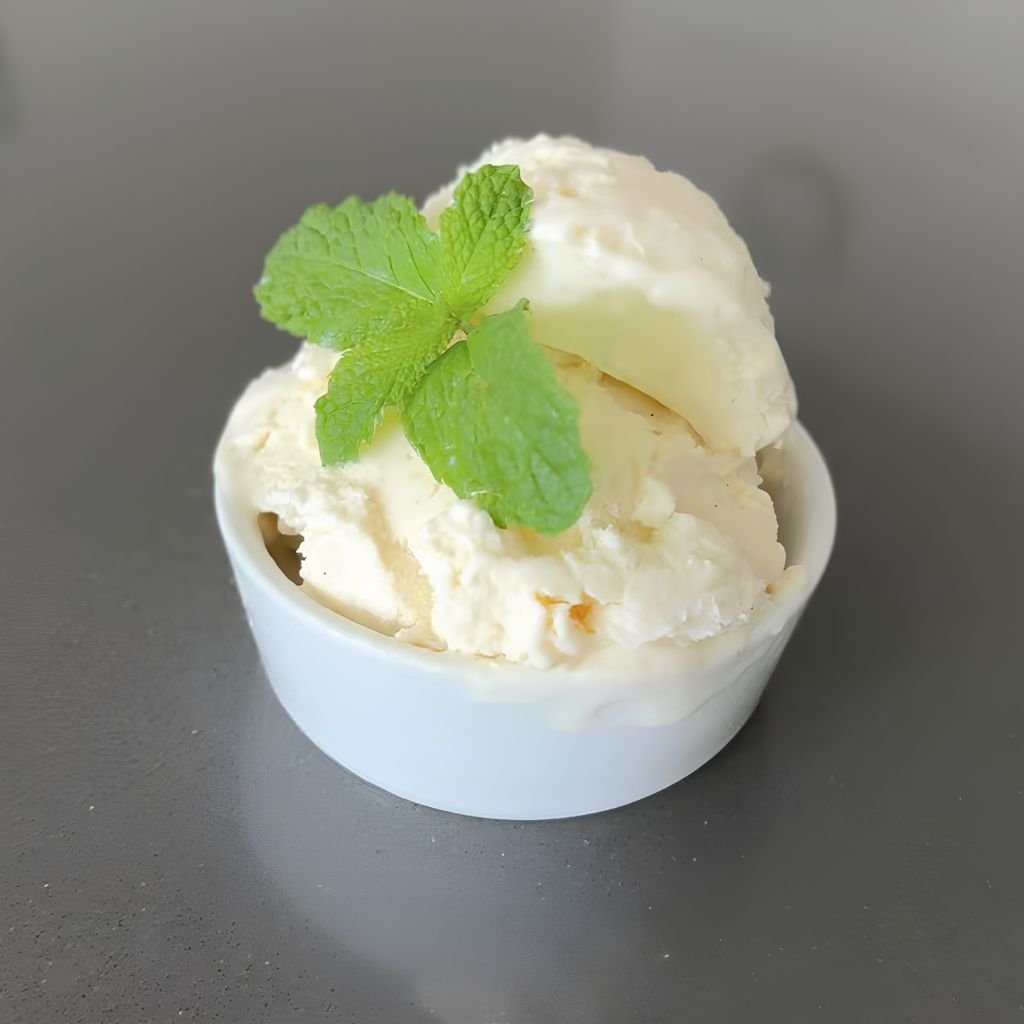
1. Classic Vanilla Bean Ice Cream
Prep Time: 15 min | Cook Time: 25 min (churn) | Serves: 4–6
A pure, creamy vanilla ice cream made with real vanilla bean — smooth, rich, and deeply satisfying. Using actual vanilla bean instead of extract makes a huge flavor difference you’ll notice in every bite.
Ingredients:
- 1 cup whole milk
- 2 cups heavy cream
- ¾ cup granulated sugar
- 2 egg yolks
- 1 whole vanilla bean (or 2 tsp pure vanilla extract)
- Pinch of salt
Instructions:
Start by preparing the vanilla bean. Lay the bean flat on a cutting board. Use a small sharp knife to slice it lengthwise down the center. Open it up and use the back of the knife blade to scrape out all the tiny black seeds inside. Set those seeds aside — they carry most of the flavor.
Pour the whole milk and heavy cream into a medium saucepan. Add the vanilla bean pod and the scraped seeds into the milk mixture. Place the pan over medium heat and warm it slowly, stirring occasionally, until you start to see small bubbles forming around the edge of the pan. You do not want it to boil — just a gentle simmer is perfect. Once it reaches that point, remove it from the heat and let it sit for 15 minutes so the vanilla can steep into the cream.
While the cream steeps, grab a medium mixing bowl and whisk together the egg yolks and sugar until the mixture turns pale yellow and looks slightly thick. This usually takes about 2 minutes of active whisking. Add a pinch of salt and mix again.
Now you need to temper the eggs so they don’t scramble. Slowly pour about half a cup of the warm cream mixture into the egg mixture, whisking constantly and quickly as you pour. Once that’s combined, pour the egg mixture back into the saucepan with the rest of the cream, still whisking.
Return the saucepan to medium-low heat. Stir the mixture constantly with a wooden spoon or silicone spatula, making sure to scrape the bottom of the pan. Cook until the custard thickens enough to coat the back of a spoon — this takes about 8 to 10 minutes. When you run your finger across the back of the coated spoon and the line holds, it’s ready.
Remove the pan from heat. Take out the vanilla bean pod and discard it. Pour the custard through a fine mesh strainer into a clean bowl to remove any cooked egg bits. Press plastic wrap directly onto the surface of the custard to prevent a skin from forming. Refrigerate for at least 4 hours, or overnight for best results.
Once the custard is fully chilled, pour it into your pre-frozen Cuisinart bowl. Churn for 20 to 25 minutes according to your machine’s instructions. The ice cream will look thick and creamy like soft-serve when it’s done. Transfer to a lidded container and freeze for at least 2 more hours before scooping for a firmer texture.
2. Old-Fashioned Chocolate Ice Cream
Prep Time: 20 min | Cook Time: 25 min (churn) | Serves: 4–6
Deep, bold, and chocolatey — the kind of chocolate ice cream that takes you back to childhood. Made with real cocoa and melted chocolate for double the richness.
Ingredients:
- 1 cup whole milk
- 2 cups heavy cream
- ¾ cup sugar
- ⅓ cup unsweetened cocoa powder
- 3 oz dark chocolate, finely chopped
- 2 egg yolks
- 1 tsp vanilla extract
- Pinch of salt
Instructions:
Begin by setting up a double boiler or using a heatproof bowl placed over a pot of simmering water. Add the chopped dark chocolate to the bowl and stir gently until it melts completely into a smooth liquid. Remove from heat and set aside to cool slightly.
In a medium saucepan, whisk together the cocoa powder and sugar until evenly combined. Slowly pour in the whole milk, whisking as you add it to avoid any lumps forming from the cocoa. Once smooth, pour in the heavy cream and add the salt. Place the pan over medium heat and warm the mixture, stirring often, until it just begins to steam and small bubbles appear at the edges. Do not let it boil.
In a separate bowl, whisk the egg yolks until they’re smooth and slightly lighter in color. To temper them, ladle a small scoop of the hot chocolate cream into the egg yolks while whisking vigorously. Repeat with another ladle, then pour the egg mixture back into the saucepan while stirring constantly.
Cook over medium-low heat, stirring the entire time, until the custard thickens to a consistency that coats the back of a spoon — about 8 to 10 minutes. Remove from heat and stir in the melted chocolate and vanilla extract. Mix until everything is fully blended and smooth.
Strain the custard through a fine mesh sieve into a clean bowl. Press plastic wrap onto the surface and chill in the refrigerator for at least 4 hours or overnight. Pour the cold mixture into your pre-frozen Cuisinart bowl and churn for 20 to 25 minutes. Scoop into a container, cover, and freeze for 2 hours before serving.
3. Strawberry Homemade Ice Cream
Prep Time: 20 min | Cook Time: 25 min (churn) | Serves: 4–6
Bright, fruity, and made with real fresh strawberries — this one tastes like summer in every scoop. No artificial dye or fake strawberry flavoring needed.
Ingredients:
- 1½ cups fresh strawberries, hulled and sliced
- ¾ cup sugar, divided
- 1 cup whole milk
- 2 cups heavy cream
- 1 tsp vanilla extract
- Pinch of salt
Instructions:
Place the sliced strawberries in a bowl and toss them with ¼ cup of the sugar. Stir to coat every piece. Cover and let the strawberries sit at room temperature for 30 minutes. During this time, the sugar pulls out the natural juices and softens the berries. The result is a thick, syrupy strawberry mixture full of concentrated flavor.
Once the strawberries have macerated, you can choose how chunky you want the final ice cream. For a smoother texture, mash the strawberries with a fork or blend them into a puree using an immersion blender. For more texture and berry pieces in every bite, just crush them lightly and leave some small chunks. Either way works great with this recipe.
In a large mixing bowl, combine the whole milk and the remaining ½ cup of sugar. Whisk together until the sugar fully dissolves into the milk — this usually takes a couple of minutes of steady stirring. Add the heavy cream, vanilla extract, and a pinch of salt. Stir everything together until well combined.
Fold in the prepared strawberry mixture, including all the juices that collected at the bottom of the bowl. Stir until evenly incorporated. Taste the mixture and adjust sweetness if needed — some strawberries are more tart than others, so you may want to add another tablespoon of sugar if yours are on the sour side.
Cover the bowl and refrigerate for at least 2 hours, or up to overnight, until the mixture is very cold. This step is important because a cold base churns more efficiently and produces creamier ice cream.
Pour the chilled mixture into your pre-frozen Cuisinart bowl and churn for 20 to 25 minutes. The ice cream will turn thick and pink as it churns. Transfer to a freezer-safe container and press a piece of plastic wrap directly on the surface before putting the lid on. Freeze for at least 2 hours before scooping.
4. Cookies and Cream Ice Cream
Prep Time: 15 min | Cook Time: 25 min (churn) | Serves: 4–6
Loaded with crushed chocolate sandwich cookies in a rich vanilla cream base. Every scoop has that satisfying crunch that cookies and cream fans love.
Ingredients:
- 1 cup whole milk
- 2 cups heavy cream
- ¾ cup sugar
- 1 tsp vanilla extract
- Pinch of salt
- 15 chocolate sandwich cookies (like Oreos), roughly crushed
Instructions:
Start by making the vanilla cream base. Pour the whole milk into a large bowl and add the sugar. Whisk vigorously for about 2 minutes until the sugar has dissolved completely and the milk no longer feels grainy when you rub a small amount between your fingers. Add the heavy cream, vanilla extract, and pinch of salt. Stir everything together until smooth and well blended.
Cover the bowl with plastic wrap and place it in the refrigerator for at least 2 hours. The base should be very cold before churning. A properly chilled base makes the churning process more effective and gives you creamier, smoother ice cream with a better texture.
While the base chills, prepare your cookies. Place the chocolate sandwich cookies in a zip-top bag. Seal it and use a rolling pin or the bottom of a heavy cup to crush them. You want a mix of fine crumbs and larger pieces — the variety of sizes gives the ice cream great texture. Some people like to leave the cookie filling intact for extra sweetness, while others scrape it out for a more purely chocolate cookie flavor. Either approach works.
Once the base is chilled, pour it into your pre-frozen Cuisinart bowl and churn for 20 to 25 minutes. Watch for the ice cream to thicken and look like soft-serve. In the last 5 minutes of churning, open the top and pour in about two-thirds of the crushed cookies. Let the machine mix them through. Once churning is complete, transfer the ice cream to a container and fold in the remaining cookie pieces by hand so you get good-sized chunks throughout.
Press plastic wrap onto the surface, seal the container, and freeze for at least 2 hours before scooping.
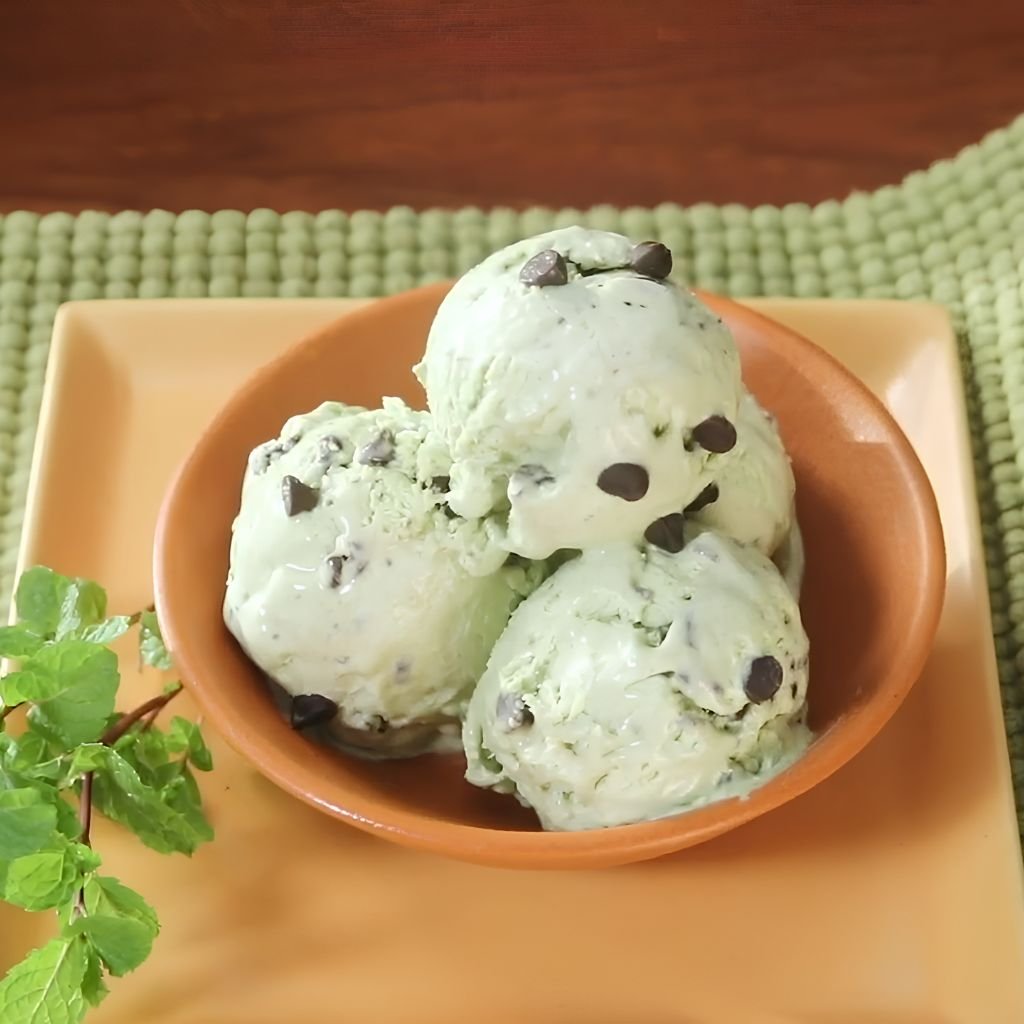
5. Mint Chocolate Chip Ice Cream
Prep Time: 15 min | Cook Time: 25 min (churn) | Serves: 4–6
Cool, refreshing mint base packed with mini chocolate chips. Made with real peppermint extract — clean, bold, and perfectly balanced.
Ingredients:
- 1 cup whole milk
- 2 cups heavy cream
- ¾ cup sugar
- 1 tsp peppermint extract
- ½ tsp vanilla extract
- Pinch of salt
- ½ cup mini chocolate chips
- A few drops green food coloring (optional)
Instructions:
In a large mixing bowl, combine the whole milk and sugar. Whisk until the sugar completely dissolves, about 2 minutes. Pour in the heavy cream, peppermint extract, vanilla extract, and a pinch of salt. Stir everything together until blended.
Taste the mixture at this point. Peppermint extract can be strong, so start with 1 teaspoon and adjust to your preference. If you want a stronger mint flavor, add another quarter teaspoon. If you’re serving kids or people who prefer mild mint, the base amount is just right.
Add a few drops of green food coloring to the mixture and stir well if you want the classic green color. This is entirely optional and doesn’t affect the taste at all, but it gives the finished ice cream that familiar mint look that many people love.
Cover the bowl and refrigerate for at least 2 hours or overnight until completely cold. Pour the chilled base into your pre-frozen Cuisinart bowl and start churning. Let the machine run for 15 to 20 minutes before adding the chocolate chips. Adding them too early can cause them to sink to the bottom rather than distributing evenly.
With about 5 minutes left in the churn cycle, pour the mini chocolate chips in through the top opening. The chips will get coated and distributed throughout the ice cream as the paddle continues to turn. When the ice cream looks thick and creamy like soft-serve, stop the machine.
Transfer to a freezer-safe container. Press a layer of plastic wrap directly on the ice cream surface to prevent ice crystals from forming. Seal with the lid and freeze for 2 to 3 hours before serving. Scoop with a warm ice cream scoop for best results.
6. Mango Ice Cream
Prep Time: 15 min | Cook Time: 25 min (churn) | Serves: 4–6
Tropical, sweet, and naturally vibrant — made with ripe mango puree that gives this ice cream its bright golden color and bold fruity flavor.
Ingredients:
- 2 cups fresh or frozen mango chunks (thawed if frozen)
- 1 cup heavy cream
- ½ cup whole milk
- ½ cup sugar
- 1 tbsp fresh lime juice
- Pinch of salt
Instructions:
Start with the mango. Fresh ripe mangoes work best for the brightest flavor. Cut the mango flesh away from the pit and scoop it from the skin. You need about 2 cups of mango chunks. Frozen mango works well too — just thaw it completely and drain off any excess liquid before using.
Place the mango chunks into a blender or food processor. Blend on high until you have a completely smooth, lump-free puree. This usually takes about 30 to 45 seconds. Stop and scrape down the sides midway through to make sure every piece gets fully blended. Once smooth, pour the mango puree into a large mixing bowl.
Add the sugar to the mango puree and stir well. The sugar will dissolve into the mango juice as you stir. Add the whole milk, heavy cream, fresh lime juice, and pinch of salt. Stir everything together until the mixture is smooth and all the ingredients are fully combined.
The lime juice is important here — it brightens the mango flavor and adds just a hint of tartness that balances the sweetness. Taste the mixture and adjust if needed. If your mangoes are very sweet, the lime juice also helps cut through the richness.
Cover the bowl and refrigerate for at least 2 hours until very cold. Pour the mixture into your pre-frozen Cuisinart bowl and churn for 20 to 25 minutes. The ice cream will turn thick and a beautiful golden yellow color as it churns.
Scoop into a lidded container and freeze for 2 hours for a firmer scoop-ready texture.
7. Blueberry Cheesecake Ice Cream
Prep Time: 20 min | Cook Time: 25 min (churn) | Serves: 4–6
Creamy cheesecake-flavored ice cream swirled with fresh blueberry sauce and chunks of graham cracker. Rich, tangy, and layered with real fruity flavor.
Ingredients:
- 4 oz cream cheese, softened
- 1 cup whole milk
- 1½ cups heavy cream
- ¾ cup sugar
- 1 tsp vanilla extract
- 1 tbsp lemon juice
- Pinch of salt
For the blueberry swirl:
- 1 cup fresh or frozen blueberries
- 3 tbsp sugar
- 1 tsp lemon juice
For topping:
- ½ cup crushed graham crackers
Instructions:
Make the blueberry sauce first so it has time to cool. Combine the blueberries, 3 tablespoons of sugar, and 1 teaspoon of lemon juice in a small saucepan over medium heat. Stir gently and cook until the blueberries begin to burst and the mixture thickens into a sauce, about 8 to 10 minutes. Remove from heat, let it cool to room temperature, then refrigerate until cold.
For the cheesecake base, beat the softened cream cheese in a mixing bowl until completely smooth with no lumps. This step is crucial — cold or lumpy cream cheese will give you uneven texture in the finished ice cream. Add the sugar and continue beating until the mixture is light and fluffy.
Slowly pour in the whole milk while mixing on low speed. Once the milk is incorporated, add the heavy cream, vanilla extract, lemon juice, and salt. Mix until everything is fully combined and the base is completely smooth.
Refrigerate the base for at least 2 hours. Pour the cold base into your pre-frozen Cuisinart bowl and churn for 20 to 25 minutes. When churning is done, spoon the ice cream into a container in alternating layers with spoonfuls of cold blueberry sauce and crushed graham crackers. Use a knife or skewer to create light swirl patterns. Do not over-mix — you want ribbons of blueberry visible throughout. Freeze for 2 to 3 hours before scooping.
8. Pineapple Coconut Ice Cream
Prep Time: 15 min | Cook Time: 25 min (churn) | Serves: 4–6
A creamy tropical combination of sweet pineapple and rich coconut — like a frozen piña colada in every scoop.
Ingredients:
- 1 cup crushed pineapple, drained (canned or fresh)
- 1 can (13.5 oz) full-fat coconut milk
- 1 cup heavy cream
- ½ cup sugar
- 1 tsp vanilla extract
- Pinch of salt
Instructions:
Drain the crushed pineapple well by pressing it through a fine strainer. You want as little excess liquid as possible so it doesn’t water down the cream base. Set the drained pineapple aside.
Shake the can of coconut milk well before opening. Pour it into a large mixing bowl. Add the heavy cream, sugar, vanilla extract, and salt. Whisk everything together until the sugar dissolves and the mixture is smooth. It should smell wonderfully tropical at this point.
Fold in the drained crushed pineapple and stir gently to distribute the fruit evenly throughout the mixture. Taste it — it should be sweet, creamy, and slightly tropical. Add more sugar if your pineapple is on the tart side.
Cover and refrigerate the mixture for at least 2 hours. Cold temperatures help the coconut fat integrate into the cream properly, which makes for a richer and smoother churned result.
Pour the chilled mixture into your pre-frozen Cuisinart bowl. Churn for 20 to 25 minutes. The coconut fat will help this ice cream become very creamy with a texture that’s almost velvety. Transfer to a container and freeze for 2 hours before serving. Garnish with toasted coconut flakes for an extra tropical touch.
9. Peach Ice Cream
Prep Time: 20 min | Cook Time: 25 min (churn) | Serves: 4–6
Sweet summer peaches blended into a light and creamy base — soft, fragrant, and full of real fruit flavor.
Ingredients:
- 1½ cups fresh ripe peaches, peeled and diced
- ¾ cup sugar, divided
- 1 cup whole milk
- 2 cups heavy cream
- 1 tsp vanilla extract
- 1 tsp fresh lemon juice
- Pinch of salt
Instructions:
Peel the peaches by scoring an X on the bottom of each one with a knife, then dropping them into boiling water for 30 seconds. Transfer to a bowl of ice water. The skin will slip off easily. Remove the pit and dice the peach flesh into small chunks.
Place the diced peaches in a bowl and toss with ¼ cup of the sugar and the lemon juice. Let the peaches macerate for 20 to 30 minutes at room temperature. The sugar draws out the natural juices and softens the fruit beautifully. After the resting time, use a fork to mash the peaches to your desired consistency — fully smooth or with small chunks for texture.
In a large bowl, whisk the remaining ½ cup of sugar into the whole milk until dissolved. Add the heavy cream, vanilla extract, and salt. Stir until combined. Fold in the mashed peach mixture along with all the accumulated juices.
Refrigerate for at least 2 hours. Pour into your pre-frozen Cuisinart bowl and churn 20 to 25 minutes. The ice cream will take on a beautiful peachy hue as it thickens. Transfer to a container and freeze at least 2 hours. Let it sit at room temperature for a few minutes before scooping so it softens just slightly for the best texture.
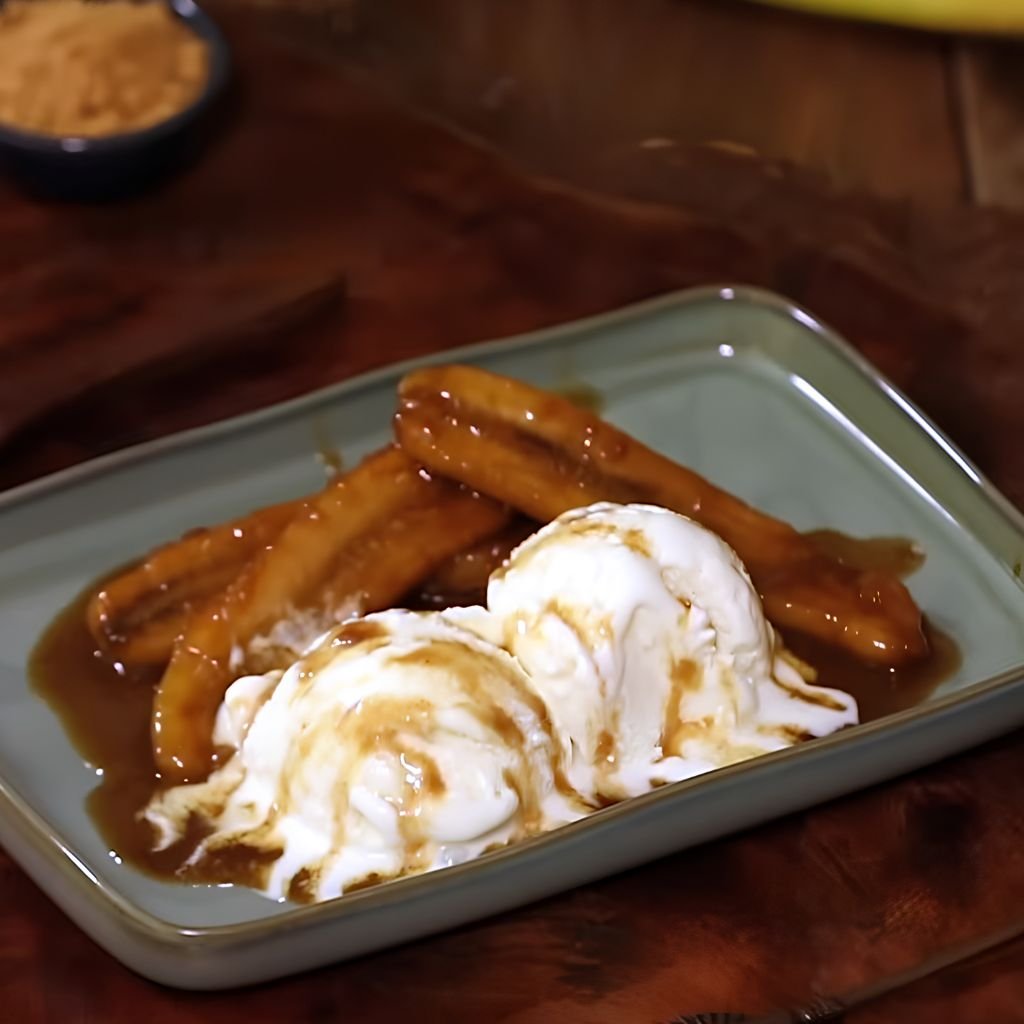
10. Banana Caramel Ice Cream
Prep Time: 20 min | Cook Time: 25 min (churn) | Serves: 4–6
Very ripe bananas and buttery caramel come together in this ultra-creamy, indulgent ice cream that’s as comforting as banana pudding.
Ingredients:
- 2 very ripe bananas, mashed
- 1 cup whole milk
- 2 cups heavy cream
- ½ cup sugar
- ½ cup caramel sauce (store-bought or homemade), plus more for swirling
- 1 tsp vanilla extract
- Pinch of salt
Instructions:
Mash the ripe bananas thoroughly in a bowl with a fork until they’re completely smooth. The riper the banana, the sweeter and more flavorful it will be. Bananas with lots of brown spots on the skin are perfect for this recipe.
In a large mixing bowl, whisk the whole milk and sugar together until the sugar fully dissolves. Add the heavy cream, vanilla extract, and salt. Stir until everything is combined. Pour in the ½ cup of caramel sauce and whisk until fully blended with the cream mixture. The caramel will make the base smell amazing.
Fold the mashed bananas into the cream mixture. Stir thoroughly to make sure the banana is evenly distributed throughout the base. Taste the mixture — it should be sweet, creamy, and have a good balance of banana and caramel flavor. Adjust with a little more caramel sauce or a pinch of salt if needed.
Refrigerate for at least 2 hours. Pour the cold base into your pre-frozen Cuisinart bowl and churn for 20 to 25 minutes. Once the ice cream is thickened and ready, scoop it into a container in layers, drizzling extra caramel sauce between each layer. Use a skewer to create a light swirl pattern. Freeze for 2 to 3 hours. The caramel swirl will firm up beautifully in the freezer.
11. Salted Caramel Ice Cream
Prep Time: 25 min | Cook Time: 25 min (churn) | Serves: 4–6
Sweet, buttery caramel balanced with just the right amount of sea salt — one of the most popular flavors for a very good reason.
Ingredients:
- 1 cup granulated sugar
- 2 tbsp unsalted butter
- 1½ cups heavy cream, warmed
- 1 cup whole milk
- 3 egg yolks
- 1 tsp vanilla extract
- 1 tsp flaky sea salt, plus more to taste
Instructions:
Make the caramel first. Pour the granulated sugar into a heavy-bottomed saucepan in an even layer. Cook over medium heat without stirring, just swirling the pan occasionally, until the sugar melts and turns a deep amber color. This takes 8 to 10 minutes. Watch it carefully — caramel can go from perfect to burnt very quickly.
Once the sugar reaches a deep amber color, remove the pan from heat and immediately add the butter. It will bubble up dramatically — this is normal. Stir until the butter fully melts and incorporates. Then slowly pour in the warmed heavy cream while stirring constantly. The mixture will bubble again. Return it to low heat and stir until smooth and fully combined. Add the sea salt and stir. Set the caramel aside to cool for 10 minutes.
In a bowl, whisk the egg yolks until lightened. Slowly pour the warm caramel into the yolks while whisking constantly to temper them. Pour the combined mixture back into the saucepan along with the whole milk. Cook over medium-low heat, stirring constantly, until the custard thickens and coats the back of a spoon, about 8 to 10 minutes.
Stir in the vanilla extract. Strain through a fine mesh sieve into a clean bowl. Taste and add more sea salt if desired. Refrigerate for at least 4 hours or overnight. Churn in your pre-frozen Cuisinart bowl for 20 to 25 minutes. Freeze for 2 hours. Sprinkle extra flaky sea salt on each scoop before serving.
12. Brownie Batter Ice Cream
Prep Time: 20 min | Cook Time: 25 min (churn) | Serves: 4–6
Dense, fudgy brownie batter flavor in a creamy ice cream base — loaded with chocolate chips and brownie pieces for serious chocolate lovers.
Ingredients:
- 1 cup whole milk
- 2 cups heavy cream
- ½ cup sugar
- ⅓ cup cocoa powder
- 2 tbsp all-purpose flour
- 2 tbsp butter, melted
- 1 tsp vanilla extract
- Pinch of salt
- ½ cup mini chocolate chips
- ½ cup brownie pieces (optional, from a baked brownie)
Instructions:
In a saucepan over medium-low heat, combine the cocoa powder, flour, and sugar. Whisk together until evenly blended. Slowly pour in the whole milk, whisking continuously to keep the mixture smooth and lump-free. The flour gives this base a slightly thicker, denser quality that mimics actual brownie batter.
Add the melted butter and stir until fully combined. Continue heating the mixture, stirring constantly, until it warms through and just begins to thicken slightly — about 5 to 7 minutes. Do not boil. Remove from heat and let the mixture cool to room temperature.
Once cooled, pour in the heavy cream, vanilla extract, and salt. Stir until fully blended. Refrigerate for at least 2 hours until very cold.
Pour the chilled base into your pre-frozen Cuisinart bowl and churn for 20 to 25 minutes. With about 3 to 4 minutes left in the churn, add the mini chocolate chips through the opening. Once churning is complete, fold in the brownie pieces gently by hand using a spatula — this keeps them from getting crushed. Transfer to a container and freeze for 2 hours. Every scoop will have pockets of fudgy brownie and chocolate chips throughout.
13. Peanut Butter Cup Ice Cream
Prep Time: 15 min | Cook Time: 25 min (churn) | Serves: 4–6
Creamy peanut butter ice cream packed with chopped peanut butter cups — a dream flavor for anyone who loves that sweet and salty combination.
Ingredients:
- 1 cup whole milk
- 2 cups heavy cream
- ¾ cup sugar
- ½ cup creamy peanut butter
- 1 tsp vanilla extract
- Pinch of salt
- 6 to 8 miniature peanut butter cups, chopped and frozen
Instructions:
Place the chopped peanut butter cup pieces in the freezer before you start. Frozen candy pieces keep their shape and texture much better when folded into ice cream. Room-temperature pieces can become soft and mushy during churning.
In a large mixing bowl, whisk the sugar into the whole milk until fully dissolved. Add the peanut butter and stir vigorously. Peanut butter can be stubborn to blend into cold liquid — a whisk works better than a spoon here. Keep stirring until the peanut butter is fully dissolved and the mixture looks smooth and uniform in color.
Pour in the heavy cream, vanilla extract, and salt. Stir together until the whole mixture is combined and smooth. Taste it — it should have a clear peanut butter flavor with good sweetness and a slight saltiness from the peanut butter itself.
Refrigerate for 2 hours. Pour into your pre-frozen Cuisinart bowl and churn for 20 to 25 minutes. The peanut butter base will churn into a beautifully thick and creamy ice cream. Once churning is done, quickly fold in the frozen peanut butter cup pieces using a spatula before transferring to a container. Freeze for 2 to 3 hours. The pieces will stay distinct and give you a great texture contrast in every scoop.
14. Espresso Coffee Ice Cream
Prep Time: 15 min | Cook Time: 25 min (churn) | Serves: 4–6
Bold espresso flavor in a rich, velvety cream base — deep, aromatic, and absolutely perfect for coffee lovers.
Ingredients:
- 1 cup whole milk
- 2 cups heavy cream
- ¾ cup sugar
- 3 tbsp instant espresso powder
- 1 tsp vanilla extract
- Pinch of salt
- 2 egg yolks (optional, for a richer custard-style base)
Instructions:
In a medium saucepan, combine the whole milk, sugar, and instant espresso powder. Whisk over medium heat until the sugar and espresso fully dissolve and the mixture is steaming and slightly fragrant — about 5 minutes. Do not let it boil. The espresso powder will dissolve completely into the warm milk, filling your kitchen with a wonderful coffee aroma.
If using egg yolks for a richer base: whisk the yolks in a bowl, then slowly pour a small amount of the hot espresso milk into the yolks while whisking quickly to temper them. Pour the tempered yolk mixture back into the saucepan and cook over medium-low heat, stirring constantly, until the custard thickens enough to coat the back of a spoon — about 8 minutes.
Remove from heat and pour in the heavy cream, vanilla extract, and salt. Stir until combined. Strain through a fine mesh strainer into a clean bowl. Let it cool to room temperature, then refrigerate for at least 4 hours or overnight.
Pour the cold espresso base into your pre-frozen Cuisinart bowl. Churn for 20 to 25 minutes. The finished ice cream will be a beautiful deep coffee brown with a dense, creamy texture. Transfer to a container and freeze for 2 hours before scooping. Serve with a sprinkle of cocoa powder or chocolate shavings for an elegant finishing touch.
15. Nutella Swirl Ice Cream
Prep Time: 15 min | Cook Time: 25 min (churn) | Serves: 4–6
Creamy vanilla ice cream with ribbons of warm Nutella swirled throughout — chocolatey, hazelnutty, and completely irresistible.

Ingredients:
- 1 cup whole milk
- 2 cups heavy cream
- ¾ cup sugar
- 1 tsp vanilla extract
- Pinch of salt
- ½ cup Nutella, slightly warmed for swirling
Instructions:
Make the vanilla ice cream base by whisking the sugar into the whole milk until fully dissolved. Add the heavy cream, vanilla extract, and salt. Stir until smooth and combined. Refrigerate for at least 2 hours until the base is completely cold.
Warm the Nutella slightly before you’re ready to assemble. Place it in a microwave-safe bowl and heat in 10-second bursts, stirring in between, until it becomes pourable and just slightly runny. Be careful not to overheat it — you just want it loose enough to drizzle, not hot.
Pour the chilled base into your pre-frozen Cuisinart bowl and churn for 20 to 25 minutes until thick and creamy. Once the churning is complete, work quickly to assemble the ice cream before it begins to melt.
Spoon a thin layer of the churned ice cream into the bottom of your storage container. Drizzle a generous ribbon of the warm Nutella over the top. Add another layer of ice cream, then another drizzle of Nutella. Repeat until all the ice cream and Nutella are used. Use a butter knife or skewer to gently swirl through the layers — just a few passes to create ribbons, not to fully mix. Over-swirling will muddy the layers.
Press plastic wrap onto the surface, seal the lid, and freeze for at least 3 hours so the swirls firm up into distinct ribbons throughout every scoop.
16. Greek Yogurt Honey Ice Cream
Prep Time: 10 min | Cook Time: 25 min (churn) | Serves: 4–6
Tangy Greek yogurt meets natural honey in this lighter, protein-rich frozen treat that’s refreshing and satisfying without feeling heavy.
Ingredients:
- 2 cups full-fat Greek yogurt
- 1 cup heavy cream
- ½ cup raw honey
- 1 tsp vanilla extract
- Pinch of salt
Instructions:
In a large mixing bowl, add the full-fat Greek yogurt. Full-fat is important here — it gives the ice cream a much creamier texture and helps prevent it from becoming icy. Spoon the honey into the yogurt and stir vigorously to combine. The honey will slowly incorporate as you stir, eventually creating a smooth, golden-tinged mixture.
Add the heavy cream, vanilla extract, and salt. Whisk together until the mixture is completely smooth and all the ingredients are evenly blended. Taste it at this stage — the flavor should be tangy from the yogurt, sweet from the honey, and fragrant from the vanilla. Adjust the honey level if you want it sweeter.
Refrigerate the mixture for at least 1 hour. It doesn’t need as much chilling time as a custard base, but it should still be cold before churning.
Pour the cold yogurt mixture into your pre-frozen Cuisinart bowl and churn for 20 to 25 minutes. Because Greek yogurt has a high protein content, this ice cream will churn into a slightly denser, tangier result than a traditional cream base. That’s exactly what makes it great.
Transfer to a container and freeze for 2 hours. Before scooping, let it sit at room temperature for 3 to 5 minutes to soften slightly, as the yogurt base can freeze a little firmer than cream-only ice cream. Drizzle with additional honey before serving for a beautiful finish.
17. Keto Vanilla Ice Cream
Prep Time: 10 min | Cook Time: 25 min (churn) | Serves: 4–6
A rich, full-fat keto-friendly vanilla ice cream with zero sugar — sweet, creamy, and totally satisfying without the carbs.
Ingredients:
- 2 cups heavy cream
- ½ cup unsweetened almond milk
- ½ cup powdered erythritol or monk fruit sweetener
- 1 tsp vanilla extract
- Pinch of salt
Instructions:
In a large bowl, combine the heavy cream and unsweetened almond milk. Add the powdered erythritol or monk fruit sweetener. It’s important to use powdered rather than granular sweetener for this recipe — granular erythritol doesn’t dissolve as well in cold cream and can leave a slightly gritty texture in the finished ice cream.
Whisk the mixture vigorously until the sweetener is fully dissolved and the cream mixture is smooth. Add the vanilla extract and salt and stir again. Taste the base to check sweetness. Keto sweeteners vary in intensity, so adjust to your preference. Some people prefer a slightly less sweet base since the cream already has a natural richness.
Refrigerate for at least 2 hours. The cream should be cold and the sweetener should stay dissolved throughout.
Pour into your pre-frozen Cuisinart bowl and churn for 20 to 25 minutes. This high-cream, low-water base churns beautifully and produces a rich, dense, very creamy ice cream. Because there’s no sugar to lower the freezing point, the finished ice cream may freeze slightly firmer than traditional versions.
Transfer to a container and freeze for 1 to 2 hours. Remove from the freezer about 5 minutes before scooping to let it soften to the perfect consistency. Store for up to 2 weeks.
18. Dairy-Free Coconut Milk Ice Cream
Prep Time: 10 min | Cook Time: 25 min (churn) | Serves: 4–6
A lusciously creamy dairy-free ice cream made entirely with coconut milk — perfect for those with lactose intolerance or a preference for plant-based desserts.
Ingredients:
- 2 cans (13.5 oz each) full-fat coconut milk
- ½ cup sugar or maple syrup
- 1 tsp vanilla extract
- Pinch of salt
Instructions:
Refrigerate the cans of coconut milk overnight. This is a very important step. When coconut milk is chilled, the thick cream separates and rises to the top. Open the cans carefully without shaking and scoop out just the thick white coconut cream layer from the top into a large mixing bowl. Reserve the coconut water at the bottom for another use (smoothies, cooking, etc.).
Add the sugar or maple syrup to the coconut cream. Whisk vigorously until the sweetener dissolves and the mixture is smooth. Maple syrup adds a slightly warm, earthy sweetness that pairs wonderfully with coconut, while regular sugar lets the pure coconut flavor shine through.
Add the vanilla extract and salt. Stir to combine. Taste the base and adjust the sweetener as needed. Because coconut has its own natural sweetness, you may find that slightly less sweetener is needed.
Refrigerate the mixture for at least 2 hours to ensure it’s fully cold before churning. Pour into your pre-frozen Cuisinart bowl and churn for 20 to 25 minutes. The coconut cream base will produce a velvety, rich ice cream that tastes indulgent despite containing no dairy.
Transfer to a container immediately and freeze for at least 2 to 3 hours. Dairy-free coconut ice cream firms up quickly in the freezer, so let it sit at room temperature for 5 to 8 minutes before scooping for the best texture.
19. Low-Sugar Berry Ice Cream
Prep Time: 15 min | Cook Time: 25 min (churn) | Serves: 4–6
A lighter, naturally sweet berry ice cream made with mixed berries and just a touch of sweetener — bright, fruity, and guilt-free.
Ingredients:
- 1½ cups mixed berries (strawberries, blueberries, raspberries), fresh or frozen
- 1 cup whole milk
- 1½ cups heavy cream
- ¼ cup honey or maple syrup
- 1 tsp lemon juice
- 1 tsp vanilla extract
- Pinch of salt
Instructions:
If using frozen berries, thaw them completely and drain off excess liquid. Place the berries in a blender and add the lemon juice. Blend until completely smooth. For an extra-smooth result, press the puree through a fine mesh strainer to remove seeds — this is especially helpful with raspberries, which have many small seeds.
In a large mixing bowl, combine the whole milk, heavy cream, honey or maple syrup, vanilla extract, and salt. Whisk until the sweetener is fully dissolved into the cream mixture. Pour in the berry puree and stir everything together until well blended.
Taste the mixture. Natural sweeteners like honey and maple syrup have a complex flavor that complements the berries beautifully, but if you prefer it slightly sweeter, add a small amount more. Keep in mind the flavor will mellow slightly once frozen.
Refrigerate the berry cream mixture for at least 2 hours. Pour into your pre-frozen Cuisinart bowl and churn for 20 to 25 minutes. The finished ice cream will be a gorgeous deep pink or purple color, depending on which berries you used. The texture will be light and creamy with a naturally fruity flavor in every bite.
Transfer to a container and freeze for 2 hours. Serve topped with a few fresh berries for a beautiful and fresh-looking presentation.
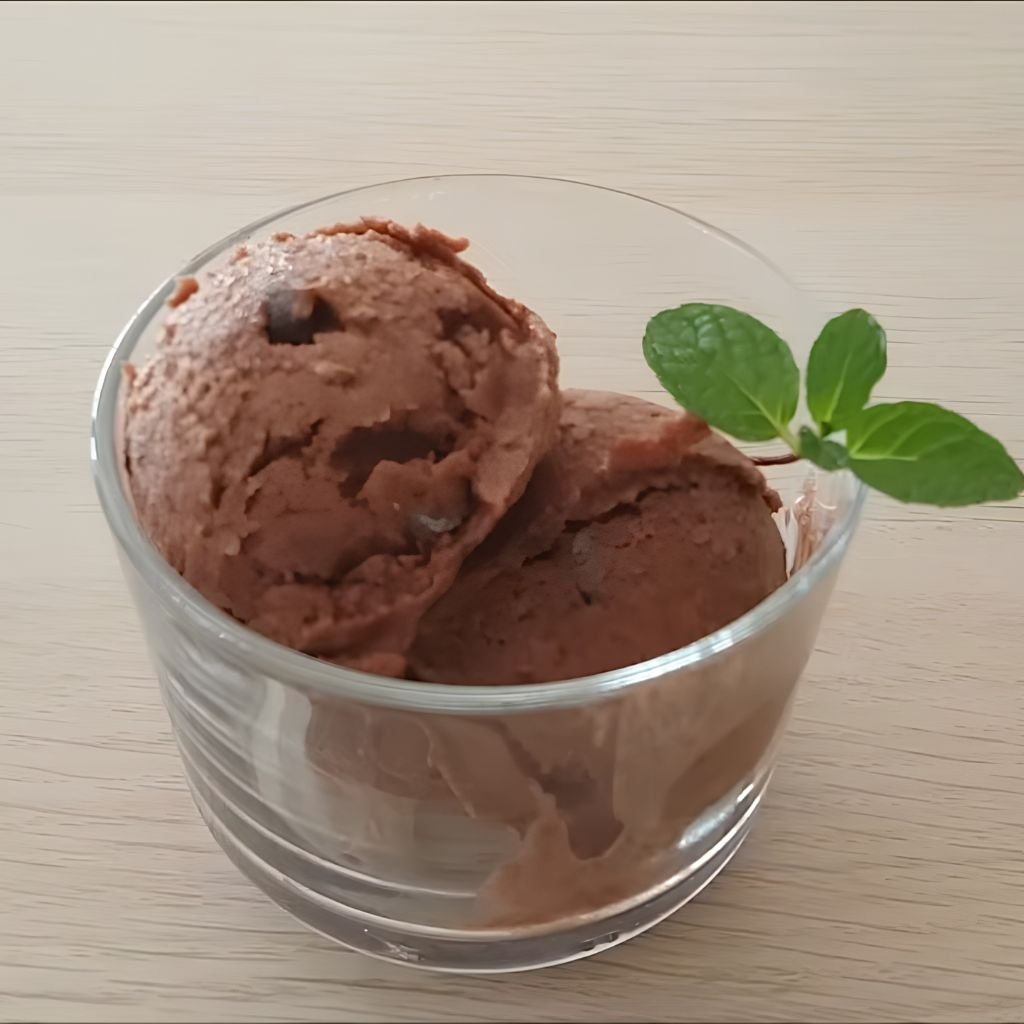
20. Vegan Chocolate Banana Ice Cream
Prep Time: 10 min | Cook Time: 25 min (churn) | Serves: 4
Rich, chocolatey, and completely plant-based — made with bananas and cocoa for a naturally sweet frozen dessert that needs no dairy at all.
Ingredients:
- 3 very ripe bananas, sliced and frozen
- 1 can (13.5 oz) full-fat coconut milk
- 3 tbsp unsweetened cocoa powder
- 2 tbsp maple syrup
- 1 tsp vanilla extract
- Pinch of salt
Instructions:
The most important ingredient here is the frozen banana. Peel the bananas, slice them into rounds, and freeze them for at least 4 hours or overnight in a single layer on a baking sheet before placing them in a bag. Frozen bananas are the key to getting a creamy, smooth, naturally sweet base without any added cream.
Once the bananas are fully frozen, place them in a blender or food processor. Add the full-fat coconut milk, cocoa powder, maple syrup, vanilla extract, and salt. Blend on high until the mixture is completely smooth. Scrape down the sides as needed. The blended mixture should look thick, dark, and chocolatey with no visible banana chunks.
Taste the mixture. The banana provides natural sweetness, and the cocoa adds depth and bitterness. If it needs more sweetness, add another tablespoon of maple syrup. For a richer chocolate flavor, add another teaspoon of cocoa powder.
Refrigerate the mixture for at least 1 hour if it’s warmed during blending, or pour it directly into your pre-frozen Cuisinart bowl if it’s still cold. Churn for 20 to 25 minutes. This mixture churns into a thick, fudgy, velvety ice cream that’s surprisingly rich for something made entirely from plants.
Transfer to a container and freeze for at least 2 hours. Let it soften slightly before scooping. Serve with fresh banana slices or a drizzle of coconut cream.
21. Cotton Candy Ice Cream
Prep Time: 10 min | Cook Time: 25 min (churn) | Serves: 4–6
Whimsical, pastel-colored, and sweetly nostalgic — this cotton candy ice cream brings all the fun of the fairground into a creamy frozen scoop.
Ingredients:
- 1 cup whole milk
- 2 cups heavy cream
- ¾ cup sugar
- 1 tsp cotton candy flavoring
- Pink and blue food coloring
- Pinch of salt
Instructions:
In a large mixing bowl, whisk the sugar into the whole milk until it dissolves completely. Pour in the heavy cream and add the salt. Stir until combined. Add the cotton candy flavoring — start with 1 teaspoon, then taste and add more if you want a stronger, more pronounced cotton candy flavor. The flavoring is quite concentrated, so a little goes a long way.
Divide the base evenly between two smaller bowls. Add a few drops of pink food coloring to one bowl and blue to the other. Stir each bowl until the color is uniform. Refrigerate both bowls for at least 2 hours until cold.
When ready to churn, pour the pink base into your pre-frozen Cuisinart bowl first. Let it churn for about 10 minutes until it begins to thicken. Then carefully pour the blue base on top and let the machine continue churning for another 10 to 15 minutes. The two colors will partially blend at the edges while still maintaining separate swirls — giving you that signature pastel cotton candy look.
Transfer quickly to a container, working in light swooping motions with your spoon to preserve the two-toned look. Freeze for 2 to 3 hours. When you scoop it, you’ll get beautiful pink and blue swirls in every bowl. Garnish with actual cotton candy pieces right before serving for a magical presentation.
22. Birthday Cake Ice Cream
Prep Time: 15 min | Cook Time: 25 min (churn) | Serves: 4–6
Vanilla birthday cake flavor loaded with rainbow sprinkles and cake pieces — festive, sweet, and guaranteed to make anyone smile.
Ingredients:
- 1 cup whole milk
- 2 cups heavy cream
- ¾ cup sugar
- 1½ tsp vanilla extract
- ½ tsp almond extract
- Pinch of salt
- ½ cup rainbow sprinkles (jimmies, not nonpareils)
- ½ cup vanilla cake pieces (from a small baked cake or store-bought)
Instructions:
In a large mixing bowl, whisk together the whole milk and sugar until the sugar is fully dissolved. Add the heavy cream, vanilla extract, almond extract, and salt. The almond extract is what gives this ice cream that distinctive birthday cake flavor — it’s a small amount but makes a big difference. Stir everything until fully blended.
Refrigerate the base for at least 2 hours until completely cold. Prepare the mix-ins: break the vanilla cake into small irregular pieces no bigger than a grape. Freeze the cake pieces in a single layer on a small plate for 30 minutes before using — frozen cake pieces hold their shape better during folding and don’t dissolve into the ice cream.
Use sprinkle jimmies rather than round nonpareils. Nonpareils bleed their color quickly into the cream, turning the whole batch gray. Jimmies hold their color better and give you prettier results.
Pour the chilled base into your pre-frozen Cuisinart bowl and churn for 20 to 25 minutes. Once the ice cream is ready, transfer half to a container. Scatter half the sprinkles and half the frozen cake pieces over the top. Add the rest of the ice cream, then the remaining sprinkles and cake pieces. Fold gently two or three times — just enough to distribute the mix-ins without breaking them down. Freeze for 2 to 3 hours and serve on a festive cone for full celebration mode.
23. Cinnamon Roll Ice Cream
Prep Time: 20 min | Cook Time: 25 min (churn) | Serves: 4–6
Warm cinnamon spice swirled through a creamy vanilla base with ribbons of brown sugar — tastes exactly like a fresh cinnamon roll in frozen form.
Ingredients:
- 1 cup whole milk
- 2 cups heavy cream
- ¾ cup sugar
- 1½ tsp ground cinnamon
- 1 tsp vanilla extract
- Pinch of salt
For the cinnamon swirl:
- 3 tbsp butter, melted
- ¼ cup brown sugar
- 1 tsp cinnamon
Instructions:
Start with the cinnamon swirl sauce. Mix the melted butter, brown sugar, and cinnamon together in a small bowl until you have a thick, paste-like mixture. Let it cool to room temperature, then refrigerate until it firms up slightly but is still spreadable — about 20 minutes. You want it cool and thick enough to create distinct swirl lines, not runny.
For the ice cream base, whisk the milk and sugar together until dissolved. Add the heavy cream, ground cinnamon, vanilla extract, and salt. Stir until fully blended and the cinnamon is well distributed throughout the liquid. Refrigerate for at least 2 hours.
Pour the chilled cinnamon base into your pre-frozen Cuisinart bowl and churn for 20 to 25 minutes. Once done, scoop layers of the churned ice cream into a freezer-safe container, adding spoonfuls of the cinnamon brown sugar swirl between each layer. Draw a knife through the layers in a figure-eight or S-shape motion to create swirls. Do this two or three times — not more, or the swirl will disappear into the ice cream.
Seal and freeze for at least 3 hours. When you scoop through the frozen container, you’ll find beautiful cinnamon ribbons winding through the creamy base. Serve warm for even more cinnamon roll vibes.
24. Pumpkin Spice Ice Cream
Prep Time: 15 min | Cook Time: 25 min (churn) | Serves: 4–6
Real pumpkin puree spiced with cinnamon, nutmeg, and cloves in a creamy fall-inspired frozen dessert that captures everything great about the season.
Ingredients:
- ¾ cup canned pumpkin puree (not pumpkin pie filling)
- 1 cup whole milk
- 2 cups heavy cream
- ¾ cup sugar
- 1 tsp cinnamon
- ¼ tsp nutmeg
- ¼ tsp ground cloves
- 1 tsp vanilla extract
- Pinch of salt
Instructions:
In a large mixing bowl, whisk together the pumpkin puree and sugar. The sugar helps break down the pumpkin into a smoother consistency. Mix until the sugar is mostly dissolved into the pumpkin, which will take a couple of minutes.
Add all the spices — cinnamon, nutmeg, and cloves — along with the vanilla extract and salt. Stir until the spices are evenly mixed throughout the pumpkin mixture. The color of the base at this point will be a deep, rich orange-brown, and it should smell like autumn.
Pour in the whole milk and whisk until the pumpkin blends smoothly into the milk with no lumps. Then add the heavy cream and stir until the entire mixture is uniform in color and texture. Taste the base and adjust spices to your preference. Some people love a heavier cinnamon flavor, while others prefer a more balanced spice blend — make it your own.
Refrigerate for at least 2 hours. Pumpkin puree is quite thick, so make sure the mixture is fully cold before churning for the best results.
Pour into your pre-frozen Cuisinart bowl and churn for 20 to 25 minutes. The pumpkin base churns into a thick, velvety ice cream with a gorgeous pumpkin color and a warm spice flavor in every bite. Transfer to a container and freeze for 2 to 3 hours. Serve with a dusting of cinnamon on top for extra fall flavor.
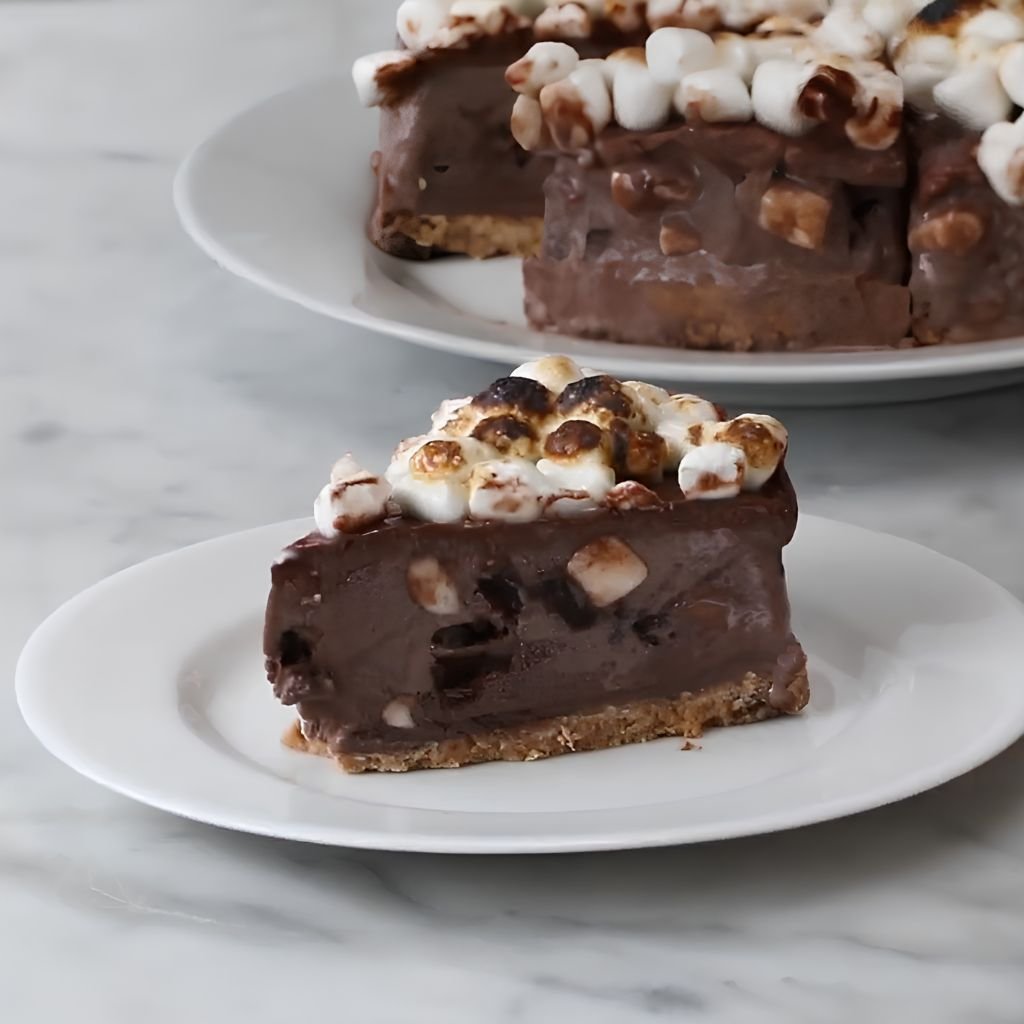
25. S’mores Ice Cream
Prep Time: 20 min | Cook Time: 25 min (churn) | Serves: 4–6
Chocolate ice cream meets toasted marshmallow and graham cracker in this campfire-inspired frozen treat — sweet, smoky-sweet, and perfectly nostalgic.
Ingredients:
- 1 cup whole milk
- 2 cups heavy cream
- ¾ cup sugar
- ¼ cup cocoa powder
- 1 tsp vanilla extract
- Pinch of salt
- ½ cup mini marshmallows
- ½ cup crushed graham crackers
- ¼ cup chocolate chips or fudge sauce
Instructions:
Make the chocolate base first. In a saucepan over medium heat, whisk together the cocoa powder and sugar. Slowly pour in the whole milk while whisking to keep the cocoa from lumping. Heat until the sugar and cocoa are fully dissolved and the mixture is steaming — about 5 minutes. Remove from heat and let cool slightly.
Pour in the heavy cream, vanilla extract, and salt. Stir until fully combined. Refrigerate for at least 2 hours.
While the base chills, prepare the marshmallows. For a toasted marshmallow effect, spread the mini marshmallows on a foil-lined baking sheet and place them under the broiler for 1 to 2 minutes, watching very carefully, until the tops are golden and lightly charred. Let them cool completely before using. This step is optional but adds an amazing depth of flavor that mimics a real s’more.
Pour the cold chocolate base into your pre-frozen Cuisinart bowl and churn for 20 to 25 minutes. Once the ice cream is ready, transfer it to a container in layers: a layer of ice cream, then a scatter of marshmallows, crushed graham crackers, and a drizzle of fudge sauce or chocolate chips. Repeat the layers and finish with a final drizzle of fudge on top.
Use a butter knife to swirl gently through the top two layers only — just enough to marble the chocolate sauce into the ice cream without fully mixing everything. Freeze for at least 3 hours. Every scoop brings chocolate cream, chewy marshmallow, crunchy cracker, and rich fudge together in one bite.
How to Customize Ice Cream Recipes in a Cuisinart Machine
One of the best parts about making your own Cuisinart 1.5 Qt Ice Cream Maker Recipes is that you can make each one your own. Here are some simple ways to get creative with any base recipe.
1. Adding Candy, Nuts, and Cookies
Mix-ins go in during the last 3 to 5 minutes of churning. This gives the machine just enough time to distribute them evenly without crushing everything. Use frozen candy pieces, chopped roasted nuts, or roughly crushed cookies. Freeze candy pieces before adding so they hold their shape. Avoid anything too soft at room temperature — it will dissolve into the base during churning.
2. Swirl Techniques for Sauces and Syrups
Swirls work best after churning, not during. Pour the churned ice cream into your container in alternating layers with your sauce — caramel, fudge, jam, Nutella, or peanut butter. Use a butter knife or chopstick to draw a few lines through the layers. Just 3 to 4 gentle passes create beautiful ribbons. More than that and the swirl disappears completely.
3. Making Ice Cream Softer or Firmer
For softer, scoopable ice cream, let the container sit at room temperature for 5 to 8 minutes before serving. Adding a tablespoon of alcohol like vodka to the base also keeps it softer because alcohol doesn’t freeze solid. For firmer ice cream, freeze for 4 or more hours and reduce the cream slightly in your recipe.
4. Adjusting Sweetness Levels
Sweetness fades slightly when things freeze, so the base should taste a little sweeter than you want the finished result. Adding a tablespoon more sugar than a recipe calls for is perfectly fine. For lower-sugar versions, swap some sugar for honey or maple syrup. They are sweeter by volume, so you can use less and still get a great result.
Conclusion
Working through all 25 of these Cuisinart 1.5 Qt Ice Cream Maker Recipes proves one thing — homemade ice cream is never boring. From the simplicity of Classic Vanilla Bean to the boldness of S’mores and the lightness of Low-Sugar Berry, there is a recipe here for every mood, season, and preference. The best flavors are the ones that feel personal, and that’s what making ice cream at home is really all about.
Don’t feel like you need to stick exactly to any single recipe. Use these as starting points and make each one yours. Swap a flavor, add a mix-in, try a different sweetener, or play with the swirl technique. The machine handles the hard part — you just need to pour in a great base and let it work.
The Cuisinart 1.5 Qt Ice Cream Maker makes it easy to bring a real homemade treat to the table without a lot of fuss. It’s compact, fast, and produces results that store-bought ice cream simply can’t match. Once you start making your own, it’s hard to go back.
Pick the recipe that sounds the most exciting to you right now and start there. Freeze the bowl tonight, mix your base tomorrow, and have fresh homemade ice cream ready by the afternoon. That first scoop is always worth the wait.