Homemade bread is one of the most comforting things you can make in your kitchen. The smell alone makes the whole house feel warm and cozy. But not everyone has the time or energy to knead dough by hand and wait around all day.
That is where a bread machine comes in. More and more home bakers are turning to bread machines because they do all the hard work for you.
The KBS bread machine is one of the most popular choices right now, and for good reason. It is easy to use, reliable, and works great for many types of bread.
In this article, you will find 20 KBS bread machine recipes — from simple white bread to vegan loaves and everything in between.
Whether you are a first-time baker or someone who loves trying new things in the kitchen, these recipes are made to work perfectly in your KBS machine.

Why Choose a KBS Bread Machine?
There are many bread machines on the market, but the KBS bread machine keeps showing up as a top pick for home bakers. Here is why so many people love it:
1. Powerful and reliable motor. The KBS bread machine uses a strong motor that handles heavy doughs like whole wheat and multigrain without slowing down or overheating.
2. Automatic kneading, rising, and baking. You just add the ingredients, pick a setting, and press start. The machine mixes, kneads, lets the dough rise, and bakes the bread — all on its own.
3. Multiple baking programs. It comes with over 15 preset programs including basic, whole wheat, French, sweet, gluten-free, and more. This makes it easy to get great results with different types of bread.
4. Crust color control. You can pick a light, medium, or dark crust depending on what you like. This small feature makes a big difference in the final loaf.
5. Delay timer. You can set the machine hours ahead so fresh bread is ready when you wake up or come home from work. This is a huge help for busy families.
6. Great for beginners. The KBS bread machine takes the guesswork out of baking. No need to worry about kneading technique or oven temperature — the machine handles all of it.
7. Consistent results every time. Because the machine controls every step, you get the same good bread each time you bake. No more dense or underbaked loaves.
8. Easy to clean. The nonstick bread pan and kneading paddle are removable and simple to wash, which makes cleanup fast and easy.
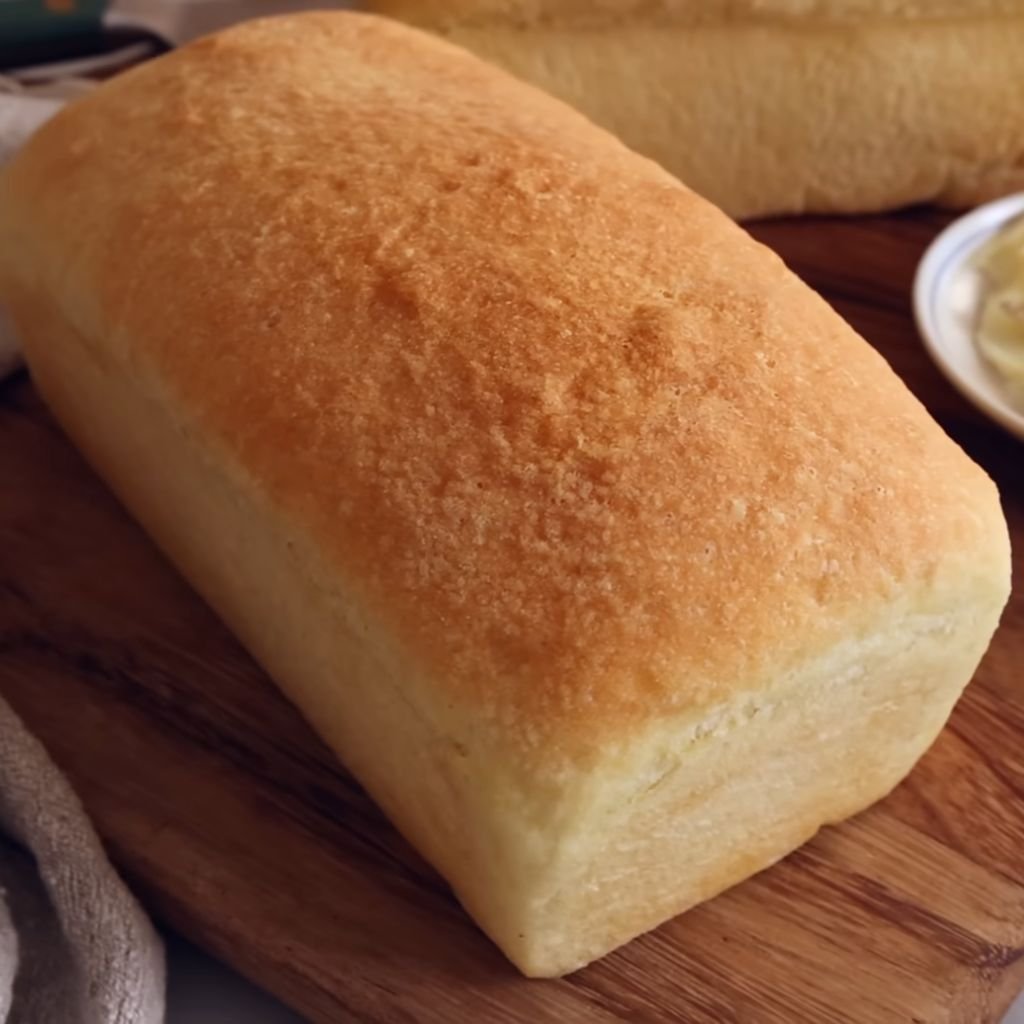
1. Classic White Bread Recipe
Prep Time: 10 minutes | Bake Time: 3 hours | Serves: 12 slices
Soft, fluffy, and golden on the outside — classic white bread is a staple that works for everything. It is great for sandwiches, toast, or just eating warm with a little butter. Making it in the KBS bread machine keeps it simple and stress-free.
Ingredients:
- 1 cup warm water (110°F)
- 2 tablespoons unsalted butter, softened
- 1 ½ teaspoons salt
- 2 tablespoons granulated sugar
- 3 cups bread flour
- 2 ¼ teaspoons active dry yeast
Instructions:
Start by gathering all your ingredients and measuring them carefully. Accurate measurements are key to getting a perfect loaf every time you use your KBS bread machine.
Pour the warm water into the bread pan first. The water should feel warm to the touch but not hot — around 110°F is ideal. If the water is too hot, it can kill the yeast and the bread will not rise properly. If it is too cold, the yeast will be slow and the dough may not get the lift it needs.
Next, add the softened butter. Cut it into small pieces so it blends in more easily during the kneading cycle. Then sprinkle in the salt. Make sure the salt does not touch the yeast directly at this stage, because salt can slow down yeast activity.
Add the sugar, then pour in the bread flour on top. Use a spoon to level off the measuring cups so you are adding the right amount. Too much flour can make the bread dense and dry.
Finally, make a small well in the center of the flour and add the yeast. Placing the yeast in the center of the flour keeps it away from the water and salt until the machine starts mixing.
Place the bread pan into the KBS bread machine and lock it in place. Close the lid. Select the Basic or White Bread setting on the machine. Choose your preferred crust color — medium is a great choice for classic white bread because it gives a nice golden finish. Set the loaf size to 1.5 pounds.
Press Start and let the machine do its job. It will mix, knead, and let the dough rise before baking. During the kneading cycle, you can peek inside to check the dough. It should form a smooth, soft ball that slightly sticks to the sides but pulls away cleanly. If the dough looks too dry and crumbly, add water one teaspoon at a time. If it looks too sticky and wet, add flour one teaspoon at a time.
Once the machine finishes baking, the bread will be hot and golden. Use oven mitts to carefully remove the bread pan from the machine. Turn the pan upside down over a wire rack and gently shake the bread out. Let the loaf cool for at least 20 to 30 minutes before slicing. Cutting into hot bread too soon can make the inside gummy and dense.
Store leftover bread in an airtight bag or container at room temperature for up to three days. For longer storage, slice the bread and freeze it in a zip-lock bag for up to three months.
2. Whole Wheat Bread Recipe
Prep Time: 10 minutes | Bake Time: 3 hours 30 minutes | Serves: 12 slices
Nutty, hearty, and full of fiber — whole wheat bread is a healthy everyday loaf that keeps you full longer. It has a slightly denser texture than white bread but still turns out wonderfully soft when made in the KBS bread machine.
Ingredients:
- 1 ⅛ cups warm water (110°F)
- 2 tablespoons olive oil
- 2 tablespoons honey
- 1 ½ teaspoons salt
- 2 cups whole wheat flour
- 1 cup bread flour
- 2 ½ teaspoons active dry yeast
Instructions:
Begin by measuring all your ingredients before you start. Having everything ready makes the process smooth and quick.
Add the warm water to the bread pan first. Then pour in the olive oil and honey. The honey adds a gentle sweetness and helps the bread stay moist. Stir these liquids together slightly in the pan using a fork or spoon before adding the dry ingredients.
Sprinkle in the salt along the edges of the pan, away from where you will place the yeast. Add the whole wheat flour, followed by the bread flour on top. The mix of two flours helps balance the dense nature of whole wheat with the strength of bread flour, giving you a better rise and a softer crumb.
Create a small indent in the top of the flour and add the yeast into it. Using warm water and proper yeast placement ensures the yeast activates well during mixing.
Place the pan into the KBS bread machine and lock it securely. Select the Whole Wheat setting on the machine. This setting has a longer kneading and rising time than the basic setting, which whole wheat dough needs because it is heavier. Choose a medium or dark crust color and set the loaf size to 1.5 pounds.
Press Start. During the preheat and first knead, the machine will warm up the dough gently before mixing begins. This is normal for whole wheat mode. Keep the lid closed as much as possible to maintain the right temperature inside the machine.
After kneading, the dough may look rougher and stickier than white bread dough. That is perfectly normal with whole wheat. As it rises, it will smooth out and puff up nicely.
When baking is complete, use oven mitts to remove the bread pan from the machine. Shake the bread out onto a wire rack and let it cool fully — at least 30 to 40 minutes — before cutting. Whole wheat bread needs a bit more cooling time than white bread because the crumb is denser and holds heat longer.
Slice and serve with butter, avocado, or your favorite sandwich fillings. Store in an airtight container at room temperature for up to four days, or freeze sliced bread for up to two months.
3. French Bread Recipe
Prep Time: 10 minutes | Bake Time: 3 hours | Serves: 10 slices
Crispy on the outside, soft and chewy on the inside — French bread made in the KBS bread machine gives you that classic bakery taste right at home. It uses just a few simple ingredients and the results are always impressive.
Ingredients:
- 1 cup warm water
- 1 ½ teaspoons salt
- 1 teaspoon sugar
- 3 cups bread flour
- 2 teaspoons active dry yeast
Instructions:
Measure all your ingredients precisely before starting. French bread relies on a simple dough, so getting the measurements right is especially important.
Pour the warm water into the bread pan. Add the salt around the edge of the pan. Then add the sugar. Pour the bread flour on top, spreading it evenly to cover the liquid.
Make a small well in the center of the flour and add the yeast. This keeps the yeast from touching the salt, which could weaken it before mixing begins.
Place the pan into the KBS bread machine and select the French Bread setting. This program runs longer than the basic setting and uses slightly different rise times to develop the chewy texture that French bread is known for. Set the crust to medium or dark for that classic golden color.
Press Start. During the kneading cycle, the dough should form a slightly stiff ball. French bread dough is typically firmer than sandwich bread dough. If the dough looks too dry, add water one teaspoon at a time. If it is too wet, add flour one teaspoon at a time. Adjustments should be small and made early in the kneading cycle.
Let the machine run through the full program. The long rising time helps develop the flavor and chew that makes French bread so good.
When the baking cycle finishes, remove the bread pan carefully using oven mitts. Tap the bread out onto a wire cooling rack. The crust will be firm and crackly right out of the machine — this is exactly what you want.
Let the loaf cool for at least 20 minutes before slicing. French bread is best eaten the same day it is made since the crust softens over time. To refresh leftover bread, place it in a 350°F oven for 5 minutes to bring the crust back to life.
Serve with soups, pasta dishes, or a simple spread of garlic butter.
4. Sweet Milk Bread Recipe
Prep Time: 15 minutes | Bake Time: 3 hours | Serves: 12 slices
Soft, pillowy, and slightly sweet — sweet milk bread is a favorite in many Asian and European households. Made with warm milk instead of water, it has a rich, tender crumb that is hard to resist.
Ingredients:
- ¾ cup warm whole milk
- ¼ cup warm water
- 3 tablespoons unsalted butter, softened
- 3 tablespoons sugar
- 1 teaspoon salt
- 3 cups bread flour
- 2 ¼ teaspoons active dry yeast
Instructions:
Before adding anything to the bread pan, make sure your milk and water are warm — around 110°F. Cold dairy can slow the yeast down and affect how well the bread rises.
Pour the warm milk and warm water into the bread pan together. Add the softened butter, cut into small pieces. Sprinkle in the sugar and then the salt around the edges of the pan, keeping them separated from where you will add the yeast.
Add the bread flour on top of the liquids. Smooth it out gently with a spoon. Create a small indent in the flour and pour the yeast into it.
Lock the bread pan into the KBS bread machine and close the lid. Select the Sweet Bread setting if available, or use the Basic setting. Set the crust color to light or medium — sweet breads can brown faster than plain breads due to the higher sugar content, so a lighter crust setting helps prevent over-browning.
Press Start. As the machine begins to knead, the butter will slowly work its way into the dough. At first, the dough may look a little shaggy, but it will come together into a smooth, slightly sticky ball within the first 10 minutes of kneading. Do not add extra flour unless the dough is extremely wet and not coming together at all.
Allow the machine to complete the full cycle. The dough will rise beautifully due to the fat and sugar content, and the inside of the loaf will bake up soft and fluffy.
When baking is done, remove the bread pan using oven mitts. Gently shake the loaf out onto a wire rack. Let it cool for at least 20 minutes before slicing. The bread will feel very soft and light — handle it gently so it keeps its shape.
Serve sliced with jam, cream cheese, or sweet butter. It also makes an excellent base for French toast the next morning.
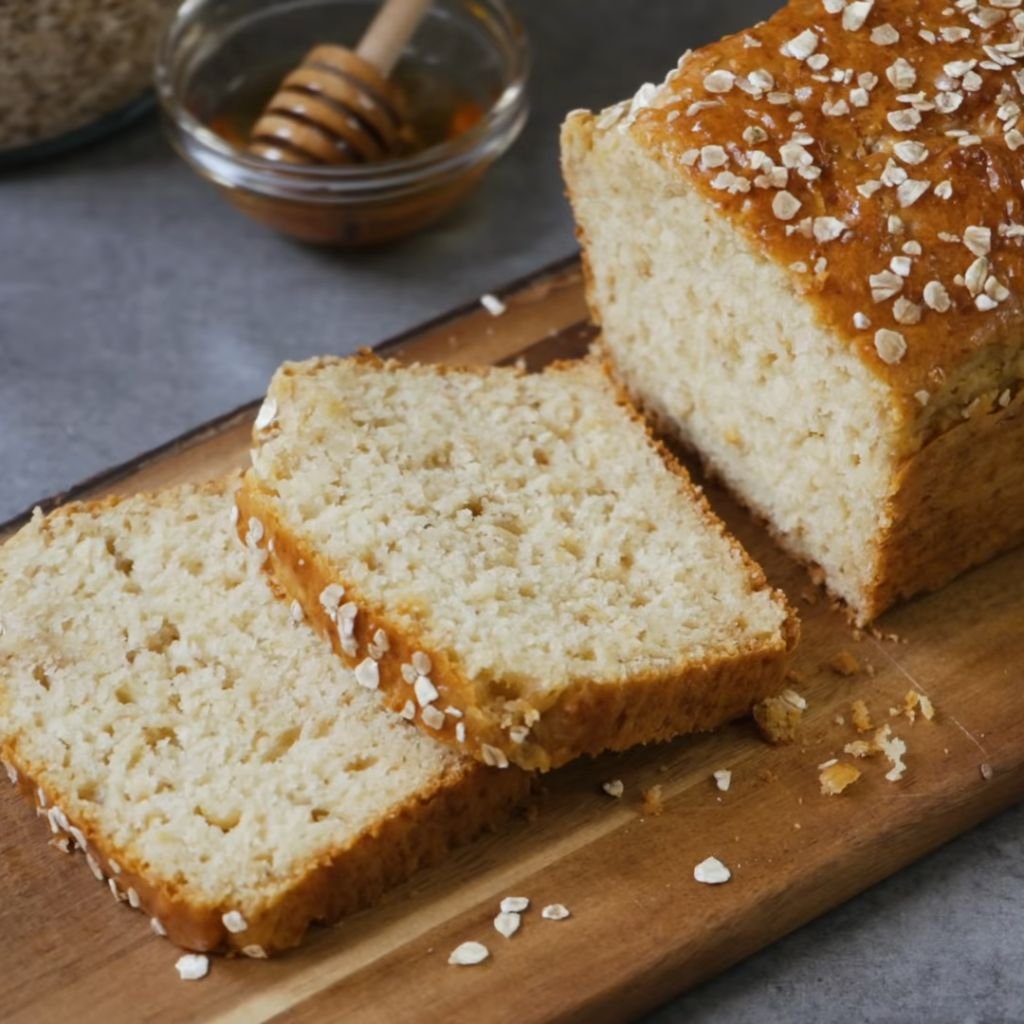
5. Honey Oat Bread Recipe
Prep Time: 10 minutes | Bake Time: 3 hours | Serves: 12 slices
Lightly sweet with a hearty texture — honey oat bread is the kind of loaf that feels both wholesome and satisfying. The oats add a gentle chew and the honey gives a natural sweetness that works perfectly in every slice.
Ingredients:
- 1 cup warm water
- 3 tablespoons honey
- 2 tablespoons unsalted butter, softened
- 1 teaspoon salt
- ½ cup rolled oats
- 2 ½ cups bread flour
- 2 teaspoons active dry yeast
Instructions:
Measure and set out all your ingredients before starting. Having everything ready at hand makes the process faster and easier.
Pour the warm water into the bread pan. Add the honey and stir it briefly into the water if possible — this helps it dissolve evenly instead of sitting in clumps under the dough. Add the softened butter in small pieces.
Sprinkle the salt around the edges of the pan. Pour in the rolled oats and then add the bread flour on top. The oats will be mixed into the dough during kneading, giving the bread its distinctive texture and appearance.
Make a small well in the flour and add the yeast. Lock the bread pan into the KBS bread machine and select the Basic or Whole Wheat setting. Either works well for this recipe. Set crust color to medium.
Press Start. During the kneading phase, the oats will break down slightly and blend into the dough. The dough ball should be smooth and just barely tacky. Avoid adding extra flour unless the dough is visibly too wet.
Let the machine run through the complete cycle. The honey helps the bread stay moist and gives the crust a beautiful golden color.
Once done, remove the bread pan and turn the loaf out onto a wire rack. Let it cool for 25 to 30 minutes before slicing. The inside will be soft and slightly chewy from the oats.
Serve with peanut butter, jam, or sliced fresh fruit. This bread is also excellent for toast in the morning.
6. Garlic Herb Bread Recipe
Prep Time: 10 minutes | Bake Time: 3 hours | Serves: 10 slices
Packed with savory flavor — garlic herb bread fills your kitchen with an amazing aroma as it bakes. Every slice is loaded with garlic and fresh herbs, making it a perfect companion for soups, pasta, and grilled dishes.
Ingredients:
- 1 cup warm water
- 2 tablespoons olive oil
- 1 ½ teaspoons salt
- 1 teaspoon sugar
- 3 cloves garlic, minced
- 1 teaspoon dried rosemary
- 1 teaspoon dried basil
- ½ teaspoon dried oregano
- 3 cups bread flour
- 2 teaspoons active dry yeast
Instructions:
Start by mincing the garlic finely. Fresh garlic gives this bread the best flavor. Measure out the herbs and have everything ready before you begin adding to the bread pan.
Pour the warm water and olive oil into the bread pan. Add the salt and sugar around the edges of the pan. Then add the minced garlic and all the dried herbs — rosemary, basil, and oregano. These will mix into the dough during kneading and release their flavor throughout the entire loaf.
Pour the bread flour on top, smoothing it out evenly. Create a small well in the center and add the yeast.
Lock the pan into the KBS bread machine and select the Basic setting. A medium or dark crust color works very well with this bread — the garlic and oil help the crust crisp up beautifully. Set the loaf size to 1.5 pounds.
Press Start. As the machine kneads the dough, you will start to smell the garlic and herbs right away. The dough should form a smooth ball with flecks of green herbs throughout. This is a good sign — it means the flavors are being worked evenly into the dough.
If the dough looks dry, add water one teaspoon at a time. If it seems too wet, add a small amount of flour. The olive oil in this recipe tends to make the dough a little softer than a plain white bread dough, so do not be alarmed if it feels slightly stickier.
Allow the machine to complete the full baking cycle. The final loaf will be golden and fragrant, with a firm crust that gives way to a soft, flavorful inside.
Remove the bread pan from the machine using oven mitts. Turn the loaf out onto a wire rack and allow it to cool for at least 20 minutes before cutting. Cutting too early will cause the steam inside to escape and leave the bread slightly gummy.
Slice thickly and serve alongside pasta dishes, vegetable soups, or as a stand-alone snack with a dip like hummus or olive oil.
7. Cinnamon Raisin Bread Recipe
Prep Time: 10 minutes | Bake Time: 3 hours | Serves: 12 slices
Warm, sweet, and full of cinnamon swirls — cinnamon raisin bread is a classic that works perfectly as toast, French toast, or just eaten on its own. The KBS bread machine handles the mixing and rising without any fuss.
Ingredients:
- 1 cup warm water
- 2 tablespoons unsalted butter, softened
- 2 tablespoons sugar
- 1 teaspoon salt
- 3 cups bread flour
- 2 teaspoons cinnamon
- ¾ cup raisins
- 2 teaspoons active dry yeast
Instructions:
Before starting, soak the raisins in warm water for 10 minutes, then drain them and pat them dry. This keeps them from pulling moisture from the dough during baking and also makes them plumper and more flavorful in the finished loaf.
Pour the warm water into the bread pan. Add the softened butter in small pieces. Sprinkle in the sugar and salt, keeping them on opposite sides of the pan.
Add the bread flour and then the cinnamon. Stir the cinnamon into the top layer of flour slightly — this helps it distribute more evenly when kneading begins. Create a small indent in the flour and pour the yeast in.
Do not add the raisins yet. Place the bread pan into the KBS bread machine and select the Basic setting. Most KBS machines have a “add-in” signal — a beep that sounds during the kneading cycle to tell you when to add mix-ins like raisins, nuts, or dried fruit. When you hear the beep, open the lid and add the raisins. This prevents the raisins from being crushed into the dough too early, which would turn the dough purple and lose the raisin texture.
If your machine does not have an add-in beep, wait until about 5 to 8 minutes into the kneading cycle, then open the lid and add the raisins manually.
Close the lid and let the machine complete the full cycle. Set the crust color to light or medium — sweet doughs brown quickly and a lighter setting avoids overbrowning.
Once baking is finished, remove the bread pan and shake the loaf out onto a wire cooling rack. Let the bread cool for at least 30 minutes before slicing. This bread slices best when fully cooled.
Serve toasted with a spread of cream cheese or butter. It also makes a wonderful breakfast bread that feels like a treat without much effort.
8. Banana Bread in KBS Bread Machine
Prep Time: 15 minutes | Bake Time: 1 hour 45 minutes | Serves: 10 slices
Moist, rich, and full of banana flavor — banana bread made in the KBS bread machine is one of the easiest quick breads you can try. Use very ripe bananas for the best sweetness and flavor in every slice.
Ingredients:
- 3 very ripe bananas, mashed
- 2 eggs, beaten
- ⅓ cup melted butter
- ¾ cup sugar
- 1 teaspoon vanilla extract
- 1 ½ cups all-purpose flour
- 1 teaspoon baking soda
- ½ teaspoon salt
- ½ teaspoon cinnamon (optional)
Instructions:
Banana bread is a quick bread, meaning it uses baking soda instead of yeast. This changes how you use the KBS bread machine for this recipe — you will use the Quick Bread or Cake setting instead of a standard bread program.
Begin by peeling and mashing the bananas in a bowl until they are completely smooth with no large lumps. The riper the bananas, the sweeter and more flavorful the bread will be. Overripe bananas with lots of brown spots are actually the best choice for this recipe.
Add the beaten eggs, melted butter, sugar, and vanilla extract to the mashed bananas. Stir everything together until well combined.
In a separate bowl, mix the flour, baking soda, salt, and cinnamon together. Whisk these dry ingredients for a few seconds to make sure the baking soda is evenly distributed.
Pour the wet banana mixture into the bread pan first. Then add the dry flour mixture on top. Do not stir — the machine will mix everything during the program.
Lock the pan into the KBS bread machine and select the Quick Bread or Cake setting. This setting uses a shorter, gentler kneading cycle and a different baking temperature than yeast bread programs. Set the crust to light or medium.
Press Start. The machine will mix the batter gently and then move into the baking phase. You may notice the batter looks lumpy at first — this is fine. Quick breads should not be over-mixed, and the machine handles the mixing at just the right level.
When the baking cycle finishes, check the bread with a wooden skewer or toothpick inserted into the center. If it comes out clean or with just a few dry crumbs, the bread is done. If it comes out with wet batter, run the machine on Bake-Only for an additional 10 to 15 minutes.
Remove the bread pan with oven mitts and shake the loaf out onto a wire rack. Allow it to cool for at least 45 minutes before slicing — banana bread slices much better when it has fully cooled.
Serve with a spread of butter or cream cheese. Banana bread stores well at room temperature for up to four days, or freeze individual slices for easy grab-and-go snacking.
9. Gluten-Free Bread Recipe
Prep Time: 10 minutes | Bake Time: 3 hours | Serves: 10 slices
Soft and satisfying without any gluten — this gluten-free bread is perfect for people with gluten sensitivity or those following a gluten-free diet. The KBS bread machine has a dedicated gluten-free setting that makes this recipe surprisingly easy.
Ingredients:
- 1 ¼ cups warm water
- 3 tablespoons olive oil
- 1 teaspoon apple cider vinegar
- 1 ½ teaspoons salt
- 2 teaspoons sugar
- 2 ½ cups gluten-free all-purpose flour blend (with xanthan gum included)
- 2 ¼ teaspoons active dry yeast
Instructions:
Gluten-free baking works differently from regular bread baking. Without gluten, the dough behaves more like a thick batter than a traditional bread dough. Knowing this ahead of time will help you understand what to expect as the machine runs.
Make sure your gluten-free flour blend includes xanthan gum — this ingredient replaces the stretchy quality that gluten normally provides and helps the bread hold its shape as it rises and bakes. Check the label on your flour bag to confirm.
Pour the warm water into the bread pan. Add the olive oil and apple cider vinegar. The vinegar helps improve the texture of gluten-free bread and gives it a slight chew. Sprinkle the salt and sugar into the pan.
Add the gluten-free flour blend on top. Because gluten-free flour blends are usually pre-mixed with starches and other ingredients, they behave differently from wheat flour during kneading. The mixture will be thicker and stickier than traditional bread dough.
Make a small indent in the flour and add the yeast. Lock the pan into the KBS bread machine and select the Gluten-Free setting. This program is specially designed to knead gluten-free dough gently and give it the right amount of baking time.
Press Start. During the kneading phase, the dough will look more like a thick batter that is being stirred rather than a smooth bread dough. This is completely normal. Do not add extra flour to thicken it — gluten-free dough is supposed to be wetter than regular dough.
The rising and baking phases will take care of the rest. When baking is complete, the loaf will be lightly browned on top and firm to the touch. Remove the pan using oven mitts and shake the bread out carefully — gluten-free bread is more fragile than wheat bread when it is hot.
Let the loaf cool completely on a wire rack before slicing — at least 45 minutes to an hour. Gluten-free bread cuts much better when fully cooled and can become gummy if sliced too soon.
Store in an airtight container for up to three days, or slice and freeze immediately for longer freshness.
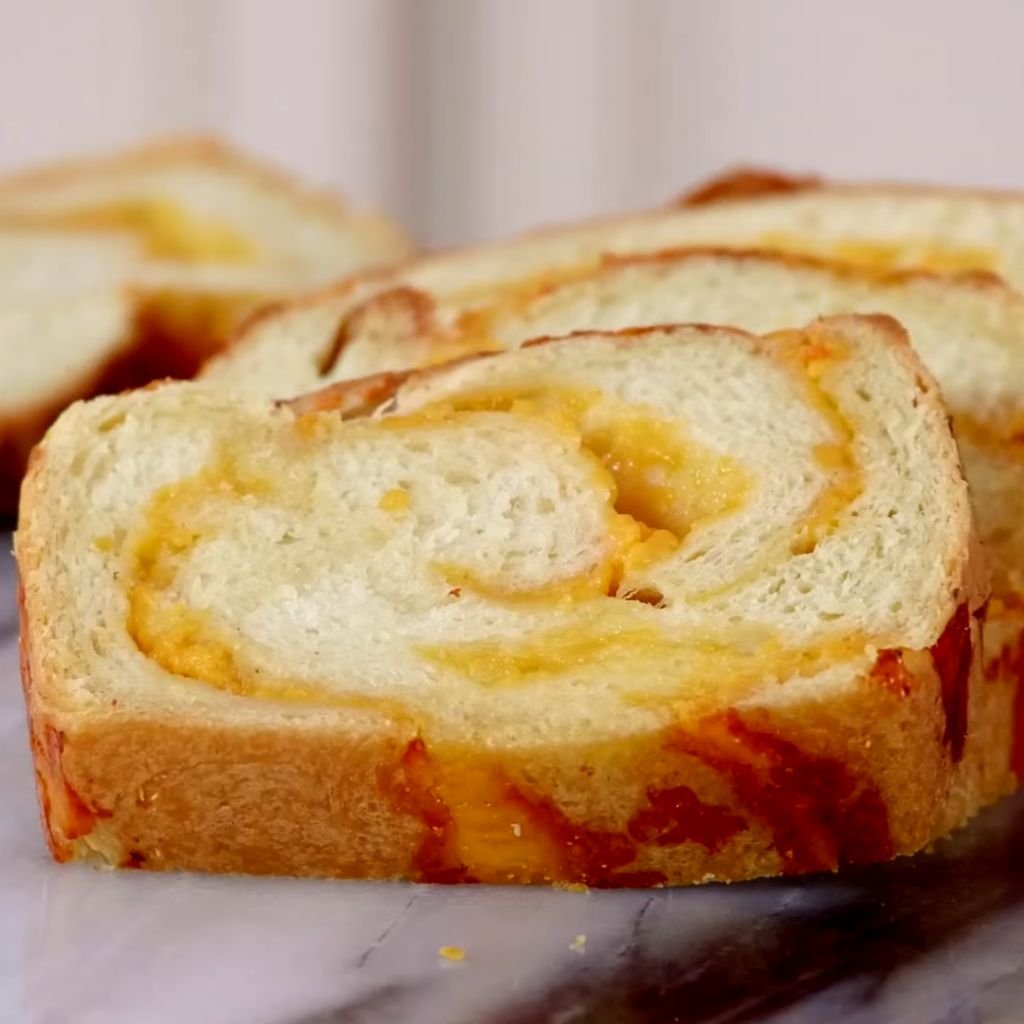
10. Cheese Bread Recipe
Prep Time: 10 minutes | Bake Time: 3 hours | Serves: 12 slices
Golden, savory, and loaded with melted cheese in every bite — cheese bread from the KBS bread machine is the kind of recipe that becomes a household favorite fast. It is incredible with soup, chili, or just eaten plain while it is still warm.
Ingredients:
- 1 cup warm water
- 1 tablespoon butter, softened
- 1 ½ teaspoons salt
- 1 teaspoon sugar
- 3 cups bread flour
- 1 cup shredded sharp cheddar cheese
- ½ teaspoon garlic powder (optional)
- 2 teaspoons active dry yeast
Instructions:
Start by shredding the cheddar cheese freshly if possible. Pre-shredded cheese from a bag works, but freshly shredded cheese melts better into the dough and gives a richer flavor.
Pour the warm water into the bread pan. Add the butter in small pieces. Sprinkle in the salt and sugar. If you are using garlic powder, add it now for a slightly more savory loaf.
Pour the bread flour on top of the liquid ingredients. Make a small indent in the flour and add the yeast.
Lock the pan into the KBS bread machine and select the Basic setting. Set the crust to medium or dark — the cheese in the dough caramelizes slightly as it bakes, giving the crust a rich golden-brown color and extra flavor.
Press Start. When the machine signals to add mix-ins (or after about 5 minutes of kneading), open the lid and add the shredded cheese. Adding the cheese at this point — rather than at the very beginning — keeps it from being completely broken down during heavy kneading. You want pieces of cheese throughout the dough, not just blended in.
Close the lid and allow the machine to complete the full cycle. As the bread bakes, you will smell the cheese melting and browning inside — one of the best aromas from any KBS bread machine recipe.
When done, remove the bread pan and turn the loaf out onto a wire rack. Be careful, as the cheese near the bottom and sides of the pan may be slightly stuck. Shake gently and the loaf should release.
Allow the bread to cool for at least 20 to 25 minutes before slicing. Serve warm for the best experience. Leftovers store well in an airtight bag for up to three days.
11. Brioche Bread Recipe
Prep Time: 15 minutes | Bake Time: 3 hours | Serves: 12 slices
Rich, buttery, and incredibly soft — brioche is a French-style enriched bread that feels luxurious with every bite. Using the KBS bread machine makes this otherwise complex recipe completely manageable.
Ingredients:
- ¼ cup warm whole milk
- 3 eggs, room temperature
- ½ cup unsalted butter, softened and cut into cubes
- 3 tablespoons sugar
- 1 teaspoon salt
- 3 cups bread flour
- 2 ¼ teaspoons active dry yeast
Instructions:
Brioche dough is enriched with eggs and a high amount of butter, which gives it its signature soft, tender texture. Because of the large amount of fat, the dough takes longer to come together than regular bread dough — but the KBS bread machine handles it beautifully.
Start by bringing the eggs and butter to room temperature before you begin. Cold butter does not incorporate well into the dough and can result in uneven texture.
Pour the warm milk into the bread pan. Crack the eggs directly into the pan as well. Beat them lightly with a fork inside the pan. Add the sugar and salt around the edges.
Pour the bread flour on top. Create a small well in the center and add the yeast. Do not add the butter yet — it gets added during the kneading cycle.
Lock the pan into the KBS bread machine and select the Basic or Sweet Bread setting. Press Start. Once the machine has been kneading for about 8 to 10 minutes, open the lid and begin adding the butter — a few cubes at a time. Wait for each addition of butter to be fully worked into the dough before adding more. This slow butter-adding process is what gives brioche its signature smooth, silky texture.
Once all the butter has been added, close the lid and let the machine continue through the rest of the kneading and rising cycles. The dough will be very soft and slightly sticky — this is normal for brioche. Resist the urge to add extra flour.
During baking, the brioche will rise beautifully and turn a deep golden brown. When done, remove the pan and gently shake the loaf out onto a wire rack. The crust will be tender and golden.
Let the brioche cool for at least 30 minutes before slicing. Serve with jam, honey, or simply enjoy it plain. Brioche also makes exceptional French toast the next day.
12. Multigrain Bread Recipe
Prep Time: 10 minutes | Bake Time: 3 hours 30 minutes | Serves: 12 slices
Hearty and nutritious — multigrain bread packs in the goodness of multiple grains in every slice. Great for people who want a more complex, filling loaf with extra fiber and nutrients.
Ingredients:
- 1 ¼ cups warm water
- 2 tablespoons honey
- 2 tablespoons olive oil
- 1 ½ teaspoons salt
- ½ cup multigrain cereal (like 7-grain hot cereal, dry)
- 1 ½ cups bread flour
- 1 cup whole wheat flour
- 2 ½ teaspoons active dry yeast
- 2 tablespoons sunflower seeds (optional)
Instructions:
Multigrain bread benefits from soaking the dry multigrain cereal before baking. Place the dry multigrain cereal into a bowl and pour ¼ cup of boiling water over it. Let it soak for 20 minutes, then drain any excess water. This softens the grains so they do not scratch the inside of the bread pan and also prevents them from drawing moisture from the dough during baking.
Pour the warm water into the bread pan. Add the honey and olive oil. Then sprinkle the salt along the edges. Add the soaked multigrain cereal to the pan.
Pour the bread flour and whole wheat flour on top. Make a small well and add the yeast.
Lock the pan into the KBS bread machine and select the Whole Wheat setting, which provides the longer knead and rise time that hearty doughs like this one need. Set the crust to medium.
Press Start. The dough will be slightly rougher in texture than white bread dough because of the grain pieces. After the first knead, open the lid to check — the dough should form a ball that is a little sticky but not falling apart.
If you are using sunflower seeds, add them at the mix-in signal or about 5 minutes into kneading so they get distributed evenly without being ground up.
Allow the full cycle to complete. When baking finishes, remove the bread pan and turn the loaf out onto a wire rack. The bread will look dense and rustic on the outside. Let it cool for at least 35 to 40 minutes before cutting.
Slice thickly and serve with nut butter, avocado, or as a base for open-faced sandwiches.
13. Pizza Dough Recipe
Prep Time: 10 minutes | Dough Time: 1 hour 30 minutes | Serves: 2 medium pizzas
Using the KBS bread machine dough setting to make pizza dough takes all the hard work out of kneading. You get a smooth, elastic dough that bakes into a crispy, chewy pizza crust every time.
Ingredients:
- 1 cup warm water
- 2 tablespoons olive oil
- 1 teaspoon salt
- 1 teaspoon sugar
- 3 cups all-purpose or bread flour
- 2 ¼ teaspoons active dry yeast
Instructions:
Pour the warm water into the bread pan. Add the olive oil, then the salt and sugar. Pour the flour on top. Make a small well and add the yeast.
Lock the pan into the KBS bread machine and select the Dough setting. This setting kneads and proofs the dough but does not bake it — you will finish the pizza in your regular oven.
Press Start. The machine will knead the dough for about 20 to 25 minutes, then let it rise for another hour. During this time, the dough will double in size and become very smooth and elastic.
When the cycle finishes, remove the bread pan from the machine. Lightly flour your countertop and turn the dough out onto it. Punch the dough down gently to release the gas bubbles from rising.
Divide the dough into two equal portions for two medium pizzas, or keep it together for one large pizza. Let the dough rest on the counter for 10 minutes, covered with a clean kitchen towel. This rest period relaxes the gluten and makes the dough easier to stretch without it snapping back.
Preheat your oven to 450°F. If you have a pizza stone, place it in the oven now to heat up.
Stretch the dough by hand or use a rolling pin to shape it into a round or rectangular pizza base. Transfer it to a lightly oiled baking sheet or a parchment-lined pizza pan. Add your sauce, cheese, and toppings.
Bake in the preheated oven for 12 to 15 minutes, or until the crust is golden and the cheese is bubbling. Remove from the oven and let cool for 5 minutes before slicing.
The dough can also be wrapped tightly in plastic wrap and refrigerated for up to 48 hours, or frozen for up to one month.
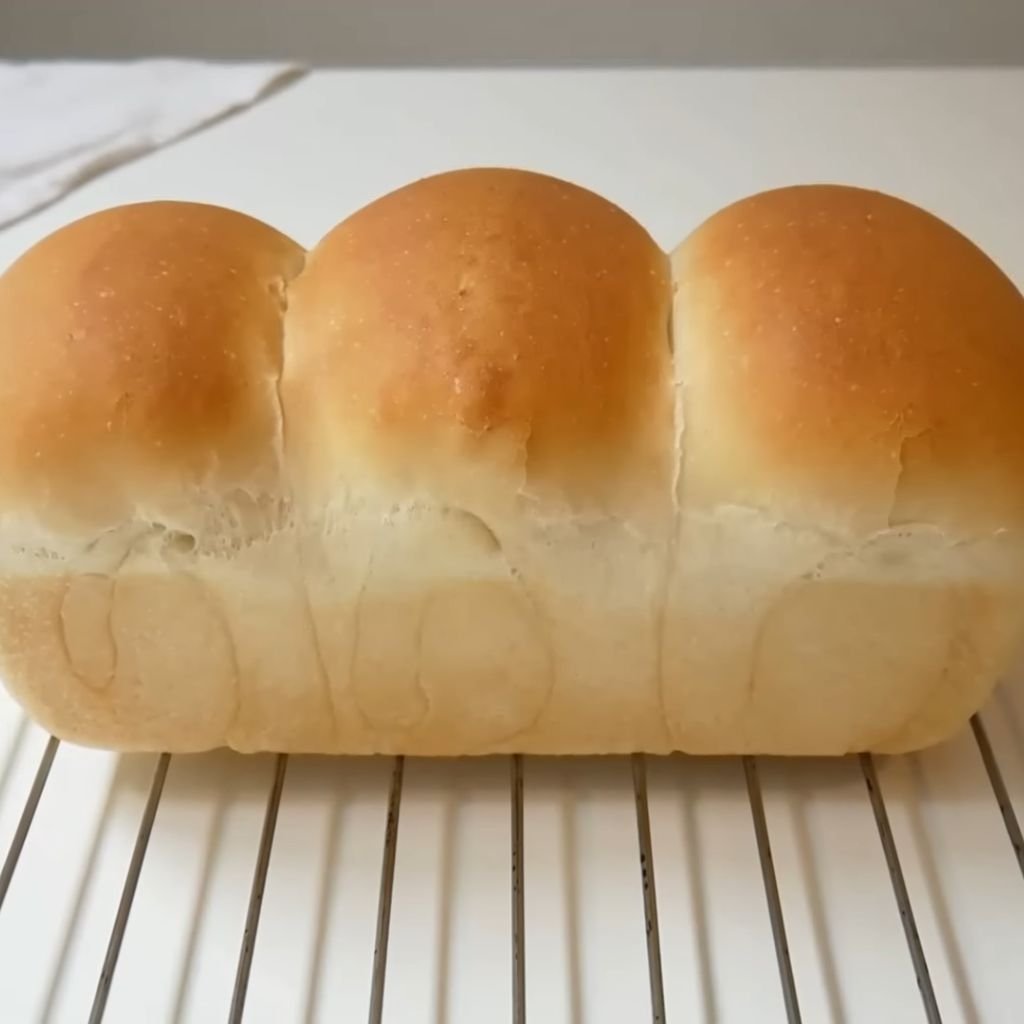
14. Dinner Roll Dough Recipe
Prep Time: 15 minutes | Dough Time: 1 hour 30 minutes + 30 min rising | Serves: 12 rolls
Soft, pillowy dinner rolls are always a hit at the dinner table. Using the KBS bread machine dough setting makes the process hands-off, and you finish the rolls in your oven for a golden, buttery finish.
Ingredients:
- ¾ cup warm milk
- ¼ cup warm water
- 3 tablespoons butter, softened
- 2 tablespoons sugar
- 1 teaspoon salt
- 3 cups all-purpose flour
- 2 ¼ teaspoons active dry yeast
- 1 egg, beaten (for brushing)
- 2 tablespoons melted butter (for brushing after baking)
Instructions:
Pour the warm milk and warm water into the bread pan. Add the softened butter in small pieces. Sprinkle the sugar and salt into the pan, then add the flour on top. Create a small well and pour in the yeast.
Lock the pan into the KBS bread machine and select the Dough setting. Press Start. The machine will knead and proof the dough without baking it.
When the cycle ends, your dough should have doubled in size and feel smooth and slightly tacky. Remove the pan from the machine. Lightly flour your work surface and turn the dough out onto it. Punch down the dough gently.
Divide the dough into 12 equal pieces. To do this evenly, roll the whole dough into a log shape, then cut it into 12 sections using a bench scraper or sharp knife. Roll each piece into a smooth ball by cupping your hand over the dough and rolling it in a circular motion on the counter.
Place the rolls into a greased 9×13 inch baking pan, leaving a little space between each one. Cover the pan with a clean kitchen towel and let the rolls rise in a warm spot for 30 to 35 minutes, until they have puffed up and are touching each other slightly.
Preheat your oven to 375°F. Brush the tops of the rolls gently with the beaten egg — this gives them a beautiful golden glaze.
Bake for 18 to 22 minutes, or until the tops are golden brown. Remove from the oven and immediately brush the tops with the melted butter. This adds flavor and keeps the crust soft.
Let the rolls cool in the pan for 10 minutes before serving. These rolls are best eaten warm and fresh, but leftovers can be stored in an airtight bag and reheated in the oven or microwave.
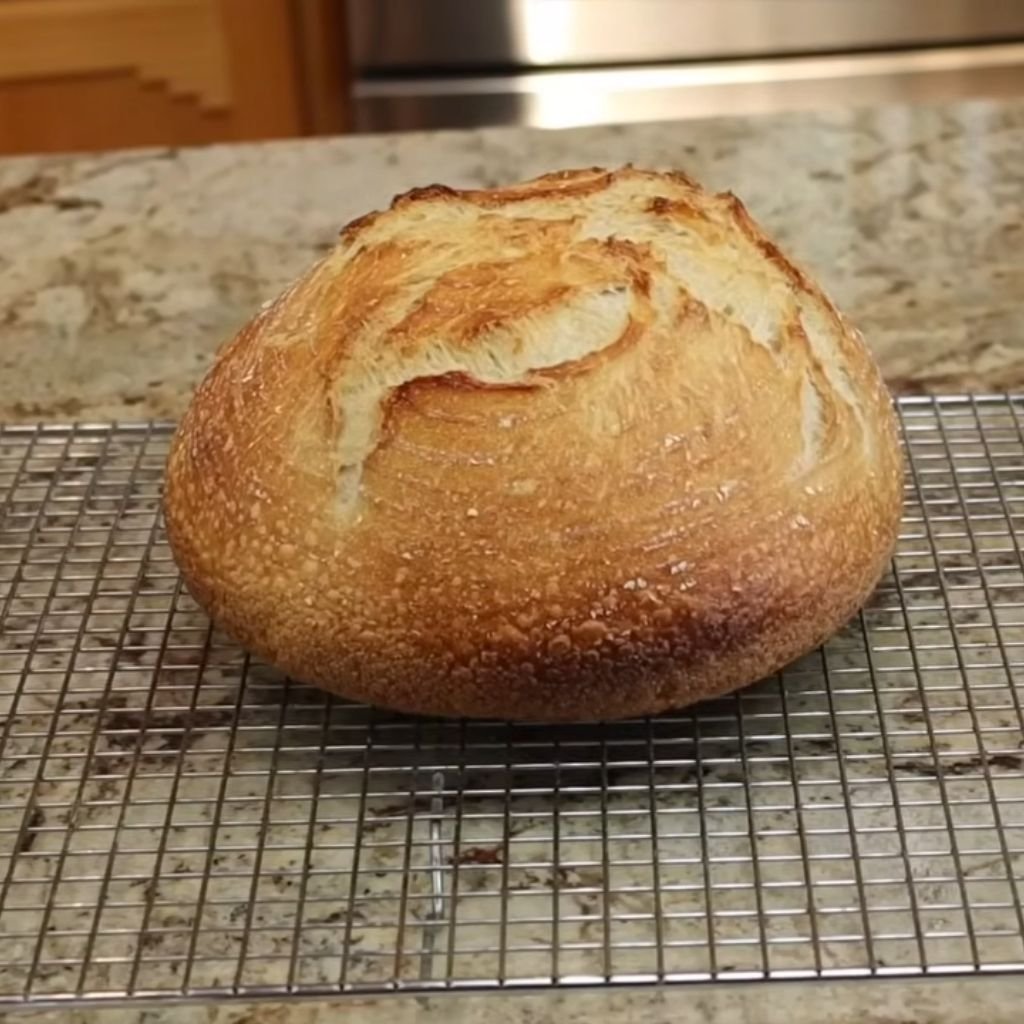
15. Sourdough Bread Machine Recipe
Prep Time: 10 minutes (plus sourdough starter) | Bake Time: 3 hours | Serves: 12 slices
Using a sourdough starter in the KBS bread machine gives you a bread with real tangy depth of flavor — without spending all day tending to the dough. Keep an active starter on hand and this recipe becomes a go-to for flavorful homemade bread.
Ingredients:
- ¾ cup active sourdough starter (fed and bubbly)
- ½ cup warm water
- 1 ½ teaspoons salt
- 1 teaspoon sugar
- 2 ½ cups bread flour
- 1 teaspoon active dry yeast (optional, for insurance)
Instructions:
For the best results, make sure your sourdough starter has been fed 8 to 12 hours before using it. An active, bubbly starter is the key to getting good rise and flavor. A starter that is not active will result in a dense loaf with very little rise.
Pour the warm water into the bread pan first. Add the sourdough starter and stir it gently into the water inside the pan using a fork. This helps it mix in more evenly during kneading.
Sprinkle the salt and sugar around the edges of the pan. Pour the bread flour on top. If you want a little extra insurance for rising — especially if your starter is not super active — add a small amount of commercial yeast (1 teaspoon) in a well in the center of the flour. This is optional but helps guarantee a good rise.
Lock the pan into the KBS bread machine and select the Basic or Whole Wheat setting. A longer cycle gives the sourdough flavor more time to develop. Set the crust to medium.
Press Start. The dough will come together slowly during the first knead. Sourdough dough can be a little firmer and less predictable than doughs made with commercial yeast alone. Let the machine work through the full cycle without opening the lid too often.
During the long rising period, the natural acids in the sourdough starter will develop flavor in the dough. The loaf may not rise as dramatically as a pure commercial yeast loaf, but it will have far more flavor and a chewier crumb.
When baking is complete, remove the bread pan using oven mitts. Turn the loaf out onto a wire rack and allow it to cool completely — at least 45 minutes — before cutting. Sourdough bread continues to firm up as it cools, and slicing too early results in a gummy texture.
Store at room temperature in a bread bag or wrapped in a clean kitchen towel for up to five days.
16. Potato Bread Recipe
Prep Time: 15 minutes | Bake Time: 3 hours | Serves: 12 slices
Soft, slightly dense, and wonderfully moist — potato bread has a texture unlike any regular sandwich loaf. Adding mashed potato to the dough gives it extra softness and helps it stay fresh longer than most other breads.
Ingredients:
- ½ cup mashed potato (cooled, no butter or salt added)
- ¾ cup warm water
- 2 tablespoons butter, softened
- 2 tablespoons sugar
- 1 ½ teaspoons salt
- 3 cups bread flour
- 2 ¼ teaspoons active dry yeast
Instructions:
Prepare the mashed potato ahead of time. Boil one medium potato, drain it, and mash it until completely smooth. Do not add butter, salt, or milk — the bread recipe provides all the seasoning. Let the mashed potato cool to room temperature before using it so it does not affect the water temperature in the bread pan.
Pour the warm water into the bread pan. Add the mashed potato and stir it into the water slightly. Add the softened butter in small pieces. Sprinkle in the sugar and salt around the edges of the pan.
Pour the bread flour on top. Make a small well and add the yeast.
Lock the pan into the KBS bread machine and select the Basic setting. Set the crust to medium. The potato adds moisture to the dough, so you may find the dough looks a bit wetter or softer than plain white bread dough — this is expected.
Press Start. During the kneading cycle, the potato will fully incorporate into the dough, giving it a slightly creamy color. If the dough seems excessively sticky, add flour one tablespoon at a time. Avoid adding too much, or the potato softness will be lost.
Allow the machine to run through the full program. The rising time may be slightly shorter than average because the potato adds fermentable starches that help the yeast work faster.
When baking is complete, remove the bread pan and turn the loaf out onto a wire rack. Let it cool for at least 30 minutes before slicing. The inside will be pillowy soft with a mild flavor that pairs well with almost any topping.
Slice and serve for sandwiches, with soups, or toasted with butter. Potato bread stays soft for up to five days when stored in an airtight bag.
17. Chocolate Bread Recipe
Prep Time: 10 minutes | Bake Time: 3 hours | Serves: 12 slices
Deep chocolate flavor with a soft, tender crumb — chocolate bread is a fun and indulgent bake that works as a dessert loaf or a special breakfast treat. Every slice is rich and slightly sweet without being overpowering.
Ingredients:
- 1 cup warm milk
- 2 tablespoons butter, softened
- 2 tablespoons sugar
- 1 teaspoon salt
- 3 tablespoons unsweetened cocoa powder
- 3 cups bread flour
- ½ cup semi-sweet chocolate chips
- 2 ¼ teaspoons active dry yeast
Instructions:
Gather and measure all your ingredients before you begin. Make sure the milk is warm — around 110°F — to help the yeast activate properly.
Pour the warm milk into the bread pan. Add the softened butter in small pieces. Sprinkle the sugar and salt around the edges of the pan.
Add the cocoa powder and then the bread flour. Stir the cocoa into the top layer of flour slightly before locking the pan into the machine — this helps it incorporate more evenly when kneading begins.
Make a small indent in the flour and add the yeast. Do not add the chocolate chips yet.
Lock the pan into the KBS bread machine and select the Basic or Sweet Bread setting. Set the crust color to light or medium — the cocoa makes the bread appear darker than it actually is, and a medium setting ensures the crust does not get too dark during baking.
Press Start. When the machine signals to add mix-ins, open the lid and pour in the chocolate chips. If your machine does not have a mix-in signal, add the chips about 5 minutes into the kneading cycle.
Close the lid and let the machine complete the full cycle. As the bread bakes, the chocolate chips will melt slightly into the crumb, creating pockets of chocolate throughout the loaf.
When done, remove the bread pan and turn the loaf out onto a wire rack. The bread will look dark and beautiful. Allow it to cool for at least 30 minutes before slicing.
Serve in thick slices with a drizzle of honey or a spread of hazelnut chocolate spread. This bread also makes a wonderful base for chocolate-themed French toast.
18. Cornbread Recipe
Prep Time: 10 minutes | Bake Time: 1 hour 30 minutes | Serves: 10 slices
Sweet, golden, and slightly crumbly — cornbread made in the KBS bread machine is a quick and easy recipe that pairs perfectly with chili, barbecue, or a warm bowl of soup. It bakes up with a tender crumb and a slightly crisp crust.
Ingredients:
- 1 cup buttermilk
- 2 eggs, beaten
- ⅓ cup melted butter
- ¼ cup sugar
- 1 teaspoon salt
- 1 cup cornmeal
- 1 cup all-purpose flour
- 1 tablespoon baking powder
Instructions:
Cornbread is a quick bread that uses baking powder for leavening, not yeast. Use the Quick Bread or Cake setting on the KBS bread machine for this recipe.
Start by measuring all your ingredients carefully. If you do not have buttermilk, you can make a quick substitute by adding one tablespoon of white vinegar or lemon juice to one cup of regular milk and letting it sit for 5 minutes before using.
Pour the buttermilk into the bread pan. Add the beaten eggs and melted butter. Stir them together inside the pan with a fork to help them combine before you add the dry ingredients.
Add the sugar and salt. Then pour in the cornmeal and all-purpose flour. Finally, add the baking powder. Do not stir the dry ingredients into the wet mixture — let the machine do this during the mixing phase.
Lock the pan into the KBS bread machine and select the Quick Bread or Cake setting. Set the crust color to light to prevent the cornbread from browning too deeply.
Press Start. The machine will mix the batter gently, which is exactly what cornbread needs. Over-mixing cornbread can make it tough and dense instead of tender and crumbly.
When the baking cycle completes, insert a toothpick into the center of the cornbread. If it comes out clean, the bread is done. If not, run the Bake-Only function for an additional 10 minutes.
Remove the bread pan using oven mitts and carefully shake the cornbread out onto a wire rack. Let it cool for 20 minutes before slicing. Serve warm with butter, honey, or a side of chili.
19. Artisan Bread Recipe
Prep Time: 10 minutes | Bake Time: 3 hours | Serves: 10 slices
Rustic, chewy, and full of character — artisan bread made in the KBS bread machine captures the look and texture of a bakery-style loaf without any special equipment or technique. A slow rise is the secret to the deep flavor in every bite.
Ingredients:
- 1 ½ cups warm water
- 1 teaspoon salt
- ½ teaspoon sugar
- 3 cups bread flour
- 1 ½ teaspoons active dry yeast
Instructions:
Artisan bread uses a wetter, looser dough than most sandwich breads. This high water content is what creates the open, chewy crumb and the crackly crust that artisan bread is known for.
Pour the warm water into the bread pan. Add the salt and sugar. Pour the bread flour on top. Make a small well and add the yeast.
Lock the pan into the KBS bread machine and select the Basic setting. For deeper flavor, you can use the Whole Wheat or French setting — both allow for a longer fermentation time that develops the artisan flavor better. Set the crust to dark for a crustier finish.
Press Start. Because the dough is wetter than usual, it will look more like a thick, sticky batter than a traditional bread ball during kneading. This is correct — do not add extra flour. The high hydration is intentional and is what creates the open crumb structure.
Let the machine run through the full cycle. The bread will rise beautifully during the proofing phase and develop a deep color during baking.
When baking is complete, remove the bread pan carefully. The loaf will be deeply golden and firm on the outside. Turn it out onto a wire rack. You may hear the crust crackling as it cools — this is a wonderful sign that the crust has developed properly.
Let the artisan loaf cool for at least 45 minutes before slicing. Cutting into it too soon will compress the open crumb structure and make the inside seem dense. Once cooled, slice thickly and serve with olive oil, soup, or your favorite cheese and charcuterie.
20. Vegan Bread Recipe
Prep Time: 10 minutes | Bake Time: 3 hours | Serves: 12 slices
Plant-based and completely dairy-free — vegan bread made in the KBS bread machine is soft, satisfying, and suitable for everyone. No eggs, no dairy, no compromise on taste or texture.
Ingredients:
- 1 cup warm water
- 2 tablespoons coconut oil or vegan butter (melted)
- 1 tablespoon maple syrup or agave nectar
- 1 ½ teaspoons salt
- 3 cups bread flour
- 2 ¼ teaspoons active dry yeast
Instructions:
Pour the warm water into the bread pan. Add the melted coconut oil or vegan butter. Pour in the maple syrup or agave nectar — this replaces the small amount of sugar used in most bread recipes and adds a very subtle natural sweetness that complements the flavor of the bread without making it taste sweet.
Sprinkle the salt around the edges of the pan. Pour the bread flour on top, smoothing it gently. Create a small well in the center of the flour and add the yeast.
Lock the bread pan into the KBS bread machine. Select the Basic setting. Set the crust color to medium. Vegan bread without eggs and dairy can sometimes be slightly lighter in color than a standard white bread loaf, so a medium crust setting ensures good color development.
Press Start. The dough will come together quickly during the kneading cycle. It should form a smooth, slightly tacky ball. Because there are no eggs or dairy fats in the dough, it may feel a little firmer than an enriched bread dough — this is normal.
Allow the machine to run through the complete kneading, rising, and baking cycle without interruption. The maple syrup or agave helps the crust develop a beautiful golden finish, and the coconut oil provides enough fat to keep the crumb soft and tender.
When the baking cycle finishes, remove the bread pan using oven mitts. Turn the loaf out onto a wire cooling rack. The bread will be lightly golden all around. Let it cool for at least 25 to 30 minutes before slicing.
Serve with plant-based butter, avocado, hummus, or any of your favorite vegan toppings. This bread stores well in an airtight bag at room temperature for up to four days, or freeze for up to two months. It is a reliable everyday loaf that works for sandwiches, toast, and anything in between.
Best Settings to Use on a KBS Bread Machine
Getting the settings right makes a big difference in how your bread turns out. Here is a quick guide to the most useful programs on the KBS bread machine:
1. Basic Mode. This is the standard setting for most white and sandwich bread recipes. It includes a full knead, rise, and bake cycle that typically takes about 3 hours. Great for classic white bread, cheese bread, honey oat bread, and garlic herb bread.
2. Whole Wheat Mode. This program runs longer than the basic setting to give heavier whole wheat and multigrain doughs enough time to develop and rise properly. The extended knead time also helps break down the bran in whole wheat flour for a better crumb. Use this for whole wheat, multigrain, and honey oat bread.
3. Gluten-Free Setting. Specially designed for doughs made without wheat flour, this setting uses a gentler knead and a longer bake time. It works best with a gluten-free flour blend that already contains xanthan gum. Do not use regular flour on this setting — the cycle timing is tuned specifically for gluten-free batter.
4. Dough Setting. This program kneads and proofs the dough without baking it. Perfect for pizza dough, dinner roll dough, cinnamon rolls, and any recipe where you want to finish shaping and baking in your regular oven. It gives you full control over the final shape and baking result.
5. Quick Bake Option. A shortened version of the basic cycle for times when you need bread faster. The bake time is reduced, which can result in a slightly denser loaf. Best used for recipes that are less sensitive to rise time, like certain white breads or quick breads.
6. Crust Color Selection Guide. The KBS machine lets you pick light, medium, or dark crust color before baking. Use light for sweet breads and quick breads that tend to brown fast. Choose medium for most everyday loaves like white, whole wheat, and French bread. Go with dark for artisan bread, sourdough, and any loaf where you want a crispier, more flavorful crust.
Conclusion
The KBS bread machine is one of the easiest ways to bring fresh, homemade bread into your daily routine. From soft sandwich loaves to hearty multigrain breads and savory herb loaves, the recipes in this article show just how many things you can make with this one machine. The biggest advantage is how much time and effort it saves — you simply add your ingredients, choose a setting, and walk away while the machine handles everything.
Homemade bread is also healthier than most store-bought options. You control every ingredient that goes into your loaf — no preservatives, no artificial flavors, and no unnecessary additives. The bread comes out fresher, tastes better, and keeps your family eating food you can actually feel good about.
The best part about these KBS bread machine recipes is that they are just a starting point. Once you get comfortable with the basics, try swapping ingredients, adding different herbs, or experimenting with mix-ins. Every small change leads to a new discovery. Baking is all about trying things and learning what works best for you and your family.
Have a favorite bread recipe you make in your KBS machine? A special ingredient you always add? Share your baking experiences and recipes in the comments — this community loves hearing from real home bakers who are making great bread every day.