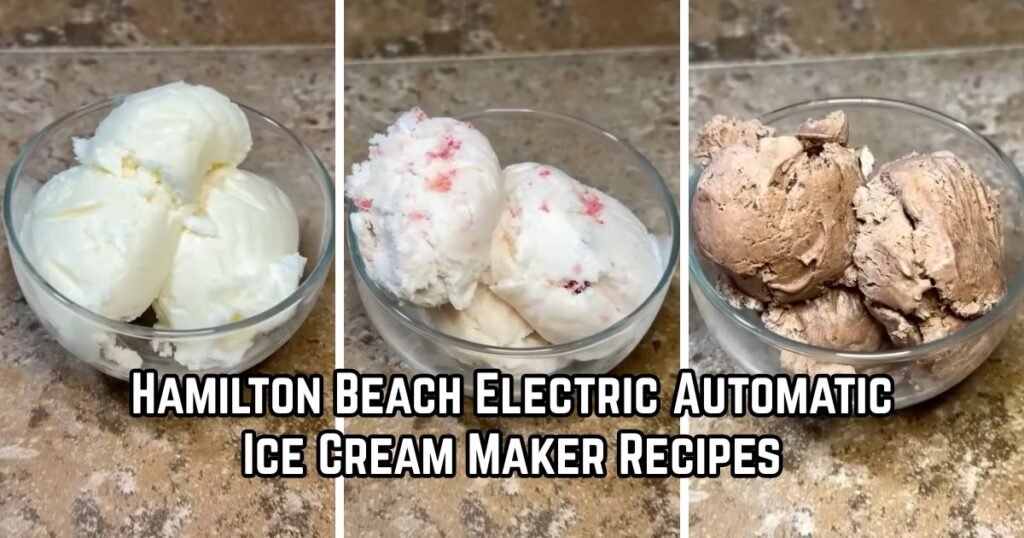
Homemade ice cream has become a favorite treat for families who want fresh flavors without added preservatives. More people are turning away from store shelves and making their own batches at home, mixing simple ingredients into something rich and creamy.
A Hamilton Beach Electric Automatic Ice Cream Maker makes this process much easier, especially for beginners who have never churned a batch before. The machine handles the hard part on its own, so there’s little guesswork involved.
Making ice cream at home comes with real benefits. Fresh ingredients go straight into the mix, custom flavors can be created based on personal taste, and the total cost stays lower compared to buying pints from the store. It also turns into a great activity families can enjoy together on a weekend afternoon.
This article covers 15 recipe ideas made for Hamilton Beach Electric Automatic Ice Cream Maker recipes, along with preparation tips and serving suggestions. Each recipe includes clear steps, so anyone can follow along and create smooth, creamy results at home.

Why Use a Hamilton Beach Ice Cream Maker for Homemade Recipes?
- Automatic operation reduces hands-on effort, since the machine handles mixing and freezing without constant attention.
- No manual churning is required, unlike traditional methods that need arm strength and patience.
- The simple design suits beginners and families, making it approachable for anyone new to homemade desserts.
- Different flavors can be tested easily, allowing endless combinations of fruits, chocolate, and mix-ins.
Getting started may seem intimidating or difficult at first glance, but it’s actually quite the opposite! With a few basic ingredients and a little patience during chilling, anyone can produce smooth, bakery-style scoops right in their own kitchen.
1. Classic Vanilla Ice Cream Recipe
Prep Time: 15 minutes | Cook Time: 25 minutes | Serve: 6
Classic vanilla ice cream brings a smooth, creamy texture with warm vanilla flavor in every bite. Made with heavy cream, whole milk, sugar, and real vanilla extract, it turns into a rich base that pairs well with almost any topping. The recipe works well for beginners since it needs only a handful of ingredients and simple steps to reach a perfect scoopable consistency.
Ingredients
- 2 cups heavy cream
- 1 cup whole milk
- 3/4 cup sugar
- 2 teaspoons vanilla extract
- Pinch of salt
Instructions
Begin by pouring the heavy cream and whole milk into a large mixing bowl. Add the sugar directly into the liquid and whisk everything together until the sugar dissolves completely, which usually takes about two to three minutes of steady stirring. The mixture should feel smooth against the back of a spoon, with no gritty texture remaining. Once the sugar disappears fully, add the vanilla extract and a small pinch of salt, then stir again to combine every ingredient evenly throughout the mixture.
After mixing, cover the bowl with plastic wrap or a tight-fitting lid and place it inside the refrigerator for at least two hours, though overnight chilling produces better results. Cold mixture churns faster and creates a smoother final texture, so skipping this step often leads to icy, grainy ice cream instead of a creamy one. While waiting, prepare the Hamilton Beach Electric Automatic Ice Cream Maker by freezing the bowl attachment for twelve to twenty-four hours beforehand, since a properly frozen bowl matters more than any other factor for successful churning.
Once the mixture reaches a cold temperature and the freezer bowl feels solid throughout, assemble the machine according to its setup instructions. Pour the chilled vanilla mixture into the frozen bowl, then turn on the machine and let it churn for twenty to twenty-five minutes. During this time, the mixture slowly thickens and expands as air gets incorporated, turning from a thin liquid into a soft-serve consistency. Watch for the mixture pulling away from the sides of the bowl, which signals that churning has reached the right stage.
Once the texture looks thick and creamy, transfer the ice cream into a freezer-safe container using a spatula. Smooth the top with the back of a spoon, then press a piece of parchment paper directly onto the surface before sealing the lid. This step helps prevent ice crystals from forming on top during storage. Place the container into the freezer for four hours to firm up before scooping, though the soft-serve version can be enjoyed right after churning ends. Serve chilled with favorite toppings for a satisfying homemade dessert everyone can enjoy without much effort or skill required.
Serving Ideas: Serve with cookies, fresh fruit, or warm chocolate sauce drizzled on top for extra flavor.
2. Rich Chocolate Ice Cream Recipe
Prep Time: 15 minutes | Cook Time: 25 minutes | Serve: 6
Rich chocolate ice cream delivers a deep, bold cocoa flavor balanced with creamy sweetness. Made using cocoa powder, chocolate chips, cream, milk, and sugar, the combination creates a dense, satisfying dessert perfect for chocolate lovers. Melting the chocolate properly before mixing helps avoid a grainy texture, giving the final batch a silky, smooth consistency that scoops beautifully every time.
Ingredients
- 2 cups heavy cream
- 1 cup whole milk
- 3/4 cup sugar
- 1/2 cup cocoa powder
- 1/2 cup chocolate chips, melted
- Pinch of salt
Instructions
Start by warming the whole milk gently in a saucepan over low heat, stirring constantly to prevent scorching along the bottom. Once the milk feels warm but not boiling, whisk in the cocoa powder gradually, breaking apart any clumps until the mixture turns smooth and dark brown. Add the sugar next, continuing to stir until it dissolves fully into the warm milk mixture, which usually takes around three to four minutes of consistent whisking.
Remove the saucepan from heat and add the melted chocolate chips into the warm cocoa mixture, stirring until everything blends into a glossy, uniform base. Pour in the heavy cream and a pinch of salt, whisking again to combine all ingredients into a rich, dark mixture. Taste the base at this point to check sweetness, adjusting sugar slightly in case a deeper flavor feels needed for personal preference.
Transfer the mixture into a bowl, cover it tightly, and refrigerate for at least three hours to allow the flavors to develop fully while the base chills down completely. Cold chocolate mixture churns more evenly and prevents icy patches from forming during the freezing process. Meanwhile, keep the ice cream maker bowl frozen solid, since chocolate bases tend to need slightly longer churning time compared to lighter recipes.
Once chilled, pour the mixture into the prepared bowl and start the churning cycle on the Hamilton Beach Electric Automatic Ice Cream Maker. Let the machine run for twenty-five to thirty minutes, checking occasionally for thickness. Chocolate mixtures often take a few extra minutes compared to vanilla bases because of the added cocoa solids and melted chocolate, which create extra density throughout the mixture.
When the texture reaches a thick, soft-serve consistency, scoop the ice cream into an airtight container. Press parchment paper against the top surface before sealing to protect against freezer burn and ice crystal formation. Freeze for four to five hours for a firmer scoop, or serve right away for a softer, silkier texture straight from the machine. Store leftovers properly to preserve the deep chocolate flavor for future servings.
Preparation Tips: Use dark cocoa powder and quality chocolate chips for deeper flavor. Chill the base fully before churning and skip extra liquid to prevent icy texture.
3. Fresh Strawberry Ice Cream Recipe
Prep Time: 20 minutes | Cook Time: 25 minutes | Serve: 6
Fresh strawberry ice cream captures the natural sweetness of ripe berries blended into a smooth, creamy base. Using fresh strawberries, cream, milk, and sugar, the recipe creates a fruity dessert with a light pink color and soft texture. Mashing the strawberries slightly before mixing helps release natural juices, giving the final ice cream a stronger berry flavor throughout every scoop.
Ingredients
- 2 cups fresh strawberries, hulled
- 1/2 cup sugar, divided
- 1 1/2 cups heavy cream
- 1 cup whole milk
- 1 teaspoon lemon juice
Instructions
Begin by washing the strawberries thoroughly and removing the green tops. Slice the berries into small pieces and place them into a bowl, then sprinkle a quarter cup of sugar over the top. Let the strawberries sit at room temperature for about twenty minutes, allowing the sugar to draw out natural juices and soften the fruit. This resting period builds stronger berry flavor into the final mixture instead of relying on plain fruit alone.
Once the strawberries release their juices, mash them lightly using a fork or potato masher, leaving small chunks for texture rather than turning them into a completely smooth puree. Add the lemon juice at this stage, which brightens the natural sweetness and keeps the color looking fresh rather than dull. Set the strawberry mixture aside while preparing the cream base separately.
In a separate bowl, combine the heavy cream, whole milk, and remaining sugar. Whisk the mixture until the sugar dissolves completely, which takes roughly three minutes of steady stirring. Once smooth, fold the mashed strawberries into the cream base, stirring gently so the fruit distributes evenly without breaking down further. Cover the combined mixture and refrigerate for at least two hours, allowing the flavors to blend together fully before churning begins.
After chilling, pour the strawberry mixture into the frozen bowl of the ice cream maker. Start the churning cycle and let the machine run for twenty to twenty-five minutes. Watch the texture closely near the end, since fruit-based mixtures sometimes take slightly less time compared to plain cream bases because of the added moisture from the berries.
Once the mixture thickens into a soft, creamy consistency with visible strawberry pieces throughout, transfer it into a freezer-safe container. Smooth the surface and press parchment paper on top before sealing tightly. Freeze for three to four hours for a firmer texture, or enjoy right away for a lighter, softer version straight from the machine. The finished dessert works well on warm days or as a topping for other homemade treats.
Tips: Mash strawberries lightly for texture, and rest them with sugar before mixing to improve fruit flavor.
4. Homemade Cookies and Cream Ice Cream Recipe
Prep Time: 15 minutes | Cook Time: 25 minutes | Serve: 6
Cookies and cream ice cream combines a smooth vanilla base with crushed chocolate sandwich cookies scattered throughout every bite. The contrast between creamy vanilla and crunchy cookie pieces creates a satisfying dessert loved by both kids and adults. Adding the cookie pieces at the right moment during churning keeps them slightly crisp instead of turning soggy inside the finished mixture.
Ingredients
- 2 cups heavy cream
- 1 cup whole milk
- 3/4 cup sugar
- 2 teaspoons vanilla extract
- 12 chocolate sandwich cookies, crushed
Instructions
Start by preparing the vanilla base first. Combine the heavy cream, whole milk, and sugar in a large mixing bowl, whisking until the sugar dissolves completely into the liquid. This process typically takes around three minutes of consistent stirring, resulting in a smooth mixture with no gritty texture remaining at the bottom of the bowl. Add the vanilla extract next, stirring again to distribute the flavor evenly throughout the base.
Cover the bowl and refrigerate the mixture for at least two hours, though overnight chilling produces smoother results with better texture once churned. While the base chills, prepare the cookies by placing them into a sealed plastic bag and crushing them using a rolling pin. Aim for a mix of small crumbs and slightly larger chunks, since varied piece sizes create better texture throughout the finished ice cream rather than one uniform crumb size.
Once the vanilla base feels cold throughout, pour it into the frozen bowl of the ice cream maker. Start the churning cycle and let the machine run for about fifteen minutes before adding the crushed cookies. Adding cookies too early can cause them to break down further during churning, losing their texture entirely by the time the process finishes.
After fifteen minutes, slowly pour the crushed cookie pieces into the machine while it continues running, allowing the paddle to fold them evenly throughout the mixture. Continue churning for another eight to ten minutes, watching for even distribution of cookie pieces without letting the mixture over-churn, which can make the texture feel dense and hard rather than light and creamy.
Once the mixture reaches a thick, soft-serve consistency with visible cookie pieces spread throughout, transfer the ice cream into an airtight container using a spatula. Press parchment paper against the surface before sealing to prevent ice crystals from forming during storage. Freeze for four hours to firm up completely, or serve right away for a softer texture straight from the machine. The combination remains a favorite among families looking for a classic, crowd-pleasing dessert option.
Tips: Add cookie pieces about fifteen minutes into churning for the best texture and crunch.
5. Mint Chocolate Chip Ice Cream Recipe
Prep Time: 15 minutes | Cook Time: 25 minutes | Serve: 6
Mint chocolate chip ice cream pairs a cool, refreshing mint base with small pieces of chocolate spread throughout each scoop. The light green color and clean mint flavor make it a popular choice during warmer months. Balancing the mint extract carefully keeps the flavor pleasant rather than overpowering, while chopped chocolate adds a satisfying crunch to every bite.
Ingredients
- 2 cups heavy cream
- 1 cup whole milk
- 3/4 cup sugar
- 1 teaspoon mint extract
- 1/2 cup chocolate chips, chopped
Instructions
Begin by combining the heavy cream, whole milk, and sugar in a large mixing bowl. Whisk the ingredients together until the sugar fully dissolves, which usually takes around three minutes of steady stirring. The base should feel smooth with no grainy texture remaining before moving to the next step. Add the mint extract slowly, starting with half a teaspoon and tasting the mixture before adding more, since mint flavor can turn overpowering quickly in case too much gets poured in at once.
Once the mint level tastes balanced, stir the mixture one more time to distribute the flavor evenly throughout the base. Cover the bowl tightly and place it inside the refrigerator for at least two hours, though longer chilling produces a smoother texture once churning begins. While the base chills, chop the chocolate chips into small, uneven pieces using a sharp knife, aiming for a mix of tiny shards and slightly larger chunks rather than one uniform size.
After the mixture chills completely, pour it into the frozen bowl of the ice cream maker and start the churning cycle. Let the machine run for about fifteen minutes before adding the chopped chocolate, giving the mint base time to thicken slightly first. Adding chocolate too early can cause pieces to sink unevenly, while adding it too late may leave pieces sitting only near the top of the mixture.
Slowly pour the chopped chocolate into the machine while it continues running, allowing the paddle to fold the pieces evenly throughout the thickening mixture. Continue churning for another eight to ten minutes, checking for even chocolate distribution and a soft-serve consistency before stopping the machine. The mint base should look pale green with visible dark chocolate specks spread across the entire batch by this point.
Once the texture reaches the right thickness, transfer the ice cream into an airtight container using a spatula, smoothing the top before sealing. Press parchment paper against the surface to prevent ice crystals from forming during storage. Freeze for four hours for a firmer scoop, or serve immediately for a softer, creamier version straight from the machine. Store any leftovers properly to keep the mint flavor fresh for later servings.
Tips: Add mint extract gradually to avoid an overpowering flavor, and chop chocolate into uneven pieces for better texture throughout the batch.
6. Coffee Ice Cream Recipe
Prep Time: 15 minutes | Cook Time: 25 minutes | Serve: 6
Coffee ice cream brings a bold, roasted flavor into a smooth, creamy dessert perfect for coffee lovers. Made with strong brewed coffee or espresso, cream, milk, and sugar, the recipe delivers a rich taste without needing extra flavoring. Choosing the right coffee strength matters greatly here, since a weak brew produces a mild dessert while a strong one creates a deep, bold flavor throughout.
Ingredients
- 1 cup strong brewed coffee or espresso, cooled
- 1 1/2 cups heavy cream
- 1 cup whole milk
- 3/4 cup sugar
Instructions
Start by brewing a strong batch of coffee or espresso, using roughly double the usual amount of grounds compared to a regular cup. Allow the brewed coffee to cool completely at room temperature, since adding hot liquid into the cream base can cause separation or an uneven texture later during churning. Cooling typically takes around thirty minutes, though placing the coffee inside the refrigerator speeds up the process considerably.
Once cooled, combine the coffee with heavy cream, whole milk, and sugar inside a large mixing bowl. Whisk the ingredients together until the sugar dissolves fully into the liquid, which usually takes about three to four minutes of steady stirring. The mixture should turn a light brown color with a smooth, even consistency throughout, without any visible sugar granules remaining at the bottom of the bowl.
Cover the bowl and refrigerate the mixture for at least two hours, though longer chilling helps intensify the coffee flavor while producing a smoother final texture. Cold mixtures churn more evenly, reducing the chance of icy patches forming during freezing. Meanwhile, keep the ice cream maker bowl frozen solid ahead of time, since coffee-based mixtures benefit from a fully hardened freezer bowl for best results.
After chilling, pour the coffee mixture into the frozen bowl and start the churning cycle. Let the machine run for twenty to twenty-five minutes, watching for the mixture to thicken gradually into a soft-serve consistency. The coffee flavor becomes more noticeable as air gets incorporated during churning, creating a light, airy texture rather than a dense, heavy one.
Once the texture thickens properly, transfer the ice cream into a freezer-safe container using a spatula. Smooth the top and press parchment paper against the surface before sealing tightly to prevent freezer burn. Freeze for four hours for a firmer scoop, or serve right away for a softer version straight from the machine. Pair the finished dessert with chocolate shavings or a light drizzle of caramel for extra flavor.
Tips: Choose a strong coffee or espresso blend for bold flavor, and cool the brewed coffee fully before mixing to avoid texture problems.
7. Peanut Butter Ice Cream Recipe
Prep Time: 15 minutes | Cook Time: 25 minutes | Serve: 6
Peanut butter ice cream delivers a thick, nutty flavor balanced with creamy sweetness in every scoop. Made using creamy peanut butter, milk, cream, and sugar, the recipe creates a dense dessert loved by peanut butter fans of all ages. Adding chocolate chunks or peanut butter cups turns the base into an even richer treat, perfect for anyone wanting extra texture throughout the batch.
Ingredients
- 1 cup creamy peanut butter
- 1 1/2 cups heavy cream
- 1 cup whole milk
- 3/4 cup sugar
- Optional: 1/2 cup chocolate chunks or chopped peanut butter cups
Instructions
Begin by placing the peanut butter into a large mixing bowl and warming it slightly in the microwave for about fifteen seconds, which makes it easier to blend smoothly with the other ingredients. Add the whole milk gradually, whisking constantly to break apart any thick clumps until the peanut butter loosens into a smoother, pourable consistency. This step prevents lumps from forming later in the finished dessert.
Once the peanut butter and milk combine smoothly, add the sugar and continue whisking until it dissolves completely into the mixture. This usually takes around three to four minutes of steady stirring, resulting in a thick, glossy base with a light tan color throughout. Pour in the heavy cream next, whisking again until every ingredient blends into one smooth, uniform mixture without any separation.
Cover the bowl tightly and refrigerate the mixture for at least two hours, allowing the flavors to settle while the base chills down completely. Cold peanut butter mixtures tend to churn more evenly, since the thickness of the peanut butter can otherwise slow down the freezing process inside the machine. Keep the ice cream maker bowl frozen solid ahead of time for the best results with this denser recipe.
After chilling, pour the mixture into the frozen bowl and start the churning cycle. Let the machine run for twenty-five to thirty minutes, since peanut butter bases often take slightly longer to thicken compared to lighter mixtures. Check the texture periodically near the end, watching for a thick, soft-serve consistency before adding any optional mix-ins.
During the final five minutes of churning, slowly add chocolate chunks or chopped peanut butter cups in case a richer version feels appealing, letting the paddle fold them evenly throughout the mixture. Once churning finishes, transfer the ice cream into an airtight container, smoothing the top before pressing parchment paper against the surface. Freeze for four hours for a firmer scoop, or serve immediately for a softer, creamier texture straight from the machine.
Optional Add-ins: Chocolate chunks or chopped peanut butter cups folded in during the last few minutes of churning.
8. Banana Ice Cream Recipe
Prep Time: 15 minutes | Cook Time: 25 minutes | Serve: 6
Banana ice cream offers a naturally sweet, creamy dessert made from ripe bananas blended with milk, cream, and sugar. The natural sugars inside ripe bananas reduce the need for extra sweetener, creating a lighter dessert with a smooth, mellow flavor. This simple recipe works well for anyone wanting a fruit-based treat without a long ingredient list or complicated preparation steps.
Ingredients
- 4 ripe bananas, mashed
- 1 1/2 cups heavy cream
- 1 cup whole milk
- 1/2 cup sugar
- 1 teaspoon lemon juice
Instructions
Start by peeling the ripe bananas and placing them into a large mixing bowl. Mash the bananas thoroughly using a fork or potato masher until the mixture turns mostly smooth, with only a few small lumps remaining for natural texture. Riper bananas with brown spots on the peel work best here, since they carry stronger natural sweetness and blend more smoothly compared to firmer, greener fruit.
Add the lemon juice to the mashed bananas immediately after mashing, stirring to combine. This step keeps the banana mixture from turning brown while also brightening the overall flavor slightly. Set the mashed banana mixture aside while preparing the cream base in a separate bowl, keeping the two components apart until closer to churning time.
In the separate bowl, combine the heavy cream, whole milk, and sugar, whisking until the sugar dissolves completely. This process usually takes around three minutes of steady stirring, producing a smooth, pale mixture with no visible sugar granules remaining. Once smooth, fold the mashed banana mixture into the cream base, stirring gently until fully combined into one consistent mixture.
Cover the bowl and refrigerate the combined mixture for at least two hours, allowing the banana flavor to blend fully into the cream base while everything chills down completely. Cold mixtures churn more evenly and help avoid icy patches from forming during the freezing process. Keep the ice cream maker bowl frozen solid ahead of time for the best possible texture once churning starts.
After chilling, pour the banana mixture into the frozen bowl and start the churning cycle. Let the machine run for twenty to twenty-five minutes, checking for a thick, soft-serve consistency near the end of the cycle. Once ready, transfer the ice cream into a freezer-safe container, smoothing the top before pressing parchment paper against the surface and sealing tightly. Freeze for three to four hours for a firmer scoop, or serve right away for a softer, lighter texture straight from the machine.
Tips: Use very ripe bananas with brown spots for natural sweetness, and add lemon juice right after mashing to keep the color fresh.
9. Mango Ice Cream Recipe
Prep Time: 20 minutes | Cook Time: 25 minutes | Serve: 6
Mango ice cream offers a bright, tropical flavor made from sweet mango puree blended with cream, milk, and sugar. The natural fruit sweetness pairs beautifully with the smooth, cold base, creating a dessert that feels light and refreshing. Choosing ripe, sweet mangoes matters greatly here, since underripe fruit produces a duller flavor with less natural sugar throughout the finished batch.
Ingredients
- 2 cups fresh mango puree
- 1 1/2 cups heavy cream
- 1 cup whole milk
- 1/2 cup sugar
- 1 teaspoon lime juice
Instructions
Begin by selecting ripe mangoes with a slight give when pressed gently and a sweet smell near the stem. Peel the mangoes and cut the flesh away from the pit, then place the pieces into a blender. Blend until completely smooth, stopping to scrape down the sides once or twice to catch any larger chunks that may remain stuck against the container walls. Measure out two cups of the finished puree for this recipe, saving any extra for another use.
Pour the mango puree into a large mixing bowl and add the lime juice, stirring to combine. The lime juice brightens the mango flavor while balancing the natural sweetness slightly, keeping the final dessert from tasting flat. Set the puree aside while preparing the cream base in a separate bowl, keeping the two mixtures apart until closer to churning time.
In the separate bowl, whisk together the heavy cream, whole milk, and sugar until the sugar dissolves completely, which usually takes around three minutes of steady stirring. Once smooth, fold the mango puree into the cream base, stirring gently until the mixture turns a consistent pale orange color throughout. Taste the mixture at this stage, adjusting sugar slightly depending on how sweet the mangoes turned out naturally.
Cover the bowl and refrigerate the combined mixture for at least two hours, allowing the mango flavor to settle into the cream base while everything chills completely. Mango mixtures sometimes carry more natural water content compared to other fruits, so chilling thoroughly helps the base churn more evenly once the process begins inside the machine.
Pour the chilled mixture into the frozen bowl of the ice cream maker and start the churning cycle. Let the machine run for twenty to twenty-five minutes, watching closely near the end for a thick, soft-serve texture. Once ready, transfer the ice cream into a freezer-safe container, smoothing the top before pressing parchment paper against the surface and sealing tightly. Freeze for three to four hours for a firmer scoop, or serve immediately for a lighter, softer version straight from the machine.
Tips: Choose sweet, fully ripe mangoes for the best flavor, and measure the puree carefully to prevent excess water content from thinning the base.
10. Caramel Ice Cream Recipe
Prep Time: 20 minutes | Cook Time: 25 minutes | Serve: 6
Caramel ice cream combines a smooth, buttery caramel flavor with a rich, creamy base for a dessert that feels indulgent without being overly sweet. Made using homemade or prepared caramel sauce, cream, milk, and sugar, the recipe creates a golden-toned treat perfect for topping with nuts or an extra drizzle of caramel. The deep flavor comes through in every scoop once properly chilled and churned.
Ingredients
- 3/4 cup caramel sauce, homemade or prepared
- 1 1/2 cups heavy cream
- 1 cup whole milk
- 1/2 cup sugar
- Pinch of salt
Instructions
Begin by preparing the caramel sauce, unless a prepared version already sits ready in the refrigerator. For homemade caramel, melt sugar slowly in a heavy saucepan over medium heat, stirring occasionally until it turns a deep amber color. Carefully add warm cream in small amounts, stirring constantly, since the mixture will bubble vigorously when the two combine. Continue stirring until the sauce turns smooth, then remove from heat and let it cool to room temperature before using.
Once the caramel sauce reaches room temperature, combine the heavy cream, whole milk, and sugar inside a large mixing bowl. Whisk until the sugar dissolves completely, which usually takes about three minutes of steady stirring. Pour in the cooled caramel sauce and a small pinch of salt, whisking again until the mixture turns a smooth, even golden-brown color throughout, with no streaks of caramel remaining visible.
Cover the bowl tightly and refrigerate the mixture for at least two hours, though longer chilling helps deepen the caramel flavor while producing a smoother final texture. Cold caramel mixtures churn more evenly, since the sugar content inside caramel sauce can otherwise slow down the freezing process happening inside the machine. Keep the ice cream maker bowl frozen solid ahead of time for the best results.
After chilling, pour the caramel mixture into the frozen bowl and start the churning cycle. Let the machine run for twenty-five to thirty minutes, since caramel-based mixtures sometimes take slightly longer to thicken compared to plain cream bases because of the added sugar content. Check the texture periodically near the end, watching for a thick, soft-serve consistency before stopping the machine.
Once ready, transfer the ice cream into an airtight container, smoothing the top before pressing parchment paper against the surface and sealing tightly. Freeze for four hours for a firmer scoop, or serve right away for a softer, silkier texture straight from the machine. Drizzle extra caramel sauce over each serving and add chopped nuts for extra crunch and flavor.
Serving Suggestions: Add chopped nuts or an extra caramel drizzle on top before serving.
11. Chocolate Chip Cookie Dough Ice Cream Recipe
Prep Time: 20 minutes | Cook Time: 25 minutes | Serve: 6
Chocolate chip cookie dough ice cream combines a smooth vanilla base with small, safe-to-eat cookie dough pieces and chocolate chips scattered throughout. The soft dough pieces add a chewy contrast against the creamy base, creating a dessert loved by both kids and adults. Preparing the cookie dough properly beforehand keeps it safe to eat without baking while maintaining a soft, chewy texture inside the finished batch.
Ingredients
- 2 cups heavy cream
- 1 cup whole milk
- 3/4 cup sugar
- 2 teaspoons vanilla extract
- 1 cup safe-to-eat cookie dough pieces
- 1/2 cup chocolate chips
Instructions
Begin by preparing the safe-to-eat cookie dough, using heat-treated flour and no eggs to keep the mixture safe without baking. Combine softened butter, brown sugar, heat-treated flour, and a splash of milk in a small bowl, mixing until a soft dough forms. Fold in a small amount of mini chocolate chips directly into the dough, then roll the mixture into small, bite-sized pieces. Place the pieces onto a plate and freeze them for at least one hour, which keeps them firm enough to hold their shape during churning.
While the dough pieces chill, prepare the vanilla base by combining the heavy cream, whole milk, and sugar inside a large mixing bowl. Whisk until the sugar dissolves completely, which usually takes around three minutes of steady stirring. Add the vanilla extract next, stirring again to distribute the flavor evenly throughout the smooth mixture. Cover the bowl and refrigerate for at least two hours, allowing the base to chill thoroughly before churning begins.
Once the vanilla base feels cold throughout, pour it into the frozen bowl of the ice cream maker and start the churning cycle. Let the machine run for about fifteen minutes before adding any mix-ins, giving the base time to thicken slightly first. Adding dough pieces too early can cause them to break apart before the mixture firms up enough to hold them steady throughout the batch.
After fifteen minutes, slowly add the frozen cookie dough pieces and chocolate chips into the machine while it continues running, allowing the paddle to fold everything evenly throughout the thickening mixture. Continue churning for another eight to ten minutes, checking for even distribution of dough pieces and chocolate chips without letting the mixture over-churn into a dense, hard texture.
Once the mixture reaches a thick, soft-serve consistency with visible dough pieces spread throughout, transfer the ice cream into an airtight container using a spatula. Press parchment paper against the surface before sealing to prevent ice crystals from forming during storage. Freeze for four hours to firm up completely, or serve immediately for a softer texture straight from the machine.
Tips: Use heat-treated flour and skip eggs when preparing cookie dough pieces to keep them safe to eat without baking.
12. Coconut Ice Cream Recipe
Prep Time: 15 minutes | Cook Time: 25 minutes | Serve: 6
Coconut ice cream brings a smooth, tropical flavor made from coconut milk, cream, shredded coconut, and sugar. The natural richness of coconut milk pairs beautifully with heavy cream, creating a dense, satisfying base with a mellow sweetness throughout. Toasting the shredded coconut before mixing adds a deeper, nuttier flavor that stands apart from plain, untoasted coconut pieces stirred straight into the batch.
Ingredients
- 1 cup coconut milk
- 1 1/2 cups heavy cream
- 1/2 cup shredded coconut
- 3/4 cup sugar
- 1 teaspoon vanilla extract
Instructions
Begin by toasting the shredded coconut in a dry skillet over medium-low heat, stirring frequently to prevent burning. Watch closely, since coconut shreds turn golden brown quickly once they start browning, usually within three to five minutes on the stovetop. Remove the toasted coconut from heat and let it cool completely on a plate before adding it into the mixture later.
While the coconut cools, combine the coconut milk, heavy cream, and sugar inside a large mixing bowl. Whisk the ingredients together until the sugar dissolves completely, which usually takes around three to four minutes of steady stirring. The mixture should turn smooth and pale, with a slightly thicker consistency compared to regular dairy-only bases because of the coconut milk content. Add the vanilla extract next, stirring again to distribute the flavor evenly throughout.
Once the toasted coconut cools fully, fold half of it directly into the cream mixture, saving the remaining portion for topping servings later. Cover the bowl and refrigerate the mixture for at least two hours, allowing the coconut flavor to blend fully into the base while everything chills down completely. Cold coconut mixtures churn more evenly, since the natural fat content inside coconut milk can otherwise slow down the freezing process.
After chilling, pour the mixture into the frozen bowl of the ice cream maker and start the churning cycle. Let the machine run for twenty to twenty-five minutes, checking near the end for a thick, soft-serve consistency. Coconut bases sometimes thicken slightly faster than plain dairy bases because of the natural fat content inside the coconut milk, so watch closely during the final few minutes of churning.
Once ready, transfer the ice cream into an airtight container, smoothing the top before pressing parchment paper against the surface and sealing tightly. Freeze for four hours for a firmer scoop, or serve right away for a softer texture straight from the machine. Sprinkle the reserved toasted coconut over each serving for extra crunch and a stronger tropical flavor.
Tips: Toast the shredded coconut before mixing for a deeper, nuttier flavor throughout the finished batch.
13. Blueberry Cheesecake Ice Cream Recipe
Prep Time: 20 minutes | Cook Time: 25 minutes | Serve: 6
Blueberry cheesecake ice cream combines a tangy cream cheese base with sweet blueberries and crushed graham cracker pieces throughout. The mixture recreates the flavor of a classic cheesecake in frozen form, balancing tart fruit against rich, creamy sweetness. Adding graham cracker pieces near the end of churning keeps them slightly crunchy instead of turning soft inside the finished dessert.
Ingredients
- 1 cup blueberries
- 8 ounces cream cheese, softened
- 1 1/2 cups heavy cream
- 3/4 cup sugar, divided
- 1/2 cup graham cracker pieces, crushed
Instructions
Begin by placing the blueberries into a small saucepan with a quarter cup of sugar over medium heat. Cook the berries gently, stirring occasionally, until they soften and release their natural juices, which usually takes around eight to ten minutes. Once the mixture thickens slightly into a loose sauce, remove it from heat and let it cool completely at room temperature before using it later in the recipe.
While the blueberry sauce cools, beat the softened cream cheese in a large mixing bowl until smooth, using a hand mixer or whisk to remove any lumps. Add the remaining sugar and continue beating until fully combined, resulting in a smooth, slightly fluffy mixture. Slowly pour in the heavy cream, whisking continuously until the mixture turns smooth and pourable, without any streaks of cream cheese remaining visible throughout the base.
Once the blueberry sauce cools fully, swirl about two-thirds of it into the cream cheese base, leaving some sauce unmixed for a marbled effect rather than blending it completely smooth. Cover the bowl and refrigerate the mixture for at least two hours, allowing the flavors to settle while everything chills down completely before churning begins.
After chilling, pour the mixture into the frozen bowl of the ice cream maker and start the churning cycle. Let the machine run for about fifteen minutes before adding the graham cracker pieces, giving the base time to thicken first. Slowly add the crushed graham crackers while the machine continues running, allowing the paddle to fold them evenly throughout the mixture without breaking them down completely.
Continue churning for another eight to ten minutes, checking for a thick, soft-serve consistency with visible graham cracker pieces spread throughout. Once ready, transfer the ice cream into a container, drizzling the remaining blueberry sauce over the top before sealing with parchment paper. Freeze for four hours for a firmer scoop, or serve right away for a softer texture straight from the machine.
Tips: Swirl the blueberry sauce rather than fully mixing it in for a marbled, cheesecake-inspired appearance throughout the batch.
14. Pumpkin Spice Ice Cream Recipe
Prep Time: 20 minutes | Cook Time: 25 minutes | Serve: 6
Pumpkin spice ice cream brings warm, cozy flavors of cinnamon and nutmeg together with real pumpkin puree and cream. The combination creates a dessert that feels perfect for fall gatherings and holiday tables, offering a change from typical warm-weather flavors. Balancing the spices carefully keeps the pumpkin flavor front and center rather than letting cinnamon and nutmeg overpower the base.
Ingredients
- 1 cup pumpkin puree
- 1 1/2 cups heavy cream
- 1 cup whole milk
- 3/4 cup sugar
- 1 teaspoon cinnamon
- 1/2 teaspoon nutmeg
Instructions
Begin by combining the pumpkin puree, cinnamon, and nutmeg inside a large mixing bowl, stirring until the spices distribute evenly throughout the puree. The mixture should turn a warm orange-brown color with a smooth, even texture before moving forward. Taste the spiced puree at this stage, adjusting either spice slightly depending on personal preference for a stronger or milder flavor throughout the finished batch.
Add the sugar directly into the pumpkin mixture, stirring until it dissolves completely into the thicker puree base. This process takes slightly longer compared to plain dairy mixtures because of the denser texture of pumpkin puree, usually requiring about four to five minutes of steady stirring. Once smooth, pour in the heavy cream and whole milk, whisking continuously until the entire mixture turns into one consistent, pale orange base.
Cover the bowl tightly and refrigerate the mixture for at least two hours, allowing the spices to blend fully into the cream base while everything chills down completely. Cold pumpkin mixtures churn more evenly, since the denser puree can otherwise slow the freezing process happening inside the machine. Keep the ice cream maker bowl frozen solid ahead of time for the best texture with this thicker recipe.
After chilling, pour the pumpkin mixture into the frozen bowl and start the churning cycle. Let the machine run for twenty-five to thirty minutes, since pumpkin-based mixtures often take slightly longer to thicken compared to lighter, dairy-only bases. Check the texture periodically near the end, watching for a thick, soft-serve consistency with visible orange coloring throughout the mixture.
Once ready, transfer the ice cream into an airtight container, smoothing the top before pressing parchment paper against the surface and sealing tightly. Freeze for four hours for a firmer scoop, or serve right away for a softer texture straight from the machine. Sprinkle a light dusting of cinnamon over each serving for extra warmth and presentation during fall gatherings.
Best For: Fall desserts, holiday gatherings, and seasonal dinner tables.
15. Rocky Road Ice Cream Recipe
Prep Time: 20 minutes | Cook Time: 25 minutes | Serve: 6
Rocky road ice cream combines a rich chocolate base with marshmallows, nuts, and chocolate pieces scattered throughout every scoop. The mixture creates a dense, textured dessert loved by anyone wanting extra mix-ins inside a classic chocolate base. Adding the marshmallows and nuts at the right stage keeps them evenly distributed rather than sinking to the bottom of the finished batch.
Ingredients
- 2 cups heavy cream
- 1 cup whole milk
- 3/4 cup sugar
- 1/2 cup cocoa powder
- 1/2 cup mini marshmallows
- 1/2 cup chopped nuts
- 1/2 cup chocolate chunks
Instructions
Begin by preparing the chocolate base first. Combine the heavy cream, whole milk, and sugar inside a large mixing bowl, whisking until the sugar dissolves completely. Add the cocoa powder gradually, breaking apart any clumps until the mixture turns smooth and evenly dark throughout. This process usually takes around four minutes of steady stirring, resulting in a rich, glossy base ready for chilling.
Cover the bowl tightly and refrigerate the mixture for at least two hours, though longer chilling helps deepen the chocolate flavor while producing a smoother final texture once churned. While the base chills, chop the nuts into small, uneven pieces using a sharp knife, and measure out the marshmallows and chocolate chunks into separate small bowls, keeping everything ready for the churning stage ahead.
Once the chocolate base feels cold throughout, pour it into the frozen bowl of the ice cream maker and start the churning cycle. Let the machine run for about fifteen minutes before adding any mix-ins, giving the base time to thicken first. Adding marshmallows and nuts too early can cause them to break apart or sink unevenly throughout the mixture.
After fifteen minutes, slowly add the marshmallows, chopped nuts, and chocolate chunks into the machine while it continues running, allowing the paddle to fold everything evenly throughout the thickening base. Continue churning for another eight to ten minutes, checking for even distribution of mix-ins without letting the mixture over-churn into a dense, hard texture that loses its light, airy quality.
Once the mixture reaches a thick, soft-serve consistency with visible marshmallows, nuts, and chocolate pieces spread throughout, transfer the ice cream into an airtight container using a spatula. Press parchment paper against the surface before sealing to prevent ice crystals from forming during storage. Freeze for four hours to firm up completely, or serve immediately for a softer texture straight from the machine.
Tips: Add marshmallows, nuts, and chocolate chunks about fifteen minutes into churning for even distribution and the best texture.
How to Store Homemade Ice Cream Properly
Best Containers for Homemade Ice Cream
- Use airtight freezer containers with tight-fitting lids to keep air away from the surface of the ice cream.
- Press a piece of parchment paper or plastic wrap directly against the surface before sealing the lid, which helps prevent freezer burn and ice crystal buildup.
- Choose shallow, wide containers over deep, narrow ones, since they freeze more evenly and scoop more easily once fully hardened.
How Long Does Homemade Ice Cream Last?
- Homemade ice cream stays fresh for up to two weeks when stored properly inside an airtight container.
- Flavor and texture remain best during the first week, gradually becoming icier the longer it sits in the freezer.
- Keep the container toward the back of the freezer, away from the door, where temperature stays more consistent and helps maintain smooth texture over time.
Conclusion
A Hamilton Beach Electric Automatic Ice Cream Maker turns homemade dessert making into a simple, approachable process for anyone, regardless of experience level. With automatic churning and minimal setup, families can skip the store-bought aisle and create fresh, flavorful batches right in their own kitchen.
Trying different recipes, from classic vanilla to bold rocky road, opens up endless opportunities for customizing flavors based on personal taste and seasonal ingredients.
Homemade ice cream does not need to feel complicated or time-consuming. With a few basic ingredients, simple preparation steps, and a reliable machine handling the hard part, anyone can produce smooth, creamy, and satisfying desserts worth sharing with family and friends throughout the year.