
Making ice cream at home is getting more popular every year. More families are skipping the store-bought tubs and making their own frozen treats from scratch.
With a machine like the Cuisinart 2 Quart Ice Cream Maker, the whole process becomes much easier and faster.
You get full control over what goes into each batch — real ingredients, no odd additives, and flavors you actually love.
The Cuisinart 2 Quart Ice Cream Maker is a top pick for home cooks because it’s simple to use and gives great results every time.
It holds the perfect amount for a family dessert night or a small get-together. You just freeze the bowl ahead of time, add your mix, and let the machine do all the work.
Whether you want a classic scoop of vanilla or something more creative, these Cuisinart 2 Quart Ice Cream Maker Recipes will walk you through it all. Homemade ice cream has never been this easy or this good.

Why Choose the Cuisinart 2 Quart Ice Cream Maker?
The Cuisinart 2 Quart Ice Cream Maker has become a kitchen staple for a good reason. Here’s what makes it stand out:
1. Simple Setup: No ice and rock salt needed. Just freeze the double-insulated bowl for 16–24 hours, pour in your mix, and turn it on. The machine handles the churning from start to finish.
2. Perfect Batch Size: The 2-quart capacity makes about 8 to 12 servings — enough for the whole family without leaving piles of leftovers.
3. Hands-Free Churning: The built-in motor spins the paddle automatically, so you don’t have to stand and stir. Just set it and let it run for 20–25 minutes.
4. Consistent Results: The mixing paddle works the same way every time, giving you smooth, creamy ice cream with no big ice crystals.
5. Easy to Clean: The bowl, lid, and paddle are all removable and simple to rinse. Most parts are dishwasher-safe.
6. Versatile Use: Great for ice cream, gelato, sorbet, frozen yogurt, and sherbet — all in one machine.
7. Budget-Friendly: Compared to fancy commercial machines, the Cuisinart 2 Quart Ice Cream Maker gives you professional-quality results at a fraction of the cost.
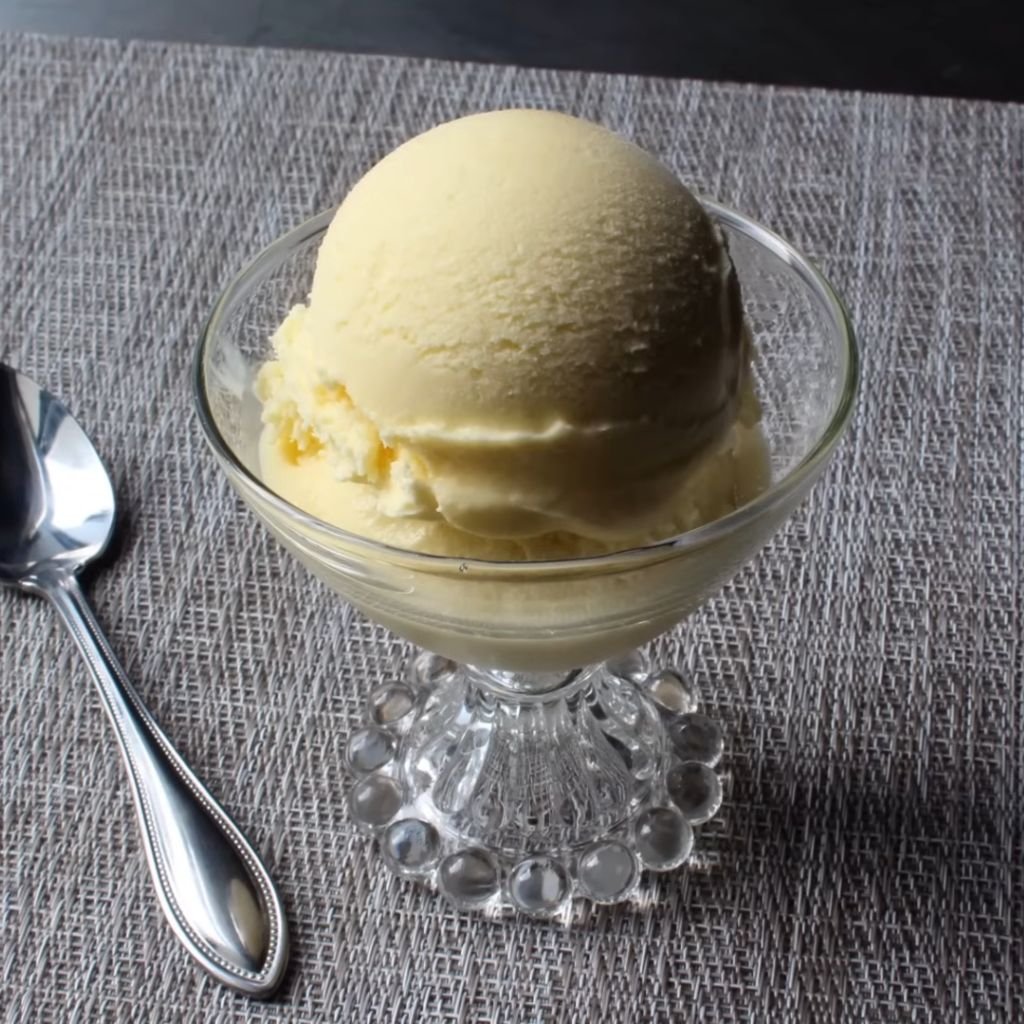
1. Classic Vanilla Ice Cream
Prep Time: 15 minutes | Churn Time: 25 minutes | Serves: 8–10
A creamy, rich vanilla ice cream made with real vanilla bean paste. The custard base gives every scoop a smooth, velvety texture that store-bought just can’t match. Perfect on its own or as the base under warm pie or brownies.
Ingredients
- 2 cups heavy whipping cream
- 1 cup whole milk
- ¾ cup granulated sugar
- 2 teaspoons pure vanilla extract or 1 tablespoon vanilla bean paste
- Pinch of salt
Instructions
Start by combining the whole milk, granulated sugar, and salt in a medium mixing bowl. Stir the mixture well with a whisk for about 2 to 3 minutes until all the sugar fully dissolves. You should not feel any gritty sugar grains at the bottom of the bowl when you run a spoon through it. This step is important because undissolved sugar can create an uneven texture once the ice cream freezes.
Once the sugar is dissolved, pour in the heavy whipping cream and stir to combine everything together. Add your vanilla extract or vanilla bean paste at this point and stir again. Vanilla bean paste will give you small visible specks in the finished ice cream, which is a sign of real, quality vanilla flavor. Pure vanilla extract works just as well and gives a clean, pure taste.
Cover the bowl with plastic wrap and refrigerate the mixture for at least 2 hours, or overnight if possible. A cold base churns better and produces a creamier texture. If you skip chilling and churn a warm base, the ice cream may turn out icy rather than smooth.
Before churning, take your Cuisinart freezer bowl out of the freezer. Make sure it has been in the freezer for at least 16 to 24 hours before use. Shake it gently — you should hear no liquid moving inside. If you can hear liquid, it needs more time to freeze. A fully frozen bowl is critical for proper churning.
Turn the Cuisinart 2 Quart Ice Cream Maker on first, then slowly pour the chilled cream mixture through the opening in the lid. Turning the machine on before adding the mix prevents it from sticking and freezing to the bowl walls right away. Churn for 20 to 25 minutes. As it churns, the mixture will slowly thicken and increase in volume. You’ll notice the texture going from liquid to a soft, creamy ice cream.
Once it reaches a thick, soft-serve consistency, stop the machine. Scoop the ice cream into a freezer-safe container and smooth out the top. Press a layer of plastic wrap directly onto the surface of the ice cream before putting the lid on — this stops ice crystals from forming on top. Freeze for at least 2 more hours for a firm, scoopable texture.
Pro Tips
- Use heavy cream with at least 36% fat content for the richest result.
- Adding 2 tablespoons of cream cheese to the base makes it extra thick and prevents iciness.
- Let the container sit at room temperature for 3–5 minutes before scooping.
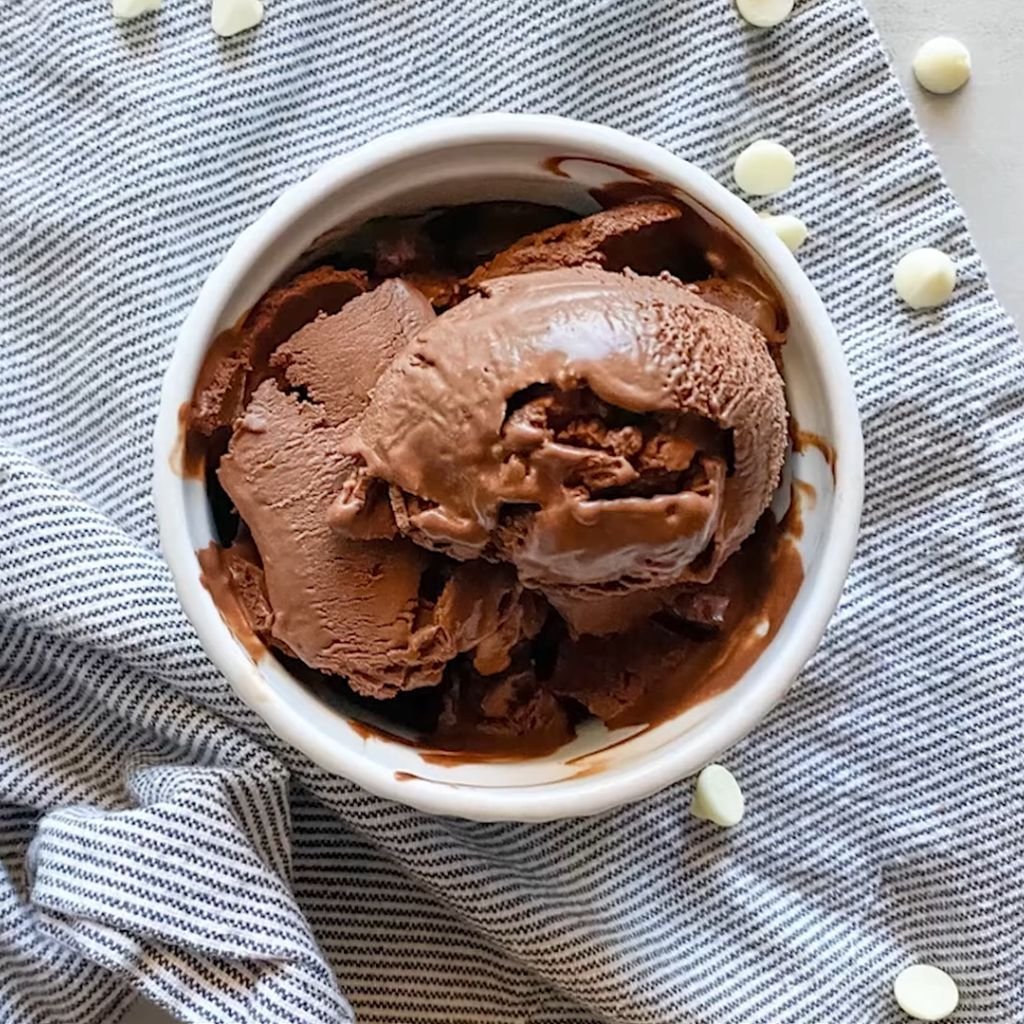
2. Old-Fashioned Chocolate Ice Cream
Prep Time: 20 minutes | Churn Time: 25 minutes | Serves: 8–10
Deep, dark, and packed with real cocoa flavor, this old-fashioned chocolate ice cream is the kind of recipe that chocolate lovers dream about. Made with both cocoa powder and a touch of melted chocolate, every bite is bold and satisfying.
Ingredients
- 2 cups heavy whipping cream
- 1 cup whole milk
- ¾ cup granulated sugar
- ½ cup unsweetened cocoa powder
- 2 oz semi-sweet chocolate, melted and cooled
- 1 teaspoon vanilla extract
- Pinch of salt
Instructions
Begin by sifting the cocoa powder into a medium saucepan. Sifting removes lumps and ensures the cocoa blends smoothly into the milk. Add the whole milk and granulated sugar to the saucepan and place it over medium heat. Stir constantly as the mixture heats up. Do not walk away from the stove at this point — the cocoa can stick to the bottom of the pan and burn quickly.
Keep stirring until the sugar fully dissolves and the cocoa is completely blended into the milk with no lumps visible. The mixture should be smooth and slightly thickened, which usually takes about 4 to 5 minutes over medium heat. Do not let it come to a full boil. Remove the saucepan from the heat once everything is dissolved and fully combined.
Stir in the melted semi-sweet chocolate right away while the mixture is still warm. The warm liquid will help the chocolate blend in smoothly. Add the vanilla extract and the pinch of salt. Stir until everything is fully incorporated and the mixture looks uniform in color.
Pour the heavy whipping cream into the chocolate base and stir well to combine. Let the mixture cool to room temperature, then cover and refrigerate for at least 2 to 4 hours, or overnight. Chilling the base all the way through is key for a silky, smooth result.
When you’re ready to churn, take the Cuisinart freezer bowl from the freezer and confirm it is fully frozen with no liquid inside. Turn the machine on, then pour the cold chocolate mixture into the bowl through the opening in the lid. Churn for 20 to 25 minutes until the ice cream is thick and creamy and pulls away slightly from the edges of the bowl.
Transfer to a freezer-safe container. For extra richness, fold in a handful of chocolate chips at this stage before freezing. Press plastic wrap onto the surface and freeze for 2 to 4 hours until firm.
Pro Tips
- Dutch-process cocoa gives a deeper, smoother chocolate flavor than natural cocoa.
- Adding 1 tablespoon of corn syrup helps prevent the finished ice cream from turning icy.
- For a fudge-swirl version, drizzle warm hot fudge into the container before the final freeze.
3. Fresh Strawberry Ice Cream
Prep Time: 20 minutes | Churn Time: 25 minutes | Serves: 8–10
Made with real ripe strawberries, this ice cream is bright, fruity, and full of natural flavor. The berries are macerated with sugar first to bring out their juices and create an intense, fresh taste in every scoop.
Ingredients
- 1½ cups fresh strawberries, hulled and sliced
- ¾ cup granulated sugar, divided
- 2 cups heavy whipping cream
- 1 cup whole milk
- 1 teaspoon vanilla extract
- Pinch of salt
Instructions
Place the sliced strawberries into a mixing bowl and add ¼ cup of the granulated sugar. Toss them together until all the strawberries are coated. Let them sit at room temperature for 20 to 30 minutes. During this time, the sugar pulls moisture out of the berries and creates a thick, sweet syrup at the bottom of the bowl. This process is called maceration and it concentrates the strawberry flavor.
After the strawberries have rested, you have two choices for texture. For a smooth, uniform ice cream, blend the macerated strawberries until completely pureed. For a chunkier texture with small berry pieces, mash them with a fork until broken down but still slightly chunky. Either method works great — it’s just a matter of personal preference.
In a separate mixing bowl, whisk together the remaining ½ cup of granulated sugar with the whole milk and salt until the sugar is fully dissolved, about 2 minutes. Add the heavy whipping cream and vanilla extract and stir until combined. Pour in the strawberry mixture and stir everything together until fully blended.
Cover the bowl with plastic wrap and refrigerate for a minimum of 2 hours. The colder the base, the better the churn. If you prepared this the night before, it will churn even more smoothly and give you a creamier texture.
Make sure your Cuisinart freezer bowl has been frozen for at least 16 to 24 hours. Turn the machine on, then slowly pour the cold strawberry cream base through the lid opening. Churn for 20 to 25 minutes until the mixture thickens into a soft, pale pink ice cream. It will look like thick soft-serve when it’s ready.
Scoop the churned ice cream into a container, press plastic wrap onto the surface, and freeze for at least 2 hours before serving.
Pro Tips
- Use the ripest, reddest strawberries you can find for the best flavor.
- A tablespoon of lemon juice added to the macerated berries brightens the overall taste.
- Frozen and thawed strawberries also work great in this recipe during off-season months.
4. Cookies and Cream Ice Cream
Prep Time: 15 minutes | Churn Time: 25 minutes | Serves: 8–10
Loaded with big chunks of chocolate sandwich cookies, this cookies and cream ice cream is a crowd-pleasing classic. The vanilla cream base is light and smooth, making every bite with a crunchy cookie piece extra satisfying.
Ingredients
- 2 cups heavy whipping cream
- 1 cup whole milk
- ¾ cup granulated sugar
- 2 teaspoons pure vanilla extract
- Pinch of salt
- 15 chocolate sandwich cookies (like Oreos), roughly broken into pieces
Instructions
In a large mixing bowl, combine the whole milk, granulated sugar, and salt. Whisk the mixture for 2 to 3 minutes until you can no longer feel or see sugar granules. The mixture should feel smooth between your fingers. This dissolving step ensures a consistent sweetness throughout the base and prevents graininess in the final product.
Pour in the heavy whipping cream and add the vanilla extract. Stir everything together until the base is fully combined and uniform. Taste the base at this point — it should be lightly sweet and smell strongly of vanilla. Adjust by adding a little more vanilla if needed, up to another half teaspoon.
Cover the bowl and refrigerate the base for at least 2 hours. A cold base is essential for achieving that thick, creamy result after churning. If you have time, leaving the base in the fridge overnight will give you the best texture.
Take the Cuisinart freezer bowl from the freezer. It should be completely solid with no liquid sloshing inside when you shake it. Turn the machine on before you pour anything in. Slowly pour the cold vanilla base through the lid opening and let it churn for 20 to 25 minutes.
While the ice cream is churning, break your chocolate sandwich cookies into rough pieces. You want a mix of sizes — some small crumbles and some larger half-cookie chunks. Avoid crushing them into a fine powder, as the larger pieces give a better texture and more satisfying bites.
In the last 5 minutes of churning time, open the top of the machine carefully and pour the broken cookie pieces in a little at a time. The paddle will mix them evenly throughout the ice cream as it continues to churn. Once all the cookies are added and the ice cream is thick, stop the machine.
Transfer the ice cream to a freezer-safe container, pressing plastic wrap on the surface. Freeze for 2 hours for a firm, scoopable consistency.
Pro Tips
- Add the cookies toward the end of churning to keep some pieces crunchy.
- Double-stuffed sandwich cookies add extra cream filling flavor to each bite.
- Stir in a swirl of vanilla pudding into the base for an extra thick and rich texture.
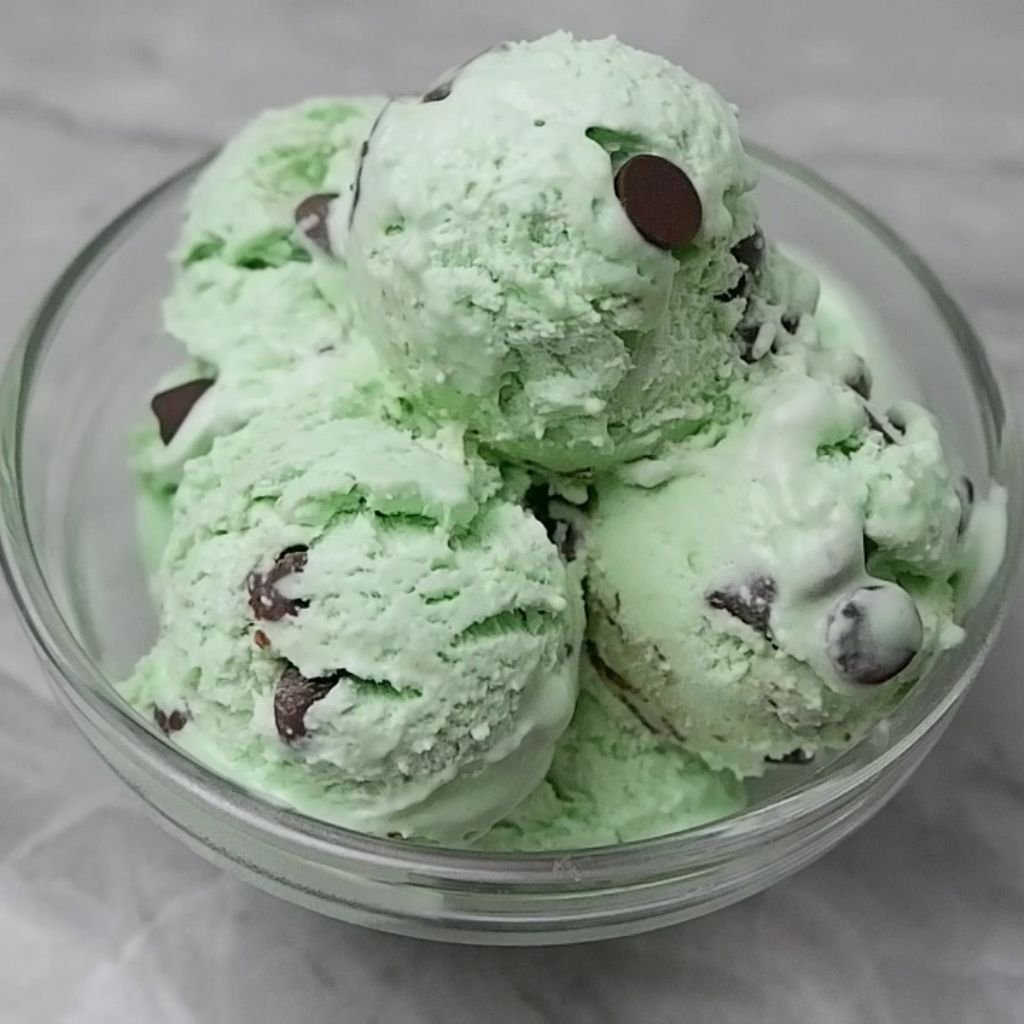
5. Mint Chocolate Chip Ice Cream
Prep Time: 15 minutes | Churn Time: 25 minutes | Serves: 8–10
Cool, refreshing, and studded with dark chocolate chips, this mint chocolate chip ice cream is one of those flavors that always disappears fast. The mint flavor is clean and bright without being overwhelming, making it perfect for all ages.
Ingredients
- 2 cups heavy whipping cream
- 1 cup whole milk
- ¾ cup granulated sugar
- 1½ teaspoons pure peppermint extract
- 1 teaspoon vanilla extract
- Pinch of salt
- 2–3 drops green food coloring (optional)
- ¾ cup mini chocolate chips or finely chopped dark chocolate
Instructions
Combine the whole milk and granulated sugar in a mixing bowl. Add the pinch of salt and whisk the mixture steadily for 2 to 3 minutes until all the sugar is completely dissolved. Sugar that hasn’t dissolved will settle at the bottom and create an uneven sweetness, so take your time here. Once dissolved, the milk should feel smooth and look clear rather than cloudy.
Add the heavy whipping cream to the bowl and stir well. Pour in both the peppermint extract and vanilla extract. The vanilla adds a gentle warmth that balances the sharpness of the peppermint and makes the overall flavor more rounded. Stir to combine.
If you want the classic green color, add 2 to 3 drops of green food coloring and stir until the color is evenly distributed throughout the base. The coloring is purely for appearance — it doesn’t change the taste at all. Some people prefer the natural white or pale color, and that’s perfectly fine.
Cover the bowl and refrigerate the base for 2 to 4 hours. You want it completely cold before churning. The colder the base, the faster and more efficiently it churns in the Cuisinart machine.
Confirm your Cuisinart freezer bowl is fully frozen, then turn the machine on. Pour the cold mint cream base slowly into the bowl through the lid opening. Churn for 20 to 25 minutes until the ice cream thickens to a soft-serve consistency.
About 5 minutes before churning is complete, add the mini chocolate chips or finely chopped dark chocolate through the lid. Adding them at the end means they stay whole and distribute evenly. If you add them at the start, they can get crushed or pushed to one area of the bowl.
Scoop the finished mint chip ice cream into a freezer container. Press plastic wrap flat against the surface, cover with a lid, and freeze for 2 hours.
Pro Tips
- Pure peppermint extract is much stronger than imitation — start with 1 teaspoon and adjust to taste.
- Dark chocolate chips complement the mint flavor better than milk chocolate chips.
- For a fresh mint version, steep 1 cup of fresh mint leaves in warm cream for 30 minutes, then strain before using.
6. Peanut Butter Ice Cream
Prep Time: 15 minutes | Churn Time: 25 minutes | Serves: 8–10
Rich, smooth, and packed with real peanut butter flavor, this ice cream is a dream for peanut butter fans. The creamy base swirls with deep, nutty flavor from start to finish, and it pairs perfectly with chocolate sauce or banana slices.
Ingredients
- 2 cups heavy whipping cream
- 1 cup whole milk
- ¾ cup granulated sugar
- ¾ cup creamy peanut butter
- 1 teaspoon vanilla extract
- Pinch of salt
Instructions
Combine the granulated sugar and whole milk in a medium saucepan over low to medium heat. Stir gently as it warms up. You don’t need the milk to boil — just warm enough to dissolve the sugar completely, which takes about 3 to 4 minutes. Keep stirring throughout this process to prevent the bottom from sticking.
Once the sugar is fully dissolved, remove the saucepan from the heat. Add the creamy peanut butter immediately while the milk is still warm. Stir vigorously using a whisk. At first it will look like the peanut butter isn’t blending in, but keep whisking and it will gradually incorporate into the milk until the mixture is smooth and creamy with no lumps. This step takes a good minute or two of steady whisking — don’t rush it.
Add the vanilla extract and pinch of salt. Stir again to fully combine. The salt is important here because it enhances and deepens the peanut butter flavor, making it taste more intense.
Pour the heavy whipping cream into the peanut butter mixture and stir everything together until uniform. Let the base cool to room temperature, then cover the bowl and refrigerate for at least 2 to 4 hours. An overnight chill gives the flavors even more time to come together.
When you’re ready to churn, check your Cuisinart freezer bowl and confirm it is completely frozen. Turn the machine on, then slowly pour the cold peanut butter base through the lid opening. Churn for 20 to 25 minutes until the ice cream is thick and creamy. Peanut butter bases tend to churn a bit heavier than plain cream, so the machine might sound slightly different — that’s completely normal.
Transfer to a freezer-safe container, press plastic wrap onto the surface, and freeze for 2 to 3 hours.
Pro Tips
- Smooth, processed peanut butter (like Jif or Skippy) blends more easily than natural peanut butter.
- Swirl in 3 tablespoons of melted chocolate fudge before the final freeze for a chocolate-peanut butter swirl.
- For extra texture, fold in crushed peanut butter cups during the last 5 minutes of churning.
7. Salted Caramel Ice Cream
Prep Time: 30 minutes | Churn Time: 25 minutes | Serves: 8–10
Sweet, buttery caramel with a hit of sea salt — this is one of those flavors that feels a little special. Making your own caramel sauce from scratch sounds tricky, but once you try it, you’ll see how straightforward it really is.
Ingredients
- 1 cup granulated sugar
- 4 tablespoons unsalted butter, cut into pieces
- ½ cup heavy cream (for caramel)
- 1 teaspoon flaky sea salt
- 1½ cups heavy whipping cream (for the base)
- 1 cup whole milk
- 3 egg yolks
- ¼ cup granulated sugar (for the custard)
Instructions
Start with the caramel. Place 1 cup of sugar in a medium saucepan over medium heat. Do not stir — just let it sit and melt slowly. You can gently swirl the pan occasionally, but stirring can cause the sugar to crystallize. Watch it closely. It will start to melt around the edges first, then gradually turn golden amber all the way through. The whole process takes about 8 to 10 minutes.
Once the caramel turns a deep amber color (like dark honey), remove the pan from the heat immediately. Working quickly, add the pieces of butter. The mixture will bubble vigorously — that’s expected. Stir until the butter is fully melted and combined. Pour in the ½ cup of heavy cream carefully, still stirring. The caramel will bubble up aggressively again. Keep stirring until completely smooth. Add the sea salt and stir once more. Set the caramel aside to cool.
In a separate saucepan, whisk together the egg yolks and ¼ cup sugar until pale. Heat the whole milk and 1½ cups heavy cream in another pot over medium heat until it just starts to steam. Slowly pour the hot cream mixture into the egg yolk mixture while whisking constantly — this is called tempering and it prevents the eggs from scrambling. Pour everything back into the saucepan and cook over low heat, stirring constantly, until the custard thickens enough to coat the back of a spoon (about 170°F).
Remove from heat, strain the custard through a fine mesh sieve, and stir in the cooled caramel sauce. Refrigerate for at least 4 hours or overnight.
Churn in your Cuisinart 2 Quart Ice Cream Maker for 20 to 25 minutes until thick and creamy. Transfer to a container, drizzle extra caramel on top if desired, and freeze for 3 to 4 hours.
Pro Tips
- Watch the caramel carefully — it goes from perfect to burned very quickly.
- Don’t skip straining the custard — it removes any cooked egg bits.
- Sprinkle extra flaky sea salt on top of the finished ice cream before serving.
8. Coffee Ice Cream
Prep Time: 20 minutes | Churn Time: 25 minutes | Serves: 8–10
Bold, smooth, and made with real espresso or strong brewed coffee, this ice cream is a treat for anyone who loves a coffee kick. The bitter notes of the coffee balance the sweetness perfectly, making it a grown-up flavor that’s hard to resist.
Ingredients
- 2 cups heavy whipping cream
- 1 cup whole milk
- ¾ cup granulated sugar
- 2 tablespoons instant espresso powder or 3 tablespoons very strong brewed coffee
- 1 teaspoon vanilla extract
- Pinch of salt
Instructions
Begin by dissolving the instant espresso powder in a small amount of warm water — about 2 tablespoons. Stir the espresso and water together until the powder is completely dissolved with no lumps. If you’re using strong brewed coffee instead, make sure it has cooled to room temperature before using it. Warm liquids should not go into the ice cream base.
In a large mixing bowl, combine the whole milk and granulated sugar. Whisk for 2 to 3 minutes until the sugar dissolves fully. You can confirm this by rubbing a small amount of the mixture between your fingers — if it feels smooth rather than grainy, the sugar has dissolved.
Pour in the dissolved espresso or cooled brewed coffee and stir to combine. Add the vanilla extract and pinch of salt. The vanilla works as a flavor enhancer here and softens the sharp edges of the coffee, giving the finished ice cream a more rounded, cafe-style taste.
Add the heavy whipping cream and stir the entire base together until smooth and fully combined. Taste it at this point. The base should be sweet, creamy, and clearly coffee-flavored. If you want a stronger coffee taste, dissolve an additional teaspoon of espresso powder and stir it in.
Cover the bowl tightly with plastic wrap and refrigerate for at least 2 to 3 hours. The base needs to be thoroughly chilled before going into the Cuisinart machine.
When ready, make sure the Cuisinart freezer bowl is completely solid. Turn the machine on, then pour the cold coffee base through the lid opening. Churn for 20 to 25 minutes. The coffee base will turn a warm, light tan color as it churns and begins to thicken.
Scoop into a freezer-safe container and freeze for 2 to 3 hours. Serve with a drizzle of chocolate sauce or a sprinkle of cocoa powder on top.
Pro Tips
- High-quality espresso powder makes a noticeably better coffee ice cream than weak instant coffee.
- Cold brew concentrate is a great substitute — use 2 tablespoons.
- Stir in ½ cup of chocolate chips during the last 5 minutes for a mocha chip version.
9. Butter Pecan Ice Cream
Prep Time: 25 minutes | Churn Time: 25 minutes | Serves: 8–10
Toasted pecans tossed in butter and a rich, butterscotch-flavored cream base — butter pecan is a Southern classic that never goes out of style. Every scoop is packed with warm, nutty flavor and satisfying crunch.
Ingredients
- 1½ cups pecan halves
- 3 tablespoons unsalted butter
- ½ teaspoon salt
- 2 cups heavy whipping cream
- 1 cup whole milk
- ¾ cup packed brown sugar
- 1 teaspoon vanilla extract
Instructions
Start by toasting the pecans. Melt the butter in a medium skillet over medium heat. Once the butter is melted and just starting to foam, add the pecan halves and the ½ teaspoon of salt. Stir the pecans to coat them in the butter, then spread them out in the pan. Toast over medium heat for 4 to 5 minutes, stirring occasionally, until the pecans are fragrant and lightly browned. Keep a close eye on them because pecans can go from perfectly toasted to burned within a minute or two.
Remove the toasted pecans from the heat and spread them on a plate or baking sheet lined with parchment paper. Let them cool completely to room temperature. Once cool, you can break any large clusters apart by hand.
In a large mixing bowl, whisk together the whole milk and brown sugar until the sugar dissolves. Brown sugar takes a little longer to dissolve than white sugar, so whisk for 3 to 4 minutes. The mixture should look uniform and slightly tan from the molasses in the brown sugar.
Add the vanilla extract, then pour in the heavy whipping cream. Stir the base thoroughly until everything is combined. Cover the bowl with plastic wrap and refrigerate for 2 to 4 hours. The base should be very cold before going into the machine.
Remove the Cuisinart freezer bowl from the freezer and confirm it is completely solid. Turn the machine on, then slowly pour the cold base through the lid opening. Churn for 20 to 25 minutes until the ice cream thickens into a soft, creamy consistency.
In the last 5 minutes of churning, add the cooled, buttered pecans through the lid opening a little at a time. They’ll get folded evenly throughout the ice cream as the machine continues churning. Once all the pecans are in and the ice cream is thick, stop the machine.
Scoop into a freezer container and freeze for 2 to 3 hours before serving.
Pro Tips
- Brown sugar creates a deeper, richer flavor than white sugar in this recipe.
- Make extra buttered pecans — they’re great as a topping on the finished ice cream.
- A tablespoon of maple syrup stirred into the base adds a wonderful layer of flavor.
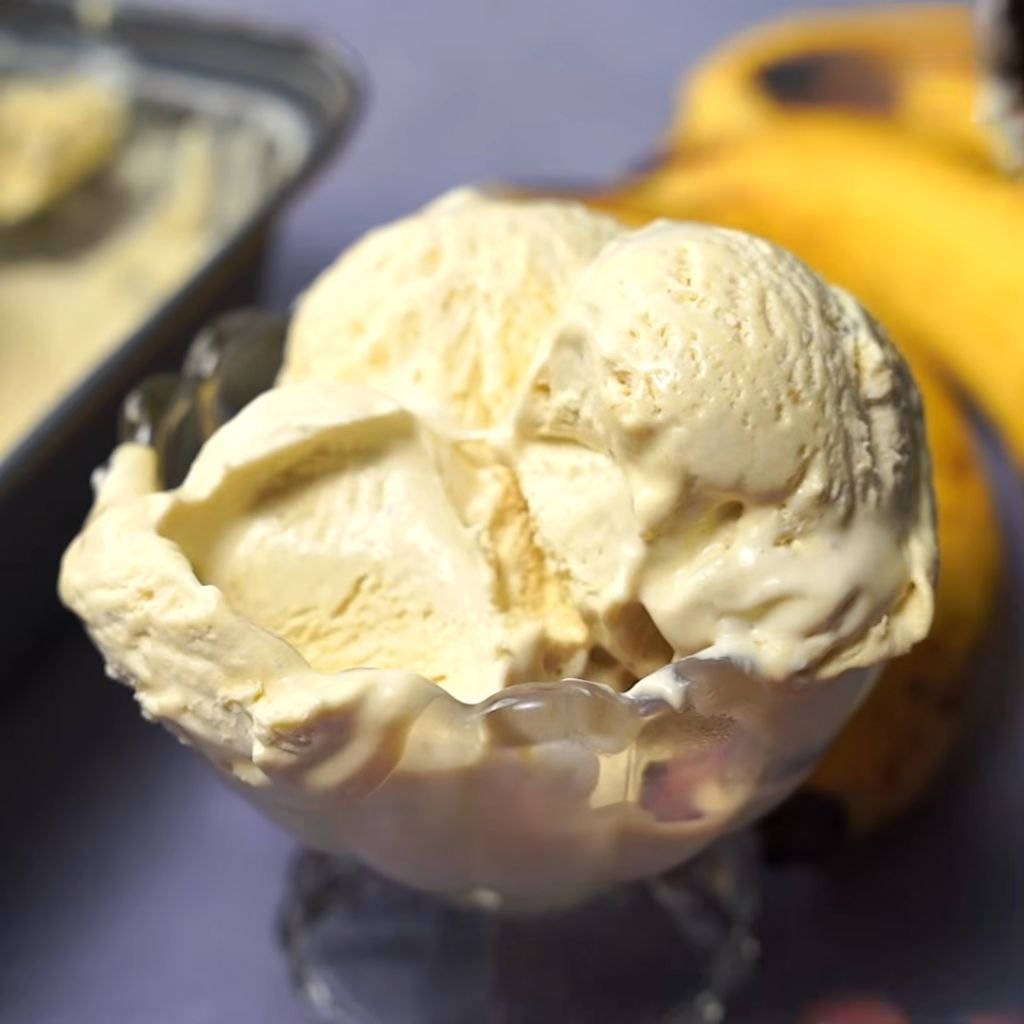
10. Banana Ice Cream
Prep Time: 15 minutes | Churn Time: 25 minutes | Serves: 8–10
Sweet, fruity, and made with real ripe bananas, this banana ice cream has a natural creaminess that makes it feel extra indulgent. The riper the bananas, the sweeter and more flavorful the ice cream will be.
Ingredients
- 3 very ripe bananas, mashed
- 2 cups heavy whipping cream
- ¾ cup whole milk
- ½ cup granulated sugar
- 1 teaspoon vanilla extract
- 1 tablespoon fresh lemon juice
- Pinch of salt
Instructions
Choose bananas that are fully ripe — the peel should be mostly yellow with lots of brown spots. These soft, sweet bananas have the strongest flavor and the most natural sugar, which gives the ice cream a more intense banana taste than underripe fruit would.
Peel the bananas and place them in a mixing bowl. Mash them thoroughly with a fork until no large lumps remain. The mixture should look smooth and slightly sticky. Add the tablespoon of fresh lemon juice and stir it in. The lemon juice does two things: it brightens the banana flavor and also prevents the bananas from turning brown during refrigeration and churning.
In a separate bowl, whisk together the whole milk and granulated sugar for 2 to 3 minutes until all the sugar has dissolved. Add the pinch of salt and vanilla extract, then stir in the heavy whipping cream. Once this cream base is smooth and combined, add the mashed banana mixture. Stir everything together until fully blended.
At this point, you can blend the entire base in a blender or with an immersion blender for a smoother, more uniform texture. Or you can leave it slightly chunky with visible banana pieces — both versions are delicious.
Cover the bowl and refrigerate for at least 2 hours. Cold temperatures help keep the banana flavor fresh and ensure a better churn.
When ready, make sure the Cuisinart freezer bowl is fully frozen. Turn the machine on, then pour the cold banana base slowly into the bowl. Churn for 20 to 25 minutes until the ice cream is pale yellow, thick, and creamy.
Scoop into a freezer container, press plastic wrap onto the surface, and freeze for 2 to 3 hours.
Pro Tips
- Overripe bananas — the ones with very dark peels — make the best banana ice cream.
- Fold in chocolate chips or swirl in Nutella before the final freeze for a banana-chocolate combo.
- Store banana ice cream well-covered since it can absorb fridge odors more easily than other flavors.
11. Chocolate Chip Ice Cream
Prep Time: 15 minutes | Churn Time: 25 minutes | Serves: 8–10
A simple, clean vanilla base loaded with generous amounts of real chocolate chips — this chocolate chip ice cream is a timeless classic that both kids and adults love. The contrast between the creamy base and the little pops of chocolate makes every spoonful interesting.
Ingredients
- 2 cups heavy whipping cream
- 1 cup whole milk
- ¾ cup granulated sugar
- 2 teaspoons pure vanilla extract
- Pinch of salt
- 1 cup semi-sweet or dark chocolate chips
Instructions
Start by combining the whole milk, granulated sugar, and salt in a large mixing bowl. Whisk vigorously for 2 to 3 minutes until the sugar granules dissolve completely. To confirm dissolution, rub a bit of the mixture between your clean fingers — it should feel completely smooth, not at all gritty.
Pour the heavy whipping cream into the milk and sugar mixture. Add the vanilla extract and stir to combine all the ingredients into a smooth, creamy base. Take a moment to taste — the balance of sweetness and vanilla should feel right. You can add a bit more vanilla (up to another half teaspoon) if you’d like a more pronounced flavor.
Cover the bowl tightly and refrigerate for a minimum of 2 hours. Overnight chilling is even better. A cold base churns far more efficiently in the Cuisinart machine, creating a dense and creamy ice cream rather than a light, icy one.
When you’re ready to churn, remove the Cuisinart freezer bowl from the freezer and confirm it is solid all the way through. Turn the machine on first, then pour the chilled vanilla base slowly through the lid opening. Let the machine churn the base for about 20 to 25 minutes. The mixture will thicken gradually — start checking after 18 minutes to see how the consistency is developing.
Once the ice cream reaches a thick soft-serve texture, add the chocolate chips through the lid opening in the last 5 minutes of churning. Pouring them in near the end rather than at the beginning ensures they stay whole and distribute evenly without sinking to the bottom. The spinning paddle will work them into the ice cream beautifully.
When the ice cream is thick, stop the machine. Scoop it into a freezer-safe container. Press a piece of plastic wrap directly onto the surface and seal with a lid. Freeze for 2 to 3 hours until firm and scoopable.
Pro Tips
- Mini chips distribute more evenly throughout the base than full-size chips.
- Chop a bar of good dark chocolate into irregular pieces for a more artisan feel.
- A dash of almond extract in the base adds a subtle complexity that works well with chocolate.
12. Rocky Road Ice Cream
Prep Time: 20 minutes | Churn Time: 25 minutes | Serves: 8–10
Loaded with mini marshmallows, crunchy almonds, and chunks of chocolate, rocky road ice cream is bold, chewy, and incredibly satisfying. The chocolate base holds everything together in the most delicious way.
Ingredients
- 2 cups heavy whipping cream
- 1 cup whole milk
- ¾ cup granulated sugar
- ½ cup unsweetened cocoa powder
- 1 teaspoon vanilla extract
- Pinch of salt
- ¾ cup mini marshmallows
- ½ cup whole roasted almonds, roughly chopped
- ½ cup chocolate chips
Instructions
Sift the cocoa powder into a medium saucepan to remove any lumps. Add the whole milk and granulated sugar to the saucepan. Place it over medium heat and stir constantly. Heat the mixture until the sugar dissolves completely and the cocoa is fully blended in — this takes about 4 to 5 minutes. Do not allow it to come to a boil. You want a warm, smooth cocoa milk mixture, not a hot one.
Remove the saucepan from the heat. Add the vanilla extract and pinch of salt and stir to combine. Pour in the heavy whipping cream and stir until the entire base is smooth and fully mixed. Taste the base — it should be rich in cocoa flavor and moderately sweet. Adjust sugar slightly at this stage if needed.
Allow the base to cool to room temperature, then cover and refrigerate for 2 to 4 hours. The colder the base when it hits the Cuisinart freezer bowl, the better the final texture will be.
While the base chills, prepare your mix-ins. Chop the roasted almonds into rough pieces — not too fine. You want chunks that give a real crunch in the finished ice cream, not a powder. Set the almonds, marshmallows, and chocolate chips aside in separate small bowls, ready to add during churning.
When ready to churn, take the Cuisinart freezer bowl from the freezer (must be fully solid) and turn the machine on. Pour the chilled chocolate base slowly into the bowl through the lid opening. Churn for 20 to 25 minutes. The base will thicken and become dark and creamy.
In the last 5 minutes of churning, add the chocolate chips first, then the almonds, and finally the marshmallows. Adding them toward the end keeps them from getting broken down too much. The mini marshmallows especially benefit from going in last — they’ll stay soft and fluffy rather than getting crushed.
Transfer the rocky road ice cream to a freezer container, press plastic wrap on top, and freeze for 3 hours.
Pro Tips
- Toast the almonds in a dry pan for 3 minutes before using — it brings out more of their nutty flavor.
- Use jumbo marshmallows cut into small pieces for even bigger marshmallow chunks.
- For extra chocolate intensity, add 2 oz of melted dark chocolate to the base.
13. Mango Ice Cream
Prep Time: 15 minutes | Churn Time: 25 minutes | Serves: 8–10
Tropical, bright, and made with real mango puree, this ice cream is like a frozen vacation. The natural sweetness and color of ripe mangoes create an ice cream that’s both vibrant and incredibly refreshing.
Ingredients
- 2 cups fresh or frozen mango, peeled and chopped
- 1½ cups heavy whipping cream
- ¾ cup whole milk
- ½ cup granulated sugar
- 1 tablespoon fresh lime juice
- Pinch of salt
Instructions
Begin by preparing the mango. If using fresh mangoes, peel them and cut the flesh away from the pit. If using frozen mango, let the pieces thaw completely at room temperature before blending. Frozen mango that hasn’t been thawed will create a lumpy or inconsistent base.
Place the mango pieces into a blender. Add the lime juice and blend on high speed until completely smooth. Stop and scrape down the sides as needed to make sure all the mango is fully pureed with no stringy fibers or chunks remaining. A smooth puree is the key to a silky, refined ice cream. Once pureed, taste the mango puree — it should be sweet, tangy, and intensely fruity. Very sweet mangoes may need only a small amount of added sugar.
In a large mixing bowl, whisk together the whole milk and granulated sugar until the sugar is completely dissolved. Add the pinch of salt and pour in the heavy whipping cream. Stir to combine. Now add the smooth mango puree to the cream base and stir everything together thoroughly until the base is a consistent, vibrant yellow-orange color throughout.
Cover the bowl and refrigerate for at least 2 to 3 hours. Cold temperature ensures the most efficient churn and the creamiest finished product.
Once chilled, confirm the Cuisinart freezer bowl is solid and turn the machine on. Pour the cold mango cream base slowly into the bowl. Churn for 20 to 25 minutes until the mango ice cream is thick, creamy, and a beautiful deep orange-yellow color.
Scoop into a container, press plastic wrap onto the surface, and freeze for 2 hours before serving.
Pro Tips
- Alphonso or Ataulfo mango varieties have the richest flavor for this recipe.
- A pinch of chili powder or cayenne added to the base creates an exciting sweet-heat combination.
- Swirl in some coconut cream before the final freeze for a mango-coconut flavor.
14. Blueberry Cheesecake Ice Cream
Prep Time: 25 minutes | Churn Time: 25 minutes | Serves: 8–10
Creamy cheesecake-flavored ice cream swirled with a thick, sweet blueberry sauce — this is a dessert that feels like it came from a fancy restaurant. The tang of the cream cheese pairs beautifully with the sweet-tart blueberry.
Ingredients
- 4 oz cream cheese, softened to room temperature
- 1½ cups heavy whipping cream
- ¾ cup whole milk
- ½ cup granulated sugar
- 2 teaspoons pure vanilla extract
- Pinch of salt
- 1 cup fresh or frozen blueberries
- 3 tablespoons granulated sugar (for blueberry sauce)
- 1 teaspoon lemon juice (for blueberry sauce)
- ½ cup crushed graham crackers
Instructions
Start by making the blueberry sauce. Combine the blueberries, 3 tablespoons of sugar, and lemon juice in a small saucepan over medium heat. Stir and cook for about 8 to 10 minutes until the berries burst open and the mixture thickens into a chunky sauce. Mash some of the berries with the back of a spoon as they soften. Remove from heat and let the sauce cool completely. You can refrigerate it once cool to help it thicken further before use.
For the cheesecake base, beat the softened cream cheese in a bowl until it is completely smooth with no lumps. Gradually add the whole milk a little at a time, whisking well after each addition to keep the base lump-free. Once all the milk is incorporated and the mixture is smooth, add the granulated sugar, vanilla extract, and pinch of salt. Stir well.
Pour in the heavy whipping cream and whisk until the entire base is creamy and smooth. Cover and refrigerate for at least 2 hours. A cream cheese base is thicker than a standard cream base, so chilling is extra important for it to churn properly.
When ready, confirm the Cuisinart freezer bowl is fully frozen. Turn the machine on, then slowly pour the cold cheesecake base into the bowl. Churn for 20 to 25 minutes until thick and creamy.
Transfer the churned ice cream to a freezer container in layers. Add a layer of ice cream, then spoon blueberry sauce on top, then sprinkle crushed graham crackers. Repeat the layers until the container is full. Run a butter knife or chopstick through the layers to create a swirl pattern. Press plastic wrap on top and freeze for 3 to 4 hours.
Pro Tips
- Let the cream cheese come fully to room temperature before mixing — cold cream cheese creates lumps.
- The graham cracker layer softens slightly after freezing, creating a crust-like texture.
- Use a high-quality vanilla for the cheesecake base — it makes a real difference in the final flavor.
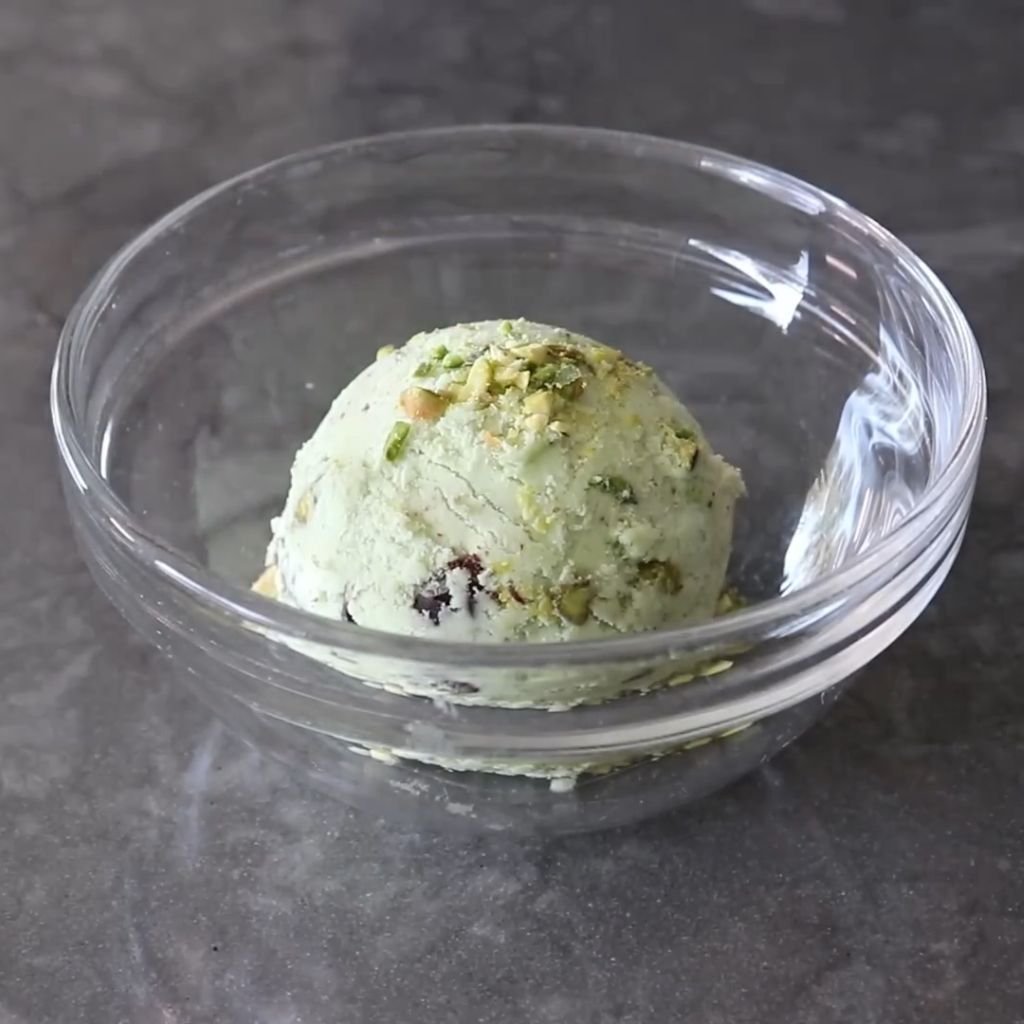
15. Pistachio Ice Cream
Prep Time: 20 minutes | Churn Time: 25 minutes | Serves: 8–10
Nutty, slightly sweet, and made with real pistachio paste and chopped pistachios, this ice cream has a natural green color and a flavor that’s both unique and deeply satisfying.
Ingredients
- ½ cup shelled, unsalted pistachios (for paste)
- ¾ cup shelled, unsalted pistachios (chopped, for mix-ins)
- 2 cups heavy whipping cream
- 1 cup whole milk
- ¾ cup granulated sugar
- 1 teaspoon almond extract
- ½ teaspoon vanilla extract
- Pinch of salt
Instructions
Start by making the pistachio paste. Place the ½ cup of pistachios in a food processor and process until they become a fine, crumbly meal. Add 2 tablespoons of heavy cream from your measured amount and continue to process until a thick, smooth paste forms. You may need to scrape down the sides of the processor a few times. The paste should be smooth with just a little texture remaining. Set it aside.
Roughly chop the remaining ¾ cup of pistachios and set them aside — these will be added during churning for texture.
In a large mixing bowl, whisk together the whole milk and granulated sugar until the sugar fully dissolves, about 2 to 3 minutes. Add the pistachio paste, almond extract, vanilla extract, and salt. Stir vigorously until the pistachio paste is fully incorporated into the milk base with no streaks.
Pour in the remaining heavy whipping cream and stir until everything is smooth and well combined. The base should look slightly green and smell wonderfully nutty and rich. Cover the bowl and refrigerate for at least 2 to 4 hours.
When ready to churn, confirm the Cuisinart freezer bowl is completely frozen. Turn the machine on and pour the cold pistachio base slowly through the lid. Churn for 20 to 25 minutes until thick and creamy.
In the last 5 minutes, pour the chopped pistachios through the lid opening. They’ll distribute throughout the ice cream as the machine continues to churn. Once finished, transfer to a container and freeze for 2 to 3 hours.
Pro Tips
- Blanching the pistachios in boiling water for 1 minute and removing the skins before processing gives a brighter green color and cleaner flavor.
- Almond extract is a classic addition to pistachio ice cream — don’t skip it.
- For a more vivid green, a tiny drop of green food coloring can be added to the base.
16. Lemon Ice Cream
Prep Time: 15 minutes | Churn Time: 25 minutes | Serves: 8–10
Bright, tangy, and refreshing, lemon ice cream is the perfect summer treat. Made with fresh lemon juice and zest, it has a clean, citrusy flavor that’s not too sweet and not too sour — just balanced and delicious.
Ingredients
- 2 cups heavy whipping cream
- 1 cup whole milk
- ¾ cup granulated sugar
- Juice of 2 large lemons (about ¼ cup)
- Zest of 2 lemons
- 1 teaspoon vanilla extract
- Pinch of salt
Instructions
Begin by zesting both lemons before cutting them open. Always zest the lemon first — it’s nearly impossible to zest a squeezed lemon. Use a fine grater or zester and grate only the bright yellow outer peel, avoiding the white pith beneath it. The pith is bitter and will make the ice cream taste harsh. You should get about 2 teaspoons of packed lemon zest from 2 large lemons.
Juice the lemons after zesting. Strain the juice through a small sieve to remove seeds and any large pulp pieces. Measure out ¼ cup of fresh lemon juice and set it aside along with the zest.
In a large mixing bowl, combine the whole milk and granulated sugar. Add the lemon zest directly to the milk and sugar mixture. The oils in the zest will infuse into the liquid as you stir, adding a deep, aromatic lemon flavor that lemon juice alone can’t give. Whisk for 2 to 3 minutes until the sugar dissolves.
Add the fresh lemon juice, vanilla extract, and salt. Stir to combine. Then pour in the heavy whipping cream and stir until the base is smooth and uniform. Note: The acid from the lemon juice can slightly thicken the cream — this is normal and won’t affect the final product.
Cover the base and refrigerate for 2 to 4 hours until completely cold. Turn the Cuisinart machine on, then pour the cold lemon base through the lid. Churn for 20 to 25 minutes until thick and creamy.
Transfer to a container and freeze for 2 hours. The lemon flavor intensifies slightly after freezing, so the finished product will taste even brighter than the base.
Pro Tips
- Meyer lemons make a sweeter, less acidic lemon ice cream if regular lemons feel too sharp.
- Adding ¼ cup of lemon curd to the base creates an extra rich, concentrated lemon flavor.
- Swirl in a bit of raspberry jam before the final freeze for a lemon-raspberry combination.
17. Coconut Ice Cream
Prep Time: 15 minutes | Churn Time: 25 minutes | Serves: 8–10
Creamy, tropical, and made with full-fat coconut milk, this coconut ice cream has a natural richness that makes every bite feel luxurious. It’s also a great option for those who prefer a lighter dairy base.
Ingredients
- 2 cans (13.5 oz each) full-fat coconut milk
- ½ cup granulated sugar
- 1 teaspoon coconut extract
- 1 teaspoon vanilla extract
- Pinch of salt
- ½ cup sweetened shredded coconut (toasted, optional)
Instructions
Open both cans of full-fat coconut milk and pour all of the contents — including the thick cream at the top and the liquid below — into a large mixing bowl. It’s important to use full-fat coconut milk and not light coconut milk or coconut cream beverage. The high fat content of full-fat coconut milk is what creates the creamy, smooth texture in the finished ice cream.
Whisk the coconut milk vigorously until the thick cream layer and the liquid are fully blended together and the mixture is smooth and uniform. This may take a minute or two if the coconut cream has solidified at the top of the can.
Add the granulated sugar and whisk again until completely dissolved. Add the coconut extract, vanilla extract, and pinch of salt. Stir until everything is fully incorporated. The base should smell wonderfully tropical at this point.
If using toasted shredded coconut as a mix-in, toast it first. Spread the shredded coconut in a dry skillet over medium-low heat. Stir frequently for 3 to 4 minutes until golden brown and fragrant. Watch it carefully as it burns quickly. Set the toasted coconut aside to cool.
Cover the coconut base and refrigerate for 2 to 3 hours. Coconut milk bases churn well when very cold.
Turn the Cuisinart machine on, pour the cold coconut base into the bowl, and churn for 20 to 25 minutes. In the last 5 minutes, add the toasted shredded coconut if using. Once thick and creamy, transfer to a container and freeze for 2 to 3 hours.
Pro Tips
- Shaking the cans before opening isn’t recommended — you want to control how the cream mixes.
- A tablespoon of vodka or rum stirred into the base before churning keeps the texture slightly softer.
- Diced fresh pineapple folded in before the final freeze adds a piña colada twist.
18. Cherry Vanilla Ice Cream
Prep Time: 20 minutes | Churn Time: 25 minutes | Serves: 8–10
Sweet, tender cherries folded into a smooth, rich vanilla base — this is a classic combination that never gets old. Using fresh or frozen cherries gives the ice cream a real fruit flavor that makes each bite feel special.
Ingredients
- 1½ cups fresh or frozen sweet cherries, pitted and halved
- 3 tablespoons granulated sugar (for cherries)
- 2 cups heavy whipping cream
- 1 cup whole milk
- ¾ cup granulated sugar (for base)
- 2 teaspoons pure vanilla extract
- Pinch of salt
Instructions
Prepare the cherries first. Combine the pitted, halved cherries with 3 tablespoons of sugar in a small saucepan over medium heat. Stir and cook for about 8 minutes until the cherries release their juices and the mixture thickens slightly into a loose sauce. Some of the cherries will break down while others remain in pieces — that’s perfect for ice cream. Remove from heat, stir in ½ teaspoon of vanilla extract, and let the mixture cool completely. You can refrigerate it to help it chill faster.
While the cherries cool, make the vanilla base. Combine the whole milk, ¾ cup of sugar, and salt in a large bowl. Whisk for 2 to 3 minutes until the sugar dissolves completely. Add the remaining vanilla extract and stir, then pour in the heavy whipping cream. Stir until the base is smooth and fully combined.
Cover the bowl and refrigerate for at least 2 hours. The base and the cherry mixture should both be cold when you’re ready to churn.
Make sure the Cuisinart freezer bowl is completely solid. Turn the machine on, then pour the cold vanilla base into the bowl through the lid opening. Churn for 20 to 25 minutes.
In the last 5 to 8 minutes of churning, slowly spoon the cooled cherry mixture into the machine through the lid. The paddle will swirl the cherries and their juices through the vanilla base, creating beautiful purple and pink ribbons. Once the ice cream is thick and the cherries are evenly distributed, stop the machine.
Transfer the ice cream to a freezer container. Press plastic wrap onto the surface and freeze for 2 to 3 hours until firm.
Pro Tips
- Bing cherries are the best fresh variety for this recipe — they’re sweet with a deep, rich flavor.
- A tablespoon of kirsch (cherry brandy) stirred into the cherry mixture before cooling adds a sophisticated touch.
- Don’t add the cherries at the very beginning of churning — they’ll color the entire base purple.
19. Mocha Ice Cream
Prep Time: 20 minutes | Churn Time: 25 minutes | Serves: 8–10
Coffee and chocolate come together in this bold, deeply flavored mocha ice cream. Made with real espresso and cocoa powder, it delivers a grown-up, cafe-style treat that coffee lovers will keep coming back to.
Ingredients
- 2 cups heavy whipping cream
- 1 cup whole milk
- ¾ cup granulated sugar
- ⅓ cup unsweetened cocoa powder
- 2 tablespoons instant espresso powder
- 1 teaspoon vanilla extract
- Pinch of salt
- ½ cup chocolate chips (optional)
Instructions
Sift the cocoa powder into a medium saucepan to ensure there are no clumps. Add the whole milk, granulated sugar, and instant espresso powder to the saucepan. Place over medium-low heat and stir constantly as it warms. The goal is to fully dissolve the cocoa, sugar, and espresso powder into the milk without bringing it to a boil.
Stir steadily for 4 to 5 minutes until the mixture is smooth, warm, and uniform in color. There should be no powder lumps or visible sugar grains. The aroma at this stage should be a wonderful blend of chocolate and coffee — deeply rich and complex. Remove the saucepan from the heat.
Add the vanilla extract and the pinch of salt to the warm mixture and stir. The vanilla rounds out the sharp edges of both the coffee and cocoa, making the overall flavor more balanced and complete.
Pour the heavy whipping cream into the chocolate-coffee base and stir well until fully combined. Let the base cool to room temperature, then cover and refrigerate for 3 to 4 hours or overnight. This base benefits from a longer chill — the flavors continue to develop and deepen while it rests in the refrigerator.
Once completely cold, confirm the Cuisinart freezer bowl is fully solid. Turn the machine on, then slowly pour the mocha base through the lid opening. Churn for 20 to 25 minutes. The base will thicken into a deep brown, dense ice cream with a strong coffee-chocolate aroma.
If using chocolate chips, add them in the last 5 minutes of churning. Once the ice cream is ready, scoop into a freezer-safe container. Press plastic wrap onto the surface and freeze for 2 to 3 hours.
Pro Tips
- Using Dutch-process cocoa gives the mocha a smoother, less acidic chocolate flavor.
- Cold brew coffee concentrate (2 tablespoons) can replace the espresso powder.
- Top each serving with a single chocolate-covered espresso bean for presentation.
20. Cinnamon Roll Ice Cream
Prep Time: 20 minutes | Churn Time: 25 minutes | Serves: 8–10
Warm cinnamon swirled through a sweet, buttery cream base with pieces of soft cinnamon roll baked in — this ice cream tastes exactly like a freshly baked cinnamon roll, just in frozen form. It’s cozy, sweet, and absolutely irresistible.
Ingredients
- 2 cups heavy whipping cream
- 1 cup whole milk
- ¾ cup granulated sugar
- 2 teaspoons ground cinnamon
- 1 teaspoon vanilla extract
- Pinch of salt
- For cinnamon swirl: 3 tablespoons butter, 3 tablespoons brown sugar, 2 teaspoons cinnamon
- 1 cup store-bought or homemade cinnamon roll pieces, roughly torn
Instructions
Start by making the cinnamon swirl sauce. Melt 3 tablespoons of butter in a small saucepan over low heat. Once melted, stir in the 3 tablespoons of brown sugar and 2 teaspoons of cinnamon. Stir for about 2 minutes until the sugar dissolves into the butter and the mixture thickens slightly. Remove from heat and let it cool completely. Once cooled, transfer to a small bowl and refrigerate until ready to use.
In a large mixing bowl, combine the whole milk, granulated sugar, and ground cinnamon. Whisk for 2 to 3 minutes until the sugar dissolves and the cinnamon is evenly distributed throughout the milk. The milk will turn a light tan color.
Add the vanilla extract and salt, then pour in the heavy whipping cream. Stir the base until smooth and fully combined. The base should smell wonderfully of cinnamon and vanilla. Cover the bowl and refrigerate for 2 to 3 hours.
While the base chills, tear or cut the cinnamon roll pieces into small, bite-size chunks. Store them in the refrigerator until needed — cold pieces hold up better during churning than room-temperature ones.
Confirm the Cuisinart freezer bowl is fully frozen, then turn the machine on. Pour the cold cinnamon base slowly into the bowl. Churn for 20 to 25 minutes until thick and creamy.
In the last 5 minutes of churning, add the cold cinnamon roll pieces through the lid opening. Once churning is done, transfer the ice cream to a container in layers, drizzling the chilled cinnamon swirl sauce between each layer. Swirl gently with a knife before sealing. Freeze for 3 hours.
Pro Tips
- Use day-old cinnamon rolls or ones that are slightly dry — they hold up better in the ice cream without getting too soggy.
- The cinnamon swirl sauce can also be drizzled on top of each serving as a finishing touch.
- A cream cheese swirl (softened cream cheese blended with powdered sugar) can be layered in for an authentic cinnamon roll frosting flavor.
21. Pumpkin Spice Ice Cream
Prep Time: 20 minutes | Churn Time: 25 minutes | Serves: 8–10
A seasonal favorite that deserves to be made year-round, this pumpkin spice ice cream is full of warm spice flavor and real pumpkin puree. The creamy base carries the pumpkin and spice beautifully, giving every bite that cozy autumn feeling.
Ingredients
- 2 cups heavy whipping cream
- 1 cup whole milk
- ¾ cup granulated sugar
- ¾ cup pure pumpkin puree (not pumpkin pie filling)
- 1 teaspoon pumpkin pie spice
- ½ teaspoon cinnamon
- 1 teaspoon vanilla extract
- Pinch of salt
Instructions
Combine the whole milk and granulated sugar in a large mixing bowl. Whisk for 2 to 3 minutes until the sugar is fully dissolved. The milk should feel smooth between your fingers rather than gritty when you test it.
Add the pumpkin puree to the bowl and whisk vigorously until the pumpkin is fully blended into the milk with no streaks or clumps. Make sure you’re using plain pumpkin puree, not pumpkin pie filling. Pumpkin pie filling already contains added sugars and spices, which would make the ice cream too sweet and unbalanced.
Add the pumpkin pie spice, cinnamon, vanilla extract, and salt. Stir until all the spices are evenly distributed throughout the base. The mixture should turn a warm orange color and smell wonderfully of fall spices.
Pour in the heavy whipping cream and stir to fully combine. Cover the bowl tightly with plastic wrap and refrigerate for at least 2 to 3 hours. The base needs to be very cold before churning.
Make sure the Cuisinart freezer bowl is fully frozen. Turn the machine on, then slowly pour the cold pumpkin base through the lid opening. Churn for 20 to 25 minutes. The base will turn into a thick, orange-tinted ice cream with a smooth, creamy texture.
Transfer to a freezer-safe container and press plastic wrap onto the surface. Freeze for 2 to 3 hours before serving. Serve with a sprinkle of cinnamon on top.
Pro Tips
- Drain excess moisture from the pumpkin puree by pressing it through a clean towel before using — this prevents a watery base.
- Swirl in a tablespoon of maple syrup for a pumpkin-maple flavor combination.
- A handful of crushed gingersnap cookies folded in before freezing adds a wonderful spicy crunch.
22. Raspberry Swirl Ice Cream
Prep Time: 25 minutes | Churn Time: 25 minutes | Serves: 8–10
A smooth, creamy vanilla base with gorgeous ribbons of fresh raspberry sauce swirled through — this raspberry swirl ice cream is as beautiful as it is delicious. The tartness of the raspberry cuts through the sweetness of the cream base perfectly.
Ingredients
- 2 cups heavy whipping cream
- 1 cup whole milk
- ¾ cup granulated sugar
- 2 teaspoons pure vanilla extract
- Pinch of salt
- For raspberry swirl: 1½ cups fresh or frozen raspberries, ¼ cup sugar, 1 teaspoon lemon juice
Instructions
Make the raspberry swirl sauce first. Combine the raspberries, ¼ cup sugar, and lemon juice in a small saucepan over medium heat. Stir and mash the berries as they heat up. Cook for 8 to 10 minutes, stirring regularly, until the raspberries completely break down and the mixture thickens into a sauce. Strain the sauce through a fine mesh sieve to remove the seeds, pressing the pulp through with the back of a spoon. Discard the seeds. Let the strained sauce cool completely, then refrigerate.
Prepare the vanilla base by combining the whole milk and granulated sugar in a large bowl. Whisk for 2 to 3 minutes until the sugar dissolves. Add the vanilla extract and salt, then pour in the heavy whipping cream. Stir until the base is smooth and fully combined.
Cover and refrigerate the base for at least 2 hours. Both the vanilla base and the raspberry sauce need to be cold before the swirling step — a warm sauce added to cold ice cream can create chunks and pockets rather than clean, beautiful swirls.
Confirm the Cuisinart freezer bowl is fully frozen. Turn the machine on, then pour the cold vanilla base slowly through the lid. Churn for 20 to 25 minutes until thick and creamy.
Scoop the freshly churned ice cream into a freezer container in layers. After each layer of ice cream, spoon a few tablespoons of cold raspberry sauce on top. Once all the ice cream and sauce are layered, use a butter knife or thin spatula to make 4 or 5 slow passes through the container, creating swirls. Don’t over-swirl — you want visible streaks of red raspberry throughout the white ice cream.
Press plastic wrap onto the surface and freeze for 3 to 4 hours until firm.
Pro Tips
- Seeding the sauce is essential — raspberry seeds in ice cream are very unpleasant.
- Make extra raspberry sauce to serve warm over the scoops as a topping.
- Add a small amount of cream cheese (2 oz) to the vanilla base for a cheesecake-style version.
23. Birthday Cake Ice Cream
Prep Time: 20 minutes | Churn Time: 25 minutes | Serves: 8–10
Loaded with rainbow sprinkles and a sweet vanilla cake-flavored base, this birthday cake ice cream is pure celebration in a bowl. It’s bright, fun, and every scoop tastes like the best part of a birthday party.
Ingredients
- 2 cups heavy whipping cream
- 1 cup whole milk
- ¾ cup granulated sugar
- 2 teaspoons pure vanilla extract
- ½ teaspoon almond extract
- 1 tablespoon cream cheese, softened
- Pinch of salt
- ½ cup rainbow jimmies (sprinkles)
- ½ cup white cake pieces or broken vanilla wafers
Instructions
In a large mixing bowl, beat the softened cream cheese with a whisk until completely smooth. Make sure there are absolutely no lumps — lumpy cream cheese will create an uneven, grainy texture in the final ice cream. Add the whole milk to the cream cheese a little at a time, whisking after each addition to keep the mixture lump-free. This gradual process ensures the cream cheese fully incorporates without balling up.
Once all the milk is blended in and the mixture is smooth, add the granulated sugar and whisk for another 2 minutes until the sugar dissolves. Add the vanilla extract, almond extract, and pinch of salt. Stir to combine. The almond extract here is subtle but important — it mimics the flavor of bakery-style cake frosting and gives the ice cream that signature “birthday cake” taste.
Pour in the heavy whipping cream and stir until the base is smooth, creamy, and fully combined. Cover and refrigerate for at least 2 hours.
Confirm the Cuisinart freezer bowl is fully frozen and solid. Turn the machine on, then pour the cold base slowly through the lid opening. Churn for 20 to 25 minutes until thick and creamy.
In the last 3 to 5 minutes of churning, add the rainbow jimmies sprinkles through the lid. Add them near the end rather than the beginning — if you add them too early, the color from the sprinkles bleeds into the entire base and turns it gray. Adding them late keeps the colors vibrant and distinct.
Transfer the ice cream to a freezer container in layers, scattering cake pieces or broken vanilla wafers between each layer. Press plastic wrap onto the surface and freeze for 2 to 3 hours.
Pro Tips
- Rainbow jimmies (the long, cylinder-shaped sprinkles) bleed less color than round nonpareils.
- Add a drop of pink food coloring to the base for a festive look.
- Swirl in store-bought birthday cake frosting before the final freeze for extra richness.
24. Dairy-Free Vanilla Coconut Ice Cream
Prep Time: 15 minutes | Churn Time: 25 minutes | Serves: 8–10
A rich, creamy dairy-free option made entirely from full-fat coconut milk and coconut cream, this vanilla coconut ice cream is smooth, luscious, and every bit as satisfying as a traditional dairy version.
Ingredients
- 2 cans (13.5 oz each) full-fat coconut milk
- 1 can (13.5 oz) coconut cream
- ½ cup maple syrup or granulated sugar
- 2 teaspoons pure vanilla extract
- 1 teaspoon coconut extract
- Pinch of salt
Instructions
Open the cans of coconut milk and coconut cream. Pour all of the contents into a large mixing bowl — don’t discard the liquid portion from the coconut milk cans. Some recipes call for only the solid cream at the top, but using the full contents of the cans creates a more balanced, pourable base that churns evenly in the Cuisinart machine.
Whisk all the coconut milk and coconut cream together vigorously until completely smooth and uniform. The thick cream layer and the liquid layer need to be fully combined before adding any other ingredients. This may take a couple of minutes of steady whisking.
Add the maple syrup or granulated sugar to the coconut mixture and whisk until fully dissolved. Maple syrup adds a subtle warmth and depth to the flavor, while granulated sugar gives a cleaner, more neutral sweetness. Either works well — it depends on the flavor profile you prefer.
Add the vanilla extract, coconut extract, and pinch of salt. Stir until everything is fully incorporated. Taste the base — it should be creamy, lightly sweet, and smell of coconut and vanilla. Adjust sweetness if needed by adding another tablespoon of sweetener.
Cover the bowl tightly and refrigerate for at least 3 to 4 hours. Coconut bases benefit from a longer chill than dairy bases. Overnight is ideal.
Once thoroughly chilled, confirm the Cuisinart freezer bowl is solid. Turn the machine on, then slowly pour the cold coconut base through the lid. Churn for 20 to 25 minutes. The ice cream will turn thick, white, and creamy.
Transfer to a freezer container, press plastic wrap on top, and freeze for 3 hours. Dairy-free ice cream tends to freeze firmer than dairy-based, so let it sit at room temperature for 5 minutes before scooping.
Pro Tips
- Coconut cream gives a richer, thicker result than coconut milk alone.
- A tablespoon of arrowroot powder whisked into the base before churning helps keep the texture from getting too icy.
- Top with toasted coconut flakes and a drizzle of melted dark chocolate for an elegant presentation.
25. Vegan Chocolate Ice Cream
Prep Time: 20 minutes | Churn Time: 25 minutes | Serves: 8–10
Deeply chocolatey and completely plant-based, this vegan chocolate ice cream is made with coconut milk and real cocoa for a rich, fudgy result. Nobody will know it’s dairy-free until you tell them.
Ingredients
- 2 cans (13.5 oz each) full-fat coconut milk
- ½ cup unsweetened cocoa powder
- ¾ cup granulated sugar
- 2 oz dark chocolate (70% cocoa or higher), melted and cooled
- 1 teaspoon vanilla extract
- Pinch of salt
Instructions
Open the cans of full-fat coconut milk and pour the entire contents into a medium saucepan. Place the saucepan over medium-low heat and stir as the coconut milk warms up. Sift the cocoa powder directly into the warm coconut milk a little at a time, whisking after each addition to prevent lumps from forming. Cocoa powder that’s added all at once is much more difficult to fully blend in.
Add the granulated sugar to the saucepan and continue stirring over medium-low heat. Keep the heat gentle — you don’t need the mixture to boil, just warm enough to fully dissolve the sugar and cocoa. This takes about 5 to 6 minutes of gentle heat and constant stirring. The mixture should be smooth, dark brown, and glossy when everything is dissolved.
Remove the saucepan from the heat. Add the melted dark chocolate to the warm cocoa-coconut base and stir vigorously until fully incorporated. The melted chocolate adds extra richness and a fudge-like intensity to the finished ice cream. Add the vanilla extract and salt, then stir once more.
Let the chocolate coconut base cool to room temperature, stirring occasionally. Once at room temperature, cover and refrigerate for at least 3 to 4 hours. A fully chilled base is especially important with vegan ice creams because they can be more prone to iciness if churned while still warm.
Remove the Cuisinart freezer bowl from the freezer — it should have been in there for at least 16 to 24 hours. Confirm it is fully frozen with no liquid movement inside. Turn the machine on, then pour the cold chocolate coconut base slowly through the lid opening. Churn for 20 to 25 minutes. The base will thicken into a dark, rich, creamy vegan chocolate ice cream.
Scoop into a freezer-safe container. Press plastic wrap flat against the surface and close with an airtight lid. Freeze for 3 to 4 hours before serving. Let the container rest at room temperature for 5 minutes before scooping, as vegan ice cream tends to freeze harder than dairy versions.
Pro Tips
- High-quality cocoa powder and dark chocolate make an enormous difference in the final flavor — don’t use low-quality cocoa.
- A tablespoon of coconut oil stirred into the base before churning helps prevent a gummy texture.
- For a vegan rocky road version, fold in vegan marshmallows and crushed almonds before the final freeze.
Troubleshooting Common Ice Cream Maker Problems
Even with a great machine like the Cuisinart 2 Quart Ice Cream Maker, things don’t always go perfectly the first time. Here are some common problems and how to fix them:
1. Why Is My Ice Cream Too Soft? The most common reason is that the freezer bowl wasn’t frozen long enough. It needs a full 16 to 24 hours in the freezer before use. Another reason could be that the base wasn’t cold enough when it went in. Always refrigerate your base for at least 2 hours before churning. Finally, too much sugar in the recipe can prevent proper freezing — follow measurements carefully.
2. Why Is It Icy Instead of Creamy? Iciness usually happens when there’s too much water in the base and not enough fat. Using low-fat milk or too little cream creates more ice crystals. Stick to whole milk and heavy whipping cream for the creamiest results. Adding a small amount of cream cheese, corn syrup, or a tablespoon of vodka to the base can also reduce iciness.
3. How Long Should I Churn Ice Cream? Most Cuisinart 2 Quart Ice Cream Maker recipes churn in 20 to 25 minutes. Thicker bases (like cheesecake or pumpkin) may take a few extra minutes. Stop when the mixture looks like thick soft-serve and the machine sounds like it’s working harder than at the beginning.
4. Best Storage Practices: Always press plastic wrap directly onto the surface of the ice cream before sealing with a lid — this prevents freezer burn and ice crystal formation on top. Store in a shallow, wide container rather than a tall, deep one for more even freezing. Use ice cream within 2 weeks for best flavor and texture.
Conclusion
Making your own ice cream at home is one of the most rewarding kitchen projects you can take on. The Cuisinart 2 Quart Ice Cream Maker makes the whole process approachable, easy, and genuinely enjoyable. There’s something special about knowing exactly what goes into each batch — real ingredients, fresh fruit, quality chocolate, and flavors that you choose.
The 25 Cuisinart 2 Quart Ice Cream Maker Recipes in this guide give you everything you need to get started, from timeless classics like vanilla and chocolate to creative flavors like birthday cake and pumpkin spice. Once you get comfortable with the basics, start experimenting. Mix-ins, swirls, and flavor combinations are limitless — and that’s the real magic of homemade ice cream.
Every batch you make is better than the last because you learn your machine, your preferred textures, and your favorite flavors. Don’t be afraid to adjust sweetness, try new fruits, or create your own signature recipe. The Cuisinart 2 Quart Ice Cream Maker is the kind of kitchen tool that earns its spot on the counter because you’ll want to use it again and again. Keep the freezer bowl ready, keep your ingredients stocked, and enjoy the process of creating something cold, creamy, and made with care.