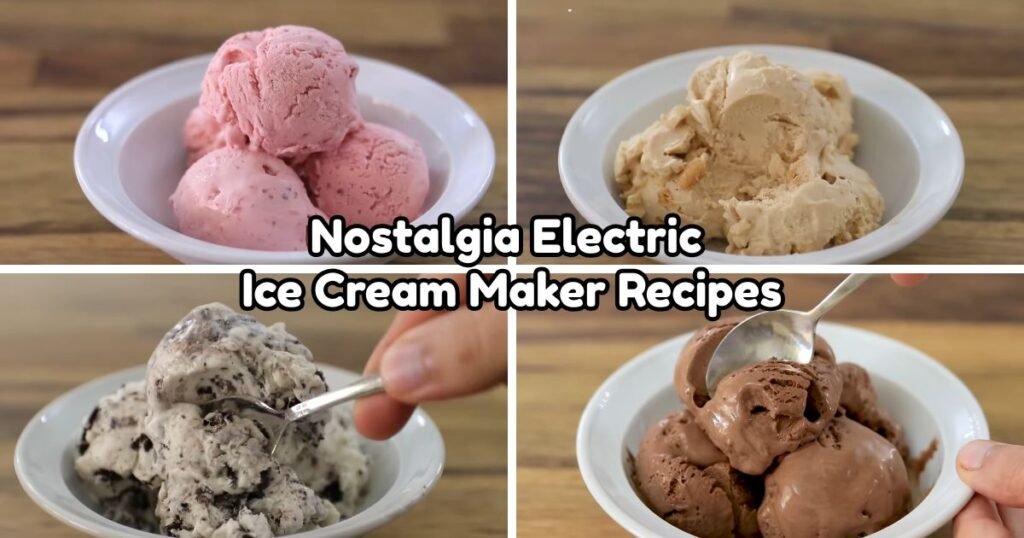
Homemade ice cream is easier than most people think, especially with a Nostalgia Electric Ice Cream Maker sitting on the counter.
This machine has become a favorite among home cooks because it turns a slow, tiring process into something quick and simple.
Traditional hand-crank machines require constant turning and a good amount of arm strength, but electric models handle all the mixing and freezing on their own. That means less work and more time enjoying the results.
Making ice cream at home comes with plenty of perks. Fresh ingredients go straight into the mix, so flavors taste brighter and cleaner.
Custom flavor combinations are easy to create, letting each batch match personal taste. It also makes a great family activity, since kids and adults can add mix-ins together and watch the machine work.
Sweetness and texture stay fully under control, unlike store-bought pints packed with hidden sugar and stabilizers.
This article covers Nostalgia Electric Ice Cream Maker recipes for every occasion. Classic flavors, creative combinations, seasonal picks, and helpful tips for smoother, creamier results are all included below.

What Makes Nostalgia Electric Ice Cream Maker Recipes Special?
1. Easy Mixing Process — The built-in motor handles all the stirring, keeping the mixture moving at a steady pace so air gets folded in evenly. There is no arm strength needed and no guessing when to stir.
2. Large Batch Sizes — Most Nostalgia models hold enough mixture to serve a full household in one round, making them a solid pick for gatherings, birthdays, or weekend treats.
3. Traditional Ice Cream Texture — The slow churn method mimics old-fashioned rock salt freezers, producing a dense, creamy result instead of the airy texture found in many store-bought pints.
4. Family Time Together — Kids enjoy pouring in mix-ins, watching the paddle turn, and waiting for the timer to finish. It becomes a shared kitchen activity rather than a solo chore.
5. Better Flavor Than Store-Bought — Homemade batches skip artificial stabilizers and preservatives. Real cream, real fruit, and real vanilla create a flavor that tastes cleaner and far richer than most packaged options.
1. Classic Vanilla Ice Cream Recipe
Prep Time: 15 minutes | Churn Time: 25-30 minutes | Serve: 6
Vanilla holds a special spot as the starting point for nearly every ice cream lover. Rich cream, real vanilla flavor, and just enough sugar create a smooth, classic base that works alone or under any topping. Made in a Nostalgia Electric Ice Cream Maker, the texture turns silky and dense, nothing like the icy tubs found at grocery stores.
Ingredients:
- 2 cups heavy cream
- 1 cup whole milk
- 3/4 cup granulated sugar
- 1 tablespoon pure vanilla extract
- Pinch of salt
- 4 large egg yolks
Instructions:
Pour the whole milk and half of the sugar into a medium saucepan and place it over medium heat. Warm the mixture gently, stirring often, until small bubbles form around the edges of the pan. Do not let the milk come to a full boil, since scorching changes the flavor of the finished ice cream.
While the milk warms, whisk the egg yolks together with the remaining sugar in a separate bowl until the mixture turns pale and slightly thick. This step builds the custard base that gives classic vanilla ice cream its rich, dense texture.
Once the milk reaches the right temperature, slowly pour a small amount into the egg mixture while whisking constantly. This gradual process, known as tempering, keeps the eggs from scrambling. Continue adding milk in small amounts until about half of it has combined with the eggs.
Pour the tempered egg mixture back into the saucepan with the rest of the milk. Set the heat to low and stir constantly with a wooden spoon or silicone spatula. Cook the custard slowly until it thickens enough to coat the back of the spoon, which usually takes eight to ten minutes. Watch the heat carefully during this stage, since custard can curdle quickly when it gets too hot.
Remove the saucepan from the heat and strain the custard through a fine mesh sieve into a clean bowl. Straining removes any small bits of cooked egg and leaves a smooth, silky base. Stir in the heavy cream, vanilla extract, and a pinch of salt until fully blended.
Cover the bowl and refrigerate the custard for at least four hours, though overnight chilling produces the best results. A cold base churns faster and creates a creamier finished product.
Once chilled, pour the custard into the frozen bowl of the Nostalgia Electric Ice Cream Maker. Turn the machine on and let it churn for twenty five to thirty minutes, or until the mixture thickens into a soft-serve consistency.
Transfer the finished ice cream into an airtight container and press a piece of parchment paper directly onto the surface. Freeze for at least two hours before scooping to allow the texture to firm up completely.
2. Homemade Chocolate Ice Cream
Prep Time: 15 minutes | Churn Time: 25-30 minutes | Serve: 6
Chocolate lovers often name this flavor as their top pick among homemade frozen treats. Deep cocoa flavor blends with a creamy custard base to create a dessert that tastes far richer than anything sold in stores. A touch of melted dark chocolate adds extra depth, giving each scoop a smooth, velvety finish that pairs well with almost any topping.
Ingredients:
- 2 cups heavy cream
- 1 cup whole milk
- 3/4 cup granulated sugar
- 1/2 cup unsweetened cocoa powder
- 4 oz dark chocolate, melted
- 4 large egg yolks
- 1 teaspoon vanilla extract
- Pinch of salt
Instructions:
Combine the whole milk, cocoa powder, and half of the sugar in a saucepan, whisking well to break up any lumps before turning on the heat. Set the burner to medium and warm the mixture, whisking often, until it becomes smooth and steam starts rising from the surface.
In a separate bowl, beat the egg yolks with the remaining sugar until the color lightens and the texture turns silky. This mixture forms the backbone of the custard and needs to be ready before the hot milk is added.
Ladle a small portion of the warm cocoa milk into the egg mixture, whisking rapidly the entire time. Add a few more ladles gradually, allowing the eggs to adjust to the heat without cooking too fast. Once roughly half the liquid has been blended in, pour everything back into the saucepan.
Reduce the heat to low and stir constantly using a heat-resistant spatula, scraping the bottom and sides of the pan to prevent sticking. Cook the custard for about nine minutes, watching for it to thicken enough to coat a spoon. Remove the pan from the heat the moment it reaches that stage.
Add the melted dark chocolate directly into the hot custard and stir until it melts completely and the color turns deep and glossy. Pour the mixture through a fine strainer into a heatproof bowl to remove any small lumps or bits of cooked egg.
Stir in the heavy cream, vanilla extract, and salt, mixing until the base looks fully smooth. Cover the bowl with plastic wrap, pressing it directly onto the surface to stop a skin from forming, then refrigerate for several hours or overnight.
Pour the chilled chocolate base into the frozen canister of the Nostalgia Electric Ice Cream Maker. Turn the machine on and allow it to churn for twenty five to thirty minutes. The mixture should thicken into a rich, soft-serve texture with a deep chocolate color.
Scoop the finished ice cream into a storage container, smoothing the top with a spatula. Cover tightly and freeze for two to three hours before serving, which allows the texture to set into a scoopable, dense consistency perfect for topping with sprinkles, nuts, or warm fudge sauce.
3. Old-Fashioned Strawberry Ice Cream
Prep Time: 20 minutes | Churn Time: 25-30 minutes | Serve: 6
Strawberry season brings out one of the most requested flavors on any homemade ice cream list. Fresh berries get mashed and folded into a creamy base, giving every bite small pockets of natural fruit flavor. Real strawberries make a noticeable difference compared to bottled syrups, since the fruit itself brings brightness and a slightly tart edge to balance the sweetness.
Ingredients:
- 2 cups fresh strawberries, hulled
- 3/4 cup granulated sugar, divided
- 2 cups heavy cream
- 1 cup whole milk
- 4 large egg yolks
- 1 teaspoon vanilla extract
- 1 tablespoon lemon juice
- Pinch of salt
Instructions:
Chop the strawberries into small pieces and place them in a bowl with a quarter cup of sugar and the lemon juice. Stir gently and let the mixture sit at room temperature for about thirty minutes, allowing the berries to release their natural juices and turn slightly syrupy.
While the strawberries macerate, prepare the custard base. Warm the whole milk in a saucepan over medium heat, stirring occasionally, until small bubbles start forming near the edges of the pan.
In a separate bowl, whisk the egg yolks together with the remaining sugar until the mixture becomes pale and smooth. Slowly pour a small amount of the warm milk into the egg mixture, whisking constantly to keep the eggs from cooking too quickly.
Return the combined mixture to the saucepan and place it back over low heat. Stir continuously with a wooden spoon, cooking the custard until it thickens enough to leave a visible trail on the back of the spoon. This process typically takes eight to nine minutes and requires close attention to avoid curdling.
Strain the custard through a fine mesh sieve into a clean bowl to remove any small cooked bits. Stir in the heavy cream, vanilla extract, and a pinch of salt, mixing until the base looks silky and fully combined.
Mash about half of the macerated strawberries with a fork or potato masher, leaving the rest in small chunks for texture. Fold both the mashed and chunky strawberries, along with their juices, into the cooled custard base.
Cover the mixture and refrigerate for a minimum of four hours, though chilling overnight produces a smoother finished texture. Cold custard churns more evenly and helps the strawberry pieces distribute throughout the ice cream instead of sinking.
Pour the chilled strawberry custard into the frozen bowl of the Nostalgia Electric Ice Cream Maker. Churn for twenty five to thirty minutes, or until the mixture thickens into a soft, creamy consistency with visible streaks of pink and red throughout.
Transfer the finished ice cream to a storage container, cover tightly, and freeze for two to three hours before scooping. The extra freezing time lets the fruit pieces firm up and keeps every scoop packed with fresh strawberry flavor.
4. Cookies and Cream Ice Cream
Prep Time: 15 minutes | Churn Time: 25-30 minutes | Serve: 6
Crushed chocolate sandwich cookies turn a simple vanilla base into a favorite treat for both kids and adults. Small cookie chunks stay slightly soft after freezing, adding texture to every spoonful. The contrast between sweet cream and rich chocolate cookie pieces gives this flavor a balance that keeps people reaching for seconds.
Ingredients:
- 2 cups heavy cream
- 1 cup whole milk
- 3/4 cup granulated sugar
- 1 teaspoon vanilla extract
- Pinch of salt
- 4 large egg yolks
- 15 chocolate sandwich cookies, roughly chopped
Instructions:
Begin by warming the whole milk and half of the sugar in a saucepan set over medium heat. Stir from time to time until the liquid turns hot and small bubbles appear near the pan’s edge, then take it off direct heat for a moment.
Beat the egg yolks with the remaining sugar in a mixing bowl until the texture turns light and creamy. Working quickly, spoon a small amount of the hot milk into the yolks while whisking nonstop, which prevents the eggs from turning into scrambled bits.
Slowly add more of the hot milk to the egg mixture, a little at a time, until the two are fully combined. Pour the entire mixture back into the saucepan and return it to low heat.
Stir constantly with a spatula, scraping the bottom of the pan often, until the custard thickens enough to coat the back of a spoon. This usually takes around eight minutes, and patience here makes a noticeable difference in the final texture.
Pour the finished custard through a fine strainer into a clean bowl, catching any small cooked egg pieces along the way. Mix in the heavy cream, vanilla extract, and salt until the base turns smooth and silky.
Cover the bowl tightly and place it in the refrigerator for at least four hours, or overnight for best results. A well-chilled base leads to a creamier finished product once churned.
Pour the cold custard into the frozen bowl of the Nostalgia Electric Ice Cream Maker and turn the machine on. Let it churn for about twenty minutes, until the mixture starts thickening into a soft consistency.
Add the chopped cookies during the final five minutes of churning, allowing the paddle to fold them evenly throughout the mixture without breaking them into powder. Continue churning until the ice cream reaches a soft-serve texture with visible cookie pieces scattered through it.
Spoon the finished mixture into an airtight container, pressing gently to remove air pockets. Freeze for two to three hours before scooping, giving the cookie pieces time to soften slightly while the cream firms up into a scoopable texture perfect for serving in bowls or cones.
5. Mint Chocolate Chip Ice Cream
Prep Time: 15 minutes | Churn Time: 25-30 minutes | Serve: 6
Cool mint flavor paired with small chocolate chips creates a refreshing option for warm afternoons. Natural mint extract gives the base a clean, light flavor without the artificial aftertaste found in some store brands. Mini chocolate chips add small bursts of texture throughout, making each spoonful a mix of smooth cream and light crunch.
Ingredients:
- 2 cups heavy cream
- 1 cup whole milk
- 3/4 cup granulated sugar
- 1 teaspoon pure mint extract
- A few drops green food coloring (optional)
- Pinch of salt
- 4 large egg yolks
- 3/4 cup mini chocolate chips
Instructions:
Combine the whole milk with half of the granulated sugar inside a medium saucepan. Place it over medium heat and warm slowly, stirring at regular intervals, until steam rises and tiny bubbles form along the edges of the pot.
Meanwhile, whisk the egg yolks together with the leftover sugar in a separate bowl until the color turns pale yellow and the texture smooths out. Set this bowl close to the stove for the next step.
Ladle a portion of the hot milk into the egg mixture while whisking briskly, which raises the temperature of the eggs gradually instead of cooking them too fast. Repeat this step a few more times until roughly half the milk has been incorporated.
Pour the combined mixture back into the saucepan and lower the heat setting. Stir the custard continuously with a wooden spoon, watching closely as it thickens over the course of about nine minutes. The custard is ready once it coats the back of the spoon in a thin, even layer.
Strain the thickened custard through a fine mesh sieve to remove any small clumps, then stir in the heavy cream, mint extract, and a pinch of salt. Add the green food coloring at this stage, mixing a drop at a time until the shade looks right, since natural mint extract alone produces a much paler color.
Cover the bowl and chill the mixture in the refrigerator for a minimum of four hours. Extended chilling time, such as an overnight rest, helps the mint flavor spread evenly through the base.
Once fully cold, pour the mixture into the frozen canister of the Nostalgia Electric Ice Cream Maker. Turn the machine on and churn for twenty to twenty five minutes until the base thickens into a soft, creamy texture.
Add the mini chocolate chips during the last few minutes of churning so the paddle distributes them evenly without crushing them into small shards. Continue running the machine until the chips are spread throughout the mixture.
Move the finished ice cream into a storage container, smoothing the surface with the back of a spoon. Freeze for two to three hours before serving to let the texture firm up into a scoopable, refreshing dessert loaded with small chocolate pieces in every bite.
6. Chocolate Chip Cookie Dough Ice Cream
Prep Time: 20 minutes | Churn Time: 25-30 minutes | Serve: 6
Small chunks of edible cookie dough scattered through a creamy vanilla base bring together two favorite desserts in one bowl. Since raw eggs stay out of the dough, this version stays safe to eat straight from the freezer. Buttery dough pieces soften slightly against the cold cream, giving each scoop a mix of textures.
Ingredients:
- 2 cups heavy cream
- 1 cup whole milk
- 3/4 cup granulated sugar
- 1 teaspoon vanilla extract
- Pinch of salt
- 4 large egg yolks
- 1/4 cup butter, softened (for dough)
- 1/3 cup brown sugar (for dough)
- 1 tablespoon milk (for dough)
- 1/2 teaspoon vanilla extract (for dough)
- 3/4 cup flour, heat-treated (for dough)
- Pinch of salt (for dough)
- 1/3 cup mini chocolate chips (for dough)
Instructions:
Start with the cookie dough since it needs time to firm up in the freezer before joining the ice cream base. In a mixing bowl, beat the softened butter and brown sugar together until the texture turns light and fluffy. Add the milk and vanilla extract, stirring until fully blended.
Spread the flour on a baking sheet and heat it in an oven set to 300 degrees for about five minutes, which removes any raw flour bacteria and makes the dough safe to eat cold. Let the flour cool completely before adding it to the butter mixture along with a pinch of salt. Stir in the mini chocolate chips, then shape the dough into small pea-sized pieces. Place these pieces on a plate and freeze them while preparing the custard.
Warm the whole milk and half of the granulated sugar in a saucepan over medium heat until small bubbles appear near the edges. In a separate bowl, whisk the egg yolks with the remaining sugar until the mixture lightens in color.
Slowly pour a portion of the hot milk into the egg mixture while whisking steadily, then gradually add the rest until fully combined. Return everything to the saucepan and cook over low heat, stirring constantly, until the custard thickens enough to coat a spoon, roughly nine minutes.
Strain the custard through a fine sieve into a clean bowl and stir in the heavy cream, vanilla extract, and salt. Cover and refrigerate for at least four hours, or overnight for a smoother result.
Pour the chilled custard into the frozen bowl of the Nostalgia Electric Ice Cream Maker and churn for twenty to twenty five minutes, until it thickens into a soft, creamy consistency.
Add the frozen cookie dough pieces during the last five minutes of churning, letting the paddle fold them gently throughout the mixture without breaking them apart. Continue churning until the dough pieces are evenly spread through the ice cream.
Transfer the finished mixture into an airtight container and freeze for two to three hours before scooping. The rest period allows both the cream and the dough pieces to firm up together, creating a well-balanced texture in every scoop.
7. Butter Pecan Ice Cream
Prep Time: 20 minutes | Churn Time: 25-30 minutes | Serve: 6
Toasted pecans bring a warm, nutty flavor to a buttery caramel-tinted cream base. Browning the butter before mixing it into the custard adds a deeper, toasted note that plain vanilla bases lack. Serving cold with warm nuts folded through creates a satisfying combination of textures perfect for cooler evenings or holiday gatherings.
Ingredients:
- 1 cup pecan halves, chopped
- 4 tablespoons butter, divided
- 2 cups heavy cream
- 1 cup whole milk
- 3/4 cup packed brown sugar
- Pinch of salt
- 4 large egg yolks
- 1 teaspoon vanilla extract
Instructions:
Melt two tablespoons of butter in a skillet set over medium heat. Add the chopped pecans and toast them for four to five minutes, stirring often, until they turn fragrant and slightly darker in color. Remove the pecans from the skillet and set them aside to cool completely.
In the same skillet, melt the remaining butter and let it cook for a few extra minutes past melting, until it turns golden brown and gives off a nutty aroma. Watch closely during this stage, since browned butter can burn quickly once it starts changing color.
Pour the whole milk into a saucepan along with half of the brown sugar and the browned butter. Warm the mixture over medium heat, stirring often, until it becomes hot and small bubbles form near the edges.
In a separate bowl, whisk the egg yolks with the remaining brown sugar until the mixture turns smooth and slightly thick. Slowly add a portion of the hot milk mixture into the eggs while whisking constantly, then gradually pour in the rest.
Return the combined mixture to the saucepan and cook over low heat, stirring the entire time, until the custard thickens enough to coat the back of a spoon. This process generally takes eight to nine minutes.
Strain the custard through a fine mesh sieve into a clean bowl to remove any small lumps. Stir in the heavy cream, vanilla extract, and a pinch of salt until the base turns smooth and fully blended.
Cover the bowl and refrigerate the mixture for at least four hours, though an overnight chill produces the smoothest texture once churned.
Pour the chilled custard into the frozen bowl of the Nostalgia Electric Ice Cream Maker and churn for twenty five to thirty minutes, until the mixture thickens into a soft, creamy consistency with a light caramel color from the browned butter.
Add the toasted pecans during the final few minutes of churning, allowing the paddle to distribute them evenly without crushing them into small pieces. Continue running the machine until the nuts spread throughout the base.
Scoop the finished ice cream into a storage container and freeze for two to three hours before serving. The rest period lets the pecans soften slightly against the cream while the base firms into a rich, scoopable dessert with a warm, toasted finish.
8. Coffee Ice Cream
Prep Time: 20 minutes | Churn Time: 25-30 minutes | Serve: 6
Bold coffee flavor turns a simple cream base into a treat that feels like dessert and an afternoon pick-me-up combined. Brewed espresso or strong coffee grounds infuse deep flavor directly into the custard, skipping artificial coffee extracts entirely. Pairs naturally with chocolate chunks, toffee bits, or a plain scoop alongside warm pie.
Ingredients:
- 2 cups heavy cream
- 1 cup whole milk
- 3/4 cup granulated sugar
- 1/4 cup coarsely ground coffee beans (or 2 tablespoons instant espresso powder)
- Pinch of salt
- 4 large egg yolks
- 1/2 teaspoon vanilla extract
Instructions:
Pour the whole milk into a saucepan and add the ground coffee beans directly into the liquid. Warm the mixture over medium heat until steam rises and small bubbles form near the edges, then remove the pan from the burner and let the coffee steep for fifteen minutes, allowing the flavor to deepen.
Strain the milk through a fine mesh sieve lined with cheesecloth to remove the coffee grounds completely, pressing gently to extract every bit of liquid. Return the strained milk to the saucepan along with half of the granulated sugar and warm it again over medium heat.
While the milk reheats, whisk the egg yolks with the remaining sugar in a separate bowl until the mixture turns pale and slightly thick. Slowly pour a portion of the hot coffee milk into the yolks while whisking constantly, then add the rest gradually until fully combined.
Pour the mixture back into the saucepan and set the heat to low. Stir continuously with a wooden spoon, cooking the custard until it thickens enough to coat the back of the spoon, which typically takes eight to nine minutes. Keep the heat gentle throughout, since coffee custard can scorch quickly on higher settings.
Remove the pan from the heat and pour the custard through a clean strainer into a bowl, catching any small cooked bits along the way. Stir in the heavy cream, vanilla extract, and a pinch of salt, mixing until the base turns smooth and glossy.
Cover the bowl and refrigerate for a minimum of four hours, though an overnight rest allows the coffee flavor to settle evenly throughout the cream. A well-chilled base also churns into a smoother finished texture.
Pour the cold coffee custard into the frozen bowl of the Nostalgia Electric Ice Cream Maker. Turn the machine on and let it run for twenty five to thirty minutes, until the mixture thickens into a soft, creamy consistency with a light tan color.
Transfer the finished ice cream into an airtight container, smoothing the top with a spatula. Freeze for two to three hours before scooping, giving the texture time to firm up into a dense, scoopable dessert with a strong, well-rounded coffee flavor throughout.
9. Salted Caramel Ice Cream
Prep Time: 25 minutes | Churn Time: 25-30 minutes | Serve: 6
Homemade caramel sauce swirled through a lightly salted cream base creates a rich balance between sweet and savory flavors. Cooking sugar down to a deep amber color builds a flavor far more complex than bottled caramel syrup. A touch of flaky sea salt on top brings out every note in the finished dessert.
Ingredients:
- 1 cup granulated sugar (for caramel)
- 6 tablespoons butter (for caramel)
- 1/2 cup heavy cream (for caramel)
- 1 teaspoon sea salt (for caramel)
- 2 cups heavy cream
- 1 cup whole milk
- 1/4 cup granulated sugar (for custard)
- 4 large egg yolks
- 1 teaspoon vanilla extract
Instructions:
Begin the caramel sauce by spreading the sugar evenly across the bottom of a heavy saucepan set over medium heat. Let the sugar melt undisturbed for the first few minutes, then stir gently as it turns from clear to a deep amber color. Watch closely during this stage, since sugar can shift from perfectly caramelized to burnt within seconds.
Once the sugar reaches a rich amber shade, add the butter in small pieces, whisking constantly as it melts into the hot sugar. The mixture will bubble vigorously, so keep whisking until everything blends into a smooth, glossy sauce.
Slowly pour in the half cup of heavy cream while whisking nonstop, since the mixture will bubble up again as the cold cream hits the hot caramel. Continue whisking until the sauce turns silky and fully combined, then remove it from the heat and stir in the sea salt. Set the caramel aside to cool while preparing the custard base.
Warm the whole milk and quarter cup of sugar in a separate saucepan over medium heat until small bubbles form near the edges. In a mixing bowl, whisk the egg yolks until they turn pale, then slowly add the hot milk while whisking constantly.
Pour the combined mixture back into the saucepan and cook over low heat, stirring continuously, until the custard thickens enough to coat a spoon, roughly eight minutes. Strain the custard through a fine mesh sieve into a clean bowl.
Stir in the heavy cream, vanilla extract, and about half of the cooled caramel sauce, mixing until the base turns a light golden color throughout. Save the remaining caramel sauce for swirling in later.
Cover the bowl and refrigerate for at least four hours, or overnight for the smoothest texture. Pour the chilled base into the frozen bowl of the Nostalgia Electric Ice Cream Maker and churn for twenty five to thirty minutes.
During the last few minutes of churning, drizzle in the remaining caramel sauce, allowing the paddle to create ribbons throughout the mixture rather than blending it in completely. Transfer the finished ice cream into a storage container, layering with extra caramel drizzle between scoops as desired.
Freeze for two to three hours before serving, and sprinkle a small pinch of flaky sea salt over each bowl right before eating for an extra layer of flavor.
10. Peanut Butter Cup Ice Cream
Prep Time: 20 minutes | Churn Time: 25-30 minutes | Serve: 6
Creamy peanut butter blends into a rich vanilla base, then gets loaded with chopped peanut butter cup candies for extra texture. The salty-sweet combination appeals to both kids and adults, making it a common request at parties and cookouts. Smooth peanut butter flavor pairs naturally with chocolate throughout every bite.
Ingredients:
- 2 cups heavy cream
- 1 cup whole milk
- 2/3 cup granulated sugar
- 3/4 cup creamy peanut butter
- Pinch of salt
- 4 large egg yolks
- 1 teaspoon vanilla extract
- 1 cup peanut butter cup candies, chopped
Instructions:
Warm the whole milk and half of the granulated sugar in a saucepan over medium heat, stirring occasionally, until the liquid turns hot and small bubbles gather near the edges. Remove the pan briefly from the heat and whisk in the peanut butter until it melts completely into the milk, creating a smooth, tan-colored liquid.
In a separate bowl, whisk the egg yolks with the remaining sugar until the mixture lightens in color and turns slightly thick. Slowly pour a portion of the warm peanut butter milk into the eggs while whisking constantly, then gradually add the rest until fully combined.
Return the mixture to the saucepan and place it back over low heat. Stir constantly with a wooden spoon or spatula, cooking the custard until it thickens enough to coat the back of a spoon, which usually takes about nine minutes given the extra thickness the peanut butter adds.
Strain the custard through a fine mesh sieve into a clean bowl, pressing gently to push through any thick bits of peanut butter that have not fully dissolved. Stir in the heavy cream, vanilla extract, and a pinch of salt until the base turns smooth and well combined.
Cover the bowl tightly and refrigerate for a minimum of four hours, though chilling overnight helps the peanut butter flavor settle evenly throughout the base. A cold custard also churns into a denser, creamier texture.
Pour the chilled mixture into the frozen bowl of the Nostalgia Electric Ice Cream Maker and turn the machine on. Let it churn for twenty five to thirty minutes, until the base thickens into a soft, creamy consistency with a light tan shade.
Add the chopped peanut butter cup candies during the final five minutes of churning, letting the paddle distribute them evenly throughout the mixture without crushing them into small crumbs. Continue running the machine until the candy pieces spread evenly through the base.
Transfer the finished ice cream into an airtight container, pressing down gently to remove any air pockets. Freeze for two to three hours before scooping, allowing the candy pieces to soften slightly while the surrounding cream firms into a rich, scoopable dessert packed with peanut butter and chocolate in every spoonful.
11. Banana Cream Ice Cream
Prep Time: 20 minutes | Churn Time: 25-30 minutes | Serve: 6
Ripe bananas blended into a smooth custard base create a naturally sweet flavor without needing extra sugar. Crushed vanilla wafer cookies folded in near the end add a familiar banana pudding taste that reminds many people of a favorite childhood dessert. Overripe bananas with brown spots work best for the strongest flavor.
Ingredients:
- 3 very ripe bananas, mashed
- 2 tablespoons lemon juice
- 2 cups heavy cream
- 1 cup whole milk
- 2/3 cup granulated sugar
- Pinch of salt
- 4 large egg yolks
- 1 teaspoon vanilla extract
- 1 cup crushed vanilla wafer cookies
Instructions:
Peel the bananas and mash them thoroughly in a bowl using a fork until mostly smooth, leaving a few small lumps for texture. Stir in the lemon juice right away to keep the bananas from turning brown while the custard base cooks.
Warm the whole milk and half of the sugar in a saucepan over medium heat, stirring occasionally, until the mixture turns hot and small bubbles appear along the edges. In a separate bowl, whisk the egg yolks with the remaining sugar until the color lightens and the texture turns smooth.
Slowly pour some of the hot milk into the egg mixture while whisking constantly, preventing the eggs from cooking too quickly. Add the rest of the milk gradually until fully blended, then pour the combined mixture back into the saucepan.
Set the heat to low and stir the custard continuously with a wooden spoon, cooking until it thickens enough to coat the back of the spoon, roughly eight to nine minutes. Remove the pan from the heat once it reaches the right thickness.
Strain the custard through a fine mesh sieve into a clean bowl to remove any small cooked pieces. Stir in the mashed bananas, heavy cream, vanilla extract, and a pinch of salt, mixing until the base turns pale yellow and fully combined.
Cover the bowl and refrigerate for at least four hours, though an overnight chill helps the banana flavor blend more fully into the cream. Cold custard also churns into a smoother, denser texture overall.
Pour the chilled banana custard into the frozen bowl of the Nostalgia Electric Ice Cream Maker. Churn for twenty five to thirty minutes, until the mixture thickens into a soft, creamy consistency with visible banana flecks throughout.
Add the crushed vanilla wafer cookies during the final few minutes of churning, letting the paddle fold them gently into the mixture without turning them into fine crumbs. Continue churning until the cookie pieces spread evenly through the base.
Scoop the finished ice cream into a storage container and freeze for two to three hours before serving. The rest period allows the banana flavor to deepen further while the wafer pieces soften slightly, creating a texture similar to classic banana pudding in every bite.
12. Rocky Road Ice Cream
Prep Time: 20 minutes | Churn Time: 25-30 minutes | Serve: 6
Marshmallows, toasted nuts, and chunks of chocolate come together in a rich chocolate base for one of the most loaded flavor combinations on this list. Each spoonful brings a mix of soft, chewy, and crunchy textures that keeps every bite interesting. Roasted almonds add a slightly savory note that balances the sweetness of the marshmallows and chocolate.
Ingredients:
- 2 cups heavy cream
- 1 cup whole milk
- 3/4 cup granulated sugar
- 1/2 cup unsweetened cocoa powder
- 4 large egg yolks
- 1 teaspoon vanilla extract
- Pinch of salt
- 1 cup mini marshmallows
- 1/2 cup roasted almonds, chopped
- 1/2 cup chocolate chunks
Instructions:
Whisk the cocoa powder into the whole milk inside a saucepan, making sure no dry lumps remain before turning on the heat. Add half of the granulated sugar and place the pan over medium heat, stirring often until the mixture turns smooth and steam begins rising from the surface.
In a separate bowl, whisk the egg yolks with the remaining sugar until the color lightens and the texture turns silky. Slowly ladle a portion of the hot cocoa milk into the egg mixture while whisking constantly, then continue adding small amounts until roughly half the liquid has been incorporated.
Pour the combined mixture back into the saucepan and reduce the heat to low. Stir constantly with a spatula, scraping the bottom of the pan to prevent scorching, and cook until the custard thickens enough to coat the back of a spoon, generally around nine minutes.
Remove the pan from the heat and strain the custard through a fine mesh sieve into a clean bowl, catching any small cooked bits. Stir in the heavy cream, vanilla extract, and salt, mixing until the base turns deep brown and fully smooth.
Cover the bowl and refrigerate for a minimum of four hours, though an overnight chill produces the richest flavor and smoothest texture once churned.
Pour the chilled chocolate base into the frozen bowl of the Nostalgia Electric Ice Cream Maker and churn for twenty five to thirty minutes, until the mixture thickens into a soft, dense consistency.
During the final five minutes of churning, add the mini marshmallows, chopped almonds, and chocolate chunks all at once, letting the paddle fold everything through the base evenly. Continue running the machine until the mix-ins spread throughout without breaking apart the marshmallows too much.
Transfer the finished ice cream into a storage container, pressing down gently to settle the mix-ins evenly. Freeze for two to three hours before scooping, giving the marshmallows time to firm up slightly while staying soft in the center, along with a satisfying crunch from the almonds in each bite.
13. Chocolate Peanut Butter Ice Cream
Prep Time: 20 minutes | Churn Time: 25-30 minutes | Serve: 6
Layers of chocolate custard and peanut butter swirl combine into a dessert built for anyone who loves the classic pairing. Instead of blending the two flavors completely, ribbons of peanut butter run through the chocolate base, keeping each flavor distinct in every scoop. A deep, dark chocolate flavor balances the richness of the peanut butter.
Ingredients:
- 2 cups heavy cream
- 1 cup whole milk
- 3/4 cup granulated sugar
- 1/3 cup unsweetened cocoa powder
- 4 large egg yolks
- 1 teaspoon vanilla extract
- Pinch of salt
- 1/2 cup creamy peanut butter, warmed slightly
Instructions:
Whisk the cocoa powder into the whole milk in a saucepan until no lumps remain, then stir in half of the granulated sugar. Place the pan over medium heat and warm the mixture, stirring frequently, until it becomes smooth and small bubbles start forming near the edges.
In a separate bowl, whisk the egg yolks with the remaining sugar until the mixture lightens in color and turns slightly thick. Slowly pour a portion of the hot cocoa milk into the eggs while whisking nonstop, then gradually add the rest until fully combined.
Return the mixture to the saucepan and lower the heat setting. Stir constantly with a wooden spoon, cooking the custard until it thickens enough to coat the back of the spoon, which usually takes around nine minutes given the added cocoa powder.
Strain the custard through a fine mesh sieve into a clean bowl to remove any small cooked pieces. Stir in the heavy cream, vanilla extract, and a pinch of salt, mixing until the base turns deep brown and fully smooth.
Cover the bowl and refrigerate for at least four hours, or overnight for the best texture once churned. A cold chocolate base churns more evenly and holds its shape better once mix-ins are added.
Pour the chilled chocolate custard into the frozen bowl of the Nostalgia Electric Ice Cream Maker and churn for twenty five to thirty minutes, until the mixture thickens into a soft, rich consistency.
While the ice cream churns, warm the peanut butter slightly in the microwave for about fifteen seconds, just enough to loosen it into a pourable consistency without making it hot. Once the ice cream reaches a soft-serve texture, transfer half of it into a storage container and drizzle a portion of the warmed peanut butter over the top.
Add the remaining ice cream on top, then drizzle the rest of the peanut butter over the surface. Use a butter knife to gently swirl the peanut butter through the layers, creating ribbons throughout without fully blending the two together.
Cover the container and freeze for two to three hours before serving, allowing the layers to firm up while keeping distinct streaks of peanut butter running through the chocolate base.
14. Birthday Cake Ice Cream
Prep Time: 20 minutes | Churn Time: 25-30 minutes | Serve: 6
Sweet cake batter flavor combined with rainbow sprinkles brings a party feeling to a simple vanilla base. Small pieces of yellow cake folded through the mixture add texture that feels close to a slice of frosted cake in frozen form. Kids especially enjoy watching the colorful sprinkles mix into the machine during the last few minutes.
Ingredients:
- 2 cups heavy cream
- 1 cup whole milk
- 3/4 cup granulated sugar
- 1 teaspoon vanilla extract
- 1/2 teaspoon almond extract
- Pinch of salt
- 4 large egg yolks
- 1 cup cubed yellow cake or pound cake
- 1/2 cup rainbow sprinkles
Instructions:
Warm the whole milk and half of the granulated sugar in a saucepan over medium heat, stirring from time to time, until the mixture turns hot and small bubbles gather near the edges. In a separate bowl, whisk the egg yolks with the remaining sugar until the texture turns pale and slightly thick.
Slowly pour a portion of the hot milk into the egg mixture while whisking constantly, preventing the eggs from cooking too fast. Continue adding milk gradually until roughly half has been combined, then pour everything back into the saucepan.
Set the heat to low and stir the custard continuously with a wooden spoon, cooking until it thickens enough to coat the back of the spoon, typically eight to nine minutes. Remove the pan from the heat once the right thickness is reached.
Strain the custard through a fine mesh sieve into a clean bowl to catch any small cooked pieces. Stir in the heavy cream, vanilla extract, almond extract, and a pinch of salt, mixing until the base turns smooth and well combined. The almond extract adds a flavor close to traditional cake batter.
Cover the bowl and refrigerate for at least four hours, though an overnight chill helps the flavors settle fully into the cream. Pour the chilled custard into the frozen bowl of the Nostalgia Electric Ice Cream Maker and churn for twenty to twenty five minutes, until the base thickens into a soft, creamy consistency.
Add the cubed cake pieces during the final five minutes of churning, letting the paddle fold them gently into the mixture without breaking them into crumbs. About one minute before the machine finishes, sprinkle in the rainbow sprinkles, allowing them to distribute quickly throughout the base without bleeding too much color into the cream.
Transfer the finished ice cream into a storage container, pressing gently to settle the cake pieces evenly throughout. Freeze for two to three hours before scooping, giving the cake cubes time to soften slightly while the sprinkles stay crisp, creating a texture close to frosted birthday cake in every spoonful.
15. S’mores Ice Cream
Prep Time: 20 minutes | Churn Time: 25-30 minutes | Serve: 6
Toasted marshmallow flavor, chunks of graham cracker, and swirls of chocolate combine into a dessert built around a classic campfire treat. Each ingredient brings a different texture, from the soft marshmallow pieces to the crunchy graham cracker bits scattered throughout the base. A hint of chocolate ties every element together into one balanced flavor.
Ingredients:
- 2 cups heavy cream
- 1 cup whole milk
- 3/4 cup granulated sugar
- 4 large egg yolks
- 1 teaspoon vanilla extract
- Pinch of salt
- 1 cup mini marshmallows
- 1 cup graham crackers, broken into pieces
- 1/2 cup chocolate fudge sauce, cooled
Instructions:
Warm the whole milk and half of the sugar in a saucepan over medium heat, stirring occasionally, until the liquid turns hot and small bubbles form along the edges. In a separate bowl, whisk the egg yolks with the remaining sugar until the mixture lightens in color and turns slightly thick.
Slowly pour some of the hot milk into the egg mixture while whisking constantly, then gradually add the rest until fully combined. Pour the mixture back into the saucepan and set the heat to low.
Stir the custard continuously with a wooden spoon, cooking until it thickens enough to coat the back of the spoon, which generally takes eight to nine minutes. Remove the pan from the heat once the custard reaches the right thickness.
Strain the custard through a fine mesh sieve into a clean bowl, then stir in the heavy cream, vanilla extract, and a pinch of salt until the base turns smooth and fully blended.
Cover the bowl and refrigerate for at least four hours, or overnight for a smoother texture once churned. Pour the chilled custard into the frozen bowl of the Nostalgia Electric Ice Cream Maker and churn for twenty to twenty five minutes, until the mixture thickens into a soft, creamy consistency.
During the last five minutes of churning, add the mini marshmallows and broken graham cracker pieces, letting the paddle fold them evenly throughout the base. Continue running the machine until both mix-ins are spread through the mixture without breaking down too much.
Spoon about a third of the ice cream into a storage container and drizzle a portion of the cooled chocolate fudge sauce over the top. Repeat with another layer of ice cream and fudge sauce, finishing with a final drizzle on top.
Use a butter knife to gently swirl the fudge sauce through the top layer, creating ribbons without fully mixing it into the base. Cover the container and freeze for two to three hours before serving, allowing the marshmallow and graham pieces to settle while the fudge ribbons stay soft and rich throughout the finished dessert.
16. Oreo Cheesecake Ice Cream
Prep Time: 20 minutes | Churn Time: 25-30 minutes | Serve: 6
Cream cheese blended into a sweet custard base creates a tangy flavor close to classic cheesecake, then gets loaded with crushed chocolate sandwich cookies. The slight tang from the cream cheese balances the sweetness of the base, keeping the flavor from turning overly sugary. Small cookie chunks scattered throughout add a familiar crunch in every bite.
Ingredients:
- 8 oz cream cheese, softened
- 2 cups heavy cream
- 1 cup whole milk
- 3/4 cup granulated sugar
- 4 large egg yolks
- 1 teaspoon vanilla extract
- Pinch of salt
- 15 chocolate sandwich cookies, roughly chopped
Instructions:
Place the softened cream cheese in a large mixing bowl and beat it with a hand mixer or whisk until completely smooth, with no lumps remaining. Set the bowl aside while preparing the custard base.
Warm the whole milk and half of the granulated sugar in a saucepan over medium heat, stirring occasionally, until the mixture turns hot and small bubbles form near the edges. In a separate bowl, whisk the egg yolks with the remaining sugar until the color lightens and the texture turns slightly thick.
Slowly pour a portion of the hot milk into the egg mixture while whisking constantly, then gradually add the rest until fully combined. Pour the mixture back into the saucepan and reduce the heat to low.
Stir the custard continuously with a wooden spoon, cooking until it thickens enough to coat the back of the spoon, generally around eight to nine minutes. Remove the pan from the heat once the custard reaches the right thickness.
Pour a small amount of the hot custard into the softened cream cheese, whisking constantly until it loosens and blends smoothly. Continue adding the rest of the custard gradually, whisking after each addition until the cream cheese fully dissolves into the mixture with no remaining lumps.
Strain the combined mixture through a fine mesh sieve into a clean bowl to catch any small bits that did not fully blend. Stir in the heavy cream, vanilla extract, and a pinch of salt until the base turns smooth and creamy.
Cover the bowl and refrigerate for at least four hours, though an overnight chill allows the cream cheese flavor to blend more fully throughout the base. Pour the chilled mixture into the frozen bowl of the Nostalgia Electric Ice Cream Maker and churn for twenty to twenty five minutes, until it thickens into a soft, dense consistency.
Add the chopped cookies during the final five minutes of churning, letting the paddle fold them evenly throughout the mixture without breaking them into fine crumbs. Continue running the machine until the cookie pieces distribute evenly through the base.
Transfer the finished ice cream into a storage container and freeze for two to three hours before scooping. The rest period allows the tangy cheesecake flavor to settle fully while the cookie pieces soften slightly, creating a texture close to a frozen slice of cheesecake in every bite.
17. Lemon Ice Cream
Prep Time: 20 minutes | Churn Time: 25-30 minutes | Serve: 6
Fresh lemon juice and zest bring a bright, tangy flavor to a smooth cream base, creating a dessert that feels lighter than most other flavors on this list. The zest infuses the cream with natural lemon oil, giving the base a stronger citrus flavor than juice alone provides. A light yellow color comes naturally from the zest without needing food coloring.
Ingredients:
- 2 cups heavy cream
- 1 cup whole milk
- 3/4 cup granulated sugar
- Zest of 3 lemons
- 1/2 cup fresh lemon juice
- 4 large egg yolks
- Pinch of salt
Instructions:
Combine the whole milk with the lemon zest in a saucepan and warm the mixture over medium heat, stirring occasionally, until small bubbles begin forming near the edges. Remove the pan from the heat and let the zest steep in the warm milk for fifteen minutes, allowing the natural oils to infuse fully into the liquid.
Strain the milk through a fine mesh sieve to remove the zest, pressing gently to release any remaining flavor caught in the strands. Return the strained milk to the saucepan along with half of the granulated sugar and warm it again over medium heat.
In a separate bowl, whisk the egg yolks with the remaining sugar until the color lightens and the texture turns smooth. Slowly pour a portion of the hot lemon milk into the egg mixture while whisking constantly, then gradually add the rest until fully combined.
Pour the mixture back into the saucepan and set the heat to low. Stir the custard continuously with a wooden spoon, cooking until it thickens enough to coat the back of the spoon, typically eight to nine minutes.
Remove the pan from the heat and strain the custard once more through a clean sieve into a bowl. Stir in the heavy cream and a pinch of salt, mixing until the base turns smooth and pale yellow.
Let the mixture cool slightly at room temperature, then whisk in the fresh lemon juice gradually. Adding the juice after the custard has cooled some prevents the acid from curdling the cream too quickly.
Cover the bowl and refrigerate for at least four hours, or overnight for the brightest, most balanced flavor. A cold base also churns into a smoother finished texture.
Pour the chilled lemon custard into the frozen bowl of the Nostalgia Electric Ice Cream Maker and churn for twenty five to thirty minutes, until the mixture thickens into a soft, pale yellow consistency.
Transfer the finished ice cream into an airtight container, smoothing the top with a spatula. Freeze for two to three hours before scooping, allowing the tangy lemon flavor to settle fully into a light, refreshing dessert perfect for warm days.
18. Blueberry Cheesecake Ice Cream
Prep Time: 25 minutes | Churn Time: 25-30 minutes | Serve: 6
Sweet cream cheese base gets swirled with a simple blueberry sauce, bringing together two favorite desserts into one frozen treat. Cooking the blueberries down into a thick sauce concentrates their natural flavor, giving the swirl a deep purple color and jammy texture. Graham cracker pieces folded in near the end add a texture similar to a cheesecake crust.
Ingredients:
- 2 cups fresh or frozen blueberries
- 1/3 cup granulated sugar (for sauce)
- 1 tablespoon lemon juice (for sauce)
- 8 oz cream cheese, softened
- 2 cups heavy cream
- 1 cup whole milk
- 1/2 cup granulated sugar (for custard)
- 4 large egg yolks
- 1 teaspoon vanilla extract
- Pinch of salt
- 3/4 cup graham cracker pieces
Instructions:
Combine the blueberries, sugar, and lemon juice in a small saucepan set over medium heat. Cook the mixture, stirring occasionally and mashing some of the berries with the back of a spoon, until it thickens into a jam-like sauce, roughly ten minutes. Remove the sauce from the heat and let it cool completely before using.
Beat the softened cream cheese in a large mixing bowl until smooth, with no remaining lumps, and set it aside for later.
Warm the whole milk and half of the custard sugar in a saucepan over medium heat, stirring occasionally, until small bubbles form near the edges. In a separate bowl, whisk the egg yolks with the remaining sugar until the color lightens and the texture turns slightly thick.
Slowly pour a portion of the hot milk into the egg mixture while whisking constantly, then gradually add the rest until fully combined. Return the mixture to the saucepan and cook over low heat, stirring continuously, until the custard thickens enough to coat the back of a spoon, roughly eight to nine minutes.
Pour a small amount of the hot custard into the cream cheese, whisking until smooth, then gradually add the rest of the custard while whisking after each addition. Strain the combined mixture through a fine mesh sieve into a clean bowl.
Stir in the heavy cream, vanilla extract, and a pinch of salt until the base turns smooth and creamy. Cover the bowl and refrigerate for at least four hours, or overnight for the best texture once churned.
Pour the chilled cheesecake base into the frozen bowl of the Nostalgia Electric Ice Cream Maker and churn for twenty to twenty five minutes, until the mixture thickens into a soft, dense consistency.
Spoon about a third of the finished ice cream into a storage container and drizzle a portion of the cooled blueberry sauce over the top, along with a scatter of graham cracker pieces. Repeat with two more layers, finishing with sauce and graham pieces on top.
Use a butter knife to gently swirl the layers together, creating ribbons of blueberry throughout without fully blending it into the base. Cover the container and freeze for two to three hours before serving, allowing the flavors to settle into a rich, fruity cheesecake dessert.
19. Peach Ice Cream
Prep Time: 20 minutes | Churn Time: 25-30 minutes | Serve: 6
Ripe summer peaches blended into a light cream base bring a naturally sweet, fruity flavor perfect for warm afternoons. Cooking the peaches briefly before blending softens their texture and deepens the flavor beyond what raw fruit alone provides. A hint of cinnamon in the base adds warmth that pairs naturally with the sweetness of the fruit.
Ingredients:
- 3 ripe peaches, peeled and chopped
- 2 tablespoons lemon juice
- 2 cups heavy cream
- 1 cup whole milk
- 3/4 cup granulated sugar, divided
- 1/4 teaspoon ground cinnamon
- 4 large egg yolks
- Pinch of salt
Instructions:
Place the chopped peaches in a saucepan with a quarter cup of the sugar and the lemon juice. Cook over medium heat, stirring occasionally, until the peaches soften and release their juices, roughly eight minutes. Remove the pan from the heat and let the peaches cool slightly before blending them into a smooth puree using a blender or food processor.
Warm the whole milk and half of the remaining sugar in a separate saucepan over medium heat, stirring occasionally, until small bubbles form near the edges. In a mixing bowl, whisk the egg yolks with the remaining sugar until the color lightens and the texture turns smooth.
Slowly pour a portion of the hot milk into the egg mixture while whisking constantly, then gradually add the rest until fully combined. Return the mixture to the saucepan and cook over low heat, stirring continuously, until the custard thickens enough to coat the back of a spoon, generally around eight to nine minutes.
Strain the custard through a fine mesh sieve into a clean bowl to remove any small cooked pieces. Stir in the heavy cream, cinnamon, and a pinch of salt, mixing until the base turns smooth and fully combined.
Fold the cooled peach puree into the custard base, stirring gently until the color turns a light golden orange throughout. Cover the bowl and refrigerate for at least four hours, though an overnight chill allows the peach flavor to blend more fully into the cream.
Pour the chilled peach custard into the frozen bowl of the Nostalgia Electric Ice Cream Maker and churn for twenty five to thirty minutes, until the mixture thickens into a soft, creamy consistency with a light orange hue.
Transfer the finished ice cream into an airtight container, smoothing the top with a spatula. Freeze for two to three hours before scooping, allowing the peach flavor to settle fully into a smooth, fruity dessert that captures the taste of summer in every scoop.
20. Mango Ice Cream
Prep Time: 20 minutes | Churn Time: 25-30 minutes | Serve: 6
Sweet, tropical mango puree blended into a light cream base creates a bright yellow dessert bursting with natural fruit flavor. Ripe mangoes bring a smooth, almost silky texture even before churning, requiring less added sugar than many other fruit flavors. A small splash of lime juice sharpens the sweetness and keeps the flavor from tasting flat.
Ingredients:
- 3 ripe mangoes, peeled and chopped
- 1 tablespoon lime juice
- 2 cups heavy cream
- 1 cup whole milk
- 1/2 cup granulated sugar
- 4 large egg yolks
- Pinch of salt
Instructions:
Puree the chopped mangoes in a blender or food processor until completely smooth, then stir in the lime juice and set the puree aside. The lime juice keeps the bright color from dulling while the custard base finishes cooking.
Warm the whole milk and half of the granulated sugar in a saucepan over medium heat, stirring occasionally, until small bubbles start forming near the edges. In a separate bowl, whisk the egg yolks with the remaining sugar until the color lightens and the texture turns slightly thick.
Slowly pour a portion of the hot milk into the egg mixture while whisking constantly, then gradually add the rest until fully combined. Pour the mixture back into the saucepan and lower the heat to a gentle simmer.
Stir the custard continuously with a wooden spoon, cooking until it thickens enough to coat the back of the spoon, generally around eight minutes. Remove the pan from the heat once the right thickness is reached.
Strain the custard through a fine mesh sieve into a clean bowl to remove any small cooked pieces. Stir in the heavy cream and a pinch of salt, mixing until the base turns smooth and pale.
Fold the mango puree into the cooled custard base, stirring until the color turns a bright golden yellow throughout. Cover the bowl and refrigerate for at least four hours, though an overnight chill allows the tropical flavor to settle more fully into the cream.
Pour the chilled mango custard into the frozen bowl of the Nostalgia Electric Ice Cream Maker and churn for twenty five to thirty minutes, until the mixture thickens into a soft, creamy consistency with a vibrant yellow color.
Transfer the finished ice cream into an airtight container, smoothing the top with a spatula. Freeze for two to three hours before scooping, allowing the tropical flavor to settle fully into a smooth, bright dessert that tastes close to fresh mango in every scoop.
21. Raspberry Swirl Ice Cream
Prep Time: 20 minutes | Churn Time: 25-30 minutes | Serve: 6
A simple vanilla base gets layered with a tart raspberry sauce, creating streaks of deep red running through every scoop. Cooking the raspberries down into a thick sauce concentrates their natural tartness, balancing the sweetness of the cream underneath. Straining out the seeds keeps the sauce smooth and easy to swirl through the finished base.
Ingredients:
- 2 cups fresh or frozen raspberries
- 1/3 cup granulated sugar (for sauce)
- 1 tablespoon lemon juice (for sauce)
- 2 cups heavy cream
- 1 cup whole milk
- 1/2 cup granulated sugar (for custard)
- 4 large egg yolks
- 1 teaspoon vanilla extract
- Pinch of salt
Instructions:
Combine the raspberries, sugar, and lemon juice in a small saucepan over medium heat. Cook the mixture, stirring and mashing the berries occasionally, until it thickens into a jam-like sauce, roughly ten minutes. Pour the sauce through a fine mesh strainer into a bowl, pressing firmly to remove the seeds, then let the smooth sauce cool completely.
Warm the whole milk and half of the custard sugar in a separate saucepan over medium heat, stirring occasionally, until small bubbles form near the edges. In a mixing bowl, whisk the egg yolks with the remaining sugar until the color lightens and the texture turns slightly thick.
Slowly pour a portion of the hot milk into the egg mixture while whisking constantly, then gradually add the rest until fully combined. Return the mixture to the saucepan and cook over low heat, stirring continuously, until the custard thickens enough to coat the back of a spoon, roughly eight to nine minutes.
Strain the custard through a fine mesh sieve into a clean bowl to remove any small cooked pieces. Stir in the heavy cream, vanilla extract, and a pinch of salt, mixing until the base turns smooth and fully combined.
Cover the bowl and refrigerate for at least four hours, or overnight for the smoothest texture once churned. Pour the chilled vanilla base into the frozen bowl of the Nostalgia Electric Ice Cream Maker and churn for twenty five to thirty minutes, until it thickens into a soft, creamy consistency.
Spoon about a third of the finished ice cream into a storage container and drizzle a portion of the cooled raspberry sauce over the top. Repeat with two more layers, finishing with a final drizzle of sauce on top.
Use a butter knife to gently swirl the sauce through the layers, creating streaks of red throughout without fully blending it into the base. Cover the container and freeze for two to three hours before serving, allowing the tart raspberry ribbons to firm up alongside the smooth vanilla base.
22. Pumpkin Spice Ice Cream
Prep Time: 20 minutes | Churn Time: 25-30 minutes | Serve: 6
Real pumpkin puree blended with warm spices brings a cozy autumn flavor to a rich, creamy base. Cinnamon, ginger, nutmeg, and cloves combine to create a familiar spice blend without needing a store-bought mix. The natural sweetness and thick texture of pumpkin puree add body to the base, giving the finished dessert a slightly denser consistency than most other flavors.
Ingredients:
- 1 cup canned pumpkin puree
- 2 cups heavy cream
- 1 cup whole milk
- 3/4 cup packed brown sugar
- 1 teaspoon ground cinnamon
- 1/2 teaspoon ground ginger
- 1/4 teaspoon ground nutmeg
- 1/8 teaspoon ground cloves
- 4 large egg yolks
- 1 teaspoon vanilla extract
- Pinch of salt
Instructions:
Warm the whole milk and half of the brown sugar in a saucepan over medium heat, stirring occasionally, until small bubbles begin forming near the edges. In a separate bowl, whisk the egg yolks with the remaining sugar until the color lightens and the texture turns slightly thick.
Slowly pour a portion of the hot milk into the egg mixture while whisking constantly, then gradually add the rest until fully combined. Pour the mixture back into the saucepan and set the heat to low.
Stir the custard continuously with a wooden spoon, cooking until it thickens enough to coat the back of the spoon, generally around eight to nine minutes. Remove the pan from the heat once the right thickness is reached.
Strain the custard through a fine mesh sieve into a clean bowl to remove any small cooked pieces. Whisk in the pumpkin puree until the base turns smooth and fully blended, with no visible streaks remaining.
Stir in the heavy cream, cinnamon, ginger, nutmeg, cloves, vanilla extract, and a pinch of salt, mixing thoroughly until the spices distribute evenly throughout the mixture and the base turns a warm orange-brown color.
Cover the bowl and refrigerate for at least four hours, though an overnight chill allows the spices to blend more fully into the cream. A well-rested base also produces a smoother texture once churned.
Pour the chilled pumpkin custard into the frozen bowl of the Nostalgia Electric Ice Cream Maker and churn for twenty five to thirty minutes, until the mixture thickens into a soft, dense consistency due to the added pumpkin puree.
Transfer the finished ice cream into an airtight container, smoothing the top with a spatula. Freeze for two to three hours before scooping, allowing the warm spice blend to settle fully into a rich, autumn-inspired dessert perfect for cooler weather.
23. Cinnamon Roll Ice Cream
Prep Time: 20 minutes | Churn Time: 25-30 minutes | Serve: 6
Cinnamon and brown sugar create a base that tastes close to a fresh-baked pastry, then gets swirled with a simple cream cheese glaze. Small pieces of cinnamon roll or brioche folded through the mixture add texture that mimics biting into a real pastry. The glaze swirl ties the whole dessert together with a familiar bakery flavor.
Ingredients:
- 2 cups heavy cream
- 1 cup whole milk
- 3/4 cup packed brown sugar
- 1 tablespoon ground cinnamon
- 4 large egg yolks
- 1 teaspoon vanilla extract
- Pinch of salt
- 1 cup cubed cinnamon rolls or brioche
- 1/2 cup cream cheese glaze (cream cheese, powdered sugar, and milk whisked smooth)
Instructions:
Warm the whole milk, brown sugar, and cinnamon together in a saucepan over medium heat, whisking to dissolve the sugar and spread the cinnamon evenly. Continue heating, stirring occasionally, until small bubbles form near the edges of the pan.
In a separate bowl, whisk the egg yolks until they turn pale and slightly thick. Slowly pour a portion of the hot cinnamon milk into the egg yolks while whisking constantly, then gradually add the rest until fully combined.
Return the mixture to the saucepan and set the heat to low. Stir the custard continuously with a wooden spoon, cooking until it thickens enough to coat the back of the spoon, roughly eight to nine minutes.
Strain the custard through a fine mesh sieve into a clean bowl to remove any small cooked pieces or bits of undissolved spice. Stir in the heavy cream, vanilla extract, and a pinch of salt, mixing until the base turns smooth and light brown.
Cover the bowl and refrigerate for at least four hours, or overnight for a fuller cinnamon flavor. Pour the chilled custard into the frozen bowl of the Nostalgia Electric Ice Cream Maker and churn for twenty to twenty five minutes, until the mixture thickens into a soft, creamy consistency.
Add the cubed cinnamon roll or brioche pieces during the final five minutes of churning, letting the paddle fold them gently throughout the base without breaking them apart too much.
Once churning finishes, spoon about a third of the ice cream into a storage container and drizzle a portion of the cream cheese glaze over the top. Repeat with two more layers, finishing with a final drizzle of glaze.
Use a butter knife to gently swirl the glaze through the layers, creating streaks throughout without fully blending it into the base. Cover the container and freeze for two to three hours before serving, allowing the pastry pieces to soften slightly while the glaze sets into soft ribbons throughout the finished dessert.
24. Coconut Ice Cream
Prep Time: 20 minutes | Churn Time: 25-30 minutes | Serve: 6
Full-fat coconut milk blended with cream creates a rich, tropical base with a naturally sweet flavor. Toasted coconut flakes folded through the mixture add texture and a deeper, nuttier version of coconut flavor than raw flakes alone provide. The combination works well on its own or as a base for tropical mix-ins like pineapple or mango chunks.
Ingredients:
- 1 can (13.5 oz) full-fat coconut milk
- 1 1/2 cups heavy cream
- 1/2 cup whole milk
- 3/4 cup granulated sugar
- 4 large egg yolks
- 1 teaspoon vanilla extract
- Pinch of salt
- 3/4 cup coconut flakes, toasted
Instructions:
Spread the coconut flakes evenly across a dry skillet set over medium-low heat. Toast the flakes for three to four minutes, stirring often, until they turn golden brown and release a nutty aroma. Remove the flakes from the skillet right away and set them aside to cool, since they can continue browning from residual heat.
Warm the whole milk, coconut milk, and half of the granulated sugar together in a saucepan over medium heat, stirring occasionally, until the mixture turns hot and small bubbles form near the edges. In a separate bowl, whisk the egg yolks with the remaining sugar until the color lightens and the texture turns slightly thick.
Slowly pour a portion of the hot coconut milk into the egg mixture while whisking constantly, then gradually add the rest until fully combined. Return the mixture to the saucepan and set the heat to low.
Stir the custard continuously with a wooden spoon, cooking until it thickens enough to coat the back of the spoon, generally around nine to ten minutes given the extra richness from the coconut milk. Remove the pan from the heat once the right thickness is reached.
Strain the custard through a fine mesh sieve into a clean bowl to remove any small cooked pieces. Stir in the heavy cream, vanilla extract, and a pinch of salt, mixing until the base turns smooth and fully combined.
Cover the bowl and refrigerate for at least four hours, though an overnight chill allows the coconut flavor to deepen further into the cream. A well-chilled base also churns into a smoother finished texture.
Pour the chilled coconut custard into the frozen bowl of the Nostalgia Electric Ice Cream Maker and churn for twenty five to thirty minutes, until the mixture thickens into a soft, creamy consistency.
Add the toasted coconut flakes during the final five minutes of churning, letting the paddle fold them evenly throughout the base without breaking them into powder. Continue running the machine until the flakes spread throughout the mixture.
Transfer the finished ice cream into an airtight container, smoothing the top with a spatula. Freeze for two to three hours before scooping, allowing the toasted coconut flavor to settle fully into a rich, tropical dessert with a light crunch running through every scoop.
25. Pistachio Ice Cream
Prep Time: 20 minutes | Churn Time: 25-30 minutes | Serve: 6
Roasted pistachios blended into a smooth custard base bring a natural green color and a slightly savory, nutty flavor. Grinding the nuts finely before adding them to the milk helps the flavor spread evenly instead of settling at the bottom. A small handful of chopped pistachios stirred in near the end adds a bit of crunch to the otherwise smooth base.
Ingredients:
- 1 cup shelled pistachios, roasted, divided
- 2 cups heavy cream
- 1 cup whole milk
- 3/4 cup granulated sugar
- 4 large egg yolks
- 1/2 teaspoon almond extract
- Pinch of salt
Instructions:
Set aside a quarter cup of the roasted pistachios for later, then grind the remaining pistachios in a food processor until they turn into a fine, slightly oily meal. Combine this pistachio meal with the whole milk and half of the sugar in a saucepan.
Warm the mixture over medium heat, stirring occasionally, until small bubbles form near the edges of the pan and the milk takes on a light green tint. Remove the pan from the heat and let the pistachio flavor steep in the warm milk for fifteen minutes.
Strain the milk through a fine mesh sieve lined with cheesecloth, pressing firmly to extract as much pistachio flavor as possible before discarding the solids. Return the strained milk to the saucepan and warm it again over medium heat.
In a separate bowl, whisk the egg yolks with the remaining sugar until the color lightens and the texture turns slightly thick. Slowly pour a portion of the hot pistachio milk into the egg mixture while whisking constantly, then gradually add the rest until fully combined.
Pour the mixture back into the saucepan and set the heat to low. Stir the custard continuously with a wooden spoon, cooking until it thickens enough to coat the back of the spoon, generally around eight to nine minutes.
Remove the pan from the heat and strain the custard once more into a clean bowl to catch any remaining bits. Stir in the heavy cream, almond extract, and a pinch of salt, mixing until the base turns a pale green and fully smooth. The almond extract enhances the natural pistachio flavor without overpowering it.
Cover the bowl and refrigerate for at least four hours, or overnight for the fullest flavor once churned. Pour the chilled pistachio custard into the frozen bowl of the Nostalgia Electric Ice Cream Maker and churn for twenty five to thirty minutes, until the mixture thickens into a soft, creamy consistency.
Roughly chop the reserved pistachios and add them during the final five minutes of churning, letting the paddle fold them evenly throughout the base. Continue running the machine until the chopped nuts distribute evenly through the mixture.
Transfer the finished ice cream into an airtight container, smoothing the top with a spatula. Freeze for two to three hours before scooping, allowing the nutty flavor to settle fully into a smooth, pale green dessert with a light crunch in every bite.
How to Store Homemade Nostalgia Ice Cream Properly
Choose the Right Container — Shallow, airtight containers work better than deep tubs since they freeze faster and limit ice crystal formation. Freezer-safe containers with tight-fitting lids keep air out and protect flavor over time.
Press Parchment Paper on Top — Placing a piece of parchment paper or plastic wrap directly against the surface before sealing the lid blocks air exposure, which slows down freezer burn and keeps the texture smooth.
Storage Length — Homemade ice cream stays at its best quality for about two to three weeks in a standard freezer. It remains safe to eat a bit longer, but texture and flavor start fading after that window.
Keep the Freezer Temperature Steady — Store containers toward the back of the freezer, away from the door, where temperature stays more constant and avoids the repeated soft-hard cycles that create large ice crystals.
Let It Sit Before Serving — Homemade batches often freeze harder than store-bought pints due to fewer stabilizers. Setting the container on the counter for five to ten minutes before scooping softens the texture enough for easy, smooth serving.
Conclusion
Making ice cream at home no longer requires hours of hand-cranking or specialized skills. A Nostalgia Electric Ice Cream Maker turns the entire process into something simple enough for a weeknight treat or a weekend project with the whole family.
From classic vanilla to bold combinations like salted caramel or rocky road, every recipe here can be adjusted with different mix-ins, extra spices, or personal touches to match individual taste. Trying a new flavor each week turns ice cream making into an ongoing kitchen project rather than a one-time experiment.
Homemade batches also fit naturally into birthday parties, backyard cookouts, holiday gatherings, and simple summer afternoons spent outside. Once the basic custard method feels familiar, creating new flavor combinations becomes second nature, turning a small kitchen appliance into one of the most-used tools in the house.