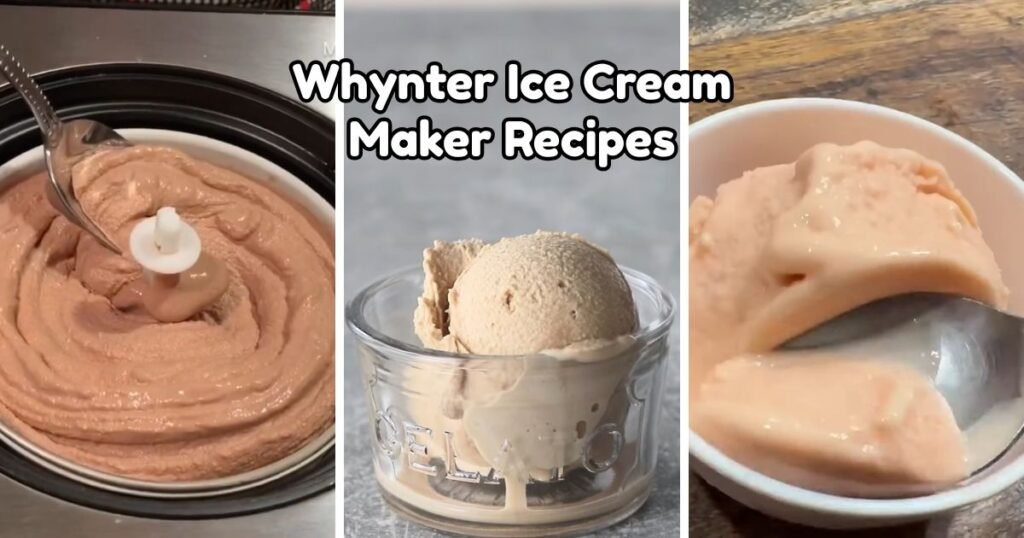
Homemade desserts have grown into a favorite weekend activity for many households, and the Whynter ice cream maker sits at the center of that trend for good reason.
This compact machine has earned a loyal following among home cooks who want smooth, creamy results without extra steps or long waiting periods.
Unlike older-style machines that need a bowl frozen overnight, a built-in compressor model works the moment it gets plugged in, so there’s no planning ahead required and no wasted freezer space.
Making ice cream at home gives cooks full control over what goes into every batch. Sugar levels, cream ratios, and mix-in choices can all be adjusted to match personal taste, and flavors stay fresher since nothing sits on a store shelf for weeks.
Texture can be softened or firmed up depending on preference, and unusual flavor combinations become easy to try without wasting store-bought pints.
This guide brings together more than 20 Whynter ice cream maker recipes, built for both first-time users and those who already know their way around a churn cycle.

What Makes Whynter Ice Cream Maker Different From Other Ice Cream Machines?
- Compressor Cooling Technology — Whynter machines use a built-in compressor instead of a removable freezer bowl. This part cools the mixing chamber directly, keeping the temperature steady from the first minute to the last.
- Continuous Batch Making — Since there’s no bowl to refreeze between batches, several rounds of ice cream can be made back to back on the same day, which works well for gatherings or bigger households.
- No Pre-Freezing Required — Traditional machines need their bowl stored in a freezer for many hours before use. A compressor model skips this step completely, so a batch can start almost right away.
- Consistent Freezing Temperature — The compressor holds a steady cold temperature throughout the churn cycle, which helps prevent uneven ice crystals and keeps the final scoop smooth.
- Smooth and Creamy Texture — Steady cooling combined with constant churning produces a dense, creamy texture that’s closer to what a scoop shop serves compared to grainy homemade batches.
- Easy Operation and Cleaning — Most Whynter models come with simple dial or digital controls, and the mixing bowl typically lifts out for quick washing after each batch.
1. Classic Vanilla Bean Ice Cream
Prep Time: 15 minutes | Churn Time: 25–30 minutes | Serve: 6
A rich, creamy base built from heavy cream, whole milk, sugar, and real vanilla bean creates one of the most requested homemade treats. Its simple ingredient list makes it approachable for a first attempt with a compressor machine, yet the flavor stays deep and satisfying enough for experienced cooks too. Smooth texture and warm vanilla notes make this a dependable starting recipe for many household kitchens.
Ingredients
- 2 cups heavy cream
- 1 cup whole milk
- 3/4 cup granulated sugar
- 1 vanilla bean, split and scraped (or 2 teaspoons pure vanilla extract)
- Pinch of salt
Instructions
Begin by pouring the whole milk into a medium saucepan set over low to medium heat. Add the granulated sugar and a small pinch of salt, stirring gently with a whisk until the sugar fully dissolves into the milk. Split the vanilla bean lengthwise using a small paring knife, then scrape the seeds directly into the saucepan with the tip of the knife. Drop the empty pod into the pan as well, since it continues releasing flavor during heating. Warm the mixture slowly, keeping it just below a simmer, and stir every minute or so to keep the sugar from settling at the bottom. Once small bubbles start forming around the edges of the pan, remove it from the heat immediately to avoid scalding the milk.
Let the warm mixture sit for about ten minutes so the vanilla bean has time to steep and release deeper flavor into the base. Remove the pod afterward, scraping any remaining seeds back into the liquid before discarding the shell. Pour in the heavy cream slowly while whisking, combining it fully with the warm milk mixture. Taste the base at this stage and adjust sweetness slightly with a small spoon of sugar, stirring until dissolved, in case a sweeter result is preferred.
Transfer the finished base into a bowl and cover it with plastic wrap, pressing the wrap directly against the surface to prevent a skin from forming. Place the bowl in the refrigerator for a minimum of four hours, though an overnight chill produces better results and a smoother final texture. Once fully chilled, pour the mixture into the Whynter ice cream maker’s mixing chamber. Turn on the machine and allow it to churn for twenty-five to thirty minutes, checking near the end for a soft-serve consistency that holds its shape on a spoon.
Once churning finishes, transfer the ice cream into a freezer-safe container with a tight lid. Press a piece of parchment paper against the surface before sealing to help block ice crystals from forming. Freeze for two to three hours for a firmer, scoopable texture before serving in bowls or cones.
Why You’ll Love It
- A simple base recipe.
- Perfect for beginners.
- Works well with toppings.
2. Rich Chocolate Ice Cream
Prep Time: 15 minutes | Churn Time: 25–30 minutes | Serve: 6
Cocoa powder and dark chocolate combine to build a deep, dessert-shop flavor that chocolate lovers keep coming back to. Melting real chocolate into the cream mixture gives the finished scoop a denser texture than cocoa alone can produce. Adjustable sweetness levels make this recipe suitable for both mild and intense chocolate preferences, depending on personal taste.
Ingredients
- 1/2 cup cocoa powder
- 4 oz dark chocolate, chopped
- 2 cups heavy cream
- 1 cup milk
- 3/4 cup sugar
- Pinch of salt
Instructions
Start by warming the milk in a saucepan over medium-low heat, stirring in the cocoa powder gradually so no dry clumps remain. Whisk continuously for about two minutes until the cocoa fully blends into the milk and the mixture turns a smooth, dark brown color. Add the granulated sugar and a small pinch of salt at this stage, continuing to stir until every grain of sugar dissolves completely.
Reduce the heat slightly and add the chopped dark chocolate in small batches, allowing each portion to melt before adding more. Stirring constantly prevents the chocolate from sticking to the bottom of the pan or scorching. Once every piece has melted and the mixture looks glossy and fully combined, remove the saucepan from the heat. Pour in the heavy cream gradually while whisking, working in a steady stream so the temperature evens out without curdling the cream.
Strain the mixture through a fine-mesh sieve into a clean bowl to catch any small bits of unmelted chocolate or cocoa clumps, resulting in a silkier finished product. Cover the bowl with plastic wrap pressed against the surface and refrigerate for at least four hours, though a longer chilling period overnight tends to deepen the chocolate flavor even further.
When the base feels fully cold to the touch, give it one more quick whisk to reincorporate any separation, then pour it into the Whynter ice cream maker’s chamber. Churn for twenty-five to thirty minutes, watching for a thick, scoopable consistency similar to soft-serve near the end of the cycle. The color should look rich and matte rather than glossy once properly churned.
Spoon the finished ice cream into an airtight freezer container, smoothing the top with a spatula. Press parchment paper directly against the surface before sealing the lid to protect against ice crystals. Allow the container to rest in the freezer for two to three hours before serving, which helps the texture firm up into clean, rounded scoops.
3. Strawberry Cheesecake Ice Cream
Prep Time: 20 minutes | Churn Time: 25–30 minutes | Serve: 6
Fresh strawberries and softened cream cheese blend into a tangy, fruity base that tastes close to a frozen slice of cheesecake. Graham cracker pieces folded in near the end add small bursts of crunch against the smooth, creamy body of the dessert. A balance of sweet fruit and light tang makes this recipe popular during warmer months.
Ingredients
- 1 1/2 cups fresh strawberries, hulled
- 8 oz cream cheese, softened
- 1 1/2 cups heavy cream
- 1/2 cup milk
- 3/4 cup sugar
- 1/2 cup graham cracker pieces
- 1 tablespoon lemon juice
Instructions
Begin by washing and hulling the strawberries, then chop them into small pieces before placing them in a bowl with two tablespoons of the sugar and the lemon juice. Let the fruit sit at room temperature for about fifteen minutes so the sugar draws out natural juices, creating a light syrup around the berries. Transfer roughly two-thirds of the strawberry mixture into a blender or food processor and pulse until mostly smooth, leaving the remaining third chopped for texture later.
In a separate mixing bowl, beat the softened cream cheese using a hand mixer or whisk until it turns light and free of lumps. Slowly pour in the milk while continuing to mix, blending until the cream cheese fully loosens into a pourable consistency. Add the remaining sugar and mix again until dissolved. Pour in the heavy cream and whisk everything together until the base looks uniform and slightly thickened.
Fold the blended strawberry puree into the cream cheese base using a spatula, stirring gently until the color turns a soft pink throughout. Taste the mixture at this point and adjust with an extra spoon of sugar in case a sweeter profile is wanted, since strawberry sweetness can vary by season.
Cover the bowl and refrigerate the base for a minimum of four hours, allowing the flavors to settle and the mixture to chill fully before churning. Once cold, pour the base into the Whynter ice cream maker and churn for twenty-five to thirty minutes. During the final five minutes, add the reserved chopped strawberries and graham cracker pieces, letting the machine fold them evenly through the mixture.
Once the texture reaches a thick, soft-serve consistency, transfer everything into a freezer-safe container. Smooth the top, press parchment against the surface, and seal tightly. Freeze for two to three hours before scooping, which allows the graham cracker pieces to firm up slightly for added texture in every bite.
4. Cookies and Cream Ice Cream
Prep Time: 15 minutes | Churn Time: 25–30 minutes | Serve: 6
A classic vanilla base gets loaded with crushed chocolate sandwich cookies for one of the most requested flavors among kids and adults alike. Crunchy cookie pieces stay scattered throughout each scoop instead of sinking to the bottom, thanks to timing them near the end of the churn cycle. Simple ingredients make this recipe quick to prepare on busy weekends.
Ingredients
- 2 cups heavy cream
- 1 cup whole milk
- 3/4 cup sugar
- 2 teaspoons vanilla extract
- 12 chocolate sandwich cookies, roughly chopped
- Pinch of salt
Instructions
Start by combining the whole milk, sugar, and a small pinch of salt in a saucepan over medium-low heat. Whisk the mixture steadily until the sugar fully dissolves and small bubbles begin forming gently around the edges of the pan. Remove the saucepan from the heat right away to prevent the milk from scorching or developing a skin on top.
Pour the heavy cream into the warm milk mixture slowly, whisking constantly so the temperature blends evenly without separating. Stir in the vanilla extract once the cream has fully combined, mixing until the base looks smooth and pale in color. Transfer the mixture into a bowl, cover with plastic wrap pressed directly against the surface, and place it in the refrigerator for at least four hours to chill completely.
While the base chills, prepare the cookies by placing them in a resealable bag and gently crushing them with a rolling pin. Aim for a mix of small crumbs and slightly larger chunks, since varied piece sizes create better texture throughout the finished ice cream. Set the crushed cookies aside at room temperature until needed.
Once the base is cold, pour it into the Whynter ice cream maker’s mixing chamber and start the churn cycle, which typically runs twenty-five to thirty minutes depending on the batch size. Watch the texture closely during the last five minutes of churning, and once it reaches a thick, soft-serve consistency, add the crushed cookies directly into the machine. Allow the paddle to fold the pieces through the mixture for one to two more minutes so they distribute evenly without turning to dust.
Scoop the finished ice cream into a freezer-safe container, layering in any remaining cookie crumbs between spoonfuls for extra texture. Press parchment paper against the top surface before sealing the lid tightly. Freeze for two to three hours before serving to let the texture firm up into clean, sturdy scoops.
5. Mint Chocolate Chip Ice Cream
Prep Time: 15 minutes | Churn Time: 25–30 minutes | Serve: 6
Fresh mint leaves or a small amount of mint extract turn a plain cream base into a cool, refreshing dessert loaded with small chocolate chips. Natural leaves give a softer, herbal flavor compared to extract, which tends to taste sharper and more familiar to most households. Either version pairs well with the light green tint many people expect from this classic combination.
Ingredients
- 2 cups heavy cream
- 1 cup whole milk
- 3/4 cup sugar
- 1 cup fresh mint leaves, packed (or 1 teaspoon mint extract)
- 3/4 cup mini chocolate chips
- Pinch of salt
Instructions
Begin by warming the whole milk gently in a saucepan over medium-low heat, stirring in the sugar and a small pinch of salt until fully dissolved. In case fresh mint leaves are being used, bruise them lightly with the back of a spoon to release their oils, then drop them directly into the warm milk. Let the leaves steep in the warm mixture for about twenty minutes, stirring occasionally so the flavor spreads evenly through the liquid without turning bitter from over-steeping.
Once the steeping time finishes, strain the milk through a fine-mesh sieve into a clean bowl, pressing gently on the leaves with the back of a spoon to release any remaining flavor before discarding them. Pour in the heavy cream slowly while whisking, blending it fully into the strained milk base. In case mint extract is being used instead of fresh leaves, skip the steeping step entirely and simply whisk the extract into the combined cream and milk mixture until evenly distributed.
Taste the base carefully at this point, since mint strength varies widely between fresh leaves and extract. Add a small amount of extra extract only in small increments, tasting after each addition, to avoid an overly sharp or medicinal flavor. Cover the bowl with plastic wrap pressed against the surface and refrigerate for a minimum of four hours, allowing the mixture to chill completely and the flavor to settle into a rounder, smoother profile.
Once fully cold, pour the base into the Whynter ice cream maker’s mixing chamber and begin the churn cycle, which generally runs twenty-five to thirty minutes. During the final five minutes, add the mini chocolate chips gradually rather than all at once, letting the paddle fold them evenly throughout the mixture so no clumps form in one spot.
Transfer the finished ice cream into a freezer-safe container, smoothing the top with a spatula before pressing parchment paper against the surface. Seal the lid tightly and freeze for two to three hours before serving, which allows the chips to firm up slightly and the base to reach a clean, scoopable texture.
6. Coffee Ice Cream
Prep Time: 15 minutes | Churn Time: 25–30 minutes | Serve: 6
Strong brewed coffee or a shot of espresso gives this base a bold, roasted flavor that pairs well with a touch of sweetness. Coffee lovers often reach for this recipe as an alternative to sugary café drinks, since the flavor stays rich without added syrups or flavorings. A smooth, dense texture makes each scoop taste close to a frozen version of a favorite morning drink.
Ingredients
- 2 cups heavy cream
- 1 cup whole milk
- 3/4 cup sugar
- 1/3 cup finely ground coffee or 3 shots espresso
- Pinch of salt
Instructions
Start by brewing the coffee using a strong ratio of grounds to water, since a weaker brew tends to get lost once combined with cream and milk. Espresso works particularly well because of its concentrated flavor, though a strongly brewed drip coffee can also produce good results. Set the brewed coffee aside to cool slightly while preparing the dairy base.
In a saucepan, combine the whole milk, sugar, and a small pinch of salt over medium-low heat, whisking gently until the sugar fully dissolves and the mixture warms through without reaching a full simmer. Remove the saucepan from the heat once small bubbles begin forming around the edges, then pour in the heavy cream slowly while whisking to keep the temperature even throughout.
Add the cooled coffee or espresso to the cream mixture gradually, tasting after each addition to gauge strength before adding more. Coffee flavor tends to soften slightly after freezing, so aiming for a base that tastes a little stronger than desired at this stage usually produces better balance once fully frozen. Whisk everything together until the color turns a consistent light brown with no streaks remaining.
Pour the finished base into a bowl, cover with plastic wrap pressed directly against the surface, and refrigerate for a minimum of four hours. An overnight chill often produces a smoother, more rounded coffee flavor by giving the ingredients extra time to meld together fully.
Once chilled, pour the base into the Whynter ice cream maker and churn for twenty-five to thirty minutes, watching for a thick, glossy texture that holds soft peaks near the end of the cycle. Transfer the finished ice cream into a freezer-safe container, press parchment paper against the surface, and seal tightly. Freeze for two to three hours before scooping to reach a firm, café-style texture perfect for pairing with a light dusting of cocoa or chopped chocolate on top.
7. Salted Caramel Ice Cream
Prep Time: 20 minutes | Churn Time: 25–30 minutes | Serve: 6
A homemade caramel sauce swirled through a rich cream base gives this recipe its deep amber color and buttery flavor. A touch of sea salt balances the sweetness, creating a contrast that keeps each bite interesting rather than one-note. Extra caramel swirled in near the end adds pockets of gooey texture throughout the finished dessert.
Ingredients
- 1 cup granulated sugar
- 6 tablespoons unsalted butter
- 1/2 cup heavy cream (for caramel)
- 1 1/2 teaspoons sea salt
- 2 cups heavy cream
- 1 cup whole milk
Instructions
Begin the caramel sauce by adding the granulated sugar to a heavy-bottomed saucepan over medium heat, stirring occasionally with a heatproof spatula as it starts to melt. The sugar will clump before smoothing out into an amber liquid, so patience during this stage matters more than constant stirring. Once the sugar reaches a deep amber color, add the butter carefully, since the mixture will bubble vigorously as it combines.
Whisk the butter into the sugar until fully melted and smooth, then slowly pour in the half cup of heavy cream while whisking constantly, again expecting some bubbling as the cold cream meets the hot sugar. Once the mixture settles and looks glossy, stir in the sea salt and remove the pan from the heat. Pour the finished caramel into a heatproof bowl and let it cool to room temperature, setting aside about a third of it for swirling later.
In a separate saucepan, warm the remaining heavy cream and whole milk together over medium-low heat until small bubbles form around the edges. Remove from heat and whisk in the larger portion of cooled caramel sauce until fully blended, creating a smooth, amber-colored base. Taste and adjust with a touch more salt in case a stronger salted flavor is preferred.
Cover the base and refrigerate for a minimum of four hours until fully chilled. Once cold, pour it into the Whynter ice cream maker and churn for twenty-five to thirty minutes until thick and creamy. During the last few minutes, drizzle in the reserved caramel slowly rather than pouring it all at once, allowing the paddle to create ribbons instead of blending it in completely.
Transfer the ice cream into a freezer-safe container, layering in extra caramel drizzle between spoonfuls for visible swirls throughout. Press parchment paper against the surface, seal tightly, and freeze for two to three hours before serving for a firm, scoopable texture with soft caramel pockets in every bite.
8. Peanut Butter Ice Cream
Prep Time: 15 minutes | Churn Time: 25–30 minutes | Serve: 6
Creamy peanut butter blended straight into the base gives this recipe a nutty, satisfying richness that peanut butter lovers request again and again. A smooth version works well on its own, while chunky peanut butter or chopped peanuts folded in near the end add extra texture. Sweetness stays balanced against the natural saltiness of the peanut butter for a well-rounded flavor.
Ingredients
- 1 cup creamy peanut butter
- 2 cups heavy cream
- 1 cup whole milk
- 2/3 cup sugar
- Pinch of salt
- 1/2 cup chopped peanuts or peanut butter chunks (optional)
Instructions
Start by warming the whole milk in a saucepan over medium-low heat, whisking in the sugar and a small pinch of salt until fully dissolved. Once the mixture warms through and small bubbles start forming around the edges, remove the saucepan from the heat. Add the peanut butter directly into the warm milk, whisking steadily until it fully melts and blends into the liquid without any remaining lumps.
Pour in the heavy cream gradually while continuing to whisk, working the peanut butter mixture into the cream until the entire base looks smooth and pale tan in color. Taste the mixture at this stage, since peanut butter brands vary in sweetness and saltiness, and adjust with a small spoon of sugar in case a sweeter base is preferred.
Transfer the finished mixture into a bowl and cover with plastic wrap pressed directly against the surface to prevent a skin from forming. Refrigerate for a minimum of four hours, though a longer chilling period helps the peanut butter flavor blend more fully with the cream and milk. Whisk the base briefly again once removed from the refrigerator, since peanut butter can sometimes settle slightly during chilling.
Pour the cold base into the Whynter ice cream maker’s mixing chamber and begin the churn cycle, which usually takes twenty-five to thirty minutes. In case chopped peanuts or extra peanut butter chunks are being added, fold them in during the final five minutes of churning, letting the paddle distribute them evenly without breaking them down too much.
Once the texture reaches a thick, soft-serve consistency, transfer the ice cream into a freezer-safe container. Smooth the top, press parchment paper against the surface, and seal the lid tightly. Freeze for two to three hours before serving, which allows the nutty base to firm up into a dense, scoopable texture that holds its shape well in a bowl or cone.
9. Mango Sorbet Recipe
Prep Time: 10 minutes | Churn Time: 20–25 minutes | Serve: 4
Ripe mango blended with a touch of sugar and lemon juice creates a bright, fruit-forward sorbet without any dairy at all. This lighter option works well after a heavy meal or during warmer months when a cooler, fruitier dessert feels more appealing. Natural mango sweetness means less added sugar compared to many dairy-based recipes.
Ingredients
- 4 cups fresh mango, peeled and chopped
- 1/2 cup sugar
- 2 tablespoons lemon juice
- 1/2 cup water
Instructions
Begin by peeling and chopping the ripe mangoes into small chunks, discarding the pit and any tough, fibrous portions near the center. Riper fruit produces a smoother, sweeter sorbet, so choosing mangoes that give slightly under gentle pressure works better than firmer, underripe pieces. Place the chopped mango into a blender or food processor along with the sugar, lemon juice, and water.
Blend the mixture on high speed for one to two minutes, stopping partway through to scrape down the sides with a spatula so no larger chunks remain stuck to the container walls. Continue blending until the puree looks completely smooth with no visible fibers or lumps. Taste the mixture at this stage, since mango sweetness varies depending on ripeness, and adjust with a small amount of extra sugar or lemon juice to balance the flavor.
Pour the puree through a fine-mesh strainer set over a clean bowl, pressing gently with a spatula to remove any remaining fibrous bits and leave behind a silky, pourable liquid. This straining step matters more for sorbet than for cream-based recipes, since any texture inconsistencies become more noticeable without dairy to smooth them out. Discard the solids left behind in the strainer.
Cover the bowl with plastic wrap and refrigerate the puree for at least two hours, allowing it to chill fully before churning. A cold starting temperature helps the sorbet freeze more evenly once placed in the machine. Once chilled, pour the mixture into the Whynter ice cream maker’s mixing chamber and begin the churn cycle, which typically runs twenty to twenty-five minutes for fruit-based mixtures without dairy.
Watch the texture closely near the end of churning, since sorbet often reaches a soft, slushy consistency rather than the thicker soft-serve texture typical of cream bases. Transfer the finished sorbet into a freezer-safe container, smoothing the top with a spatula before sealing tightly. Freeze for one to two hours before serving for a firmer, scoopable texture that still stays bright and fruity.
10. Banana Ice Cream
Prep Time: 15 minutes | Churn Time: 25–30 minutes | Serve: 6
Ripe bananas mashed or blended into a cream base give this recipe a naturally sweet, mellow flavor that needs very little added sugar. Overripe bananas with brown speckled skins work especially well, since their sugars concentrate as the fruit softens. A hint of vanilla rounds out the banana flavor without overpowering it.
Ingredients
- 4 ripe bananas, mashed
- 2 cups heavy cream
- 1 cup whole milk
- 1/2 cup sugar
- 1 teaspoon vanilla extract
- 1 tablespoon lemon juice
Instructions
Start by peeling the ripe bananas and placing them in a mixing bowl, mashing them thoroughly with a fork or potato masher until mostly smooth with only a few small lumps remaining. In case a completely smooth texture is preferred, transfer the mashed bananas into a blender and pulse briefly until fully pureed. Stir in the lemon juice at this stage, since it helps prevent the bananas from browning while the rest of the base comes together.
In a saucepan, combine the whole milk and sugar over medium-low heat, stirring gently until the sugar fully dissolves and the mixture warms through without reaching a simmer. Remove the saucepan from the heat and pour in the heavy cream slowly while whisking, blending it fully into the warm milk. Stir in the vanilla extract once the cream has combined evenly throughout the mixture.
Let the cream mixture cool slightly at room temperature for about ten minutes before folding in the mashed bananas, since adding fruit to a very hot base can sometimes cause slight curdling. Once combined, whisk everything together until the color turns a light, even cream tone with small flecks of banana visible throughout.
Transfer the base into a bowl, cover with plastic wrap pressed directly against the surface, and refrigerate for a minimum of four hours. A longer chilling period helps the banana flavor deepen and blend more fully with the cream base. Whisk the mixture briefly again after chilling, since banana puree can sometimes separate slightly while sitting.
Pour the cold base into the Whynter ice cream maker and churn for twenty-five to thirty minutes, checking near the end for a thick, soft-serve texture. Transfer the finished ice cream into a freezer-safe container, press parchment paper against the surface, and seal tightly. Freeze for two to three hours before serving, which allows the texture to firm up into a dense, scoopable consistency with a naturally sweet banana flavor.
11. Coconut Ice Cream
Prep Time: 15 minutes | Churn Time: 25–30 minutes | Serve: 6
Coconut milk and shredded coconut combine with heavy cream to build a tropical, richly flavored base that works well on its own or alongside fruit toppings. Toasting the shredded coconut beforehand adds a deeper, slightly nutty flavor compared to using it raw. This recipe suits both dairy-based kitchens and those looking for a lighter, coconut-forward alternative to heavier flavors.
Ingredients
- 1 can (13.5 oz) coconut milk
- 1 1/2 cups heavy cream
- 1/2 cup shredded coconut
- 3/4 cup sugar
- Pinch of salt
Instructions
Begin by toasting the shredded coconut in a dry skillet over medium-low heat, stirring frequently to prevent burning. Watch closely, since coconut can go from lightly golden to burnt within a short window of time once it starts browning. Once the coconut turns a light golden color and smells fragrant, remove it from the heat immediately and set it aside to cool completely on a plate.
In a saucepan, combine the coconut milk, sugar, and a small pinch of salt over medium-low heat, whisking gently until the sugar fully dissolves into the liquid. Coconut milk can separate slightly when stored, so whisking thoroughly at this stage helps recombine the thicker cream portion with the thinner liquid for an even texture. Once small bubbles start forming around the edges, remove the saucepan from the heat.
Pour in the heavy cream slowly while whisking, blending it fully into the warm coconut milk mixture until the color turns a consistent off-white shade. Stir in about two-thirds of the toasted coconut, reserving the remaining portion for folding in later during the churn cycle. Taste the base and adjust sweetness slightly in case a stronger coconut flavor is desired, using a small amount of coconut extract for extra depth.
Transfer the mixture into a bowl, cover with plastic wrap pressed against the surface, and refrigerate for a minimum of four hours to chill completely. Once cold, pour the base into the Whynter ice cream maker’s mixing chamber and churn for twenty-five to thirty minutes. During the final five minutes, add the reserved toasted coconut, letting the paddle distribute it evenly throughout the mixture.
Transfer the finished ice cream into a freezer-safe container, smoothing the top before sealing tightly with a lid. Freeze for two to three hours before serving, which allows the texture to firm up into a rich, scoopable dessert with pockets of toasted coconut throughout.
12. Pistachio Ice Cream
Prep Time: 20 minutes | Churn Time: 25–30 minutes | Serve: 6
Roasted pistachios blended into a cream base give this recipe its signature nutty flavor and naturally light green color, without relying on artificial coloring. Chopped nuts folded in after churning add crunch against the smooth, dense base. A slightly sweet, buttery flavor makes this recipe popular among those looking for something outside the usual chocolate and vanilla options.
Ingredients
- 1 cup shelled pistachios, roasted and unsalted
- 2 cups heavy cream
- 1 cup whole milk
- 3/4 cup sugar
- Pinch of salt
- 1/2 cup chopped pistachios (for folding in)
Instructions
Begin by placing the roasted pistachios into a food processor and pulsing until finely ground, stopping before the nuts turn into a paste. A slightly coarse, sandy texture works best for this step, since a smooth paste can make straining the mixture more difficult later. Set aside a half cup of whole or roughly chopped pistachios separately for folding into the finished base later.
In a saucepan, warm the whole milk over medium-low heat, whisking in the sugar and a small pinch of salt until fully dissolved. Add the finely ground pistachios directly into the warm milk, stirring frequently to prevent them from settling and sticking to the bottom of the pan. Let the mixture simmer gently for about five minutes, allowing the pistachio flavor to fully infuse into the milk.
Remove the saucepan from the heat and let the mixture cool slightly for ten minutes before pouring in the heavy cream while whisking steadily. Once combined, pour the entire mixture through a fine-mesh strainer set over a clean bowl, pressing firmly with the back of a spoon to extract as much pistachio flavor and liquid as possible before discarding the solids left behind.
Cover the strained base with plastic wrap pressed against the surface and refrigerate for a minimum of four hours, allowing the mixture to chill fully and the flavor to settle. Once cold, pour the base into the Whynter ice cream maker’s mixing chamber and churn for twenty-five to thirty minutes, watching for a thick, pale green, soft-serve consistency near the end of the cycle.
During the final few minutes, add the reserved chopped pistachios, letting the paddle fold them evenly throughout the mixture. Transfer the finished ice cream into a freezer-safe container, press parchment paper against the surface, and seal tightly. Freeze for two to three hours before serving, which allows the nutty flavor to settle and the texture to firm up into clean, dense scoops.
13. Lemon Ice Cream
Prep Time: 15 minutes | Churn Time: 25–30 minutes | Serve: 6
Fresh lemon juice and zest bring a bright, tangy flavor to this cream base, balanced against enough sugar to keep the sourness in check. Using both juice and zest gives a fuller citrus flavor than juice alone, since the zest carries much of the lemon’s aromatic oils. This lighter dessert works well after a rich meal or during warm afternoons.
Ingredients
- 3/4 cup fresh lemon juice
- 2 tablespoons lemon zest
- 2 cups heavy cream
- 1 cup whole milk
- 1 cup sugar
- Pinch of salt
Instructions
Begin by zesting two to three lemons using a fine grater, being careful to remove only the bright yellow outer layer and avoiding the bitter white pith underneath. Set the zest aside in a small bowl. Juice the lemons afterward, straining out any seeds, until three-quarters of a cup of fresh juice has been collected.
In a saucepan, combine the whole milk, sugar, lemon zest, and a small pinch of salt over medium-low heat, stirring gently until the sugar fully dissolves and the mixture warms through. Remove the saucepan from the heat once small bubbles start forming around the edges, then let the mixture sit for about ten minutes so the zest can infuse its oils fully into the warm milk.
Pour in the heavy cream slowly while whisking, blending it fully into the zest-infused milk mixture. Add the lemon juice gradually in small increments, whisking constantly, since adding citrus juice too quickly to a dairy base can sometimes cause slight curdling or a grainy texture. Taste the base after each addition and stop once the desired tartness has been reached.
Pour the finished base through a fine-mesh strainer into a clean bowl to catch the lemon zest, resulting in a smoother final texture. Cover with plastic wrap pressed against the surface and refrigerate for a minimum of four hours, allowing the flavor to settle and the mixture to chill completely before churning.
Once cold, pour the base into the Whynter ice cream maker’s mixing chamber and churn for twenty-five to thirty minutes, watching near the end for a thick, pale yellow, soft-serve consistency. Transfer the finished ice cream into a freezer-safe container, press parchment paper against the surface, and seal tightly. Freeze for two to three hours before serving for a firm, refreshing dessert with a clean citrus finish.
14. Blueberry Ice Cream
Prep Time: 20 minutes | Churn Time: 25–30 minutes | Serve: 6
Fresh blueberries cooked down into a thick puree bring deep color and natural sweetness to this cream base, without needing large amounts of added sugar. Cooking the berries first concentrates their flavor and removes excess water, keeping the final texture smooth rather than icy. Small bursts of fruit flavor come through in every spoonful.
Ingredients
- 2 cups fresh blueberries
- 1/3 cup sugar (for berries)
- 2 cups heavy cream
- 1 cup whole milk
- 1/2 cup sugar (for base)
- 1 tablespoon lemon juice
Instructions
Begin by placing the fresh blueberries into a saucepan along with the sugar and lemon juice, setting the pan over medium heat. Stir occasionally as the berries begin to release their juices and soften, mashing them gently with the back of a spoon or a potato masher to help break them down evenly. Let the mixture simmer gently for about eight to ten minutes, until it thickens into a jammy consistency and coats the back of a spoon.
Remove the blueberry mixture from the heat and let it cool to room temperature, then transfer it into a blender and pulse briefly until mostly smooth, leaving small flecks of berry skin for texture. Set the cooled puree aside while preparing the cream base separately.
In a separate saucepan, combine the whole milk and the remaining sugar over medium-low heat, stirring until the sugar fully dissolves and the mixture warms through without reaching a simmer. Remove from heat and pour in the heavy cream slowly while whisking, blending it fully into the warm milk until smooth and pale.
Fold the cooled blueberry puree into the cream base using a spatula, stirring gently until the color turns a deep purple-blue throughout. In case a marbled look is preferred instead of a fully blended color, reserve a portion of the puree to swirl in later during churning rather than mixing it in completely at this stage.
Cover the bowl and refrigerate for a minimum of four hours, allowing the mixture to chill fully. Once cold, pour the base into the Whynter ice cream maker and churn for twenty-five to thirty minutes until thick and creamy. Transfer the finished ice cream into a freezer-safe container, press parchment paper against the surface, and seal tightly. Freeze for two to three hours before serving for a firm, fruity dessert with rich color throughout.
15. Chocolate Chip Cookie Dough Ice Cream
Prep Time: 25 minutes | Churn Time: 25–30 minutes | Serve: 6
A smooth vanilla base gets loaded with small pieces of edible cookie dough, giving each scoop pockets of soft, sweet texture against the creamy background. Making the dough eggless and heat-treated keeps it safe to eat without baking, while still tasting close to raw cookie dough. Mini chocolate chips scattered through the dough add extra bursts of flavor.
Ingredients
- 2 cups heavy cream
- 1 cup whole milk
- 3/4 cup sugar
- 2 teaspoons vanilla extract
- 1/2 cup flour, heat-treated
- 1/4 cup brown sugar
- 3 tablespoons butter, softened
- 1/3 cup mini chocolate chips (for dough)
Instructions
Begin by preparing the cookie dough pieces first, since they need time to firm up before being added later. Spread the flour onto a baking sheet and bake at 350°F for about five minutes to eliminate any raw flour safety concerns, then let it cool completely. In a small bowl, cream together the softened butter and brown sugar until smooth, then mix in the cooled heat-treated flour and a splash of milk until a soft, workable dough forms. Fold in the mini chocolate chips, then roll the dough into small pea-sized pieces and place them on a plate in the freezer to firm up while preparing the ice cream base.
In a saucepan, warm the whole milk over medium-low heat, whisking in the sugar and a small pinch of salt until fully dissolved. Remove the saucepan from the heat once small bubbles start forming around the edges, then pour in the heavy cream slowly while whisking. Stir in the vanilla extract once the cream has combined evenly, mixing until the base looks smooth and pale throughout.
Transfer the mixture into a bowl, cover with plastic wrap pressed against the surface, and refrigerate for a minimum of four hours to chill completely. Once cold, pour the base into the Whynter ice cream maker’s mixing chamber and begin the churn cycle, which typically runs twenty-five to thirty minutes.
During the final few minutes of churning, add the chilled cookie dough pieces gradually, letting the paddle fold them evenly throughout the mixture without breaking them apart too much. Transfer the finished ice cream into a freezer-safe container, layering in any extra dough pieces between spoonfuls. Press parchment paper against the surface, seal tightly, and freeze for two to three hours before serving for a firm, loaded texture in every scoop.
16. Nutella Hazelnut Ice Cream
Prep Time: 15 minutes | Churn Time: 25–30 minutes | Serve: 6
Chocolate hazelnut spread blends directly into a cream base for a rich, nutty dessert that tastes close to a frozen version of a favorite breakfast spread. Chopped hazelnuts folded in near the end add a satisfying crunch against the smooth, chocolatey background. A simple ingredient list makes this recipe quick to prepare on short notice.
Ingredients
- 1 cup chocolate hazelnut spread
- 2 cups heavy cream
- 1 cup whole milk
- 1/3 cup sugar
- Pinch of salt
- 1/2 cup chopped hazelnuts
Instructions
Start by warming the whole milk in a saucepan over medium-low heat, whisking in the sugar and a small pinch of salt until fully dissolved. Once the mixture warms through and small bubbles begin forming around the edges, remove the saucepan from the heat. Add the chocolate hazelnut spread directly into the warm milk, whisking steadily until it fully melts and blends into the liquid without any remaining lumps or streaks.
Pour in the heavy cream gradually while continuing to whisk, working the chocolate hazelnut mixture into the cream until the entire base looks smooth, glossy, and evenly colored. Taste the base at this stage, since chocolate hazelnut spreads vary in sweetness between brands, and adjust with a small spoon of sugar in case a sweeter result is desired.
Transfer the finished mixture into a bowl and cover with plastic wrap pressed directly against the surface to prevent a skin from forming. Refrigerate for a minimum of four hours, though a longer chilling period helps the hazelnut flavor blend more fully with the cream and milk base. Whisk the mixture briefly again once removed from the refrigerator, since the spread can sometimes settle slightly during chilling.
Pour the cold base into the Whynter ice cream maker’s mixing chamber and begin the churn cycle, which usually takes twenty-five to thirty minutes. During the final five minutes, add the chopped hazelnuts gradually, letting the paddle distribute them evenly without breaking them down too much into smaller pieces.
Once the texture reaches a thick, soft-serve consistency, transfer the ice cream into a freezer-safe container. Smooth the top, press parchment paper against the surface, and seal the lid tightly. Freeze for two to three hours before serving, which allows the nutty, chocolatey base to firm up into a dense, scoopable texture with crunchy pieces throughout.
17. Pumpkin Spice Ice Cream
Prep Time: 15 minutes | Churn Time: 25–30 minutes | Serve: 6
Pumpkin puree blended with warm cinnamon and nutmeg brings a cozy, seasonal flavor to this cream base, tasting close to a frozen slice of spiced pie. Using canned pumpkin puree keeps preparation quick, though roasted fresh pumpkin also works well for a deeper flavor. Warm spices balance nicely against the natural sweetness of the pumpkin.
Ingredients
- 1 cup pumpkin puree
- 2 cups heavy cream
- 1 cup whole milk
- 3/4 cup sugar
- 1 teaspoon cinnamon
- 1/2 teaspoon nutmeg
- Pinch of salt
Instructions
Begin by combining the whole milk and sugar in a saucepan over medium-low heat, whisking gently until the sugar fully dissolves and the mixture warms through without reaching a simmer. Add the cinnamon, nutmeg, and a small pinch of salt directly into the warm milk, whisking steadily so the spices distribute evenly without clumping together in one spot.
Remove the saucepan from the heat once small bubbles start forming around the edges, then whisk in the pumpkin puree gradually, blending it fully into the spiced milk mixture until no streaks remain. Pour in the heavy cream slowly while continuing to whisk, working it into the pumpkin mixture until the base turns a smooth, even orange color throughout.
Taste the mixture at this stage, since pumpkin puree and spice blends can vary in strength between brands, and adjust with a small pinch of extra cinnamon or nutmeg in case a stronger spiced flavor is preferred. Whisk thoroughly after any adjustment to distribute the added spice evenly through the base.
Transfer the mixture into a bowl, cover with plastic wrap pressed directly against the surface, and refrigerate for a minimum of four hours to chill completely. A longer chilling period, closer to overnight, often allows the spices to blend more fully with the pumpkin and cream for a rounder final flavor.
Once cold, pour the base into the Whynter ice cream maker’s mixing chamber and churn for twenty-five to thirty minutes, watching near the end for a thick, orange-toned, soft-serve consistency. Transfer the finished ice cream into a freezer-safe container, press parchment paper against the surface, and seal tightly. Freeze for two to three hours before serving for a firm, spiced dessert well suited to cooler months.
18. Matcha Green Tea Ice Cream
Prep Time: 15 minutes | Churn Time: 25–30 minutes | Serve: 6
Matcha powder whisked into a cream base brings an earthy, slightly grassy flavor along with a naturally vibrant green color. Sifting the powder before mixing helps prevent clumps, resulting in a smoother finished texture. A moderate amount of sugar balances the mild bitterness that matcha carries on its own.
Ingredients
- 3 tablespoons matcha powder
- 2 cups heavy cream
- 1 cup whole milk
- 3/4 cup sugar
- Pinch of salt
Instructions
Begin by sifting the matcha powder through a fine-mesh strainer into a small bowl, breaking up any clumps that formed during storage. Sifting matters more with matcha than with most other powders, since unsifted matcha tends to leave gritty, undissolved specks throughout the finished base.
In a saucepan, warm about a quarter cup of the whole milk over low heat, just enough to loosen it slightly without simmering. Whisk the sifted matcha powder into this small portion of warm milk first, forming a smooth, concentrated paste before adding the remaining liquid. This step helps the matcha dissolve evenly rather than clumping once combined with a larger volume of milk.
Add the remaining whole milk and the sugar into the saucepan, whisking the matcha paste in gradually until fully incorporated. Continue warming the mixture over medium-low heat, stirring frequently, until the sugar fully dissolves and the color turns an even, bright green throughout. Remove the saucepan from the heat once small bubbles begin forming around the edges.
Pour in the heavy cream slowly while whisking, blending it fully into the matcha mixture until smooth. Taste the base at this stage and adjust sweetness slightly with a small spoon of sugar in case a milder matcha bitterness is preferred, stirring until fully dissolved.
Transfer the mixture into a bowl, cover with plastic wrap pressed against the surface, and refrigerate for a minimum of four hours. Once cold, pour the base into the Whynter ice cream maker and churn for twenty-five to thirty minutes until thick and creamy. Transfer the finished ice cream into a freezer-safe container, press parchment paper against the surface, and seal tightly. Freeze for two to three hours before serving for a firm, vividly colored dessert with a distinct, earthy flavor.
19. Vegan Chocolate Ice Cream
Prep Time: 15 minutes | Churn Time: 25–30 minutes | Serve: 6
Full-fat coconut milk stands in for dairy in this rich, chocolatey base, giving it a naturally creamy texture without cream or milk. Cocoa powder provides deep chocolate flavor, while a plant-based sweetener keeps the recipe suitable for those avoiding refined sugar. This version works well for households mixing dairy and dairy-free preferences at the same gathering.
Ingredients
- 2 cans (13.5 oz each) full-fat coconut milk
- 1/2 cup cocoa powder
- 2/3 cup plant-based sweetener (maple syrup or agave)
- 1/2 teaspoon vanilla extract
- Pinch of salt
Instructions
Begin by shaking both cans of coconut milk thoroughly before opening, since the cream and liquid portions tend to separate during storage. Pour the coconut milk into a saucepan set over medium-low heat, whisking gently to recombine everything into one smooth liquid before adding any other ingredients.
Sift the cocoa powder into the warming coconut milk gradually, whisking constantly to prevent clumps from forming. Continue whisking until the cocoa fully dissolves and the mixture turns a deep, even brown color throughout. Add the plant-based sweetener and a small pinch of salt at this stage, stirring until fully incorporated into the base.
Let the mixture warm gently for about five minutes, stirring occasionally, without allowing it to reach a full simmer. Remove the saucepan from the heat and stir in the vanilla extract, mixing until evenly distributed throughout the chocolate base. Taste the mixture at this point and adjust sweetness with a small amount of extra plant-based sweetener in case a sweeter result is preferred, stirring thoroughly after each addition.
Pour the finished base into a bowl, cover with plastic wrap pressed directly against the surface, and refrigerate for a minimum of four hours. Coconut milk-based mixtures often benefit from a longer chilling period, so an overnight rest tends to produce a smoother texture once churned.
Once fully cold, give the base a quick whisk to reincorporate any separation, then pour it into the Whynter ice cream maker’s mixing chamber. Churn for twenty-five to thirty minutes, watching for a thick, glossy consistency near the end of the cycle. Transfer the finished ice cream into a freezer-safe container, press parchment paper against the surface, and seal tightly. Freeze for two to three hours before serving for a rich, dairy-free dessert with a dense, satisfying texture.
20. Birthday Cake Ice Cream
Prep Time: 15 minutes | Churn Time: 25–30 minutes | Serve: 6
A sweet vanilla base gets mixed with small pieces of yellow cake and colorful sprinkles for a festive, celebration-ready dessert. Folding the cake pieces in near the end keeps them from turning mushy, so each scoop still carries a bit of texture. Sprinkles add a pop of color that makes this recipe popular for birthdays and other gatherings.
Ingredients
- 2 cups heavy cream
- 1 cup whole milk
- 3/4 cup sugar
- 2 teaspoons vanilla extract
- 1 cup yellow cake, cut into small cubes
- 1/2 cup rainbow sprinkles
- Pinch of salt
Instructions
Start by combining the whole milk, sugar, and a small pinch of salt in a saucepan over medium-low heat. Whisk the mixture steadily until the sugar fully dissolves and small bubbles begin forming gently around the edges of the pan. Remove the saucepan from the heat right away to prevent the milk from scorching or developing a skin on top.
Pour the heavy cream into the warm milk mixture slowly, whisking constantly so the temperature blends evenly without separating. Stir in the vanilla extract once the cream has fully combined, mixing until the base looks smooth and pale throughout. Transfer the mixture into a bowl, cover with plastic wrap pressed directly against the surface, and place it in the refrigerator for at least four hours to chill completely.
While the base chills, prepare the cake pieces by cutting a small slice of yellow cake into pea-sized cubes, then spreading them on a plate and placing them in the freezer for about thirty minutes. Freezing the cake pieces beforehand helps them hold their shape once folded into the churned ice cream instead of dissolving into the mixture.
Once the base is fully cold, pour it into the Whynter ice cream maker’s mixing chamber and start the churn cycle, which typically runs twenty-five to thirty minutes. During the final few minutes, add the frozen cake pieces and rainbow sprinkles gradually, letting the paddle fold them evenly throughout the mixture without breaking the cake down too much.
Transfer the finished ice cream into a freezer-safe container, layering in a few extra sprinkles between spoonfuls for a festive look. Press parchment paper against the surface before sealing the lid tightly. Freeze for two to three hours before serving to let the texture firm up into clean, celebration-ready scoops.
How to Store Homemade Ice Cream Made With a Whynter Ice Cream Maker
Storing homemade batches properly keeps every recipe tasting fresh long after the churn cycle finishes. A few simple habits make a noticeable difference in both texture and flavor over time.
Use Airtight Containers — A tightly sealed, freezer-safe container keeps outside air away from the ice cream, which helps preserve flavor and slows down texture changes over several weeks.
Prevent Ice Crystals — Pressing a layer of parchment or wax paper directly against the surface before sealing the lid blocks air pockets that lead to icy patches on top.
Keep Proper Freezer Temperature — Setting the freezer to 0°F or below helps maintain a firm, scoopable texture and keeps the base from softening and refreezing unevenly.
Best Serving Texture Tips — Letting a container sit at room temperature for five to ten minutes before scooping softens the texture slightly, making it easier to serve clean, rounded scoops without excess melting.
Conclusion
A Whynter ice cream maker turns homemade dessert making into a straightforward, enjoyable part of any kitchen routine.
Its compressor design removes the wait tied to pre-freezing a bowl, letting flavors move from mixing bowl to finished scoop within a single afternoon. With more than 20 recipes to choose from, there’s room to explore everything from classic vanilla to bold matcha or a dairy-free chocolate option, depending on what sounds appealing at the moment.
Trying new combinations, adjusting sweetness levels, and folding in favorite mix-ins turns each batch into something personal rather than a copy of a store-bought pint.
Sticking close to a familiar flavor or experimenting with something new both work well here, since these Whynter ice cream maker recipes offer a starting point for building a kitchen habit that stays simple, creative, and genuinely satisfying batch after batch.