
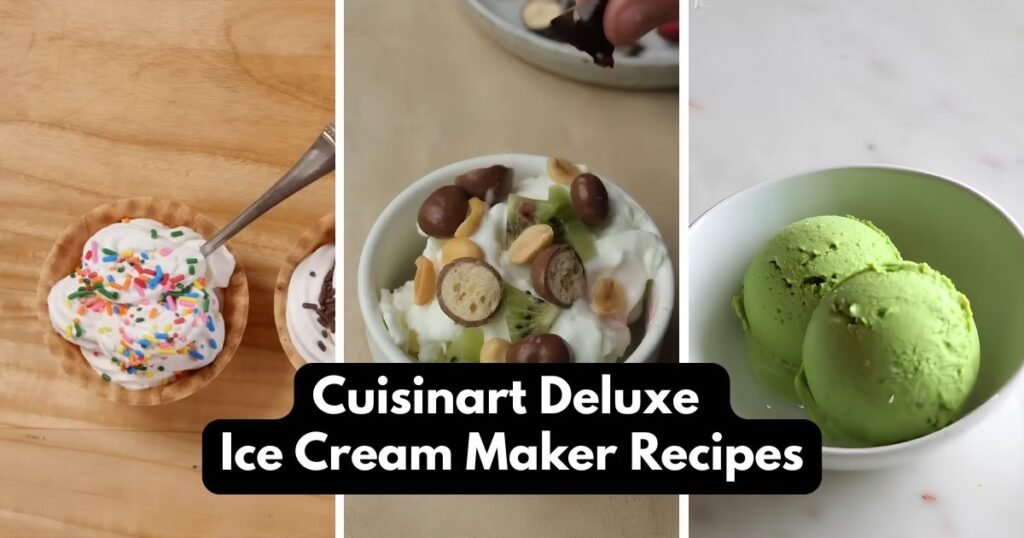
My neighbor Carol brought over a container of her homemade peach ice cream last summer, and the texture was so smooth it barely tasted like anything from a freezer at all.
She mentioned her Cuisinart deluxe ice cream maker recipes were nothing more than cream, sugar, and patience.
That conversation sent me straight to the store for my own machine. Since then, my kitchen has turned into a small ice cream shop, with vanilla, strawberry, and cookie flavors lined up in the freezer almost every week.

How the Cuisinart Deluxe Ice Cream Maker Works
1. Understanding the Freezer Bowl
The freezer bowl has a double insulated wall that holds cooling liquid inside it. This design lets the bowl freeze the mixture quickly and keep an even temperature the whole time it churns.
The bowl needs about 12 to 24 hours in the freezer before use, so plan ahead the night before a recipe. To check that the cooling liquid is completely frozen, give the bowl a gentle shake.
When you hear no liquid moving inside, the bowl is ready to use. Keep it stored in the back of your freezer, since that spot usually stays the coldest, and this way it’s ready anytime you want to make a batch.
2. Using the Mixing Arm and Lid
The mixing arm sits inside the freezer bowl and turns while the machine runs, moving the mixture along the frozen walls so it thickens evenly and picks up a little air along the way.
The easy-lock lid rests on top of the base and turns clockwise to click into place. Once it’s locked, the ingredient spout on top lets you pour in the liquid mixture without lifting the lid, and it makes adding extras simple too.
When a recipe calls for chocolate chips, nuts, cookie pieces, or other mix-ins, drop them through this same spout during the last few minutes of churning so they blend in without getting broken apart.
3. Choosing the Right Function
This machine has three settings on its control panel. The ICE CREAM setting works for regular ice cream and frozen yogurt.
The GELATO setting is built for gelato recipes, which tend to have a denser texture. The SORBET setting works best for fruit-based frozen desserts made without dairy. Pick your function before starting the churning cycle, since it locks in once the timer begins and can’t be switched partway through.
4. How Long Does It Take to Make Ice Cream?
Most frozen desserts made in this machine finish in 15 to 35 minutes. The exact time depends on the recipe and how much mixture you poured in.
Once the dessert reaches a soft-serve thickness, it’s ready to eat right away, or you can scoop it into a container and freeze it for two or more hours for a firmer, scoopable texture.
Tips for Getting Smooth Homemade Ice Cream
1. Keep the Freezer Bowl Completely Frozen
A fully frozen bowl is the biggest factor in a smooth, creamy batch. A bowl that’s only partly frozen won’t cool the mixture fast enough, and you’ll end up with something closer to a milkshake than ice cream. Before starting, shake the bowl one more time to check for any liquid movement inside.
2. Chill Your Ingredients Before Churning
Cold ingredients freeze faster once they hit the churning bowl, which helps the mixture set up smoothly instead of forming ice crystals.
Mix your base a few hours ahead of time and keep it refrigerated until you’re ready to pour it in. This step also cuts down on total churning time.
3. Do Not Overfill the Bowl
Always keep your mixture below the fill line marked inside the bowl, usually about a half inch from the top. Ice cream mixtures expand quite a bit as they churn and freeze, so a bowl filled too high will overflow once the mixing arm gets going.
4. When to Add Mix-Ins
Cookies, chocolate chips, nuts, fruit pieces, and candy all go in through the ingredient spout, not mixed into the base ahead of time.
Adding them during the last few minutes of churning keeps larger pieces from getting crushed into tiny bits by the mixing arm.
1. Classic Vanilla Ice Cream
⏱ Time
Prep Time: 10 minutes
Churn Time: 25 minutes
Total: 35 minutes (plus 2 hours freezing time for firmer texture)
Servings: 6
This vanilla batch is the one I make most often, mostly because it goes with almost any topping I have on hand. The flavor comes from real vanilla bean paste instead of extract, which gives the finished scoop small flecks of vanilla and a rounder, less sharp sweetness. It churns up soft and thick, and holds its shape well once it’s frozen a bit longer.
Ingredients
- 2 cups heavy cream
- 1 cup whole milk
- 3/4 cup granulated sugar
- 2 teaspoons vanilla bean paste (or pure vanilla extract)
- Pinch of salt
Instructions
- In a medium mixing bowl, whisk together the heavy cream, whole milk, and granulated sugar until the sugar mostly dissolves. This takes about two minutes of steady whisking, and the mixture should feel slightly less gritty when you rub a drop between your fingers.
- Stir in the vanilla bean paste and a pinch of salt, then whisk everything one more time to spread the vanilla flecks evenly through the base. Cover the bowl and refrigerate for at least one hour, though a few hours chilled works even better for flavor.
- Remove your frozen freezer bowl from the freezer and set it on the center of the base right away, since it starts to soften the moment it leaves the cold. Place the mixing arm inside with the circle side facing up.
- Set the easy-lock lid onto the base, positioned slightly right of center, then turn it clockwise until it clicks into place. Select the ICE CREAM function on the control panel and press Start.
- Pour the chilled vanilla mixture through the ingredient spout right after the machine starts turning, then set the measuring cap back on top of the lid. Let the machine run for about 20 to 25 minutes.
- Check the texture once it thickens to a soft-serve consistency. For scoopable ice cream, transfer it to an airtight container and freeze for two hours or longer before serving.
Tips for the Creamiest Texture
Use cream and milk straight from the coldest part of your refrigerator, since colder ingredients churn into a smoother base with fewer ice crystals. Vanilla bean paste gives a rounder flavor than extract, though pure extract still works well when that’s what you have.
2. Homemade Chocolate Ice Cream
⏱ Time
Prep Time: 15 minutes
Churn Time: 25 minutes
Total: 40 minutes (plus 2 hours freezing time for firmer texture)
Servings: 6
This chocolate version leans rich and slightly bitter instead of overly sweet, thanks to cocoa powder whisked directly into the warm base before chilling. Melting cocoa this way keeps the flavor deep and smooth rather than gritty, which matters more than most people expect once the mixture starts to churn.
Ingredients
- 2 cups heavy cream
- 1 cup whole milk
- 2/3 cup granulated sugar
- 1/2 cup unsweetened cocoa powder
- 4 ounces semisweet chocolate, chopped
- 1 teaspoon vanilla extract
- Pinch of salt
Instructions
- Warm the milk in a small saucepan over medium-low heat until small bubbles form around the edges, but don’t let it come to a full boil. Remove the pan from the heat as soon as steam rises steadily.
- Whisk the cocoa powder and sugar into the warm milk until both dissolve completely, then add the chopped chocolate. Stir slowly for about a minute, letting the residual heat melt the chocolate into a smooth, dark mixture.
- Pour in the heavy cream, vanilla extract, and salt, whisking until the base looks glossy and evenly colored. Cover the bowl and refrigerate for at least two hours, since a fully cold base churns much better than a warm one.
- Place your frozen freezer bowl on the base, then set the mixing arm inside with the circle side facing upward. Lock the lid into place by turning it clockwise.
- Choose the ICE CREAM function and press Start, then pour the chilled chocolate base through the ingredient spout right away. Replace the measuring cap over the spout opening.
- Let the machine churn for 20 to 25 minutes, checking near the end for a thick, soft-serve texture. Scoop it into a container and freeze for two hours for a firmer scoop, or serve it right from the bowl for a softer treat.
Optional Chocolate Mix-Ins
Chopped chocolate chunks, mini chocolate chips, or crushed chocolate wafer cookies all work well added through the spout during the last five minutes of churning. Toasted almonds or a swirl of fudge sauce make good additions too.
3. Strawberry Ice Cream
⏱ Time
Prep Time: 15 minutes
Churn Time: 25 minutes
Total: 40 minutes (plus 2 hours freezing time for firmer texture)
Servings: 6
Fresh strawberries mashed with a little sugar and left to sit turn juicy enough to swirl straight into the cream base, with no cooking required. The berries soften and release their juice within about thirty minutes, which gives the finished ice cream real fruit flavor in nearly every bite instead of a faint pink tint.
Ingredients
- 1 1/2 cups fresh strawberries, hulled and chopped
- 3/4 cup granulated sugar, divided
- 1 1/2 cups heavy cream
- 3/4 cup whole milk
- 1 teaspoon lemon juice
- 1 teaspoon vanilla extract
Instructions
- Combine the chopped strawberries with 1/4 cup of the sugar in a bowl, stirring gently to coat the pieces. Let this sit at room temperature for about 30 minutes, giving the berries time to release their natural juice.
- Mash about half of the softened strawberries with a fork, leaving the rest in small chunks for texture. Stir in the lemon juice, then set the bowl aside.
- In a separate bowl, whisk together the heavy cream, whole milk, remaining 1/2 cup sugar, and vanilla extract until the sugar dissolves completely. Fold in the strawberry mixture, then refrigerate everything for at least one hour.
- Set the frozen freezer bowl onto the base and place the mixing arm inside with the circle side facing up. Lock the lid by turning it clockwise into place.
- Select the ICE CREAM function, press Start, and pour the chilled strawberry mixture through the ingredient spout as soon as the mixing arm begins turning.
- Churn for 20 to 25 minutes, until the mixture thickens and turns a soft pink color throughout. Transfer to a container and freeze for two hours for a scoopable texture, or enjoy it soft right away.
Tips for Using Fresh Strawberries
Choose berries that are fully red with no white or green near the stem, since these give the strongest flavor and sweetest juice. Frozen strawberries work in a pinch too, thawed and drained well before mashing.
4. Cookies and Cream Ice Cream
⏱ Time
Prep Time: 10 minutes
Churn Time: 25 minutes
Total: 35 minutes (plus 2 hours freezing time for firmer texture)
Servings: 6
This one started as a way to use up a half-empty package of sandwich cookies sitting in my pantry. Crushing them into uneven chunks instead of fine crumbs gives the finished batch little pockets of cookie and cream scattered through every scoop, which is really the whole point of this flavor.
Ingredients
- 2 cups heavy cream
- 1 cup whole milk
- 2/3 cup granulated sugar
- 1 1/2 teaspoons vanilla extract
- Pinch of salt
- 12 chocolate sandwich cookies, roughly chopped
Instructions
- Whisk together the heavy cream, whole milk, and sugar in a mixing bowl until the sugar dissolves and the mixture feels smooth between your fingers. This usually takes about two minutes of steady stirring.
- Add the vanilla extract and salt, whisking once more to combine everything evenly. Cover the bowl and refrigerate for at least one hour before churning.
- Place the frozen freezer bowl on the base, then set the mixing arm inside with the circle side turned upward. Lock the lid into position by turning it clockwise.
- Select the ICE CREAM function and press Start, then pour the chilled vanilla base through the ingredient spout right away. Set the measuring cap back over the opening.
- Let the base churn for about 15 minutes before adding the chopped cookies through the spout. This timing keeps the pieces from getting broken down too much by the mixing arm.
- Continue churning for another 5 to 10 minutes, until the mixture reaches a thick, soft-serve texture with cookie pieces spread throughout. Freeze in an airtight container for two hours for a firmer scoop.
When to Add the Cookie Pieces
Wait until the base has already thickened somewhat before adding the cookies, usually around the fifteen-minute mark. Adding them too early lets the mixing arm crush them into fine crumbs instead of leaving visible chunks.
5. Mint Chocolate Chip Ice Cream
⏱ Time
Prep Time: 10 minutes
Churn Time: 25 minutes
Total: 35 minutes (plus 2 hours freezing time for firmer texture)
Servings: 6
Peppermint extract gives this batch its cool, sharp flavor, and a small drop of green food coloring makes it look the way people expect mint ice cream to look. Real mint leaves steeped in warm cream give a softer, more herbal flavor if you’d rather skip the extract altogether.
Ingredients
- 2 cups heavy cream
- 1 cup whole milk
- 3/4 cup granulated sugar
- 1 to 1 1/2 teaspoons peppermint extract
- Few drops green food coloring (optional)
- Pinch of salt
- 3/4 cup mini chocolate chips
Instructions
- Whisk the heavy cream, whole milk, and sugar together in a bowl until the sugar dissolves fully. Rub a small amount between your fingers to check that no grittiness remains.
- Stir in the peppermint extract, salt, and food coloring if using, starting with less extract than you think you need since the flavor gets stronger once the mixture chills. Refrigerate for at least one hour.
- Set your frozen freezer bowl onto the base, then place the mixing arm inside with the circle side facing up. Turn the lid clockwise to lock it into place.
- Select the ICE CREAM function, press Start, and immediately pour the chilled mint base through the ingredient spout. Cover the spout with the measuring cap.
- Churn for about 15 to 18 minutes before adding the mini chocolate chips through the spout, letting them scatter through the thickening mixture rather than clump together.
- Continue churning for another 5 to 10 minutes until the texture turns thick and soft-serve like. Freeze for two hours in an airtight container for a firmer scoop.
Chocolate Chip Tips
Mini chocolate chips distribute more evenly than regular-sized chips and stay easier to scoop once the ice cream is fully frozen. Freezing the chips for a few minutes beforehand helps keep them from melting into the mixture too quickly.
6. Chocolate Chip Ice Cream
⏱ Time
Prep Time: 10 minutes
Churn Time: 25 minutes
Total: 35 minutes (plus 2 hours freezing time for firmer texture)
Servings: 6
A plain vanilla base loaded with chocolate chips doesn’t need much explanation, but getting the chip size and timing right makes a bigger difference than most people expect. Larger chunks give a satisfying bite, while chopped pieces spread more evenly through each scoop.
Ingredients
- 2 cups heavy cream
- 1 cup whole milk
- 3/4 cup granulated sugar
- 2 teaspoons vanilla extract
- Pinch of salt
- 3/4 cup semisweet chocolate chips or chopped chocolate
Instructions
- Combine the heavy cream, whole milk, and sugar in a mixing bowl, whisking steadily until the sugar fully dissolves into the liquid. This should take roughly two minutes.
- Add the vanilla extract and salt, stirring once more to blend everything smoothly. Cover the bowl and chill in the refrigerator for at least one hour.
- Place the frozen freezer bowl on the center of the base, then set the mixing arm inside with the circle side facing up. Lock the lid by turning it clockwise.
- Choose the ICE CREAM function and press Start, pouring the chilled vanilla base through the ingredient spout right after the mixing arm starts turning.
- Let the base churn for 15 to 18 minutes, then add the chocolate chips through the spout so they mix into the thickened base without getting crushed too finely.
- Continue churning for another 5 to 10 minutes until everything reaches a thick, soft-serve consistency. Transfer to a container and freeze for two hours for a firmer texture.
Best Time to Add Chocolate Chips
Waiting until the base has thickened somewhat, usually around the fifteen-minute mark, keeps the chips whole instead of breaking them into smaller bits. Chopped chocolate melts slightly into the mixture, creating thin ribbons instead of solid chunks.
7. Salted Caramel Ice Cream
⏱ Time
Prep Time: 20 minutes
Churn Time: 25 minutes
Total: 45 minutes (plus 2 hours freezing time for firmer texture)
Servings: 6
Making the caramel from scratch takes a little extra attention on the stove, but the deep, slightly burnt sugar flavor it gives is worth the extra step. A touch of flaky sea salt on top balances the sweetness and makes this one of the richer flavors on this list.
Ingredients
- 1 cup granulated sugar
- 1/4 cup water
- 1 1/2 cups heavy cream, divided
- 1 cup whole milk
- 1/2 teaspoon fine sea salt
- 1 teaspoon vanilla extract
- Flaky sea salt, for topping
Instructions
- Combine the granulated sugar and water in a medium saucepan over medium heat. Swirl the pan occasionally, but avoid stirring directly, until the sugar melts and turns a deep amber color, which takes about 8 to 10 minutes.
- Remove the pan from heat and carefully pour in 1/2 cup of the heavy cream, whisking constantly as it bubbles up. The mixture will steam and sputter, so stand back slightly while whisking.
- Whisk in the remaining heavy cream, whole milk, fine sea salt, and vanilla extract until the caramel is fully blended into the liquid with no hard clumps remaining. Let the mixture cool for about 15 minutes at room temperature.
- Refrigerate the caramel base for at least two hours, or until fully chilled. A cold base is important here since caramel mixtures can churn slower than plain cream bases.
- Set the frozen freezer bowl on the base, place the mixing arm inside with the circle side up, then lock the lid into place by turning it clockwise.
- Select the ICE CREAM function, press Start, and pour the chilled caramel base through the ingredient spout. Churn for 20 to 25 minutes until thick and soft-serve like, then freeze for two hours in an airtight container. Sprinkle flaky sea salt over each scoop before serving.
Caramel Swirl Tips
Reserve a few tablespoons of extra caramel sauce to swirl on top after churning is finished, rather than mixing it in during the churn cycle. This creates visible caramel ribbons instead of blending the flavor evenly throughout.
8. Peanut Butter Ice Cream
⏱ Time
Prep Time: 15 minutes
Churn Time: 25 minutes
Total: 40 minutes (plus 2 hours freezing time for firmer texture)
Servings: 6
Creamy peanut butter whisked directly into the base gives this flavor a thick, almost fudgy texture once it churns. A little extra salt helps balance the sweetness, since peanut butter can make the finished ice cream taste flatter than expected without it.
Ingredients
- 1 cup creamy peanut butter
- 3/4 cup granulated sugar
- 2 cups heavy cream
- 1 cup whole milk
- 1 teaspoon vanilla extract
- 1/4 teaspoon salt
Instructions
- Whisk the peanut butter and sugar together in a mixing bowl until the mixture turns smooth and slightly lighter in color. This takes a minute or two of steady stirring, and small sugar grains should disappear almost completely.
- Slowly pour in the heavy cream and whole milk while whisking constantly, working out any peanut butter clumps as you go. Add the vanilla extract and salt, whisking one final time to combine everything evenly.
- Cover the bowl and refrigerate the mixture for at least one hour. Peanut butter bases sometimes separate slightly while chilling, so give the mixture a quick whisk right before churning.
- Place the frozen freezer bowl onto the base, then set the mixing arm inside with the circle side facing up. Lock the lid into place by turning it clockwise.
- Select the ICE CREAM function and press Start, pouring the chilled peanut butter base through the ingredient spout as soon as the mixing arm begins turning. Replace the measuring cap over the spout.
- Churn for 20 to 25 minutes, checking near the end for a thick, soft-serve consistency. Transfer to an airtight container and freeze for two hours for a firmer scoop.
Peanut Butter Mix-In Ideas
Chopped peanut butter cups, roasted peanuts, or a swirl of extra peanut butter added through the spout during the last few minutes of churning all work well here. A drizzle of chocolate syrup on top rounds out the flavor nicely.
9. Chocolate Peanut Butter Ice Cream
⏱ Time
Prep Time: 15 minutes
Churn Time: 25 minutes
Total: 40 minutes (plus 2 hours freezing time for firmer texture)
Servings: 6
This flavor combines a chocolate base with pockets of peanut butter swirled through it, which gives every scoop a slightly different balance of the two flavors. Warming the peanut butter briefly before swirling makes it easier to pour through the spout without clogging.
Ingredients
- 2 cups heavy cream
- 1 cup whole milk
- 2/3 cup granulated sugar
- 1/3 cup unsweetened cocoa powder
- 1 teaspoon vanilla extract
- Pinch of salt
- 1/2 cup creamy peanut butter, slightly warmed
Instructions
- Whisk the whole milk, sugar, and cocoa powder together in a saucepan over low heat until the cocoa dissolves completely and no dry lumps remain. Remove from heat once the mixture looks smooth and glossy.
- Stir in the heavy cream, vanilla extract, and salt, whisking until fully combined. Let the base cool at room temperature for about 15 minutes before covering and refrigerating for at least one hour.
- Warm the peanut butter in the microwave for about 15 seconds, just enough to loosen it into a pourable consistency. Set it aside near the machine for later.
- Place the frozen freezer bowl on the base, set the mixing arm inside with the circle side up, and lock the lid into place by turning it clockwise.
- Select the ICE CREAM function, press Start, and pour the chilled chocolate base through the ingredient spout right away. Churn for about 18 to 20 minutes until it thickens noticeably.
- Drizzle the warmed peanut butter through the spout during the last few minutes of churning, letting it swirl through the chocolate base rather than blend in completely. Freeze in an airtight container for two hours for a firmer texture.
Topping Ideas
Chopped peanut butter cups, crushed pretzels, or a final drizzle of warm peanut butter over each scoop all pair well with this flavor. A sprinkle of flaky salt on top brings out both the chocolate and peanut butter flavors.
10. Coffee Ice Cream
⏱ Time
Prep Time: 10 minutes
Churn Time: 25 minutes
Total: 35 minutes (plus 2 hours freezing time for firmer texture)
Servings: 6
Instant espresso powder dissolved directly into warm cream gives this flavor a strong, straightforward coffee taste without needing to brew a separate pot. It’s one of the simplest recipes on this list, but the flavor tastes far more intense than the short ingredient list suggests.
Ingredients
- 2 cups heavy cream
- 1 cup whole milk
- 3/4 cup granulated sugar
- 3 tablespoons instant espresso powder
- 1 teaspoon vanilla extract
- Pinch of salt
Instructions
- Warm the whole milk in a small saucepan over medium-low heat until steam rises steadily from the surface, but don’t let it reach a full boil. Remove the pan from the heat.
- Whisk the espresso powder and sugar into the warm milk until both dissolve completely, leaving no gritty texture when you rub a drop between your fingers. Let the mixture cool for a few minutes.
- Stir in the heavy cream, vanilla extract, and salt, whisking until the base looks evenly colored throughout. Cover and refrigerate for at least one hour, or until fully chilled.
- Set the frozen freezer bowl on the base, place the mixing arm inside with the circle side facing up, then lock the lid by turning it clockwise.
- Select the ICE CREAM function, press Start, and pour the chilled coffee base through the ingredient spout right away. Set the measuring cap back over the opening.
- Churn for 20 to 25 minutes until the mixture thickens to a soft-serve consistency. Freeze in an airtight container for two hours for a firmer, scoopable texture.
Choosing the Right Coffee
Instant espresso powder gives the strongest, most concentrated flavor, though instant coffee granules work as a milder substitute if that’s what’s on hand. Avoid brewed coffee here, since the added liquid can throw off the base’s texture.
11. Banana Ice Cream
⏱ Time
Prep Time: 15 minutes
Churn Time: 25 minutes
Total: 40 minutes (plus 2 hours freezing time for firmer texture)
Servings: 6
Very ripe bananas mashed into the base give this flavor a natural sweetness, so it needs less added sugar than most other flavors on this list. A splash of lemon juice keeps the bananas from turning brown while the mixture chills in the refrigerator.
Ingredients
- 3 very ripe bananas, mashed
- 1/2 cup granulated sugar
- 1 teaspoon lemon juice
- 1 1/2 cups heavy cream
- 3/4 cup whole milk
- 1 teaspoon vanilla extract
Instructions
- Mash the ripe bananas in a bowl with a fork until mostly smooth, leaving a few small lumps for texture if you’d like. Stir in the sugar and lemon juice right away, mixing until combined.
- Add the heavy cream, whole milk, and vanilla extract to the banana mixture, whisking everything together until fully blended. The mixture will look slightly thicker than a plain cream base because of the mashed banana.
- Cover the bowl and refrigerate for at least one hour, or until the mixture is completely cold. Give it a quick stir before pouring, since the banana can settle slightly while chilling.
- Place the frozen freezer bowl on the base, then set the mixing arm inside with the circle side facing up. Lock the lid into place by turning it clockwise.
- Select the ICE CREAM function and press Start, pouring the chilled banana base through the ingredient spout as soon as the machine begins turning.
- Churn for 20 to 25 minutes, checking for a thick, soft-serve texture near the end. Transfer to an airtight container and freeze for two hours for a firmer scoop.
Using Ripe Bananas
Bananas with brown spots covering most of the peel give the sweetest flavor and mash more easily than firmer, yellow bananas. Overripe bananas that have started to turn mushy work especially well here and are worth saving instead of throwing away.
12. Peach Ice Cream
⏱ Time
Prep Time: 20 minutes
Churn Time: 25 minutes
Total: 45 minutes (plus 2 hours freezing time for firmer texture)
Servings: 6
Peak-season peaches roasted briefly before blending give this flavor a deeper, more concentrated taste than using them raw. The skins slip off easily once the peaches cool, which saves some extra peeling work at the cutting board.
Ingredients
- 3 medium ripe peaches, peeled and chopped
- 1/2 cup granulated sugar, divided
- 1 teaspoon lemon juice
- 1 1/2 cups heavy cream
- 3/4 cup whole milk
- 1/2 teaspoon vanilla extract
Instructions
- Toss the chopped peaches with 1/4 cup of the sugar and lemon juice in a bowl, then let the mixture sit at room temperature for about 20 minutes so the fruit releases its juice.
- Blend or mash about half of the peaches into a smooth puree, leaving the rest in small chunks for texture. Set the mixture aside once it’s ready.
- Whisk the heavy cream, whole milk, remaining 1/4 cup sugar, and vanilla extract together in a separate bowl until the sugar dissolves completely. Fold in the peach mixture, stirring gently to combine.
- Refrigerate the base for at least one hour, or until fully chilled. Cold fruit mixtures churn more smoothly than ones still slightly warm from sitting out.
- Set the frozen freezer bowl on the base, place the mixing arm inside with the circle side up, and lock the lid by turning it clockwise.
- Select the ICE CREAM function, press Start, and pour the chilled peach base through the ingredient spout right away. Churn for 20 to 25 minutes until thickened, then freeze in an airtight container for two hours for a firmer texture.
Fresh vs. Frozen Peaches
Fresh, ripe peaches give the best texture and flavor, especially during summer months when they’re in season. Frozen peaches work well too, though they should be thawed and drained of excess liquid before chopping and mixing.
13. Mango Ice Cream
⏱ Time
Prep Time: 15 minutes
Churn Time: 25 minutes
Total: 40 minutes (plus 2 hours freezing time for firmer texture)
Servings: 6
Ripe mango blended into a smooth puree gives this flavor a bright, tropical taste that feels different from the usual berry-based options. The natural sweetness of a good mango means this base needs only a small amount of added sugar.
Ingredients
- 2 cups ripe mango, peeled and chopped
- 1/2 cup granulated sugar
- 1 teaspoon lime juice
- 1 1/2 cups heavy cream
- 3/4 cup whole milk
Instructions
- Blend the chopped mango, sugar, and lime juice together in a blender until completely smooth, with no visible chunks remaining. This usually takes about 30 seconds on high speed.
- Pour the mango puree into a mixing bowl, then whisk in the heavy cream and whole milk until fully combined. The mixture should look pale orange and slightly thick.
- Cover the bowl and refrigerate for at least one hour, or until completely chilled. A fully cold base is especially important with fruit purees, since they can churn slower than plain cream mixtures.
- Place the frozen freezer bowl on the base, set the mixing arm inside with the circle side facing up, and lock the lid into place by turning it clockwise.
- Select the ICE CREAM function, press Start, and pour the chilled mango base through the ingredient spout right after the mixing arm starts turning.
- Churn for 20 to 25 minutes until the mixture thickens to a soft-serve texture. Freeze in an airtight container for two hours for a firmer, scoopable result.
How to Get Strong Mango Flavor
Choose mangoes that give slightly when pressed and smell sweet near the stem, since these are the ripest and most flavorful. A small pinch of salt added to the puree also helps bring out the natural sweetness of the fruit.
14. Lemon Sorbet
⏱ Time
Prep Time: 15 minutes
Churn Time: 25 minutes
Total: 40 minutes (plus 2 hours freezing time for firmer texture)
Servings: 6
This sorbet uses fresh lemon juice and zest for a sharp, clean flavor that works well after a heavy meal. Since it contains no dairy, the texture depends heavily on getting the sugar-to-liquid ratio right, which keeps it from freezing too hard.
Ingredients
- 1 cup granulated sugar
- 1 1/2 cups water
- 1 cup fresh lemon juice
- 1 tablespoon lemon zest
- Pinch of salt
Instructions
- Combine the sugar and water in a small saucepan over medium heat, stirring until the sugar dissolves completely. This simple syrup takes about 3 to 4 minutes to come together.
- Remove the syrup from the heat and let it cool to room temperature, which takes roughly 15 to 20 minutes on the counter. Cooling it fully before adding the lemon juice keeps the flavor bright instead of muted.
- Stir the lemon juice, lemon zest, and salt into the cooled syrup, whisking until everything is evenly combined. Refrigerate the mixture for at least one hour, or until fully chilled.
- Set the frozen freezer bowl on the base, place the mixing arm inside with the circle side up, then lock the lid into place by turning it clockwise.
- Select the SORBET function, press Start, and pour the chilled lemon mixture through the ingredient spout right away. Replace the measuring cap over the opening.
- Churn for 20 to 25 minutes until the sorbet thickens and turns pale yellow throughout. Freeze in an airtight container for two hours for a firmer texture before serving.
Balancing Sweet and Tart Flavors
Taste the mixture before churning and adjust with a little extra sugar if the lemon flavor feels too sharp, or more juice if it tastes too sweet. The balance should taste slightly stronger than you want the final sorbet to be, since freezing dulls sweetness somewhat.
15. Strawberry Sorbet
⏱ Time
Prep Time: 15 minutes
Churn Time: 25 minutes
Total: 40 minutes (plus 2 hours freezing time for firmer texture)
Servings: 6
Pureed strawberries blended with a simple syrup make a smooth, dairy-free sorbet with a bright pink color and bold berry flavor. A splash of lemon juice keeps the sweetness from tasting flat once it’s frozen.
Ingredients
- 3 cups fresh strawberries, hulled
- 3/4 cup granulated sugar
- 3/4 cup water
- 1 tablespoon lemon juice
Instructions
- Combine the sugar and water in a small saucepan over medium heat, stirring until the sugar fully dissolves. Remove from heat and let the syrup cool to room temperature.
- Blend the strawberries in a blender or food processor until completely smooth, then strain the puree through a fine mesh sieve if you’d like a smoother, seedless sorbet.
- Stir the cooled syrup and lemon juice into the strawberry puree, whisking until fully combined. Refrigerate the mixture for at least one hour, or until it’s completely cold.
- Place the frozen freezer bowl on the base, set the mixing arm inside with the circle side facing up, and lock the lid by turning it clockwise.
- Select the SORBET function, press Start, and pour the chilled strawberry mixture through the ingredient spout as soon as the mixing arm begins turning.
- Churn for 20 to 25 minutes until the sorbet thickens and reaches a smooth, soft consistency. Freeze in an airtight container for two hours for a firmer scoop.
Tips for Smooth Fruit Sorbet
Straining the puree removes small seeds and fibrous bits that can make the finished sorbet feel slightly gritty. Using very ripe, sweet strawberries also cuts down on how much added sugar the recipe needs.
16. Mango Sorbet
⏱ Time
Prep Time: 15 minutes
Churn Time: 25 minutes
Total: 40 minutes (plus 2 hours freezing time for firmer texture)
Servings: 6
This dairy-free sorbet relies entirely on ripe mango for its flavor and natural thickness, needing only a little sugar syrup to balance things out. The color turns a deep golden orange once it’s fully churned.
Ingredients
- 3 cups ripe mango, peeled and chopped
- 1/2 cup granulated sugar
- 1/2 cup water
- 2 teaspoons lime juice
Instructions
- Combine the sugar and water in a small saucepan over medium heat, stirring until the sugar dissolves completely. Remove from heat and allow the syrup to cool fully before moving forward.
- Blend the chopped mango and lime juice in a blender until completely smooth, scraping down the sides as needed to catch any remaining chunks.
- Whisk the cooled syrup into the mango puree until fully combined, then refrigerate the mixture for at least one hour, or until completely chilled.
- Set the frozen freezer bowl on the base, place the mixing arm inside with the circle side up, and lock the lid into place by turning it clockwise.
- Select the SORBET function, press Start, and pour the chilled mango mixture through the ingredient spout right after the machine begins turning.
- Churn for 20 to 25 minutes until the sorbet reaches a thick, smooth texture throughout. Freeze in an airtight container for two hours for a firmer result before serving.
Fresh Mango Tips
Frozen mango chunks work well here when fresh mango isn’t in season, though they should be thawed slightly before blending for a smoother puree. Adding a touch more lime juice helps brighten the flavor if the mango tastes overly sweet.
17. Vanilla Frozen Yogurt
⏱ Time
Prep Time: 10 minutes
Churn Time: 25 minutes
Total: 35 minutes (plus 2 hours freezing time for firmer texture)
Servings: 6
Plain Greek yogurt gives this frozen treat a slight tang that regular ice cream doesn’t have, while still churning up smooth and creamy. It’s a lighter option that still feels like a proper dessert once it’s fully frozen.
Ingredients
- 2 cups plain Greek yogurt
- 1 cup heavy cream
- 2/3 cup granulated sugar
- 1 1/2 teaspoons vanilla extract
- Pinch of salt
Instructions
- Whisk the Greek yogurt and heavy cream together in a mixing bowl until fully combined and smooth. The mixture should look thick but pourable once blended.
- Add the sugar, vanilla extract, and salt, whisking until the sugar dissolves completely into the base. Rub a small amount between your fingers to check that no grittiness remains.
- Cover the bowl and refrigerate for at least one hour, or until the mixture is completely chilled. A cold base helps this churn into a smoother, less icy texture.
- Place the frozen freezer bowl on the base, set the mixing arm inside with the circle side facing up, and lock the lid by turning it clockwise.
- Select the ICE CREAM function, since this setting works for frozen yogurt as well, and press Start. Pour the chilled yogurt base through the ingredient spout right away.
- Churn for 20 to 25 minutes until the mixture thickens to a soft-serve consistency. Freeze in an airtight container for two hours for a firmer, scoopable texture.
Using the ICE CREAM Function
The machine doesn’t have a separate frozen yogurt setting, so the ICE CREAM function is the correct choice for any yogurt-based recipe. The churning time stays about the same as a regular ice cream batch.
18. Strawberry Frozen Yogurt
⏱ Time
Prep Time: 15 minutes
Churn Time: 25 minutes
Total: 40 minutes (plus 2 hours freezing time for firmer texture)
Servings: 6
Fresh strawberries blended right into the yogurt base give this version a natural pink color and fruity flavor without any added coloring. It has a slightly tangy finish that pairs well with the sweetness of the berries.
Ingredients
- 1 1/2 cups fresh strawberries, hulled
- 2 cups plain Greek yogurt
- 3/4 cup heavy cream
- 2/3 cup granulated sugar
- 1 teaspoon lemon juice
Instructions
- Blend the strawberries until smooth in a blender or food processor, scraping down the sides once or twice to catch any larger pieces left behind.
- Whisk the strawberry puree, Greek yogurt, and heavy cream together in a mixing bowl until fully combined. The mixture should look pale pink and fairly smooth.
- Add the sugar and lemon juice, whisking until the sugar fully dissolves into the base. Cover the bowl and refrigerate for at least one hour, or until completely cold.
- Set the frozen freezer bowl on the base, place the mixing arm inside with the circle side up, and lock the lid into place by turning it clockwise.
- Select the ICE CREAM function and press Start, pouring the chilled strawberry yogurt base through the ingredient spout as soon as the machine begins turning.
- Churn for 20 to 25 minutes until the mixture reaches a thick, soft-serve texture. Freeze in an airtight container for two hours for a firmer result before serving.
Fruit Preparation Tips
Straining the strawberry puree through a fine mesh sieve removes seeds and gives a smoother finished texture. Using very ripe strawberries cuts down on how much added sugar the recipe actually needs.
19. Chocolate Frozen Yogurt
⏱ Time
Prep Time: 10 minutes
Churn Time: 25 minutes
Total: 35 minutes (plus 2 hours freezing time for firmer texture)
Servings: 6
Cocoa powder whisked into a yogurt base creates a tangy, chocolate-forward dessert that feels a little lighter than a full ice cream version. The slight tartness from the yogurt actually works well against the richness of the cocoa.
Ingredients
- 2 cups plain Greek yogurt
- 1 cup heavy cream
- 3/4 cup granulated sugar
- 1/3 cup unsweetened cocoa powder
- 1 teaspoon vanilla extract
- Pinch of salt
Instructions
- Whisk the Greek yogurt and heavy cream together in a mixing bowl until smooth and fully combined. Set this mixture aside for a moment.
- In a separate small bowl, whisk the sugar and cocoa powder together to break up any clumps before adding them to the yogurt mixture. This step keeps the cocoa from clumping once it’s combined with the wet ingredients.
- Whisk the cocoa mixture, vanilla extract, and salt into the yogurt base until everything is evenly blended and no dry streaks remain. Cover and refrigerate for at least one hour.
- Place the frozen freezer bowl on the base, set the mixing arm inside with the circle side facing up, and lock the lid by turning it clockwise.
- Select the ICE CREAM function, press Start, and pour the chilled chocolate yogurt base through the ingredient spout right away.
- Churn for 20 to 25 minutes until the mixture thickens to a soft-serve consistency throughout. Freeze in an airtight container for two hours for a firmer, scoopable texture.
How to Get a Creamy Texture
Whisking the cocoa powder with sugar first, rather than adding it directly to the wet ingredients, prevents small dry clumps from forming in the finished base. A full hour of chilling before churning also helps the mixture freeze more smoothly.
How to Store Cuisinart Homemade Ice Cream
1. Choose the Right Storage Container
Use an airtight, freezer-safe container for any leftover ice cream, sorbet, or frozen yogurt. A shallow, wide container works better than a tall, narrow one, since it freezes more evenly and keeps large ice crystals from forming in the center.
2. How Long Does Homemade Ice Cream Last?
Homemade frozen desserts generally taste best within one to two weeks of churning. The texture stays smooth for the first several days, then gradually becomes a bit icier and firmer the longer it sits in the freezer.
3. How to Soften Frozen Ice Cream Before Serving
Let the container sit at room temperature for about five to ten minutes before scooping, which softens the texture just enough for easy serving. Avoid leaving it out much longer than that, since it can start melting around the edges and lose its shape.
Conclusion
Nineteen flavors give plenty of room to experiment, from simple vanilla and chocolate to fruit-based sorbets and tangy frozen yogurts.
The same machine handles ice cream, gelato, frozen yogurt, and sorbet, all with the same basic setup and just a different function selected on the control panel.
Start with a simple flavor like classic vanilla to get comfortable with the timing and texture, then branch out into fruit flavors, chocolate combinations, or recipes with cookie and candy mix-ins folded in.




Pingback: 25 Best Cuisinart 1 Pint Wonder Ice Cream Maker Recipes for Small Batches -