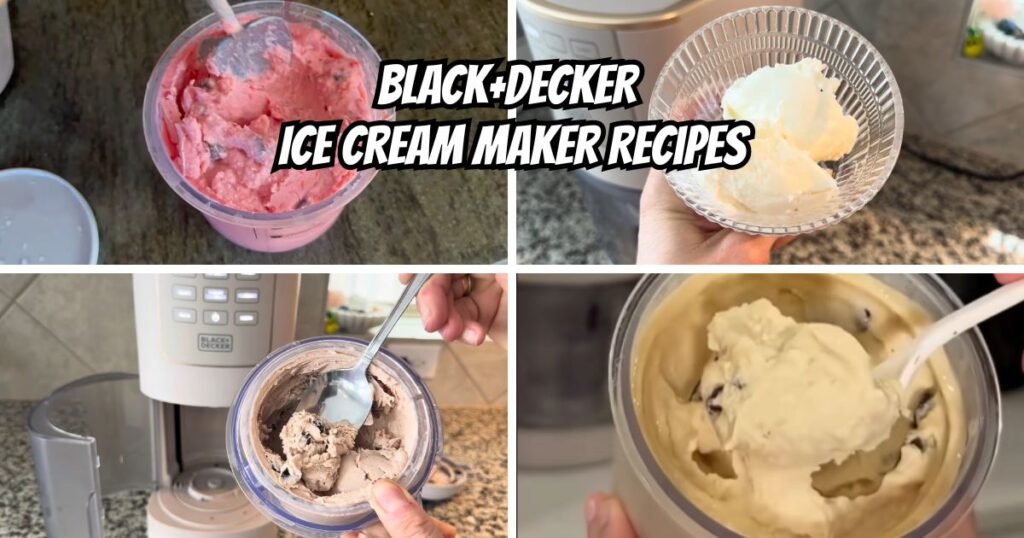
Making frozen desserts at home used to sound like a big project. Not anymore. The BLACK+DECKER Ice Cream Maker turns this into something simple and low stress.
This little machine has automatic programs built in. One button gives you classic ice cream. Another button gives you lite ice cream, sorbet, gelato, frozen yogurt, or a thick milkshake. You pick the treat, load the ingredients, and let the machine do the mixing and freezing.
Homemade recipes also give you full control. You choose the fruit, the chocolate, the cookies, the nuts, and even lighter swaps for sugar or dairy. Nothing hides in a store-bought tub.
This guide brings together more than 20 BLACK+DECKER Ice Cream Maker recipes for people who are just starting out and for anyone who already loves making frozen desserts. Grab a spoon and get ready to freeze up something good.
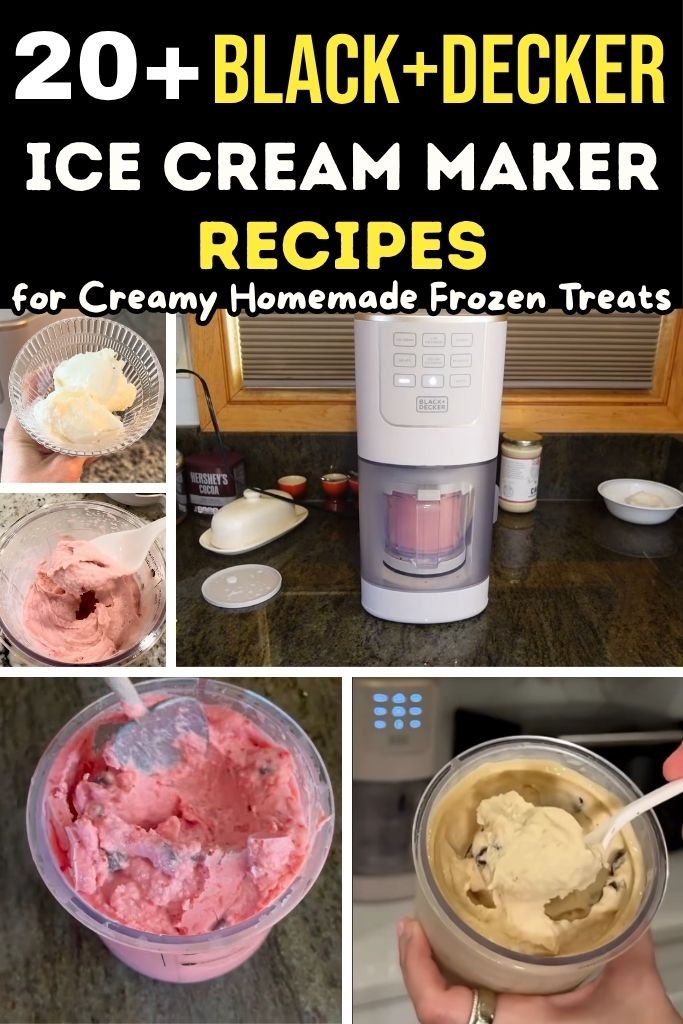
Why Choose the BLACK+DECKER Ice Cream Maker for Homemade Desserts?
Home cooks pick this machine for a few clear reasons. Here is a quick rundown.
1. Simple, compact design. The unit sits neatly on a counter and does not take up much space. It fits in most kitchens without trouble.
2. Easy operation. A few buttons control the whole machine. Load the bowl, choose a setting, and press start.
3. Smart bowl system. The inner bowl holds the mixture, and the outer bowl supports it during churning. A mixing shaft and paddle spin inside to blend and freeze the mixture at the same time.
4. Smooth, creamy results. The paddle keeps ice crystals small, so the final texture stays soft and scoopable instead of hard and icy.
5. Multiple programs for multiple treats. Each auto setting adjusts speed and timing for a specific dessert, so a fruit sorbet and a custard-based gelato both come out right.
6. No complicated steps. There is no need to pre-freeze bulky bowls overnight in most models, and cleanup only involves a few removable parts.
Understanding BLACK+DECKER Ice Cream Maker Functions Before Making Recipes
Before starting any recipe, it helps to know what each button actually does. This section breaks down every function in plain terms.
Ice Cream Function for Classic Frozen Desserts
The ICE CREAM setting is built for traditional, indulgent recipes. It takes dairy or dairy alternatives and turns them into a thick, creamy, scoopable dessert. This is the setting to use for old-fashioned favorites.
Best recipes to use with this function:
- Vanilla ice cream
- Chocolate ice cream
- Strawberry ice cream
Lite Ice Cream Function for Healthier Options
The LITE ICE CREAM setting works for anyone who wants a lighter dessert. It handles recipes made with lower sugar, lower fat, sugar substitutes, keto ingredients, or paleo-friendly swaps without losing a creamy finish.
Recipe examples:
- Low-sugar vanilla ice cream
- Protein ice cream
- Sugar-free chocolate ice cream
Sorbet Function for Fruity Frozen Treats
The SORBET setting is made for fruit. Recipes with high water and sugar content, like mashed or pureed fruit, freeze into a smooth, refreshing treat under this program. There is no dairy needed at all.
Highlight options:
- Mango sorbet
- Raspberry sorbet
- Lemon sorbet
Gelato and Frozen Yogurt Functions for Creamy Desserts
The GELATO setting is built for custard-style bases, the kind used in Italian desserts. Traditional ice cream usually leans on heavy cream for richness, while gelato uses egg yolks and milk to build a denser, silkier texture with less air churned into it.
The YOGURT ICE CREAM setting turns everyday yogurt into a frozen treat. For the best results, use full-fat yogurt with added sugar. Nonfat yogurt or yogurt with no added sugar will not freeze or set correctly in this machine.
Tips for Getting the Creamiest Results with BLACK+DECKER Ice Cream Maker
A few small habits make a noticeable difference in texture. Here are the main ones worth remembering.
- Prepare ingredients properly before processing.
- Chill every ingredient before adding it to the bowl. Cold mixtures churn faster and freeze more evenly.
- Use good quality dairy or a trusted dairy alternative, since the base ingredient shapes the final flavor and texture.
- Balance sugar and liquid carefully. Too much sugar keeps a mixture from firming up, and too little makes it grainy.
- How to use the mix-in function correctly.
- The MIX IN setting folds in cookies, candies, nuts, cereal, or frozen fruit pieces after the base dessert finishes processing.
- Use a spoon to create a hole about one and a half inches wide that reaches down to the bottom of the inner bowl, then add the chopped mix-ins to that hole before running the MIX IN function again.
- When to use the RESPIN function.
- RESPIN smooths out texture after one of the main programs finishes running.
- It works well when the mixture drops below negative seven degrees Fahrenheit and turns crumbly rather than creamy. Do not run RESPIN before using MIX IN.
- Cleaning and maintaining your BLACK+DECKER Ice Cream Maker.
- Wash all removable parts, including the inner bowl, outer bowl, lids, and paddle, after every use.
- Keep the base unit dry at all times, since it houses the motor and electronics.
- Store the machine in a cool, dry spot with the parts fully dried to avoid odors or mold between uses.
20+ BLACK+DECKER Ice Cream Maker Recipes
Here is the full recipe collection, organized by dessert type. Each one lists prep time, churn time, servings, ingredients, and clear step-by-step instructions.
1. Homemade Vanilla Bean Ice Cream
⏱ Time Prep Time: 10 minutes Churning time: 25 minutes Total: 35 minutes plus 2 hours freezing Servings: 6
This is the recipe every beginner should try first. It uses the ICE CREAM function and only a handful of pantry staples, yet it turns out rich, smooth, and full of real vanilla flavor. It also works as a base for almost any mix-in you like later on.
Ingredients
- 2 cups heavy cream
- 1 cup whole milk
- 3/4 cup granulated sugar
- 2 teaspoons vanilla extract
- 1 vanilla bean, seeds scraped (optional)
Instructions
In a mixing bowl, whisk the heavy cream, whole milk, and sugar together until the sugar dissolves completely. This usually takes about two minutes of steady whisking.
Stir in the vanilla extract and the scraped vanilla bean seeds, mixing until the tiny flecks spread evenly through the liquid.
Cover the bowl and refrigerate the mixture for at least one hour, or overnight for a deeper flavor.
Pour the chilled mixture into the inner bowl of the ice cream maker, making sure not to fill it past the max line.
Lock the inner bowl into the outer bowl, close the lid, and select the ICE CREAM function on the control panel.
Let the machine run its full cycle, which usually takes around 25 minutes, until the mixture thickens into a soft-serve texture.
Transfer the finished ice cream into a freezer-safe container and smooth the top with a spatula.
Freeze for at least two hours for a firmer, scoopable texture before serving.
2. Chocolate Fudge Ice Cream
⏱ Time Prep Time: 10 minutes Churning time: 25 minutes Total: 35 minutes plus 2 hours freezing Servings: 6
Deep cocoa flavor makes this one feel like a treat from a real scoop shop. Melted chocolate adds a fudgy richness that plain cocoa powder alone cannot match, and chopped chocolate chunks can be folded in at the end using the MIX IN function.
Ingredients
- 2 cups heavy cream
- 1 cup whole milk
- 2/3 cup granulated sugar
- 1/2 cup unsweetened cocoa powder
- 4 ounces semisweet chocolate, melted and cooled
- 1 teaspoon vanilla extract
- 1/2 cup chocolate chunks (optional mix-in)
Instructions
Whisk the cocoa powder into the milk first, breaking up any clumps before adding the other ingredients.
Add the heavy cream, sugar, and vanilla extract, then whisk everything together until smooth and fully combined.
Slowly pour in the melted chocolate while whisking, so it blends in without hardening into small bits.
Chill the mixture in the refrigerator for at least one hour before churning.
Pour the cold mixture into the inner bowl and lock it into place inside the outer bowl.
Select the ICE CREAM function and let the machine run its complete cycle.
When the base looks thick and glossy, spoon it into a container. Create a hole down the center for the chocolate chunks, then run the MIX IN function to fold them through.
Freeze for two hours before scooping and serving.
3. Strawberry Cheesecake Ice Cream
⏱ Time Prep Time: 15 minutes Churning time: 25 minutes Total: 40 minutes plus 2 hours freezing Servings: 6
Fresh strawberries bring natural sweetness, and cream cheese adds that familiar cheesecake tang. Graham cracker pieces folded in near the end give every bite a bit of crunch alongside the fruity, creamy base.
Ingredients
- 1 1/2 cups fresh strawberries, chopped
- 1/3 cup granulated sugar (for the strawberries)
- 1 1/2 cups heavy cream
- 1/2 cup whole milk
- 4 ounces cream cheese, softened
- 1/2 cup granulated sugar (for the base)
- 1 teaspoon lemon juice
- 3/4 cup crushed graham crackers
Instructions
Toss the chopped strawberries with 1/3 cup sugar in a small bowl, then let them sit for 20 minutes so they release their juices.
Mash about half of the strawberry mixture with a fork, leaving the rest in small chunks for texture.
In a separate bowl, beat the softened cream cheese until smooth, then slowly whisk in the heavy cream and milk.
Add the remaining 1/2 cup sugar and the lemon juice, whisking until the mixture looks silky with no lumps.
Fold the strawberry mixture into the cream cheese base, then chill everything for at least one hour.
Pour the chilled mixture into the inner bowl and select the ICE CREAM function.
Once the cycle finishes, spoon the ice cream into a container, create a center hole, add the crushed graham crackers, and run the MIX IN function to fold them in.
Freeze for two hours before serving.
4. Cookies and Cream Ice Cream
⏱ Time Prep Time: 10 minutes Churning time: 25 minutes Total: 35 minutes plus 2 hours freezing Servings: 6
This one leans on a simple vanilla base and a generous amount of crushed chocolate sandwich cookies. The MIX IN function keeps the cookie pieces distributed evenly instead of clumping in one spot.
Ingredients
- 2 cups heavy cream
- 1 cup whole milk
- 3/4 cup granulated sugar
- 1 1/2 teaspoons vanilla extract
- 10 chocolate sandwich cookies, roughly crushed
Instructions
Whisk the heavy cream, whole milk, sugar, and vanilla extract together until the sugar fully dissolves.
Cover and chill the mixture for at least one hour, since a cold base churns faster and smoother.
Pour the chilled base into the inner bowl and lock it into the outer bowl.
Select the ICE CREAM function and allow the machine to complete its full churning cycle.
Check the texture near the end. It should look thick and hold soft peaks when a spoon is dragged through it.
Spoon the finished ice cream into a container and press a hole down the middle with a spoon.
Add the crushed cookies into the hole, then run the MIX IN function so the pieces spread evenly through the batch.
Freeze for two hours before scooping.
5. Mint Chocolate Chip Ice Cream
⏱ Time Prep Time: 10 minutes Churning time: 25 minutes Total: 35 minutes plus 2 hours freezing Servings: 6
A cool mint base pairs with small chocolate chips for a homemade take on a classic scoop shop flavor. Fresh mint extract keeps the flavor clean instead of overly sweet or artificial tasting.
Ingredients
- 2 cups heavy cream
- 1 cup whole milk
- 3/4 cup granulated sugar
- 1 teaspoon peppermint extract
- Few drops green food coloring (optional)
- 3/4 cup mini chocolate chips
Instructions
Whisk the heavy cream, whole milk, and sugar together until the sugar has fully dissolved into the liquid.
Stir in the peppermint extract a little at a time, tasting as needed since mint extract can turn overpowering fast.
Add the food coloring when using it, mixing until the color looks even throughout.
Chill the mixture for at least one hour before churning.
Pour the cold base into the inner bowl and select the ICE CREAM function.
Let the machine run its complete cycle until the mixture thickens into a soft-serve consistency.
Transfer to a container, create a center hole, add the mini chocolate chips, and run the MIX IN function to distribute them.
Freeze for two hours before serving.
6. Mango Sorbet
⏱ Time Prep Time: 10 minutes Churning time: 20 minutes Total: 30 minutes plus 1 hour freezing Servings: 4
Ripe mango brings natural sweetness and a smooth, almost creamy texture without any dairy at all. This one uses the SORBET function and works well as a light dessert after a heavy meal.
Ingredients
- 3 cups ripe mango, peeled and chopped
- 1/2 cup granulated sugar
- 2 tablespoons lemon juice
- 1/4 cup water
Instructions
Blend the mango, sugar, lemon juice, and water together in a blender until completely smooth, with no visible chunks remaining.
Taste the puree and adjust sweetness with a bit more sugar, since mango ripeness varies from fruit to fruit.
Strain the mixture through a fine mesh sieve for a very smooth texture, though this step can be skipped.
Chill the puree in the refrigerator for at least 30 minutes before churning.
Pour the chilled puree into the inner bowl, making sure it sits below the max fill line.
Select the SORBET function and let the machine run its complete cycle.
Check the texture toward the end. It should look thick, smooth, and hold its shape when scooped.
Transfer to a container and freeze for one hour for a firmer scoop.
7. Strawberry Lemon Sorbet
⏱ Time Prep Time: 10 minutes Churning time: 20 minutes Total: 30 minutes plus 1 hour freezing Servings: 4
Sweet strawberries and bright lemon juice balance each other out in this warm-weather favorite. The combination tastes light and refreshing, perfect for a quick dessert on a hot afternoon.
Ingredients
- 3 cups fresh strawberries, hulled
- 1/2 cup granulated sugar
- 3 tablespoons lemon juice
- 1 teaspoon lemon zest
Instructions
Blend the strawberries, sugar, and lemon juice together until the mixture turns completely smooth.
Stir in the lemon zest by hand, which keeps small bright flecks visible in the final texture.
Taste the puree and add a little more sugar or lemon juice depending on how tart the strawberries are.
Chill the mixture for 30 minutes in the refrigerator before pouring it into the machine.
Pour the chilled puree into the inner bowl and select the SORBET function.
Allow the machine to run its complete cycle, watching for a thick, smooth finish near the end.
Spoon the finished sorbet into a container, pressing down gently to remove air pockets.
Freeze for one hour before serving for the best scoopable texture.
8. Raspberry Sorbet
⏱ Time Prep Time: 10 minutes Churning time: 20 minutes Total: 30 minutes plus 1 hour freezing Servings: 4
Raspberries give this sorbet a bold color and a bright, slightly tart flavor. Straining out the seeds creates a smoother finish, though this step can be skipped for a more rustic texture.
Ingredients
- 3 cups fresh or frozen raspberries
- 1/2 cup granulated sugar
- 2 tablespoons lemon juice
- 1/4 cup water
Instructions
Combine the raspberries, sugar, lemon juice, and water in a blender, then blend until smooth.
Pour the puree through a fine mesh sieve to remove the seeds, pressing down with a spoon to push through as much liquid as possible.
Taste the strained puree and adjust the sugar depending on how tart the berries turned out.
Chill the puree for 30 minutes before churning it in the machine.
Pour the cold mixture into the inner bowl and select the SORBET function.
Let the machine run its complete cycle until the texture looks thick and holds its shape.
Spoon the finished sorbet into a container, smoothing the top with a spatula.
Freeze for one hour before serving.
9. Pineapple Coconut Sorbet
⏱ Time Prep Time: 10 minutes Churning time: 20 minutes Total: 30 minutes plus 1 hour freezing Servings: 4
Pineapple brings a tangy sweetness, and coconut milk adds a rich, tropical note without needing any dairy. This combination tastes bright and satisfying, especially during warmer months.
Ingredients
- 2 1/2 cups fresh pineapple, chopped
- 1/2 cup full-fat coconut milk
- 1/3 cup granulated sugar
- 1 tablespoon lime juice
Instructions
Blend the pineapple, coconut milk, sugar, and lime juice together until the mixture becomes completely smooth.
Taste the blended mixture and add more sugar depending on how sweet the pineapple naturally is.
Chill the mixture in the refrigerator for at least 30 minutes before churning.
Pour the chilled mixture into the inner bowl, keeping it below the max fill line.
Select the SORBET function on the control panel and let the cycle run completely.
Watch for a thick, creamy-looking finish near the end of the cycle.
Transfer the sorbet into a container and press down gently to smooth the surface.
Freeze for one hour before scooping and serving.
10. Watermelon Sorbet
⏱ Time Prep Time: 10 minutes Churning time: 20 minutes Total: 30 minutes plus 1 hour freezing Servings: 4
Watermelon makes an especially light and refreshing sorbet, perfect for warm days. Since the fruit already holds so much natural water, this recipe needs very little added liquid.
Ingredients
- 4 cups seedless watermelon, cubed
- 1/3 cup granulated sugar
- 2 tablespoons lime juice
- Pinch of salt
Instructions
Blend the watermelon cubes, sugar, lime juice, and salt together until completely smooth.
Taste the mixture, keeping in mind that watermelon sweetness can vary quite a bit between fruits.
Pour the mixture through a fine mesh sieve for a smoother texture, though this step is optional.
Chill the strained mixture for 30 minutes in the refrigerator before churning.
Pour the cold mixture into the inner bowl and select the SORBET function.
Allow the machine to run its complete cycle, checking near the end for a thick, smooth texture.
Spoon the finished sorbet into a container and smooth the top with a spatula.
Freeze for one hour before serving for the best texture.
11. Low-Sugar Vanilla Lite Ice Cream
⏱ Time Prep Time: 10 minutes Churning time: 25 minutes Total: 35 minutes plus 2 hours freezing Servings: 6
This version swaps most of the sugar for a sugar substitute, making it a solid choice for anyone watching their sugar intake. The LITE ICE CREAM function is built specifically for recipes like this one.
Ingredients
- 2 cups heavy cream
- 1 cup unsweetened almond milk
- 1/2 cup granulated sugar substitute (erythritol blend)
- 2 teaspoons vanilla extract
- Pinch of salt
Instructions
Whisk the heavy cream, almond milk, and sugar substitute together until the mixture looks fully combined.
Stir in the vanilla extract and a pinch of salt, mixing until everything blends smoothly.
Chill the mixture for at least one hour in the refrigerator before churning.
Pour the chilled base into the inner bowl and lock it into the outer bowl.
Select the LITE ICE CREAM function and let the machine complete its full cycle.
Check the texture near the end, since sugar substitutes can churn a little differently than regular sugar.
Transfer the finished mixture into a container and smooth the top.
Freeze for two hours before serving for a firmer, scoopable result.
12. Chocolate Protein Ice Cream
⏱ Time Prep Time: 10 minutes Churning time: 25 minutes Total: 35 minutes plus 2 hours freezing Servings: 4
Protein powder turns this chocolate treat into a snack that fits nicely after a workout. It still tastes rich and chocolatey, just with a bit more staying power than a regular scoop.
Ingredients
- 1 1/2 cups unsweetened almond milk
- 1/2 cup heavy cream
- 2 scoops chocolate protein powder
- 2 tablespoons cocoa powder
- 3 tablespoons honey or sugar substitute
Instructions
Whisk the almond milk and heavy cream together in a bowl until fully blended.
Add the protein powder and cocoa powder gradually, whisking constantly to avoid clumps forming.
Stir in the honey or sugar substitute, tasting and adjusting sweetness as needed.
Chill the mixture for at least one hour before pouring it into the machine.
Pour the chilled base into the inner bowl and select the LITE ICE CREAM function.
Let the cycle run completely, checking that the texture thickens into a soft, scoopable consistency.
Spoon the finished mixture into a container and smooth the surface.
Freeze for two hours before serving.
13. Keto-Friendly Peanut Butter Ice Cream
⏱ Time Prep Time: 10 minutes Churning time: 25 minutes Total: 35 minutes plus 2 hours freezing Servings: 6
Natural peanut butter brings rich flavor and healthy fats, while a low-carb sweetener keeps this recipe friendly for a keto lifestyle. It tastes indulgent despite the lighter ingredient list.
Ingredients
- 2 cups heavy cream
- 1/2 cup unsweetened almond milk
- 1/2 cup natural peanut butter
- 1/2 cup low-carb sweetener
- 1 teaspoon vanilla extract
Instructions
Whisk the heavy cream and almond milk together in a large bowl until fully combined.
Add the peanut butter and whisk vigorously until it dissolves smoothly into the liquid with no lumps.
Stir in the low-carb sweetener and vanilla extract, mixing until everything blends evenly.
Chill the mixture for at least one hour before churning.
Pour the chilled base into the inner bowl and select the LITE ICE CREAM function.
Allow the machine to complete its cycle, checking that the texture looks thick and creamy near the end.
Transfer the mixture into a container and smooth the top with a spatula.
Freeze for two hours before scooping and serving.
14. Banana Lite Ice Cream
⏱ Time Prep Time: 10 minutes Churning time: 25 minutes Total: 35 minutes plus 2 hours freezing Servings: 4
Ripe bananas bring natural sweetness on their own, so this recipe needs very little added sugar. It tastes creamy and mild, making it a good option for kids or for anyone easing into lighter desserts.
Ingredients
- 3 very ripe bananas, mashed
- 1 cup whole milk
- 1/2 cup plain yogurt
- 2 tablespoons honey
- 1/2 teaspoon vanilla extract
Instructions
Mash the ripe bananas in a bowl until mostly smooth, with only a few small lumps remaining.
Whisk in the whole milk, yogurt, honey, and vanilla extract until the mixture looks even and well combined.
Chill the mixture for at least 30 minutes in the refrigerator before churning.
Pour the chilled base into the inner bowl and select the LITE ICE CREAM function.
Let the machine run its complete cycle, checking near the end for a thick, soft-serve texture.
Spoon the finished mixture into a container and smooth the surface with a spatula.
Freeze for two hours before serving for a firmer scoop.
Let the container sit at room temperature for a few minutes before scooping, since banana-based bases can freeze harder than dairy ones.
15. Classic Vanilla Gelato
⏱ Time Prep Time: 20 minutes Churning time: 25 minutes Total: 45 minutes plus 2 hours freezing Servings: 6
This custard-style dessert uses egg yolks to build a dense, silky texture that traditional ice cream does not have. The GELATO function is designed exactly for bases like this one.
Ingredients
- 2 cups whole milk
- 1/2 cup heavy cream
- 4 large egg yolks
- 2/3 cup granulated sugar
- 1 teaspoon vanilla extract
Instructions
Heat the whole milk and heavy cream together in a saucepan over medium heat until it just starts to steam, without letting it boil.
In a separate bowl, whisk the egg yolks and sugar together until the mixture turns pale and slightly thick.
Slowly pour a small amount of the hot milk into the egg mixture while whisking constantly, which warms the eggs without scrambling them.
Pour the egg mixture back into the saucepan with the rest of the milk, stirring constantly over low heat until the custard thickens enough to coat the back of a spoon.
Remove the custard from the heat and stir in the vanilla extract, then strain it through a fine mesh sieve into a clean bowl.
Chill the custard completely in the refrigerator, ideally for a few hours or overnight.
Pour the chilled custard into the inner bowl and select the GELATO function.
Let the machine run its complete cycle, then transfer the gelato into a container and freeze for two hours before serving.
16. Chocolate Hazelnut Gelato
⏱ Time Prep Time: 20 minutes Churning time: 25 minutes Total: 45 minutes plus 2 hours freezing Servings: 6
Chocolate hazelnut spread melts right into the custard base, giving this gelato a rich, nutty flavor in every bite. It tastes like a dessert straight from an Italian gelato shop.
Ingredients
- 2 cups whole milk
- 1/2 cup heavy cream
- 4 large egg yolks
- 1/2 cup granulated sugar
- 1/2 cup chocolate hazelnut spread
- 1/4 cup cocoa powder
Instructions
Heat the milk and heavy cream together in a saucepan over medium heat until steaming, without letting it come to a full boil.
Whisk the egg yolks and sugar together in a separate bowl until the mixture turns pale and thick.
Slowly whisk a small amount of the hot milk into the egg mixture to warm it gradually before combining everything back in the saucepan.
Stir the mixture constantly over low heat until it thickens enough to coat a spoon, then remove it from the heat.
Whisk in the chocolate hazelnut spread and cocoa powder until the custard turns smooth and fully blended.
Strain the custard through a fine mesh sieve, then chill it in the refrigerator for a few hours or overnight.
Pour the chilled custard into the inner bowl and select the GELATO function, letting the machine run its complete cycle.
Transfer the gelato into a container and freeze for two hours before serving.
17. Coffee Gelato
⏱ Time Prep Time: 20 minutes Churning time: 25 minutes Total: 45 minutes plus 2 hours freezing Servings: 6
Strong brewed espresso gives this gelato a bold coffee flavor that pairs perfectly with the dense, custard-style texture. It works well as an after-dinner dessert alongside a small biscuit.
Ingredients
- 1 3/4 cups whole milk
- 1/2 cup heavy cream
- 1/3 cup finely ground espresso beans
- 4 large egg yolks
- 2/3 cup granulated sugar
Instructions
Heat the milk and heavy cream together with the ground espresso in a saucepan over medium heat until steaming.
Remove the saucepan from the heat and let the espresso steep in the warm milk for about 10 minutes to build a strong flavor.
Strain the mixture through a fine mesh sieve to remove the coffee grounds, then return the liquid to the saucepan and reheat gently.
Whisk the egg yolks and sugar together in a separate bowl until pale and slightly thick.
Slowly whisk a small amount of the warm coffee milk into the egg mixture, then pour everything back into the saucepan together.
Stir constantly over low heat until the custard thickens enough to coat the back of a spoon.
Chill the custard fully in the refrigerator, then pour it into the inner bowl and select the GELATO function.
Let the machine complete its cycle, then freeze the gelato for two hours before serving.
18. Strawberry Frozen Yogurt
⏱ Time Prep Time: 10 minutes Churning time: 20 minutes Total: 30 minutes plus 1 hour freezing Servings: 4
Full-fat yogurt with added sugar creates the creamiest results with this machine, and fresh strawberries add natural sweetness and color. This recipe uses the YOGURT ICE CREAM function built into the machine.
Ingredients
- 2 cups full-fat plain yogurt (with added sugar)
- 1 1/2 cups fresh strawberries, chopped
- 1/3 cup granulated sugar
- 1 tablespoon lemon juice
Instructions
Toss the chopped strawberries with the sugar in a small bowl and let the mixture sit for about 15 minutes to draw out the juices.
Blend the strawberry mixture along with the lemon juice until it turns mostly smooth, leaving a few small chunks for a chunkier texture.
Whisk the strawberry puree into the full-fat yogurt until fully combined and evenly colored.
Chill the mixture for at least 30 minutes in the refrigerator before churning.
Pour the chilled mixture into the inner bowl, keeping it below the max fill line.
Select the YOGURT ICE CREAM function and let the machine run its complete cycle.
Check the texture near the end. It should look thick and creamy, similar to soft serve.
Transfer to a container and freeze for one hour before serving.
19. Chocolate Cookie Milkshake
⏱ Time Prep Time: 5 minutes Churning time: 5 minutes Total: 10 minutes Servings: 2
This thick milkshake comes together fast using either homemade or store-bought ice cream as a base. Crushed cookies blended right in give every sip a bit of texture alongside the chocolate flavor.
Ingredients
- 2 cups chocolate ice cream (homemade or store-bought)
- 1/2 cup whole milk
- 6 chocolate sandwich cookies, roughly crushed
- Whipped cream for topping (optional)
Instructions
Add the chocolate ice cream and whole milk into the inner bowl of the machine.
Add the crushed cookies on top of the ice cream and milk, distributing them evenly over the surface.
Select the MILKSHAKE function on the control panel and let the machine run its short cycle.
Check the thickness partway through, since milkshakes can vary depending on how firm the starting ice cream was.
Once the cycle finishes, pour the milkshake into two tall glasses.
Top with whipped cream, and add a few extra cookie crumbs for looks.
Serve right away with a wide straw or a long spoon, since thick milkshakes can be tricky to sip through a narrow one.
20. Peanut Butter Banana Milkshake
⏱ Time Prep Time: 5 minutes Churning time: 5 minutes Total: 10 minutes Servings: 2
Creamy peanut butter and ripe banana combine for a milkshake that tastes rich and a little nutty, almost like a dessert version of a classic sandwich. It comes together in minutes with almost no cleanup.
Ingredients
- 2 cups vanilla ice cream (homemade or store-bought)
- 1/2 cup whole milk
- 1 ripe banana, sliced
- 3 tablespoons peanut butter
Instructions
Add the vanilla ice cream and whole milk into the inner bowl of the machine.
Drop in the sliced banana and peanut butter on top of the ice cream and milk.
Select the MILKSHAKE function and let the machine run its short cycle until everything blends together.
Check partway through to see that the banana has broken down and blended smoothly into the mixture.
Once finished, pour the milkshake into two glasses, scraping the bowl to get every last bit.
Add a drizzle of extra peanut butter on top for looks, when wanted.
Serve immediately while the texture stays thick and cold.
Recipe Variations and Customization Ideas
This machine works well past the recipes listed above. Here are a few directions worth trying.
- Dairy-free ideas. Swap heavy cream and milk for full-fat coconut milk, cashew milk, or oat milk. These alternatives still churn into a creamy texture under the ICE CREAM or LITE ICE CREAM function.
- Fruit-based variations. Almost any soft fruit works in the SORBET function, including peaches, blackberries, or a mix of tropical fruits blended together.
- Chocolate lover variations. Add extra cocoa powder, chopped dark chocolate, or a swirl of chocolate syrup right before freezing for a deeper chocolate flavor.
- Kid-friendly mix-ins. Rainbow sprinkles, mini marshmallows, crushed pretzels, or small candy pieces all work well folded in using the MIX IN function.
- Seasonal flavors. Pumpkin spice, peppermint, apple cinnamon, and holiday cookie ice cream all make good options during colder months, using warm spices or crushed holiday cookies as the main flavor base.
How to Store Homemade BLACK+DECKER Ice Cream
Storing a finished batch correctly keeps the texture soft and the flavor fresh for longer.
- Best containers to use. Shallow, airtight containers work better than tall narrow ones, since less air touches the surface and ice crystals form more slowly.
- How long it stays fresh. Homemade ice cream, sorbet, and gelato usually taste best within one to two weeks, since there are no preservatives holding back ice crystal growth.
- Tips for keeping it scoopable. Press a piece of plastic wrap directly onto the surface before sealing the lid, which blocks air and slows down freezer burn.
- When to use RESPIN after freezing. When a batch sits in the freezer for a while and turns hard or crumbly instead of creamy, running the RESPIN function for a short cycle can bring back a smoother, scoopable texture.
Conclusion
This machine turns homemade frozen desserts into something anyone can manage in an afternoon.
Between the ICE CREAM, LITE ICE CREAM, SORBET, GELATO, YOGURT ICE CREAM, and MILKSHAKE settings, there is a program suited for almost any craving.
Trying new flavors and mix-ins might feel intimidating at first glance. It’s actually quite the opposite!
These BLACK+DECKER Ice Cream Maker recipes make it simple to build creamy, homemade treats one batch at a time, right from a home kitchen.