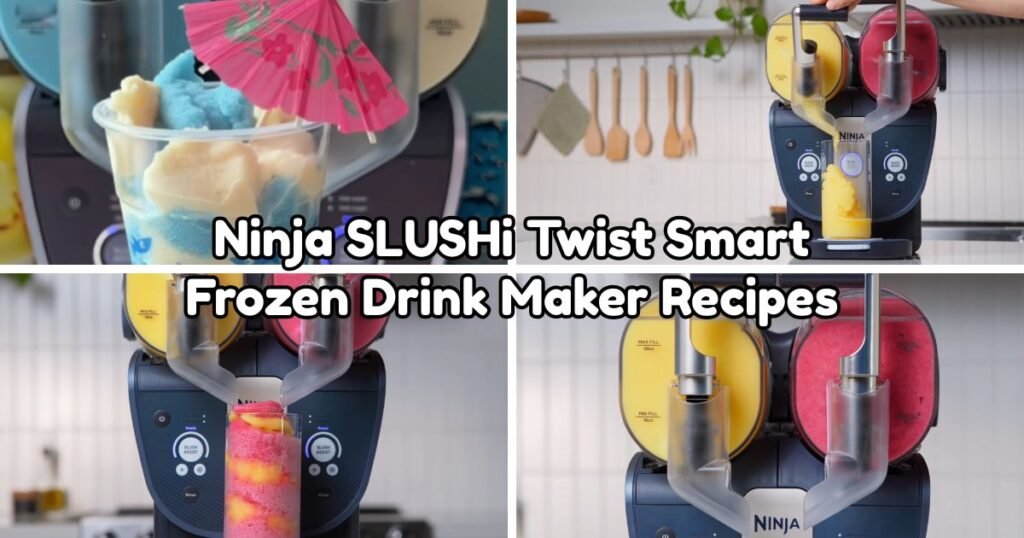
Making cold drinks at home can turn into messy work fast. Crushed ice, loud blenders, and sticky counters keep many people from bothering with frozen treats at all.
The Ninja SLUSHi Twist Smart Frozen Drink Maker changes that picture completely.
This machine freezes your drink mixture right inside the vessel. No ice cubes, no blender, no sticky cleanup. You pour in your mixture, pick a setting, and the machine handles the rest on its own.
Making frozen drinks at home comes with real perks. You control the sugar, the flavor, and the strength of every glass poured. Store-bought slush drinks often carry extra dyes and chemicals, but a homemade batch skips all of that.
With this machine, you can make slushies, frozen cocktails, milkshakes, frozen coffee, and fruit drinks any day you want, without a store trip or a long wait for results.
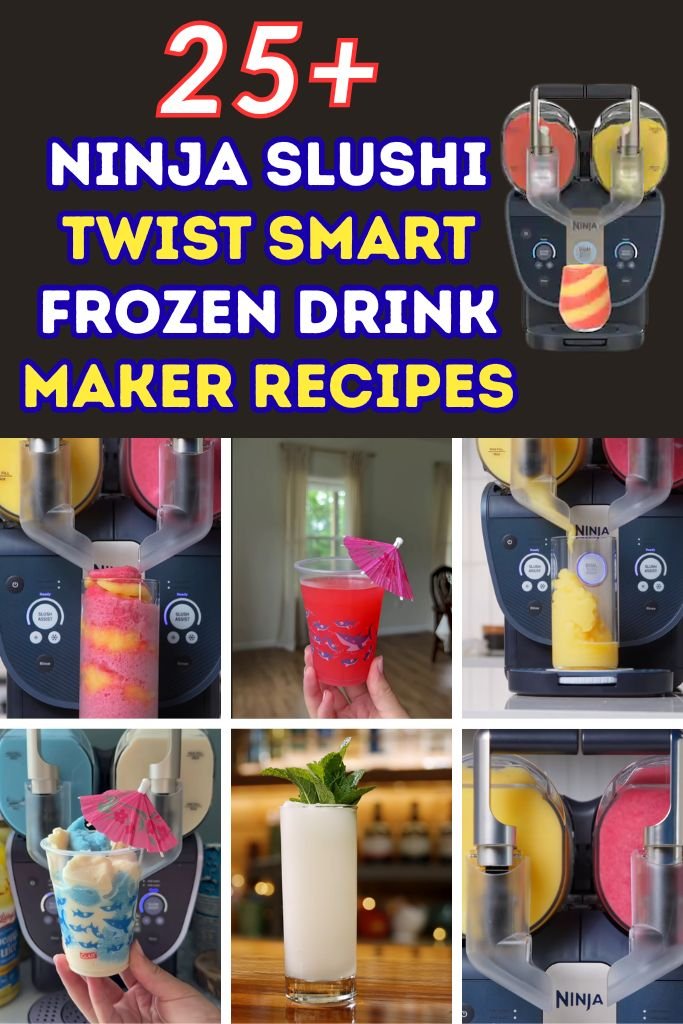
This guide holds more than 25 Ninja SLUSHi Twist Smart Frozen Drink Maker recipes, made for every season and every occasion. From bright summer fruit slush to cozy holiday drinks, there is something here for each craving.
How the Ninja SLUSHi Twist Smart Frozen Drink Maker Works
Here is a quick look at how this machine turns a simple liquid mix into a frozen drink:
- Pour your prepared drink mixture into the vessel.
- Pick the program setting that matches your recipe.
- The machine freezes the mixture on its own, with no extra work from you.
- Your drink stays ready and cold until the moment you serve it.
No Ice Needed
Most home slush makers ask you to crush ice before starting. This machine works in a different way. It freezes the liquid itself using its own cooling system, so there are no ice trays, no bags of ice, and no watery drinks caused by melting cubes.
Smart SlushAssist™ Technology
The SlushAssist™ setting reads your drink mixture and adjusts the freezing process based on what it senses. This works well for homemade recipes, since you don’t need to guess which program matches your mix best. The machine handles that part for you.
Two Independent Freezing Vessels
This machine holds two separate freezing vessels, and each one runs on its own program. That means you can freeze a fruity slush on one side and a creamy milkshake on the other, both at the same time, with no mixing of flavors.
Keeps Drinks Frozen Until You’re Ready to Serve
Once your drink reaches the right texture, the machine holds it there. The cooling stays active in the background, so your drink doesn’t melt into liquid while it waits on the counter for guests or family to grab a glass.
Best Ninja SLUSHi Twist Settings for Different Drinks
Picking the right setting makes a big difference in texture and flavor. Here is a simple guide to match your drink with the best program:
- Homemade recipes — use SlushAssist™
- Soda slush — use Slush
- Lemonade — use Slush
- Fruit juice — use Frozen Juice
- Frozen coffee — use Milkshake
- Chocolate milkshake — use Milkshake
- Frozen margarita — use Frozen Cocktail Max
- Piña Colada — use Frozen Cocktail
- Frozen rosé (Frosé) — use Frozen Cocktail
- Smooth frozen mocktails — use SlushAssist™
Keep in mind that drinks with more alcohol content need a stronger freezing setting, while sweeter, lighter drinks freeze well on gentler programs.
Tips for the Best Ninja SLUSHi Twist Recipes
Follow these simple tips to get smooth, well-frozen drinks every single time.
Never Add Ice
This machine freezes the liquid on its own, without any help from ice cubes. Adding ice can throw off the freezing balance and leave your drink watery instead of smooth and thick.
Stay Between the MIN and MAX Fill Lines
Pouring too much or too little liquid can cause overflow or lead to uneven freezing. Keep your mixture between the two fill lines marked inside each vessel for the best result.
Choose the Correct Program
Matching your recipe to the right preset gives you the best texture every time. A margarita mix needs a different program than a plain fruit juice slush, so check the settings guide above before you start.
Adjust the Thickness
Want a thinner drink you can sip through a straw with ease? Lower the setting a notch. Want a thick, spoonable slush instead? Raise the setting up for a colder, firmer texture.
Use Enough Natural Sugar
Sugar plays a real role in how frozen drinks form inside the machine. Without enough of it, your mixture may freeze into a solid block rather than turning into a proper slush.
Rinse Between Flavors
Run the rinse cycle before switching from one recipe to the next. This small step keeps old flavors from mixing into your next batch and keeps every drink tasting clean and fresh.
25+ Ninja SLUSHi Twist Twist Recipes
Below you will find a full collection of recipes made for this machine, sorted by drink type. Each one lists prep time, servings, ingredients, and clear step-by-step instructions.
1. Classic Cherry Slush
⏱ Time Prep Time: 10 minutes Slush time: 45–60 minutes Total: About 1 hour Servings: 4
This cherry slush brings a bold, sweet-tart flavor that feels bright with every sip. It’s a simple recipe made with cherry juice and lemon for balance, and it works great for warm afternoons, backyard parties, or a quick treat after school. The bright red color makes it a real crowd pleaser at any table.
Ingredients
- 3 cups cherry juice (not concentrate)
- 1/4 cup granulated sugar
- 2 tablespoons fresh lemon juice
- 1 cup cold water
- Fresh cherries for topping (optional)
Instructions
- In a large mixing bowl or pitcher, stir together the cherry juice, sugar, lemon juice, and cold water. Mix well until the sugar fully dissolves into the liquid.
- Taste the mixture and adjust the sweetness by adding a touch more sugar, one tablespoon at a time, based on how tart your cherry juice is.
- Pour the finished mixture into one vessel of your Ninja SLUSHi Twist. Check that the liquid sits between the MIN and MAX fill lines before moving forward.
- Select the Slush setting on the machine, since this is a regular sweet drink and not a homemade blend that needs sensing.
- Let the machine run its freezing cycle. This usually takes between 45 and 60 minutes, depending on your kitchen temperature and the sugar level in your mix.
- Check the texture partway through. Thicker mixtures with more sugar may need a longer freeze time, so give it extra minutes when needed.
- Once the slush reaches a soft, scoopable texture, it’s ready to pour. Spoon it into glasses right away for the best texture.
- Top each glass with a fresh cherry or two for a nice finishing touch, then serve right away while the texture stays at its best.
2. Blue Raspberry Slush
⏱ Time Prep Time: 8 minutes Slush time: 45–55 minutes Total: About 1 hour Servings: 4
This blue raspberry slush carries that classic carnival flavor everyone grew up loving, made right at home with simple pantry items. The deep blue color and sweet berry taste make this a hit for birthday parties, movie nights, or a treat kids and adults both enjoy on a hot day. It comes together fast with minimal prep work.
Ingredients
- 2 cups blue raspberry drink mix or syrup, prepared per package directions
- 2 cups cold water
- 1 tablespoon fresh lime juice
- 2 tablespoons granulated sugar (adjust to taste)
Instructions
- Prepare your blue raspberry drink mix according to the package directions, or combine syrup with water using your preferred ratio for a strong berry flavor.
- Stir in the fresh lime juice and sugar, mixing until everything blends smoothly into one liquid with no clumps left behind.
- Pour the mixture into a clean vessel, staying within the MIN and MAX lines printed on the inside wall of the container.
- Choose the Slush program on your machine, since this is a regular sweetened drink rather than a milkshake or juice blend.
- Start the freezing cycle and let the machine run without opening the lid, which helps the mixture freeze at an even rate throughout.
- After about 45 minutes, check the consistency through the lid window. Give it more time when the mixture still looks loose or watery.
- Once your slush reaches a bright blue, icy texture, spoon or pour it into serving cups right away for the freshest taste.
- Serve with a straw and a spoon, since this thicker slush works well sipped or scooped, depending on how firm the final texture turns out.
3. Strawberry Lemonade Slush
⏱ Time Prep Time: 10 minutes Slush time: 50–60 minutes Total: About 1 hour 10 minutes Servings: 4
Sweet strawberries meet tangy lemonade in this bright pink slush that tastes like summer in a cup. This recipe blends real fruit with fresh lemon juice for a drink that feels light, cool, and not overly sweet. It works well as an afternoon treat or a drink for backyard gatherings with friends and family.
Ingredients
- 1 1/2 cups fresh or frozen strawberries, hulled
- 2 cups prepared lemonade
- 2 tablespoons granulated sugar
- 1 tablespoon fresh lemon juice
Instructions
- Add the strawberries to a blender along with two tablespoons of the lemonade, then blend until the mixture turns smooth with no large fruit chunks left.
- Pour the blended strawberry mixture into a pitcher, then stir in the rest of the lemonade, sugar, and fresh lemon juice until fully combined.
- Taste the mixture before pouring, and add more sugar in small amounts when the lemonade tastes too tart for your liking.
- Pour the finished mixture into your Ninja SLUSHi Twist vessel, keeping the liquid level between the marked MIN and MAX lines.
- Select the Slush setting, since this drink uses regular sugar content similar to soda or basic lemonade recipes.
- Run the freezing cycle for about 50 to 60 minutes, checking the texture near the end through the lid window without opening it early.
- Once the mixture turns into a soft, pink slush with a smooth texture, it’s ready to be poured into glasses for serving.
- Garnish with a lemon slice or a small strawberry on the rim, then serve immediately while the texture stays at its coldest and best.
4. Watermelon Lime Slush
⏱ Time Prep Time: 12 minutes Slush time: 45–55 minutes Total: About 1 hour Servings: 4
This watermelon lime slush pairs juicy, sweet watermelon with a sharp splash of lime for a drink that feels fresh and cooling on hot days. The natural sugar in ripe watermelon helps this recipe freeze into a smooth texture without needing much added sweetener. It makes a light, refreshing choice for warm-weather gatherings.
Ingredients
- 3 cups seedless watermelon chunks
- 2 tablespoons fresh lime juice
- 1 tablespoon granulated sugar (optional, based on watermelon sweetness)
- 1/2 cup cold water
Instructions
- Add the watermelon chunks to a blender and blend until fully smooth, with no solid pieces of fruit left behind in the mixture.
- Pour the blended watermelon through a fine mesh strainer into a bowl, pressing gently to remove excess pulp for a smoother final texture.
- Stir in the fresh lime juice, sugar, and cold water, mixing well until the liquid looks even and fully combined.
- Taste the mixture and adjust sweetness only when needed, since ripe watermelon often carries enough natural sugar on its own.
- Pour the finished mixture into your machine’s vessel, checking that the liquid stays between the MIN and MAX fill lines marked inside.
- Choose the Frozen Juice setting, since this recipe uses a naturally sweet fruit base similar to orange juice or apple cider.
- Let the machine run its freezing cycle for about 45 to 55 minutes, checking near the end for a soft, icy texture.
- Once ready, pour into chilled glasses and serve right away, with a lime wedge on the rim for a nice added touch.
5. Peach Iced Tea Slush
⏱ Time Prep Time: 10 minutes Slush time: 50–60 minutes Total: About 1 hour 10 minutes Servings: 4
This peach iced tea slush brings together brewed tea and sweet peach flavor for a porch-worthy drink that feels smooth and satisfying. It’s a great pick for warm afternoons or family cookouts, offering a lighter, less sugary option compared to soda-based slush drinks. The peach flavor keeps this recipe smooth and rounded in every sip.
Ingredients
- 2 cups brewed black tea, cooled completely
- 1 cup peach juice or nectar
- 2 tablespoons honey or granulated sugar
- 1 tablespoon fresh lemon juice
Instructions
- Brew your black tea using your normal method, then let it cool fully to room temperature before moving on to the next step.
- In a pitcher, combine the cooled tea with the peach juice, honey or sugar, and fresh lemon juice, stirring until everything blends smoothly together.
- Taste the mixture and adjust the sweetness level, adding more honey in small amounts when the tea flavor feels too sharp or bitter.
- Pour the finished tea mixture into a clean vessel, keeping the liquid between the MIN and MAX lines printed inside the container.
- Select the Slush setting on your machine, since this drink carries a similar sugar level to standard sweetened tea recipes.
- Run the freezing cycle for about 50 to 60 minutes, checking the texture near the end through the lid window.
- Once the mixture reaches a soft, icy texture with a light peach color, it’s ready to be poured into glasses for serving.
- Garnish with a peach slice or fresh mint leaf, then serve right away while the slush holds its coldest, smoothest texture.
6. Tropical Mango Slush
⏱ Time Prep Time: 10 minutes Slush time: 45–55 minutes Total: About 1 hour Servings: 4
This tropical mango slush tastes rich, sweet, and a little tangy, thanks to fresh mango and a touch of lime. It brings warm island flavor right to your kitchen counter without needing any special tools beyond your Ninja SLUSHi Twist. This recipe works great for pool days, summer parties, or a simple afternoon pick-me-up.
Ingredients
- 3 cups ripe mango chunks, fresh or frozen
- 2 tablespoons fresh lime juice
- 1 cup cold water
- 2 tablespoons honey or granulated sugar
Instructions
- Add the mango chunks to a blender along with the lime juice, water, and honey, then blend on high speed until fully smooth.
- Pour the blended mixture through a mesh strainer when using fresh mango, since this removes any stringy bits and gives a smoother final drink.
- Taste the mixture and adjust the sweetness by adding a bit more honey, one tablespoon at a time, until the flavor feels balanced.
- Pour the finished mixture into a clean vessel, keeping the liquid level between the MIN and MAX lines marked inside the container.
- Select the Frozen Juice setting on your machine, since mango carries natural sugar similar to other fruit juice bases.
- Let the freezing cycle run for about 45 to 55 minutes, checking the texture near the end through the lid window.
- Once the mixture turns into a soft, orange-gold slush with a smooth texture, it’s ready to pour into serving glasses.
- Serve right away with a lime wedge on the rim, and add a small piece of fresh mango on top for a nice finishing touch.
7. Pineapple Coconut Slush
⏱ Time Prep Time: 10 minutes Slush time: 50–60 minutes Total: About 1 hour 10 minutes Servings: 4
This pineapple coconut slush brings warm, creamy flavor with a bright fruity edge, almost like a frozen piña colada without the rum. Coconut milk gives it a smooth, rich body, while the pineapple juice keeps things sweet and tangy. It’s a solid choice for hot afternoons or a treat that feels a little special.
Ingredients
- 2 cups pineapple juice
- 1 cup coconut milk (full fat, canned)
- 2 tablespoons granulated sugar
- 1 tablespoon fresh lime juice
Instructions
- In a mixing bowl, whisk together the pineapple juice, coconut milk, sugar, and lime juice until the mixture looks smooth and fully blended.
- Give the coconut milk a good stir before measuring it out, since the cream can separate and settle at the top of the can.
- Taste the mixture and adjust the sweetness level based on how tart your pineapple juice tastes, adding sugar in small amounts as needed.
- Pour the finished mixture into your machine’s vessel, staying between the MIN and MAX fill lines printed on the inside wall.
- Choose the Milkshake setting for this recipe, since the coconut milk gives the mixture a creamy, dairy-like body that freezes best on this program.
- Run the freezing cycle for about 50 to 60 minutes, checking near the end for a soft, creamy, and scoopable texture.
- Once the slush reaches the right thickness, spoon or pour it into glasses right away for the best texture and flavor.
- Top with a small pineapple wedge or a sprinkle of toasted coconut flakes, then serve while the drink stays at its coldest.
8. Frozen Orange Creamsicle
⏱ Time Prep Time: 8 minutes Slush time: 45–55 minutes Total: About 1 hour Servings: 4
This frozen orange creamsicle recipe brings back that classic popsicle flavor in a cold, sippable drink. Sweet orange juice pairs with cream and a hint of vanilla for a smooth, dessert-like treat. It’s a great option for kids and adults alike, and it works well as a light after-dinner drink on a warm evening.
Ingredients
- 2 cups orange juice
- 1/2 cup half-and-half or light cream
- 2 tablespoons granulated sugar
- 1/2 teaspoon vanilla extract
Instructions
- In a mixing bowl, whisk together the orange juice, half-and-half, sugar, and vanilla extract until the mixture looks smooth and well combined.
- Taste the mixture before pouring, and adjust the sweetness by adding a little more sugar, based on how tart your orange juice tastes.
- Pour the finished mixture into a clean vessel, keeping the liquid level between the MIN and MAX lines marked on the inside wall.
- Select the Milkshake setting on your machine, since the added cream gives this recipe a rich, dairy-based body.
- Let the freezing cycle run for about 45 to 55 minutes, checking the texture near the end through the lid window.
- Once the mixture turns thick and creamy with a light orange color, it’s ready to be poured into glasses for serving.
- Give the finished slush a quick stir with a spoon before pouring, since this helps even out the texture from top to bottom.
- Serve right away with an orange slice on the rim, and enjoy while the drink holds its coldest, creamiest texture.
9. Frozen Fruit Punch Slush
⏱ Time Prep Time: 8 minutes Slush time: 45–55 minutes Total: About 1 hour Servings: 4
This frozen fruit punch slush carries a bold, sweet flavor that reminds a lot of people of summer camp and backyard parties. Made with a simple fruit punch base, this recipe comes together fast and freezes into a bright, colorful drink that kids and adults both enjoy. It works great for birthday parties and warm-weather get-togethers.
Ingredients
- 3 cups prepared fruit punch
- 1 tablespoon fresh lemon juice
- 1 tablespoon granulated sugar (optional, based on punch sweetness)
- 1/2 cup cold water
Instructions
- In a pitcher, combine the fruit punch, lemon juice, sugar, and cold water, stirring until the mixture looks fully blended.
- Taste the mixture and skip the added sugar completely when your fruit punch already tastes sweet enough on its own.
- Pour the finished mixture into a clean vessel, staying between the MIN and MAX fill lines printed inside the container.
- Select the Slush setting on your machine, since this drink carries a sugar level similar to soda or basic punch recipes.
- Run the freezing cycle for about 45 to 55 minutes, checking the texture near the end through the lid window.
- Once the mixture turns into a bright, icy slush, it’s ready to be spooned or poured into glasses for serving.
- Give the slush a quick stir before serving, since this helps even out the texture and color throughout the mixture.
- Serve right away with a few fresh berries dropped into each glass for a colorful, cheerful finishing touch.
10. Frozen Apple Cider Slush
⏱ Time Prep Time: 10 minutes Slush time: 50–60 minutes Total: About 1 hour 10 minutes Servings: 4
This frozen apple cider slush brings warm fall flavor into a cold, refreshing drink. A touch of cinnamon and a splash of lemon juice give this recipe depth, making it taste like a cozy autumn treat even when served ice cold. It’s a nice pick for fall gatherings, football watch parties, or a seasonal twist on a classic slush.
Ingredients
- 3 cups apple cider
- 1/4 teaspoon ground cinnamon
- 1 tablespoon fresh lemon juice
- 1 tablespoon brown sugar (optional)
Instructions
- In a mixing bowl, stir together the apple cider, cinnamon, lemon juice, and brown sugar until everything blends into one smooth liquid.
- Taste the mixture and adjust the cinnamon level slightly, adding just a pinch more when you want a stronger spiced flavor.
- Pour the finished mixture into your machine’s vessel, keeping the liquid level between the MIN and MAX lines marked inside.
- Choose the Frozen Juice setting for this recipe, since apple cider carries natural sugar similar to other fruit juice bases.
- Let the freezing cycle run for about 50 to 60 minutes, checking the texture near the end through the lid window.
- Once the mixture turns into a soft, amber-colored slush, it’s ready to be poured into glasses for serving right away.
- Give the finished slush a light stir before pouring, since this helps spread the cinnamon evenly throughout the mixture.
- Serve with a cinnamon stick or a thin apple slice on the rim for a warm, seasonal finishing touch.
11. Frozen Pink Lemonade
⏱ Time Prep Time: 8 minutes Slush time: 45–55 minutes Total: About 1 hour Servings: 4
This frozen pink lemonade recipe keeps things simple, sweet, and a little tart, with a soft pink color that looks great in any glass. A splash of cranberry juice gives the classic lemonade base its rosy shade and a slightly fruity edge. It’s a light, cooling drink that works well for spring parties or a quiet afternoon at home.
Ingredients
- 2 cups prepared lemonade
- 1/2 cup cranberry juice
- 1 tablespoon fresh lemon juice
- 1 tablespoon granulated sugar (optional)
Instructions
- In a pitcher, stir together the lemonade, cranberry juice, fresh lemon juice, and sugar until the mixture looks fully blended and smooth.
- Taste the mixture and add sugar only when the lemonade tastes too sharp, since cranberry juice already carries a mild sweetness.
- Pour the finished mixture into a clean vessel, staying between the MIN and MAX fill lines marked on the inside wall.
- Select the Slush setting on your machine, since this drink carries a sugar level close to regular sweetened lemonade.
- Run the freezing cycle for about 45 to 55 minutes, checking the texture near the end through the lid window.
- Once the mixture turns into a soft, pink slush with an even color, it’s ready to be poured into glasses for serving.
- Give the slush a light stir before pouring, since this helps spread the color and flavor evenly through the mixture.
- Serve right away with a thin lemon wheel on the rim of each glass for a bright, cheerful finishing touch.
12. Frozen Grape Slush
⏱ Time Prep Time: 8 minutes Slush time: 45–55 minutes Total: About 1 hour Servings: 4
This frozen grape slush has that deep purple color and bold, sweet flavor many people remember from childhood snack drinks. Made with real grape juice, this recipe skips the artificial flavoring found in packaged versions while keeping that same rich, familiar taste. It’s an easy pick for kids’ parties or a quick afternoon treat.
Ingredients
- 3 cups grape juice
- 1 tablespoon fresh lemon juice
- 1/2 cup cold water
- 1 tablespoon granulated sugar (optional, based on juice sweetness)
Instructions
- In a pitcher, combine the grape juice, lemon juice, cold water, and sugar, stirring until the mixture looks fully blended.
- Taste the mixture before pouring, and skip the added sugar entirely when your grape juice already tastes sweet on its own.
- Pour the finished mixture into your machine’s vessel, keeping the liquid level between the MIN and MAX lines marked inside.
- Choose the Frozen Juice setting for this recipe, since grape juice carries natural sugar similar to other fruit juice bases.
- Let the freezing cycle run for about 45 to 55 minutes, checking the texture near the end through the lid window.
- Once the mixture turns into a soft, deep purple slush, it’s ready to be spooned or poured into glasses for serving.
- Give the finished slush a quick stir before pouring, since this helps keep the color and texture even throughout each glass.
- Serve right away in a chilled cup, and enjoy while the drink holds its coldest and smoothest texture.
13. Frozen Coffee Frappé
⏱ Time Prep Time: 10 minutes Slush time: 50–60 minutes Total: About 1 hour 10 minutes Servings: 4
This frozen coffee frappé tastes rich, smooth, and just sweet enough, made with cold brewed coffee and a splash of milk. It works as a great afternoon pick-me-up or a cool dessert drink after dinner, all made without a trip to a coffee shop. The texture comes out thick and smooth, similar to a café-style frozen coffee drink.
Ingredients
- 2 cups strong brewed coffee, cooled completely
- 1/2 cup milk or half-and-half
- 3 tablespoons granulated sugar
- 1/2 teaspoon vanilla extract
Instructions
- Brew your coffee using your normal method, then let it cool fully to room temperature before moving on to the next step.
- In a mixing bowl, whisk together the cooled coffee, milk, sugar, and vanilla extract until the mixture looks smooth and well combined.
- Taste the mixture and adjust the sweetness by adding a little more sugar, based on how strong your coffee tastes.
- Pour the finished mixture into a clean vessel, staying between the MIN and MAX fill lines marked on the inside wall.
- Select the Milkshake setting on your machine, since the added milk gives this recipe a rich, creamy body similar to dairy drinks.
- Run the freezing cycle for about 50 to 60 minutes, checking the texture near the end through the lid window.
- Once the mixture turns thick and smooth with a light brown color, it’s ready to be poured into glasses for serving.
- Top with a small splash of milk or a dusting of cocoa powder, then serve right away while the drink stays cold.
14. Mocha Frozen Coffee
⏱ Time Prep Time: 10 minutes Slush time: 50–60 minutes Total: About 1 hour 10 minutes Servings: 4
This mocha frozen coffee blends bold coffee flavor with rich chocolate for a drink that feels like a real treat. Cocoa powder adds depth without making the drink too heavy, while the milk keeps the texture smooth and creamy. It’s a great pick for anyone who loves chocolate and coffee together in one cold, thick glass.
Ingredients
- 2 cups strong brewed coffee, cooled completely
- 1/2 cup milk
- 2 tablespoons cocoa powder
- 3 tablespoons granulated sugar
Instructions
- Brew your coffee using your normal method, then let it cool fully to room temperature before starting the next step.
- In a mixing bowl, whisk together the cooled coffee, milk, cocoa powder, and sugar until the cocoa fully dissolves with no dry clumps left.
- Taste the mixture and adjust the sweetness or cocoa level slightly, based on how rich you want the final chocolate flavor to be.
- Pour the finished mixture into your machine’s vessel, keeping the liquid level between the MIN and MAX lines marked inside.
- Choose the Milkshake setting for this recipe, since the milk and cocoa give the mixture a thick, dairy-based body.
- Let the freezing cycle run for about 50 to 60 minutes, checking near the end for a thick, scoopable texture.
- Once the slush reaches the right consistency, spoon or pour it into glasses right away for the best texture and flavor.
- Top with a light dusting of cocoa powder or a few chocolate shavings, then serve while the drink holds its coldest texture.
15. Vanilla Milkshake
⏱ Time Prep Time: 8 minutes Slush time: 45–55 minutes Total: About 1 hour Servings: 4
This vanilla milkshake keeps things classic and simple, made with just a few basic ingredients found in most kitchens. The vanilla flavor stays smooth and rounded, making this a great base recipe you can build on later with fruit or other mix-ins. It’s a solid, easy pick for a quick treat any day of the week.
Ingredients
- 2 cups whole milk
- 1/2 cup heavy cream
- 3 tablespoons granulated sugar
- 1 teaspoon vanilla extract
Instructions
- In a mixing bowl, whisk together the milk, heavy cream, sugar, and vanilla extract until the sugar fully dissolves into the liquid.
- Taste the mixture and adjust the sweetness level slightly, adding sugar in small amounts based on your personal taste.
- Pour the finished mixture into a clean vessel, staying between the MIN and MAX fill lines printed on the inside wall.
- Select the Milkshake setting on your machine, since this recipe uses a full dairy base similar to classic milkshakes.
- Run the freezing cycle for about 45 to 55 minutes, checking the texture near the end through the lid window.
- Once the mixture turns thick and creamy with a smooth, pale color, it’s ready to be poured into glasses for serving.
- Give the finished milkshake a quick stir before pouring, since this helps even out the texture from top to bottom.
- Serve right away with a straw and spoon, and enjoy while the milkshake holds its coldest, creamiest texture.
16. Chocolate Milkshake
⏱ Time Prep Time: 8 minutes Slush time: 45–55 minutes Total: About 1 hour Servings: 4
This chocolate milkshake tastes rich, thick, and full of deep cocoa flavor, without needing any store-bought syrup packed with extra additives. Real cocoa powder gives this recipe its bold chocolate taste, while the cream keeps the texture smooth and satisfying. It’s a solid choice for chocolate lovers looking for a simple homemade treat.
Ingredients
- 2 cups whole milk
- 1/2 cup heavy cream
- 3 tablespoons cocoa powder
- 1/4 cup granulated sugar
Instructions
- In a mixing bowl, whisk together the milk, heavy cream, cocoa powder, and sugar until the cocoa fully dissolves with no dry lumps left.
- Taste the mixture and adjust the chocolate flavor by adding a bit more cocoa powder when you want a richer, deeper taste.
- Pour the finished mixture into a clean vessel, staying between the MIN and MAX fill lines marked on the inside wall.
- Select the Milkshake setting on your machine, since this recipe uses a full dairy base with added cocoa.
- Run the freezing cycle for about 45 to 55 minutes, checking the texture near the end through the lid window.
- Once the mixture turns thick and creamy with a deep brown color, it’s ready to be poured into glasses for serving.
- Give the finished milkshake a quick stir before pouring, since this helps spread the cocoa evenly through the mixture.
- Serve right away with whipped cream on top or a few chocolate shavings for a nice finishing touch.
17. Cookies and Cream Milkshake
⏱ Time Prep Time: 12 minutes Slush time: 45–55 minutes Total: About 1 hour Servings: 4
This cookies and cream milkshake brings crushed chocolate sandwich cookies into a smooth, creamy base for a treat that feels like dessert in a glass. The cookie pieces add texture and small bursts of chocolate flavor throughout each sip. It’s a great pick for birthday parties, weekend treats, or any time you want something a little extra sweet.
Ingredients
- 2 cups whole milk
- 1/2 cup heavy cream
- 3 tablespoons granulated sugar
- 8 chocolate sandwich cookies, crushed into small pieces
Instructions
- In a mixing bowl, whisk together the milk, heavy cream, and sugar until the sugar fully dissolves into the liquid.
- Crush the sandwich cookies into small pieces using a food bag and a rolling pin, or pulse them briefly in a food processor.
- Stir most of the crushed cookies into the milk mixture, saving a small amount aside for topping the finished drink later.
- Pour the finished mixture into your machine’s vessel, keeping the liquid level between the MIN and MAX lines marked inside.
- Choose the Milkshake setting for this recipe, since the dairy base needs a creamy, thick freezing program.
- Let the freezing cycle run for about 45 to 55 minutes, checking near the end for a thick, scoopable texture.
- Once the slush reaches the right consistency, spoon or pour it into glasses right away for the best texture and flavor.
- Top each glass with the reserved crushed cookies, then serve right away while the drink holds its coldest texture.
18. Strawberry Milkshake
⏱ Time Prep Time: 10 minutes Slush time: 45–55 minutes Total: About 1 hour Servings: 4
This strawberry milkshake tastes fresh, sweet, and creamy, made with real strawberries instead of syrup or artificial flavoring. The bright pink color and smooth texture make this a treat kids love, but the flavor stays balanced enough for adults to enjoy just as much. It comes together fast with only a handful of ingredients.
Ingredients
- 1 1/2 cups fresh or frozen strawberries, hulled
- 1 1/2 cups whole milk
- 1/2 cup heavy cream
- 3 tablespoons granulated sugar
Instructions
- Add the strawberries to a blender and blend until smooth, with no large chunks of fruit left in the mixture.
- Pour the blended strawberries into a mixing bowl, then whisk in the milk, heavy cream, and sugar until fully combined.
- Taste the mixture and adjust the sweetness level slightly, based on how ripe and sweet your strawberries taste.
- Pour the finished mixture into a clean vessel, staying between the MIN and MAX fill lines marked on the inside wall.
- Select the Milkshake setting on your machine, since this recipe uses a full dairy base with added fruit puree.
- Run the freezing cycle for about 45 to 55 minutes, checking the texture near the end through the lid window.
- Once the mixture turns thick and creamy with a light pink color, it’s ready to be poured into glasses for serving.
- Serve right away with a fresh strawberry on the rim of each glass for a bright, cheerful finishing touch.
19. Frozen Piña Colada
⏱ Time Prep Time: 10 minutes Slush time: 50–60 minutes Total: About 1 hour 10 minutes Servings: 4
This frozen piña colada brings together sweet pineapple and rich coconut for a tropical drink that feels like a mini getaway. This version can be made with or without rum, so it works for a wide range of gatherings and guests. The creamy texture and bright flavor make it a favorite at summer parties and warm-weather cookouts.
Ingredients
- 2 cups pineapple juice
- 1 cup coconut cream
- 2 tablespoons granulated sugar
- 1/2 cup light rum (optional)
Instructions
- In a mixing bowl, whisk together the pineapple juice, coconut cream, and sugar until the mixture looks smooth and fully blended.
- Stir in the rum when using it, mixing well so the alcohol spreads evenly throughout the rest of the liquid.
- Taste the mixture and adjust the sweetness level slightly, based on how tart your pineapple juice tastes.
- Pour the finished mixture into your machine’s vessel, keeping the liquid level between the MIN and MAX lines marked inside.
- Choose the Frozen Cocktail setting when using rum, since this program handles drinks up to fifteen percent alcohol. Skip to the Milkshake setting instead when leaving the rum out.
- Let the freezing cycle run for about 50 to 60 minutes, checking near the end for a thick, creamy texture.
- Once the slush reaches the right consistency, spoon or pour it into glasses right away for the best texture and flavor.
- Top with a small pineapple wedge or a sprinkle of toasted coconut, then serve while the drink stays at its coldest.
20. Frozen Margarita
⏱ Time Prep Time: 10 minutes Slush time: 50–60 minutes Total: About 1 hour 10 minutes Servings: 4
This frozen margarita brings that classic bar-style flavor right to your own counter, with a sharp lime taste balanced by a touch of sweetness. Made with tequila, lime juice, and orange liqueur, this recipe carries a strong flavor that pairs well with salty snacks and warm-weather gatherings. It’s a solid pick for parties, game nights, or a relaxed evening at home.
Ingredients
- 1 cup tequila
- 1/2 cup orange liqueur
- 1 cup fresh lime juice
- 1/2 cup simple syrup
Instructions
- In a large pitcher, combine the tequila, orange liqueur, lime juice, and simple syrup, stirring well until fully blended.
- Taste the mixture and adjust the sweetness by adding a little more simple syrup, based on how tart your lime juice tastes.
- Pour the finished mixture into your machine’s vessel, staying between the MIN and MAX fill lines marked on the inside wall.
- Select the Frozen Cocktail Max setting on your machine, since this recipe carries a higher alcohol content that needs a stronger program.
- Run the freezing cycle for about 50 to 60 minutes, checking the texture near the end through the lid window.
- Once the mixture reaches a thick, slushy texture, it’s ready to be poured into glasses for serving right away.
- Rim each glass with salt before pouring, when you prefer that classic bar-style presentation for this drink.
- Serve right away with a lime wedge on the rim, and enjoy while the margarita holds its coldest, iciest texture.
21. Frozen Strawberry Daiquiri
⏱ Time Prep Time: 10 minutes Slush time: 50–60 minutes Total: About 1 hour 10 minutes Servings: 4
This frozen strawberry daiquiri brings sweet, fruity flavor together with a sharp lime edge, all wrapped up in a smooth, icy texture. Real strawberries give this drink a natural sweetness and a bright pink color that looks great served in any glass. It’s a solid pick for summer parties, poolside gatherings, or a relaxed evening with friends.
Ingredients
- 1 1/2 cups fresh or frozen strawberries, hulled
- 1 cup white rum
- 1/2 cup fresh lime juice
- 1/2 cup simple syrup
Instructions
- Add the strawberries to a blender and blend until fully smooth, with no large chunks of fruit left in the mixture.
- Pour the blended strawberries into a pitcher, then stir in the rum, lime juice, and simple syrup until fully combined.
- Taste the mixture and adjust the sweetness by adding a bit more simple syrup, based on how tart the lime juice tastes.
- Pour the finished mixture into your machine’s vessel, keeping the liquid level between the MIN and MAX lines marked inside.
- Select the Frozen Cocktail setting on your machine, since this recipe carries an alcohol content that fits within that program’s range.
- Let the freezing cycle run for about 50 to 60 minutes, checking the texture near the end through the lid window.
- Once the mixture reaches a thick, icy texture with a bright pink color, it’s ready to be poured into glasses for serving.
- Serve right away with a fresh strawberry on the rim of each glass for a colorful, inviting finishing touch.
22. Frozen Rosé (Frosé)
⏱ Time Prep Time: 10 minutes Slush time: 50–60 minutes Total: About 1 hour 10 minutes Servings: 4
This frozen rosé, often called frosé, turns a bottle of light pink wine into a cold, slushy drink perfect for warm evenings. A touch of strawberry and lemon rounds out the flavor, giving this recipe a fruity edge without covering up the wine itself. It’s become a popular pick for outdoor parties and relaxed summer dinners.
Ingredients
- 3 cups rosé wine
- 1 cup fresh strawberries, hulled
- 2 tablespoons fresh lemon juice
- 2 tablespoons granulated sugar
Instructions
- Add the strawberries to a blender along with the lemon juice and sugar, then blend until fully smooth.
- Pour the blended strawberry mixture into a pitcher, then stir in the rosé wine until everything blends together smoothly.
- Taste the mixture and adjust the sweetness level slightly, based on how dry or sweet your chosen wine tastes.
- Pour the finished mixture into your machine’s vessel, staying between the MIN and MAX fill lines marked on the inside wall.
- Select the Frozen Cocktail setting on your machine, since wine-based drinks fit within this program’s alcohol range.
- Run the freezing cycle for about 50 to 60 minutes, checking the texture near the end through the lid window.
- Once the mixture reaches a soft, pink, slushy texture, it’s ready to be poured into glasses for serving right away.
- Serve with a fresh strawberry or a small mint leaf on top for a light, pretty finishing touch.
23. Frozen Moscow Mule
⏱ Time Prep Time: 10 minutes Slush time: 50–60 minutes Total: About 1 hour 10 minutes Servings: 4
This frozen Moscow Mule keeps the classic ginger and lime flavor of the original drink, turned into a cold, thick slush version. The ginger beer gives this recipe its signature spicy kick, while the lime juice keeps things bright and balanced. It’s a great choice for guests who enjoy a drink with a little more bite and character.
Ingredients
- 1 cup vodka
- 2 cups ginger beer
- 1/2 cup fresh lime juice
- 2 tablespoons simple syrup
Instructions
- In a large pitcher, combine the vodka, ginger beer, lime juice, and simple syrup, stirring gently to avoid losing too much fizz.
- Taste the mixture and adjust the sweetness by adding a bit more simple syrup, based on how spicy your ginger beer tastes.
- Pour the finished mixture into your machine’s vessel, keeping the liquid level between the MIN and MAX lines marked inside.
- Select the Frozen Cocktail setting on your machine, since this recipe fits within the fifteen percent alcohol range.
- Run the freezing cycle for about 50 to 60 minutes, checking the texture near the end through the lid window.
- Once the mixture reaches a thick, icy texture with a pale gold color, it’s ready to be poured into glasses for serving.
- Give the finished slush a light stir before pouring, since this helps spread the ginger flavor evenly through the drink.
- Serve right away with a lime wedge on the rim, and enjoy while the drink holds its coldest, iciest texture.
24. Frozen Peach Bellini
⏱ Time Prep Time: 10 minutes Slush time: 50–60 minutes Total: About 1 hour 10 minutes Servings: 4
This frozen peach bellini turns a brunch classic into a cold, slushy treat, made with sweet peach puree and sparkling wine. The soft peach flavor pairs nicely with the light, bubbly base, creating a drink that feels a little special without much extra effort. It works well for brunch gatherings, bridal showers, or a relaxed weekend afternoon.
Ingredients
- 1 1/2 cups peach puree or peach nectar
- 2 cups prosecco or sparkling wine
- 2 tablespoons fresh lemon juice
- 1 tablespoon granulated sugar (optional)
Instructions
- In a mixing bowl, stir together the peach puree, prosecco, lemon juice, and sugar until the mixture looks fully blended.
- Taste the mixture and skip the added sugar entirely when your peach puree already tastes sweet enough on its own.
- Pour the finished mixture into a clean vessel, staying between the MIN and MAX fill lines marked on the inside wall.
- Select the Frozen Cocktail setting on your machine, since sparkling wine fits within this program’s alcohol range.
- Run the freezing cycle for about 50 to 60 minutes, checking the texture near the end through the lid window.
- Once the mixture reaches a soft, peachy slush texture, it’s ready to be poured into glasses for serving right away.
- Give the finished slush a light stir before pouring, since this helps even out the color and flavor throughout.
- Serve right away in a chilled glass, with a thin peach slice on the rim for a nice finishing touch.
25. Frozen Sangria
⏱ Time Prep Time: 12 minutes Slush time: 50–60 minutes Total: About 1 hour 10 minutes Servings: 4
This frozen sangria brings together red wine, orange juice, and mixed fruit for a bold, fruity drink that feels perfect for gatherings. The fruit flavors soften the wine slightly, creating a smooth, balanced taste that works well for guests who might not usually reach for straight wine. It’s a great pick for dinner parties or relaxed weekend get-togethers.
Ingredients
- 3 cups red wine
- 1/2 cup orange juice
- 1/4 cup brandy (optional)
- 2 tablespoons granulated sugar
Instructions
- In a large pitcher, combine the red wine, orange juice, brandy, and sugar, stirring well until fully blended.
- Taste the mixture and adjust the sweetness level slightly, based on how dry your chosen red wine tastes.
- Pour the finished mixture into your machine’s vessel, keeping the liquid level between the MIN and MAX lines marked inside.
- Select the Frozen Cocktail setting on your machine, since this recipe fits within the fifteen percent alcohol range.
- Let the freezing cycle run for about 50 to 60 minutes, checking the texture near the end through the lid window.
- Once the mixture reaches a thick, deep red slush texture, it’s ready to be poured into glasses for serving.
- Give the finished slush a light stir before pouring, since this helps spread the fruit flavor evenly through the drink.
- Serve right away with a few pieces of chopped fruit dropped into each glass for a colorful, festive finishing touch.
Recipe Variations
Once you get comfortable with the basics, you can start bending these recipes to match your own needs and taste preferences.
Sugar-Free Frozen Drinks
Swap out granulated sugar for a sugar substitute made for cold drinks, such as monk fruit sweetener or a sugar-free simple syrup. Keep in mind that some substitutes freeze a little differently than real sugar, so you may need to test the thickness setting on your machine before landing on the right texture.
Dairy-Free Options
Replace milk and cream with oat milk, almond milk, or coconut milk in any of the milkshake recipes listed above. These swaps still give you a creamy texture, and coconut milk in particular freezes into a rich, thick slush that holds up well.
Kid-Friendly Recipes
Stick with the fruit juice slushies and milkshake recipes when making drinks for kids, and skip anything from the cocktail section entirely. Bright colors like the blue raspberry and grape slush tend to be favorites among younger family members.
High-Protein Frozen Drinks
Add a scoop of your favorite protein powder into any milkshake recipe before pouring it into the vessel. Vanilla and chocolate protein powders blend the smoothest, and this small addition turns a simple treat into more of a snack or light meal replacement.
Tropical Flavor Ideas
Combine mango, pineapple, and coconut in different ratios to build your own custom tropical blend beyond the recipes listed here. A splash of passion fruit juice also pairs nicely with these flavors when you want something a little different.
Holiday Frozen Drinks
Turn the apple cider recipe into a holiday drink by adding a pinch of nutmeg alongside the cinnamon already in the mix. Cranberry juice also works well as a holiday base, especially when paired with a splash of orange juice for a festive, layered flavor.
Storage Tips
Getting the most out of your Ninja SLUSHi Twist means knowing how to store your drinks properly and keep the machine clean between uses.
How long frozen drinks stay fresh
Most frozen drinks made in this machine taste best within the first hour after they reach the right texture, while the flavor and consistency sit at their peak. When left in the machine with the power on, drinks can hold their frozen texture for several hours, though the taste stays freshest during that first stretch of time.
Refreezing recommendations
Avoid refreezing a drink that has already melted down and been left out for a long stretch, since the texture and flavor tend to suffer after that first freeze-thaw cycle. It’s best to prepare a fresh batch of mixture rather than trying to bring an old, melted batch back to its original texture.
Cleaning the machine after use
Run the rinse cycle right after each use, especially before switching between very different flavors, such as moving from a coffee drink to a fruit slush. Remove the vessels, lids, and dispensing parts on a regular basis for a deeper hand wash, which keeps sticky residue from building up over time and helps the machine perform well for years to come.
Conclusion
The Ninja SLUSHi Twist Smart Frozen Drink Maker takes the guesswork and mess out of making frozen drinks at home.
With no ice required and two vessels working at once, this machine makes it simple to prepare two different drinks side by side, for a family movie night, or or a small gathering with friends.
Don’t be afraid to experiment with your own flavor combinations and settings once you get familiar with the basics.
This collection covers slushies, milkshakes, frozen coffee, mocktails, cocktails, and fruit drinks, so there’s something here to make throughout the entire year, no matter the season or occasion.