Fresh bread made at home feels simple and rewarding. Bread makers help turn basic ingredients into soft, warm loaves with very little effort. Many people love using them because they save time and keep the process easy, even for beginners.
Neretva Bread Maker Recipes are a great choice for home baking. The Neretva bread maker offers steady heat, clear settings, and simple controls.
This helps create soft bread with a good texture every time. It may seem hard at first, but it’s actually quite the opposite! With the right steps, anyone can make great bread at home.
Making bread at home gives better freshness and full control over ingredients. It also helps save money compared to store-bought loaves. No need for extra additives or unknown items.
This guide shares easy steps, helpful tips, and tasty recipes using Neretva Bread Maker Recipes. Each recipe is written in a simple way, so it feels easy to follow.
Why Choose a Neretva Bread Maker for Homemade Recipes
1. Simple One-Touch Use: Just add ingredients, choose a setting, and press start. The machine handles mixing, kneading, rising, and baking on its own.
2. Beginner Friendly Design: No baking experience needed. Clear buttons and preset programs help anyone make bread at home without confusion.
3. Wide Recipe Options: It is not only for bread. You can make dough, cake, jam, and many other homemade recipes using the same machine. This makes it useful for different meals.
4. Even Baking Every Time: The heating system spreads warmth evenly. This helps bread bake properly inside and outside, giving a soft and balanced texture.
5. Time Saving for Busy Days: The timer function allows you to set everything in advance. The machine works while you focus on other tasks at home.
1. Basic White Bread
Prep Time: 10 minutes | Cook Time: 3 hours | Serve: 8 slices
This soft and simple loaf is perfect for daily meals. It has a light texture and mild flavor. Great for toast, sandwiches, or butter spread. This recipe is one of the most loved options in Neretva Bread Maker Recipes for beginners.
Ingredients
- 1 cup warm water (240 ml)
- 2 tbsp sugar
- 2 tbsp butter (soft)
- 1 ½ tsp salt
- 3 cups bread flour
- 2 tsp active dry yeast
Instructions
Start by checking the bread pan is clean and dry. Place the pan into the machine securely. Pour warm water into the pan first. Make sure the water is not too hot, as it can harm the yeast.
Add sugar next, spreading it gently in the water. Then place the butter in small pieces so it melts evenly during mixing. Sprinkle salt on one side of the pan. Keep it away from the yeast at this stage.
Add the bread flour slowly, covering all the liquid. This step is important to keep the yeast separate at first. Create a small dip in the center of the flour and add the yeast there.
Insert the pan into the bread maker. Close the lid firmly. Select the “Basic” bread setting. Choose a medium crust for balanced color. Press start.
During the first mixing stage, watch for a few minutes. The dough should form a soft ball. Add a small spoon of flour if it looks too sticky. Add a few drops of water if it seems dry.
Let the machine continue its full cycle. It will mix, knead, rise, and bake the bread. Avoid opening the lid during baking time, as it can affect the final result.
Once the cycle ends, remove the pan carefully using gloves. Let the bread cool for about 10 minutes before removing it from the pan. Place it on a rack to cool fully. Slice after cooling. This keeps the texture soft and even. Enjoy fresh homemade bread.
2. Soft Sandwich Bread
Prep Time: 10 minutes | Cook Time: 3 hours | Serve: 10 slices
Soft sandwich bread is smooth, light, and easy to slice. It works well for school lunches and quick meals. This is one of the most useful Neretva Bread Maker Recipes for daily use.
Ingredients
- 1 cup warm milk (240 ml)
- 2 tbsp sugar
- 2 tbsp butter
- 1 tsp salt
- 3 cups bread flour
- 2 tsp active dry yeast
Instructions
Begin by placing the bread pan on a flat surface. Pour warm milk into the pan. Milk helps give this bread a softer texture than water-based recipes.
Add sugar into the milk and stir slightly with a spoon. Place butter pieces into the liquid so they soften during mixing. Add salt to one corner of the pan.
Next, pour the bread flour evenly on top. Make sure all liquid is covered. This helps create a better mixing process. Form a small space in the center of the flour and add the yeast.
Place the bread pan into the machine and lock it into position. Close the lid. Select the “Soft Bread” or “Sandwich Bread” setting. Choose a light crust for a softer outer layer.
Press start and allow the machine to begin mixing. Watch the dough during the first kneading step. It should be smooth and slightly sticky but not wet. Adjust with small amounts of flour or milk if needed.
Let the machine run its full program. It will handle kneading and rising at the right temperature. This step helps create soft and even bread.
When baking begins, avoid opening the lid. Keep the heat steady inside the machine. Once done, remove the bread pan with care.
Let the bread cool in the pan for a few minutes. Then take it out and place on a cooling rack. Cooling fully helps keep slices clean and neat. Cut into even slices using a sharp knife. This bread stays soft for sandwiches and spreads.
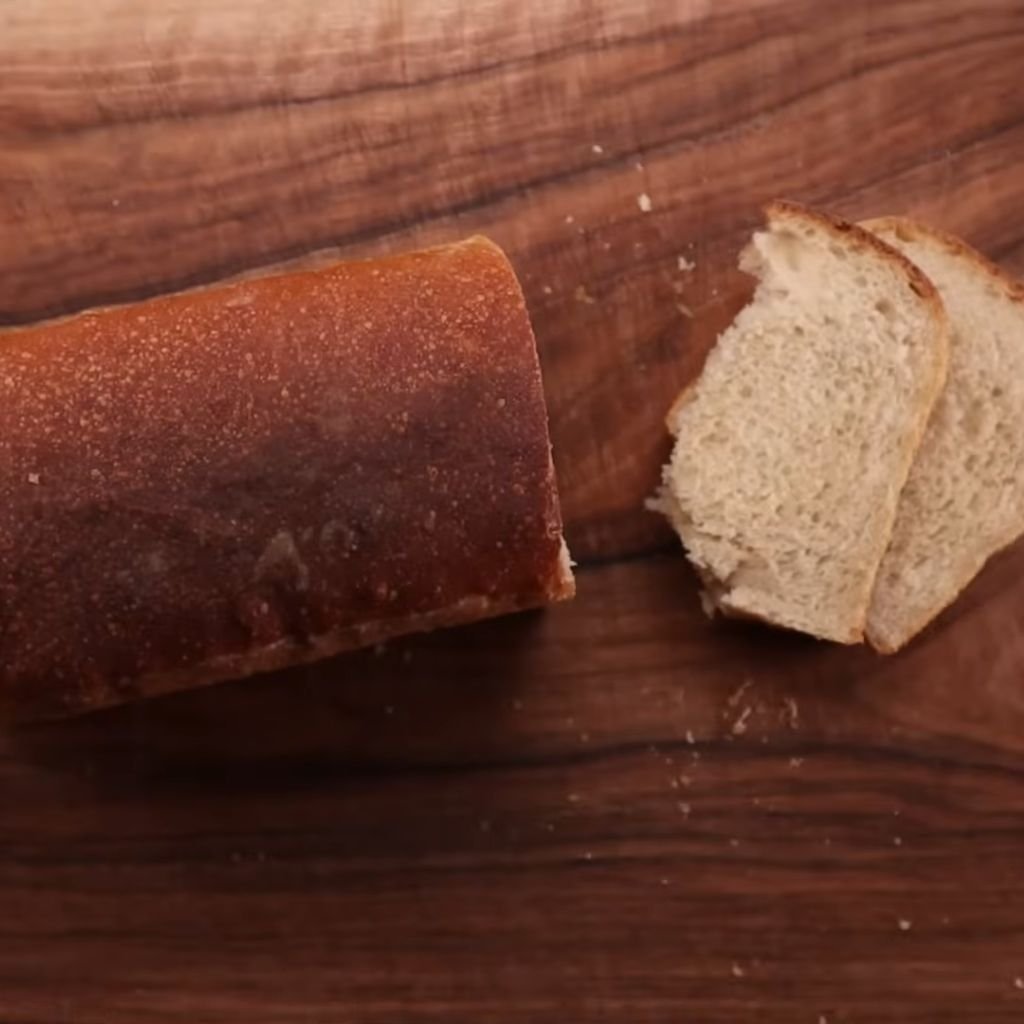
3. French Bread
Prep Time: 10 minutes | Cook Time: 3 hours | Serve: 8 slices
French bread has a light inside and a slightly crisp crust. It works well with soups or simple butter. This recipe is a popular choice in Neretva Bread Maker Recipes for a classic style loaf with simple ingredients.
Ingredients
- 1 cup warm water (240 ml)
- 1 tbsp sugar
- 1 ½ tsp salt
- 3 cups bread flour
- 2 tsp active dry yeast
Instructions
Place the bread pan on a clean surface. Add warm water into the pan first. The water should feel warm but not hot. This helps the yeast work well during mixing.
Add sugar to the water and let it settle. Sprinkle salt on one side of the pan. Keeping salt away from yeast at the start helps the dough rise better.
Slowly add bread flour over the liquid. Spread it evenly so it covers the water fully. Make a small dip in the center of the flour using a spoon. Add the yeast into this space.
Insert the pan into the bread maker. Close the lid tightly. Select the “French Bread” setting on the machine. Choose a medium or dark crust to get that slightly firm outer layer.
Press start and allow the machine to begin mixing. During the first kneading stage, check the dough texture. It should look smooth and slightly firm. Add a small amount of flour if the dough sticks too much to the sides. Add a few drops of water if it looks too dry.
Let the bread maker continue its full cycle. It will handle kneading, rising, and baking. Avoid opening the lid once baking starts. This keeps the heat steady and helps the crust form well.
After baking is complete, remove the bread pan carefully using oven gloves. Let the bread rest in the pan for about 5 to 10 minutes.
Take the bread out and place it on a wire rack. Allow it to cool fully before slicing. This helps keep the inside texture soft and even. Slice and serve with butter or soup. The crust will be lightly crisp while the inside stays soft.
4. Italian Herb Bread
Prep Time: 10 minutes | Cook Time: 3 hours | Serve: 8 slices
Italian herb bread has a rich smell and a soft texture. It pairs well with pasta dishes or olive oil. This is one of the most flavorful options in Neretva Bread Maker Recipes.
Ingredients
- 1 cup warm water (240 ml)
- 2 tbsp olive oil
- 1 ½ tsp salt
- 1 tbsp sugar
- 3 cups bread flour
- 2 tsp active dry yeast
- 1 tsp dried oregano
- 1 tsp dried basil
- ½ tsp garlic powder
Instructions
Start by placing the bread pan on a stable surface. Pour warm water into the pan. Make sure the water is not too hot. Add olive oil to the water, which helps give the bread a soft texture.
Add sugar into the mixture and let it settle. Sprinkle salt on one side of the pan. Then add the dried oregano, basil, and garlic powder into the liquid. This allows the flavor to spread evenly during mixing.
Next, add the bread flour slowly, covering all the liquid. This step helps keep the yeast separate until mixing begins. Create a small space in the center of the flour and add the yeast there.
Place the bread pan into the machine and secure it. Close the lid properly. Select the “Basic” or “Herb Bread” setting. Choose a medium crust to balance texture and flavor.
Press start to begin the process. Watch the dough during the first kneading stage. It should form a soft and slightly firm ball. Add a small amount of flour if it sticks too much, or a few drops of water if it looks dry.
Allow the machine to continue through kneading and rising stages. The herbs will blend into the dough evenly during this time. Avoid opening the lid during baking, as it may affect the final texture.
When the cycle ends, remove the bread pan with care. Let the bread cool for a few minutes inside the pan. Then transfer it to a cooling rack.
Wait until the bread is fully cool before slicing. This helps keep the slices neat and prevents breaking. Serve with olive oil or alongside pasta dishes. The herbs give a rich smell and warm flavor.
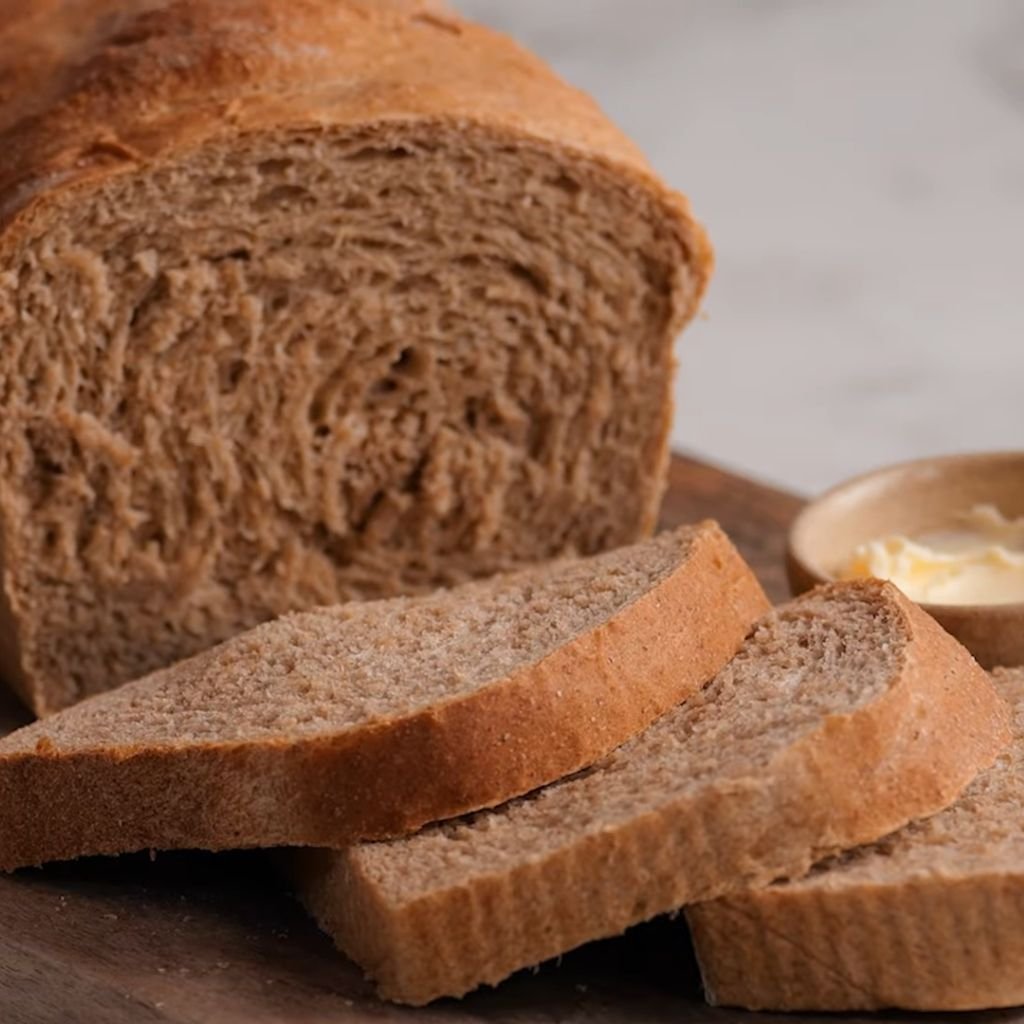
5. Whole Wheat Bread
Prep Time: 10 minutes | Cook Time: 3 hours | Serve: 8 slices
Whole wheat bread has a rich texture and a slightly nutty flavor. It is a healthy option for daily meals. This is one of the most balanced choices in Neretva Bread Maker Recipes, offering both taste and nutrition in every slice.
Ingredients
- 1 cup warm water (240 ml)
- 2 tbsp honey
- 2 tbsp olive oil
- 1 ½ tsp salt
- 3 cups whole wheat flour
- 2 tsp active dry yeast
Instructions
Place the bread pan on a flat surface. Pour warm water into the pan first. Add honey to the water and stir gently so it blends well. Add olive oil next to help keep the bread soft.
Sprinkle salt on one side of the pan. Then add whole wheat flour slowly, making sure it covers all the liquid. Whole wheat flour is heavier than white flour, so even layering helps mixing.
Make a small dip in the center of the flour and add yeast into it. This keeps the yeast separate until the mixing starts.
Insert the pan into the bread maker and close the lid. Choose the “Whole Wheat” setting on the machine. Select a medium crust for the best texture.
Press start and allow the machine to begin mixing. During the first kneading cycle, check the dough. Whole wheat dough should be slightly firm but still soft. Add a little water if it looks dry, or a small amount of flour if too sticky.
Let the machine complete the kneading and rising stages. Whole wheat bread may take a bit longer to rise, but the machine handles this well. Avoid opening the lid during baking time.
Once baking is done, remove the pan carefully. Let the bread rest in the pan for a few minutes before taking it out.
Place the loaf on a cooling rack and allow it to cool fully. This step helps keep the slices firm and easy to cut. Slice and serve for a healthy meal option.
6. Multigrain Bread
Prep Time: 10 minutes | Cook Time: 3 hours | Serve: 8 slices
Multigrain bread is filled with grains that add texture and flavor. It is hearty and works well for breakfast or lunch. This is a top pick in Neretva Bread Maker Recipes for those who enjoy rich and filling bread.
Ingredients
- 1 cup warm water (240 ml)
- 2 tbsp honey
- 2 tbsp butter
- 1 ½ tsp salt
- 2 cups bread flour
- 1 cup multigrain mix
- 2 tsp active dry yeast
Instructions
Start by placing the bread pan on a clean surface. Pour warm water into the pan. Add honey and stir gently so it mixes well with the water. Place butter pieces into the liquid so they soften during mixing.
Sprinkle salt into one corner of the pan. Then add bread flour slowly, covering the liquid. After that, add the multigrain mix evenly over the flour. This helps spread the grains throughout the dough.
Make a small dip in the center and add yeast into that space. Keeping yeast separate at the start helps it activate properly during mixing.
Insert the bread pan into the machine and secure it. Close the lid firmly. Select the “Multigrain” or “Whole Wheat” setting. Choose a medium crust setting for balanced texture.
Press start to begin. During the first kneading stage, check the dough. It should form a soft ball with visible grains. Add a little flour if it sticks too much or a few drops of water if it feels dry.
Allow the machine to run through its full cycle. It will knead, rise, and bake the bread. Avoid opening the lid once baking begins to keep heat steady.
When the cycle ends, remove the bread pan carefully using gloves. Let the bread cool inside the pan for a few minutes.
Take the loaf out and place it on a cooling rack. Allow it to cool fully before slicing. Cut into slices and serve. The grains add texture and a rich flavor to every bite.
7. Oatmeal Bread
Prep Time: 10 minutes | Cook Time: 3 hours | Serve: 8 slices
Oatmeal bread is soft, filling, and slightly sweet. It works great for breakfast or light snacks. This recipe is a warm favorite in Neretva Bread Maker Recipes because oats add a gentle texture and rich feel.
Ingredients
- 1 cup warm milk (240 ml)
- ½ cup rolled oats
- 2 tbsp honey
- 2 tbsp butter (soft)
- 1 ½ tsp salt
- 2 ½ cups bread flour
- 2 tsp active dry yeast
Instructions
Place the bread pan on a flat surface. Pour warm milk into the pan first. Add rolled oats into the milk so they start softening. Let them sit for a short moment so the oats absorb moisture.
Add honey into the mixture and stir gently. Place butter pieces into the liquid so they melt during mixing. Sprinkle salt on one side of the pan.
Add bread flour slowly on top of the liquid. Spread it evenly so all wet parts are covered. Make a small space in the center and add yeast into it.
Insert the pan into the bread maker and close the lid firmly. Select the “Basic” or “Whole Wheat” setting depending on the machine option. Choose a light or medium crust for a soft finish.
Press start. During the first kneading stage, check the dough texture. It should feel soft but not runny. Add a small spoon of flour if it sticks too much. Add a few drops of milk if it looks dry.
Let the machine continue through kneading, rising, and baking stages. The oats will blend into the dough and give a soft, hearty texture. Avoid opening the lid during baking time.
Once baking is complete, remove the pan carefully. Let the bread rest for about 5 to 10 minutes inside the pan.
Take the loaf out and place it on a cooling rack. Allow it to cool fully before slicing. Cut into soft slices and serve with butter or jam.
8. Banana Bread
Prep Time: 10 minutes | Cook Time: 2.5 hours | Serve: 8 slices
Banana bread is sweet, soft, and full of banana flavor. It is a popular treat and a great way to use ripe bananas. This is one of the most loved sweet options in Neretva Bread Maker Recipes.
Ingredients
- 2 ripe bananas (mashed)
- 2 eggs
- ¼ cup melted butter
- ½ cup sugar
- 1 ½ tsp vanilla extract
- 1 ½ tsp baking powder
- 1 ½ cups all-purpose flour
- ½ tsp salt
Instructions
Start by placing the bread pan on a stable surface. Mash ripe bananas in a bowl until smooth, then pour them into the pan. Add eggs and mix gently.
Pour melted butter into the mixture and stir slowly. Add sugar and vanilla extract so the flavor spreads evenly.
Sprinkle baking powder and salt over the wet mixture. Then add flour slowly on top. Make sure it covers the liquid fully.
Insert the pan into the bread maker and close the lid. Select the “Cake” or “Quick Bread” setting. Choose a light crust since this is a soft sweet bread.
Press start. During the first mixing stage, check the batter. It should look thick but smooth. Add a small spoon of flour if too wet or a drop of milk if too thick.
Let the machine run its full baking cycle. The bread will rise and bake slowly into a soft loaf. Avoid opening the lid during baking.
Once done, remove the pan carefully using gloves. Let the bread cool inside the pan for about 10 minutes.
Take it out and place on a cooling rack. Allow it to cool fully before slicing. Cut into slices and serve. This bread stays soft and sweet for snacks or breakfast.
9. Chocolate Chip Bread
Prep Time: 10 minutes | Cook Time: 2.5 hours | Serve: 8 slices
Chocolate chip bread is soft, sweet, and filled with small chocolate pieces. It works well as a snack or light dessert. This is a tasty option in Neretva Bread Maker Recipes for anyone who enjoys sweet bread at home.
Ingredients
- 1 cup warm milk (240 ml)
- 2 tbsp melted butter
- ½ cup sugar
- 1 egg
- 1 ½ tsp vanilla extract
- 1 ½ tsp baking powder
- 2 cups all-purpose flour
- ½ tsp salt
- ½ cup chocolate chips
Instructions
Place the bread pan on a clean surface. Pour warm milk into the pan first. Add melted butter and mix gently. Crack the egg into the mixture and stir slowly until smooth.
Add sugar and vanilla extract so the flavor spreads evenly through the batter. Sprinkle baking powder and salt over the liquid.
Slowly add flour on top, covering all wet parts. This helps create a smooth mixing process. Keep chocolate chips aside for later.
Place the pan into the bread maker and close the lid. Select the “Cake” or “Sweet Bread” setting. Choose a light crust option for a soft finish.
Press start. During the mixing stage, check the batter texture. It should look thick and smooth. Add a small spoon of flour if too runny or a few drops of milk if too thick.
When the machine signals for mix-ins, add chocolate chips. This helps spread them evenly without melting too early.
Let the machine continue its full cycle. The bread will rise and bake slowly into a soft loaf. Avoid opening the lid during baking time.
Once baking is complete, remove the pan carefully. Let the bread cool inside the pan for about 10 minutes.
Transfer to a cooling rack and allow it to cool fully. This keeps the slices neat and firm. Slice and enjoy. Each bite gives a soft texture with sweet chocolate pieces.
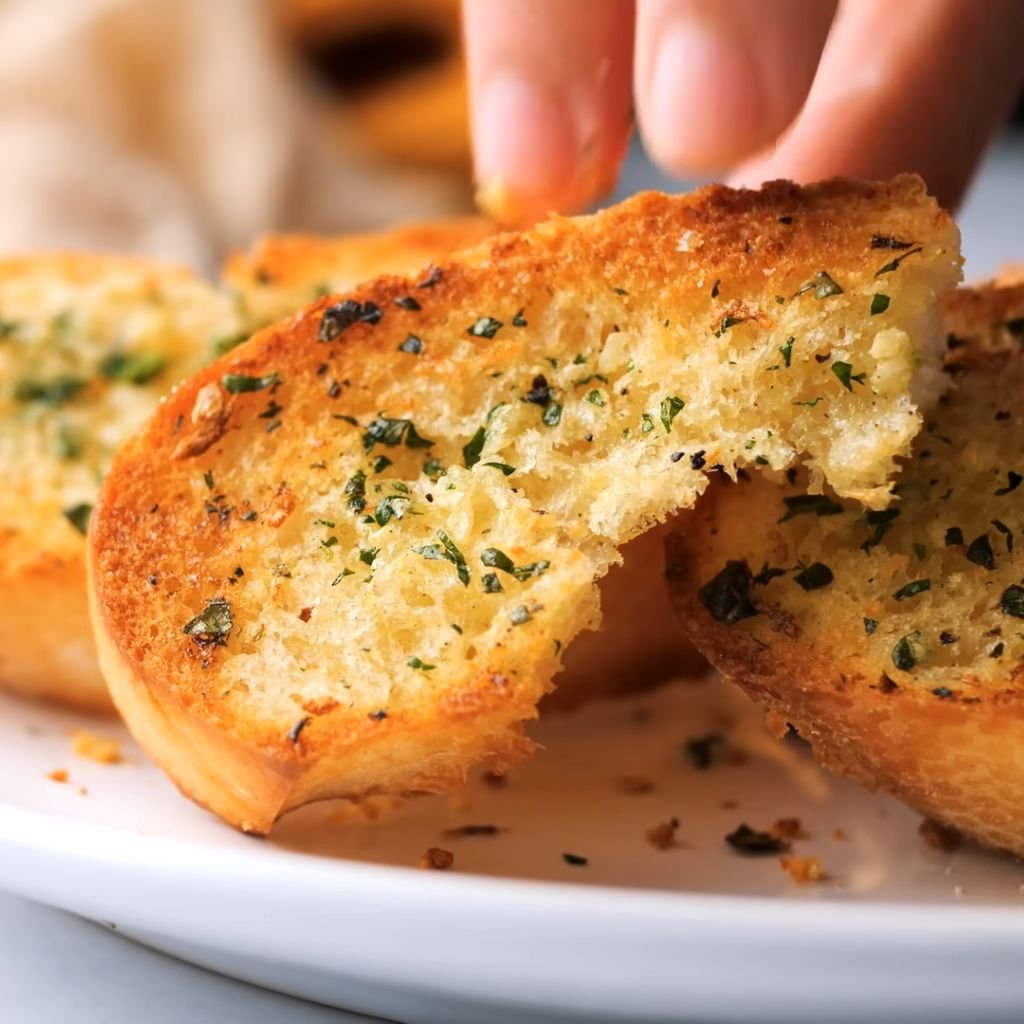
10. Garlic Bread
Prep Time: 10 minutes | Cook Time: 2.5 hours | Serve: 6 slices
Garlic bread is savory, soft, and full of garlic flavor. It pairs well with pasta, soup, or salads. This is a strong favorite in Neretva Bread Maker Recipes for simple side dishes.
Ingredients
- 1 cup warm water (240 ml)
- 2 tbsp olive oil
- 2 tbsp butter (soft)
- 1 tbsp sugar
- 1 ½ tsp salt
- 3 cups bread flour
- 2 tsp active dry yeast
- 1 ½ tsp garlic powder
- 1 tbsp dried parsley
Instructions
Start by placing the bread pan on a flat surface. Pour warm water into the pan. Add olive oil and butter so they blend during mixing. Stir in sugar gently.
Sprinkle salt on one side of the pan. Add garlic powder and dried parsley into the liquid so flavor spreads early in the dough.
Slowly add bread flour over the mixture. Make sure all liquid is covered. Create a small hole in the center and add yeast into it.
Place the pan into the bread maker and close the lid. Select the “Basic” or “French Bread” setting. Choose a medium crust for a balanced texture.
Press start. During the first kneading stage, check the dough. It should feel soft and slightly firm. Add a small spoon of flour if it sticks too much. Add a few drops of water if it feels dry.
Let the machine complete its full cycle. The dough will rise and bake slowly into a soft garlic loaf. Avoid opening the lid during baking.
Once baking is done, remove the pan carefully. Let the bread rest inside the pan for a few minutes.
Transfer to a cooling rack and allow it to cool slightly. Brush with a little melted butter and garlic for extra flavor. Slice and serve warm. This bread pairs well with many meals.
11. Cheese Bread
Prep Time: 10 minutes | Cook Time: 2.5 hours | Serve: 8 slices
Cheese bread is soft inside with rich cheese flavor in every bite. It works well for breakfast or side dishes. This recipe is a popular pick in Neretva Bread Maker Recipes for cheese lovers.
Ingredients
- 1 cup warm milk (240 ml)
- 2 tbsp butter (soft)
- 1 tbsp sugar
- 1 ½ tsp salt
- 3 cups bread flour
- 2 tsp active dry yeast
- 1 cup shredded cheddar cheese
Instructions
Place the bread pan on a flat surface. Pour warm milk into the pan first. Add butter and let it soften in the warm liquid. Stir in sugar until it blends well.
Sprinkle salt on one side of the pan. Add half of the shredded cheese into the liquid so the flavor spreads during mixing.
Slowly add bread flour on top of the mixture. Cover all wet parts fully. Make a small hole in the center and place yeast inside. Keep it away from salt at the start.
Insert the pan into the bread maker and close the lid tightly. Select the “Basic” or “Cheese Bread” setting. Choose a medium crust for a balanced finish.
Press start. During the first kneading stage, check the dough texture. It should form a soft ball. Add a little flour if too sticky or a few drops of milk if dry.
When the machine signals for mix-ins, add the remaining cheese. This helps create pockets of melted cheese inside the bread.
Let the machine finish its full cycle. The dough will rise and bake slowly into a soft loaf with rich flavor. Avoid opening the lid during baking time.
Once baking is complete, remove the pan carefully. Let the bread rest for about 10 minutes inside the pan.
Take it out and place on a cooling rack. Allow it to cool slightly before slicing. This helps the cheese set inside the bread. Slice and serve warm. The inside stays soft and cheesy.
12. Onion Bread
Prep Time: 10 minutes | Cook Time: 2.5 hours | Serve: 8 slices
Onion bread has a soft texture with a mild sweet onion flavor. It pairs well with soups and savory meals. This is a flavorful option in Neretva Bread Maker Recipes for everyday cooking.
Ingredients
- 1 cup warm water (240 ml)
- 2 tbsp olive oil
- 1 tbsp sugar
- 1 ½ tsp salt
- 3 cups bread flour
- 2 tsp active dry yeast
- 1 cup finely chopped onion (lightly sautéed)
Instructions
Start by placing the bread pan on a stable surface. Pour warm water into the pan. Add olive oil and sugar, then stir gently so it blends.
Lightly sauté chopped onions until soft, then let them cool. Add the onions into the liquid so flavor spreads during mixing.
Sprinkle salt on one side of the pan. Slowly add bread flour over the mixture, covering all wet parts evenly. Make a small hole in the center and add yeast.
Insert the pan into the bread maker and close the lid. Select the “Basic” or “French Bread” setting. Choose a medium crust for a balanced finish.
Press start. During the first kneading stage, check the dough. It should feel soft and slightly firm. Add a small spoon of flour if it sticks too much. Add a few drops of water if it feels dry.
Let the machine complete mixing, rising, and baking. The onions will blend into the dough and give a mild sweet flavor. Avoid opening the lid during baking.
Once done, remove the pan carefully. Let the bread cool inside the pan for a few minutes.
Transfer to a cooling rack and allow it to cool slightly before slicing. This helps keep the texture even. Slice and serve with soups or meals. The onion flavor stays soft and rich.
13. Herb & Olive Oil Bread
Prep Time: 10 minutes | Cook Time: 2.5 hours | Serve: 8 slices
Herb & olive oil bread is soft, light, and full of simple herbal flavor. It works well with soups, salads, or light meals. This is one of the smooth and aromatic picks in Neretva Bread Maker Recipes.
Ingredients
- 1 cup warm water (240 ml)
- 3 tbsp olive oil
- 1 tbsp sugar
- 1 ½ tsp salt
- 3 cups bread flour
- 2 tsp active dry yeast
- 1 tsp dried oregano
- 1 tsp dried thyme
- 1 tsp dried basil
Instructions
Place the bread pan on a clean, flat surface. Pour warm water into the pan first. Add olive oil and sugar, then mix gently so everything blends well.
Sprinkle salt on one side of the pan. Add dried oregano, thyme, and basil into the liquid so the flavor spreads through the dough during mixing.
Slowly pour bread flour over the mixture. Cover all wet areas fully. Make a small hole in the center and place yeast inside it. Keep yeast away from salt at the start.
Insert the pan into the bread maker and close the lid firmly. Select the “Basic” or “Herb Bread” setting. Choose a medium crust for a balanced finish.
Press start. During the first kneading stage, check the dough texture. It should form a soft and smooth ball. Add a small spoon of flour if it feels too sticky or a few drops of water if it feels dry.
Let the machine run through kneading, rising, and baking stages. The herbs will spread evenly, giving a soft and fragrant loaf. Avoid opening the lid during baking time.
Once baking is complete, remove the pan carefully using oven gloves. Let the bread rest inside the pan for a few minutes.
Take it out and place on a cooling rack. Allow it to cool fully before slicing for best texture. Slice and serve with olive oil dip or light meals.
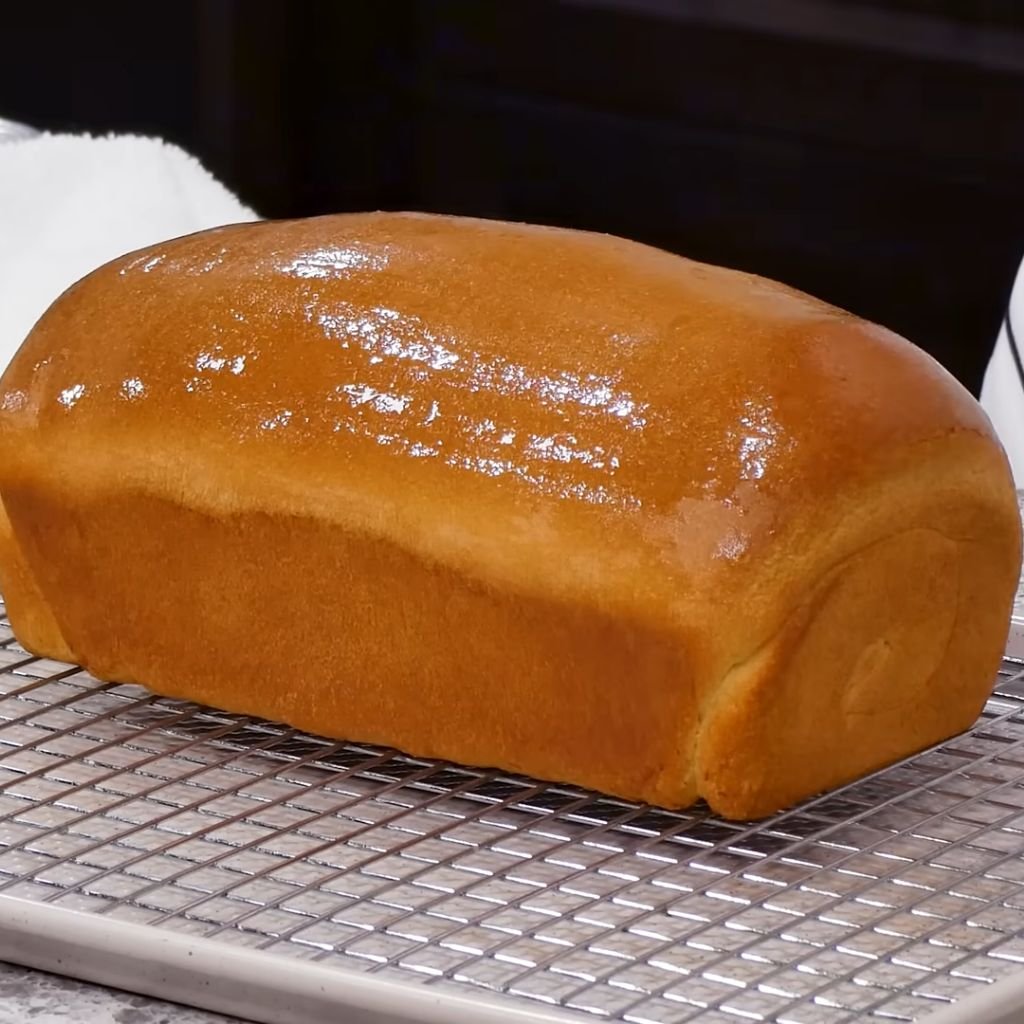
14. Brioche Bread
Prep Time: 15 minutes | Cook Time: 3 hours | Serve: 8 slices
Brioche bread is rich, soft, and slightly sweet. It has a buttery texture that feels smooth in every bite. This is a special treat in Neretva Bread Maker Recipes for soft homemade bread.
Ingredients
- ½ cup warm milk (120 ml)
- 2 large eggs
- 3 tbsp butter (soft, cubed)
- 3 tbsp sugar
- 1 ½ tsp salt
- 3 cups bread flour
- 2 tsp active dry yeast
Instructions
Place the bread pan on a stable surface. Pour warm milk into the pan first. Add eggs and mix gently until smooth.
Add sugar and stir lightly so it blends into the liquid. Sprinkle salt on one side of the pan.
Slowly add bread flour over the mixture, covering all wet parts. Make a small space in the center and place yeast inside.
Insert the pan into the bread maker and close the lid. Select the “Sweet Bread” or “Brioche” setting. Choose a light crust for a soft finish.
Press start. During the first kneading stage, check the dough. It may look sticky at first, but it will become smooth as it mixes. Add a small spoon of flour if too wet.
When the machine continues kneading, add butter cubes one by one. This helps the dough become rich and soft.
Let the machine complete the full cycle. The dough will rise slowly and bake into a soft golden loaf. Avoid opening the lid during baking time.
Once done, remove the pan carefully. Let the bread rest inside the pan for about 10 minutes.
Take it out and place on a cooling rack. Allow it to cool fully before slicing. Slice and enjoy. The bread is soft, rich, and slightly sweet.
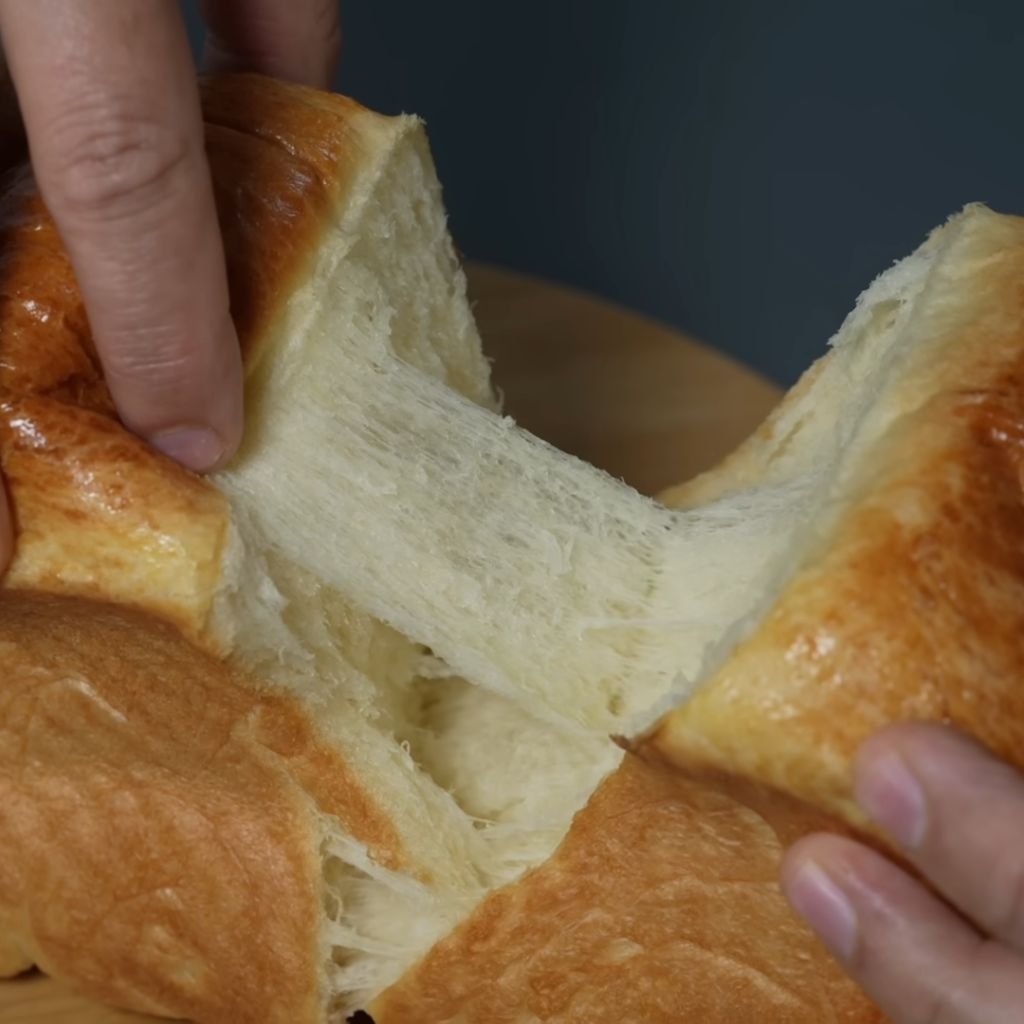
15. Japanese Milk Bread
Prep Time: 10 minutes | Cook Time: 3 hours | Serve: 8 slices
Japanese milk bread is extra soft with a light, fluffy texture. It is often used for sandwiches and toast. This is a top favorite in Neretva Bread Maker Recipes for its cloud-like softness.
Ingredients
- 1 cup warm milk (240 ml)
- 3 tbsp sugar
- 3 tbsp butter (soft)
- 1 ½ tsp salt
- 3 cups bread flour
- 2 tsp active dry yeast
Instructions
Place the bread pan on a clean surface. Pour warm milk into the pan first. Add sugar and stir gently so it dissolves fully.
Add soft butter in small pieces so it spreads evenly during mixing. Sprinkle salt on one side of the pan.
Slowly add bread flour over the liquid, covering all wet areas. Make a small dip in the center and place yeast inside it. Keep yeast away from salt at the start.
Insert the pan into the bread maker and close the lid. Select the “Milk Bread” or “Soft Bread” setting. Choose a light crust for a very soft finish.
Press start. During the first kneading stage, check the dough. It should feel soft and slightly sticky, but not runny. Add a small spoon of flour if needed.
Let the machine continue its full cycle. The dough will go through kneading, rising, and baking. This slow process helps create a fluffy texture. Avoid opening the lid during baking time.
Once baking is done, remove the pan carefully. Let the bread rest inside the pan for a few minutes.
Take it out and place on a cooling rack. Allow it to cool fully before slicing. Slice gently. The texture stays soft and airy.
16. Sourdough (Bread Maker Version)
Prep Time: 10 minutes | Cook Time: 3.5 hours | Serve: 8 slices
Sourdough has a light tangy flavor and chewy texture. This bread maker version makes the process simple. It is a special part of Neretva Bread Maker Recipes for homemade sour taste without hard steps.
Ingredients
- 1 cup warm water (240 ml)
- ½ cup sourdough starter
- 1 tbsp sugar
- 1 ½ tsp salt
- 3 cups bread flour
Instructions
Place the bread pan on a flat surface. Pour warm water into the pan first. Add sourdough starter and mix gently until it blends with the water.
Add sugar and stir lightly. Sprinkle salt on one side of the pan to keep balance in flavor.
Slowly add bread flour over the liquid, covering all wet areas. Make a small hole in the center and add yeast only when needed by your bread maker setting (some machines use starter only).
Insert the pan into the bread maker and close the lid. Select the “Dough” or “Sourdough” setting if available. Choose a medium crust for a balanced finish.
Press start. During mixing, check the dough texture. It should feel elastic and soft. Add a little flour if too sticky or a few drops of water if dry.
Let the machine complete kneading and rising cycles. Sourdough takes longer rising time, so patience helps the final texture. Avoid opening the lid during baking.
Once baking is done, remove the pan carefully. Let the bread rest inside the pan for a short time.
Transfer to a cooling rack and allow it to cool fully before slicing. Slice and serve. The flavor is slightly tangy with a chewy soft bite.
17. Potato Bread
Prep Time: 10 minutes | Cook Time: 3 hours | Serve: 8 slices
Potato bread is soft, moist, and stays fresh for longer time. Mashed potato gives a light texture and gentle taste. This is a comforting option in Neretva Bread Maker Recipes for daily meals.
Ingredients
- 1 cup warm water (240 ml)
- ½ cup mashed boiled potato (cooled)
- 2 tbsp butter (soft)
- 2 tbsp sugar
- 1 ½ tsp salt
- 3 cups bread flour
- 2 tsp active dry yeast
Instructions
Place the bread pan on a clean surface. Pour warm water into the pan first. Add mashed potato and mix gently until it blends with water.
Add soft butter and stir slowly so it spreads evenly. Add sugar and mix again until it dissolves.
Sprinkle salt on one side of the pan. Slowly add bread flour over the mixture, covering all wet parts fully.
Make a small space in the center of the flour and place yeast inside it. Keep yeast separate from salt at the start.
Insert the pan into the bread maker and close the lid. Select the “Basic” or “Potato Bread” setting. Choose a medium crust for a soft finish.
Press start. During the first kneading stage, check the dough. It should feel soft and slightly sticky because of the potato. Add a small spoon of flour if it becomes too wet.
Let the machine complete kneading, rising, and baking. The potato helps keep the bread soft and fluffy. Avoid opening the lid during baking time.
Once baking is complete, remove the pan carefully using oven gloves. Let the bread rest inside the pan for a few minutes.
Transfer the loaf to a cooling rack and let it cool fully before slicing. Slice and serve. The texture stays soft even after cooling.
Storage Tips for Homemade Bread
1. Room Storage – Keep bread in a clean container or wrapped in cloth. Store at room temperature for 2–3 days.
2. Refrigeration – Not best for soft bread, but can last up to 5–7 days when sealed well.
3. Freezing – Slice bread first, then freeze in bags. It stays good for up to 2 months.
4. Reheating – Warm slices in toaster or oven for a fresh feel.
Conclusion
Using Neretva Bread Maker Recipes makes home baking simple and stress-free. Each recipe brings soft texture, fresh aroma, and easy steps that anyone can follow. From basic white bread to sweet banana bread, every loaf gives a fresh homemade feel.
Trying different flavors helps bring variety to daily meals. Small changes like herbs, fruits, or grains can create new results every time. Keep testing new mixes and adjust ingredients based on personal taste. Homemade bread always gives better control, better freshness, and a more satisfying result in every slice.