
Waffles are one of those breakfast foods that never get old. They are crispy, warm, and you can put almost anything on top.
That is why waffle makers have become a go-to kitchen tool in so many homes across the country. With the right machine, you can skip the diner line and make something just as good — or even better — right at home.
Cuisinart waffle maker recipes are a great place to start because the machine heats evenly every time, giving you that perfect golden crust without guessing.
It is simple to use and easy to clean, which makes it a solid pick for busy mornings or slow weekend brunches.
In this article, you will find 30 Cuisinart waffle maker recipes that cover all the basics and then some. There are classic buttermilk waffles, healthy whole wheat and oatmeal options, fruity and dessert-style picks, savory cheese and bacon waffles, and even some creative ideas like hash browns and jalapeño cornbread.
These recipes work for families, brunch lovers, meal preppers, and anyone who just wants a hot homemade breakfast without the fuss.

Why Cuisinart Waffle Makers Are Perfect for Homemade Recipes
1. Even heat distribution. The Cuisinart waffle maker spreads heat across the whole plate, so your batter cooks at the same rate from edge to center. No burnt spots, no raw middles.
2. Crispy outside, fluffy inside. The plates lock in steam while cooking, which gives you that light, airy inside texture while the outside gets a nice golden crunch.
3. Easy cleanup. Most Cuisinart models have non-stick plates that wipe down fast. Some are even removable and dishwasher safe, which saves time after cooking.
4. Different waffle styles. Depending on your model, you can make thin classic waffles, deep Belgian-style waffles, or even mini waffles. The machine adapts to many batter types.
5. Great for all skill levels. The indicator light tells you when your waffle is ready, so you do not need to guess. Beginners can get great results from the very first try, and experienced cooks can push the batter further with mix-ins and toppings.
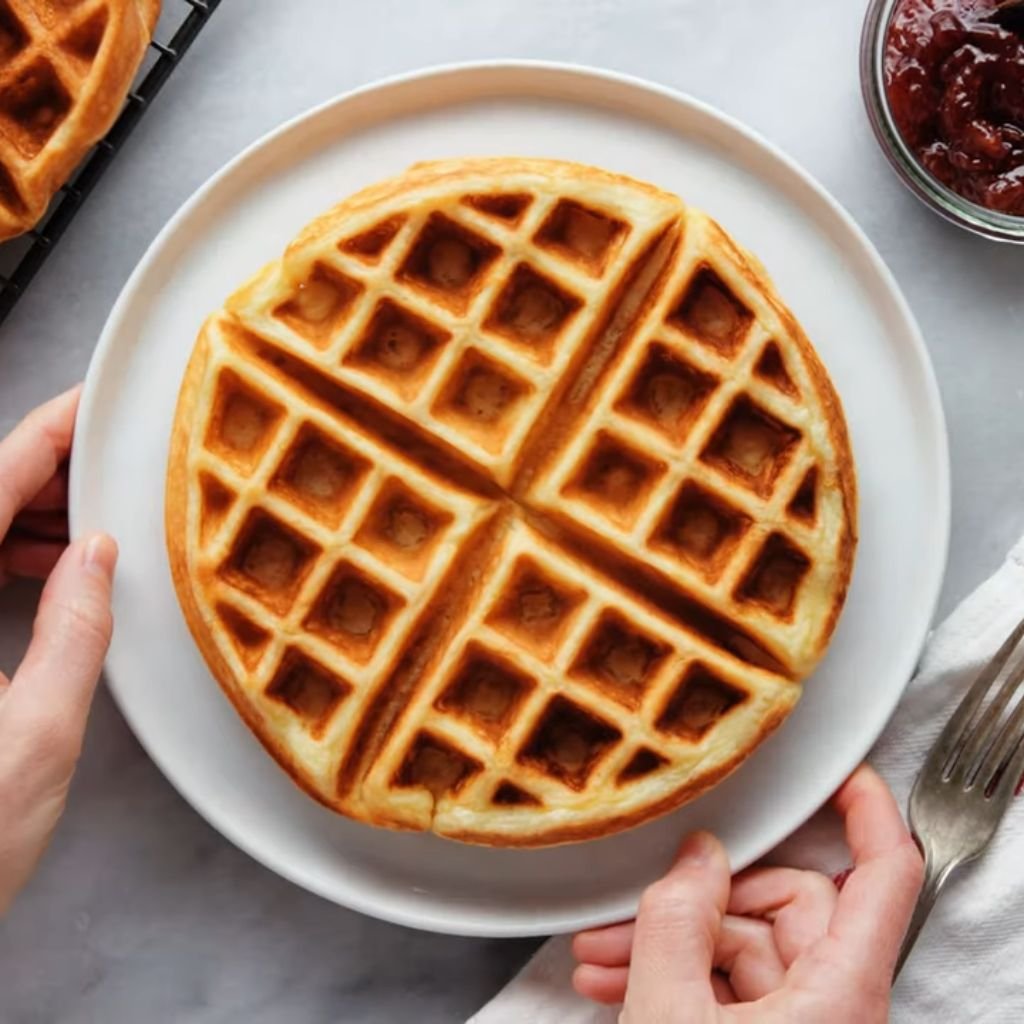
1. Classic Buttermilk Waffles
Prep Time: 10 min | Cook Time: 5 min per waffle | Serves: 4
Light, golden, and crispy on the edges with a soft center — classic buttermilk waffles are the kind of breakfast that works any day of the week. The buttermilk gives them a slight tang and keeps the inside from going dense. Top with maple syrup and butter and you are done.
Ingredients:
- 2 cups all-purpose flour
- 2 tbsp granulated sugar
- 1 tsp baking powder
- ½ tsp baking soda
- ½ tsp salt
- 2 cups buttermilk
- 2 large eggs
- ⅓ cup unsalted butter, melted
- 1 tsp vanilla extract
Instructions:
Start by preheating your Cuisinart waffle maker. Set it to a medium-high heat setting. While it warms up, gather your dry ingredients. In a large mixing bowl, add the all-purpose flour, sugar, baking powder, baking soda, and salt. Use a whisk to stir everything together until there are no clumps. Make a well in the center of the dry mixture and set the bowl aside.
In a separate medium bowl, crack the two eggs and beat them lightly with a fork. Pour in the buttermilk, the melted butter, and the vanilla extract. Stir everything together until fully combined. Make sure the butter is not too hot before adding it, or it could begin to cook the eggs.
Pour the wet mixture into the well you made in the dry ingredients. Stir gently with a spatula or wooden spoon. Do not overmix the batter. A few lumps are perfectly normal and actually help keep the waffles fluffy. Overmixing will activate the gluten in the flour too much and make your waffles tough.
Let the batter rest for about 3 to 5 minutes. This short rest allows the baking soda and baking powder to start working with the buttermilk, creating those tiny bubbles that make the waffles rise and stay light inside.
Once your waffle maker is ready, lightly spray the plates with non-stick cooking spray or brush with a small amount of melted butter. Pour enough batter to fill the plate about three-quarters full. Close the lid and cook until the indicator light shows it is done, or until steam stops coming from the sides — about 4 to 5 minutes. Do not open the lid early. Opening too soon can cause the waffle to split apart.
When done, lift the waffle out carefully using a fork or tongs. Place it on a wire rack instead of a plate if you want to keep the outside crispy — a plate can trap steam underneath. Repeat with the remaining batter, re-spraying the plates as needed between waffles. Serve hot with butter and real maple syrup.
2. Belgian Style Crispy Waffles
Prep Time: 15 min | Cook Time: 6 min per waffle | Serves: 4
Deep pockets, a crisp golden shell, and a soft pillowy center — Belgian style waffles are made for loading up with fresh fruit, whipped cream, or a drizzle of warm syrup. The yeast in the batter makes a big difference in texture.
Ingredients:
- 2 cups all-purpose flour
- 1 packet (2¼ tsp) active dry yeast
- 1½ cups warm milk (110°F)
- ½ cup unsalted butter, melted
- 2 large eggs, separated
- 1 tbsp sugar
- 1 tsp vanilla extract
- ½ tsp salt
Instructions:
Begin by activating the yeast. Pour the warm milk into a large bowl and sprinkle the yeast on top. Add the sugar and stir gently. Let this sit for about 5 to 7 minutes until it looks foamy on the surface. If it does not foam, the yeast may be old and you should start with a fresh packet.
Once the yeast is active, add the melted butter, vanilla extract, salt, and egg yolks to the bowl. Stir until combined. Gradually add the flour while stirring, about half a cup at a time. Keep stirring until a smooth batter forms. Cover the bowl loosely with plastic wrap or a clean kitchen towel and let it rest at room temperature for 30 to 45 minutes. The batter will puff up slightly as the yeast works.
While the batter rests, separate your egg whites into a clean, dry bowl. Using a hand mixer or a stand mixer, beat the egg whites on medium-high speed until stiff peaks form. This means when you lift the beaters out, the peaks hold their shape without drooping. Do not under-beat them — stiff peaks are what give Belgian waffles their signature light interior.
After the batter has rested, gently fold the beaten egg whites into the batter. Use a spatula and fold slowly, cutting through the center and lifting up from the bottom. You want to keep as many air bubbles as possible. Stop folding when you no longer see white streaks.
Preheat your Cuisinart waffle maker to high heat. Lightly grease the plates with non-stick spray. Pour the batter in, filling the plates generously since Belgian waffles are thicker. Close the lid and cook for 5 to 6 minutes. The waffles need a bit more time than standard waffles because of their depth. When they are a deep golden brown and the steam has slowed down, they are ready. Lift out carefully, serve immediately, and top with your choice of fresh strawberries, whipped cream, or powdered sugar.
3. Vanilla Breakfast Waffles
Prep Time: 10 min | Cook Time: 4 min per waffle | Serves: 4
Some mornings call for something simple and comforting. These vanilla breakfast waffles have a mild sweetness and a warm vanilla flavor that makes them feel like a real treat. Great on their own or with fresh fruit on the side.
Ingredients:
- 1¾ cups all-purpose flour
- 2 tsp baking powder
- 1 tbsp sugar
- ¼ tsp salt
- 1½ cups whole milk
- 2 large eggs
- ⅓ cup vegetable oil
- 2 tsp pure vanilla extract
Instructions:
Preheat your Cuisinart waffle maker to medium heat while you mix the batter. In a large bowl, whisk together the flour, baking powder, sugar, and salt. Make sure the dry ingredients are evenly mixed so the baking powder is distributed throughout the flour.
In another bowl, whisk together the eggs, milk, vegetable oil, and vanilla extract. Pour this mixture into the dry ingredients and stir just until combined. The batter may look slightly lumpy, and that is perfectly fine. Do not stir until it is completely smooth — that overworks the batter and leads to dense, chewy waffles.
Let the batter sit for 3 minutes. This short rest helps the baking powder begin to react and gives the batter a slightly thicker consistency, which makes it easier to pour onto the waffle plates without spreading too thin.
Grease the preheated waffle plates with a light coat of non-stick spray. Pour the batter in, filling about three-quarters of the plate. Close the lid firmly and cook until the light signals doneness or until the outside looks golden and the steam has nearly stopped — roughly 4 minutes. Remove the waffle and let it cool briefly on a wire rack. The vanilla flavor becomes a little more noticeable as it cools slightly, making each bite taste warm and fragrant. Serve with a light dusting of powdered sugar or a handful of fresh blueberries.
4. Cinnamon Sugar Waffles
Prep Time: 10 min | Cook Time: 5 min per waffle | Serves: 4
These waffles smell amazing while they cook. The cinnamon sugar goes right into the batter, so every bite has that warm, spiced sweetness. No need to add much to these — a little butter is all they need.
Ingredients:
- 2 cups all-purpose flour
- 2 tsp baking powder
- 2 tbsp sugar
- 1½ tsp ground cinnamon
- ½ tsp salt
- 1¾ cups milk
- 2 eggs
- ⅓ cup butter, melted
- 1 tsp vanilla extract
- Extra cinnamon sugar for topping: 2 tbsp sugar + ½ tsp cinnamon, mixed
Instructions:
Preheat the Cuisinart waffle maker to medium-high heat. In a large bowl, combine the flour, baking powder, sugar, cinnamon, and salt. Whisk until the cinnamon is fully blended into the flour mixture. Cinnamon tends to clump when it hits wet ingredients, so mixing it thoroughly with the dry ingredients first helps it spread evenly through the batter.
In a separate bowl, whisk together the milk, eggs, melted butter, and vanilla extract. Add the wet ingredients to the dry ingredients and stir gently until just combined. Avoid over-stirring. The batter should look slightly thick and have a warm tan color from the cinnamon.
Rest the batter for 5 minutes. Meanwhile, stir together the extra cinnamon and sugar in a small bowl and set aside for topping.
Lightly spray the waffle plates with non-stick spray. Pour in enough batter to fill the plates about three-quarters of the way. Close the lid and cook for 4 to 5 minutes until golden brown. When you open the lid, the cinnamon aroma will be strong and sweet.
Remove the waffle carefully and immediately sprinkle the cinnamon sugar topping over the surface while it is still hot. The heat helps the sugar stick slightly to the crispy outside. Serve right away. These waffles pair beautifully with a scoop of vanilla ice cream for a dessert version, or with a pat of salted butter for a classic breakfast.
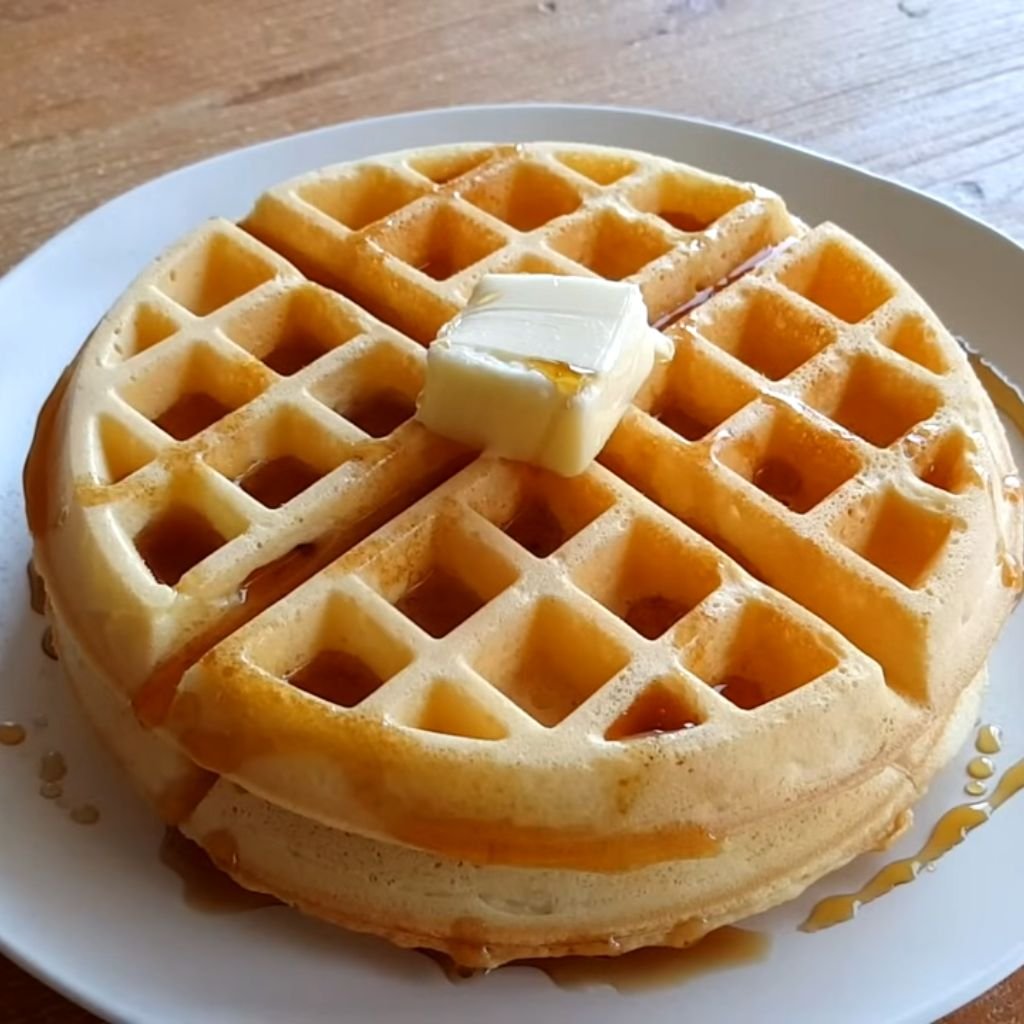
5. Golden Butter Waffles
Prep Time: 10 min | Cook Time: 5 min per waffle | Serves: 4
Rich, buttery, and golden from edge to edge — these waffles are simple but absolutely satisfying. The extra butter in the batter gives them a deeper flavor and helps create those crispy edges without drying out the inside.

Ingredients:
- 2 cups all-purpose flour
- 1 tbsp sugar
- 2 tsp baking powder
- ½ tsp salt
- 1¾ cups milk
- 2 eggs
- ½ cup unsalted butter, melted and slightly cooled
- 1 tsp vanilla extract
Instructions:
Turn on the Cuisinart waffle maker and let it preheat fully on medium-high. While it heats, mix the flour, sugar, baking powder, and salt together in a large bowl. Give it a good whisk so everything is evenly blended.
In a separate bowl, beat the eggs lightly, then add the milk, melted butter, and vanilla. Stir until smooth. The butter should be melted but not hot — if it is too warm, it can begin cooking the eggs when they are added. Let the butter cool for a couple of minutes off the heat before combining.
Pour the wet ingredients into the dry ingredients and stir gently. Stop as soon as the flour is mixed in. A few lumps in the batter are normal and will not affect the final result. Let the batter sit for 5 minutes.
Lightly grease the plates with non-stick spray or brush them with a thin layer of melted butter for extra crispness. Add the batter and cook for about 4 to 5 minutes until the waffles are a deep golden color. The high butter content means they brown a bit faster, so keep an eye on the first one to gauge the right timing for your machine.
Once cooked, lift out carefully and serve immediately with real maple syrup. The buttery flavor is already strong, so the syrup brings just enough sweetness to round everything out.
6. Whole Wheat Waffles
Prep Time: 10 min | Cook Time: 5 min per waffle | Serves: 4
Whole wheat waffles are a solid choice for mornings when you want something a little more filling. The whole wheat flour gives a slightly nutty flavor and a hearty texture that keeps you going longer than standard white flour waffles.
Ingredients:
- 1½ cups whole wheat flour
- ½ cup all-purpose flour
- 2 tsp baking powder
- ½ tsp baking soda
- 1 tbsp honey or maple syrup
- ½ tsp salt
- 1¾ cups buttermilk
- 2 eggs
- ¼ cup coconut oil or vegetable oil
- 1 tsp vanilla extract
Instructions:
Preheat the Cuisinart waffle maker on medium heat. In a large bowl, combine the whole wheat flour, all-purpose flour, baking powder, baking soda, and salt. Stir well to distribute the leavening agents through the flour blend.
In a separate bowl, whisk together the buttermilk, eggs, oil, honey (or maple syrup), and vanilla. Pour the wet ingredients into the dry and stir until just combined. The batter will be slightly thicker than standard waffle batter because whole wheat flour absorbs more liquid. If it seems too thick to pour easily, add one to two tablespoons of additional buttermilk to loosen it slightly.
Let the batter rest for 5 minutes. Whole wheat flour takes a little longer to hydrate fully, and the rest time helps the batter come together for a better texture.
Lightly spray the waffle plates with non-stick spray. Pour the batter in, filling about three-quarters of the plate. Cook for 5 minutes or until the waffle is golden brown and comes away from the plate cleanly. Whole wheat waffles can stick more easily than regular waffles, so do not rush to open the lid. When the steam slows and the indicator light confirms doneness, open carefully.
Serve with sliced bananas, a drizzle of honey, or a spoonful of peanut butter for a satisfying and nutritious start to the day.
7. Oatmeal Protein Waffles
Prep Time: 10 min | Cook Time: 5 min per waffle | Serves: 3
These waffles pack in protein and fiber, making them a great post-workout breakfast or a filling start to a busy day. Oats and protein powder team up in the batter for a waffle that is actually good for you.
Ingredients:
- 1 cup rolled oats (blended into oat flour)
- ½ cup vanilla protein powder
- 1 tsp baking powder
- ¼ tsp salt
- 1 cup milk or unsweetened almond milk
- 2 eggs
- 1 tbsp honey
- 1 tsp vanilla extract
- 1 tbsp coconut oil, melted
Instructions:
Start by turning the rolled oats into flour. Place them in a blender or food processor and pulse until you get a fine powder that looks like flour. This usually takes about 30 seconds. Measure out one cup of the blended oat flour and place it in a large mixing bowl.
Add the protein powder, baking powder, and salt to the bowl with the oat flour. Whisk together so all the dry ingredients are evenly combined. Protein powder can clump easily, so break up any lumps with the whisk before adding the wet ingredients.
In a separate bowl, beat the eggs and then add the milk, honey, vanilla extract, and melted coconut oil. Stir until smooth. Pour the wet mixture into the dry ingredients and stir until a batter forms. The batter will be slightly thicker than traditional waffle batter because of the oat flour — this is normal.
Let the batter sit for 3 to 4 minutes. During this time, the oat flour absorbs the liquid and the batter thickens slightly, which helps produce a waffle with better structure. If it becomes too thick to pour, add a splash of milk.
Preheat your Cuisinart waffle maker to medium heat and grease the plates well with non-stick spray since protein waffles can stick more than regular ones. Pour the batter in and cook for about 5 minutes. Do not open the lid early — protein powder can make the surface feel less firm than regular flour, and the waffle needs the full cook time to set properly. When golden and firm, remove carefully and serve with Greek yogurt and fresh berries for a balanced, high-protein breakfast.
8. Banana Oat Waffles
Prep Time: 10 min | Cook Time: 5 min per waffle | Serves: 3
Ripe bananas do the heavy lifting in these waffles. They add natural sweetness, moisture, and flavor without needing much added sugar. Combined with oats, the result is a soft, hearty waffle with real banana taste in every bite.
Ingredients:
- 2 ripe bananas, mashed
- 1 cup rolled oats (blended into flour)
- 1 tsp baking powder
- ¼ tsp cinnamon
- ¼ tsp salt
- 2 eggs
- ½ cup milk
- 1 tbsp maple syrup
- 1 tsp vanilla extract
Instructions:
Blend the rolled oats in a blender until they reach a fine flour consistency. Pour into a large bowl and add the baking powder, cinnamon, and salt. Stir to combine.
Peel the ripe bananas and mash them well in a separate bowl using a fork. Mash until the texture is mostly smooth with just a few small lumps. The riper the banana, the sweeter and easier to mash it will be. Add the eggs, milk, maple syrup, and vanilla to the mashed banana. Whisk everything together until well combined.
Pour the banana mixture into the oat flour mixture. Stir gently until just combined. The batter will be thick and slightly sticky. Do not add extra liquid unless the batter is completely dry and will not pour at all — the bananas add plenty of moisture.
Preheat the Cuisinart waffle maker to medium heat and spray the plates generously. Banana batter tends to stick more than regular batter, so do not skip this step. Pour the batter onto the plates, spreading it slightly with the back of a spoon if needed to fill the corners. Close the lid and cook for 4 to 5 minutes.
These waffles brown quickly because of the natural sugars in the banana, so check the color once the steam slows. When done, they should be golden with slightly caramelized edges. Serve with sliced fresh banana, a drizzle of honey, and a pinch of extra cinnamon on top.
9. Almond Flour Keto Waffles
Prep Time: 10 min | Cook Time: 4 min per waffle | Serves: 3
Low in carbs and high in flavor, these almond flour waffles are made for anyone following a keto or low-carb eating plan. They have a slightly denser texture than regular flour waffles, but the buttery, nutty flavor makes them worth every bite.
Ingredients:
- 1½ cups almond flour
- 2 tsp baking powder
- ¼ tsp salt
- 3 eggs
- ¼ cup unsweetened almond milk
- 3 tbsp melted butter or coconut oil
- 1 tsp vanilla extract
- 1 tbsp granulated erythritol or your preferred keto sweetener
Instructions:
Preheat the Cuisinart waffle maker to medium heat. In a medium bowl, combine the almond flour, baking powder, salt, and erythritol. Whisk thoroughly to break up any almond flour clumps — almond flour is denser than regular flour and tends to pack together, so make sure it is well aerated before adding the wet ingredients.
In a separate bowl, beat the eggs until slightly frothy. Add the almond milk, melted butter, and vanilla extract. Whisk until smooth and fully combined.
Pour the wet ingredients into the dry and stir until a thick batter forms. Almond flour batter will be much thicker and slightly sticky compared to regular waffle batter. This is expected and is part of what makes these waffles hold together without traditional gluten.
Let the batter sit for 2 minutes. Grease the waffle plates generously with non-stick spray or brush with coconut oil. This step is especially important for almond flour waffles since they can stick to the plates if not well-greased.
Pour the batter onto the plates. Because almond flour batter is thicker, use the back of a spoon or a spatula to gently spread it toward the edges if needed. Close the lid and cook for 4 to 5 minutes. The waffles will not look as bubbly as standard waffles when done, but they should be firm and golden brown on the outside. Open the lid carefully and let them sit for 30 seconds before removing — almond flour waffles are more delicate and need a moment to firm up after cooking. Serve with sugar-free syrup, fresh raspberries, or a dollop of full-fat whipped cream.
10. Gluten-Free Crispy Waffles
Prep Time: 10 min | Cook Time: 5 min per waffle | Serves: 4
Made with a gluten-free flour blend, these waffles come out surprisingly crispy and light. Great for anyone with a gluten sensitivity, and nobody will notice the difference once they are on the plate.
Ingredients:
- 2 cups gluten-free all-purpose flour blend (with xanthan gum)
- 2 tsp baking powder
- ½ tsp baking soda
- 1 tbsp sugar
- ½ tsp salt
- 1¾ cups buttermilk
- 2 eggs
- ⅓ cup vegetable oil
- 1 tsp apple cider vinegar
- 1 tsp vanilla extract
Instructions:
Preheat the Cuisinart waffle maker to medium-high heat. The apple cider vinegar in this recipe helps react with the baking soda to create lift in the batter, which is especially important when using gluten-free flour that does not naturally produce the same rise as wheat-based flour.
In a large bowl, whisk together the gluten-free flour blend, baking powder, baking soda, sugar, and salt. Make sure the leavening agents are evenly mixed throughout — gluten-free batters are more sensitive to uneven distribution than regular batters.
In a separate bowl, combine the buttermilk, eggs, vegetable oil, apple cider vinegar, and vanilla extract. Whisk until smooth. Add the wet ingredients to the dry ingredients and stir until a smooth batter forms. Gluten-free batter tends to be slightly smoother than regular waffle batter and will not have as many lumps.
Allow the batter to rest for 5 full minutes. This rest period is important because gluten-free flour blends take longer to absorb liquid, and the batter will thicken up during this time. If you skip the rest, the waffles may turn out gummy in the middle.
Grease the plates well and pour the batter in. Cook for 5 minutes without opening the lid. Gluten-free waffles can be fragile when hot, so let them cook completely before opening. When golden and firm, remove carefully and serve immediately with maple syrup. They crisp up quickly after coming off the iron, so eat them right away for the best texture.
11. Blueberry Waffles
Prep Time: 10 min | Cook Time: 5 min per waffle | Serves: 4
Fresh blueberries folded right into the batter burst open as the waffle cooks, leaving little pockets of sweet, jammy fruit throughout. These are colorful, fragrant, and a real crowd-pleaser at weekend brunch.
Ingredients:
- 2 cups all-purpose flour
- 2 tsp baking powder
- 1 tbsp sugar
- ½ tsp salt
- 1¾ cups milk
- 2 eggs
- ⅓ cup vegetable oil
- 1 tsp vanilla extract
- 1 cup fresh or frozen blueberries (if frozen, do not thaw)
Instructions:
Preheat your Cuisinart waffle maker to medium heat. In a large bowl, whisk together the flour, baking powder, sugar, and salt. In a separate bowl, mix the milk, eggs, oil, and vanilla extract until combined.
Pour the wet ingredients into the dry ingredients and stir gently until just mixed. A few lumps are fine. Now add the blueberries and fold them in carefully with a spatula. Use a gentle folding motion instead of stirring so the berries stay whole and do not bleed too much into the batter. If using frozen blueberries, add them straight from the freezer — thawed berries release too much liquid and can make the batter runny.
Let the batter rest for 3 minutes after folding in the berries.
Spray the plates with non-stick spray and pour the batter in. Be aware that blueberries can settle to the bottom of the batter bowl, so stir gently between each waffle to redistribute them. Close the lid and cook for about 5 minutes.
The blueberries inside the waffle will cook down and their juice will caramelize slightly against the hot plates, which creates small patches of deep purple-blue inside the golden waffle. Open the lid carefully — any berry that touched the plates directly may stick slightly, so use a fork or tongs to lift edges first. Serve with a drizzle of honey and a handful of fresh blueberries on top.
12. Strawberry Cream Waffles
Prep Time: 15 min | Cook Time: 5 min per waffle | Serves: 4
Light and golden waffles topped with a simple strawberry cream made from fresh berries and whipped cream. The combination of warm waffle and cold cream topping is something really special.
Ingredients:
For the waffles:
- 2 cups all-purpose flour
- 2 tsp baking powder
- 1 tbsp sugar
- ½ tsp salt
- 1¾ cups milk
- 2 eggs
- ⅓ cup oil
- 1 tsp vanilla extract
For the strawberry cream:
- 1 cup fresh strawberries, sliced
- 1 tbsp sugar
- 1 cup heavy whipping cream
- 2 tbsp powdered sugar
- ½ tsp vanilla extract
Instructions:
Begin by making the strawberry topping so it has time to macerate while the waffles cook. Place the sliced strawberries in a small bowl and sprinkle with one tablespoon of sugar. Stir gently and set aside. The sugar will draw out the natural juices from the strawberries and create a light syrup over the next 10 to 15 minutes.
Pour the heavy cream into a large bowl. Using a hand mixer or stand mixer, beat the cream on medium-high speed. Add the powdered sugar and vanilla extract after about one minute of beating. Continue beating until soft peaks form — the cream should hold its shape when the beaters are lifted but still have a slight curl at the tip. Do not over-beat or it will become grainy. Refrigerate until ready to serve.
To make the waffle batter, whisk together the flour, baking powder, sugar, and salt in a large bowl. In a separate bowl, mix the milk, eggs, oil, and vanilla. Pour the wet mixture into the dry and stir until just combined. Rest the batter for 3 minutes.
Preheat the Cuisinart waffle maker to medium heat and lightly grease the plates. Pour the batter in and cook each waffle for about 5 minutes until golden. Remove and set on a wire rack.
To serve, place a waffle on a plate. Spoon the macerated strawberries over the top along with some of the berry syrup that has formed. Add a generous dollop of whipped cream. Serve immediately.
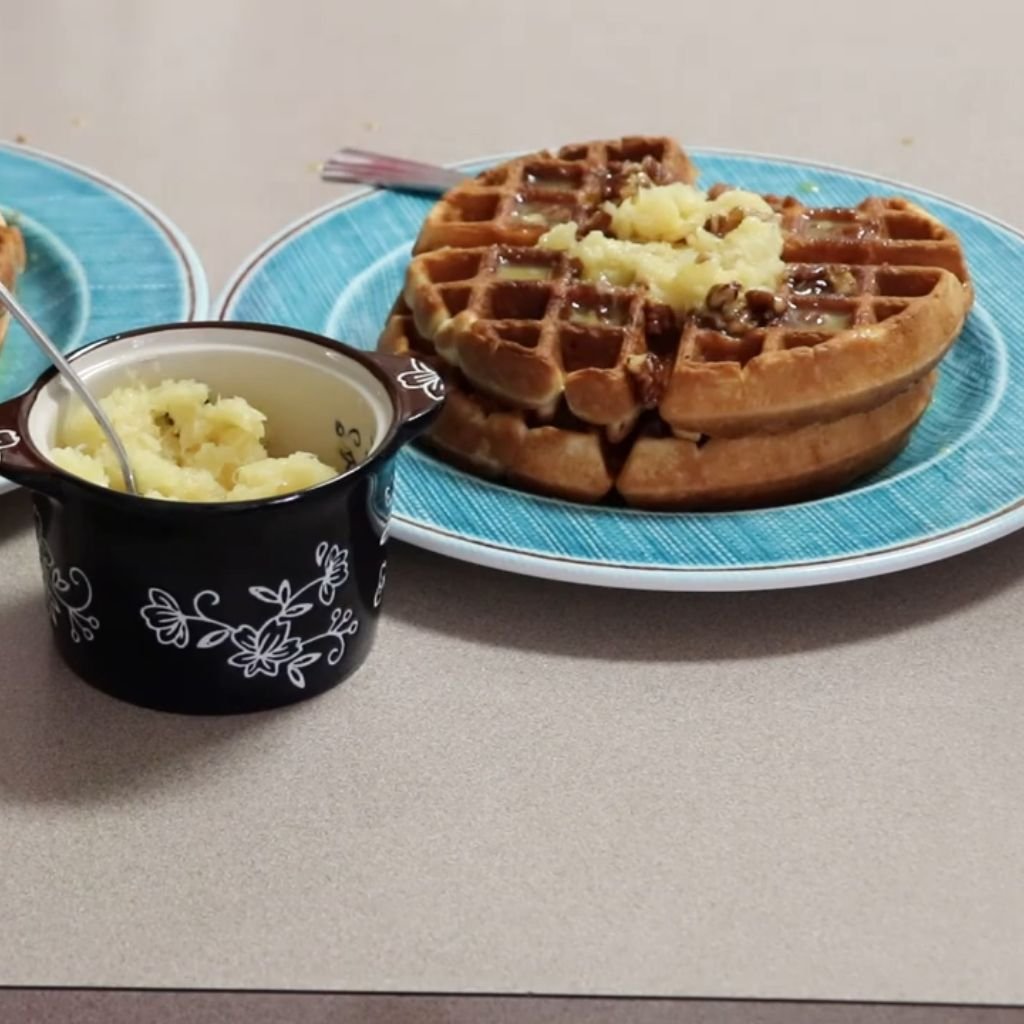
13. Apple Cinnamon Waffles
Prep Time: 15 min | Cook Time: 5 min per waffle | Serves: 4
Diced apples and warm cinnamon make these waffles taste like autumn in every bite. The soft apple pieces cook right into the waffle and add a gentle sweetness and moisture that keeps the inside tender.
Ingredients:
- 2 cups all-purpose flour
- 2 tsp baking powder
- 1½ tsp ground cinnamon
- 2 tbsp brown sugar
- ½ tsp salt
- ¼ tsp nutmeg
- 1¾ cups milk
- 2 eggs
- ⅓ cup vegetable oil
- 1 tsp vanilla extract
- 1 cup peeled and finely diced apple (about 1 medium apple)
Instructions:
Peel and core one medium apple. A firm variety like Honeycrisp or Fuji works best because it holds its shape during cooking instead of turning to mush. Dice the apple into small pieces — about the size of a blueberry. Set aside.
Preheat the Cuisinart waffle maker to medium-high. In a large bowl, combine the flour, baking powder, cinnamon, brown sugar, salt, and nutmeg. Whisk thoroughly so the spices are evenly distributed. Brown sugar may clump slightly, so use the back of a spoon to break up any pieces.
In a separate bowl, mix the milk, eggs, oil, and vanilla. Pour the wet ingredients into the dry and stir until just combined. Fold in the diced apple using a spatula. Try to distribute the apple pieces evenly throughout the batter. Let the batter rest for 5 minutes so the apple releases a little juice into the batter.
Spray the waffle plates generously with non-stick spray. The apple pieces and brown sugar in the batter can cause sticking, so do not skip the greasing step. Pour the batter onto the plates and close the lid.
Cook for 5 minutes. The apple pieces inside will soften as they cook and the brown sugar will caramelize slightly against the hot plates. Open the lid when the steam slows and the waffle looks golden with slightly darker edges. Serve with a drizzle of caramel sauce or a simple dusting of cinnamon sugar on top.
14. Pumpkin Spice Waffles
Prep Time: 10 min | Cook Time: 5 min per waffle | Serves: 4
Packed with real pumpkin puree and warm spices, these waffles bring all the cozy fall vibes any time of year. The pumpkin keeps them moist and gives them a soft, deep orange color that looks as good as it tastes.
Ingredients:
- 2 cups all-purpose flour
- 2 tsp baking powder
- 1½ tsp pumpkin pie spice
- 1 tsp cinnamon
- 2 tbsp brown sugar
- ½ tsp salt
- 1½ cups milk
- ¾ cup canned pumpkin puree (not pumpkin pie filling)
- 2 eggs
- ¼ cup melted butter
- 1 tsp vanilla extract
Instructions:
Open a can of pure pumpkin puree — not the pumpkin pie filling that already has spices and sweetener added. Measure out three-quarters of a cup and set it aside. Store the remaining puree in a sealed container in the refrigerator for up to five days.
Preheat the Cuisinart waffle maker to medium-high heat. In a large mixing bowl, whisk together the flour, baking powder, pumpkin pie spice, cinnamon, brown sugar, and salt. Make sure the spices are well distributed through the flour so every bite has balanced flavor.
In a second bowl, whisk together the milk, pumpkin puree, eggs, melted butter, and vanilla. Stir until smooth and fully combined — the pumpkin puree can take a moment to fully incorporate with the milk.
Pour the pumpkin mixture into the dry ingredients and stir until just combined. The batter will be slightly thicker than standard waffle batter and will have a pale orange color. Let it rest for 3 to 4 minutes.
Grease the waffle plates and pour in the batter. Cook for about 5 minutes. Pumpkin waffles benefit from the full cook time to develop a slightly crisp outside — the pumpkin puree makes the interior naturally moist, so the outside needs those few extra minutes to firm up. When the waffles are golden and the edges look set, remove carefully. Serve with a drizzle of maple syrup and a light dusting of cinnamon.
15. Coconut Pineapple Waffles
Prep Time: 10 min | Cook Time: 5 min per waffle | Serves: 4
One taste of these waffles and you will feel like you are somewhere warm and sunny. Shredded coconut and crushed pineapple go into the batter together for a tropical twist on the classic morning waffle.
Ingredients:
- 2 cups all-purpose flour
- 2 tsp baking powder
- 1 tbsp sugar
- ½ tsp salt
- 1 cup coconut milk
- ¾ cup crushed pineapple, drained
- 2 eggs
- ¼ cup coconut oil, melted
- ½ cup shredded sweetened coconut
- 1 tsp vanilla extract
Instructions:
Drain the crushed pineapple well. Place it in a fine mesh strainer and press down with the back of a spoon to remove as much liquid as possible. Excess pineapple juice will make the batter too wet and prevent the waffles from crisping up properly.
Preheat the Cuisinart waffle maker to medium-high heat. In a large bowl, mix the flour, baking powder, sugar, and salt. In a separate bowl, whisk together the coconut milk, eggs, melted coconut oil, and vanilla extract. Add the drained pineapple to the wet ingredients and stir to combine.
Pour the wet mixture into the dry ingredients and stir until just combined. Fold in the shredded coconut last. The coconut adds texture and a sweet, toasted flavor once it hits the hot plates. Do not overmix after adding the coconut.
Let the batter rest for 3 minutes. Grease the waffle plates generously — coconut and sugar can cause sticking. Pour the batter in and cook for 5 to 6 minutes. The shredded coconut on the outside of the waffle will become lightly toasted and golden, adding a slightly crunchy texture that pairs perfectly with the soft pineapple inside.
Serve these with a sprinkle of toasted coconut flakes on top and a drizzle of honey or a spoonful of pineapple jam.
16. Chocolate Chip Waffles
Prep Time: 10 min | Cook Time: 5 min per waffle | Serves: 4
Chocolate chips melted right inside a golden waffle — yes, please. These are a huge hit with kids and adults alike, and they work just as well for a weekend breakfast as they do for dessert.
Ingredients:
- 2 cups all-purpose flour
- 2 tsp baking powder
- 2 tbsp sugar
- ½ tsp salt
- 1¾ cups milk
- 2 eggs
- ⅓ cup vegetable oil
- 1 tsp vanilla extract
- ¾ cup semi-sweet chocolate chips
Instructions:
Preheat the Cuisinart waffle maker to medium heat. In a large bowl, whisk together the flour, baking powder, sugar, and salt. In a separate bowl, combine the milk, eggs, oil, and vanilla. Pour the wet ingredients into the dry and stir until just combined — do not overmix.
Fold the chocolate chips into the batter gently using a spatula. Distribute them evenly so each waffle gets a good amount. Let the batter rest for 3 minutes.
Spray the waffle plates well with non-stick spray. Chocolate chips that touch the plates directly will melt against the hot surface and can stick and burn if the plates are not properly greased.
Pour the batter in and close the lid. Cook for about 5 minutes. When you open the lid, the chocolate chips inside will have melted into soft, gooey pockets of chocolate throughout the waffle. Some chips on the surface may have caramelized slightly, creating small spots of crispy, slightly bittersweet chocolate on the outside crust.
Remove carefully and serve right away while the chocolate is still warm and melted. Great with a dusting of powdered sugar, a drizzle of chocolate syrup, or alongside a glass of cold milk.
17. Nutella Stuffed Waffles
Prep Time: 15 min | Cook Time: 5 min per waffle | Serves: 4
A layer of creamy Nutella is hidden right in the center of each waffle, creating a warm, melted filling that surprises you with every bite. The outside stays golden and crispy while the inside gets rich and chocolatey.
Ingredients:
- 2 cups all-purpose flour
- 2 tsp baking powder
- 1 tbsp sugar
- ½ tsp salt
- 1¾ cups milk
- 2 eggs
- ⅓ cup vegetable oil
- 1 tsp vanilla extract
- ½ cup Nutella
Instructions:
Preheat the Cuisinart waffle maker to medium heat. Make the waffle batter by combining the flour, baking powder, sugar, and salt in a large bowl. In another bowl, whisk together the milk, eggs, oil, and vanilla. Pour wet into dry and stir gently until just combined. Let the batter rest for 5 minutes.
Meanwhile, scoop the Nutella into a small bowl and warm it in the microwave for 15 to 20 seconds so it becomes slightly runny and easier to spread. Set it beside the waffle maker.
Grease the plates well with non-stick spray. Pour a thin base layer of batter onto the preheated plates — enough to cover the surface but not fill it completely. Working quickly, drop spoonfuls of warmed Nutella onto the batter, keeping the Nutella about half an inch away from the edges so it does not leak out when the lid closes.
Pour another thin layer of batter over the top to seal the Nutella inside. The two layers of batter should sandwich the filling completely. Close the lid.
Cook for 5 to 6 minutes. The Nutella inside will melt fully and become warm and almost liquid. Do not rush — the batter needs the full time to cook through on both sides, especially around the filled center.
When done, open the lid carefully. Use a fork to gently lift the edges before removing the whole waffle. The Nutella filling will be very hot, so let the waffle rest for one minute before cutting into it. Serve with sliced strawberries or bananas on top.
18. Red Velvet Waffles
Prep Time: 15 min | Cook Time: 5 min per waffle | Serves: 4
Bold red color, a hint of cocoa, and a creamy glaze on top — red velvet waffles look stunning and taste even better. They work beautifully as a special occasion breakfast or a sweet dessert.
Ingredients:
For the waffles:
- 2 cups all-purpose flour
- 2 tbsp unsweetened cocoa powder
- 2 tbsp sugar
- 2 tsp baking powder
- ½ tsp baking soda
- ½ tsp salt
- 1¾ cups buttermilk
- 2 eggs
- ⅓ cup vegetable oil
- 1 tbsp red food coloring
- 1 tsp vanilla extract
- 1 tsp apple cider vinegar
For the cream cheese glaze:
- 4 oz cream cheese, softened
- 1 cup powdered sugar
- 3–4 tbsp milk
- ½ tsp vanilla extract
Instructions:
Start by making the cream cheese glaze so it is ready to drizzle when the waffles come off the iron. In a medium bowl, beat the softened cream cheese with a hand mixer until smooth. Add the powdered sugar and mix on low speed until combined. Add the milk, one tablespoon at a time, and the vanilla extract. Beat on medium speed until the glaze is smooth and pourable — similar to the consistency of a thick dressing. Add more milk if needed to reach your desired thickness. Set aside at room temperature while you make the waffles.
Preheat the Cuisinart waffle maker to medium heat. In a large bowl, whisk together the flour, cocoa powder, sugar, baking powder, baking soda, and salt. The cocoa powder may clump, so sift it if needed before adding it to the flour.
In a second bowl, whisk the buttermilk, eggs, oil, red food coloring, vanilla, and apple cider vinegar. The vinegar reacts with the baking soda to add lift and also helps bring out the red color when combined with the cocoa. Stir until fully combined.
Pour the red mixture into the dry ingredients and stir gently until just combined. The batter will be a deep red color. Let it rest for 3 minutes.
Grease the waffle plates and pour the batter in. Cook for about 5 minutes until the waffles are cooked through and the outside looks slightly dry and set. The red color will remain visible even after cooking.
Remove and place on a plate. Drizzle the cream cheese glaze generously over each waffle. Serve immediately.
19. Brownie Batter Waffles
Prep Time: 10 min | Cook Time: 5 min per waffle | Serves: 4
Rich chocolate batter cooked in the waffle iron creates something between a brownie and a waffle — crispy on the outside and fudgy in the middle. Top with a scoop of vanilla ice cream and you have a full dessert.
Ingredients:
- 1 cup all-purpose flour
- ½ cup unsweetened cocoa powder
- 1 tsp baking powder
- ¼ tsp salt
- ¾ cup sugar
- ½ cup butter, melted
- 2 eggs
- ½ cup milk
- 1 tsp vanilla extract
- ½ cup semi-sweet chocolate chips
Instructions:
Preheat your Cuisinart waffle maker to medium-high heat. In a large bowl, sift together the flour, cocoa powder, baking powder, and salt. Sifting is especially important here because cocoa powder tends to clump and can create uneven pockets in the batter.
In a separate bowl, combine the sugar and melted butter. Whisk until smooth. Add the eggs one at a time, whisking well after each addition. Add the milk and vanilla extract and stir until fully combined.
Pour the wet chocolate mixture into the sifted dry ingredients and stir until a thick, smooth batter forms. The batter will be noticeably denser than regular waffle batter — more like a pourable brownie batter. Fold in the chocolate chips.
Let the batter rest for 2 minutes. Grease the waffle plates generously. Brownie batter is very rich in fat, but also sticky, so proper greasing is important.
Pour the batter onto the plates. Because the batter is thick, it may not spread on its own — use the back of a spoon to gently push it toward the edges. Close the lid and cook for 5 minutes. The outside should be slightly firm and set, while the inside will remain fudgy and moist. Do not overcook these — the interior will firm up slightly as they cool.
Remove and serve warm with a generous scoop of vanilla ice cream, a drizzle of chocolate sauce, and a light dusting of powdered sugar.
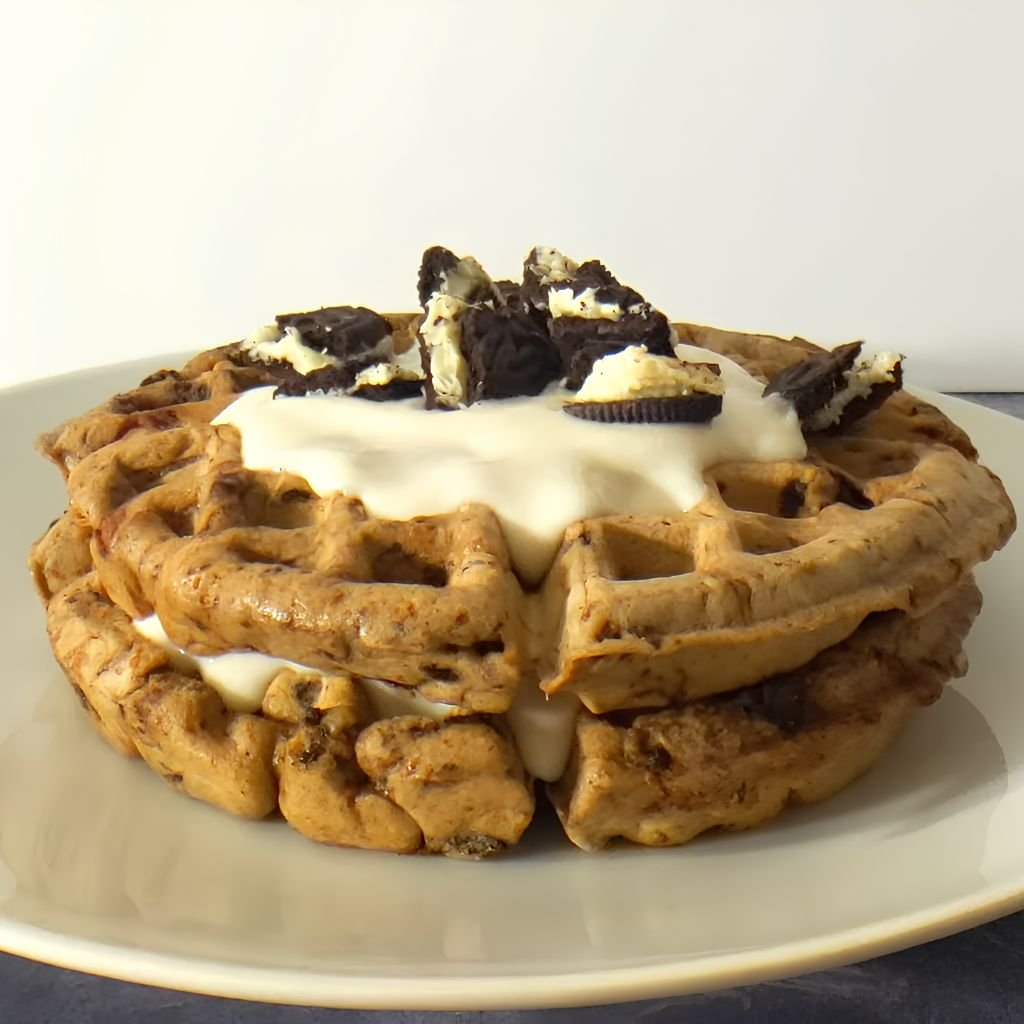
20. Cookies and Cream Waffles
Prep Time: 10 min | Cook Time: 5 min per waffle | Serves: 4
Crushed chocolate sandwich cookies folded into a vanilla waffle batter — these taste like a classic Oreo milkshake in waffle form. Fun, indulgent, and great for a weekend treat.
Ingredients:
- 2 cups all-purpose flour
- 2 tsp baking powder
- 2 tbsp sugar
- ½ tsp salt
- 1¾ cups milk
- 2 eggs
- ⅓ cup vegetable oil
- 1 tsp vanilla extract
- 1 cup crushed chocolate sandwich cookies (about 10 cookies, roughly crushed)
For serving:
- Whipped cream
- Extra crushed cookies
Instructions:
Place about 10 Oreo-style cookies in a zip-top bag and use a rolling pin to crush them into rough, uneven pieces. You want a mix of small crumbs and larger chunks — this gives the waffles both flavor throughout and some textural pockets. Set aside.
Preheat the Cuisinart waffle maker to medium heat. In a large bowl, mix the flour, baking powder, sugar, and salt. In another bowl, whisk together the milk, eggs, oil, and vanilla. Pour the wet into the dry and stir until just combined.
Fold the crushed cookies into the batter. Stir gently so the pieces stay somewhat intact and do not get fully pulverized into the batter. Let the batter rest for 3 minutes. The cookie pieces will absorb some of the batter liquid, which helps them stay in place while cooking.
Grease the waffle plates and pour the batter in. The larger cookie pieces may not lay flat, so you can gently press the batter down before closing the lid. Cook for about 5 minutes.
The cookies inside the waffle will soften and the chocolate from the cookie crumbs will bleed slightly into the surrounding batter, creating a marbled black-and-white pattern when you cut the waffle open. The outside will be golden with crispy cookie bits embedded in the surface.
Serve with whipped cream and a sprinkle of extra crushed cookies on top.
21. Cheddar Cheese Waffles
Prep Time: 10 min | Cook Time: 5 min per waffle | Serves: 4
Sharp cheddar folded into a savory batter creates waffles that are cheesy, crispy, and absolutely satisfying. Skip the syrup — these go better with eggs and hot sauce, or alongside a bowl of tomato soup.
Ingredients:
- 2 cups all-purpose flour
- 2 tsp baking powder
- ½ tsp baking soda
- 1 tsp garlic powder
- ½ tsp onion powder
- ½ tsp salt
- ¼ tsp black pepper
- 1¾ cups buttermilk
- 2 eggs
- ¼ cup melted butter
- 1½ cups shredded sharp cheddar cheese
Instructions:
Preheat the Cuisinart waffle maker to medium-high heat. In a large bowl, combine the flour, baking powder, baking soda, garlic powder, onion powder, salt, and pepper. Whisk well until the spices are evenly mixed throughout the flour.
In a separate bowl, whisk together the buttermilk, eggs, and melted butter. Pour the wet ingredients into the dry and stir gently until just combined. The batter will be slightly lumpy — this is fine.
Add the shredded cheddar cheese and fold it in carefully. The cheese will make the batter feel heavier and slightly sticky. Try to distribute it as evenly as possible. Let the batter rest for 3 to 4 minutes.
Grease the waffle plates with non-stick spray. Cheese in the batter can cause sticking if the plates are not well greased — do not skip this step. Pour the batter onto the plates. Some cheese will sit on the surface of the batter and may touch the plates directly. This is actually a good thing — the cheese that touches the hot iron will crisp and toast, forming a slightly crunchy, golden-brown cheese crust on the outside of the waffle.
Cook for 5 to 6 minutes. The waffle needs a little extra time for the cheese inside to melt fully and the outside to develop that golden crust. Open the lid slowly. If the cheese has melted onto the plate edges, use a fork to release the sides before lifting.
Serve hot topped with a fried egg, a few dashes of hot sauce, or alongside a bowl of warm soup.
22. Bacon and Chive Waffles
Prep Time: 15 min | Cook Time: 5 min per waffle | Serves: 4
Crispy bacon pieces and fresh chives cooked right into the waffle — these are loaded with savory flavor and make a hearty meal on their own. Great for brunch or even a quick dinner.
Ingredients:
- 2 cups all-purpose flour
- 2 tsp baking powder
- ½ tsp salt
- ¼ tsp black pepper
- 1¾ cups milk
- 2 eggs
- ¼ cup vegetable oil
- 6 strips bacon, cooked and crumbled
- 3 tbsp fresh chives, finely chopped
Instructions:
Cook the bacon first. Place the strips in a skillet over medium heat and cook until fully crisp, turning as needed. Transfer to a paper towel-lined plate to drain and cool. Once cooled, crumble or chop the bacon into small pieces. Measure the crumbled bacon and set it aside along with the chopped fresh chives.
Preheat the Cuisinart waffle maker to medium-high heat. In a large bowl, whisk together the flour, baking powder, salt, and pepper. In a separate bowl, mix the milk, eggs, and oil. Pour the wet mixture into the dry and stir until just combined. Do not overmix.
Fold in the crumbled bacon and chopped chives using a spatula. Stir gently to distribute them evenly throughout the batter. Let the batter rest for 3 minutes.
Spray the plates generously with non-stick spray. Bacon fat can cause slight sticking even with a non-stick plate, so greasing well is important here. Pour the batter in and close the lid.
Cook for 5 to 6 minutes. The bacon pieces inside the waffle will become even crispier as they hit the hot plates. The chives will soften but keep their mild onion flavor. When done, the waffle will have a savory, salty aroma from the bacon that fills the kitchen.
Remove carefully and serve immediately with sour cream, a fried egg on top, or a drizzle of maple syrup if you enjoy the sweet-and-savory combination.
23. Chicken and Waffles
Prep Time: 20 min | Cook Time: 5 min waffle + 15 min chicken | Serves: 4
A classic Southern combination — crispy fried chicken served on top of a golden waffle, drizzled with hot sauce and maple syrup. The contrast of savory, spicy chicken and sweet waffle is absolutely worth the extra effort.
Ingredients:
For the waffles:
- 2 cups all-purpose flour
- 2 tsp baking powder
- 1 tbsp sugar
- ½ tsp salt
- 1¾ cups buttermilk
- 2 eggs
- ⅓ cup oil
- 1 tsp vanilla extract
For the chicken:
- 4 boneless chicken thighs
- 1 cup buttermilk (for soaking)
- 1 cup all-purpose flour
- 1 tsp paprika
- 1 tsp garlic powder
- ½ tsp cayenne pepper
- ½ tsp salt
- ½ tsp black pepper
- Oil for frying
Instructions:
Start the chicken at least one hour ahead. Place the chicken thighs in a bowl and pour the buttermilk over them. Make sure each piece is fully covered. Cover and refrigerate for at least one hour — or up to overnight. The buttermilk tenderizes the chicken and helps the coating stick.
When ready to cook, remove the chicken from the buttermilk. In a shallow dish, combine the flour, paprika, garlic powder, cayenne, salt, and black pepper. Dredge each piece of chicken through the seasoned flour, pressing firmly so the coating sticks to all sides. Shake off any excess flour.
Heat about two inches of oil in a large heavy-bottomed skillet over medium-high heat to 350°F. You can test the oil by dropping a small pinch of flour into it — if it sizzles immediately, the oil is ready. Carefully lower the coated chicken into the hot oil. Cook for about 6 to 7 minutes per side, turning once, until the coating is deep golden brown and the internal temperature of the chicken reaches 165°F. Transfer to a wire rack to drain.
While the chicken rests, make the waffles. Mix the flour, baking powder, sugar, and salt in one bowl. In another bowl, combine the buttermilk, eggs, oil, and vanilla. Stir wet into dry until just combined. Rest for 3 minutes. Grease the waffle plates, pour the batter in, and cook for 5 minutes per waffle.
To plate, place one waffle on a dish and lay a piece of crispy chicken on top. Drizzle with hot sauce and a generous pour of maple syrup. Serve immediately.
24. Jalapeño Cornbread Waffles
Prep Time: 10 min | Cook Time: 5 min per waffle | Serves: 4
Spicy jalapeño and sweet cornmeal come together in a waffle that is bold, savory, and slightly sweet. Serve these alongside chili, pulled pork, or just eat them with a pat of honey butter.
Ingredients:
- 1 cup yellow cornmeal
- 1 cup all-purpose flour
- 2 tsp baking powder
- 1 tbsp sugar
- ½ tsp salt
- 1½ cups buttermilk
- 2 eggs
- ¼ cup vegetable oil
- 2 jalapeños, seeded and finely diced
- ½ cup shredded pepper jack cheese (optional)
Instructions:
Remove the seeds and white membrane from the jalapeños before dicing — this reduces most of the heat while keeping the pepper flavor. For extra heat, leave a few seeds in. Dice the jalapeños into small pieces and set aside.
Preheat the Cuisinart waffle maker to medium-high heat. In a large bowl, mix the cornmeal, flour, baking powder, sugar, and salt. Stir well to combine. In a separate bowl, whisk together the buttermilk, eggs, and oil until smooth.
Pour the wet ingredients into the dry and stir until just combined. Fold in the diced jalapeños and the pepper jack cheese, if using. The cheese will melt during cooking and add an extra layer of spicy, melty richness to the waffles.
Let the batter rest for 4 minutes. Cornmeal takes slightly longer to absorb liquid than flour, and the rest period helps ensure the waffles cook evenly without a grainy texture in the center.
Grease the waffle plates well with non-stick spray. Pour the batter in and cook for 5 to 6 minutes. These waffles benefit from a slightly longer cook time because cornmeal-based batters are denser and need more time to set through. The outside will be golden yellow with visible green flecks from the jalapeño. The inside will be moist, slightly crumbly in the cornbread style, and spicy.
Serve with a smear of honey butter (mix one part honey with two parts softened butter) or alongside a bowl of beef chili.
25. Hash Brown Waffles
Prep Time: 15 min | Cook Time: 6 min per waffle | Serves: 4
Shredded potato pressed into the waffle iron comes out with the crispiest outside you have ever tasted on a hash brown. No flipping, no mess — just press and cook. Serve as a base for eggs Benedict or pile them high with your favorite toppings.
Ingredients:
- 3 cups shredded russet potatoes (about 2 large potatoes, or use frozen shredded hash browns, thawed)
- 1 egg
- 2 tbsp all-purpose flour
- ½ tsp garlic powder
- ½ tsp onion powder
- ½ tsp salt
- ¼ tsp black pepper
- 2 tbsp grated Parmesan cheese (optional)
- Non-stick spray
Instructions:
If using fresh potatoes, peel and shred them using a box grater or a food processor with a shredding disc. Place the shredded potato in the center of a clean kitchen towel or several layers of paper towels. Gather the edges of the towel and twist tightly over the sink, squeezing out as much moisture as possible. Do this step twice. Removing moisture is the most important step in this recipe — excess water is what makes hash browns soggy instead of crispy.
If using frozen hash browns, thaw them completely and squeeze them dry the same way.
Place the dried shredded potato in a large bowl. Add the egg, flour, garlic powder, onion powder, salt, pepper, and Parmesan if using. Mix together with your hands or a fork until the mixture is evenly coated and holds together when pressed. The flour and egg act as the binder that holds the hash brown waffle together.
Preheat the Cuisinart waffle maker to high heat — hash browns need more heat than regular waffle batter to get truly crispy. Spray both the top and bottom plates generously with non-stick spray.
Scoop the potato mixture onto the bottom plate and press it down firmly with the back of a spoon or your fingers. Spread it to fill the plate as evenly as possible. Close the lid and press down firmly for the first few seconds to compress the potato mixture.
Cook for 6 to 8 minutes. Do not open the lid early. Hash brown waffles need more time than regular waffles because you are essentially cooking shredded potato, not a wet batter. When the steam has fully stopped and the edges look deep golden brown, open the lid. If the hash brown sticks at all, use a fork to release the edges and wait another minute before trying to lift.
Remove carefully — the waffle will be very crispy on both sides and golden brown throughout. Serve immediately topped with a fried egg, sour cream, chopped chives, and hot sauce, or use as the base for eggs Benedict instead of an English muffin.
How to Store and Reheat Homemade Waffles
1. Refrigeration. Once your waffles have cooled completely, stack them with a small piece of parchment paper between each one to prevent sticking. Place them in an airtight container or zip-top bag and refrigerate for up to 3 days. Do not store them while still warm — trapping heat inside the container creates steam that makes the waffles soggy.
2. Freezing. For longer storage, place cooled waffles in a single layer on a baking sheet and freeze for one to two hours until solid. Once frozen, transfer them to a zip-top freezer bag with parchment between each waffle. They will keep in the freezer for up to 3 months. Label the bag with the date and waffle type.
3. Reheating in the toaster. The toaster is the best option for getting waffles crispy again. Pop refrigerated or frozen waffles directly into the toaster slots and toast on medium-high until hot and crispy. For thick Belgian-style waffles, you may need to run a second toaster cycle.
4. Reheating in the oven. Preheat the oven to 375°F. Place waffles directly on the oven rack or a wire rack set over a baking sheet. Heat for 5 to 8 minutes until hot and crispy. Avoid placing them on a flat baking sheet without a rack — the bottom will steam instead of crisp.
5. Reheating in the air fryer. Set the air fryer to 350°F and place waffles in the basket in a single layer. Heat for 3 to 4 minutes, flipping once halfway through. The air fryer produces some of the crispiest results and is especially good for frozen waffles.
Conclusion
From classic buttermilk and Belgian-style waffles to pumpkin spice, red velvet, and crispy hash browns, these 25 Cuisinart waffle maker recipes cover a lot of ground. There is something here for every kind of morning — whether you want something quick and simple, hearty and savory, fruity and fresh, or rich and dessert-like. The best part is that waffles are endlessly customizable. You can swap in different fruits, try new spice combinations, load up the toppings, or keep things minimal depending on your mood.
Homemade waffles are much easier than most people expect, especially when you have a reliable machine doing the hard work. With a Cuisinart waffle maker, you get even cooking and consistent results every single time, which takes the guesswork out of the process. These recipes work for families feeding a crowd, individuals doing breakfast meal prep for the week, or anyone who just wants a warm homemade meal without spending a lot of time in the kitchen.
Give a few of these recipes a try and see which ones become your go-to favorites. Make a batch on Sunday and freeze the extras for easy weekday mornings. Share your favorite combinations or topping ideas in the comments — it is always great to hear what is working in other kitchens.